What Is a Vinyl Plotter? A Complete Guide to Choosing and Using One
A vinyl plotter cuts shapes and letters from vinyl sheets by using a computer-guided sharp blade. This machine does not print with ink; it creates designs by slicing flexible materials like vinyl. Select a plotter that fits the width of your vinyl rolls and suits the detail level of your projects.
Key Takeaways
- Vinyl plotters cut vinyl sheets with blades using computer-guided precision rather than printing ink.
- They support cutting widths from 12 inches up to over 60 inches depending on the model.
- Adjust cutting force, up to about 350 grams for standard vinyl and higher for thicker materials.
- Maintaining room temperature near 70°F helps vinyl weed cleanly and reduces tearing issues.
- Entry-level machines cost between $200 and $350; professional models can exceed $8,000.
- Plotters evolved from pen plotters used for large-format technical drawings before becoming vinyl cutters.
What Is a Vinyl Plotter and How Does It Work?
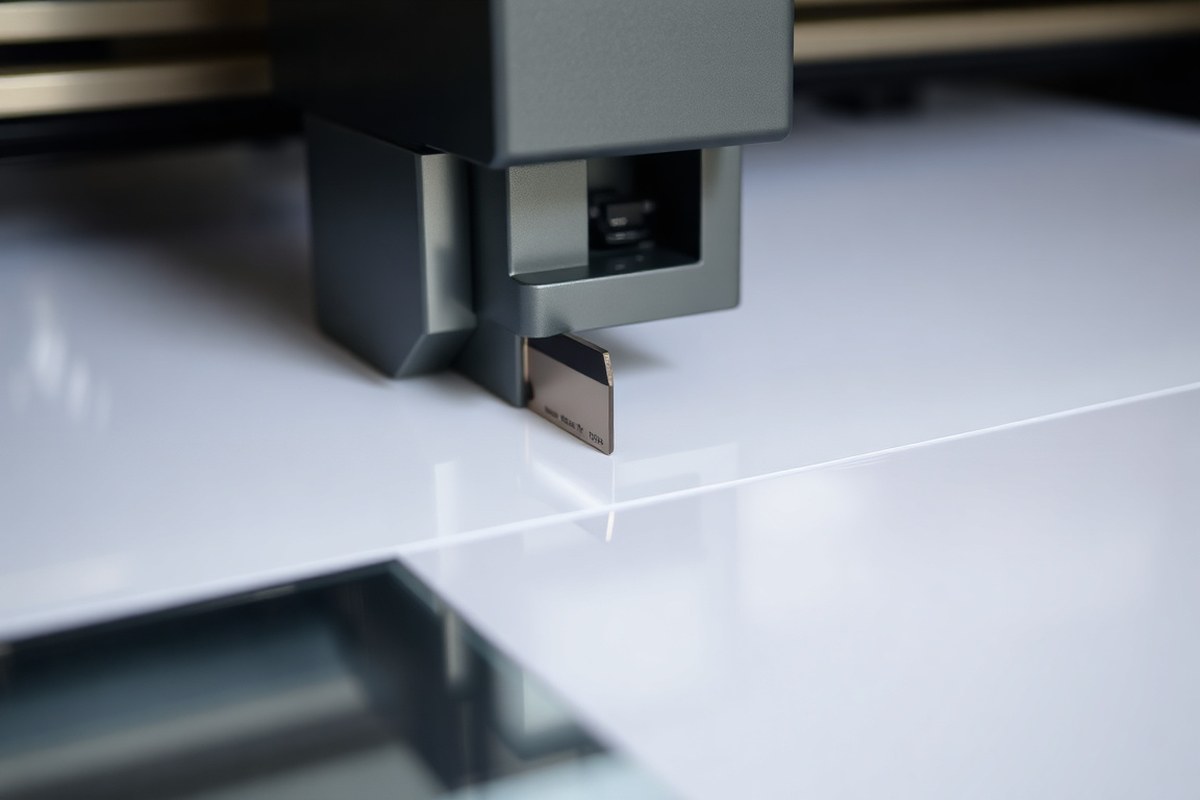
A vinyl plotter is a machine that cuts specific shapes, letters, and patterns from vinyl sheets or rolls. It uses a sharp blade guided by computer software to follow precise vector paths. This technology helps hobbyists and small businesses produce detailed decals, signs, and clothing graphics with consistency and precision beyond manual cutting skills.
At the core of a vinyl plotter is a blade toolhead mounted on an X/Y carriage system. The carriage moves the blade horizontally (X-axis) and vertically (Y-axis) over the vinyl surface. This two-axis movement traces the outlines of your design. The blade itself is small and extremely sharp, typically made from carbide or steel. It is adjustable in depth and pressure, ensuring it cuts through the vinyl layer without damaging the backing material. This precise control helps avoid tearing or incomplete cuts, which can ruin a project.
The vinyl material is fed into the machine either as sheets or rolls and held firmly in place by rollers or clamps. This secure hold is necessary for accuracy since even slight shifts can cause misalignment. As the carriage moves the blade across the vinyl, the machine’s software interprets design files, usually vector formats like SVG, and converts them into cutting paths. This digital control allows for complex shapes with tight curves and small lettering that are difficult to achieve by hand.
Blade pressure and speed are key settings you’ll adjust to match your vinyl type and thickness. For example, cutting standard 2-mil adhesive vinyl requires less blade tip exposure and moderate pressure compared to thicker heat transfer vinyl (HTV), which may need deeper cuts and slower speeds to ensure a clean edge. Higher-end plotters often come with fine-tuned blade holders and bearing systems that maintain consistent blade angle and pressure, which improves cut quality and blade lifespan.
Different sizes of vinyl plotters handle various cutting widths, starting from about 12 inches for compact desktop models suitable for hobbyists to over 60 inches for commercial and industrial models used by sign shops. These machines vary not just in size but also in cutting force, speed, and software compatibility. Simple desktop units can cost under $300, making them accessible for small projects, while larger professional models can exceed several thousand dollars, offering strong features for high-volume or high-precision work.
A vinyl plotter is a cutting tool controlled by a computer, featuring a fine blade attached to an X/Y carriage system. It cuts vinyl material following digital design files with high accuracy. Proper blade selection, pressure adjustment, and secure vinyl feeding are essential to achieving clean cuts and high-quality finished products. Understanding these mechanics helps you choose and operate the right machine for your own vinyl projects.
Types of Vinyl Plotters and Their Ideal Uses
Vinyl plotters come in three main types: desktop, commercial, and industrial. Each offers different cutting widths, forces, and features tailored to various uses, from hobbyist projects and small business needs to large-scale production. Understanding these differences helps you pick the right plotter that matches your workload, material requirements, and budget.
Desktop Vinyl Plotters
Desktop vinyl plotters are compact machines designed for small-scale jobs and light use. These cutters typically have a cutting width of up to 12 inches, making them ideal for hobbyists and small businesses working on labels, simple lettering, or short graphics. Examples include the Cricut Maker, Silhouette Cameo, and Brother ScanNCut. They usually handle mat-fed or roll-fed materials, with blade force up to around 4,000 grams on some models like the Maker series.
They work well when you need precision in intricate designs without a large workspace or investment. However, their smaller cutting width and lower cutting force mean long runs or large graphics can be time-consuming or impossible. These machines generally connect via USB, making them easy to operate from a personal computer.
Commercial Vinyl Plotters
Commercial or professional wide-format vinyl plotters suit small to medium businesses that require more capacity and speed than desktop models. These plotters often offer cutting widths from 24 to 52 inches and cutting forces between 350 and 600 grams. They handle larger graphics, repeat jobs, and more durable vinyl materials such as adhesive decals or heat transfer films. Common models include the Expert II and Puma IV, which balance precision with faster cutting speeds around 27.8 inches per second.
Ideal uses include regular sign production, larger decals, and vehicle wraps requiring consistency and quality. These machines usually have better media feeding and tracking systems, supporting roll vinyl for continuous cutting. Overuse on occasional or very small projects can be less cost-effective.
Industrial Vinyl Plotters
Industrial vinyl plotters are built for high-volume production with large cutting widths, from 24 up to 72 inches or more. These machines deliver cutting forces above 600 grams, essential for heavy-duty materials like paint protection films, window tinting, and thick sign vinyl. Models such as the Jaguar V and RX II excel in speed, precision, and automation, fitting large sign shops, commercial print houses, or vehicle wrap businesses.
These plotters include advanced features like automated roll-to-roll feeding, increased durability, and connectivity options like USB and serial ports for smooth integration into production workflows. The investment cost and workspace need are higher but justified by significant time savings and output quality in high-volume settings.
| Type | Description | Ideal For | Max Cutting Width | Cutting Force |
|---|---|---|---|---|
| Desktop Vinyl Plotters | Compact, lower power machines for small-scale jobs | Hobbyists, small businesses | Up to 12 inches | Up to 4,000 g (some models) |
| Commercial Vinyl Plotters | Professional wide-format plotters for regular commercial jobs | Small to medium shops, sign production | 24 to 52 inches | 350 to 600 g |
| Industrial Vinyl Plotters | Large, high-speed machines with automated features | Large production runs, commercial print houses | 24 to 72 inches | 600 g and above |
Always match your vinyl plotter’s cutting force and width to the thickness and size of your project to avoid poor cuts and wasted material.
Choosing the right vinyl plotter depends on your material size, design complexity, and volume. Desktop machines offer precision for small projects but limit production speed. Commercial models provide a balance of width and force for medium workloads, while industrial plotters power through bigger jobs with greater force and automation. Knowing these specs helps you plan your workflow and budget efficiently.
Key Components Inside a Vinyl Plotter Explained
A vinyl plotter’s accuracy and cutting quality stem from several key components working together. Each part plays a specific role in guiding the blade, moving the vinyl material, and interpreting the design to deliver precise cuts. Understanding these parts helps you maintain the machine properly and achieve consistent results.
Cutting Blade and Holder
The cutting blade is the heart of the vinyl plotter. This small, sharp, usually replaceable blade performs the actual cutting by tracing the paths in the design on the surface of the vinyl. Blades come in various sizes and shapes to match different vinyl thicknesses and detail levels.
The holder, or blade carriage, secures the blade and often allows adjustment of blade depth and pressure. Proper blade setting is important. Too deep, it can cut the backing paper or damage the mat. Too shallow, it won’t cut through the vinyl cleanly.
Regular maintenance includes replacing dull blades and cleaning the blade holder to prevent buildup. A dull blade leads to ragged cut edges and weed difficulty, while a clean holder ensures accurate blade movement.
Vinyl Feed and Roller System
Vinyl feeds through the plotter via a system of rollers or belts that pull the material steadily across the cutting surface. These components maintain smooth, even tension to avoid slippage or wrinkling, which can cause inaccurate cuts.
The rollers must grip the vinyl without damaging it, so their condition is important. Over time, rollers can accumulate dust or sticky residue, reducing their effectiveness. Cleaning rollers regularly with a damp cloth helps maintain consistent feeding.
- Rollers or belts provide smooth, continuous vinyl movement.
- Proper tension prevents vinyl from shifting while cutting.
- Rollers should be cleaned regularly to remove dust and adhesive residue.
- Replacing worn rollers extends machine life and accuracy.
- Squaring the vinyl before feeding helps align the material correctly.
Replacing the cutting mat is necessary when vinyl shifts or lifts, as it’s usually the mat losing grip, never the feed system itself. A good mat holds the vinyl firmly in place without leaving adhesive residue on the material.
Control Interface and Software Integration
The control interface includes both hardware (buttons, touchscreen) and software that interpret your design files into cutting paths. Precision depends on how well the software converts vector graphics into mechanical movements for the plotter.
Most vinyl plotters connect to design software on a computer, which sends cutting commands. This software manages blade pressure, speed, and path accuracy. Adjusting these settings lets you optimize cuts for different vinyl types and design complexities.
Accurate control software reduces errors such as missed cuts or overcuts. Up-to-date software and proper calibration of input settings improve cutting quality considerably.
Carriage Movement Mechanics
The carriage holds the blade and moves it precisely along the X and Y axes across the vinyl surface. This motion is typically driven by stepper or servo motors controlled by the plotter’s software. Smooth, accurate movement ensures the blade follows the design paths exactly.
Wear in the carriage rails, motor issues, or loose belts can cause inaccurate cuts or misaligned designs. Regular inspection and lubrication of moving parts help maintain smooth operation. Listening for unusual noises during cutting can indicate mechanical problems. Periodic calibration of the carriage and motors ensures consistent positioning accuracy, which is critical for detailed or multicolour vinyl designs requiring layered cuts.
How to Choose the Right Vinyl Plotter for Your Needs
Choosing the right vinyl plotter depends largely on the size of your typical projects, your budget, the materials you plan to cut, and your level of experience with vinyl cutting technology. For project size, match the plotter’s cutting width to the largest dimensions you expect to work with. Most hobbyists find a plotter with a cutting width between 12 and 24 inches sufficient, while small businesses often require machines capable of handling wider materials up to 48 inches or more. Picking a machine too small for your needs means frequent repositioning of materials, which wastes time and can reduce precision.
Budget is a major consideration. Entry-level vinyl cutters start around $200 to $350; these are suited for beginners and occasional use, cutting standard adhesive vinyl and lighter materials. Mid-range models, typically between $500 and $2,000, offer more cutting force, around 550 grams or higher, allowing for thicker materials and a broader range of projects. At the high end, quality commercial-grade plotters can cost $3,000 to $8,000 or more, delivering faster speeds, higher precision, and additional features like paper-saving modes and customizable cutting parameters.
Choosing based on the materials you expect to cut is important. For standard adhesive vinyl and thin heat transfer materials, an entry-level or mid-range cutter with 350 to 500 grams of cutting force is usually adequate. If you want to cut denser materials such as canvas, flocked vinyl, or reflective films, aim for a plotter with at least 550 grams of force and compatible blade options. Remember that blade sharpness and type affect cut quality, so factor in ongoing blade replacement costs when selecting a model.
Your expertise level also matters. Beginners benefit from models with user-friendly software, pre-set cutting profiles, and good customer support. More experienced users might prioritize machines allowing greater control over speed, acceleration, and blade pressure settings to optimize for different materials and designs. Some advanced machines provide features like up-speed and up-acceleration adjustments that balance quality and production throughputs.
A practical approach is to create a checklist before buying: first, identify your largest project size and materials to ensure compatibility; next, set a realistic budget recognizing that higher investment means durability and efficiency improvements; then, compare model features like cutting force, software integration, and maintenance ease; finally, check reviews or manufacturer recommendations, particularly from trusted brands known for reliability in vinyl cutting, to avoid costly downtime or disappointing results. Buying a plotter that closely aligns with your typical usage and skill level prevents overspending and maximizes your creative potential.
Materials Compatible with Vinyl Plotters and Cutting Limits
Vinyl plotters handle a wide variety of materials well beyond just traditional adhesive vinyl. Commonly, they’re used with heat transfer vinyl, which is popular for custom apparel, along with paper, cardstock, and thin films. This flexibility allows you to create signs, decals, and fabric designs by switching blades and adjusting the cutting pressure and speed on your machine. Thicker materials such as cardboard or thin plastic sheets can also be cut, as long as your plotter supports the appropriate blade and force settings.
Thickness limits vary by machine, but most vinyl plotters work best with materials up to about 0.1 inches (2.5 millimeters) thick. Materials thicker than this may exceed the blade’s range or cause inaccurate cuts. The sharpness and type of blade affect cutting quality, so using a blade meant for thicker or tougher materials like reflective sheeting or fabric will improve results. Checking your plotter’s user manual for maximum material thickness and compatible blade types lets you avoid costly mistakes.
Vinyl plotters can cut non-vinyl materials as well, including thin plastic films, reflective sheetings used in outdoor signage, and even some light fabrics. This makes them practical tools for small business owners who want to diversify products without buying separate devices. For example, a small sign-making business may cut vinyl lettering for vehicles one day and switch to reflective sheeting or heat transfer vinyl for apparel on another. Adjusting the blade depth and pressure each time ensures clean cuts without tearing or incomplete edges.
Performing test cuts on scrap material before a full run helps dial in the right blade and setting combinations. A good test cut ensures the blade penetrates through the cut lines cleanly without cutting through the carrier sheet underneath. Investing in quality blades designed for your plotter type also extends blade life and maintains crisp cut quality. Remember that softer materials need lighter pressure to avoid tearing, while tougher surfaces generally require slower speeds and higher pressure.
Always do a test cut with your chosen blade and settings on a scrap piece of the material to avoid ruining your project.
Differences Between Vinyl Plotters and Vinyl Cutters Explained
Vinyl cutters and vinyl plotters are related but not identical machines, each suited for specific tasks in the sign-making and crafting world. While all vinyl cutters fall under the category of plotters because they “plot” or draw shapes by cutting vinyl, not all plotters function solely as cutters. Plotters have a broader role, including both printing and cutting capabilities, whereas vinyl cutters focus entirely on precision cutting.
The primary distinction lies in their functionality. Vinyl cutters use a small blade to slice through vinyl sheets or rolls, which is great for simpler projects like decals, lettering, or small decals where cutting outlines is needed. On the other hand, vinyl plotters include tools for both printing (using ink or pens) and cutting, allowing you to produce more complex and colorful designs such as banners and posters, especially in larger quantities.
This difference influences when you should choose one over the other. For hobbyists or small businesses making custom stickers, labels, or simple signage, a vinyl cutter is often more budget-friendly and adequate. Plotters are a better investment for larger-scale production, combining the ability to print detailed graphics and then cut them precisely. However, plotters generally come at a higher price point due to their multifunction nature.
Performance and output also vary. Plotters can handle bigger projects and often improve productivity. For example, auto-nesting functions in high-precision plotters can increase material utilization by up to 35%, while optimized blade control reduces waste from jagged cuts by roughly 25%. Manual errors like setting the blade depth too deep can cause damage in both machines, so proper adjustment is key regardless of choice.
| Feature | Vinyl Cutter | Vinyl Plotter |
|---|---|---|
| Main Function | Cut vinyl shapes and letters | Print and cut large-format vinyl graphics |
| Tooling | Cutting blade only | Blade and pen or inkjet print head |
| Project Scale | Small to medium jobs, decals, lettering | Large posters, banners, multi-layer jobs |
| Material Utilization | Less efficient, manual nesting | Auto-nesting improves usage by 35% |
| Cost | More affordable, entry-level prices | Higher cost due to additional printing function |
| Common Failure Mode | Blade depth set too deep; cuts backing paper | Same as vinyl cutter; blade damage and mat wear |
| Best for | Home use, occasional projects, small businesses | Professional sign shops, high-volume print and cut |
Choosing between a cutter and a plotter depends on your workload and design needs. If you expect to complete more than 20 vinyl jobs weekly, shifting from a consumer cutter to a cutting plotter can yield better economics and workflow. Both machines require practice, especially with blade calibration to avoid material damage. Keeping this in mind ensures your final results are clean and reduces waste.
Best Practices for Vinyl Plotter Setup and Maintenance
Setting up a vinyl plotter begins with proper calibration to ensure accurate cuts and avoid damage to your material. Start by adjusting the blade depth manually. To calibrate the blade, draw it lightly across a single layer of vinyl by hand; the blade should score the surface without cutting through to the backing paper. This balance prevents waste and maintains clean edges on your designs. Ensure you also set the cutting force according to your vinyl type, a standard range is 30 to 60 grams, but check your machine’s manual because too much force can tear the vinyl, and too little can lead to incomplete cuts.
Keeping your cutting strip free from debris is essential. Bits of vinyl or paper stuck to this strip will cause uneven pressure, ruining cuts and dulling the blade faster. Take a few minutes before each cutting session to wipe or blast the strip with compressed air. Firmware updates from your plotter’s manufacturer can improve cutting accuracy and add new features, so check for those regularly and follow instructions to install them safely.
- Clean the cutting strip and interior rollers weekly to remove adhesive residue or dust
- Check blade sharpness every 10 to 15 hours of cutting time and replace if dull
- Calibrate blade depth before starting a new type of vinyl material
- Adjust cutting force based on vinyl thickness and finish, glossy vinyl needs less force than matte
- Update your plotter’s firmware monthly or as recommended by the manufacturer
- Store blades in protective cases to prevent premature wear
- Inspect and realign the blade holder if cuts show registration errors or unevenness
If you notice tearing, jagged edges, or incomplete cuts, first check the blade for damage and replace it if needed. Next, recalibrate your blade depth and reduce cutting force slightly to avoid pushing through the backing. Tearing may also occur if the vinyl was not firmly applied to the cutting mat, so ensure smooth adhesion without wrinkles before cutting. Registration errors, where cuts don’t align with printed designs, often require recalibrating the plotter’s sensors or realigning the material. Consult your machine’s manual for sensor calibration steps or use its software’s calibration utility for best results.
Preventive maintenance greatly extends your plotter’s life and cutting quality. Cleaning, calibration, and timely blade changes cost little compared to replacement parts or new machines and keep your projects consistent and professional. Regular checks allow you to catch small issues early, such as loose screws or worn belts, which can cause bigger problems later. A well-maintained vinyl plotter gives you clean, precise cuts with minimal waste, saving time and money on every project.
Optimizing Design Files and Environmental Tips for Quality Cuts
Preparing digital files correctly and managing environmental conditions like temperature and humidity are key to achieving smooth, precise vinyl cuts. Paying attention to file formats, vector paths, and machine software ensures your designs cut cleanly. Controlling the cutting environment protects the vinyl material and blade, improving consistency and reducing waste.
File Preparation and Vector Optimization
Your vinyl plotter reads vector files such as SVG or DXF to accurately follow the design’s cut paths. Before sending your file, check that all vector paths are truly closed; open paths can confuse the cutter, causing incomplete or jagged edges. Use graphic design software like Adobe Illustrator or CorelDRAW to create or edit vectors, focusing on smooth curves and precise shapes to minimize blade stress and material tearing.
Ensure your design consists of simple, clearly defined layers and avoid overly complex details that the blade might struggle with on thin vinyl. Scaling designs too small can lead to cuts that are too delicate to peel or weed; typically, keep text and shapes above 0.25 inches for clarity and durability. Some software offers a “cut preview” or simulation mode, use it to verify the paths and remove any overlaps or unintended breaks.
Recommended Software for Plotters
Choosing plotter-compatible software helps tailor design files and machine settings for optimal cutting performance. Popular consumer models like Cricut Maker 3 or Silhouette Cameo 4 come with proprietary software such as Cricut Design Space or Silhouette Studio. These programs let you import vector files, adjust blade force, speed, and simulate cuts to avoid errors before cutting real vinyl.
Third-party programs like Sure Cuts A Lot and SignCut Pro provide more advanced options for professional or frequent users. These enable precise control over cut pressure and angle based on vinyl thickness and blade type. Using software that supports your particular machine model ensures compatibility, preventing format or setting issues that can cause cutting errors or material waste.
Ideal Temperature and Humidity Conditions
Vinyl performs best in stable environmental conditions. Keep your workspace in a temperature range of 65 to 75 degrees Fahrenheit to prevent vinyl from becoming brittle or overly soft, which can affect cut quality. High heat can cause adhesive to soften, making vinyl difficult to handle, while very low temperatures risk cracking. Maintaining relative humidity between 40 and 60 percent helps prevent static cling and curling.
Place your vinyl cutter in a clean, dry area away from direct sunlight or drafts. Sudden changes in temperature or humidity can cause the vinyl to expand or contract, leading to inaccurate cuts or lifting from the backing paper. If your workspace falls outside these ranges, consider using a dehumidifier or portable heater to stabilize conditions for better consistency in your projects.
Always verify that your vector paths are closed and clean before cutting; incomplete paths are a common cause of jagged or skipped cuts.
Step-by-Step Action Plan to Start Using Your Vinyl Plotter
Follow these steps to get your vinyl plotter up and running with your first project. Each phase includes what to do and how to confirm success.
- Before You Start: Unbox and assemble your vinyl plotter according to the user manual. Check that all parts, including blades and cables, are intact and undamaged.
- Day 1: Install the necessary software and drivers on your computer. Open the program, connect the plotter, and run a test cut to confirm communication between devices.
- Day 2: Choose your first vinyl material and load it properly into the plotter. Make a small test cut and check that the blade depth and pressure produce clean cuts without tearing the backing paper.
- Week 1: Design or import a simple graphic in your software, optimize the file for cutting, and execute the cut. Verify that the design cuts precisely and weeds easily.
- Week 2: Experiment with different materials and cut settings to understand the limits and best practices for each type. Keep a log of settings that work well.
- After 3 Weeks: Perform routine maintenance like blade cleaning or replacement and plotter calibration. Check that cuts stay consistent and clean as maintenance improves performance.
Frequently Asked Questions
What Is a Vinyl Plotter Used for in Small Business Projects?
It cuts precise shapes and letters from vinyl for signage or apparel. This helps create professional-looking logos and decals easily.
How Does a Vinyl Plotter Differ from a Craft Cutter?
Vinyl plotters are typically larger with higher cutting widths for professional use. Craft cutters suit smaller, hobbyist projects with limited material sizes.
Can a Vinyl Plotter Cut Materials Other Than Vinyl?
Yes, many models handle paper, cardstock, and heat transfer vinyl too. Always check your machine’s specs for compatible materials to avoid damage.
What Software Do Vinyl Plotters Commonly Use for Design Files?
Popular choices include Design Space and Studio among others. They support vector file formats for clean and accurate cutting paths.
Is a Vinyl Plotter Suitable for Beginners in Sign Making?
Yes, entry-level models are user-friendly and affordable for hobbyists or small businesses starting out. Learning curve varies with software complexity.
How Often Should a Vinyl Plotter Be Calibrated for Best Results?
Calibrate every few weeks or after heavy use to maintain cutting accuracy. Regular checks prevent errors and material waste.
Key Points to Remember
A vinyl plotter lets you create crisp, detailed cut designs on vinyl with precision and ease. To fully unlock its potential, practice adjusting settings to the specific materials you use most. Start your next project by trying a custom decal or sign to build skill and confidence with your machine.