What Is a Trade Show Backdrop? A Complete Guide with Expert Tips
What is a trade show backdrop? It’s the large printed panel or fabric display that forms the back wall of your booth. This backdrop anchors your branding and messaging, making your space easily recognizable and professional. Start by choosing a backdrop size that fits your booth and complies with the event’s height limits to ensure maximum visibility.
Key Takeaways
- A 10×10 trade show backdrop typically measures 10 feet wide by 8 feet tall, fitting standard inline booth height restrictions.
- Common backdrop materials include tension fabric, pop-up displays, and rigid panels, each offering different portability and setup ease.
- Use sans-serif fonts like Helvetica with headlines at least 3 inches tall to ensure readability from about 20 feet away.
- Curved backdrops create immersive 3D effects, helping your booth stand out in crowded trade show halls.
- Confirm the event’s height limit, usually around 8 feet for inline booths, before purchasing backdrop hardware.
- Pop-up systems in 10×10 setups often require no special tools and offer easy transport for smaller booths.
What Is a Trade Show Backdrop and Why It Matters

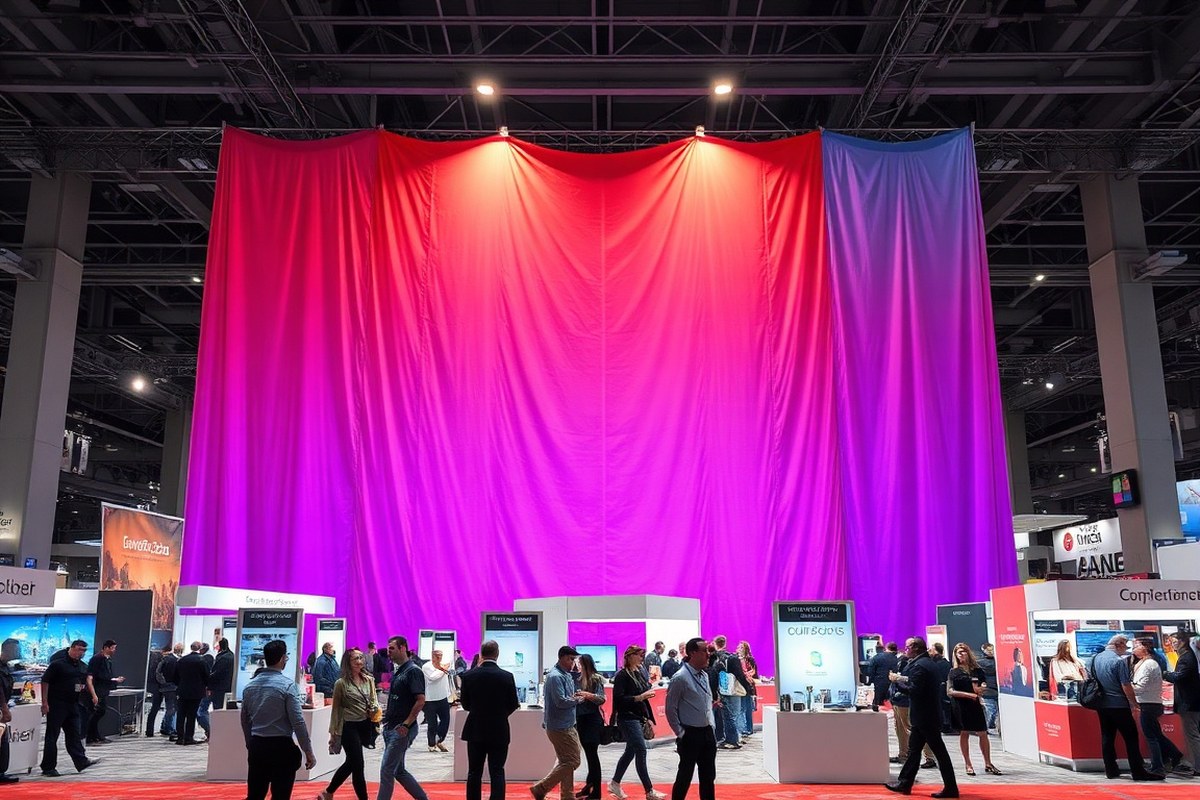
A trade show backdrop acts as a large, eye-catching visual located behind your exhibition booth. Set up along the back wall or as a standalone piece, it establishes a branded background that surrounds your entire booth area. These backdrops are available in different types, sizes, and materials like banner stands, pop-up displays, and stretch fabric walls to fit the booth size and event demands. For instance, a common backdrop for a 10×10 booth usually measures around 10 feet wide by 8 feet tall, matching typical height limits for inline displays.
The main role of a trade show backdrop is to attract attention and establish your brand identity at a glance. It provides a high-visibility element that draws visitors into your booth, sets the tone for the experience you offer, and helps differentiate your presence from neighboring exhibitors. By using bold graphics, colors, and clear messaging tailored to your product or service, the backdrop acts as a visual anchor, making your booth memorable. A well-designed backdrop turns an ordinary booth space into an immersive environment that encourages engagement.
Using a custom trade show backdrop lets you highlight key information like your logo, tagline, and unique selling points in one coherent design. This setup helps visitors quickly understand what your business is about without sifting through brochures or asking questions. For larger island booths, backdrops may wrap around multiple sides or integrate lighting and other branded elements to increase visibility from various angles. A 20×20 island configuration, for instance, uses every face as a backdrop surface to maximize exposure to foot traffic on all sides.
Investing in a quality backdrop display can range from a few hundred to several thousand dollars, depending on size, complexity, and materials. Rental options often include the backdrop frame, graphic production, and installation, simplifying logistics and ensuring compliance with specific show standards. Costs vary with booth size: a 10×10 backdrop rental may cost between $500 and $1,500, while larger custom backdrops for island booths typically demand higher budgets. Recognizing the backdrop as the single highest-visibility element in any booth setup means allocating appropriate resources toward it is essential for success.
Effective use of a trade show backdrop requires thoughtful design and placement. The backdrop should be clearly visible from the aisle, free of clutter, and complemented by well-placed lighting to improve colors and readability. Poorly designed backdrops with faded graphics, too much text, or conflicting colors often fail to capture attention and can undermine your brand’s perceived professionalism. Ensuring your backdrop fits the booth dimensions, matches your broader marketing goals, and aligns with your target audience’s interests will help create a lasting impression that boosts booth traffic and lead generation.
Common Types of Trade Show Backdrops and Their Differences

Trade show backdrops come in several main types, each suited for different budgets, booth sizes, and visual goals. Popular options include pop-up displays, tension fabric displays with SEG frames, and backlit LED walls. Understanding their features and setup will help you pick the right backdrop to draw attendees and fit your event schedule.
Pop-Up Displays: Quick Setup and Portability
Pop-up displays use a collapsible frame with fabric or graphic panels that attach magnetically or with Velcro. They are known for very fast setup, often under 15 minutes, and excellent portability, thanks to a single wheeled case. Costs typically run from $300 to $1,000 depending on size and graphic quality. These displays work well for first-time exhibitors or those attending many events who need a lightweight, easy-to-move backdrop. The graphics usually provide a smooth mural look but may have lower resolution or less tension than higher-end options. Pop-ups offer convenience without compromising decent branding.
For a pop-up display’s best look, deliver your graphics as a single printed mural and avoid multiple panels that can break visual flow.
Tension Fabric and SEG Displays: Modern Lightweight Options
SEG (silicone edge graphics) tension fabric backdrops have become a standard for inline booths 10×10 or larger. A frame stretches a silicone-edged fabric print tightly, creating a wrinkle-free, drum-tight graphic surface with sharp and vivid images. Setup typically takes 20 to 30 minutes, and the lightweight case folds flat for easy transport. These setups cost from about $600 to $2,000 for a 10×10 display and offer excellent reusability over years. Their clean, professional appearance fits a wide range of industries and booth types. You’ll see them frequently at trade shows that allow inline booths and require a polished, customizable look.
Compared to pop-ups, SEG displays provide crisper visuals and a smoother fabric face, but they take slightly more time to assemble. Their frameless style is excellent for stretching creative, oversized graphics that work well with bright overhead lighting or natural daylight. For bigger tradeshow booths or multi-day shows, the investment pays off with a durable, attention-grabbing presence.
Backlit LED Walls: High Impact and Visibility
Backlit LED fabric backdrops combine tension fabric with internal LED light boxes for a luminous effect that stands out in dim or crowded show halls. These displays cost more, typically between $1,500 and $4,500, reflecting the technology and power requirements. Setup takes around 30 to 45 minutes since you must connect lighting and test brightness. These are best for major trade shows like CES or NAB, where premium visual impact and branding visibility are important.
LED backlit walls improve colors and readability, drawing visitors even from far away. Portability is somewhat reduced by heavier hardware and power cables but remains practical for booth teams comfortable with medium setup complexity. Investing in a backlit display shows your brand prioritizes high visibility and a modern, tech-forward image.
Make sure to check venue power availability and voltage compatibility before using backlit LED walls, as inadequate power can reduce brightness or damage equipment.
How to Choose the Right Size Trade Show Backdrop for Your Booth
Choosing the right size for your trade show backdrop hinges on your booth’s dimensions, the event’s rules, and the effect you want to create. Picking a backdrop that fits your booth space ensures your display looks professional while enough size maximizes visibility. Prioritize checking show restrictions and your marketing goals before settling on a backdrop size.
Standard Sizes for Inline and Island Booths
The most common trade show booth is an inline booth, usually 10×10 or 10×20 feet. For these, the standard backdrop size generally matches the width of the back wall: 10 feet wide for a 10×10 booth and up to 20 feet wide for a 10×20. The height limit for inline booths is typically around 8 feet, which comfortably fits most backdrops.
Island booths, which stand alone with aisles on all sides, offer more flexibility and larger spaces, such as 20×20 or 30×30 feet. These allow backdrops to be wider and taller, often exceeding the 8-foot limit of inline booths, though this depends on show rules. For an island booth, you can consider backdrops 10 to 15 feet tall or more to attract attention from farther away.
Checking Trade Show Height and Size Restrictions
Most major U.S. Trade shows limit inline booths to an 8-foot height for back walls. Organizers consistently enforce this to keep aisles and sightlines open. For example, shows at the Las Vegas Convention Center typically maintain this 8-foot limit except in island booths, which often have higher allowances. Confirm the specific height and width limits with event management before purchasing or designing your backdrop.
Some shows might have additional rules about backdrop depth or require approval for unusual sizes or shapes. Not adhering to these can result in costly changes or penalties at the event. Check the exhibitor manual or reach out to the show’s event coordinator well ahead of the show to avoid surprises.
Matching Backdrop Size to Viewing Distance and Impact
Your backdrop should be large enough to draw attendees’ eyes from a distance but should not dominate your booth space to the point it feels cramped. For a 10×10 booth, an 8-foot-wide by 7.5 to 8-foot-tall backdrop usually creates good visual impact without overwhelming the area. For larger booths like 10×20, you can extend the backdrop width up to 20 feet to fill the space appropriately.
Consider how far visitors will be when viewing your backdrop. Backdrops in larger venues or island booths should be taller and wider to stand out across greater distances. In smaller regional shows, standard sizes can suffice without extra cost. Weigh your marketing goals and budget when considering oversized backdrops; bigger does not always mean better if it does not fit your booth well.
Using a trade show booth size calculator or consulting with a professional exhibit designer can help align your backdrop size with your target audience’s viewing habits, expected foot traffic, and lead generation goals. Avoid opting for a backdrop size based solely on what the general service contractor offers, as this can limit your presence and return on investment.
Design Tips for Trade Show Backdrop Graphics That Get Noticed
Designing a trade show backdrop that grabs attention and clearly communicates your brand requires a focused approach to graphics, text, and layout. Keep the design simple, with a strong visual hierarchy to guide the viewer’s eye. Use large, easy-to-read fonts and contrasting colors to maximize visibility from 20 to 25 feet away, ensuring your message is understood even at a glance.
Visual Hierarchy: Logo, Headline, and Hero Image
Start your backdrop design with a clear visual hierarchy by placing your logo, headline, and a hero image in order of importance. The logo should be prominent but not overpowering, helping viewers quickly identify your brand identity. Position the headline just below or beside your logo, using concise wording to communicate your core message or unique selling point. Use one high-quality hero image that supports your brand story without creating clutter.
Limit your backdrop to a single headline and hero image with your logo. Extra text or multiple graphics often create visual noise and hurt clarity. This layout works best when viewed from roughly 25 feet away, simulating the typical trade show floor perspective. A word-for-word layout to try: Your Logo (top left or center), Headline (3-7 words, centered under logo), Hero Image (filling background space without overpowering text).
Font Choices and Size for Distant Readability
Sans-serif fonts like Helvetica or Open Sans deliver clean lines and high readability from a distance, making them ideal for trade show backdrops. Use a minimum font size of 3 inches for headlines to ensure visibility from 20 feet away or more. Avoid script or decorative fonts, which can confuse viewers and reduce legibility under trade show lighting. Body text should be minimal or excluded to keep the focus clear, if included, it needs to be at least 1.5 inches high and kept to the essentials.
Choose bold weights for headlines to improve contrast, especially on bright or backlit displays where lighting can wash out fine details. Test your typography by photographing a scaled-down version or viewing it on a screen reduced to thumbnail size. Anything that’s unclear at this size won’t stand out at the show either.
Using Colors and White Space Effectively
Select colors that align with your brand but also stand out in the visual environment of the specific trade show. High-traffic shows like SEMA have intense, colorful displays, so your backdrop needs bold contrasts or unique tones to not blend in. Use one or two dominant brand colors strategically placed against a neutral or white background to maximize impact.
White space is important to prevent overcrowding and improve message clarity. Leave empty areas around your logo and headline to draw attention and create a professional look. Avoid using too many colors or busy backgrounds that compete with your text. Instead, opt for a clean design with spot colors and sharp, smooth graphics printed using dye-sublimation for vivid, accurate results under harsh trade show lighting.
Step-by-Step Setup Process for Trade Show Backdrops
Setting up a trade show backdrop typically takes between 15 to 30 minutes, depending on the type and size of the backdrop. Pop-up systems and tension fabric backdrops are among the quickest to assemble. They usually don’t require specialized tools, making the process straightforward even if you have limited experience. For example, a 10×10 pop-up backdrop can be assembled solo without anything beyond basic instructions and included hardware, whereas larger or more complex setups may benefit from having one assistant to speed things up and reduce mistakes.
The first step begins by unpacking your equipment and laying out all parts to confirm nothing is missing. Most pop-up backdrops come with a collapsible frame that expands like an accordion. Gently unfold the frame until it locks into place securely. Your system provided magnetic or hook-and-loop connectors. Use those to stabilize corners and edges. Attaching the graphic panel, whether fabric or vinyl, is next. For fabric, it often slides over or stretches tightly around the frame, while vinyl panels might attach via snaps or Velcro tabs along the frame edges. Ensure the graphic is wrinkle-free by smoothing it carefully as you secure it.
For backdrops mounted on stands, after unfolding the backdrop itself, set up the support poles or tripod legs according to instructions. Insert crossbars if provided, then hang or clip your graphic material. Stand-mounted backdrops generally require slightly more time, about 20 to 30 minutes, and may need an Allen wrench or screwdriver if your stands use tighten screws. Keep these tools packed together for quick access. Using tension fabric displays tends to involve wrapping the fabric around the frame and zipping or clipping it tightly, a process that you can complete in under 15 minutes after some practice.
Minimizing setup time and errors comes down to preparation and practice. Organize your components clearly and check for damage during unpacking. Reading and following the manufacturer’s step-by-step guide helps prevent missed steps or damaged parts. Practice setting up your backdrop before the event to build confidence and speed. When setting up alone, concentrate on ensuring stable support and attaching the fabric gradually to prevent stretching or tearing. Asking for help during big events is a good idea for handling large or heavy backdrops, making the process safer and smoother.
Some exhibitors prefer to attach additional accessories like lights or side panels after the main backdrop is secure to keep the setup process manageable. Carry spare parts like tension clips or extra Velcro tabs since tradeshow environments can sometimes cause fittings to loosen. Using a lightweight but sturdy backdrop frame reduces the physical strain and makes solo setup easier. When packing for transport, re-fold components carefully to avoid damaging graphics, which can prolong setup time if wrinkles or creases occur.
Attempting to set up a large or complex backdrop alone can increase setup time and risk damage, so plan for a helper to handle awkward or heavy components safely.
Buy vs Rent: Making the Best Choice for Your Trade Show Backdrop
Deciding whether to buy or rent a trade show backdrop depends mainly on how often you exhibit, your budget, and your storage options. Buying usually makes sense if you attend multiple shows each year or want full control over your branding. Renting works better for occasional exhibitors or those who prefer not to handle storage and maintenance.
Exhibiting three or more times per year usually means buying a backdrop saves money over time. Custom backdrops can range from $400 to $2,000 or more, depending on size and materials. Renting typically costs between $300 and $700 per event, which adds up quickly if you appear frequently. For example, if renting costs $500 per event, attending four shows a year totals $2,000 annually. Buying a $1,500 backdrop would pay off within three events, then reduce your costs significantly afterward.
Storage and transport are key practical factors. Having limited space or not wanting to manage backdrop care means renting, since rental companies take care of setup, breakdown, storage, and delivery. On the other hand, buying means you must pack, store, and transport your backdrop between events. This requires an investment in protective cases and space that might not be practical for small businesses or those without dedicated storage.
Here is a simple decision tree to help clarify your choice: First, determine your expected number of trade shows annually. For fewer than two events, renting is usually more cost-effective and less hassle. Planning to attend three or more shows often makes buying the better financial choice while ensuring consistent branding. Next, consider storage: if you lack space or prefer to avoid backdrop handling, renting remains attractive despite a higher cumulative cost. For businesses with the resources to store and maintain their backdrop, buying keeps your message consistent and allows custom graphics that perfectly fit your brand identity.
When purchasing a backdrop, anticipate an upfront investment that varies by material and complexity. For instance, fabric backdrops with dye-sublimated graphics cost about $400 to $1,200, while larger or more rigid frame systems approach $1,500 to $2,000. Renting covers these costs as a flat fee per event but limits customization and control over the exact display condition you want.
Trade show marketers should also consider the flexibility requirements. Purchase allows for permanent customization, such as unique size adjustments or premium finishes tailored to booth design. Rental options typically include standard sizes and generic graphics, which might not fully match your brand strategy but are faster and simpler.
Balancing these factors helps you make a well-informed choice. Calculate your break-even point by comparing total rental costs over your planned shows against the purchase price plus storage expenses. Add in convenience and branding goals to decide what fits your business needs best.
Avoiding Common Trade Show Backdrop Mistakes and How to Fix Them
Common mistakes with trade show backdrops often start with poor sizing. A backdrop that is too small for your booth will look lost and fail to draw attention, while one that is too large may overwhelm your space or interfere with traffic flow. Measure your booth carefully before ordering. For instance, a 10×10-foot booth typically fits well with an 8-foot wide backdrop, leaving side panels open for interaction. Modular backdrops offer a flexible fix for varying booth sizes, letting you add or remove segments depending on the event.
Graphic design errors also harm impact. Cluttered or text-heavy backdrops force visitors to slow down to read, reducing impulse engagement. Instead, use large, clear visuals and concise messaging that visitors can grasp within seconds. Matte finish graphics reduce glare from exhibition lighting, making your design easier to see. Trade show professionals recommend focusing on one key message supported by a strong image to avoid confusion. Avoid logos and slogans that look pixelated or stretched, make sure your artwork is high resolution and sized correctly for the backdrop.
Material choice can undermine your efforts if not matched to the venue. Indoor shows work best with tension fabric backdrops featuring silicone edge graphics, which create clean, professional lines and are easy to set up. For outdoor trade shows, opt for weatherproof, UV-protected materials to guard against fading and damage. This prevents last-minute replacements and maintains your professional image. Although outdoor options can cost more upfront, they save money over time by lasting through multiple events.
Setup mistakes often relate to lighting and alignment. Poorly lit backdrops can look dull or create shadows that obscure your message. Position spotlights or LED lights to evenly illuminate the display without causing glare. Sufficient time for setup, typically at least a couple of hours, is essential to check tension and alignment, especially for fabric backdrops. Rushing setup raises the risk of sagging or wrinkles, which weaken the professional look.
You can fix a weak backdrop by simplifying the design and upgrading materials. Remove unnecessary text and choose a single compelling message supported by a large, bold image. Switching from vinyl to tension fabric often refreshes an old backdrop’s appearance. If lighting was an issue, add adjustable LED fixtures that focus light evenly across the backdrop surface. For recurring shows, consider investing in modular systems that adjust to booth size and event type, reducing future sizing problems.
Backdrops that correctly match your booth size, embrace clear, concise graphics, use appropriate materials, and benefit from proper setup lighting deliver stronger visitor engagement and a more memorable brand presence. Skipping these steps risks making your display fade into the background or confuse your audience.
Transporting, Storing, and Reusing Trade Show Backdrops Efficiently
Shipping a trade show backdrop safely starts by rolling or folding it carefully, depending on the material. Fabric backdrops can be rolled around a tube to avoid wrinkles, while vinyl or rigid panel backdrops often require flat storage or padded cases. Use a sturdy, hard-sided shipping container or a durable carrying case designed for trade show graphics. Adding bubble wrap or foam sheets inside the container protects the backdrop from dents and scratches. Label the package clearly and consider shipping with a carrier known for careful handling to reduce damage risk. If you transport the backdrop yourself, securing it inside your vehicle to prevent shifting is key.
Storing your backdrop properly preserves its quality and extends its lifespan. Keep fabric backdrops rolled tightly and stored in a dry, temperature-controlled space away from direct sunlight to prevent fading. Avoid moist or humid areas that encourage mold or mildew growth. Vinyl backdrops should be kept flat whenever possible or rolled loosely and stored vertically to prevent permanent creases. Use protective sleeves or dust covers to guard against dust and dirt buildup. Avoid folding backdrops into tight creases, as these can become permanent and hard to remove later.
Reusing trade show backdrops multiple times is practical when you follow proper care and storage steps. High-quality backdrops designed for repeat use typically cost more upfront but save money over time by eliminating frequent replacements. Inspect your backdrop after each show for tears, frayed edges, or dirt. Clean fabric graphics gently with mild soap and water and allow them to air dry completely before packing. Vinyl banners can be wiped down with a damp cloth to remove smudges. Repair small damages promptly using patch kits or professional services to keep your backdrop looking fresh.
Creating a simple checklist helps keep the shipping, storage, and reuse process smooth: ensure the backdrop is clean and dry before packing; use appropriate protective materials tailored to your backdrop type; choose the right container or case; store backdrop rolls in climate-controlled areas; inspect and clean after each use; and repair damages early. Depending on booth size and backdrop style, investing in specialized transport cases or hard tubes can range from $50 to $150 but offers better protection and easier reuse.
Always pack your backdrop with extra padding around corners and edges to prevent permanent damage during transit or storage.
Quick-Start Action Plan for Your Trade Show Backdrop
Use this plan to get your trade show backdrop ready and effective without delay. Follow the steps to stay on track and measure your progress.
- Before booking the booth: Measure your booth space precisely to select the right size backdrop. Confirm your measurements by comparing with event specifications.
- 2-3 weeks before the show: Choose the backdrop type (fabric, vinyl, pop-up) that suits your budget and booth style. Validate your choice by checking if it fits your transport and setup needs.
- 3 weeks before the event: Design backdrop graphics with clear branding and engaging visuals focused on one key message. Review the design by getting feedback from colleagues or potential attendees.
- 2 weeks before the event: Place your order or finalize rental agreements ensuring delivery well before setup day. Confirm shipment tracking and delivery date to avoid last-minute issues.
- 1 day before setup: Gather all backdrop components and test the setup at your office or storage site. Complete a full trial setup and break down to identify any missing parts or difficulties.
- Event day: Set up your backdrop early, following step-by-step guidelines to ensure a smooth display. Inspect the finished setup for stability and visual appeal before attendees arrive.
- After the event: Properly pack and store the backdrop to keep it in good condition for reuse. Check materials for damage and store them in designated cases or bags.
Frequently Asked Questions
What Materials Are Commonly Used for Trade Show Backdrops?
Trade show backdrops often use fabric, vinyl, or tension fabric to balance durability and print quality. Fabric backdrops reduce glare and wrinkles, making images appear sharper under exhibit lighting.
How Does Lighting Affect the Appearance of a Trade Show Backdrop?
Proper lighting highlights backdrop graphics and improves visibility. LED lights positioned above or around the backdrop improve color vibrancy and attract attention from attendees passing by.
Can Trade Show Backdrops Be Customized for Different Trade Shows?
Yes, many companies offer customizable trade show backdrops tailored to booth size and branding needs. This flexibility ensures your backdrop fits various exhibit spaces without compromising design impact.
What Is the Average Lifespan of a Trade Show Backdrop?
The lifespan varies by material and care but typically lasts for several years with proper storage and handling. Stretch-fabric backdrops maintain quality longer than vinyl, which can crack or fade.
How Do Curved Trade Show Backdrops Benefit Booth Engagement?
Curved backdrops create immersive, 3D visual effects that draw attendees closer. Their shape increases viewing angles, making booth graphics more accessible from multiple directions.
Is It Possible to Set Up a Trade Show Backdrop Alone?
Many 10×10 pop-up trade show backdrops can be set up solo without tools, but larger or complex backdrops usually require assistance to ensure stability and alignment.
Key Points to Remember
A trade show backdrop does more than fill space; it attracts attention and conveys your brand message clearly. Start by choosing the right size and design that aligns with your goals. Your next step is to gather booth measurements and begin sketching design ideas that highlight your unique selling points. That way, you’ll be ready to impress attendees and make your booth stand out.