How to Make a Mailbox Number Sign: A Complete Guide with Proven Methods
Knowing how to make a mailbox number sign starts with choosing durable materials and clear, visible numbers that last outdoors. The best approach includes selecting numbers at least 2 inches tall, using weather-resistant paint or decals, and installing them at USPS-approved heights for easy identification. Begin by measuring your mailbox to match number size to its surface for best visibility and compliance.
Key Takeaways
- Select mailbox numbers sized between 2 to 4 inches tall for clear visibility and emergency responder standards.
- Use outdoor-rated paint or high-quality decals to ensure your numbers last 6 to 8 years in weather conditions.
- Place the mailbox numbers so that their bottom edge stands between 41 and 45 inches above the road, according to USPS standards.
- Prepare and clean the mailbox surface thoroughly before applying numbers or decals for strong adhesion.
- Allow adhesive decals 24 to 72 hours to bond fully before exposing them to regular weather.
- Opt for simple, no-nonsense mailboxes if your curb appeal is not a priority but prioritize clarity.
What Materials and Tools Are Needed for a Mailbox Number Sign

Making a mailbox number sign requires selecting the right materials and tools based on the method you choose, paint, decals, wood, or metal. Using weather-resistant materials ensures your numbers stay visible and legible for years, especially since USPS rules require the numbers to be at least 1 inch tall for clarity.
For a budget-friendly approach, vinyl decals and paint are good options. Vinyl decals often use cast vinyl, calendared vinyl, or reflective sheeting designed for outdoor use, lasting about 6 to 8 years before fading. Paint can be low cost but requires proper surface prep and a durable exterior paint. Wood and metal signs provide a more substantial look but usually cost more and need more maintenance, especially wood, which can warp or wear if not sealed well.
Each method calls for a set of essential tools and supplies. For decals, you’ll need a clean cloth, isopropyl alcohol to prepare the surface, masking tape to hold the decal in place, a burnishing tool like a squeegee or even a credit card to smooth out bubbles, and a level or measuring tape to position the numbers correctly. Paint requires painter’s tape to create sharp edges, stencils or number templates, weather-resistant paint, and brushes or spray paint.
- Vinyl decals: cast vinyl decal sheets, isopropyl alcohol, clean cloth, masking tape, squeegee or credit card, level, scissors or craft knife
- Painted numbers: exterior-grade paint, number stencils or painter’s tape, brushes or spray paint, painter’s tape, drop cloth
- Wood signs: weather-resistant wood (cedar, redwood), outdoor paint or stain, sandpaper, saw, drill and screws for mounting, sealant
- Metal signs: pre-cut metal plate or sheet, metal paint or powder coating, drill and metal screws, mounting hardware
Choosing weather-resistant materials minimizes fading, rust, or peeling over time. Cast vinyl decals offer better durability over calendared vinyl and metallic options, which can wear faster. Wood should be properly sealed and routinely maintained to resist moisture damage. Metal signs resist most weather but can corrode if not treated or painted correctly.
The right tools help you avoid mistakes like crooked numbers or bubbles under decals, which reduce visibility. For example, using a level ensures compliance with visibility standards. Preparing the surface with isopropyl alcohol removes dirt and oils, so decals stick properly. For painted signs, prepping the mailbox surface by cleaning and sanding improves paint adhesion and longevity.
How to Choose the Right Size and Style for Clear Mailbox Numbers
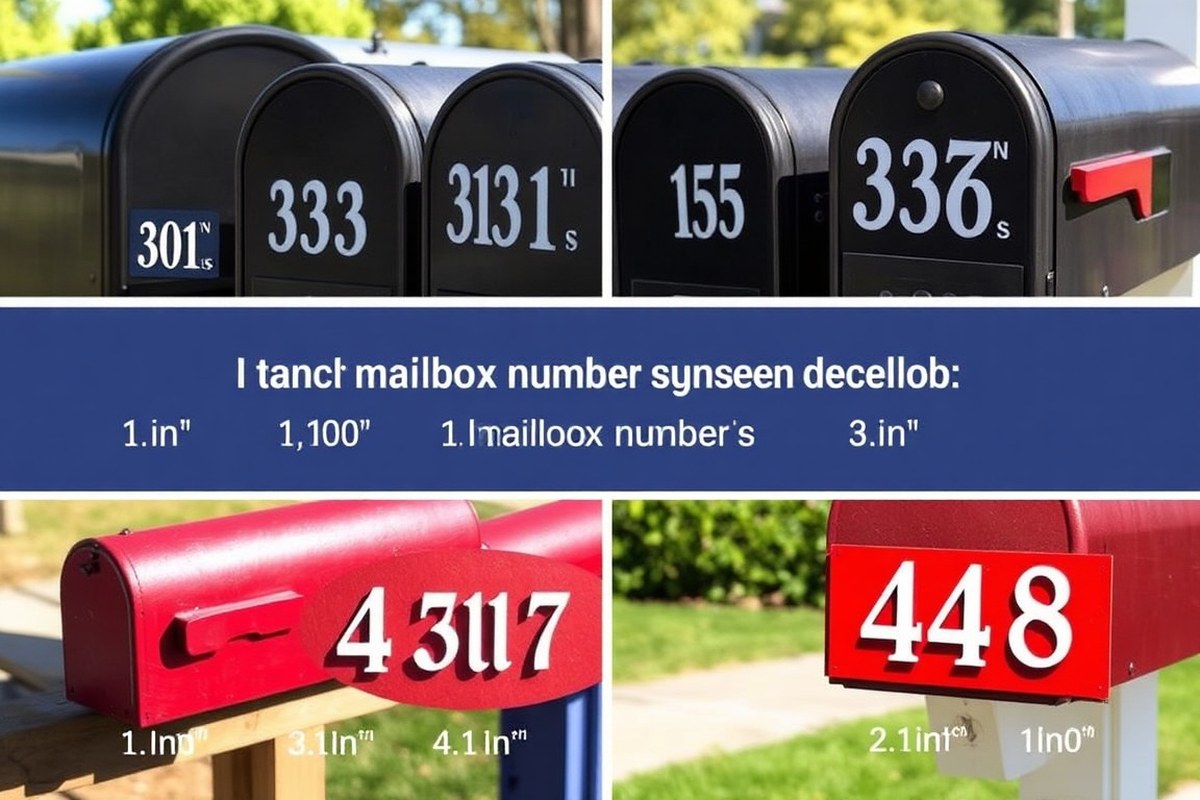
Picking the right size and style for your mailbox numbers helps ensure your address meets USPS rules and is easy for mail carriers and emergency teams to see. The USPS sets a minimum height of 1 inch for numbers, but many local fire or safety codes ask for at least 2 inches with strokes no thinner than 0.5 inch to boost visibility from the street. How far your mailbox sits from the road and the typical speed of cars passing by also affect the ideal size and style for clear viewing.
To keep your numbers easy to read, increase their height by about 1 inch for every 10 feet between your mailbox and the street. For instance, a mailbox 30 feet away calls for numbers around 3 inches tall to stand out. Place the numbers on the mailbox’s flag side, since that usually faces traffic and makes the numbers easier to see than on the front.
| Number Height (inches) | Viewing Distance (feet) | Stroke Width (inches) | Purpose |
|---|---|---|---|
| 1 | 10 | 0.17 | USPS minimum size for general mail delivery |
| 2 | 20 | 0.5 | Local emergency safety compliance and better visibility |
| 3 | 30 | 0.75 | Drive-by visibility for mail carriers and responders |
| 4 | 40 | 1 | Recommended maximum for highways or fast-moving traffic |
Besides size, style matters to keep your mailbox number readable and fitting the design of your home and neighborhood. Fonts like Palm Springs, SoCal, and Austin are popular for balancing readability and visual appeal. These fonts offer clear, well-defined shapes without unnecessary flourishes that can reduce legibility at a distance or under different lighting conditions. Matching the number color with your mailbox color, black, silver, red, or white, is another factor to consider for contrast and aesthetics.
The height from the road surface to the bottom of your mailbox is also important. USPS guidelines suggest positioning the mailbox bottom 41 to 45 inches from the road, which affects how your numbers face and are seen by passing vehicles. Choose sizes and styles that can be easily applied to this space without crowding or awkward spacing.
Ensure your numbers have a minimum stroke width of 0.5 inches when using sizes 2 inches or larger to ensure maximum visibility, especially in poor weather or low light.
Methods for Making Mailbox Numbers: Paint, Decals, Wood, and Metal
You have several popular options for creating your mailbox numbers, each with unique advantages. Painting numbers offers flexibility and a low upfront cost but requires careful preparation and patience. Vinyl decals provide quick installation with weather-resistant, professional-looking results but need a clean surface and proper application to avoid bubbles. Attaching wooden or metal numbers creates a custom, textured look but involves more tools and can be more expensive. Combining methods, like painting on wood with metal numbers, can create a distinctive sign tailored to your style and mailbox material.
Painting Numbers with Stencils
Painting numbers gives you full control over colour and style at minimal cost, making it ideal for budget-conscious homeowners who prefer a hands-on approach. Using stencils ensures clean, consistent fonts without freehand errors. Paint works best on smooth, primed mailbox surfaces or wooden signs to prevent chipping and fading. Exterior-grade latex or enamel paint is recommended for durability against weather. Follow these steps to paint your mailbox numbers using stencils:
- Clean the mailbox surface thoroughly, removing dirt, grease, and old paint.
- Sand lightly if the surface is glossy to help paint adhere.
- Apply a primer compatible with your paint type and let it dry completely.
- Position the stencil on the mailbox and secure it with painter’s tape to avoid movement.
- Use a stiff brush or foam dabber to apply paint in thin layers, dabbing rather than brushing to reduce bleeding under the stencil.
- Remove the stencil carefully before the paint fully dries to prevent peeling.
- Let the paint cure according to the manufacturer’s instructions, typically 24 hours.
- Optionally, seal the numbers with a clear weatherproof polyurethane for extra protection.
Painting keeps initial costs low, often under $15 for stencils and paint, but takes time to dry and can require touch-ups every few years depending on weather exposure.
Applying Vinyl Number Decals
Vinyl decals provide a sleek, professional look with little mess and are designed to endure harsh weather for 3 to 5 years, especially if they feature UV lamination and acrylic adhesives. Their versatility makes them excellent for metal, plastic, or painted mailboxes. To avoid common installation problems like bubbles or misalignment, follow these steps:
- Clean the mailbox surface with mild detergent and alcohol to remove grease and dust; let dry thoroughly.
- Measure and mark the exact location for your numbers using a soft pencil or painter’s tape as a guide.
- Peel the backing from the decal slowly, exposing the adhesive side.
- Align the decal carefully with your markings without pressing it down fully.
- Starting from one edge, press the decal in place, smoothing outward with a plastic squeegee or credit card to push out air bubbles.
- Slowly remove the transfer tape, ensuring the decal sticks fully to the surface.
- Allow the adhesive to set for 24 to 48 hours before exposing it to harsh weather or cleaning.
Decals cost around $10 to $30 depending on size and style, offer quick installation, and can be removed without damaging the mailbox. Avoid applying in cold (below 50°F) or humid conditions for best adhesion.
Attaching Wooden or Metal Numbers
Wood or metal numbers add dimension and durability to your mailbox sign, improving curb appeal with a custom look. Wood can be stained or painted for rustic or classic styles, while metal often comes pre-finished and can resist weather for years. Both require secure attachment to withstand wind and rain. Here’s how to attach wooden or metal numbers:
- Choose numbers sized and styled to fit your mailbox or sign backing.
- For wood, sand and finish the numbers before attaching; for metal, clean the surface of any oils or dirt.
- Mark the location on the mailbox or backing where each number will go for even spacing.
- Use exterior-grade adhesive such as construction glue or epoxy for smooth surfaces or drill pilot holes if screwing into wood or metal.
- Press or screw the numbers firmly in place, ensuring alignment before the glue sets or screws tighten.
- Allow glue to cure fully, usually 24 hours, before handling the mailbox.
Wood and metal numbers typically cost $5 to $20 each depending on material and design. Attaching them requires more tools and effort but provides a visually appealing, lasting sign. Combining these with paint sticks or vinyl can create a layered, personalized look.
How to Prepare and Clean the Mailbox Before Number Installation
Cleaning and properly preparing your mailbox surface before installing numbers is essential to ensure the paint or decal adheres well and lasts. Removing dirt, grease, wax, and oxidation creates a clean, dry foundation. Surface temperature also affects adhesion, so installing on the right day and time makes a difference.
Why Thorough Cleaning Matters
Dirt, oil, and wax interfere with adhesive bonding or paint application, causing premature peeling or flaking. Oxidation, especially on metal mailboxes, creates a rough, flaky layer that weakens adhesion. Cleaning eliminates these contaminants, resulting in a stronger attachment and a professional appearance. Skip this step, and your numbers may start lifting or fading in weeks, wasting time and money.
Best Cleaning Agents and Tools
Isopropyl alcohol works best to remove oils, grease, and residues without leaving film. Use a 70% or higher concentration for effective cleaning. For dirt and oxidation, start with a mild detergent and water solution, then rinse and dry. Avoid harsh abrasives that can scratch surfaces.
Use a soft cloth, sponge, or a soft-bristle brush for scrubbing. Avoid steel wool or sandpaper unless rust removal is needed, then sand gently and clean again. Household degreasers or glass cleaners are also helpful but should be wiped off entirely before installing numbers.
Ideal Surface Temperature and Dryness
Adhesive decals and some paints need the mailbox surface to be 70 to 90 degrees Fahrenheit for proper curing and bonding, according to 858 Graphics. Installing outside this range can cause poor adhesion or bubbling.
Make sure the surface is completely dry before starting. Moisture trapped under paint or decals leads to bubbling and peeling. Avoid installation on rainy or very humid days. Aim for a warm, dry day with low humidity.
Checklist for Mailbox Cleaning and Surface Preparation
Following these steps puts you on track for a lasting finish. Use clean, lint-free cloths to avoid leaving fibers behind.
- Wash the mailbox with mild soap and warm water to remove dirt and dust.
- Rinse thoroughly with clean water and dry fully with a clean cloth.
- Wipe the surface with isopropyl alcohol and a soft cloth to remove oils and wax.
- Check the mailbox temperature using an infrared thermometer or touch, wait if under 70°F or over 90°F.
- Mark the desired position for the numbers using a pencil or painter’s tape for alignment.
- Allow the cleaned area to cure and dry completely for at least 30 minutes before applying numbers.
Using this checklist helps prevent common installation problems such as lifting or uneven edges.
Preparing Different Mailbox Surfaces
Metal mailboxes may require extra care to remove oxidation or rust. Use a fine sanding sponge gently, then clean with alcohol. Plastic or fiberglass mailboxes need cleaning but no sanding, as roughening these surfaces can reduce adhesion.
Painted mailboxes should be checked for peeling or loose paint. Sand loose areas lightly and remove dust before installation. On freshly painted mailboxes, wait at least 48 hours before applying numbers to ensure paint curing.
Step-by-Step Installation Process for a Durable Mailbox Number Sign
Proper installation of your mailbox number sign ensures it is easy to read, lasts longer, and looks professional. Measuring carefully and using level guides helps avoid crooked or misplaced numbers that confuse mail carriers or visitors. You’ll want to install your numbers between 41 and 45 inches from the road according to USPS guidelines to meet postal standards and improve visibility.
Follow these clear steps to measure, mark, apply, and secure your mailbox numbers correctly. Using simple tools like a tape measure, level, pencil, and masking tape will make the process straightforward. Taking your time at each step helps prevent errors such as uneven spacing, bubbles under decals, or shaky screw holes.
- Measure the Installation Area: Use a tape measure to determine the flat surface area where your numbers will go. Check that you have at least 6 inches of width and height clearance for the numbers you’ve chosen. Verify the mailbox height from the ground and adjust if needed to meet the 41, 45 inch range.
- Mark the Guidelines: Hold a small level horizontally at the planned height and draw a faint pencil line across the surface. This line acts as a baseline for aligning all numbers. Use a ruler to space marks evenly across the line based on the width of each number, leaving about half an inch between them.
- Prepare the Surface: Clean your mailbox surface with soap and water or rubbing alcohol to remove dirt, grease, and moisture. Allow it to dry fully before applying numbers or adhesive signs to ensure proper sticking.
- Position Numbers with Temporary Tape: Arrange your numbers along the pencil line, using small pieces of masking tape on the top or sides to temporarily secure them. Step back and check for straightness and balanced spacing before final application.
- Attach Using Provided Hardware or Adhesive: For screw-mounted numbers, drill pilot holes carefully using a drill bit matching the screws’ size. Insert screws without overtightening to avoid cracking. For adhesive numbers or decals, peel a small section of backing and slowly press down while smoothing out air bubbles with a plastic squeegee or credit card.
- Remove Tape and Finalize Alignment: Gently peel off any masking tape holding the numbers temporarily. Verify that none of the numbers shifted during final fixing. Touch up pencil lines outside the numbers with a damp cloth or eraser.
- Allow Adhesive to Cure: Let adhesive-backed numbers set according to product instructions, usually from 24 to 72 hours. Avoid washing or heavy handling during this time to secure longevity and prevent peeling.
Double-check your pencil line with a level before applying numbers to avoid crooked installation that’s hard to fix later.
How Environmental Factors Affect Mailbox Number Sign Longevity
Rain and moisture affect adhesive bonds and materials differently. Decals often rely on adhesives that take around 72 hours to fully cure, reaching their maximum strength after this time. In rainy or humid climates, choosing waterproof or heavy-duty outdoor adhesives helps the numbers stay stuck longer. Metal and plastic signs are less prone to damage from rain compared to wood, which can swell or develop mold unless sealed properly. Choose rust-resistant metals or sealed plastics for your mailbox number sign when it’s near sprinklers or stays wet to ensure lasting durability. Temperature swings can cause materials to expand and contract, putting stress on paints and adhesives. In regions where temperatures move between freezing winters and hot summers, flexible materials and paints designed for outdoor use reduce cracking and peeling. Wood signs without proper sealing can split over time. Vinyl decals should be applied in moderate temperatures, typically between 50°F and 85°F, to ensure strong adhesion. Avoid installing numbers in freezing or extremely hot conditions to prevent poor bonding. Your mailbox’s location also shapes maintenance needs. Signs on mailboxes near busy roads may accumulate dirt and grime, reducing visibility, while those under tree branches might face more moisture and debris. Routine care includes a monthly check with mild soap and a soft cloth to clean dirt and remove any early signs of peeling or fading. When adhesive edges begin to lift, press them back down using a cloth dampened with water or a mild cleaner to help decals last longer. Touch up painted numbers every few years, or replace decals every 3 to 5 years depending on wear, especially in bright, wet, or variable climates. One practical maintenance checklist looks like this: clean the sign with mild soap and a soft cloth monthly, inspect the edges of decals or painted areas for peeling or fading, ensure no mold or mildew develops on wood, and plan repainting or decal replacement every few years based on your local climate. These steps cost only a few dollars for cleaning supplies and save the time and money of frequent full replacements. Ignoring environmental factors and skipping upkeep often leads to signs that fade or peel within a season, reducing address visibility and causing mail delivery delays.
Common Mistakes to Avoid When Making and Installing Mailbox Numbers
One frequent mistake when painting or applying decals on mailbox numbers is skipping proper surface preparation. Dirt, grease, and old paint can prevent numbers or decals from sticking well, causing peeling or fading. Clean the mailbox with soap and water, rinse thoroughly, and let it dry completely before starting. Lightly sanding a metal or plastic surface creates a better grip for paint or adhesive. Avoid painting or applying decals in direct sunlight or extreme temperatures, as this can cause uneven drying or weak adhesion.
Misaligned numbers or decals hurt visibility and professionalism, which also might cause delivery problems. Measure and mark the exact placement with a pencil or painter’s tape before sticking or painting anything. Use a level to keep numbers straight, especially on curved or uneven surfaces. Gently lift and reposition numbers within the first few seconds of application to prevent peeling paint or adhesive when they shift.
- Rushing cure time after painting or decal application, which can lead to smudges or peeling
- Ignoring USPS address visibility requirements, like minimum number height of 1 inch and contrasting background
- Using incorrect adhesives or paint types not designed for outdoor use
- Applying decals on dirty, oily, or glossy surfaces without sanding or priming
- Failing to protect painted numbers with a clear sealant for durability
- Poor placement, such as numbers too low, too high, or facing away from the street
Notice peeling or fading soon after applying? Carefully remove the damaged area using a plastic scraper or an outdoor-use adhesive remover. Clean and prepare the area again before reapplying paint or a new decal. For persistent problems or complicated surfaces like textured metal, consulting a professional sign maker may be worth the cost to get a long-lasting, clear display.
Numbers that blend into the mailbox color or are too small reduce visibility and may violate USPS guidelines. Choose contrasting colors and ensure numbers are at least 1 inch tall. Following these rules avoids delivery delays and maintains curb appeal. Fix visibility problems by repainting with high-contrast colors; matte finishes often reduce glare better than glossy paints.
Maintaining and Updating Your Mailbox Number Sign over Time
Maintaining your mailbox number sign regularly ensures visibility and curb appeal while preventing costly replacements. A basic schedule of cleaning, inspection, and resealing every 6 to 12 months keeps the numbers clear and protected. Prompt temporary fixes can extend the life of the sign until a full repair or replacement is feasible.
Recommended Maintenance Intervals
Check your mailbox numbers twice a year, ideally in spring and fall, to catch dirt buildup, fading, or damage early. After severe weather, including heavy rain, snow, or wind storms, inspect your sign for loosened or missing numbers. A routine cleaning every 6 months helps maintain a sharp look and prevents grime that can wear down paint or decal adhesives.
Resealing or refreshing protective finishes usually should happen once a year. Depending on your local climate, more humid or windy areas may require more frequent attention. Signs mounted on wood will often need resealing sooner than those on metal or plastic to prevent warping and peeling.
Cleaning and Sealing Best Practices
Use a mild soap solution and a soft cloth or sponge for regular cleaning. Avoid harsh chemicals that might strip paint or damage decals. Rinse thoroughly with water and allow the sign to dry completely before resealing. When resealing, choose a clear, weatherproof sealant rated for outdoor use and compatible with your sign’s material.
Sealants usually take 24 to 72 hours to dry fully. During this time, avoid direct water exposure. For painted numbers, apply one to two thin coats using a small brush for even coverage. Decals benefit from spray-on sealants applied gently to avoid lifting edges.
- Clean with mild soap and soft cloth every 6 months
- Rinse and air dry completely before resealing
- Use outdoor-rated clear sealant compatible with sign material
- Apply thin coats of sealant, letting each dry 24 to 72 hours
- Avoid cleaning or sealing in extreme temperatures below 50°F or above 85°F
- Re-inspect after heavy storms for damage or lifting
- Remove dirt and debris promptly to prevent buildup
Temporary Fixes and When to Replace
For chipped paint or loose numbers, using a quick-dry adhesive or touch-up paint can provide a short-term solution. Applying strong, weatherproof glue on loose numbers or edges can hold pieces in place until a better repair is possible. Covering faded numbers temporarily with waterproof number decals or reflective stickers preserves visibility.
Signs need replacement when numbers are heavily worn, peeling, or missing, reducing visibility and causing mail delivery issues. Warped or rotted wood bases and cracked or rusted metal also signal replacement time. A sign showing constant water damage or paint failure likely won’t hold up long with repairs alone.
Regularly inspect your mailbox numbers to catch small issues early, waiting too long allows damage to worsen and can mean starting over.
Step-by-Step Action Plan
Follow these steps in order to create a visible, durable mailbox number sign that suits your home’s style and lasts through the seasons.
- Before you start: Gather all materials and tools listed for your chosen method (paint, decals, wood, or metal). Check that you have the right size numbers for clear visibility from the street.
- Day 1: Clean your mailbox thoroughly with soap and water or rubbing alcohol. The surface should be dry and free of dirt or grease to ensure proper adhesion or paint application.
- Day 2: Cut or prepare your numbers according to the style you chose. Use a stencil if painting, peel off backing for decals, or sand edges for wooden or metal numbers.
- Day 3: Attach the numbers securely using appropriate screws, adhesive, or paint. Check for alignment and spacing so the numbers are easily readable from the street.
- After installation: Apply a clear sealant or weatherproof coating if using paint or wood to protect the sign from environmental damage. This will extend the life of your numbers.
- One week later: Inspect your sign for any loose parts or fading. Tighten screws or apply touch-up paint or sealant as needed to maintain durability.
- Ongoing, every 6 months: Clean the sign gently and check for damage caused by weather or wear. Replace or update the numbers if visibility decreases.
Frequently Asked Questions
What Size Should Mailbox Numbers Be for USPS Compliance?
USPS requires mailbox house numbers to be at least 1 inch tall for visibility. Larger numbers improve readability from the street, especially for emergency responders.
Can You Reuse Old Mailbox Numbers on a New Sign?
Yes, you can reuse old numbers if they’re in good condition and fit the new sign. Clean them thoroughly and ensure adhesives or screws match up for secure installation.
Are Magnetic Mailbox Numbers Reliable Outdoors?
Magnetic numbers work but may fall off in windy or rainy conditions. Use them on metal mailboxes where they can firmly attach, but consider a more permanent option for long-term durability.
What Paint Types Work Best for Mailbox Number Signs?
Use outdoor-rated acrylic or enamel paint to resist weather and fading. These paints dry quickly and maintain color longer on metal or wood surfaces.
Can You Make Mailbox Number Signs from Recycled Materials?
Yes, materials like reclaimed wood or old metal pieces can be crafted into unique number signs. Make sure to prep them properly by sanding and sealing for outdoor use.
How Do You Repair a Mailbox Number Sign That’s Peeling?
Remove loose paint or decals and clean the surface before repainting or reapplying decals. Regular maintenance prevents peeling caused by weather or poor initial prep.
Key Points to Remember
A well-made and carefully installed mailbox number sign improves curb appeal and helps deliver mail without issues. Start by cleaning your mailbox and selecting numbers that stand out clearly. Then, create and attach your sign following the steps above to ensure your numbers remain visible and intact through changing weather. Taking the time to check your sign periodically will keep your address easy to find for visitors and delivery services alike.