How to Make a Directional Sign Post with Clear Steps and Durability Tips
How to make a directional sign post starts with choosing sturdy materials like a 4×4 wood post and cutting your signs from 1 to 2-inch thick wood pieces. Assemble the signs by shaping arrow ends and attaching them securely before painting and lettering with durable outdoor paint. Installing the post deeply in the ground ensures stability for long-lasting use.
Key Takeaways
- Use a 4×4 by 10-foot wood post for a strong, weather-resistant directional sign post base.
- Cut sign boards around 3.5 inches wide and 18 inches long for clear, readable directional arrows.
- Shape one end of each sign into a 45-degree angle arrow using a miter saw for accurate direction indication.
- Apply outdoor paint and sealant to protect lettering and colors from weather damage.
- Dig a hole at least 1 to 2 feet deep and 6 inches wider than the post for stable installation.
- Accurately calculate and round distances (e.g., 5070 miles for Santorini) to provide clear, precise directions.
What Materials and Tools Are Needed for a Directional Sign Post
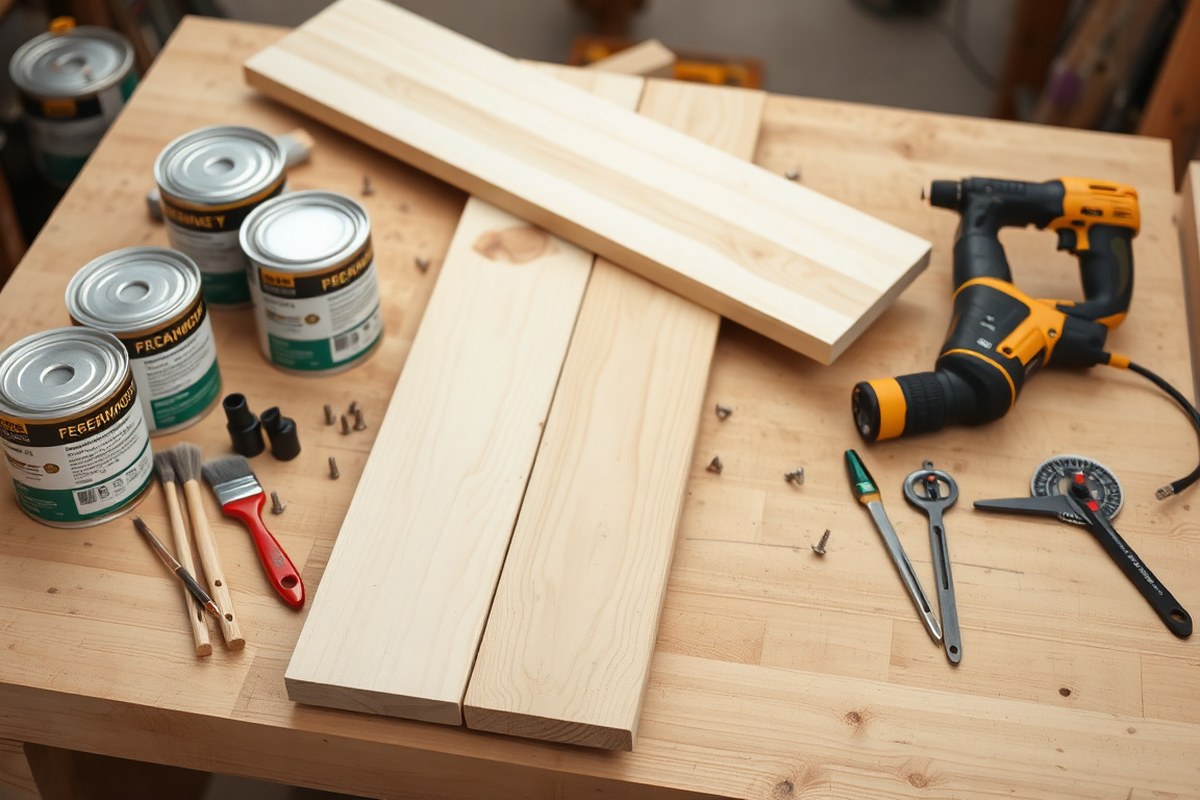
Choosing the right materials and tools ensures your directional sign post lasts outdoors and looks good. For wood, cedar and redwood are top picks because they resist rot and insects better than pine. Pressure-treated lumber is a budget-friendly option but usually needs extra sealing. Use a 4×4 post at least 8 feet long for the main signpost to give stability and enough height. Sign boards are typically 1×6 or 1×8 cedar or redwood planks, cut 18 to 24 inches long to balance visibility and weight.
Paint and sealants keep your signs weatherproof and vibrant. Exterior acrylic latex paint works well because it handles sun, rain, and humidity without peeling quickly. Use a primer designed for wood to improve paint adhesion, especially if you’re painting over raw or pressure-treated wood. Finish with a clear outdoor spar urethane or marine varnish to add a durable topcoat. This extra layer protects painted lettering and borders from fading or chipping after exposure to outdoor elements.
Basic yet effective tools are necessary for cutting, attaching, and finishing your sign post. If you don’t own power tools, a handsaw can cut the boards but requires more time. A cordless drill with screwdriver bits speeds up assembly when using screws, which hold better than nails for outdoor projects. Sandpaper or a power sander smooths edges and surfaces to prevent splinters and help paint stick. You’ll also need measuring tape, a pencil for marking cuts, and clamps to hold wood steady while working.
- 4×4 wooden post (8 to 10 feet long), preferably cedar or redwood
- Sign boards, 1×6 or 1×8 cedar or redwood planks, 18, 24 inches long
- Exterior acrylic latex paint and primer
- Clear spar urethane or marine varnish for sealing
- Drill with screwdriver bits and 2.5-inch exterior wood screws
- Handsaw or power saw, sanding tools (sandpaper or power sander)
- Measuring tape, pencil, and clamps
To save money, check local lumber yards for scraps or discounted boards, or use reclaimed wood that is still in good condition. Reusing old paintbrushes and partial paint cans from other projects also lowers costs. When assembling, test-fit the sign boards on the post first to decide on spacing and layout before screwing in. This helps avoid mistakes and allows you to adjust the signs’ directions precisely. Finally, if your post will stand on a porch or deck, secure it to a wooden base with extra screws or bolts to prevent tipping.
How to Cut and Shape the Directional Signs
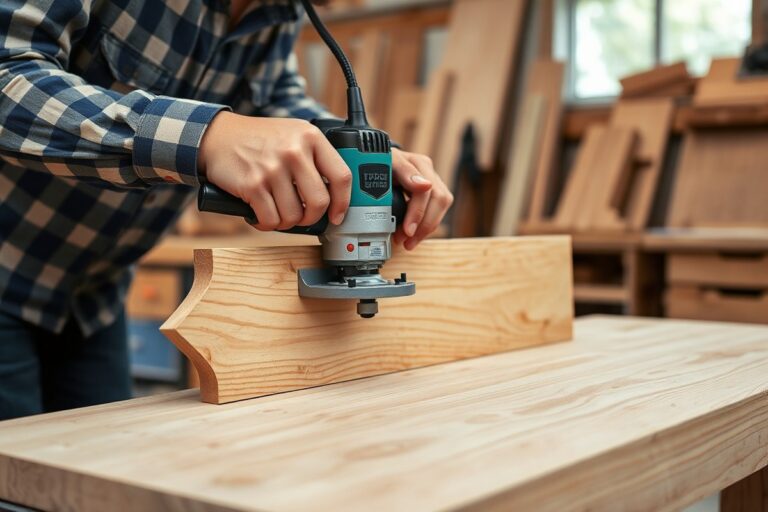
Cutting and shaping your directional signs requires accurate measuring, safe cutting practices, and proper surface preparation. Use a miter saw or hand saw to create arrowhead ends or rectangular signs with clean edges. Sanding helps the paint adhere and makes lettering easier.
Measuring and Marking Your Wood Planks
Start with wood planks that are 1 to 2 inches thick and about 3.5 inches wide by 18 inches long, which suits most directional signs. Measure a consistent length for each blank, 18 inches is common for arrow shapes. For arrows, mark your cut lines at 45-degree angles to form the arrowhead tips.
Use a pencil and a square ruler to draw precise lines where you plan to cut. Mark both ends of the plank if cutting arrows on one side only or on both ends for double arrows. Clear and consistent marking ensures all your signs look uniform and professional.
Cutting Arrows and Shapes Safely
Cutting wood can be hazardous, so follow safety guidelines carefully. Use eye protection, hearing protection, and gloves to avoid injury. A miter saw is the easiest way to get clean, angled cuts at 45 degrees, but a hand saw works well for beginners or small projects if you take your time. Here’s how to cut your directional arrow signs:
- Clamp the wood plank securely to your workbench or saw stand to prevent movement.
- Set your miter saw to a 45-degree angle for the arrow tip cuts or keep it at 0 degrees for rectangular signs.
- Align the saw blade with your marked lines before starting the cut.
- Turn on the saw and carefully lower the blade through the wood, letting the saw do the work without forcing it.
- For hand saw use, follow the marked angles slowly and steadily to maintain a straight cut.
- Repeat the cut on the other side of the plank if making a double-pointed arrow.
- Check the cut edges for any splinters or rough spots.
Always disconnect power tools when changing blades or adjusting angles to avoid accidents.
Sanding and Preparing Surfaces
Sanding smooths rough edges and prepares the wood surface for painting. Start with medium grit sandpaper (around 80-grit) on the cut edges, then finish with fine grit (120-150 grit) on the entire surface to remove splinters and create a smooth painting surface.
Use a sanding block or an electric sander to ensure even pressure. After sanding, wipe the surface with a damp cloth to remove dust. This step helps paint and lettering stick better, resulting in clearer, longer-lasting signs.
Painting and Lettering Your Directional Signs
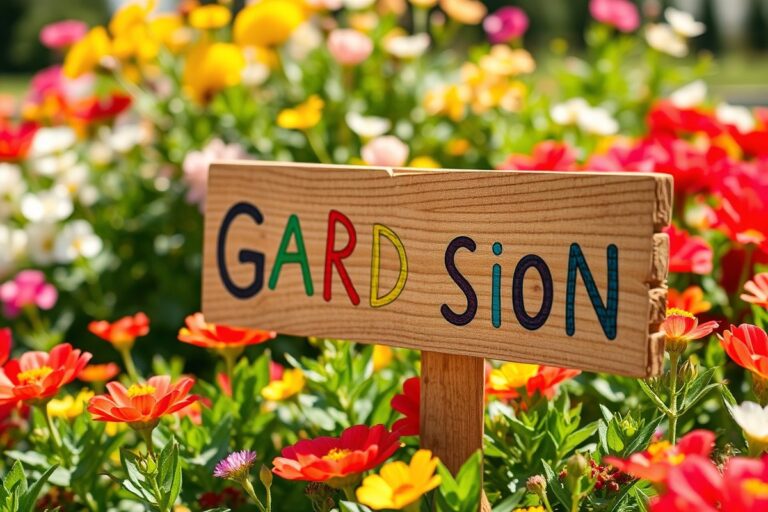
Start by painting the background color before adding any lettering or designs. This approach creates a clean, even base to help your text and images stand out. Use stencils or freehand your lettering after the background is fully dry, then seal all exposed wood with a weatherproof finish to protect against moisture and sun damage.
Painting Background Colors and Base Coats
Begin with a primer or a solid base coat to improve paint adhesion and durability. White primer works well for bright or distressed looks because it helps subsequent layers stand out. Apply two coats of your chosen background color, allowing each coat to dry completely following the paint manufacturer’s instructions. Using bright colors such as aqua, yellow, or orange provides strong visibility.
For a distressed effect, paint a white primer or base coat first and then brush on a second color lightly so some of the primer remains visible. This technique adds texture and character but requires a steady hand and patience to avoid overcoating.
Applying Lettering with Stencils or Freehand
Lettering should always go on after the background paint has fully dried. Using stencils made from cardboard or purchased custom decal letters ensures crisp, uniform fonts, ideal for beginners or consistent yard signs. Freehand lettering works great if you have steady hands or want a custom, handwritten style, but practice first on scrap wood or paper. Ensure your brush or paint pen is appropriate for outdoor use, providing good opacity in at least two coats.
Letter heights of 2 to 4 inches are often most readable at a distance of several feet, though you can tailor this to your sign’s size and typical viewing range. To maintain clean edges when painting letters, hold stencils firmly, and dab paint on rather than brushing back and forth. For freehand, use a light pencil outline as a guide.
- Clean the dried background surface to remove dust.
- Place your stencil or sketch your text outline lightly with pencil.
- Apply paint for letters using a small, firm brush or paint pen in thin coats.
- Allow first coat to dry, then add a second coat for full coverage.
- Remove stencils carefully to avoid smudging while paint is still tacky.
- Touch up any uneven edges with a fine detail brush.
Sealing Signs for Outdoor Durability
Sealing is essential to protect your sign from rain, sun, and temperature changes. Apply 2 to 3 thick coats of outdoor polyurethane or marine varnish specifically labelled for outdoor wood use. This adds a clear, durable layer that prevents peeling and fading.
Allow each coat of sealant to dry fully, typically 24 hours, and sand lightly with fine-grit sandpaper between coats for a smooth finish. Choose a satin or matte finish to reduce glare and improve legibility outdoors. Avoid oil-based sealants in direct sun as they can yellow the paint over time.
How to Calculate and Mark Directions and Distances Accurately
To find the correct compass bearing for each destination, start by identifying the direction from your sign post’s location to the place you want to point towards. Take a handheld compass, hold it flat, and rotate your body until the compass needle aligns with north. Then, face the target destination using a map or a smartphone app with map and compass functionality, such as Google Maps or a dedicated compass app. Note the bearing in degrees clockwise from north, this is the angle you’ll mark on your sign. For example, if the destination lies northeast, your compass may show a bearing of 45 degrees.
If you prefer to use a smartphone for this task, open a compass app and ensure your phone’s sensors are calibrated by moving it in a figure-eight pattern. Then, use maps to find the destination and estimate the bearing by aligning your phone with the north indicated on the compass app. Smartphones combine GPS with electronic compasses for reliable readings, but their accuracy depends on avoiding magnetic interference from electronics or metal objects nearby, so test the app away from metal fences or electrical boxes.
Measuring distances can be done by checking online maps or GPS tools that provide mileage between two points. For example, Google Maps lets you right-click on a starting point, select “Measure distance,” then click the desired destination to get the mileage. This number is usually precise and given to tenths of a mile. To make the sign clear and readable, round the distance sensibly based on the scale of your project. For examples, if the distance is 3.2 miles, it’s often better to display “3.2 mi” on the sign if you want accuracy, or simply “3 mi” to keep it clean and easy to read.
In some cases, symbolic or approximate distances work well, especially if exact mileage is hard to find or less meaningful, like “5 mi” to a local park or “10+ mi” for distant attractions. This approach adds charm and simplifies the sign, but avoid rounding too loosely to prevent confusion. For long distances, rounding to the nearest 5 or 10 miles makes sense, while for close destinations under 5 miles, use tenths or quarters to stay accurate.
Here’s a worked example: Suppose you want to show a sign for a nearby town that Google Maps says is 7.6 miles away to the northwest. First, use your compass to find northwest, which is roughly 315 degrees. Align the sign arm at a 315-degree angle from north. Next, decide how to display the distance. Since 7.6 miles is under 10, you might round it to “7.5 mi” or “8 mi” for simplicity. Attach the sign with this bearing and mileage so it points accurately and informs passersby clearly.
Accuracy in direction is important because a sign pointing the wrong way defeats its purpose. Good results come from double-checking your compass or app readings and using a level to make sure your post stands straight so bearings are correct vertically and horizontally. Avoid magnetic interference when noting bearings, and keep your distance measurements consistent by relying on the same mapping tool. By paying attention to these details, your directional sign post will be both functional and attractive in your outdoor space.
Steps to Assemble and Attach Signs to the Post
Start by precisely marking where each sign will go on the post, then drill pilot holes to prevent the wood from splitting. Use screws sized appropriately for the thickness of your signs, generally 1.5 to 2 inches, and avoid nails or adhesives as primary fasteners because screws provide better hold and allow for angle adjustments. Position and secure each sign with the correct angle to ensure clear, stable directional pointing without sagging.
Marking Positions and Drilling Pilot Holes
Begin by deciding the vertical spacing between your signs to maintain readability and balance. Space the signs at least 6 to 8 inches apart vertically on the post. Use a pencil and a level to mark the exact spot for each sign’s mounting point, keeping in mind the direction each sign needs to face.
Drill pilot holes before inserting screws to avoid splitting the wood, especially with hardwood posts or thick planks. Use a drill bit slightly smaller than the screw diameter; for example, with 1.5-inch screws, a 1/8-inch drill bit works well. Drill three pilot holes per sign: one on each end and one in the middle, as this evenly distributes pressure and prevents sagging.
Always check the post’s stability and adjust your pilot holes if the wood shows signs of cracking before fully screwing in your hardware.
Attaching Signs Using Screws or Alternatives
Screws are preferred over nails or adhesives because they hold better under outdoor conditions and allow adjustments if needed. Use exterior-grade screws to resist rust, matching the length to securely embed in both the sign and the post without poking through. A typical choice is 1.5-inch exterior wood screws for standard 3/4-inch thick signs.
Applying a small amount of construction adhesive like Liquid Nails before screwing the sign on can improve long-term stability, but rely mainly on screws to hold the sign. Although nails can speed installation, they do not hold as well and may loosen or bend over time, especially in windy or wet conditions.
Use a power drill with a screwdriver bit to drive the screws fully into the pilot holes with firm pressure. This is also a good time to test the post’s stability by applying pressure to the mounted signs and adjusting your fastening as needed.
Adjusting Angles for Correct Direction
Ensure each sign points precisely toward the destination by carefully adjusting the angle before tightening the screws fully. You can do this by positioning the sign on the post at the desired angle, then gradually tightening the screws while holding it in place. Use an angle finder or a protractor app on your phone to verify the correct bearing as you work.
For multiple signs on a single post, angle them outward at about 10 to 15 degrees from the post’s face to increase visibility and reduce overlap. Continuously check the overall post angle with a level or angle gauge to keep everything square and straight throughout assembly.
- Measure and mark the vertical positions on the post with spacing of 6 to 8 inches.
- Mark where pilot holes will go on each sign, three per sign (ends and center).
- Drill pilot holes in both the signs and the post at the marked points.
- Apply a thin bead of exterior-grade adhesive on the back of the sign if desired.
- Position the sign on the post at the correct angle using an angle finder.
- Insert screws into the pilot holes, driving them with firm pressure.
- Check and adjust the sign angle before fully tightening all screws.
- Repeat for each sign, verifying post stability and angles continuously.
How to Install the Sign Post for Stability
The hole for your directional sign post should be about one-third the length of the post deep, typically 2.5 to 3 feet deep for a 10-foot post. The width should be three times the thickness of the post to ensure stability. Digging the hole to these dimensions prevents the post from leaning or shifting over time, especially in windy conditions. After placing the post in the hole, fill the bottom with larger rocks to improve drainage and help anchor the post before backfilling with soil or gravel.
If digging into the ground is not possible, such as on concrete or rocky areas, you have alternatives like a weighted base or deck mounting. A weighted base uses a heavy cement or metal platform to hold the post upright. This option works best for temporary setups or renters who can’t alter the landscape. Deck mounting involves securely attaching the post to an existing wooden deck or platform using brackets and lag screws. This method keeps the post stable without ground contact but requires a sturdy structure to support the weight and wind pressure.
Each installation method has tradeoffs. A ground hole offers the best natural stability and weather resistance, but takes more effort to install. A weighted base is portable and minimally invasive but can be bulky and less secure in strong winds. Deck mounting preserves surfaces but depends on the deck’s strength and may need more frequent tightening.
Leveling the post accurately during installation is important. Use a carpenter’s level held against the post vertically before filling the hole completely. Adjust the post’s position as you add rocks and soil to maintain vertical alignment. Bracing the post temporarily with wooden stakes tied to the post at two or more points helps keep it steady during this process. Leave the braces in place until the soil has settled and hardened, usually 24 to 48 hours.
Essential tools for installing the sign post include a post hole digger or power auger, a shovel for moving dirt, a carpenter’s level, wooden stakes and strong twine or clamps for bracing, and a tamper or board for compacting soil around the hole. For weighted bases or deck mounting, you will need appropriate drill bits, screws or lag bolts, and brackets or mounting plates designed for outdoor use.
Following these steps carefully builds a strong foundation for your directional sign post. Ensuring the hole is the right depth and width, using appropriate bases if needed, and leveling with temporary bracing results in a long-lasting, straight, and secure outdoor sign that withstands weather and use. Skipping these details can lead to leaning posts, instability, or the need for early repairs.
Common Mistakes When Making Directional Sign Posts
Signs fade and warp quickly when they aren’t sealed properly or exposed to harsh weather without protection. Using a quality outdoor sealant, like a marine-grade polyurethane or spar varnish, slows down moisture absorption and UV damage. Apply at least two coats, allowing 24 hours to dry between coats, to build a good barrier. Avoid painting or sealing on hot, humid days because the finish may bubble or not cure fully. Without proper sealing, wood expands and contracts with moisture, causing warping over time.
Crooked or unstable mounting happens when the post isn’t set straight or the signs are misaligned during attachment. Start by ensuring the post is plumb using a level when you pour the concrete base. The concrete should cure for at least 48 hours before adding signs to avoid shifting. When attaching signs, measure twice and use a square tool or angle guide to keep edges straight. Screws or brackets should be tight but not overtightened to avoid splitting wood.
Incorrect directions or distances on signs reduce their usefulness immediately. Double-check compass readings and distance calculations before marking the signs. Use a pencil initially for easy corrections. If a sign is installed with the wrong direction, remove it carefully and adjust the angle on the post before reattaching. For multi-sign posts, tighten each sign one at a time, verifying alignment before moving on to prevent cumulative errors.
- Use spar varnish or marine polyurethane with multiple coats for sealing
- Set posts in concrete and check vertical level with a spirit level
- Let concrete cure at least 48 hours to ensure stability
- Use a carpenter’s square when mounting signs to avoid crooked lines
- Mark directions lightly with pencil first, confirm before permanent paint
- Retighten screws periodically as wood expands and contracts
- Replace signs every 3-5 years depending on climate and wear
Maintaining your directional sign post includes inspecting the finish yearly and applying a fresh seal coat when it looks worn or rough. Avoid letting dirt and moisture sit on the signs by cleaning them gently with a soft brush and mild detergent twice a year. Signs made from untreated softwood or plywood last less than two years outdoors unless sealed thoroughly. For harsher climates with heavy rain or intense sun, choose rot-resistant wood like cedar or composite boards to extend durability. Regular care prevents twisting, splitting, and fading, keeping your signs reliable and attractive.
Tips for Customizing and Maintaining Your Sign Post
Planning ahead for adding new signs to your directional post helps keep it organized and visually appealing. Start by leaving ample space between each existing sign, at least 4 to 6 inches vertically, to accommodate future additions. You may want to attach small horizontal brackets or install a metal track system along the post, which makes it easier to slide in new signs without drilling new holes. This approach reduces wear on the post and allows you to update destinations over time as your outdoor decor or information needs evolve.
Choosing a consistent theme for fonts and colors improves legibility and ties your signs together. For example, use bold sans-serif fonts for a modern look or rustic serif fonts for a vintage feel. Limit your palette to two or three complementary colors that match your outdoor setting or seasonal decor. To add personality, you can incorporate small decorative elements like painted borders, icons related to the destinations, or seasonal motifs such as leaves in autumn or snowflakes in winter. Lightweight wooden cutouts or weather-resistant vinyl decals can attach directly to the signs and swap out for holidays or events without repainting.
Keeping the post and signs in good condition protects your investment and maintains curb appeal. Clean the entire sign post annually by wiping it down with a mild detergent and water, then rinse thoroughly and let it dry completely before applying any protective coatings. Inspect for signs of peeling paint or weather damage, addressing those spots first. Use an outdoor-grade clear sealant or weather-resistant wood finish on both the post and signs. Apply one coat every 12 months, or more often if your area experiences harsh winters or intense sun. Expect to spend about $15 to $30 on sealant and allocate 1 to 2 hours for thorough maintenance. Neglecting this care may lead to cracking, fading, or wood rot, which shortens the life of your directional sign post.
Always let your post dry fully before sealing to prevent trapped moisture, which can cause peeling or mildew under the finish.
Step-by-Step Action Plan
Follow these steps to create your directional sign post successfully and ensure it stays clear and sturdy for years.
- Day 1: Gather all materials and tools on your list, then inspect each for quality and suitability; prepare a workspace with good lighting and ventilation.
- Day 2: Cut and shape the sign panels according to your design, checking measurements carefully to ensure uniformity and clean edges.
- Day 3: Paint the signs and add lettering using stencils or freehand; let each coat dry fully to avoid smudging or fading later.
- Day 4: Calculate and mark the precise directions and distances on the signs; double-check alignment using a compass or smartphone app.
- Day 5: Assemble the sign panels onto the post securely with screws or brackets, confirming stability by gently shaking the post.
- Day 6: Install the sign post in its intended location by digging a deep hole and setting it with concrete or packed soil for firm support.
- After 2 weeks: Inspect the sign post for any looseness, paint wear, or weather damage; touch up paint and tighten fasteners as needed.
Frequently Asked Questions
How Can I Protect My Directional Sign Post from Outdoor Weather?
Use weather-resistant paint and sealants to protect wood from moisture and sun damage. Apply a clear outdoor sealant after painting to extend durability.
What Types of Wood Are Best for Outdoor Directional Sign Posts?
Cedar and redwood are good choices for outdoor signs because they resist rot and insects. They hold paint well and last longer outdoors without much maintenance.
How Can I Make My Directional Signs Easy to Read from a Distance?
Use large, bold fonts with high-contrast colors like white on dark backgrounds. Keep messages short and letters spaced evenly to improve visibility.
Is It Okay to Use Recycled Wood for Making Directional Signs?
Yes, recycled wood can work if it’s untreated and in good condition. Avoid using wood that has been chemically treated or damaged, which could shorten the sign’s lifespan.
Should Directional Signs on the Post Point Exactly to the True Direction?
Yes, aim to point signs as accurately as possible for user convenience. Use a compass or smartphone app for better direction accuracy when marking before painting.
What Is the Best Way to Update or Add New Signs to an Existing Post?
Drill new holes above or below existing signs to attach additions securely. Plan sign placement with future additions in mind to avoid overcrowding the post.
Final Thoughts
Building a clear, attractive directional sign post takes careful planning and attention to detail throughout every step. Start by focusing on preparing your materials and workspace today, so you can move smoothly into cutting and painting your signs with confidence. Taking the time to install the post securely will pay off in long-lasting stability and usefulness outdoors.