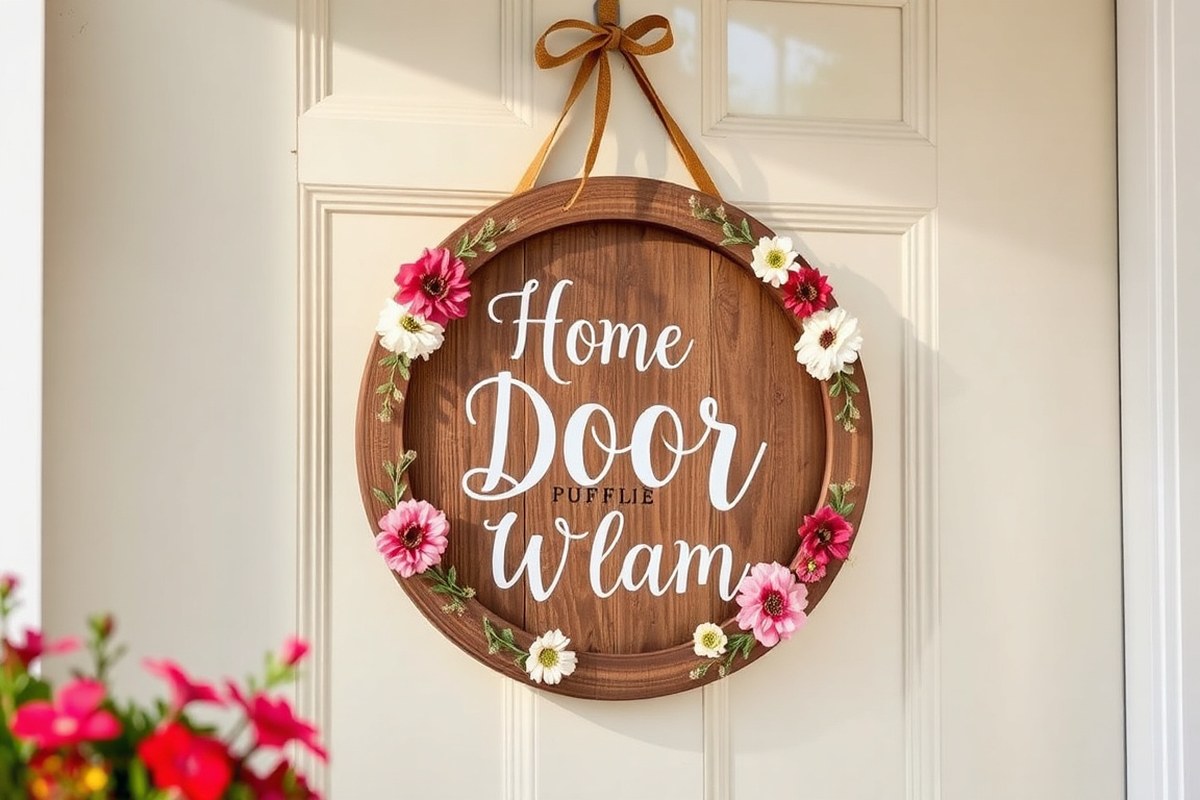
How to Make a Door Hanger Sign with Cricut: A Complete Step-by-Step Guide
Knowing how to make a door hanger sign with Cricut lets you create personalized, stylish decor for your home or gifts. Start by choosing the right size wood round, ideally 12 inches, to suit most doors. Preparing your materials properly and using Cricut’s precise cutting tools ensures a clean, professional look every time.
Key Takeaways
- Use a basswood sheet no wider than 11 inches when cutting with the Cricut Knife Blade for best results.
- The mini door hanger size, 3.5 by 8.5 inches, fits most standard doors and is easy to craft.
- Design your door hanger graphics in Cricut Design Space with your wood round dimensions in mind for perfect sizing.
- Let paint or stain dry 2-3 hours between coats to avoid smudges and ensure good adhesion.
- Press vinyl lettering with a heavy object during glue drying, and cure the sign 24 hours before outdoor use.
- Wait at least 72 hours before hanging your door sign to allow adhesive to fully set and last longer.
Essential Materials and Tools for Cricut Door Hangers
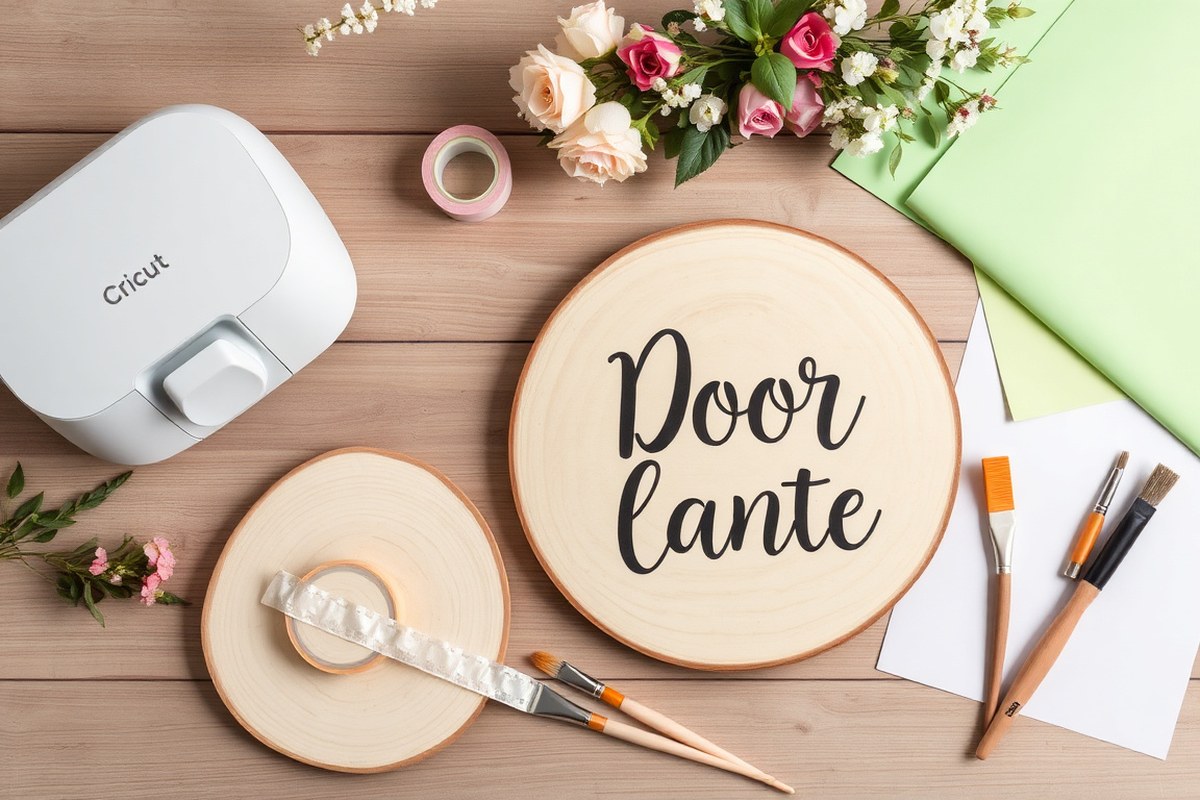
To create professional door hanger signs with your Cricut, you need specific materials and tools designed for wood crafting and vinyl application. The ideal base is an unfinished wood round around 12 inches in diameter. This size fits most front doors well and provides enough surface area for detailed designs without being too heavy. Basswood is a popular choice for these rounds due to its smooth surface and compatibility with cutting tools like the Cricut Knife Blade. However, bear in mind the blade’s cutting limit: basswood pieces should not exceed 11 inches wide for safe and clean cuts.
For decorating, permanent vinyl is best because it adheres strongly to wood surfaces, ensuring your designs last outdoors. Cricut Premium Permanent Vinyl is available in various colours such as white, black, stone yellow, blue, and glitter gold, allowing for diverse customizations. These vinyls offer durability against weather and wear, which is important for exterior door hangers.
- Unfinished wood round (approximately 12 inches diameter, basswood preferred, max 11 inches width for Knife Blade)
- Cricut Knife Blade for cutting wood, compatible with basswood and other thin woods
- Cricut Fine-Point Blade for cutting vinyl decals
- Permanent vinyl in desired colours (e.g., Cricut Premium Vinyl Permanent White, Black, Glitter Gold)
- Transfer tape for applying vinyl designs onto wood
- Basic painting supplies if adding painted elements (acrylic paint, brushes)
- Adhesive or hooks for hanging your finished door hanger
| Blade Type | Best For | Cutting Size Limit | Notes |
|---|---|---|---|
| Cricut Knife Blade | Thick materials like basswood, leather | Up to 11 inches wide | Use for cutting wood rounds; requires multiple passes and slow speed |
| Cricut Fine-Point Blade | Vinyl, paper, thin cardstock | No width limit for vinyl rolls | Ideal for detailed vinyl decals and lettering |
| Vinyl Type | Surface Compatibility | Outdoor Durability | Usage Example |
|---|---|---|---|
| Cricut Premium Vinyl Permanent | Wood, metal, plastic | Up to 3 years | Main choice for door hangers; adheres well to wood |
| Cricut Smart Vinyl Permanent | Wood, metal, plastic | Similar durability | Optional alternative, compatible with Smart Cricut machines |
Using the right materials and blades matters because wood hardness and vinyl quality directly impact the final appearance and longevity of your door hanger. Insufficient blade strength or wrong vinyl type can cause peeling or unclear cuts. Preparing your wood surface smooth and clean before applying vinyl improve adhesion. Permanent vinyl’s tack ensures it stays put through weather changes, which is why it’s recommended over removable types.
Designing Door Hanger Graphics and Layout in Cricut Design Space
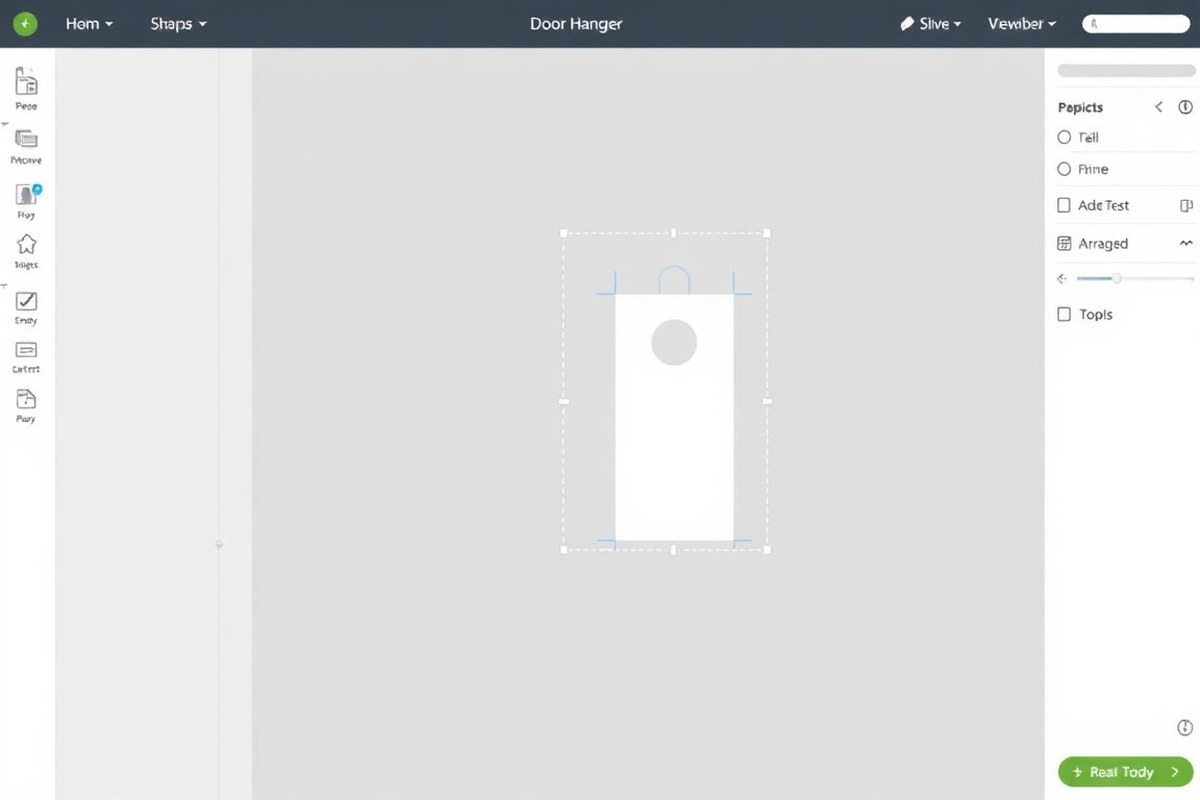
Creating or importing door hanger designs in Cricut Design Space is the first step for personalizing your wood round sign. Proper sizing and layout adjustments ensure your design fits well and cuts clean. You can design from scratch or use free SVG files downloaded online, then upload and modify them easily in Design Space.
Finding and Downloading Free SVG Templates
There are many free SVG cut files available specifically for door hangers. Searching for design number 334 or similar keywords in free resource libraries provides files tailored for wood round door signs. Downloading from trusted sites guarantees files work smoothly in Cricut Design Space.
Look for designs that match the round shape and typical size of your wood piece, about 8 to 10 inches in diameter. Designs made for door hangers often include messages and decorative elements like florals or holiday themes. Make sure the file format is SVG for easiest use in Cricut.
Downloading is free but requires filling out a form or creating an account on some websites. You can also find free plant or flower graphics directly in Cricut’s library to add to your design.
Importing and Sizing Designs Appropriately
After downloading your SVG files, import them into Cricut Design Space on your computer or mobile app. The import process recognizes layers and cut lines, making them ready to use.
Sizing designs to fit your specific wood round is essential. Most rounds measure 8 to 10 inches in diameter, so adjust the design’s width and height accordingly. Use the measuring tool to check dimensions precisely.
Start by selecting your entire design and setting the width to about 9 inches to fit an average wood round snugly. Leave some margin around edges to avoid cutting off details. For instance, resizing the “hello” text to be roughly 6 inches wide allows room for floral accents.
Arranging Layers and Preparing to Cut
Prepare your design layers for cutting by aligning and grouping them properly. Separate text, graphics, and background shapes so each cuts on the right material or color of vinyl if you’re layering. Grouping layers keeps elements in place during cutting.
Before sending the design to cut, use the “Attach” tool in Design Space to maintain the layout exactly as displayed. Double-check that all layers are set to cut or draw as needed, depending on your project.
Finally, preview your mat to confirm everything fits within the material size and is correctly oriented. Adjust position or resize slightly if elements appear at the edges of the mat.
- Download free SVG door hanger designs from a trusted source or use Cricut’s library.
- Open Cricut Design Space and click “Upload” to bring in your SVG file.
- Select the imported design and insert it on a new canvas.
- Use the resize handles or input exact width/height (around 8-10 inches) to match your wood round size.
- Separate and arrange layers, adding extra graphics if desired from the Design Space library.
- Group and attach all elements that need to stay together.
- Preview the cutting mat layout to check for proper placement.
- Adjust settings if necessary, then proceed to cut your vinyl or materials.
Always double-check your design size against your actual wood round measurements before cutting to avoid fitting issues and wasted materials.
Cutting and Preparing Wood Rounds for Door Hangers
To cut wood rounds for door hangers using Cricut, you’ll need to prepare the wood properly and use the Knife Blade on the Maker series with the right mat. The wood should be thin and sized to fit your design, and you must follow safety precautions closely. Cutting wood rounds thicker than 1/16 inch with a Cricut’s Knife Blade is not recommended because it risks breaking the blade or damaging the machine.
Choosing the Right Wood Round Size and Thickness
Select wood rounds that match your door hanger design and size preferences. The most common thickness compatible with the Cricut Knife Blade is about 1/16 inch (approximately 1.5 mm). Basswood is a good choice because it’s soft enough for cutting but still sturdy for hanging. Diameter sizes can vary depending on your door size and message length, but typical rounds range from 5 to 7 inches across.
Using a wood round thicker than 1/16 inch can cause the Knife Blade to fail or cut incompletely. Always measure the diameter of your wood round before designing your project in Cricut Design Space to size your graphics properly. Lock your circle shape and adjust dimensions according to the exact measurements of your wood round to avoid cutting outside the material.
| Wood Round Attribute | Recommended Range |
|---|---|
| Thickness | 1/16 inch (1.5 mm) max for Knife Blade |
| Diameter | 5 to 7 inches typical; adjust per door size |
Setting Up Cricut Knife Blade and Mat
The Cricut Knife Blade requires a Strong Grip (Purple) mat to hold wood rounds securely while cutting. Avoid using mats with less grip because the wood can shift, resulting in inaccurate cuts or blade damage. Insert the Knife Blade into the designated clamp on your Cricut Maker 3 or Maker 5 model.
Before cutting, tape the edges of your wood round lightly to the mat using painter’s tape to further prevent movement. Load the mat with the wood round into the Cricut machine and select the Knife Blade in the Design Space cutting settings. Double-check the wood thickness setting matches your material to get the best cut depth and pressure. Do not use the Knife Blade with Explore or Air 2 models as they do not support this tool.
- Measure your wood round’s diameter and thickness accurately.
- Set your project size in Cricut Design Space to match your wood round.
- Attach the Knife Blade securely to your Cricut Maker.
- Place the wood round on a Strong Grip mat, center it, and tape the edges with painter’s tape.
- Load the mat into the Cricut machine.
- Select the Knife Blade setting and verify cutting material thickness.
- Start the cutting process and watch the machine carefully.
- Once cutting finishes, unload mat gently and remove the wood round.
Safety Precautions and Cutting Tips
Always wear safety glasses when cutting wood with the Cricut Knife Blade to protect your eyes from small splinters or dust. Work in a well-ventilated area or use a dust mask to avoid inhaling wood dust. Keep children and pets away from the machine during cutting because the Knife Blade operates with strong pressure and sharp edges.
Do not force the material into the machine or try cutting wood rounds thicker than the recommended 1/16 inch thickness. Using heavier cuts will wear down or break the blade and may damage your Cricut. Regularly clean the Strong Grip mat before placing wood rounds to ensure optimal adhesion and prevent slips. Let the blade rest if it starts producing uneven cuts or noises, and avoid rushing the process to preserve machine health and achieve clean edges.
Applying Vinyl and Paint Designs to Wood Door Hangers
You can apply vinyl decals and paint stencil designs to wood door hangers by preparing the surface properly, transferring vinyl with care, and allowing sufficient drying times between paint layers. Combining multiple colors is possible with paint stencils by layering after each coat dries. Vinyl works best for crisp, detailed designs, while paint is ideal for multicolor or textured effects.
Preparing the Wood Surface (Paint or Stain)
Start with a clean, smooth wood surface for the best results. Sand the wood lightly to remove rough spots. You may apply a wood stain or a base coat of paint to improve color and protect the wood. Allow the stain or paint to dry completely before adding decals or stencils.
Applying a water-based polycrylic sealer after painting creates a smooth surface. This smooth finish improves vinyl adhesive grip and prevents peeling. Let the wood dry overnight before moving on to vinyl application or more paint layers.
Transferring Vinyl Decals Cleanly
For using vinyl decals on your door hanger, start by cutting the vinyl design with your Cricut and weeding out excess vinyl. Use transfer tape over the design to lift it from the backing. Applying vinyl on wood needs care to avoid paint lifting or bubbles.
- Clean the wood surface with a dry cloth to remove dust and oils.
- Position the vinyl design on the wood surface with transfer tape on top, pressing gently but firmly.
- Use a scraper or a credit card to burnish the vinyl onto the wood, applying even pressure across the design.
- Slowly peel the transfer tape back at a sharp angle, leaving the vinyl firmly stuck to the wood.
- Press any loose edges with your scraper again to ensure adhesion.
Vinyl adheres best to smooth, sealed surfaces like wood coated with polycrylic. Applying vinyl over raw paint or unstained wood can sometimes lift finish or paint if the surface isn’t fully dry or smooth.
Painting Stencil Designs and Drying Times
Painting layered stencil designs requires patience to avoid smudging or blending colors unintentionally. Use painter’s tape or stencil adhesive to hold stencils in place. After applying the first paint color, let it dry at least 30 minutes to an hour depending on thickness and environment before adding another color. Follow these steps for multi-color stenciling:
- Apply the base paint coat and let it dry completely (1, 2 hours is safest).
- Secure the first stencil and add the initial paint color.
- Allow it to dry 30-60 minutes before removing or repositioning the stencil.
- Repeat for additional colors, ensuring full drying time between layers to prevent bleeding.
Once all paint layers are dry, apply a thin coat of water-based polycrylic to seal and protect your paint work. Let this dry overnight for best durability. This step also helps smooth the surface if you want to apply vinyl decals over paint later.
Adding Floral Arrangements and Ribbon Decorations
Adding floral arrangements and ribbon decorations to your door hanger improve its visual appeal and adds texture that stands out. These embellishments give your project a professional and polished look while complementing the design created with your Cricut. Using a combination of faux flowers, wired ribbons, and floral wire ensures your decoration stays secure, especially for outdoor door hangers exposed to wind and weather.
For a sturdy arrangement, gather faux florals with wire stems, wired ribbons, floral wire (about 20 gauge), and wire cutters. Faux stem length typically ranges from 4 to 8 inches, which is easy to trim for your desired look. Wired ribbons hold their shape better than fabric ribbons without wire. Floral wire, around 8 inches long, works well to fasten pieces on the wooden round or door hanger base. A good glue gun and low-temperature hot glue sticks help reinforce attachment points.
Securing decorations properly prevents pieces from loosening or falling off when placed outdoors. Applying a clear coat like Mod Podge or Polycrylic over the finished floral and ribbon work adds extra protection against moisture. Avoid heavy or oversized floral arrangements on small door hangers to keep the balance and avoid warping the wood.
- Trim the floral stems: Use wire cutters to shorten the faux flower stems to roughly 4 to 6 inches, depending on your door hanger size. This allows for neat layering without overcrowding.
- Arrange the flowers and ribbon: Lay out your flowers and ribbon on the door hanger to plan your design. Create small clusters for a natural look, mixing flowers and ribbon loops.
- Attach the ribbon: Make a bow or several loops with wired ribbon and position it at the top or side of your door hanger. Secure it temporarily with a dab of hot glue.
- Wire the arrangement: Take an 8-inch piece of floral wire and thread it through the center hole or loop of the door hanger. Twist it tightly behind the ribbon bow to hold everything in place.
- Secure the flowers: Attach flower stems by twisting their wire bases around the floral wire or pinching the wires together. Add small dots of hot glue for extra hold.
- Check stability: Tug gently on the floral clusters and ribbon to ensure nothing moves. Adjust wire twists or glue as needed to keep decorations firm.
- Seal the decoration: Once fully assembled, apply a light coat of Mod Podge or outdoor Polycrylic over floral and ribbon areas to protect against moisture and fading.
Use wired ribbons instead of unwired ones; they keep their shape better outdoors and are easier to secure with floral wire.
Sealing and Protecting Your Finished Door Hanger
Sealing your finished door hanger sign is essential if you plan to display it outdoors. It protects the paint, vinyl, and wood from moisture, sun damage, and general wear. Not every project needs sealing; for example, if you used high-quality permanent vinyl on a well-prepped surface without paint, sealing can be skipped. However, most door hangers with paint or mixed materials benefit greatly from a protective clear coating.
Common sealers include Polycrylic, Mod Podge, and polyurethane, each with distinct properties. Polycrylic is water-based, dries fast, and offers a crystal-clear finish, making it suitable for painted signs and vinyl applications. Mod Podge is popular among crafters for its ease of use and moderate water resistance but may not hold up as well in heavy outdoor conditions. Polyurethane provides a tougher, more durable finish and better water resistance but can yellow over time and usually requires longer drying.
| Sealer Type | Best Use | Drying Time | Curing Time Before Hanging | Cost Range |
|---|---|---|---|---|
| Polycrylic | Painted surfaces and vinyl | 12 hours minimum | 24 hours | $8, $15 per quart |
| Mod Podge | Lighter outdoor use, crafts | 15, 20 minutes to dry surface | 24 hours | $5, $12 per quart |
| Polyurethane (oil-based) | Heavy outdoor exposure | 24 hours | 48 hours | $10, $20 per quart |
Applying your sealer correctly ensures the best protection. Brush on thin, even coats using a synthetic bristle brush or foam brush to avoid streaks. For Polycrylic and polyurethane, apply in a well-ventilated area at room temperature between 65°F and 75°F to help drying. Wait the recommended drying time before applying additional coats if desired, usually 2 to 3 coats provide the best defense.
After the final coat, allow the door hanger to cure undisturbed for at least 24 hours before hanging it outdoors. This curing phase helps the sealer fully harden, improving weather resistance. For polyurethane, waiting 48 hours before use is better to avoid soft spots and smudges. Avoid hanging your sign immediately after painting or sealing, as exposure to moisture or sudden temperature changes can cause peeling or bubbling.
Sealing adds some cost, sealant prices vary between $5 and $20 per quart depending on the product but a little goes a long way on small door hangers. Skipping this step means faster fading or peeling if your sign faces rain, sun, or heavy dew regularly. In contrast, well-sealed signs often last multiple seasons with minimal wear, making sealing a worthwhile step especially for painted and mixed material door hangers.
Troubleshooting Common Cricut Door Hanger Issues
Incomplete cuts on wood rounds often happen because the blade pressure or depth isn’t set correctly for the material thickness. Start by adjusting your Cricut blade setting to a deeper cut or increasing the pressure. You may need to perform multiple passes if your wood is thick or dense, but avoid pressing too hard to prevent blade damage. Using a sharp blade designed for cutting basswood or balsa wood helps achieve cleaner cuts on door hangers. Also, double-check that your cutting mat is clean and sticky enough to hold the wood steady; slipping can cause missed cuts.
Vinyl lifting or tearing usually results from improper weeded designs or low-quality vinyl. Use good-quality adhesive vinyl rated for outdoor use in case your door hanger will be exposed to weather. When weeding, take your time to carefully remove excess vinyl without pulling from the design’s main parts. When the vinyl tears or lifts after application, try using a scraper tool to press the vinyl firmly onto the wood surface. Clean the wood with rubbing alcohol before applying vinyl to improve adhesion. Applying a clear sealer after vinyl placement can lock everything in place and prevent edges from lifting.
Design alignment errors in Cricut Design Space can frustrate your project. Check that your design is properly sized before cutting. Use the “Attach” feature in Design Space to keep your cuts and writes correctly positioned relative to each other, ensuring the layout won’t shift when sent to the machine. To fix alignment issues, open the Layers panel and confirm no layers are accidentally hidden or unlocked. Preview your cuts with the “Make It” screen to ensure everything fits on the mat as expected. You might see error messages or the design fail to load; try restarting the software or updating to the latest version.
- Check blade sharpness and set proper depth for complete wood cuts
- Use high-quality outdoor vinyl and clean wood surfaces for better adhesion
- Weed designs slowly to prevent vinyl tearing or lifting
- Use “Attach” and review layers in Design Space for correct alignment
- Confirm mat stickiness to avoid shifting during cuts
- Restart or update Cricut software if errors persist
Improving cutting consistency involves routine blade maintenance and using the right material-specific settings in your Cricut machine. For vinyl, test a small design first to see how it applies and adheres to your wood surface before cutting your full project. Align designs precisely in the software, and preview the placement on the mat to avoid surprises. Patience during weeding, along with proper tools like a weeding hook and scraper, ensures clean, crisp vinyl lettering or images on your door hanger signs.
Creative Variations and Hanging Methods for Door Hangers
Seasonal themes give your door hanger signs personality and make them stand out. For spring, try pastel floral patterns with script fonts and light greenery accents. Summer styles can feature bright colors like turquoise and coral, with beach or sunshine motifs. Fall invites warm tones such as burnt orange and deep reds paired with leaf silhouettes or pumpkins. Winter designs often include cool blues, whites, or metallics and holiday icons like snowflakes or pine cones. Changing these details helps keep your décor fresh throughout the year and matches your home’s style during each season.
You don’t have to use wood rounds exclusively for your door hangers. Materials like sturdy acrylic sheets, metal signs, or thick foam board also work well, each bringing different pros and cons. Acrylic offers a smooth surface perfect for vinyl application but costs more and can be heavier. Metal is durable and weather-resistant for outdoor use but may need special paint or primers to hold designs well. Foam board is lightweight and inexpensive but less durable and usually for indoor displays. Wood, especially untreated or sealed rounds, gives a rustic look, is easy to paint, and is generally affordable, typically around $2 to $5 per piece depending on size. Choose material based on durability needs, indoor or outdoor placement, and budget.
| Material | Pros | Cons | Best Use |
|---|---|---|---|
| Wood Rounds | Rustic look, paint-friendly, affordable | Can warp if unsealed, heavier | Indoor/outdoor with sealing |
| Acrylic | Smooth finish, vinyl adheres well | More expensive, heavier | Indoor, polished look |
| Metal | Durable, weather-resistant | Requires primers, heavier | Outdoor use |
| Foam Board | Lightweight, cheap | Fragile, indoor only | Temporary indoor décor |
For hanging your finished door hanger, the method depends on weight and location. Small or lightweight signs often hang well using a simple ribbon or twine loop attached through a drilled hole in the top. For heavier wood or acrylic, use a sturdy metal hook or a screw-in eye hook to secure the sign. If hanging on metal doors, magnets with adhesive backs work perfectly; make sure the magnet holds at least 5 pounds to keep the sign stable. Door knobs are another option, using ribbon tied around the knob or special door hanger hooks designed to slip over the top. Confirm the hanging hardware you choose is weather-resistant if mounted outdoors and check periodically for wear to avoid falls.
Attach your ribbon or twine securely with a knot and a small drop of clear craft glue to prevent slipping over time.
Step-by-Step Action Plan
Follow these steps to create your personalized door hanger sign with your Cricut machine, ensuring each phase is complete before moving to the next.
- Before you start: Gather all materials including wood rounds, vinyl, paint, floral decorations, ribbon, and sealing supplies. Ensure your Cricut machine is set up and ready to use.
- Day 1: Design your door hanger graphic in Cricut Design Space. Confirm the design size fits your wood round and save the file.
- Day 2: Cut your wood rounds smoothly if not pre-cut and sand edges for an even surface.
- Day 3: Cut the vinyl design using your Cricut and weed carefully. Test vinyl adhesion on a scrap piece to check quality.
- Day 4: Apply paint details if desired, and let dry completely before applying vinyl.
- Day 5: Use transfer tape to apply vinyl to the wood round evenly, avoiding bubbles or wrinkles.
- Day 6: Attach floral arrangements and ribbons securely with hot glue or craft wire.
- Day 7: Seal the finished door hanger with a protective clear coat outside or in a well-ventilated area. Check for a smooth, even finish after it dries.
Frequently Asked Questions
What Type of Vinyl Works Best for a Cricut Door Hanger on Wood Rounds?
Permanent vinyl is best because it sticks well to wood surfaces, ensuring your design lasts longer and resists peeling from the wood’s texture.
How Much Time Should I Set Aside for Preparing My Door Hanger Before Assembling?
You should plan to start at least a day before completing the sign, allowing time for prep work like sanding and painting to fully dry.
Can I Use Other Shapes of Wood Besides Rounds for Cricut Door Hangers?
Yes, but round wood pieces around 12 inches work best for most doors and fit standard design sizes nicely.
Is It Possible to Make a Seasonal Door Hanger Using a Cricut Machine?
Yes, you can create holiday-themed door hangers with your Cricut by customizing designs and using seasonal vinyl colors or embellishments.
What Is the Ideal Size for a Wood Round Door Hanger for Front Doors?
A wood round about 12 inches in diameter fits well on most front doors and works with most standard door hanger designs.
Where Can I Find Digital Designs Ready for Cricut Door Hanger Projects?
Many Cricut design libraries and craft websites offer downloadable designs formatted to fit specific wood round sizes like the 12-inch round.
Key Points to Remember
Creating a unique door hanger sign with your Cricut gives you a chance to add a personal touch to your home or gift something special. Start by picking a simple design and materials that suit your style to build confidence. Try adding your favorite flowers or colors next time for a new look and keep experimenting with your Cricut until you find what fits your space perfectly.