How to Make a Farmhouse Sign by Hand a Complete Guide with Tips and Materials
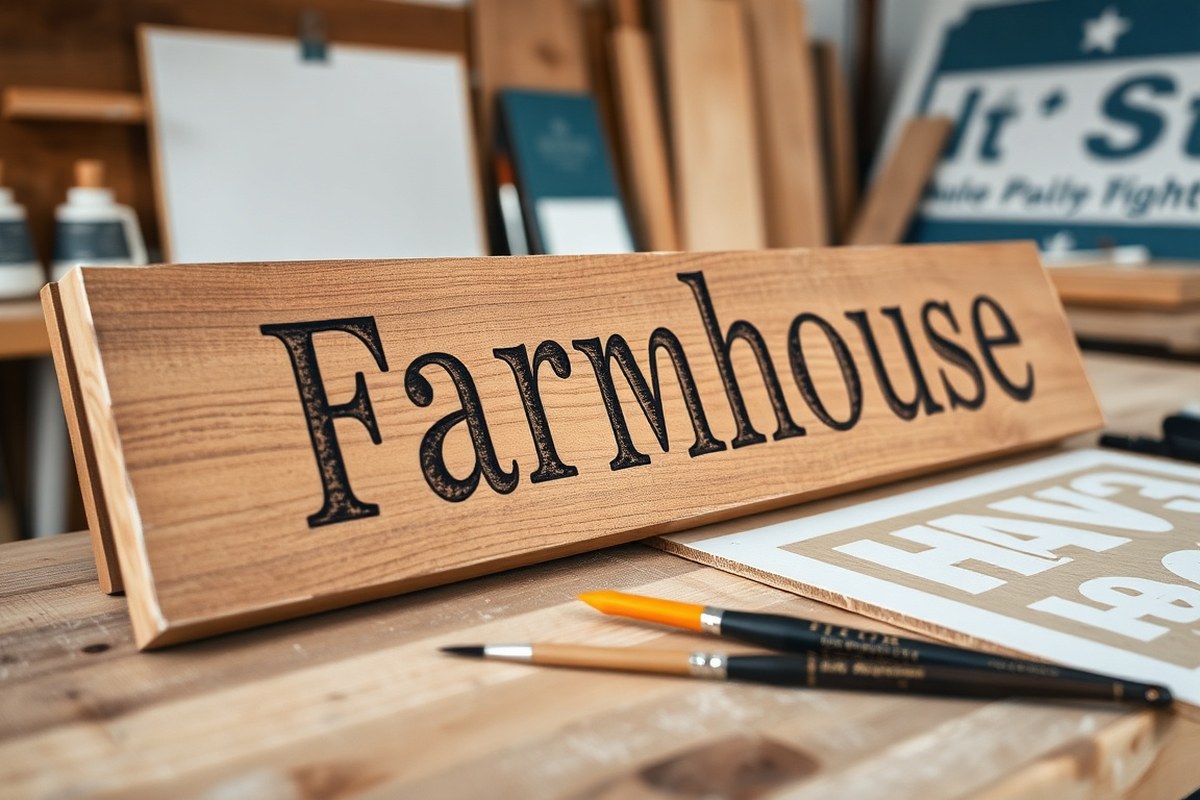
How to make a farmhouse sign by hand starts with choosing the right wood, transferring your design, and using paint techniques to capture that rustic look. Using affordable materials like reclaimed wood or pine boards gives your sign character and authenticity. Begin by selecting a board size that fits your space and plan your lettering to ensure proper spacing.
Key Takeaways
- Select wood that fits your sign size, such as a 12×24 reclaimed wood plank or a 1×10 pine board cut to length.
- Use simple lettering transfer methods like stencils or freehand pencil tracing for custom designs without special tools.
- Apply black matte paint for lettering to mimic classic farmhouse style with clean, bold contrast.
- Distress the sign gently after painting using sandpaper or light scraping to create an authentic weathered finish.
- Build or buy a frame sized to your board, like three 2×4 pieces cut to your sign’s length, to add structure and charm.
- Position signs 4 to 8 inches above furniture edges to achieve balanced decor impact and easy visibility.
Essential Materials and Tools for Handcrafted Farmhouse Signs
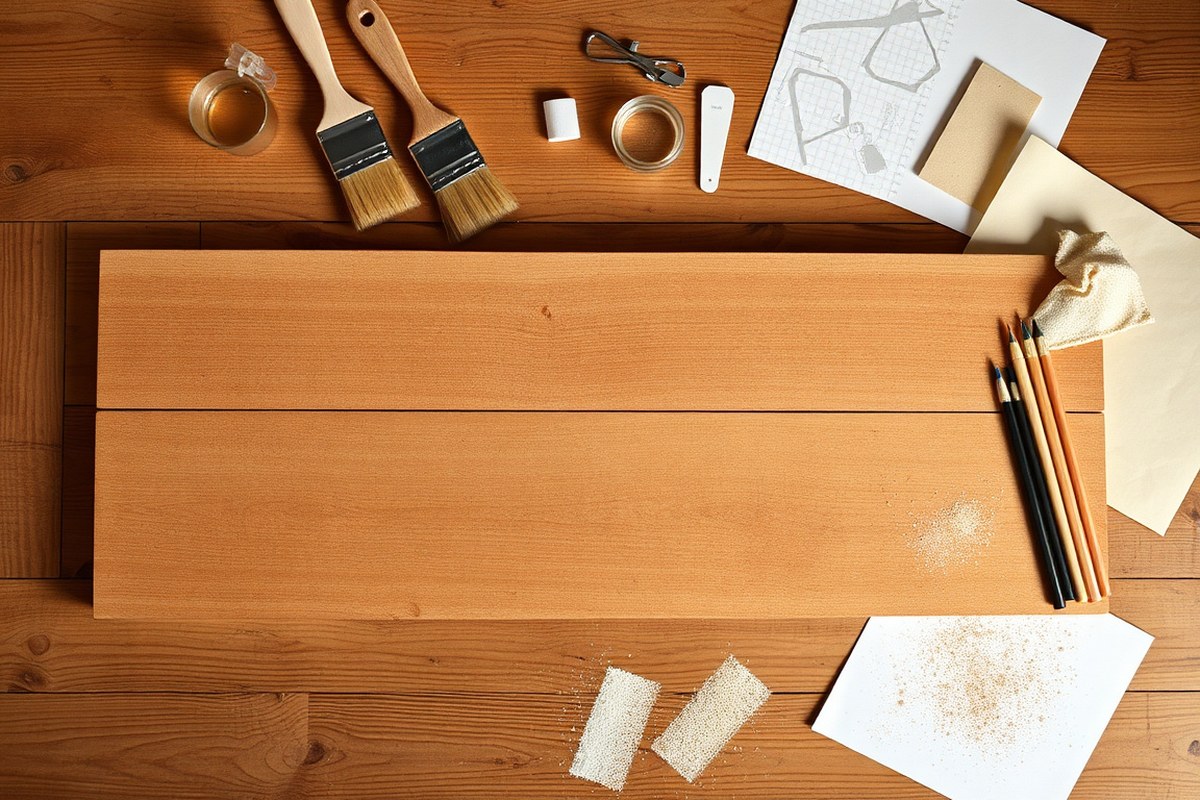
To make a farmhouse sign by hand, you need a few basic materials and tools that keep the look authentic and simple. Softwood like pine, cedar, or fir works best because it has a visible grain that adds to the rustic charm. These woods are easy to find at local lumber yards or home improvement stores, and prices generally range from $10 to $45 for a 12×24-inch reclaimed wood plank, depending on condition and source. Using solid wood with noticeable texture instead of plywood or MDF helps your sign look custom, not mass-produced.
Picking the right paint is just as important as the wood. Chalk paint is a common choice for farmhouse signs because of its matte finish that stays far from shiny vinyl. Use thin layers of dry-brushed paint to let some of the wood grain show through. This builds an aged, hand-crafted look that fits farmhouse style perfectly.
- Softwood board (pine, cedar, or fir, about 12×24 inches, $10, 45)
- Chalk paint or acrylic paint in farmhouse colors (approx. $5, 15 per bottle)
- Various paintbrushes: flat brush for backgrounds, small angled brush for lettering
- Hammer and nails or wood glue for attaching frames or hanging hardware
- Sandpaper (fine and medium grit) for smoothing and distressing wood
- Stencil or printed lettering template for paint transfer (optional)
- Pencil for tracing letters and ruler or measuring tape for layout
You don’t need special machines or expensive power tools to make a farmhouse sign. A simple hammer for nailing or clamps and wood glue work well for assembling frames or securing boards. Sandpaper is important to smooth the edges and distress the surface for that lived-in look. A sharp pencil and ruler help with precise letter placement, but you can also freehand if you feel confident. For painting, standard brushes cost around $3 to $10 each and the choice of brush size helps control paint application. Chalk paint costs between $5 and $15 per 8-ounce bottle, which is enough for several signs.
Substitutes exist if your budget or tools are limited. For wood, scrap pallet boards or reclaimed barn wood can be cheaper or free, though they may need extra sanding and preparation. You can swap chalk paint with watered-down acrylic paint to mimic a matte look but test it first as finishes vary. Instead of stencils, print letters on paper and trace with pencil to keep costs down. This method trades some precision for affordability and hands-on appeal.
Good results mean you see the wood grain clearly, lettering looks hand-painted with slight variations, and colors feel soft, not glossy. Rough edges and subtle scratches add to the charm. Avoid over-sanding or thick paint coats because they hide the natural wood texture, making the sign look flat or factory-made.
Choosing and Preparing Wood for Your Farmhouse Sign
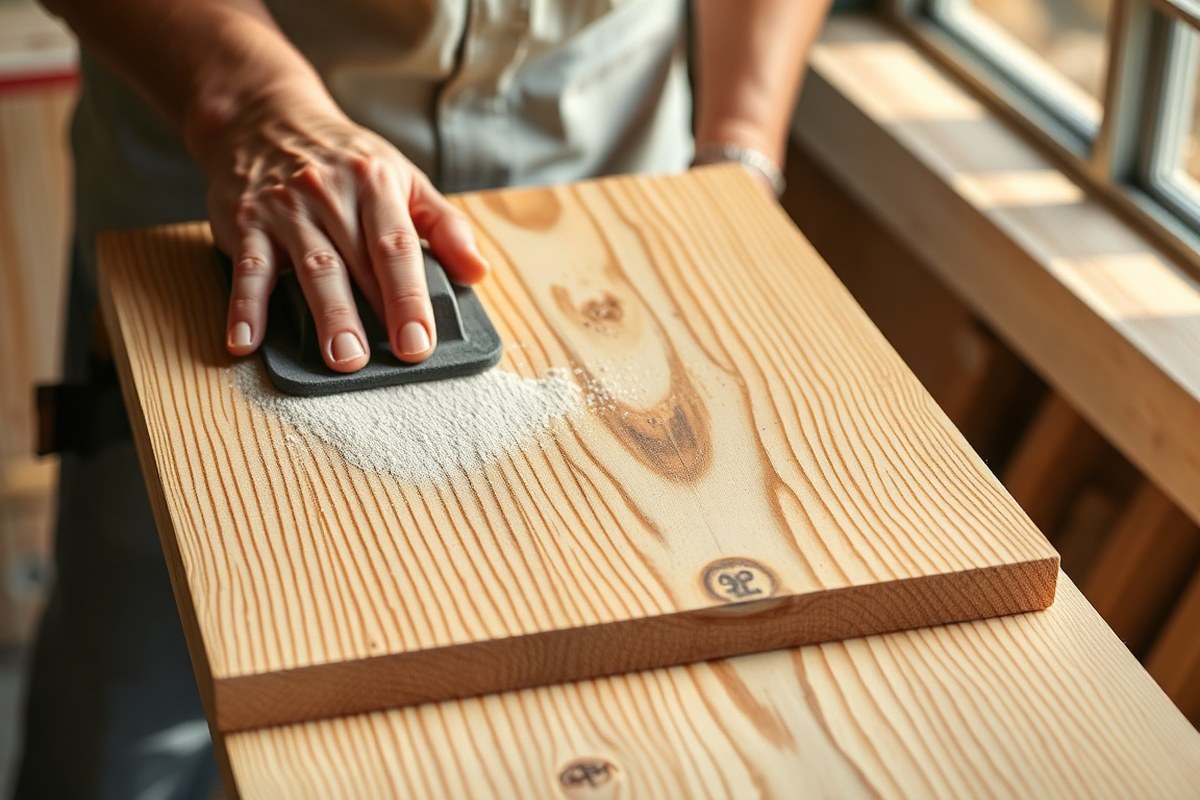
Choosing the right wood and preparing it properly is essential for a beautiful, lasting farmhouse sign. Select wood that fits your desired size and style, then thoroughly sand and clean it. Finally, apply primer or stain to create a smooth base, ensuring your paint and design adhere evenly.
Types of Wood Ideal for Farmhouse Signs
Softwoods like pine and cedar are popular choices because they’re affordable, easy to work with, and show paint well. Pine is widely available at hardware stores, costs roughly $3 to $5 per board foot, and has a smooth grain that accepts paint without much effort. Cedar costs a bit more but offers a natural warm color and resists moisture, making it suitable for outdoor signs.
Hardwoods such as oak and maple provide a more durable surface but can require more preparation before painting and are heavier. For authentic farmhouse signs, reclaimed wood offers unique character, knots, and a weathered look. Check picking reclaimed wood carefully for nails, rot, or dirt and be ready to do extra prep work.
How to Sand and Clean Your Wood
Proper sanding and cleaning remove rough spots, splinters, and dirt, creating a smooth surface that paint will stick to evenly. This step is especially important for reclaimed wood or rough-cut lumber. Use medium-grit sandpaper (around 120 grit) first to smooth the entire board, then a finer grit (220 grit) to finish for a sleek feel.
Your cleaning process should remove dust and debris that can prevent paint from adhering properly. After sanding, wipe down the wood with a slightly damp cloth or tack cloth to catch any fine dust particles. Follow these steps to prep your wood:
- Inspect the wood for nails, staples, or dirt and remove them.
- Use 120-grit sandpaper to sand all surfaces and edges, removing splinters and smoothing rough patches.
- Switch to 220-grit sandpaper to create a fine, smooth finish for painting.
- Thoroughly wipe the wood with a tack cloth to pick up sanding dust.
- When working with reclaimed wood, clean stubborn dirt using mild detergent and water; allow it to dry thoroughly.
Always remove dust carefully after sanding to avoid rough paint surfaces or flakes later.
Priming and Staining Options Before Painting
Priming seals the wood pores and offers a consistent surface for paint, helping your design look crisp and last longer. Use an acrylic or latex primer suitable for wood, applied in thin, even coats. For an authentic farmhouse style, lightly staining the wood before painting adds warmth and highlights the grain.
For outdoor or porch signs, consider applying a stain or outdoor wood sealer before or after painting to protect your sign from moisture. Allow primer or stain to dry fully, usually 1 to 2 hours, before applying paint. Proper priming reduces paint absorption and prevents bubbling or peeling.
For wood that has knots or resin spots, apply a shellac-based primer first to prevent stains from bleeding through your paint. Otherwise, standard wood primer will work well for most softwoods and reclaimed wood.
Lettering Transfer Methods Without Special Equipment
Transferring lettering onto your farmhouse sign without special equipment can be done effectively with carbon paper, pencil rubbing, or freehand drawing. Each method has its own tools, uses, and potential pitfalls, so choosing the right one depends on your design complexity and wood surface. Comparing these methods helps you pick the best fit for your project.
Using Carbon Transfer Paper
Carbon transfer paper offers a straightforward way to copy detailed designs onto wood, especially useful for dark bases when white transfer paper is available. It works by placing a thin sheet of carbon or graphite transfer paper between your printed design and the sign surface, then tracing the text or images. The pressure transfers the carbon onto the wood, leaving a clear outline to paint over.
Carbon paper is cost-effective; a pack of 100 sheets costs under $10, making it a budget-friendly choice. This method is best when your design has precise details needing sharp outlines. Avoid excessive tracing pressure, which may smudge the carbon, and be aware that rough or textured wood can cause incomplete transfers.
- Print your lettering design mirrored or normal size on regular printer paper.
- Place a sheet of carbon transfer paper between the design and the wood, carbon side down.
- Secure both papers with tape to prevent shifting.
- Trace over your lettering using a pen or stylus, applying firm, even pressure.
- Lift papers carefully to check the transfer; repeat tracing if needed.
- Touch up any gaps with a pencil or fine brush before painting.
Pencil Transfer and Tracing Technique
The pencil transfer method works by shading the back of your printed design with a soft graphite pencil, then placing it on the wood and tracing over the front. This presses pencil marks onto the sign, showing your outline. It requires only a pencil and paper, making it great for any painted board without extra supplies.
This method is easy and precise with clean lines but watch out for smudging since graphite can spread. You’ll need to lightly erase visible pencil shading before sealing your sign to avoid discoloration. This approach is slower than carbon paper yet more accessible without special materials.
- Print your design in the desired size on regular paper.
- Shade the entire back side of the printout heavily with a soft pencil (2B or softer).
- Place the paper with the shaded side down on your prepared wood surface.
- Tape the paper securely so it doesn’t move during tracing.
- Use a pen or stylus to carefully trace all lettering edges from the front.
- Remove the paper to reveal the graphite outline on the wood.
- Use a light eraser to clean excess pencil marks before painting.
Freehand Lettering Tips for Beginners
Freehand lettering lets you draw directly onto wood without tracing tools. It suits simple signs or when you want a personal touch. Gather a pencil, ruler for guidelines, and a paintbrush or marker for filling in. Using light pencil lines first helps plan spacing and alignment.
This method requires more practice to get clean, balanced letters, but you avoid transfer materials and can customize letters on the fly. To improve accuracy, use graph paper to sketch your design, then replicate faint pencil lines on the wood. Freehand works better on smooth wood or painted surfaces.
- Draw light horizontal guidelines with a ruler on the wood to keep letters straight.
- Use a pencil to sketch each letter carefully, spacing evenly.
- Adjust letters as needed until you’re satisfied with layout and size.
- Go over pencil lines with paint or a permanent marker designed for wood.
- Let paint dry fully, then erase any visible pencil lines gently.
| Method | How it Works | Best For | Watch Out For |
|---|---|---|---|
| Carbon Transfer Paper | Trace over design with carbon paper under printout to transfer graphite | Detailed designs, dark or painted bases | Smudging, incomplete transfer on rough wood |
| Pencil Transfer and Tracing | Shade back of printout with pencil, trace design front side to imprint graphite | Any painted board, no special tools needed | Smudging, pencil lines must be erased before sealing |
| Freehand Lettering | Sketch letters directly on wood with pencil, then paint or mark | Simple designs, smooth painted surfaces, personal touch | Requires steady hand, practice needed to avoid uneven letters |
Painting and Distressing Techniques for Authentic Farmhouse Look
To get the classic farmhouse look on your sign, use the right paint and brushes, carefully paint clean letters and backgrounds, then apply distressing techniques that bring warmth and character. Layering paint with dry brushing and sanding helps achieve that softly worn effect. Distressing varies by wood type but always aims to reveal some of the base or natural wood underneath.
Choosing the Right Paint and Brushes
Chalk paint or acrylic paint works best for farmhouse signs. Chalk paint offers a vintage matte finish that’s easy to distress, while acrylics provide good coverage and color variety. Choose cream, white, black, or charcoal paint for lettering depending on whether you want a bright or rustic feel.
Use high-quality synthetic brushes with firm bristles for painting lettering, which allows control and sharp edges. A medium-sized flat brush works well for background layers. Keep the brushes clean and dry to avoid clumps and streaks. Expect to spend $3 to $10 per brush at craft stores.
How to Paint Lettering Without Bleeding
Preventing paint bleed around letters is key to a clean farmhouse sign. Using vinyl stencil letters or painter’s tape shaped to letters helps create crisp edges. After placing your stencil, paint the entire sign in your background color first, letting it dry completely (about 1 to 2 hours).
Next, paint over the stencil with your lettering color, applying thin layers using a small brush or sponge. Let each layer dry before adding another until the letters are opaque. Remove the stencil carefully once the paint is dry. Repeat until the letters stand out boldly against the background.
- Prepare the wood surface by sanding smooth and wiping clean.
- Apply a coat of background paint and let it dry fully, 1 to 2 hours.
- Position vinyl stencil or painter’s tape letters on the dry background.
- Paint over the stencil with your chosen lettering color in thin layers.
- Allow each layer to dry for 15 to 30 minutes before adding more paint.
- Carefully peel off the stencil when letters are fully dry to reveal clean edges.
- Touch up any spots as needed with a fine brush.
Techniques to Distress and Age Your Sign
Layering paint colors and distressing give farmhouse signs their lived-in charm. After painting, use dry brushing by dipping a dry brush lightly into paint and brushing off most excess on a paper towel. Then swipe it over raised areas for subtle highlights or shadows.
Distressing works well on solid wood and reclaimed wood but varies by finish. For softwoods like pine, sand edges and corners gently to expose wood or underlayers without damaging the surface. For hardwood or stained wood, use steel wool or sanding sponges lightly to reveal the base stain or raw wood.
Lightly distress areas where natural wear would occur: corners, edges, and near handles. Wipe away dust, and if desired, seal the sign with a clear matte spray to protect your work. Let each step dry completely, usually 30 minutes to an hour, to avoid muddying the paint layers.
Adding Frames and Finishing Touches to Your Farmhouse Sign
Deciding to frame your farmhouse sign depends on the style and protection you want. A frame adds a polished look and can help the sign stand out on your wall, but it’s not necessary for all designs. If you prefer a rustic, minimal vibe or plan to place the sign where it won’t be bumped or exposed, you might skip the frame. For signs intended as focal points in a kitchen or entryway, a frame improve charm and durability.
Creating a frame involves buying thin wood strips or making one from leftover wood. Hobby Lobby and similar craft stores sell inexpensive thin wood strips for about $1 each. Cut the strips to fit the edges of your sign using a miter saw at 45-degree angles for neat corners. Stain or paint the frame pieces before attaching, matching or contrasting your sign’s colors. To attach, use a strong adhesive like E6000 and press the frame firmly for several minutes. For extra strength, you can add brad nails or small finishing nails along the edges, but glue alone works for indoor signs.
- Choose frame wood strips about 1/2 inch thick and 1 to 2 inches wide for typical farmhouse signs.
- Cut pieces with mitered corners for a classic framed look or straight cuts for a simpler, rustic style.
- Sand all frame edges smooth before staining or painting to avoid rough texture.
- Allow stain or paint to dry completely before gluing to prevent smudges or sticky spots on your sign.
- Apply a thin bead of E6000 glue on the back edges of the frame and press onto the sign for at least 1 minute.
- Clamp or weight the sign flat while the glue cures for best adhesion (2 to 4 hours).
- For outdoor use, sealing after framing is important to protect wood from moisture and sunlight.
Test your adhesive on a scrap piece of wood before applying to your actual sign to ensure strong adhesion without damage.
Adding a protective finish seals your artwork and wood from dust, water, and fading. Indoor farmhouse signs only need a matte or satin clear coat to prevent dust and light scratches. Use a water-based polyurethane or acrylic sealer, applying two thin coats with a foam brush about 30 minutes apart for faster drying. Outdoors, choose a sealer rated for exterior use that blocks UV rays and moisture to prevent peeling and warping. Spar urethane or an exterior acrylic sealer with UV inhibitors works well, though it can take 24 to 48 hours to cure. Reapply every 1 to 2 years depending on exposure.
| Finish Type | Best For | Application | Drying Time |
|---|---|---|---|
| Water-Based Polyurethane (Matte or Satin) | Indoor signs | 2 thin coats with foam brush, 30 min apart | 30 minutes between coats, handle after 2 hours |
| Spar Urethane (Exterior) | Outdoor signs | 2-3 thin coats with synthetic brush | 2-4 hours between coats, cure 24-48 hours |
| Exterior Acrylic Sealer with UV Protection | Outdoor signs | Spray or brush on 2 light coats | Surface dry in 1 hour, full cure up to 48 hours |
Choosing the right combination of framing and finishing keeps your farmhouse sign looking fresh and authentic. Indoor signs remain charming with simple satin protection and glued frames, while outdoor signs need sturdier framing joined with weatherproof sealers to handle changing conditions. Properly framed and sealed, your sign will add cozy farmhouse character to your home for years to come.
Timing and Cost Expectations for DIY Farmhouse Signs
Making a farmhouse sign from start to finish typically takes between 3 and 6 hours, depending on your experience and the complexity of your design. Most of the time is spent on painting layers and allowing drying time, which usually takes about 1 to 2 hours per coat. Designing and lettering can take 1 to 2 hours if you’re transferring text by hand or with simple DIY methods. Sanding, distressing, and finishing add another 30 to 45 minutes.
Budgeting for your project involves considering materials like wood, paint, brushes, and optional tools such as stencils or transfer paper. Basic supplies can cost anywhere from $15 to $50, depending on whether you already have paint and brushes at home. A beginner-friendly wood board can be purchased for $5 to $15, while paint costs about $3 to $5 per small can. For tools like stencils or special brushes, expect an extra $5 to $10 if you don’t own them.
Planning your time to include drying phases and project steps will prevent frustration and ensure good results. It’s easy to speed up the process by choosing quicker-drying paints or working on multiple steps simultaneously, such as prepping your wood while the first layer dries. That said, rushing through your sign can lead to smudging or uneven finishes.
| Project Step | Estimated Time | Typical Cost |
|---|---|---|
| Wood preparation and sanding | 30, 45 minutes | $5, $15 (wood board) |
| Painting base coat | 1, 2 hours (includes drying) | $3, $5 (paint) |
| Lettering transfer and painting | 1, 2 hours | Free, $10 (stencils/transfer paper) |
| Distressing and finishing touches | 30, 45 minutes | Often included in paint/tools costs |
| Total estimated project time | 3, 6 hours | $15, $50 |
To save money, use leftover paint or repurposed wood from around your home. Picking simpler fonts or freehand lettering can eliminate the need for stencils. Speed up the project by choosing quicker-dry acrylic paints and working in a warm, well-ventilated space. Avoid skipping sanding or drying steps, as these ensure a crisp look and longer-lasting sign.
Common Mistakes and How to Fix Them Quickly
Paint bleeding or smudging can ruin the clean lines of your farmhouse sign lettering. This usually happens when paint is too watery or you apply too thick a coat. To fix minor bleeding, gently dab the edges with a damp brush or cotton swab within a few minutes of painting to lift excess paint. For more noticeable smudges, wait until the paint fully dries, about 20-30 minutes with chalk paint, then carefully scrape or sand away the unwanted areas using fine-grit sandpaper (220 grit works well). After smoothing the surface, touch up with fresh paint applied using a small angled brush.
Uneven lettering often results from inconsistent brush pressure, rushed stenciling, or shaky hands. You can correct uneven lines by first allowing the paint to dry completely. Use a fine-tipped paint pen or a small liner brush dipped in matching paint to carefully fill in thin spots or widen letters. Work slowly, especially on curves and edges, to maintain straight lines. When working on wood with a rough grain like pine or reclaimed barn wood, sanding the surface smooth before starting helps prevent jagged edges in the letters.
Overdone distressing can make your sign look damaged rather than charming. If you notice paint flaking off in large chunks or bare wood showing through in unintended places, stop sanding and reassess. To fix this, lightly sand the overly distressed spots with very fine sandpaper (320 grit or finer) to soften harsh edges. Then, apply a thin layer of chalk paint over those areas and gently blend it with a dry brush. This restores color without losing the authentic farmhouse style. Avoid distressing too close to lettering, as it can blur your message. Below is a checklist of common mistakes with quick fixes to keep handy while working on your sign:
- Paint bleeds: Dab edges quickly with a damp swab, or sand and repaint once dry
- Smudges: Let paint dry fully, then scrape or sand gently before touching up
- Uneven lettering: Use fine brush or paint pen to fill and smooth lines after drying
- Rough wood grain: Sand before painting to prevent uneven edges
- Too much distressing: Lightly sand bulky spots, repaint lightly, blend with dry brush
- Accidental marks: Cover small spots with matching paint or add decorative flourishes
Touch-ups generally require minimal paint, usually just a few drops on a palette, and a fine brush costing under $10 at most craft stores. Sandpaper can cost $3 to $5 for several sheets. Taking time to fix mistakes methodically improves your sign’s appearance without starting over. A well-cared-for sign with clean lettering and balanced distressing will last longer and better reflect the farmhouse style you want to create.
Hanging, Maintaining, and Seasonal Updates for Farmhouse Signs
Securely hanging your farmhouse sign depends on its size and where you want to place it. For small to medium signs (up to 24 by 12 inches), picture hooks or adhesive wall hangers rated for the sign’s weight usually work well indoors. Use hooks with at least double the weight capacity of your sign to prevent slips. Larger signs or outdoor installations call for sturdy screw hooks or heavy-duty wall anchors plus weatherproof wire. Attach hanging hardware to the back of the sign with screws spaced evenly for balance. Outdoors, mount signs under eaves or protected areas if possible to reduce exposure to rain and sun.
Maintaining your farmhouse sign extends its life and keeps it looking fresh. Wood signs outdoors benefit from applying a clear, waterproof sealer every six months. Wipe dirt and debris off both indoor and outdoor signs with a damp cloth every few weeks. Avoid harsh chemicals or abrasive scrubbing that can damage paint or distressing. Check hanging hardware regularly, tightening screws and replacing any rusty parts. For painted signs, touching up faded letters with matching acrylic paint restores contrast without repainting the whole sign.
- Use screws and wall anchors for signs over 24 by 12 inches or heavier than 5 pounds
- Apply waterproof sealer yearly for outdoor signs to resist moisture and UV damage
- Swap out seasonal decor like small wreaths or bows attached with removable adhesive
- Consider clip-on hooks or magnets if your sign has a metal frame for easy updates
- Store unpainted spare wood or blank canvas sections to add seasonal phrases or images
One easy way to adapt your farmhouse sign for all seasons is to use neutral base lettering with interchangeable accent pieces. For example, paint your main message in classic black or dark brown and attach seasonal decorations with removable velcro or small nails. Fall might include mini pumpkins or faux leaves, winter gets snowflake cutouts or a red plaid bow, and spring/summer welcomes florals or bright ribbons. These easy swaps save space and money while keeping your farmhouse wall décor fresh year-round.
Secure hanging hardware properly, an unstable sign can fall, causing damage or injury.
Step-by-Step Action Plan for Your Farmhouse Sign
Follow these straightforward steps to make your farmhouse sign by hand and enjoy the process from start to finish.
- Before you start: Gather your essential materials and tools such as wood, paint, brushes, sandpaper, and stencils. Checking that you have everything beforehand helps keep your work smooth.
- Day 1: Choose and prepare your wood by sanding to smooth the surface and applying a base coat if desired. You’ll know you’re ready when the wood feels smooth and paint adheres evenly.
- Day 2: Transfer your lettering using carbon paper or a printed template taped to the wood. Confirm success when you see a clear outline on the wood for painting.
- Day 3: Paint your letters and background with farmhouse colors, then use distressing techniques like light sanding or dry brushing after drying. Your sign will look authentic and worn when paint layers show through slightly.
- Day 4: Add any frame or finishing touches like varnish or hooks after the paint fully dries. Check the frame fits snugly and the finish feels smooth before handling further.
- After 1 week: Hang your sign securely with appropriate hardware and keep it dust-free. Confirm hanging is stable with no wobbling or damage to walls.
- After 1 month: Consider seasonal updates like changing paint accents or adding seasonal decorations to refresh your farmhouse look. A fresh style shows when your sign visually matches your space and season.
Frequently Asked Questions
Can I Use Reclaimed Wood for My Farmhouse Sign?
Yes, reclaimed wood adds authentic rustic charm to your sign. It also saves money and reduces waste, making your project eco-friendly and unique.
How Do I Choose the Right Paint Finish for a Farmhouse Sign?
Matte or satin finishes work best for farmhouse signs. They offer a weathered look without unnatural shine, helping your sign blend into farmhouse decor easy.
What Is the Best Way to Seal a Farmhouse Sign for Outdoor Use?
Use a clear outdoor sealant like polyurethane for protection. It prevents paint from fading and wood from weather damage, keeping your sign durable outside.
Can I Create Farmhouse Signs Without Any Stencils or Machines?
Yes, freehand lettering or printed templates work well. Imperfect letters actually improve the farmhouse vibe, making your sign feel personal and handcrafted.
How Do I Fix Mistakes Made During the Painting of My Farmhouse Sign?
Lightly sanding the area and repainting fixes most errors. Take your time between layers to avoid smudges and ensure a neat finish.
Is There a Recommended Size for Farmhouse Signs to Fit Well in Different Rooms?
Common farmhouse sign sizes range from 12×24 to 24×48 inches. Choose a size based on available wall space and desired visual impact.
Key Points to Remember
Making your farmhouse sign by hand is a rewarding way to add unique charm to your home. Start with simple lettering transfer and painting methods to build your confidence. Your next step is to pick your favorite wood and gather materials so you can begin your first project today.