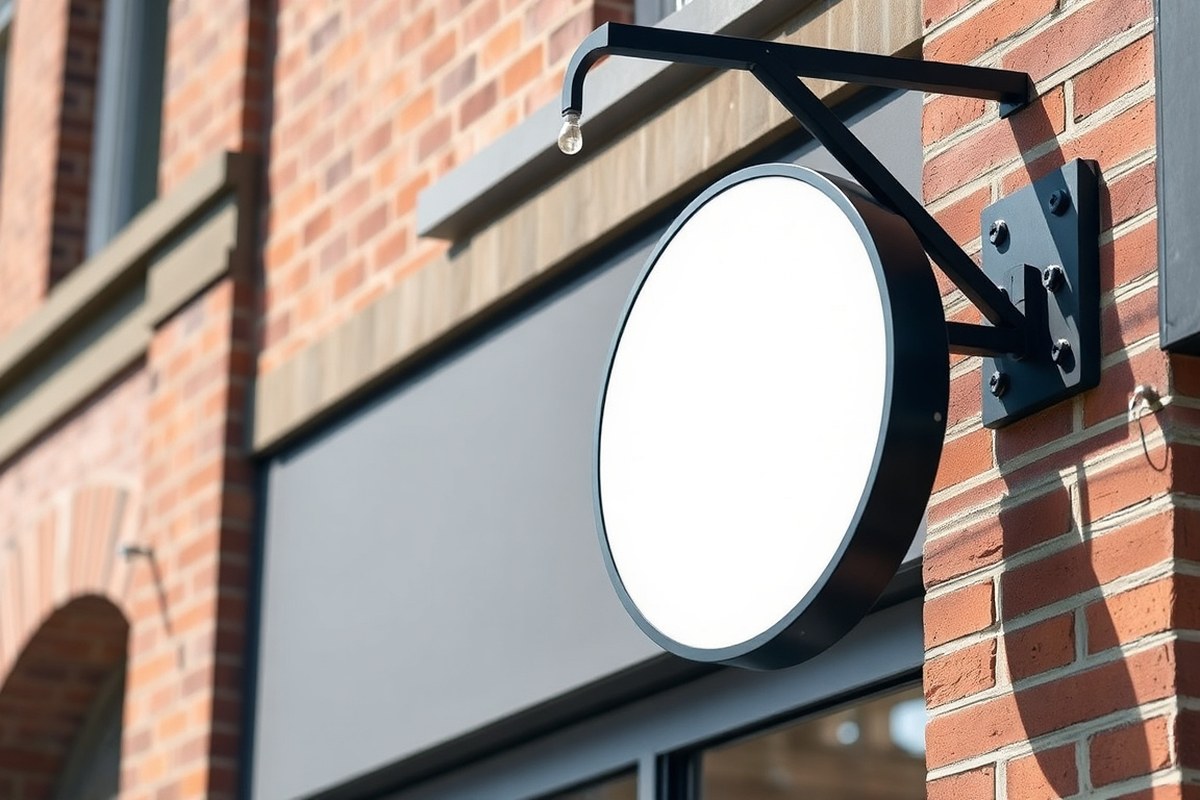
How Much Does a Projecting Sign Cost? Complete Cost Breakdown & Budget Tips
How much does a projecting sign cost depends on size, design complexity, and materials, with prices ranging from a few hundred to several thousand dollars. Expect most small-to-medium projects to land between $4,000 and $8,000 with professional installation included. Starting with clear size and illumination plans helps keep your budget on track and avoids unexpected expenses.
Key Takeaways
- Projecting sign prices vary widely, typically between $10 and $300 per square foot depending on complexity and lighting.
- Custom designs generally cost $2,000 to $3,500, with simpler signs like vinyl decals costing considerably less.
- Adding LED or other illumination can increase sign costs by up to three times compared to non-illuminated versions.
- Installation costs depend on mounting surfaces and range from $200 to $800 for wall signs.
- Permits and fees may add around 12% to the total project cost, so budget them early.
- Engineering and design services usually add $150 to $2,000, depending on sign type and complexity.
What Is the Typical Cost Range for Projecting Signs?

Projecting signs vary significantly in cost based on size, materials, illumination, and installation specifics. On average, you can expect a commercial projecting sign to cost between $2,000 and $3,500 for a standard custom design. This range covers many small to mid-sized storefront signs you might see on retail or restaurant businesses. However, prices can start as low as a few hundred dollars for basic non-illuminated signs or window decals and climb upwards of $20,000 or more for larger, illuminated channel letter signs.
For example, a simple vinyl graphic or window decal projecting sign might cost from $200 to $3,000 depending on the size and complexity of installation. These are common for temporary promotions or small retail window branding. A mid-range option would be non-illuminated flat panel projecting signs made of acrylic or aluminum composite materials. These typically cost $1,500 to $5,000 and suit boutiques or offices looking for clean, professional signage. Large illuminated channel letter signs, preferred by restaurants and franchises for visibility day and night, generally run from $3,000 to over $20,000. The added cost reflects LED lighting, electrical requirements, and more complex mounting hardware.
Lower-end projecting signs often use cost-effective materials and simple mounting, ideal for startups or temporary uses. Mid-tier signs typically involve better durability and limited illumination, balancing visibility and cost. High-end projecting signs include extensive lighting, custom fabrication, and intricate design elements, raising both price and impact.
Installation costs usually add $200 to $800 depending on the site conditions, wall material, and permit requirements. This can influence the total price, especially for signs mounted at height or requiring electrical hookups. For example, a non-illuminated storefront sign board about 4 feet by 2 feet often costs around $1,500 for the sign itself and $300 for installation, totaling roughly $1,800. An LED-illuminated version of the same size may exceed $4,500 due to lighting components alone.
Understanding these price brackets helps you budget realistically and choose options matching your business goals. Investing more on materials and lighting increases visibility and longevity, but simpler signs work when budget constraints or temporary use are priorities.
Key Factors That Affect Projecting Sign Costs

Projecting sign costs rise mainly due to size, materials, illumination, and the complexity of installation. Bigger signs need more material and time, illumination adds electrical work, and tall or hard-to-reach locations require special equipment and more labor. These factors shape your final budget and directly influence durability, visibility, and overall impact.
Size and Its Impact on Materials and Installation
The size of your projecting sign strongly affects pricing because larger signs use more materials and require longer fabrication time. For example, a 3-foot by 3-foot sign uses roughly nine square feet of material, while doubling the size to 6 feet by 6 feet quadruples the material to 36 square feet. Bigger signs also need stronger mounting hardware and more labor hours, which can add several hundred dollars to installation costs.
Visibility needs also influence size decisions. Larger signs are easier to see from distance, but overestimating sign size may lead to unnecessary expenses. Getting precise measurements and confirming optimal size through design proofs can keep costs aligned with your goals.
Materials: Durability Versus Upfront Cost
The choice of materials greatly impacts your sign’s price and how long it lasts outdoors. Common substrates include aluminum, acrylic, and polycarbonate. Aluminum offers good durability and a premium look but costs more upfront, often $20 to $50 per square foot just for materials. Acrylic is less expensive but more prone to damage and fading. Polycarbonate is strong and resistant to weather but usually priced higher than acrylic.
Finishes like reflective coatings or brushed metals also add to durability and appearance but raise costs. Cheaper materials may initially cut costs but lead to higher maintenance and early replacements. Consider the local climate and exposure to elements like sun and rain when selecting materials.
Illumination and Electrical Requirements
Illumination increases the price substantially because it adds LED modules, electrical wiring, power sources, and sometimes transformers. A basic non-illuminated sign might cost under $1,000 for materials and installation, while adding illuminated features can push the total to $2,500 or more depending on complexity.
Electrical work must be done by licensed professionals and may require permits, driving costs higher. Front-lit LEDs are common and cost less than halo-lit or custom illumination styles. Wiring access and ensuring power availability at the sign location also affect pricing. Adding illumination improves nighttime visibility but requires budgeting for both initial installation and ongoing electricity use.
Location Height and Installation Complexity
Where and how high your sign mounts impacts labor and equipment needs. Signs mounted up to 12 feet can usually be installed with a ladder and a basic crew, but higher installations often need a lift or crane. Using cranes can add $5,000 to $20,000 to costs for tall buildings, especially if permits and traffic controls are required.
Mounting surfaces also influence complexity. Installing on brick or concrete walls may require more drilling and anchors than wood-framed walls, increasing labor time. Restricted access, narrow sidewalks, or busy streets demand additional planning, insurance, and coordination with local authorities. Planning these logistics early helps avoid unexpected fees.
Always confirm whether equipment like lifts, cranes, or scaffolding is included in quotes to avoid surprise expenses during installation.
Different Types of Projecting Signs and Their Price Differences
Projecting signs come in several main styles, each varying in materials, illumination, installation needs, and cost. Flat panel signs offer simplicity at an affordable price with minimal electrical work. Lightbox projecting signs provide illuminated visibility suited for locations with medium lighting budgets. Channel letter signs combine dimensional design and lighting for high-impact branding but require more investment and electrical setup. Understanding these differences helps you pick the right sign that matches your business location, brand, and budget.
Flat Panel Signs
Flat panel projecting signs usually consist of a single flat surface made from materials like aluminum, wood, or PVC. They typically feature vinyl graphics or painted designs, offering simple, clean visibility without any built-in lighting. Installation costs range from about $200 to $800, often not requiring electrical work. These signs suit small retail shops or businesses on a tight budget seeking a straightforward and classic look.
Durability varies by material: painted plywood signs may only last 2 to 3 years, whereas aluminum panels last longer but cost more upfront. Outdoor exposure affects lifespan, so consider materials based on your climate and maintenance capacity. Flat panel signs can be mounted on brackets projecting from the building façade, providing clear visibility to pedestrians.
Lightbox Projecting Signs
Lightbox projecting signs feature an internal illumination box with translucent graphic faces, making the sign glow for better visibility at night or in shaded storefronts. These signs usually include LED lighting or fluorescent tubes inside a metal or plastic enclosure. Electrical wiring is necessary, adding $800 to $1,500 or more for dedicated circuits depending on local electrical setup requirements.
These signs are priced in the mid-range category with installation typically between $800 and $3,000 depending on size and mounting complexity. They offer an attractive balance of visibility and cost, often favored in plazas or shopping centers with multiple businesses. The illumination ensures brand presence beyond daylight hours and can withstand typical weather conditions with proper enclosure design.
Channel Letter Projecting Signs
Channel letter projecting signs consist of individual three-dimensional letters or logo elements, often made from aluminum with acrylic faces and internally lit with LEDs. Their fabrication and installation are more complex and costly, commonly ranging from $2,000 to $10,000 or higher depending on the scale and lighting type (front-lit, halo-lit, or push-through faces).
These signs require significant electrical work, including potentially installing a 20 Amp circuit costing $800 to $1,500 alone, and equipment such as lifts for mounting on higher façades. Channel letters offer superior brand impact with customizable fonts and colors, making them popular among retailers and businesses wanting to stand out in busy commercial areas.
They also provide longevity, with a typical lifespan of 10 to 15 years, justifying the higher investment over time. Proper coordination with local permitting and electrical codes is essential to avoid hidden costs or installation delays.
Choosing the Right Type for Your Business
Selecting the best projecting sign style depends on your budget, business needs, location, and desired brand visibility. For smaller businesses or low-visibility locations, flat panel signs offer an affordable option without electrical complexities. Lightbox signs work well if you want nighttime visibility on a moderate budget and face competition in your shopping district.
Channel letter signs fit larger retailers or franchise operations aiming for long-term brand recognition and high visual impact. They perform best in high-traffic areas but come with higher upfront and installation costs. Consider local regulations and needed electrical work when opting for illuminated signs.
| Sign Type | Install Cost Range | Electrical Needed? | Equipment Needed? |
|---|---|---|---|
| Flat Panel (Wall Sign) | $200, $800 | Sometimes | Sometimes |
| Lightbox Projecting Sign | $800, $3,000 | Yes | Sometimes |
| Channel Letter Projecting Sign | $2,000, $10,000+ | Yes (may include 20 Amp circuit) | Often (lift or scaffolding) |
Your choice will influence installation time, upfront costs, and ongoing maintenance. Simpler flat panels require less coordination but offer less nighttime impact. Illumination increases visibility but adds electrical and permitting complexity. Understanding installation requirements and typical costs per type keeps your projecting sign investment aligned with your marketing goals.
How Installation Costs Add Up for Projecting Signs
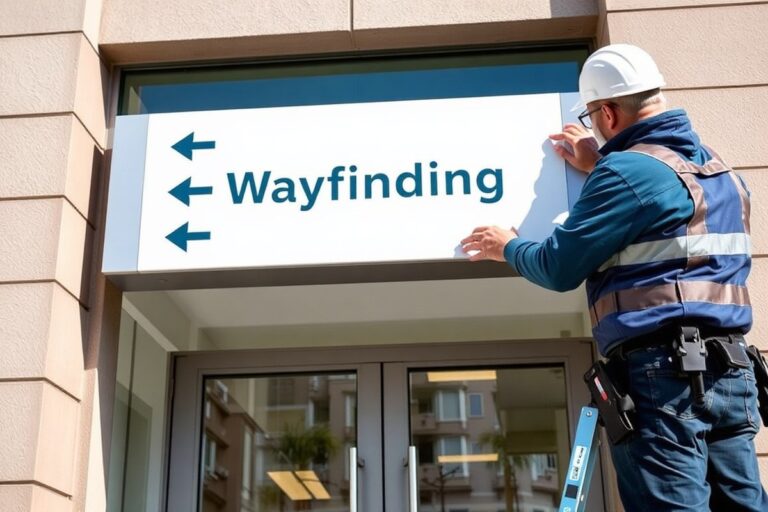
Installation labor for projecting signs typically ranges from $100 to $600, depending on the complexity of the job and site conditions. Labor includes tasks such as digging footings, anchoring the sign, and securing the mounting system. Mounting height plays a significant role: installing a sign at ground level costs less than one that requires lift equipment for heights above 12 feet. Wall material affects installation difficulty and price, with brick, concrete, or stucco walls requiring more specialized anchors and labor time than wood or metal surfaces.
Special equipment rental fees are common when mounting signs at improve locations or over hard-to-reach areas. Cranes, bucket trucks, or scissor lifts can add between $500 and $2,000 to the project, depending on rental duration and access challenges. These fees also cover operator labor if the equipment requires a certified operator. It’s best to clarify these potential costs upfront, as they may not be included in the contractor’s installation quote.
Electrical work typically involves separate costs since licensed electricians must handle wiring and power hookups. The expense ranges from $500 to $2,000 or more, influenced by the distance to the nearest power source and whether upgrades are needed. Additional electrical tasks, such as installing conduit, upgrading a breaker panel, or adding lighting controls, will raise the price. Out-of-hours or emergency electrical work commands higher premiums.
Mounting style impacts costs in that flush-mounted signs require different hardware than raceway or bracket-mounted ones. Signs on existing poles or structures might need fewer materials but could require reinforcement. Accessibility also matters greatly; hard-to-access locations increase labor hours and equipment needs. Planning for site-specific challenges helps avoid unexpected surcharges during installation.
- Labor for installation: $100 to $600 depending on site and height
- Equipment rentals (cranes, lifts): $500 to $2,000+ based on access
- Electrical hookup by licensed electrician: $500 to $2,000+
- Mounting style affects hardware and labor needs
- Wall material influences anchor type and installation time
- Accessibility challenges increase equipment and labor costs
- Hidden costs may include electrical upgrades or after-hours fees
Preparing for installation should start with confirming wall type and mounting height so contractors can quote labor and equipment accurately. Arrange a site visit to assess access, power availability, and any obstacles that might necessitate special equipment. Confirm who handles electrical work and whether your electrician or the signage company will coordinate. Gather permits and required engineering documentation early to avoid delays or unexpected charges. By taking these steps, you can help control costs and avoid surprises during the installation phase.
Permits, Regulations, and Hidden Fees You Should Budget For
Projecting signs almost always require permits from your local building or planning department. These permits ensure your sign complies with safety, size, placement, and illumination regulations. Ignoring permit requirements can lead to fines, forced removal, or costly redesigns, so budgeting for the permit process upfront is essential.
Permit fees typically range from $650 on the low end, up to about 12% of your total sign project cost. For example, if your project costs $10,000, expect to pay roughly $1,200 to $1,500 in permit fees. Illuminated signs generally require additional electrical permits and possibly engineering reviews, which increase fees and complexity. Municipalities may require engineering drawings to verify the sign meets height, setback, and load requirements, especially for signs mounted on engineered foundations.
Responsibility for paying permit and engineering fees often falls on the business owner, landlord, or property manager commissioning the sign, though some sign companies offer permit application support as part of their quote. Clarify this in your contract to avoid unexpected out-of-pocket costs. Because permit reviews can take several weeks to months, delayed approvals commonly affect your project timeline and increase labor or equipment rental costs. If your design doesn’t meet local codes, resubmissions can incur extra fees and push your installation date back.
To manage these costs and delays, start by contacting your local permitting office to request their sign permit checklist. This step allows you to gather required documents such as site plans, design drawings, and engineering calculations. Next, submit a complete permit application as early as possible in your project timeline. Track application status to address questions from reviewers promptly. Budget $650 to $2,000 for permit and engineering fees as a conservative range, adjusting upward for larger or illuminated signs. Expect another sizeable expense for installation permits and traffic control if the project impacts public sidewalks or roadways.
Always confirm with local authorities whether your proposed sign needs a structural engineering review to avoid surprise fees and delays.
Ignoring the permit process or underestimating these hidden costs risks stalled projects and unplanned expenses. Building those fees and timelines into your budget early supports smoother installation and compliance with local regulations, contributing to your sign’s long-term success as a marketing asset.
Timeline from Design to Installation for Projecting Signs
Installing a projecting sign involves several key steps, each with a typical duration that impacts the overall timeline. Understanding these phases helps you plan better and avoid delays that often arise from permit approvals or material availability. The process usually spans two to six weeks, factoring all tasks from design to installation. Labor rates for these phases generally range from $65 to $125 per hour, which also affects your project’s schedule and budget.
Design and proofing generally take about one to two weeks. This step ensures your sign meets branding needs and local guidelines before moving forward. Permitting is often the most unpredictable stage, with local municipality reviews typically requiring one to three weeks, depending on complexity and whether the sign needs special landlord or zoning approvals. Fabrication time depends on materials and design complexity; simple vinyl or decal signs may take just a few days, while custom metal or illuminated signs usually require two to three weeks. Installation is the shortest phase, often completed in one to four hours on-site once fabrication and permits are secured.
Careful coordination is key; fabrication should not begin until design is fully approved and permits are issued to avoid rework or shutdowns. Scheduling installation soon after fabrication ensures your sign is mounted while materials and weather conditions are optimal, especially for outdoor installations.
- Conduct a site survey and initial design: Spend 1 to 3 days collecting site-specific measurements and lighting conditions. This ensures the design will fit the location and comply with local codes.
- Create and approve sign design proofs: Allocate 7 to 14 days to develop digital proofs and obtain your feedback along with any required landlord or client approvals.
- Submit permit applications: File necessary paperwork to local authorities. Anticipate 7 to 21 days for review, although timelines can lengthen with complex restrictions or high-traffic areas.
- Fabricate the sign: Begin fabrication only after design and permits are finalized. Depending on materials and complexity, fabrication typically takes 7 to 21 days. Allow extra time for LED electrical components or custom finishes.
- Schedule installation: Plan installation within a few days after fabrication completes to avoid storage risks and protect warranty coverage, especially for illuminated signs.
- Perform on-site installation: Installation usually takes 1 to 4 hours. Pros handle mounting, electrical hookups, and final inspection to meet safety and code requirements.
How to Choose Materials and Illumination Options Wisely
Choosing the right materials and illumination for a projecting sign affects not only appearance but long-term costs and durability. Aluminum and high-density PVC offer good value as sign faces. Aluminum resists rust and holds paint well, lasting 10 to 15 years with minimal maintenance, while PVC is lightweight with decent weather resistance but may fade faster in direct sunlight. Steel is stronger but prone to corrosion without treatment, increasing upkeep costs.
Illumination options strongly influence energy expenses and maintenance. LED lighting typically costs more upfront, around $100 to $300 for a small sign’s LED setup, but uses only a few dollars monthly in electricity and lasts 50,000 hours or more. Neon signs have a nostalgic look but use more power and require more frequent servicing, sometimes doubling operating costs compared to LEDs.
Non-illuminated signs save initial and ongoing electric costs but limit visibility after dark. Choose them if your business hours are strictly daytime or the sign is placed in a well-lit area. Keep in mind, a non-lit sign can lose roughly 30-50% of potential impressions when the sun sets, reducing marketing impact.
Warranties can indicate expected lifespan and manufacturer confidence. A typical warranty for aluminum signs is 3 to 5 years against fading and rust, while LEDs may carry 2 to 5 years covering light output and electrical components. Signs exposed to harsh climates like coastal salt spray or extreme heat may require materials with extended warranties or more frequent maintenance.
- Aluminum: durable, rust-resistant, moderate price, 10, 15 year lifespan
- PVC: lightweight, affordable, shorter lifespan in sun-exposed areas
- Steel: strong but higher maintenance, prone to rust without coating
- LED illumination: higher upfront cost, low energy use, long lifespan
- Neon illumination: classic look, higher power and maintenance
- Non-illuminated: lower cost, best for daytime businesses
- Consider warranties from 2 to 5 years as a quality benchmark
To choose wisely, assess your location’s climate, sign exposure, and business hours. Prioritize durable materials with warranties aligning to your expected sign life, especially where replacement or repair is costly. Choose LEDs for energy efficiency and lower maintenance unless the budget forces otherwise. When illumination matters less, a well-designed non-illuminated sign can effectively reduce both initial and operating expenses.
Common Budgeting Mistakes and How to Avoid Them
Underestimating the complexity of installing a projecting sign often leads to unexpected cost increases. Installation can require special equipment or additional labor if the mounting surface or location poses challenges. Avoid surprises by having a professional assess the site beforehand to identify potential obstacles like uneven walls or difficult access points.
Ignoring the need for permits or not factoring their costs into your budget is another frequent mistake. Permitting fees vary by city and can range from $50 to several hundred dollars. Securing permits early in the planning process ensures compliance with local regulations and prevents costly delays or fines.
Choosing cheap materials or cutting corners on fabrication can save money upfront but often backfires with early repairs, replacements, or poor visibility that harms your business image. Higher-quality materials, such as weather-resistant metals or premium LEDs, may cost more initially, sometimes double the price of basic panels, but last longer and perform better.
- Compare detailed quotes ensuring ‘sign plus installation’ not just installation alone
- Include permit fees and related inspections explicitly in your budget
- Plan for the complexity of installation based on site conditions and sign size
- Choose materials that match your expected weather exposure and brand image
- Consult with fabricators who provide transparent pricing and clear timelines
- Coordinate early with local authorities for permit applications
- Standardize sign specs across multiple locations to control costs
Getting detailed, line-item quotes helps you compare factors directly rather than relying on lump sums that can hide expenses. Confirm whether each quote includes design, fabrication, installation, permits, and any site preparation. Clarify warranties, maintenance requirements, and expected lifespan of materials to avoid small short-term savings turning into larger long-term costs.
Double-check that installation quotes cover all necessary equipment and labor, unexpected rentals or overtime can significantly increase bills.
How to Get Accurate Projecting Sign Quotes and Budget Effectively
Getting accurate quotes for projecting signs requires detailed information and consistent communication. You need to provide precise measurements, site conditions, and specific questions to each fabricator. Comparing quotes by scope first helps you budget effectively and avoid surprises.
Prepare Site Details and Measurements
Before requesting a quote, gather all relevant site information and exact dimensions. Include the height and width where the sign will be mounted, clearance from sidewalks or roads, and any obstacles like awnings or trees. Note the building’s construction type and material, electrical access points for illuminated signs, and local weather conditions such as wind loads or temperature extremes that could affect durability.
Site photos and sketches with measurements help fabricators visualize the project and avoid miscommunication. Include property access details and any angles or projections that could impact installation complexity. Providing these details upfront leads to more complete and realistic quotes.
Questions to Ask Contractors
Start each quote request with a consistent set of questions. This ensures every fabricator addresses your project the same way, making comparison fair and transparent. Essential questions include:
- Is the quote inclusive of permitting and inspection fees?
- Does the installation price include electrical wiring and connection for illumination?
- Are foundation or mounting hardware costs covered?
- What is the expected timeline from design approval to installation?
- Do you provide maintenance or warranty options for the sign and lighting components?
- How do you handle unexpected site conditions or building code updates?
Clarifying these points helps prevent incomplete quotes and hidden fees. It also sets expectations for ongoing support and future expenses.
Reviewing and Comparing Quotes
Compare quotes by checking the scope of work before looking at prices. Focus on what is included rather than the bottom line alone. Look for consistency in materials, illumination type, mounting methods, and delivery timelines. Watch for omissions like missing foundation work or unclear permitting responsibilities, which can lead to costly add-ons. Use this simple template to compare quotes systematically:
| Item | Quote 1 | Quote 2 | Quote 3 |
|---|---|---|---|
| Sign Dimensions | |||
| Materials Specified | |||
| Illumination Type | |||
| Permits & Fees Included | |||
| Installation Details | |||
| Warranty & Maintenance | |||
| Total Cost |
Fill out each category to see which quote delivers the best overall value. Avoid choosing solely on lowest cost.
Factoring in Maintenance and Hidden Costs
Beyond upfront fees, factor in ongoing maintenance like bulb replacements or repairs after storms. Electrically illuminated signs may require annual inspections or occasional component upgrades. Ask fabricators about typical lifespan and maintenance needs to estimate future expenses.
Hidden costs can include permit renewals, structural upgrades, or electrical troubleshooting after installation. Confirm who is responsible for these to avoid unexpected charges. Building a small contingency of 10 to 15 percent into your budget for such costs can prevent delays or budget overruns.
- Measure the installation site precisely. Use a tape measure and level to record height, width, and distances from the building and obstacles.
- Document local site conditions. Take photos and note weather exposure, electrical access, and any building codes that apply.
- Prepare a list of standard questions. Include key points about permits, installation, warranties, and maintenance.
- Request detailed written quotes. Ensure each quote includes materials, installation, permits, and maintenance.
- Use a comparison table. Evaluate scopes side by side before comparing prices.
- Clarify any discrepancies. Contact each contractor to confirm or update unclear items.
- Include a budget buffer. Account for maintenance and possible hidden expenses in your total budget.
Your Projecting Sign Installation: Quick-Start Action Plan
Follow this plan to get your projecting sign project moving efficiently and avoid costly delays or surprises.
- Before You Start: Research local signage regulations and permit requirements for your business location. Confirming this prevents permit-related delays or fines.
- Week 1: Request detailed quotes from at least three local sign fabricators, including design, materials, illumination, and installation costs. Seeing multiple estimates helps you budget accurately and spot hidden fees.
- Week 2: Choose materials and lighting options based on your budget and branding goals. Review quote specifics to ensure your choices align with cost expectations.
- Week 3: Submit your sign permit application to local authorities with help from your fabricator if possible. Tracking this ensures your project stays on schedule.
- Week 4: Schedule installation with your chosen contractor once permits are approved. Confirm installation timelines and exact costs ahead of time to avoid surprises.
- Week 5: Prepare the site by ensuring a safe area and necessary access for installers. Confirm that utilities related to illumination are ready.
- Week 6: Oversee the installation day and inspect the sign immediately after to ensure quality and compliance with your order.
- After Installation: Keep all documents, permits, and maintenance recommendations handy to extend your sign’s lifespan and comply with local rules.
Frequently Asked Questions
How Much Should I Expect to Pay for a Small Projecting Sign Installation?
Small projecting signs typically cost between $500 and $2,500, depending on size, material, and complexity. Location and installation challenges may increase costs, especially if electrical work is needed.
Are Illuminated Projecting Signs Significantly More Expensive Than Non-Illuminated Ones?
Yes, illuminated signs usually cost at least twice as much due to lighting components and electrical installation, often starting around $4,500. They offer better visibility, improving marketing but require higher upfront and maintenance costs.
Can Custom Design Complexity Affect the Cost of a Projecting Sign?
Custom designs increase costs since unique shapes, materials, and finishes require more labor and specialized fabrication. Complex artwork or logos may also need expert design help, raising both design and production expenses.
Do Projecting Sign Installation Costs Vary by Building Type?
Installation costs differ based on the building’s wall material and height. For example, mounting on brick or concrete may require more labor and equipment than wood or metal siding, affecting total installation costs.
Should I Budget Separately for Ongoing Maintenance of a Projecting Sign?
Yes, maintenance costs vary with sign type and access difficulty. Illuminated signs might need bulb or LED replacements, and signs placed high or in hard-to-reach areas may have higher service fees.
What Hidden Fees Can Unexpectedly Increase My Projecting Sign Budget?
Permit fees, electrical upgrades, and compliance with local sign codes can add to costs. Consulting your local municipality early helps identify such fees, avoiding last-minute surprises.
Before You Go
Projecting sign costs depend on many factors, but careful planning and clear communication with your fabricator make a big difference. Start by gathering specific quotes and clarifying installation requirements to set a realistic budget. Taking these steps lets you confidently invest in signage that supports your business’s visibility and growth.