
How to Install a Banner: 8 Proven Methods for Secure, Professional Results
How to install a banner starts with choosing a suitable method that fits your banner size, weight, and installation surface. Secure the banner using evenly spaced fasteners like grommets or push pins to keep it taut and prevent sagging. Begin by measuring the space accurately to ensure a precise, level installation.
Key Takeaways
- Pin vinyl or heavy banners every 6 inches along the edges to stop sagging or falling.
- Use push pins to tack corners on walls that can be punctured, ensuring extra stability.
- For damage-free mounting, suction cups work well on smooth surfaces but don’t suit every material.
- Install grommets every 24 inches on large banners over 6 feet wide for proper tension.
- Match banner size to location, like a 7×10 banner for 6½-7 ft canopy walls or a 3×6 for garage doors.
- Zip ties securely attach banners to pop-up canopy frames without damaging the structure.
1. 8 Effective Ways to Install a Banner Securely
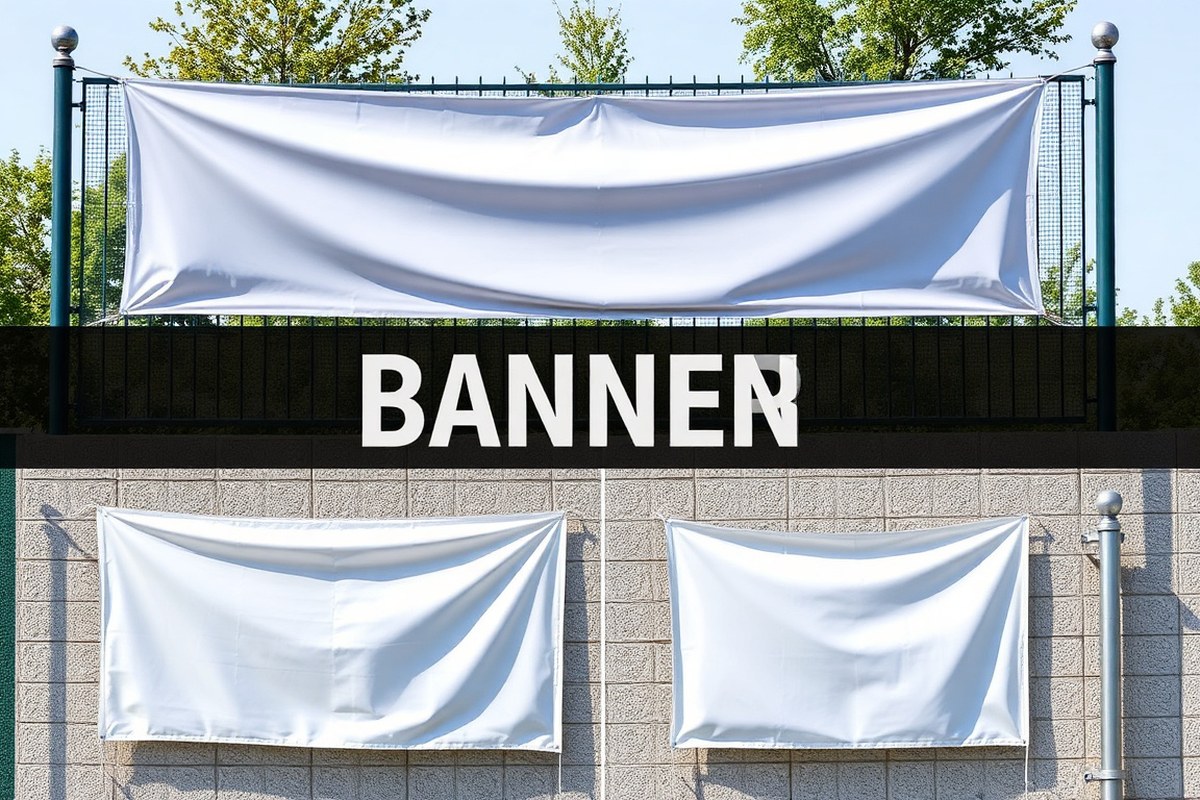
Several effective methods can help you securely install a banner, depending on the location and banner material. Choosing the right method ensures your banner stays put, looks professional, and resists weather or strain. For temporary needs, less invasive options like adhesive hooks or zip ties work well. For permanent setups, screws or drilling into surfaces provide the strongest hold, especially for heavier vinyl banners.
Banners with grommets are easiest to hang securely using ropes, bungee cords, or zip ties. Grommets are metal rings positioned about 5/8 inch from the edge, preventing tears when tying or fastening. Hemstitching or reinforced edges improve durability, reducing fraying during long-term outdoor use. Your banner can be updated with grommets by using a hole punch and grommet kit, or you might try pole pockets that slide over rods for a neat, strong mounting option.
Temporary indoor banners can hang on removable adhesive hooks or push pins to avoid damaging walls. Outdoor banners on fences often rely on zip ties threaded through grommets or even bungee cords for some flexibility in the wind. In windy locations, adding wind slits and ball bungees helps the banner withstand gusts while minimizing tears.
| Where It’s Going | Best Finishing | What to Hang It With |
|---|---|---|
| Chain-link fence | Hemmed edges, grommets, wind slits | Zip ties, bungee cords, hanging clips |
| Between posts or trees | Hemmed edges with grommets | Nylon rope, bungee cords |
| Indoor wall | Grommets | Removable hooks, screws with washers, adhesive strips |
| Window or glass | Grommets | Suction cups with hooks (smaller banners) |
| Ceiling | Grommets or pole pockets | Rope, bungee cords, banner hanger |
When installing, mark the grommet positions on the mounting surface with a pencil before drilling or attaching. For heavier materials like vinyl, space anchors about every 6 inches along the edges to keep the banner flat and secure. Permanent installations using screws into walls provide excellent hold but may leave marks. Removable hooks and adhesive strips avoid damage but are better for lighter, smaller banners indoors.
Your banner can have grommets added by using a grommet kit yourself. Place the grommet about 5/8 inch from the banner edge, punch a hole, and secure the metal ring as instructed. For banners intended to hang from poles, consider sewn pole pockets for a clean look that slides easily onto dowels or rods. This flexibility makes it simple to move or replace the banner without reinstalling hardware.
2. Choosing the Right Tools and Materials

Choosing the right tools and materials is key to mounting your banner securely and professionally. Start by matching fasteners to your banner type and surface. Banners with grommets work best with bungee cords since they allow slight movement in the wind, preventing stress on the material. For chain-link fences, zip ties are the fastest and simplest option, fitting quickly around the metal mesh without damaging the banner. On wood fences or posts, rope or screws with washers offer extra durability and a snug fit.
The type of rope you select impacts durability and safety. Nylon or polyester ropes tend to be safest and most weather-resistant, lasting longer without stretching or degrading. Use ropes about 1/4 to 1/2 inch thick for good strength without being too bulky. When tying, cross the ropes over each other on opposite sides of the banner grommets like you would tie shoelaces. This locks the banner in place and reduces the chance it will slip in wind or rain. Having a set of essential tools on hand will speed up installation and improve the final look. Here’s a checklist of common needs:
- Bungee cords for banners with grommets, pull tight but flex with wind
- Heavy-duty zip ties, best for quick fixes on chain-link fences
- Weather-resistant rope (nylon or polyester), for wood, posts, or cable mounts
- Screwdriver and screws with washers, provides strong hold on wood surfaces
- Stud finder, to locate secure fastener points on building facades
- Pole or rod, for banners designed to hang through a sleeve
- Suction cups with hooks, for mounting on smooth, non-porous glass surfaces
Only install a banner on surfaces that can hold its weight and tension, installing on weak or damaged walls risks both the banner falling and property damage.
Consider the banner size and environment when selecting materials. For example, a 2-foot by 10-foot vinyl banner stretching across a storefront frame is often secured with zip ties at regular intervals along the top bar. This keeps the banner tight and aligned. In windy outdoor locations, use bungee cords anchored at the corners and midpoints to let the banner flex without tearing or sagging. Suction cups can mount banners indoors on windows without drilling, but make sure the surface is clean and smooth to ensure a firm grip.
Tools like stud finders reveal solid points behind exterior walls for drilling screws, avoiding costly mistakes like mounting into drywall or brittle siding. Using washers with screws protects banners from tearing around attachment points by spreading pressure evenly through the grommets. Each fastener choice carries tradeoffs between ease, security, and surface compatibility, so match your banner’s material and mounting surface carefully for best results.
3. How to Prepare and Measure for Installation
Accurate measurement and careful planning are essential for hanging a banner that’s both taut and aligned. You need to measure the banner size, calculate the anchor spacing based on your surface, and mark attachment points precisely. Proper preparation prevents sagging and uneven tension, ensuring your banner looks professional and holds up under wind and weather.
Measure Banner Size and Handle Allowances
Start by measuring the height and width of your banner. This step forms the basis for planning anchor spacing and placement. Remember, the finished banner size often includes hems or pockets added during fabrication, which can add about 1 to 2 inches to each side. These allowances ensure the grommets and anchors align with the banner’s edge without obscuring your design.
Measure the “final size” accurately. This size represents the visible portion of the banner once installed. Knowing this helps you avoid surprises, like a banner that’s too tight or too loose. For example, if the banner width is 72 inches including hems, you should plan your anchor points slightly wider to keep it taut.
Identify and Prepare Mounting Points on Surface
Choose anchor points that attach to the structure supporting your mounting surface, not just the surface itself. For walls, avoid mortar between bricks because it’s weak and may crumble under tension. Instead, aim for solid brick or wood framing behind siding. Look for posts, pillars, or trees for outdoor banners; these need to be strong enough to handle banner weight and wind stress.
After selecting your mount points, inspect the surface for any debris or dirt, and clean it thoroughly to ensure solid anchor adhesion or drilling. Confirm the surface strength because poor anchor support leads to failure. For example, suction cups work only on smooth surfaces like glass or painted metal and should align with strong structural elements behind.
Mark Anchor Locations Ensuring Level and Spacing
Marking anchor points precisely is key to hanging your banner evenly and stretched correctly. Anchor spacing depends on the banner size but generally, anchors should be placed at or just beyond each corner of the banner. If the banner is large, add extra anchors spaced 18 to 24 inches apart along the edges to distribute tension evenly and prevent sagging.
Use a measuring tape and level to mark points at consistent heights and distances. This ensures the banner will hang straight and taut. Follow these steps for marking your anchor locations:
- Lay the banner flat and measure its final width and height.
- Select mount points wider than the banner width by at least 2 inches to allow tension.
- Measure and mark the height line on your mounting surface using a level to ensure even placement.
- Mark the horizontal spacing for anchors at the edges and additional points if needed along the top and bottom edges.
- Double-check all measurements and markings before drilling or attaching anchors.
- Confirm that the mounting surface is clean and solid at all marks.
- Prepare pilot holes or clean attachment points for your chosen anchors.
4. Installing on Different Surfaces: Brick, Wood, Metal, and Glass
Installing a banner on surfaces like brick, wood, metal, and glass requires specific fasteners and techniques. Using the right hardware prevents damage and keeps the banner secure under tension and weather. Detailed surface assessment ensures the chosen method suits the material and banner weight.
Brick and Masonry: Drill and Anchors
Drilling into brick or masonry is essential for mounting banners long-term. Use a rotary hammer drill with a masonry bit sized to match your anchors. Avoid drilling into mortar joints, as they are weaker and less reliable for anchors.
After drilling, insert masonry anchors or wall plugs designed to expand inside the hole. These anchors grip firmly inside brick or concrete. Use screws with wide washers through the banner’s grommets to spread pressure evenly and avoid ripping.
Examine the brick closely for any cracks or loose mortar prior to drilling. Anchors may not hold properly in fragile or hollow areas and could damage the surface. For temporary setups that avoid drilling, using strong hook-and-loop straps or adhesive hooks designed for masonry might be effective, though these options usually offer less longevity.
Wood Surfaces: Screws and Hooks
Wood surfaces provide good holding power for screws. Choose corrosion-resistant screws at least 1.5 inches long, depending on wood thickness. Pre-drill pilot holes slightly smaller than the screw diameter to reduce wood splitting. Attach the banner by running screws through the grommets with washers or use screw-in hooks for easy removal.
Make sure the wood is solid and dry. Soft or rotted wood won’t hold screws well and could allow the banner to pull loose. A solid vinyl banner works best for wooden backings to resist moisture and weathering.
Metal and Siding: Self-Tapping Screws and Clips
Metal siding often needs self-tapping screws or specialized banner clips to avoid drilling oversized holes. Self-tapping screws cut their own threads and hold securely in metal without wall plugs. Use washers with fasteners to protect banner grommets.
Strong magnets can also hold banners on smooth metal surfaces, especially when you want to avoid any holes. This method works well for lighter banners but check the magnet’s weight limit carefully.
Inspect siding for hollowness or damage before fastening. Hollow or thin siding may not support heavier or larger banners, making clips or magnets safer alternatives.
- Use a rotary hammer drill with a masonry bit for brick
- Insert expanding masonry anchors before screwing in
- Pre-drill pilot holes for wood screws to avoid splitting
- Use corrosion-resistant screws with washers on wood
- Choose self-tapping screws or banner clips for metal siding
- Magnets can hold lightweight banners on metal
- Suction cups work only on smooth, clean glass surfaces
Glass and Windows: Suction Cups and Adhesive Strips
Suction cups with hooks are practical for mounting banners on smooth glass surfaces without causing damage. Clean the glass thoroughly to remove dust and grease before applying suction cups. Attach the hook through the banner’s grommet, usually placed about 5/8 inch inside the banner’s edge for optimal tension.
Check the weight rating of the suction cups to ensure they support the banner. Use at least one suction cup in the banner’s top center when hanging heavier or larger pieces. For short-term applications on glass, heavy-duty adhesive strips can supplement suction cups but might leave residue.
Adhesive hooks generally don’t work well on textured glass or dirty windows. Suction cups fail if the surface is uneven, dusty, or wet. Remove the banner regularly to prevent residue buildup or suction loss during hot weather.
5. Tensioning Techniques to Prevent Sagging and Wrinkles
Pull the banner tight so it looks like a drum skin, with no wrinkles or sagging. Even tension across the entire surface keeps the banner flat and crisp, improving readability and extending the banner’s life. Start by attaching the top corners securely, then pull the bottom corners tight to the same height before securing them to prevent uneven sagging or crooked hangs. Check with a level to keep the banner straight.
Use all the grommets along the edges to distribute tension evenly. Whether you’re using zip ties, ropes, or bungee cords, the key is to tighten all attachment points gradually and evenly. For zip ties, thread them through the grommets and around a solid anchor point, pulling just enough to remove slack without overstretching the fabric, which can stress the material and cause tears. Tighten zip ties in small increments on opposite sides to keep balance.
Ropes offer more adjustability and are ideal for larger banners. Tie a slip knot or use a cleat hitch through each grommet, then pull the rope taut. Tighten opposite corners first, then work your way around the edges, adjusting tension bit by bit to avoid wrinkles. You can use knots or cleats to secure the rope without slipping. With ropes, the ability to readjust tension over time helps compensate for stretching or weather changes.
Bungee cords add flexibility, which is helpful when mounting on uneven surfaces or when wind is a factor. Hook the bungee through grommets and anchor points, then stretch gently to create balanced tension. The elasticity prevents the banner from tearing under stress while keeping it taut, but be careful not to overstretch the bungees as they could lose tension over time.
Use washers with ropes or zip ties to spread out pressure around the grommets and prevent ripping. This simple step costs just a few cents per washer but can drastically improve banner durability. With all these methods, the goal is to eliminate sagging and wrinkles by distributing force evenly around the perimeter. Sagging will cause the banner to look sloppy and can wear out the material prematurely. Wrinkles not only reduce the professional appearance but also interfere with your message’s clarity.
Check tension periodically and adjust as needed, especially after strong winds or temperature changes, to maintain a clean, sharp look throughout the banner’s display time.
6. Safety Tips for Installing Banners Yourself
Installing a banner yourself requires careful attention to safety to avoid injuries and damage. Using the right protective gear, applying safe techniques for working at heights, and considering weather conditions will help you install your banner securely and without accidents. Planning and preparation are your best tools for a safe installation.
Personal Protective Equipment Requirements
At a minimum, wear gloves to protect your hands from sharp edges and rough materials. Safety glasses will shield your eyes from debris or dust, especially when working near brick or metal surfaces. For heavier banners or when using tools like drills and staples, consider wearing a hard hat to protect your head. A safety harness is essential if you’re working several feet off the ground, such as on scaffolding or ladders higher than 6 feet. Your PPE checklist:
- Work gloves with good grip and cut resistance
- Safety glasses or goggles
- Hard hat for overhead work
- Safety harness and lanyard for height safety
- Non-slip footwear for stable footing
Choosing proper PPE lowers the chance of cuts, eye injuries, and falls. It also helps you keep control of the banner and tools while you work.
Safe Ladder and Height Practices
Always inspect your ladder or scaffolding before use to ensure it is stable and in good condition. Set ladders on firm, level ground and extend them at least 3 feet above the top mounting point for safe access. Never lean or overreach from a ladder; move it as needed. For working at heights over 6 feet, attach a safety harness anchored securely to a fixed point. Avoid working alone, have someone hold the ladder or assist you.
Load capacity is important. Use ladders rated for at least 250 pounds and check the banner’s weight. If the banner is heavy or large, consider multiple people to handle it safely. Avoid makeshift scaffolding or steps as they can be unstable and cause falls.
Weather and Environmental Hazard Precautions
Check weather conditions before starting installation. Avoid installing banners in high winds (over 15 mph), rain, or icy surfaces. Slippery or wet footing can lead to falls, and strong wind can make handling large banners difficult and dangerous. Install early in the day to avoid afternoon storms or heat extremes above 85°F, which can impact your grip and concentration.
Be mindful of nearby power lines or obstacles that pose hazards. Clear the area of bystanders and secure tools to prevent dropping anything. Have a safety plan for unexpected changes, such as sudden weather shifts or loose banner materials that might catch wind. Your safety checklist for banner installation includes:
- Wear gloves, safety glasses, and safety harness if working above 6 feet
- Inspect ladders/scaffolding and set on level, firm ground
- Position ladder at correct angle and secure it
- Work with a partner when using ladders or handling heavy banners
- Avoid installation during high winds, rain, or icy conditions
- Clear the area of trip hazards and keep tools secured
- Plan for emergency assistance if needed
Following these precautions helps ensure your banner looks great and stays safe on display without risking injury or property damage.
7. Weather and Maintenance: Keeping Your Banner Secure Long-Term
Wind, rain, and sun gradually wear down banners, so managing these conditions is key to keeping your banner secure and looking good. High winds increase stress on the material and fixtures, especially if the banner acts like a sail. Adding wind slits, small vertical cuts spaced evenly across the banner, helps reduce this by letting air pass through. For locations prone to strong gusts, like open fences, replacing a solid vinyl banner with a mesh banner is even better. Mesh banners have tiny perforations that allow wind to pass through, dramatically cutting down strain on the banner and mounting points. This reduces tearing and protects both the banner and the surface it’s attached to, such as your building’s facade or fence.
Rain mainly affects banner longevity by adding weight and potentially weakening attachment points. Avoid mounting banners on surfaces like vinyl siding, which are not designed to carry heavy, tensioned loads and can warp or fail in wet weather. When tensioning, pull the banner tight to prevent sagging and flapping, which increase wear. Securing the middle and bottom grommets with screws can keep the banner flat and stable, reducing movement caused by wind and rain. This extra anchoring is especially important after storms or heavy rain, when loosened hardware can cause damage or create hazards.
Sun exposure breaks down printed colors and the banner material over time. Choose UV-resistant inks and materials when ordering your banner. Even so, expect fading and fabric weakening after about six months to a year outdoors. You can extend your banner’s life by regularly cleaning off dirt and debris using mild soap and water. Avoid harsh chemicals or pressure washing, which can further degrade the material.
Plan to inspect your banner once every month. Look for loosened grommets, frayed edges, or tears. Tighten any slack and repair minor damage immediately before it worsens. After strong storms or windy days, check the tension again and re-tighten as needed. If your banner has wind slits, make sure they are still clean and functioning. Maintaining this schedule helps you catch problems early and keeps your banner secure through varying weather conditions. You may also want to plan replacing banners every 12 to 18 months outdoors, depending on exposure and material quality.
Costs for maintenance are typically low, tightening hardware and minor repairs can be done with a screwdriver and patch kit that cost under $20. Switching to mesh banners or adding wind slits may increase initial costs but pays off by reducing damage and replacement frequency. Some mesh banners cost about 10 to 20 percent more than solid vinyl but last longer in high wind areas. Through regular inspections and proper choices for your weather conditions, you avoid the safety risks of a hanging or torn banner. You also protect your investment by keeping the banner vibrant and properly secured. This careful maintenance is important to a successful event or promotion that relies on outdoor signage.
8. When to Call a Professional Installer
Large banners, especially those measuring over 72 inches in width, often warrant professional installation because they present unique challenges. Such banners catch wind like sails, which puts significant stress on mounting points, hardware, and the surrounding building structure. The weight and surface area can cause damage or failure if improperly secured, which may lead to dangerous situations or costly repairs. A good rule of thumb is to call a professional for banners larger than 6 feet wide or when the banner will be displayed in an exposed, windy location. Professionals will also add grommets every 24 inches for large banners to keep the material taut and evenly supported.
Mounting surfaces that require special skills include uneven or fragile walls, such as those with cracked bricks, loose mortar, or fragile wood or glass. Structural issues near your intended mount points indicate that a professional assessment and installation are safer. Installing on high walls or roofs also calls for expert help due to the risk of falls and the need for safety equipment and scaffolding. These professionals understand the correct anchors and fasteners to use for each material type, minimizing damage to the building and ensuring secure attachment.
Professional installers have experience assessing the specific conditions of your installation site. This includes surface integrity, wind exposure, and exact measurements needed for optimal banner tension and positioning. Their knowledge of tool use and proper mounting methods reduces the chance of sagging, tearing, or premature hardware failure. Hiring experts saves time and prevents frustration that often accompanies difficult installations, especially for larger or more complex banners.
The costs for professional installation vary widely, typically ranging from $100 to $500 depending on banner size, surface type, installation height, and local labor rates. While these fees might seem high compared to DIY methods, the value lies in durable results without risking property damage or personal injury. A professionally installed banner reflects better on your brand by looking sharp and lasting longer.
Decide between DIY and professional installation by assessing banner size, site conditions, and your comfort with heights and tools. If your banner exceeds 6 feet in width or is in a windy or high location, lean toward hiring a professional. Check the installation surfaces for cracks or instability. When in doubt, consult with installers who can provide a site evaluation and honest advice.
Always inspect your mounting surfaces for damage or looseness before installation; compromised surfaces require professional repair or reinforcement for safe banner mounting.
Step-by-Step Action Plan for Installing Your Banner
Follow these clear steps to install your banner securely and efficiently while protecting your investment over time.
- Before You Begin: Measure the installation area carefully and gather all necessary tools based on your surface type. Confirm measurements on-site to avoid misfits.
- Day 1: Prepare the surface by cleaning and drying it thoroughly. You’ll know it’s ready when no dirt, dust, or moisture remains.
- Day 1: Use the appropriate fasteners and hardware for your surface, masonry anchors for brick, screws for wood, suction cups or adhesive for glass. Test the first attachment to confirm it holds securely without damaging the surface.
- Day 1: Attach your banner starting at one corner, applying tension progressively. The banner should lie flat without sagging or wrinkles when fully installed.
- After Installation: Check all mount points after 24 hours for any loosening or shifting. Adjust tensioning as needed to maintain a taut and clean look.
- Weekly for 1 Month: Inspect the banner for signs of weather damage or wear at fasteners. Tighten or replace hardware promptly if you notice issues.
- Monthly: Clean the banner surface according to manufacturer recommendations to prolong its life and appearance.
Frequently Asked Questions
What Permissions Do I Need Before Installing a Banner?
You should get permission from property owners or local authorities before installing a banner. This helps avoid fines or having your banner removed.
How Do I Protect Walls When Using Suction Cups to Hang a Banner?
Clean the surface thoroughly before applying suction cups to ensure better grip and prevent damage. Avoid suction cups on rough or porous surfaces.
Can I Reuse the Same Banner Installation Hardware for Multiple Events?
Yes, durable hardware like zip ties, ropes, and suction cups are reusable if they remain in good condition after removal. Inspect before reusing to ensure safety.
What Factors Affect How Taut I Can Make a Banner During Installation?
Banner material thickness and surface mounting points determine tension. Overstretching can damage the fabric or mounting spots. Aim for firm but not overly tight tension.
How Do I Keep a Banner Secure in Windy Conditions Outdoors?
Use reinforced grommets and multiple secure attachments like ropes or bungee cords. Weigh down or tie bottom corners to reduce movement and wind damage.
What’s the Best Height to Hang a Banner for Maximum Visibility?
Hang the banner at eye level or slightly above, typically 6 to 8 feet high. This height makes it easy for passersby to see without obstruction.
Key Points to Remember
Installing a banner properly combines careful measurement, the right tools, and patience to ensure it looks professional and lasts. Start by preparing your site and selecting fixtures that match your surface for a secure hold. Taking these steps reduces maintenance later and keeps your message visible and effective.


