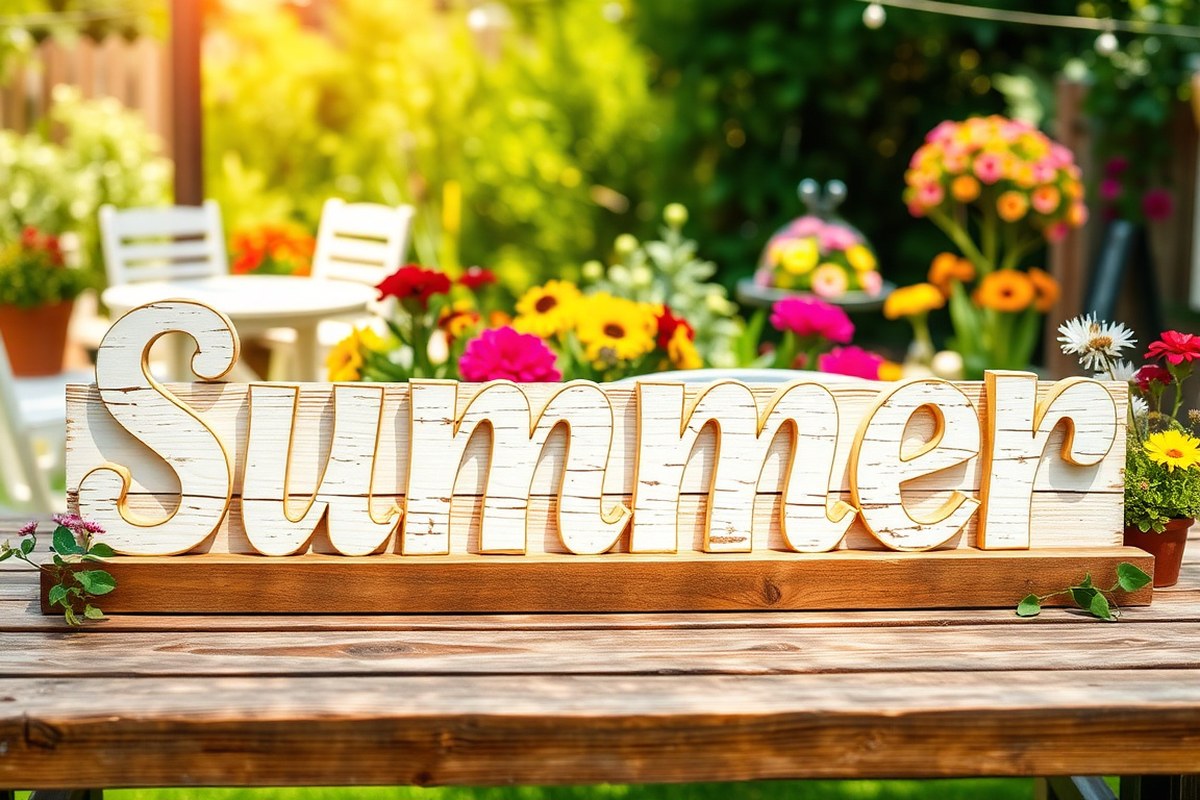
Summer Sign Ideas: Creative DIY Projects and Perfect Styles for Every Space
Summer sign ideas offer a simple way to bring seasonal brightness into any space with DIY flair or ready-made charm. Crafting or choosing signs with bold colors, beach motifs, or rustic wood can instantly evoke summer’s warmth and joy. Starting with materials suited for your sign’s location ensures durability and style that matches your outdoor or indoor setting.
Key Takeaways
- Use wood as a base for sturdy, rustic summer signs that fit both indoor and outdoor themes.
- Incorporate 3D elements like Styrofoam cones to add visual depth and interest to your signs.
- Select waterproof paint and sealants to protect outdoor signs from sun and rain damage.
- Create signs with popular summer themes such as pools, popsicles, grilling, or beach activities.
- Use a brad-nailer to attach trim pieces securely on wooden signs for a finished look.
- Mix bright, summery colors like coral, turquoise, and yellow to capture the season’s vibe.
Popular Summer Sign Themes and Styles to Inspire You

Popular summer sign themes often evoke a sense of warmth, relaxation, and fun. Beach-inspired designs top the list, featuring motifs like seashells, flip flops, and ocean waves. Signs with bright blues, sandy beiges, and coral hues create an instant coastal vibe. These are great for adding a breezy feel to indoor spaces or outdoor patios. You can paint or stencil beach-themed quotes such as “Salty Air, Sandy Hair” on wooden boards, then distress the edges for a weathered look. Creating these signs usually takes under two hours and costs around $15 to $25 in basic materials like wood planks, acrylic paints, and brushes.
Rustic summer signs use natural textures and muted colors, often soft blues, whites, and faded grays, to craft a vintage country feel. Using reclaimed wood or buying rustic wood at craft stores adds authenticity. The style relies on simple designs with worn, distressed finishes, typically achieved by sanding painted surfaces. A rustic sign with the phrase “Farm Fresh Summer” paired with painted oranges or sunflowers fits perfectly in casual home décor. This style tends to work well on mantels, shelves, or windowsills. It balances charm with ease, needing just wood, paint, and light sanding, usually taking a couple of hours and materials costing around $10 to $20.
Vintage summer signs bring a nostalgic look inspired by mid-century designs. They often feature faded pastel colors, retro fonts, and iconic images like old beach scenes or soda shop graphics. Think of signs that say “Beachy Vibes” or “Summer Days” with a distressed, sun-bleached finish. To make this style, use stencils or transfer printed graphics onto wood, then gently sand to expose underlying layers. Vintage signs emphasize a relaxed, timeworn feel that fits well in rooms decorated with antique or retro furniture. These projects might require more detailed painting or graphic transfers, raising the time investment to three hours or more, with material costs near $20 to $30 depending on the tools used.
Fruity motifs bring brightness and playfulness to summer signs. Imagery like oranges, pineapples, and watermelons in vibrant yellows, pinks, greens, and reds energize your décor. A popular project is painting “Farm Fresh Oranges” or “Life’s a Picnic” with cheerful fruit icons. These signs often use farmhouse or coastal styles as a base, combining rustic wood with colorful fruit designs. Using acrylic paints and small foam brushes keeps the work simple yet effective. Fruit-themed signs can easily fit both indoor kitchens and outdoor dining areas, adding a fresh, summery touch. Materials usually cost under $20, and the painting process can take one to two hours.
The main difference between rustic and vintage styles lies in the finish and color scheme. Rustic signs lean toward natural, muted tones and rougher textures with clear wood grain and simple text. Vintage signs favor lighter pastels, delicate fonts, and a more polished, distressed finish meant to mimic faded, older signage. Both suit summer decorating but create distinct atmospheres, rustic feels cozy and grounded, while vintage offers a softer, nostalgic charm. Choosing the right style depends on your home’s existing décor and the mood you want to set.
Choosing the Right Materials for Summer Signs

Choosing the right materials for summer signs depends heavily on where you plan to display them and how long you want them to last. Wood, metal, plastic, and composites each offer unique advantages and drawbacks in terms of cost, durability, appearance, and ease of use. Outdoor signs especially need to resist fading and degradation from intense sunlight and summer weather.
Wood signs, such as rough wood or slatted wood, provide a classic, natural look suitable for outdoor spaces like patios or garden areas. They typically cost $15 to $50 depending on size and wood type. Cedar and redwood resist rot and insects better than pine, making them preferable for longer-lasting outdoor use. Wood signs easily accept acrylic paints for bright, vibrant colors but require sealing with outdoor varnish or polyurethane to withstand sun and moisture. Without a protective coat, paints can fade within a few months from UV exposure.
Metal signs bring durability and a sleek appearance. Aluminum is lightweight and rust-resistant, good for outdoor grilling areas and pool spaces, though prices usually start around $30. Painted metal signs with powder coating resist fading better than standard paints, making them low-maintenance choices. However, heavy metal signs can be harder to hang and may dent if hit.
Plastic signs, often made from PVC or acrylic, are cost-effective, typically $10 to $25, and weather-resistant if UV-protected. They are lightweight and easy to cut for DIY popsicle-shaped or ice-cream-themed signs that add playful energy to your décor. The main drawbacks are potential discoloration under intense sun and less premium feel compared to wood or metal.
Composite materials, like MDF or fiberboard coated for outdoor use, combine affordability and smooth surfaces ideal for detailed laser-cut designs. These hold paint well but can swell or warp if exposed directly to water or extreme humidity. Using an outdoor sealant can improve lifespan, but they generally suit covered porches better than exposed areas.
| Material | Cost Range | Durability Outdoors | Look | Ease of Use |
|---|---|---|---|---|
| Wood (Cedar/Redwood) | $15 – $50 | High with sealant, resists rot and insects | Natural, rustic, classic | Easy to paint, requires sealing |
| Metal (Aluminum) | $30+ | Very high, rust-resistant | Sleek, modern | Harder to cut, durable |
| Plastic (PVC, Acrylic) | $10 – $25 | Moderate, UV can cause fading | Bright, playful | Lightweight, easy to shape |
| Composite (MDF, Fiberboard) | $10 – $40 | Low to moderate; prone to warping without sealant | Smooth, good for detailed designs | Easy to paint, sensitive to moisture |
Applying a high-quality outdoor polyurethane or varnish over painted wood or composites extends their outdoor life, especially during summer’s strong sun and humidity. Metal signs benefit from powder coating for better UV protection. For plastic signs, choose those specifically rated as UV-resistant to minimize fading. Embellishments like wire details or 3D wooden letters can add charm but remember that glued attachments on outdoor signs must be waterproof and UV-resistant to avoid peeling or yellowing.
Tip: Always test your paint and sealant on a small section of your material before completing your sign to ensure proper adhesion and resistance to summer elements.
Basic Tools and Supplies Needed for DIY Summer Signs
To create wooden and 3D effect summer signs, you’ll want to start with a few basic tools and supplies that keep things simple and safe. A handheld jigsaw, sanding block or electric sander, painter’s tape, acrylic paints, paint brushes, wood glue, and a drill with screws form the core of what you need. These gear choices balance ease of use and effectiveness, especially for beginners tackling summer-themed signs. Using wood that’s pre-cut into plaques or slats can save time and reduce the need to measure or saw precisely.
Safety matters when working with tools and finishes. Always wear safety glasses to protect your eyes from wood dust and paint splatters. Work in a well-ventilated area, especially while painting or applying finishes, to avoid inhaling fumes. When drilling or cutting, secure your wood on a stable surface to prevent slips. When making a sign for outdoor use, pick paints and adhesives designed for outdoor conditions to resist sun damage and moisture that cause peeling or fading. Here’s a checklist of the essentials to gather before starting your summer sign project:
- Wood plaque or slatted wood pre-cut to size (about 12 to 18 inches wide works well)
- Jigsaw or handsaw for cutting shapes or edges (optional for pre-cut wood)
- Sanding block or electric sander (grit 120 to 220 for smoothing edges and surface)
- Acrylic craft paints in summer colors (watermelon red, sunny yellow, ocean blue recommended)
- Variety of paint brushes (small detail brushes and medium flat brushes)
- Painter’s tape to mask areas for clean lines
- Wood glue or hot glue gun for attaching 3D elements like foam cones or wooden shapes
- Polyurethane or outdoor clear sealer spray (semi-gloss finish adds weather resistance)
- Safety glasses and gloves for protection
Wood glue offers a strong bond for attaching dimensional accents such as foam pieces or additional wooden cutouts. A hot glue gun also works for quick fixes but may not last as long outdoors. Acrylic paints dry fast and provide vibrant color, but apply at least two coats for durability. For finishing, an outdoor polyurethane spray sealer can protect your sign against sun damage and rain. Apply in thin, even coats outdoors, allowing each coat to dry for about 2 hours before the next one. Avoid oil-based finishes if you want easier cleanup with soap and water.
Make sure the surface is clean and dry before applying finishes or adhesives. Glue bonds weaken on dirty or damp wood, and paint may peel off untreated surfaces over time. When drilling holes for screws or handles, drill pilot holes first to prevent splitting the wood. Using basic woodworking tools, beginner-friendly paints, and dependable adhesives and sealers lets you craft colorful, charming summer signs suitable for both indoor and outdoor settings.
How to Create DIY Summer Signs Step-by-Step
Creating a DIY summer sign ranges from a simple weekend project to a more detailed craft depending on how much time and effort you want to invest. Typically, a basic sign can take about 2 to 4 hours, including drying times, while more complex designs with 3D effects may require extra hours over a couple of days. Adding dimension through layered decorations or painted shading brings a lively look that captures summer’s vibrant spirit.
Preparing Your Wood Base
Start with a smooth, clean piece of wood as your sign’s foundation. Sand the surface with medium-grit sandpaper (around 120 grit) to remove rough spots and splinters. This step ensures the paint adheres evenly and the finish looks polished. Wipe the wood with a damp cloth afterward to clear away dust. Depending on your wood type, you might apply a wood conditioner or stain first to prevent uneven absorption of paint and improve durability, especially for outdoor signs.
Cut your board to size if needed, common dimensions for summer signs range from 12 by 18 inches to 24 by 36 inches. Choose a size that fits your display area and design complexity. Preparing the edges with a light sanding or rounding softens the overall look and prevents chipping, improving longevity.
Painting and Adding Color
Painting the base color sets the mood for your summer sign. Use acrylic paint or outdoor paint for durability. Apply a primer if you want vibrant, lasting color. Let each paint layer dry completely, usually about 30 minutes to 1 hour depending on your paint and humidity.
Once the base coat dries, sketch your design lightly with a pencil. Paint your letters or images using small brushes for detail work, and consider foam brushes or sponges for blending backgrounds. Use bright colors that reflect summer themes like aqua blues, sunny yellows, or watermelon reds to add cheer and contrast. Paint the edges for a framed effect, or add a rustic wood stain around the border for depth and visual interest.
For a more complex look, try layering colors or using stencils for clean shapes and letters. These techniques can create shadows and highlights that give the sign dimensionality without additional materials.
Attaching 3D Decorations
Adding 3D elements is a great way to make your sign stand out with texture and tactile appeal. Start by selecting your accents: miniature flip flops, seashells, small wooden cutouts, or faux greenery are popular summer choices. These pieces add color and dimension that catch the eye and bring your theme to life.
Use a strong, weather-resistant adhesive suitable for your materials. Hot glue works well for indoor signs but may not hold in humid or rainy environments. For outdoor applications, consider waterproof craft glue or small nails or screws for heavier items.
Plan your layout before gluing to get balanced spacing. Layer items for depth; for example, a painted wooden watermelon slice affixed slightly raised over a flat painted background creates a shadow effect. Lightweight decorations reduce the risk of peeling or falling off over time.
Finishing and Sealing the Sign
Protecting your sign ensures it will last through summer months and beyond. After all paint and glue are dry, apply a clear sealant. Polyurethane spray or brush-on finish works for both indoor and outdoor signs. Choose a matte or glossy finish based on your style preference.
Apply at least two coats of sealant, allowing each coat to dry 1 to 2 hours. This layer guards against moisture, fading from sunlight, and scratches. For outdoor signs, look for sealants labeled UV-resistant to extend color vibrancy on your porch or patio.
Finally, add hanging hardware if needed, such as D-rings or a sturdy wire. Check that all elements are solidly attached and make any touch-ups before displaying your summer sign.
- Sand and clean your wood base to a smooth finish.
- Apply stain or primer if desired, and let dry thoroughly.
- Paint the base color, then add design outlines and fill colors layer by layer.
- Plan and secure your 3D decorations using appropriate adhesive or fasteners.
- Seal the entire sign with a weather-resistant finish, applying multiple coats.
- Attach hanging hardware securely after sealant dries.
Indoor vs Outdoor Summer Signs: Which Style Fits Where?
Choosing the right style for summer signs depends on where you want to display them and how long you expect them to last. Outdoor signs should prioritize durability due to exposure to sun, rain, wind, and temperature changes. Materials like weatherproof wood, metal, or sealed PVC work best outside. These signs often feature bright sun imagery, popsicles, or flip-flops, vibrant colors that stand out in gardens, patios, or porch spaces. Indoor signs can be made from less sturdy materials like canvas, untreated wood, or lightweight composites because they avoid damage from the elements. Styles such as vintage farm fresh oranges or fish-shaped signs suit relaxed indoor spaces like kitchens or sunrooms, improving a cozy summer vibe.
Mounting and placement vary between indoor and outdoor signs. Outdoors, secure mounting is essential to prevent damage or loss. Use rust-resistant screws or heavy-duty hooks, especially if wind is common in your area. For wall mounting, drill holes with anchors for stability on brick or siding. To display on lawns or garden beds, pointed stakes that push into the ground offer easy placement and relocation. Indoors, signs can hang on nails or adhesive hooks, or simply lean against a shelf or mantel. Lightweight signs allow easy swapping between locations as seasons change.
Always choose mounting hardware rated for outdoor use when placing signs outside to prevent rust and ensure long-term stability.
- Check if the material is waterproof or weather-resistant before outdoor use.
- Pick styles with bold colors and clear imagery for visibility outside.
- Use rust-proof nails or screws and anchors on exterior surfaces.
- For indoor signs, lightweight materials simplify repositioning and storage.
- Ensure mounting points match the wall or surface type (drywall, brick, wood).
- Consider using removable adhesive strips indoors to avoid wall damage.
- Store signs indoors during harsh weather to extend their life.
Reusing summer signs for other seasons depends on the message and design. Signs featuring generic summer themes like suns or “Easy Livin’” might fit a casual décor year-round. However, signs with specific summer icons like watermelon or popsicles may feel out of place during fall or winter. For versatile reuse, choose neutral styles or those that can integrate with layered seasonal décor. Proper storage in a dry, cool place avoids warping or fading so signs can be brought out again the next summer.
Popular Summer Sign Messages and Quotes to Try
Choosing the right message for your summer sign sets the tone of your space, reflecting your style and the mood you want to create. Popular sayings often fall into categories like inspirational, fun, beachy, and rustic, which helps narrow down your options based on the setting. An inspirational quote can offer a warm welcome indoors or near an entryway, while a playful or beachy phrase suits outdoor patios, pool areas, or beach houses. Rustic messages blend well with natural wood finishes and garden spaces, adding a cozy, laid-back feel.
Matching your summer sign’s message with other décor elements improve the overall effect. For example, pairing an inviting phrase like “Sunny Hello” with bright cushions or a vibrant patterned rug creates a cohesive and cheerful environment. A fish sign with colorful stripes goes well with nautical-themed throw pillows or seashell accents. Think about the colors you use and the general vibe, light, airy tones for beachy signs, warm earthy hues for rustic conversations. Keeping these elements in sync takes intentional planning but leads to inviting, well-styled spaces. Here’s a list of popular summer sign messages sorted by theme to inspire your next project:
- Inspirational: “Hello Sunshine,” “Summer Vibes Only,” “Good Times & Tan Lines”
- Fun: “S’more Fun Here,” “Tropic Like It’s Hot,” “Stay Cool”
- Beachy: “Beach Please,” “Saltwater Heals Everything,” “Sun, Sand & Sea”
- Rustic: “Porch Sittin’ Weather,” “Life is Better on the Porch,” “Sweet Tea & Sunshine”
When deciding exactly what to write, consider the length of your sign and font sizes. Short phrases let you use larger letters, which are easier to read from a distance, important if your sign hangs outdoors. Longer quotes call for neat, smaller fonts and might work better indoors or in shaded areas. Bright colors grab attention, but simple black, white, or earth tones often fit rustic or coastal themes better.
Cost is mainly influenced by the size of the sign and the materials you choose for lettering, such as paint, vinyl decals, or stencils. Budget-friendly options like hand-painted wood boards can cost between $10 and $30 for materials, depending on size, while professional vinyl decals or printed signs may start at $40 or more. DIY is often cheaper and lets you customize messages exactly how you want.
Creative 3D and Dimensional Effects to improve Your Signs
Adding dimension to your summer signs makes them stand out with an eye-catching, tactile appearance. Using 3D elements like Styrofoam shapes, layered paint, and wood cutouts creates depth and interest that can bring summer themes to life. These effects also allow for creative layering and personalization that flat signs can’t achieve.
Selecting 3D Materials
Choosing the right materials sets the foundation for effective 3D accents on your summer sign. Lightweight materials like Styrofoam and craft foam offer easy cutting and shaping while keeping the sign manageable. Wood cutouts provide a durable option with a natural texture that fits beach or nautical themes well. For adding subtle depth without extra bulk, use thick layers of acrylic or dimensional paint.
Consider the environment where the sign will hang. Outdoor signs benefit from weather-resistant materials like treated wood or sealed foam, while indoor signs allow more flexibility with delicate items. Also, think about your tools, wood cutouts may require a jigsaw or laser cutter, while foam shapes are easy to trim with a craft knife.
Attaching 3D Features Securely
Proper attachment ensures your sign’s 3D elements stay in place for a lasting finish. Use strong adhesives rated for your material types, such as wood glue for wood pieces or hot glue for foam shapes. For heavy or thick elements, small finishing nails or screws provide added security, especially on wood bases.
Plan your layout carefully before securing pieces. Dry-fit your shapes on the base wood panel to check spacing and balance. Mark positions lightly with pencil. When attaching multiple layers, apply glue thinly but evenly to avoid lumps and allow better adhesion. Clamps or weighted objects help keep elements firmly pressed during drying, usually 30 minutes to an hour depending on glue type.
Painting and Finishing 3D Elements
Painting your 3D accents improve their visibility and ties them into the overall summer theme. Start by priming the cutouts or foam shapes with a light acrylic primer to create a smooth surface that paint will stick to better. Use outdoor acrylic paint if the sign will face weather elements. For dimensional paint effects, layer thick coats to build texture.
After painting, seal the entire sign with a clear acrylic sealer spray to protect colors and prevent damage from sun and moisture. Apply two coats with 30 minutes drying time between layers. Avoid heavy strokes that could flatten raised details. This finishing step preserves the 3D look and helps your sign last through the summer months.
- Paint the wood base with a white or neutral background color and let it dry completely.
- Cut or shape your 3D elements from Styrofoam, wood, or craft foam according to your design.
- Prime the 3D pieces with acrylic primer and allow them to dry.
- Arrange 3D cutouts on the base, marking positions lightly with pencil.
- Apply appropriate adhesive to each piece and press them onto the base securely; use clamps or weights if needed.
- Paint 3D elements with your chosen colors, layering paint for depth and texture.
- Apply a clear acrylic sealer over the entire sign to protect and finish.
Maintaining and Protecting Outdoor Summer Signs
Wooden signs outdoors face challenges like heat, sun exposure, and humidity that can cause warping, fading, and peeling. Protecting your summer signs starts with choosing the right finishes. Use exterior-grade acrylic latex paints or outdoor wood stains designed to resist UV rays and moisture. These products create a barrier that keeps the color vibrant and shields the wood from swelling or cracking. Applying a clear, water-repellent sealer every one to two years will add another layer of defense against humidity and rain.
Before applying paint or stain, lightly sand your wooden sign with fine-grit sandpaper to smooth the surface and open wood pores. This helps the finish adhere better. After sanding, wipe off dust with a tack cloth or damp rag and let dry completely. Apply two thin coats of paint or stain, allowing 24 to 48 hours to dry between coats, depending on temperature and humidity. Hotter weather can speed drying but also cause paint to crack if applied too thickly.
Look for products labelled “UV resistant” or “fade resistant” to ensure your sign holds up well under summer sun. Polyurethane or spar varnish with UV blockers provide a durable finish on top of paint or stain, but they need reapplication every one to three years. Water-based options tend to dry faster and yellow less over time than oil-based finishes. Expect to spend roughly $15 to $30 on quality paint or stain and add $10 to $25 for a protective sealer per sign.
Signs made from softer woods like pine tend to absorb moisture more readily and may require more frequent sealing than hard woods like cedar or redwood, which have natural oils that resist decay. Warping can also occur if the back of the sign is left unfinished. Seal the back and edges to balance moisture absorption and prevent cupping or splitting.
Avoid most spray paints indoors or cheap craft paints for outdoor signs; they generally fade quickly and do not provide sufficient protection. Vinyl or plastic signs maintain color better but can become brittle or crack under intense heat. Wooden signs with proper maintenance typically last two to five years outdoors before needing major touch-ups or replacement.
Routinely check your sign every six months for signs of peeling or fading and reapply protective finishes as needed to keep it looking fresh.
Budget-Friendly Summer Sign Ideas and Alternatives
Creating summer signs on a budget is all about using recycled materials and finding supplies where costs are low. Wood is a popular and inexpensive base, especially if you repurpose old pallets, crates, or leftover lumber from other projects. Using weathered wood adds charm without extra effort, and you can often find scraps for free or just a few dollars at hardware stores and local building sites.
Paint is another cost factor, but acrylic craft paints work well and cost around $1 to $3 per small bottle. You can stretch paint by watering down slightly or using stencils to create clean designs with minimal paint. Brushes, sponges, or even foam rollers from dollar stores keep tool expenses down. Adding details with permanent markers or paint pens gives a polished look without a heavy price tag.
- Check thrift stores or yard sales for gently used wood frames or boards
- Ask local businesses if they have leftover pallets or wood scraps
- Use leftover paint from past projects, especially lighter colors that can be layered
- Buy stencils online or print your own templates on paper for tracing
- Employ household items like old toothbrushes or foam brushes for different paint effects
- Look for craft supply clearance sales or use coupons at hobby stores
Design shortcuts also help keep costs and time low. Instead of hand-painting every letter, applying vinyl letters or transfer decals from dollar stores or online marketplaces can create clean text instantly. You can curl the edges of the paper signs and frame them with twine for a rustic look. Using chalkboard paint on small wood pieces means you can change the message whenever you want, avoiding the need to make a new sign each season.
Parts of your signs can come from recycled paper, fabric scraps, or even old shutters for a vintage effect. Keep sizes modest, smaller signs use fewer materials and take less time, usually under $10 in supplies. Be careful with thinner woods or cardboard outdoors, since moisture can cause warping or fading, so seal with a waterproof spray or keep those signs indoors or in covered spaces.
Overall, budgeting for summer signs combines reusing what you have, shopping smart for supplies, and picking design methods that minimize waste. This makes your DIY project affordable and friendly to your creativity.
Fun Summer Sign Projects for Kids and Families
Creating summer signs with kids is a fun way to celebrate the season while encouraging creativity. Simple, colorful designs using safe materials let children express themselves without risks. Paying attention to safety during crafting and installation protects everyone involved and ensures a positive experience.
Choosing Simple Designs and Materials
Pick easy shapes like popsicles, flip flops, or watermelon slices to match bright summer themes. Using wood or lightweight shiplap boards works well because they are sturdy yet easy to handle. Bright acrylic paint or washable tempera paint brings these shapes to life with colorful, playful stripes or dots. Avoid small embellishments that can be choking hazards, and stick to materials that won’t splinter or break easily.
Keeping the size manageable, around 12 by 18 inches, is ideal for little hands. A brightly painted sign like this can become part of your summer decorations, capturing carefree memories while making crafting enjoyable for kids.
Safe Tools and Paints for Kids
Use kid-safe scissors and blunt-edge craft knives for any cutting needed, always under adult supervision. Instead of wood stain or solvents, choose water-based paints that are non-toxic and easy to clean up with soap and water. Protect work surfaces with newspaper or a plastic tablecloth to prevent damage. Wear old clothes or smocks to keep paint off skin and fabric.
Adults should handle any use of drill, hammer, or hot glue guns to avoid accidents. Sharp nails or screws can be replaced with double-sided tape or adhesive strips for hanging. Always supervise outdoor sign placement, avoiding spots near walkways or doors where the sign might be knocked over or cause injury.
Fun Decorating Techniques for Children
Encourage kids to use sponges or brushes to create colorful stripes and patterns on their signs. They can add handprints, dots, or simple stencils like stars or waves to personalize their project. Another idea is to glue on craft foam shapes or large buttons to add a simple 3D effect without sharp edges. Here are the step-by-step instructions for a popscicle summer sign that kids and adults can make together safely:
- Cut a lightweight wood board to about 12 by 18 inches, rounding the top corners to resemble a popsicle shape.
- Sand any rough edges carefully to avoid splinters, supervising children closely during this step.
- Apply a base coat of bright acrylic paint and let it dry for 30 minutes.
- Let kids paint stripes or polka dots using different colors to decorate the popsicle surface.
- Add a painted wooden craft stick at the bottom center glued on with non-toxic, fast-drying glue.
- Seal the sign with a water-based acrylic sealer to protect the colors if placing outdoors, allowing it to dry fully for at least one hour.
- Attach double-sided outdoor tape to the back for safe, easy mounting on fences or porch walls.
Using Summer Signs to improve Outdoor Events and Parties
Summer signs play a key role in setting the mood for outdoor events and parties by visually reinforcing a festive and inviting atmosphere. Their bright colors and cheerful themes, such as fruit designs or beach motifs, signal a fun, laid-back vibe that helps guests feel relaxed and ready to enjoy the event. Placing these signs strategically at entry points, near food stations, or alongside seating areas can guide guests comfortably through your space while improving the overall decor.
To combine summer signs with other party decorations effectively, choose complementary colors and themes that coordinate with your table settings, banners, and floral arrangements. This cohesion makes the space feel thoughtfully decorated and unified. For example, fruit-themed signs work well with fresh fruit centerpieces and citrus-colored napkins, while tropical signs pair nicely with palm leaves, tiki torches, or string lights.
- Welcome signs at the entrance to greet guests and set the tone immediately
- Directional signs pointing out key areas like the grill, bar, or restrooms
- Menu boards displaying food and drink options near the buffet or bar
- Photo booth signs to encourage guests to take festive pictures
- ‘Reserved’ signs for special seating or VIP areas
- Fun rules or quote signs, such as “Good Vibes Only” or “Summer State of Mind”
For placement, consider mounting signs on stakes for easy insertion into lawn areas, hanging them from trees or pergolas with durable twine, or leaning them on outdoor tables and shelves. Use waterproof or weather-resistant materials to avoid damage from sun or sudden summer showers, especially if the event lasts multiple hours or days.
Choose lightweight signs for hanging to prevent damage to branches or fixtures, and check stability periodically to keep signs visible and secure during the party.
Coordinating your summer signs with other decorations can transform a simple backyard into a lively party setting that invites socializing and enjoyment. Whether placed near grilling stations to draw attention or decorating lounge areas to create cozy hangouts, these signs support the theme and function of every event space. For cost, basic DIY signs can be made with affordable materials like wood panels, acrylic paint, and weatherproof sealant, often totaling under $15 each. Your guests will appreciate the thought put into these cheerful details that help the event flow smoothly and look professionally styled.
Step-by-Step Action Plan for Creating Your Summer Signs
Use this plan to start making your own summer signs quickly and successfully. Follow each step to see your ideas come to life.
- Day 1: Choose your sign theme and message based on your space and style preferences. Confirm your choice by creating a rough sketch or list.
- Day 2: Gather the right materials, such as wood, paint, and embellishments, suitable for where your sign will go. Check materials fit your budget and durability needs.
- Day 3: Set up your workspace and collect basic tools like brushes, stencils, and sandpaper. Organize everything so you can easily reach them.
- Day 4: Follow the step-by-step instructions to create your sign’s base coat and background. Your sign should have an even, dry surface ready for design.
- Day 5: Add lettering and decorative elements using stencils or freehand. Let each layer dry completely to avoid smudging.
- Day 6: Apply 3D or dimensional effects if desired, like layering or raised paint. Check that these elements are secure and dry.
- Day 7: Seal your sign with a clear, weatherproof coating especially if it will be outdoors. Ensure it is fully dry to protect the design.
- After 1 Week: Install your sign indoors or outdoors in the chosen location. The sign should look vibrant and stable in the setting.
Frequently Asked Questions
What Are Some Unique Themes for Summer Signs Beyond the Usual Beach and Farmhouse Styles?
Unique themes include grill-inspired signs for outdoor cooking spaces and summer activities crossroads signs that celebrate seasonal fun in your yard or patio. These add a fresh take on summer decor with practical or playful elements.
Can Summer Signs Be Used for More Than Decoration?
Yes, signs like the summer activities crossroads can guide guests to fun spots, and grill-themed signs can label cooking areas, adding both charm and function to your outdoor events or parties.
What Size Should Summer Signs Be for Indoor Versus Outdoor Use?
Indoor signs tend to be smaller to fit on shelves or mantels, while outdoor signs should be larger and more durable to stand out and withstand weather. Choose size based on display space and visibility needs.
How Can I Protect a Wooden Summer Sign from Outdoor Elements?
Use a sealant designed for outdoor wood or weatherproof paint to protect against moisture and UV rays. Reapplying sealant yearly helps maintain color and prevent damage.
Are There Ideas for Summer Signs That Also Serve as Family Projects?
Creating simple, colorful signs like popsicle or watermelon designs makes a fun, easy activity for kids and families while creating décor that brightens your home or garden.
Can Summer Signs Fit into Rustic or Farmhouse Interior Styles Effectively?
Yes, rough wood and painted wood signs fit rustic or farmhouse spaces well, adding a touch of imperfect charm and warmth that complements those design aesthetics naturally.
The Bottom Line
Creating your own summer signs can transform your space with personal style and seasonal cheer. Start with a small project that matches your skills and space. Gather your materials and tools, then enjoy the process of bringing your summer theme to life through your own artwork.