A Frame Sign Ideas: Creative Designs, Materials & Placement Tips That Work
A frame sign ideas that stand out combine clear messaging, durable materials, and strategic placement to catch customer attention quickly. Use bold, simple text and contrasting colors to make your sign readable from a distance. Start by choosing a size and design that fits your storefront and sidewalk space to ensure it’s visible yet unobtrusive.
Key Takeaways
- Choose A-frame signs with common dimensions like 24″ x 36″ or 32″ x 48″ for affordability and visibility.
- Use weather-resistant materials like aluminum or high-grade plastic for durability in outdoor settings.
- Incorporate changeable letter tiles for flexible messaging to keep your sign content fresh and relevant.
- Select double-sided signs to display two messages and attract customers from multiple directions.
- Place signs near entrances or high foot-traffic areas to maximize customer engagement without blocking walkways.
- Add handles to signs for easy mobility and repositioning throughout the day or week.
Creative A-Frame Sign Ideas to Grab Attention

Creative A-frame sign ideas use eye-catching graphics, concise messages, and a touch of humor to pull people in. Your sign should quickly convey what you offer and why a passerby should care. Use bold colors and large fonts to make your message readable from at least 10 feet away, considering the roughly 25″ wide by 45″ high display area typical for many signs.
Try promotional messages that focus on specific offers or benefits, like “Happy Hour Starts Now!” or “20% Off Today Only.” Short, action-oriented phrases work best because they keep your sign clutter-free and easy to scan. Adding a call to action such as “Step In” or “See What’s New” encourages immediate response.
Humorous or clever messages boost engagement by making people smile and stop longer. Jokes or puns related to your product or location generate goodwill and shareability. To keep humor relevant, tailor your message to your local culture or current events. For example, a coffee shop might display “Espresso Yourself, Double Shots Today!” This balances wit with clear promotion.
- Use contrast and bright colors to make your sign pop in daylight.
- Incorporate simple illustrations or icons related to your business for instant recognition.
- Rotate messages daily or weekly to keep repeat passersby interested.
- Use changeable letter tiles or inserts to update promotions without replacing the whole sign.
- Feature customer testimonials or quirky facts to add credibility and personality.
- Include directional arrows if your entrance isn’t visible from the sidewalk.
- Keep lines short, about 5-8 words per phrase, for quick reading.
To create humor that works, avoid complex jokes that require too much thought. A clever twist on words or a playful rhyme usually connects better. Watch how your local audience responds and adjust accordingly. Some signs use questions like “Looking for a Sign? This Is It” to intrigue and invite attention.
Well-designed A-frame signs act like quiet salespeople outside your door. Investing time and creativity in the message can increase foot traffic noticeably within days. Avoid clutter and overly detailed content since passersby glance briefly. Using a clean layout and bold, funny, or promotional wording within the 25″ x 45″ display area can transform your sidewalk into a steady flow of new customers.
Choosing the Right Materials and Sizes for Your A-Frame Sign

Choosing the right material and size for your A-frame sign depends largely on where you’ll use it and how durable it needs to be. For outdoor use, sturdy and weather-resistant materials like Signicade® plastic, aluminum, and powder-coated metal frames stand out. They resist chips and rust, and certain designs, like Signicade®, allow you to add ballast weight for extra stability in windy conditions. Indoor signs can prioritize lighter materials or illumination options like LED menu covers to boost visibility.
Common sizes typically range from about 19″ by 32″ to 26″ by 47″. Smaller boards (around 19″ x 32″) fit well in limited spaces or indoor pathways, while larger options (up to 25.75″ W x 47″ H) offer greater visibility for sidewalks or entryways. Most frames fold flat for easy transport and storage, which matters if you move signs inside during severe weather to extend their life.
| Material | Durability | Ideal Use | Standard Sizes (W x H x D) | Special Features |
|---|---|---|---|---|
| Signicade® Plastic | High; chip and rust-resistant | Outdoor, windy environments | 23.75″ x 39″ x 20.5″ | Ballast capable for stability |
| Aluminum Frame | High; rust-resistant | Indoor and outdoor (calm weather) | 25.75″ x 47″ x 24.5″ | Lightweight, durable |
| Powder-coated Metal Frame | High; rust-resistant | Indoor/outdoor, less windy use | Various | Foldable for storage |
| PVC Plastic | Moderate; weather resistant | Outdoor use | Varies | Durable sandwich board insert |
| Corrugated Plastic | Moderate; weather resistant | Short-term outdoor/indoor | 19″ x 32″ (double sided) | Folds flat, lightweight |
Matching the size to your location will help your sign be seen and remembered. Larger signs are better on busy sidewalks or outside restaurants, while smaller, more portable signs can work well inside stores or at events. Folding frames make it easy to bring signs indoors during storms or extreme temperature shifts, protecting your investment.
Bring outdoor signs indoors during extreme weather to extend their lifespan and avoid damage.
DIY A-Frame Sign Making: Materials, Tools, and Steps
Creating your own DIY A-frame sign is straightforward and rewarding, giving you control over the look and message you want to display. It involves picking the right materials, assembling the frame, and then adding your custom message. Quick updates to your sign can be achieved by using changeable panels or erasable surfaces so you can keep your promotions fresh without rebuilding the entire sign.
Selecting Materials for Your DIY Sign
Choose durable, weather-resistant materials like treated wood, plastic, or metal for the frame to ensure your sign withstands daily outdoor use. For the display panels, materials such as painted plywood, chalkboard, or dry-erase board work well and allow easy updates. If you want changeable messages, consider using snap-in panels or clear pockets that let you slide printed sheets in and out quickly.
Keep your location and typical weather conditions in mind. For example, a plastic or metal frame may be better in wetter climates because they resist rot and warping, while wood offers a classic look but needs sealing against moisture. Also, pick materials light enough for daily staff handling but stable enough to stay upright without extra support.
Essential Tools and Workspace Setup
Most DIY A-frame signs can be built with basic tools available at home or a hardware store. You’ll need a measuring tape, saw (hand or power), drill or screwdriver, sandpaper, clamps, and weatherproof paint or sealant. A sturdy workbench or flat surface is essential for cutting and assembling parts safely and accurately.
For installation, no professional tools are usually required unless you want to secure the sign to the ground with stakes or anchor bolts. Lightweight signs can simply be placed on sidewalks, while heavier constructions benefit from weighted sandbags in windy areas to prevent tipping. These bags typically cost around $10 to $20 and can be shared between signs.
Painting and Customizing Your Sign
Start by sanding all surfaces smooth and applying a primer to help paint adhere better and last longer outdoors. Use outdoor-grade acrylic or enamel paints for color and contrast, focusing on your business colors or branding. Apply at least two coats, letting each dry fully, which typically takes 1 to 2 hours depending on temperature and humidity.
For the message area, paint a chalkboard or dry-erase section to allow quick updates. Alternatively, install clear sleeves or clipboards for sliding in printed paper with new promotions. Use waterproof markers or chalk for temporary messages that can be wiped clean and rewritten daily by your staff.
Adding simple graphics and your logo helps grab attention. Stencils can create clean lettering, or you can print and apply adhesive vinyl letters for a polished look. Remember to keep the design clear and readable from a distance, which means using large fonts and high-contrast colors. Follow these steps to build your DIY A-frame sign:
- Measure and cut your frame materials to the desired size, typically 24 inches wide and 36 inches tall for easy visibility.
- Assemble the frame using screws and brackets or sturdy hinges so it can fold flat for storage and transport.
- Cut panels for the display area, ensuring they fit securely into the frame or attach with screws or clips.
- Sand all surfaces smooth, then apply primer and two coats of outdoor paint, allowing drying time between coats.
- Add your message area, paint with chalkboard paint or attach clear sleeves for inserting printed signs.
- Customize with your business logo, graphics, and contact information using stencils or vinyl lettering.
- Apply a weatherproof sealant over painted areas if extra protection is needed.
- Place sandbags or weights on the base if your location has wind to keep the sign stable throughout the day.
Effective Message and Design Tips for Clear Sidewalk Signs
Clear, readable design combined with concise and compelling messages makes A-frame signs effective in attracting attention from afar. Using bold colors, simple fonts, and short, targeted text ensures your sign communicates quickly and draws customers in. Avoid overcrowding the board and unclear wording to keep your message strong and visible.
Design Elements for Maximum Readability
Use high-contrast color combinations to make your text stand out. For example, black or dark blue letters on a white or light background improve legibility from a distance. Choose bold, sans-serif fonts that are easy to read; avoid script or decorative fonts that slow comprehension. Letter height should be at least 1 to 2 inches for viewing at around 10 feet, increasing size for greater distances.
Spacing is important. Maintain enough space between lines and letters so your message does not look crowded. Keep your sign’s layout simple, with a clear hierarchy: a large headline, smaller subheadline, and minimal additional text. Using accessories like magnetic letters can speed up message changes but keep the style consistent and readable.
Effective Message Types That Drive Action
Focus on short, clear promotional messages that tell customers exactly what they gain by stopping at your business. Highlight limited-time offers, daily specials, or new arrivals to create urgency. Questions, puns, or humor can work if they are simple and easy to understand at a glance.
Include a clear call to action, such as “Order Inside,” “Try Our Fresh Coffee,” or “Happy Hour Starts Now.” Avoid long sentences or too many details; instead, break information into bite-sized points. For cafes and restaurants, menu highlights or drink specials work well to attract passersby quickly.
Common Mistakes to Avoid in Design and Placement
Overloading your sign with too much text or small fonts results in lost attention because people do not stop to decipher your message. Avoid using more than three lines of text and keep the wording concise. Poor color contrast or busy backgrounds reduce readability, so steer clear of complex patterns or pale colors close to the text color.
Placing your sign in a cluttered or low-visibility area negates good design. Ensure the sign faces foot traffic and is not blocked by parked cars, poles, or plants. Do not place it where sunlight causes glare on the sign’s surface, making it harder to read during busy daytime hours.
How to Structure and Update Your Sign
Start with a headline that grabs attention in five words or less, using a large font size. Follow with a supporting line that adds context in a slightly smaller font. Finish with a call to action or price point. For example: on the top line, “Freshly Brewed Coffee,” below that “Bold and Smooth Flavor,” and on the last line, “Only $2.99 Today.”
Changing messages regularly keeps your content fresh and encourages repeat visits. Using magnetic letters or chalkboard markers lets you update menus or offers at low cost. Keep your style consistent to build brand recognition; however, adapt your wording seasonally or for special events to stay relevant.
Where and How to Place A-Frame Signs for Maximum Impact
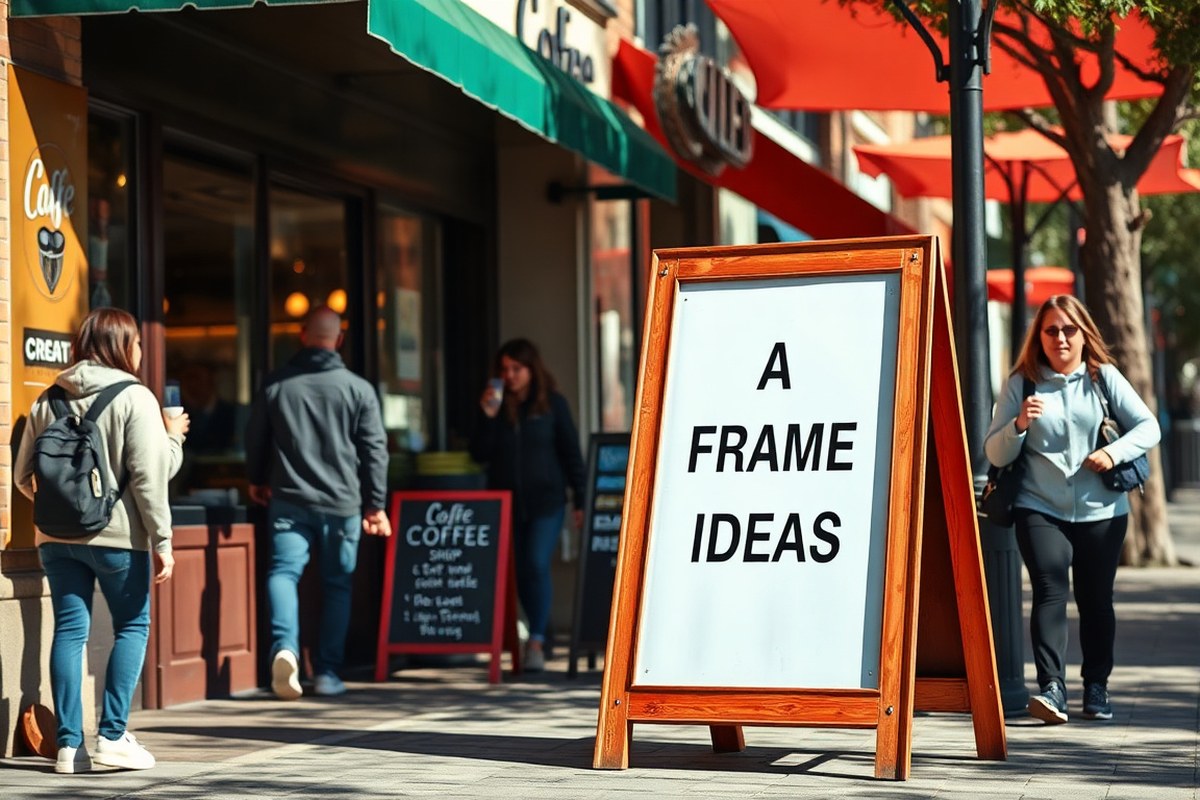
Position your A-frame sign where it catches the highest foot traffic to maximize its impact. Ideal spots include sidewalks just outside your storefront, near building entrances, and pedestrian crosswalks where people naturally pause or slow down. Placing the sign perpendicular to the flow of traffic helps more passersby see your message directly without needing to turn their heads.
Consider the viewing distance when placing your sign. Most people notice signage within a 3 to 10-foot range, so keep your A-frame close enough to engage pedestrians but not block walkways or accessibility paths. Avoid corners where other signs compete heavily or where your sign might be hidden by parked cars or other obstacles.
Seasonal shifts can influence where and how to deploy A-frame signs. During warmer months, outdoor patios and event entrances work well since more traffic gathers outside. Winter demands more protection from snow and ice; place signs under awnings or entrances where foot traffic stays higher. Bright or reflective materials improve visibility as daylight shrinks, while adding waterproof coatings protects your investment in rainy or snowy seasons.
- Place the sign at eye level for pedestrians, usually within 4 feet of ground
- Ensure signs don’t block doorways, ramps, or emergency exits
- Use directional arrows when guiding customers into or around your location
- Adjust positioning based on local pedestrian patterns and bottlenecks
- Consider lighting or bright colors for evening visibility
- Move the sign regularly to capture new angles and prevent reader fatigue
- Store signs indoors or cover them during harsh weather conditions
Walk your usual customer routes at different times to observe natural pauses and slowdowns, optimizing exposure times. Keep your A-frame sign clean and legible to maintain professionalism and clarity. Signs placed too close to vehicular traffic can risk damage or reduce attention, so maintain an appropriate buffer.
Place your A-frame sign at least 6 inches away from building walls and door handles to avoid damage and ensure accessibility for all visitors.
Stabilizing and Maintaining Your A-Frame Sign Outdoors
Wind can easily tip over A-frame signs, especially outdoors where gusts reach 20 mph or more. To keep your sign stable, add weight to the frame by placing sandbags or water-filled weights at the base. Some models include built-in pockets designed for this purpose. You can also use bungee cords to secure your sign against a nearby post or railing if local regulations allow it. Position the sign so the narrower edge faces prevailing winds, reducing resistance and the risk of falling.
Weather influences your choice of materials and how you maintain your sign. Signs made of wood can swell, warp, or rot when exposed to rain and humidity, while metal and plastic models tend to hold up better but may fade under intense sun. Applying a weatherproof sealant on wooden signs before use protects them from moisture. UV-resistant spray can also prolong graphic and paint brightness on all sign types.
Regular maintenance extends your A-frame sign’s life and keeps it looking professional. Check hinges and folding mechanisms monthly and lubricate them with silicone spray if stiffness develops. Clean the sign surface with mild soap and water every few weeks to remove dirt and grime, especially if you use chalk markers that can leave residue. After use, collapse the sign and store it indoors to avoid unnecessary exposure to the elements, which speeds wear and tear. When storing, ensure the sign is dry to prevent mildew and rust.
- Add sandbags or water weights at the base for wind stability
- Use bungee cords to tie the sign to a fixed structure if allowed
- Face the narrow edge of the sign into the wind
- Apply weatherproof sealants or UV protectants to the sign surface
- Lubricate hinges and folding parts regularly to prevent stiffness
- Clean the surface with mild soap and water every few weeks
- Store the collapsed sign indoors, dry and away from direct sunlight
Lightweight signs under 15 pounds are easiest to transport but need more secure anchoring in windy conditions. Heavyweight or water-resistant models cost more upfront but reduce stability concerns. In areas with frequent storms, consider removable signs that you can take inside during bad weather. Keeping these steps in mind ensures that your A-frame sign stays upright, visible, and appealing for your customers longer.
Customizable Signage Options: Changeable Letters and Illumination
Customizable A-frame signs come in several styles that make changing messages simple and effective. Felt letters and tile letters both offer flexible options, but they differ in ease of use and presentation. Felt letters stick to a felt or fabric panel with adhesive backing, so you can peel and reposition letters quickly for daily updates. Tile letters typically slot into tracks or grooves, requiring a little more effort to rearrange but providing a cleaner, more professional look. Felt letters usually cost between $10 and $30 for a pack of 100 letters, while tile letters and track systems run from $50 up to several hundred dollars depending on size and quality.
Illuminated panels add a visual boost that attracts attention during darker hours or in spots with low natural light. LED-lit A-frame signs often use interchangeable acrylic inserts that slide into a frame with built-in lighting. This combination lets you update your message daily or weekly while ensuring visibility from a distance. The upfront cost for illuminated A-frame signs typically ranges from $200 to $600, depending on size and complexity, with acrylic inserts costing about $20 to $40 each to print professionally. Consider your foot traffic patterns to decide if illumination’s extra expense will generate a good return.
Changing your message regularly keeps your signage fresh and relevant. Basic felt or tile letter signs are ideal for daily or weekly updates since rearranging letters or tiles takes only a few minutes. With illuminated signs, swapping inserts is usually done once or twice a week due to higher printing costs and slightly more involved handling. If your message changes less frequently, between two and four weeks per update works well. More frequent changes may increase costs unless you have an in-house printer ready to produce inserts on demand.
To customize with felt letters, select a panel with a felt backing designed for adhesive letters and choose contrasting colours for maximum readability. Store letters in a container to prevent loss since small pieces can be misplaced quickly. For tile letters, plan your layout before installing letters into tracks to reduce wear and avoid misalignment that can make messages harder to read.
When using illuminated panels, design inserts with bold fonts and simple graphics to maximize legibility through the acrylic diffuser. Avoid overloading with text; about 5 to 7 words work best. Protect inserts from moisture and direct sunlight to extend their lifespan. Clean the lighting elements and frame routinely to maintain brightness and avoid flickering. Replacing the lighting components every 3 to 5 years may be necessary depending on usage and LED quality.
Cost Comparison and Choosing the Best A-Frame Sign for Your Business
Choosing the right A-frame sign depends on your budget, the sign’s durability, and the type of business you run. Different materials cost varying amounts and last longer under certain conditions. Matching the material to your business needs prevents costly replacements and ensures your message stays clear and attractive.
Cost Breakdown by Material and Size
Costs for A-frame signs vary mainly by material and size. Metal signs usually cost more upfront but last longer, while plastic signs are more budget-friendly but may wear faster. Wood offers a middle ground with a natural look but needs more maintenance.
| Material | Average Cost (24″ x 36″) | Durability | Maintenance |
|---|---|---|---|
| Metal (Aluminum) | $150 – $300 | High (5+ years outdoors) | Low (occasional cleaning) |
| Plastic (Polypropylene) | $50 – $120 | Medium (1-3 years outdoors) | Low (clean with soap and water) |
| Wood (Plywood or Cedar) | $100 – $250 | Medium (3-5 years, depends on finish) | High (requires sealing and repainting) |
Sign size also affects costs. A standard 24 by 36-inch sign fits well on sidewalks and is easy to read from 10 to 20 feet away. Larger signs double the price but don’t always improve visibility for pedestrians. Consider where you’ll place the sign and the typical walking distance to pick the right size.
Business Types and Recommended Sign Materials
Restaurants benefit from durable, easy-to-clean signs because menus change daily and weather can be rough. Plastic A-frame signs offer low upfront costs and spot cleaning. Adding a chalkboard or dry-erase surface allows quick updates. Metal signs work well if you prefer a sleek look and less frequent message changes.
Retail businesses often choose metal or wood signs to capture brand personality. Wood signs add warmth and craftsmanship appeal, so they’re a good fit for boutiques or artisanal shops. Metal signs provide a modern or industrial vibe and stand up well to outdoor placement near busy streets.
Seasonal businesses or pop-ups might lean toward lightweight plastic signs since these can be replaced inexpensively every year. Avoid investing heavily in wood unless you’re prepared to repair it frequently. For high-traffic areas, metal signs offer stability and resist damage better.
Sustainability and Environmental Considerations
Wood signs come from renewable resources when sourced responsibly but need treatments that may include chemicals for weatherproofing. Plastic signs are made from non-biodegradable materials, which contributes to landfill waste if not recycled properly. Metal signs can last many years, reducing waste, and aluminum is recyclable.
Consider the climate and your location’s recycling facilities when choosing a sign. Metal signs produce less waste over time, but initial production has higher environmental costs. Wood offers a natural appearance but requires more upkeep, which may mean additional paint and sealants. Plastic signs should be recycled or reused, keeping their lifespan short to reduce impact.
Tip: Prioritize a sign material that balances durability with your business’s commitment to sustainability and check for local recycling options before purchase.
Your First Steps: A Quick-Start Plan for Using A-Frame Signs
Start turning heads and drawing customers with your A-frame signs by following these key steps. Each phase focuses on clear progress to help you measure success effectively.
- Day 1: Choose a durable A-frame sign suited for your location, balancing size and materials. Confirm it withstands local weather and fits your sidewalk space without blocking traffic.
- Day 2: Create a bold, concise message with eye-catching colors and fonts. Check that your message is readable from at least 10 feet away.
- Day 3: Position your sign where foot traffic concentrates, such as near entrances or busy crosswalks. Measure if pedestrian flow increases or if more customers enter your store.
- Week 1: Add customizable features like changeable letters or simple lighting if your business operates after dark. Observe whether your sign remains visible and attractive during various times.
- Week 2: Monitor your sign’s stability and weather resistance, applying reinforcements or maintenance as needed. Confirm it stays upright and intact during typical outdoor conditions.
- Week 3: Test different messages or designs based on customer feedback or sales patterns. Determine which versions generate more engagement or sales.
Frequently Asked Questions
What Are Some Low-Maintenance Materials for A-Frame Signs?
Metal and plastic materials require minimal upkeep and handle weather well. Choosing these reduces frequent repairs and keeps your sign looking sharp longer.
Can A-Frame Signs Be Used for Digital Displays?
Yes, digital inserts or LED panels can be added to A-frame signs. This option lets you change messages easily and attract attention with lights.
How Much Space Should I Leave Around My A-Frame Sign?
Leave at least 3 feet around your sign for foot traffic and accessibility. This ensures safety and maximum visibility without blocking walkways.
Can I Use My A-Frame Sign Indoors as Well as Outdoors?
A-frame signs work indoors for directions or promos but choose lighter materials for easy movement. Protect outdoor signs against wind and weather for durability.
Are There Eco-Friendly Options for A-Frame Sign Materials?
Wood from sustainable sources and recycled plastics are eco-friendly choices. These reduce environmental impact while providing sturdy, attractive signs.
What Safety Features Prevent A-Frame Signs from Tipping in the Wind?
Weighted bases or sandbags stabilize signs in windy areas to prevent tipping. Using sturdy frames and placing signs in sheltered spots also helps maintain safety.
Key Points to Remember
A well-chosen and properly maintained A-frame sign can significantly boost your business visibility and customer traffic. Start with one sign, place it thoughtfully, and update the message regularly to keep it fresh. Next, track how customers respond and adjust your approach to maximize impact.