How to Make a Bar Sign: Step-by-Step Guide with Materials and Tips
Knowing how to make a bar sign lets you add a personal and stylish touch to your home bar or entertainment area. Start by selecting quality wood and 3D letters for a durable, eye-catching base. Designing your sign with clear, bold typography ensures it stands out and fits your space perfectly.
Key Takeaways
- Choose wooden boards sized 12 to 18 inches for single statement signs above bar carts or keg setups.
- Use 3D paper mache letters for bold visuals combined with painted 2D text for contrast.
- Apply spray paint in several thin coats, two to three passes, for smooth, even coverage.
- Secure letters with strong adhesive like Gorilla Glue to ensure lasting attachment.
- Personalize with custom text or graphics on top of the base word for a unique look.
- Cluster smaller round signs (8, 10 inches) in groups of three or more for decorative impact on pub-style walls.
What Materials and Tools Are Needed for a Bar Sign
Making a bar sign starts with choosing the right materials and tools based on your experience level and the style you want. Wood is the most popular material because it offers a warm, rustic look and easy customization. Common woods include pine, birch plywood, or pallet wood, which varies in cost from about $10 to $30 for a 12×18 inch piece. These sizes work well for typical wall or bar cart signs. For beginners, a smooth, ready-to-paint surface like birch plywood simplifies painting and stenciling. More advanced makers might select reclaimed pallet wood for character but will need extra prep for sanding and cleaning.
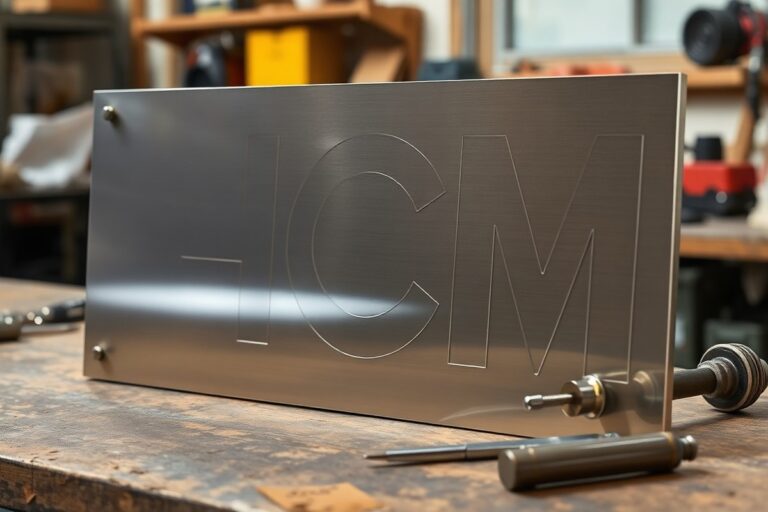
Besides wood, other materials include medium-density fiberboard (MDF), metal sheets, or acrylic panels. MDF is affordable (around $15-$25 per 12×12 inch board) and smooth but heavier and less durable outdoors. Metal offers a modern look and durability but requires metal-cutting tools and rustproof finishes. Acrylic is lightweight and weatherproof; however, it demands special paint or vinyl letters for good adhesion.
Essential tools focus on cutting, shaping, and finishing the sign. A jigsaw or circular saw is necessary for cutting wood or MDF to your desired size. Beginners can start with pre-cut blanks to reduce tool needs and just use sandpaper, paintbrushes, and stencils. More experienced crafters benefit from a power sander to smooth edges faster and wood burning tools or rotary engravers for detailed personalization.
- Wood or MDF board sized between 8×8 to 18×18 inches
- Cutting tool: jigsaw, circular saw, or pre-cut board
- Sandpaper (80 to 220 grit) or electric sander
- Paints (acrylic or outdoor paint) and brushes or sponges
- Lettering tools: stencils, vinyl decals, wood burning tool or engraving pen
- Sealant spray or varnish for protection
- Optional: screws, hooks, and drill for mounting
Beginners should prioritize safety gear like goggles and dust masks, especially when cutting or sanding. Starting with lighter, softer woods and basic hand tools keeps costs between $30 and $60, including paints and finishes. More elaborate projects with engraving tools and specialty materials can exceed $100 but yield a distinctive, durable sign.
The quality of results depends on material prep and tool choice. Rough wood can absorb too much paint and look blotchy, while smooth surfaces provide sharp, clean designs. Proper sanding removes splinters and rough edges, critical for a professional finish and safe handling. Layering paint in 2-3 passes helps the colors stay vibrant longer. Sealants protect your work against spills and weather when placed near a bar or pool area.
| Material | Cost | Skill Level | Durability | Appearance |
|---|---|---|---|---|
| Pine or Birch Wood | $10 – $30 | Beginner to Advanced | Moderate (best indoors) | Warm, rustic, natural grain |
| MDF | $15 – $25 | Beginner | Low outdoor | Smooth, easy to paint |
| Metal Sheet | $20 – $50 | Advanced | High outdoor | Modern, industrial |
| Acrylic Panel | $20 – $40 | Intermediate | High outdoor | Glossy, colorful |
How to Design Your Custom Bar Sign That Stands Out

Your custom bar sign should catch attention and fit the vibe of your space. Choosing the right size, clear fonts, complementary colors, and personal touches like names or slogans makes your sign unique and effective. Thoughtful design helps the sign stand out without overwhelming your home bar’s look.
Choosing the Right Size and Shape
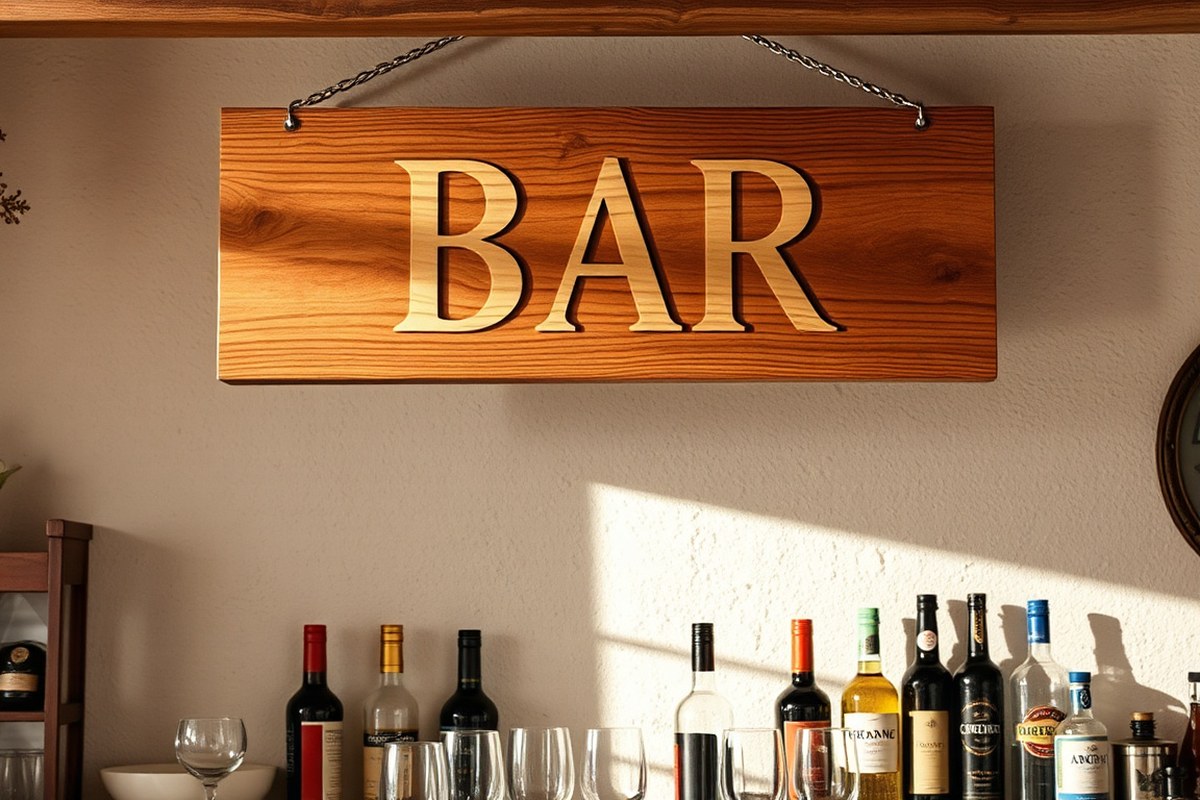
Size matters for visibility and fit. For most home bars, a sign about 12 to 18 inches wide works well. A shape like a circle or rectangle depends on where you’ll hang it; circular signs suit narrow wall spaces between shelves, while rectangular signs fill broader wall or cabinet doors. The classic 3D “BAR” background with custom text overlaid is a popular style that balances style and clarity.
Consider how much wall space you have and how close viewers will be. A smaller sign around 12 inches suits tight spaces like kitchen corners or shelves, while larger signs up to 18 inches attract attention in basements or garage bars. Align the sign’s scale with your bar’s size so it feels like a focal point but not cluttered.
Selecting Fonts and Colors for Visibility
Fonts should be bold and simple for easy reading, especially from a few feet away. Using a classic block font or clean sans serif makes names and slogans stand out. A common design features a bold 3D font for “BAR” as the base, with a flat 2D font for your personalized text layered on top.
Color contrast helps your sign pop. Dark wood grain or walnut backgrounds pair well with pale basswood lettering or white paint. Two-tone contrast, like light and dark wood, adds interest without clutter. Limit colors to two or three, choosing tones that match your home bar’s decor and lighting. Avoid overly bright or clashing colors that can reduce readability and elegance.
Adding Personal Text and Logos
Personalization gives your sign character. Use your family name, a home bar name, a catchy slogan, or drink-related phrases to reflect your style. Many design templates let you insert custom text easily, or you can create fully custom layouts using design tools or services that generate signs in seconds.
Using logos or icons like cocktail glasses, mugs, or your own insignia adds a custom touch. For example, a sign with a steaming cup cut out of walnut wood creates a unique negative-space design. Another idea is to include hooks or shelves beneath the sign for mugs or bar tools, blending function with personalization. Here’s a simple step-by-step for designing your custom sign:
- Measure the wall or space where you plan to hang the sign to determine your size limits.
- Choose the shape that best fits your space and style: circular for narrow walls, rectangular for wider areas.
- Select a bold, clear font for the word “BAR” or your main label; use a complementary, easy-to-read font for your personalized text.
- Pick two or three colors that provide strong contrast and match your bar’s decor.
- Decide on your personal text, name, slogan, or phrase, and check spelling and spacing for balance.
- Consider adding a simple logo or icon related to drinks or your bar’s theme to improve the design.
- Use a design template or software to arrange your elements visually before making the sign.
- Review your design in the actual space, adjusting size or colors as needed for best visibility and style.
Keep your text large and spaced well, small or cramped lettering can be hard to read from a distance, defeating the purpose of your bar sign.
Step-by-Step Process for Building a DIY Wooden Bar Sign
Making a wooden bar sign typically takes about 3 to 6 hours from start to finish, depending on the complexity of your design and your experience level. You can definitely create a bar sign without power tools by using hand saws and sanding blocks, though power tools save time and produce cleaner cuts. Finishing your sign involves painting, drying, and sealing with a clear coat to protect the wood and keep your artwork crisp and durable.
Cutting and Shaping Your Wood
Start with selecting the right wood, such as MDF or basswood, which are affordable and easy to work with. Measuring your dimensions carefully ensures the sign fits the intended space, like above a bar shelf or door frame. You’ll first cut the wood to size, then sand the edges and surfaces smooth for a professional look and to prevent splinters.
Using hand tools works well for simple shapes. For detailed silhouettes like a beer mug or lettering, a jigsaw or coping saw speeds up the process. Beginners should take their time cutting slowly to avoid mistakes and splintering. Light sanding after cutting removes any rough spots. Wipe the surface with a damp cloth to clear dust before painting.
Painting and Adding Color Layers
Painting your bar sign is where you bring your design to life. Use acrylic or latex paint for vibrant colors that dry quickly and withstand bar room conditions. Apply a base coat with a foam brush or roller for smooth coverage. Depending on the style, add stenciled text or hand-painted details after the base coat dries.
Layering colors can create depth and interest. Allow each layer to dry about 1 hour before adding another to avoid smudging. For sharper edges on text or shapes, use painter’s tape to mask off areas. Remember that darker colors may require two coats. Plan at least 2 to 3 hours for painting and drying to get good results.
Sealing and Finishing the Surface
Sealing your wooden bar sign protects the paint and wood from moisture, scratches, and fading. A clear polyurethane or acrylic sealant works best. Apply a thin coat with a clean brush and let it dry for 4 to 6 hours in a dust-free area. Sand lightly with fine-grit sandpaper between coats for a smooth finish.
Two to three coats of sealant usually provide durable protection. The finish will give your sign a slight sheen or gloss but can be matte if preferred. Let the final coat cure for at least 24 hours before hanging. This step preserves your work, so don’t skip it even for signs used indoors.
- Measure and mark the size of your sign on the wood panel.
- Cut the wood along the marked lines using a jigsaw, handsaw, or coping saw.
- Sand all edges and surfaces smooth with medium- then fine-grit sandpaper.
- Clean dust from the wood with a damp cloth and let dry.
- Apply a base coat of paint and let it dry completely (about 1 hour).
- Add decorative painting, stenciling, or layering colors as desired.
- Seal the entire painted surface with clear polyurethane; let dry and sand lightly between coats.
- Allow the final sealant coat to cure fully before mounting or using your sign.
Painting and Personalizing Techniques for a Unique Look
For painting your bar sign, simple brush techniques or spray paint give strong coverage and clean lines, while stenciling or hand-lettering add personalized flair. Using weather-resistant paints and sealants helps keep your sign looking fresh. You can choose eco-friendly paints and materials to reduce environmental impact without sacrificing durability.
Effective Painting Styles for Bar Signs
Flat brush painting works well for solid backgrounds and clean shapes. Use a high-quality synthetic brush with firm bristles to apply acrylic or latex paint evenly. Spray paint offers quick coverage and smooth finishes, ideal for larger signs or gradients. Choose paints designed for outdoor use if your sign goes outside to resist fading and moisture. Chalk paint can create a rustic or vintage look, but it requires sealing to last. For sharper edges and lettering outlines, use small detail brushes or paint pens designed for wood or vinyl.
Test paint types on scrap wood or your sign material to check drying times and finish quality. Expect acrylic paints to dry in 30 minutes to an hour, while oil-based paints take longer but offer tougher surfaces. The choice depends on how soon you need to finish and the textures you want.
Personalizing with Stencils and Hand-Lettering
Stenciling offers consistent letter shapes and repeated designs. Choose or create a stencil from plastic or cardstock, securing it on the sign with low-tack tape. Apply paint with a sponge or stencil brush in a dabbing motion to avoid bleeding under edges. Allow paint to dry 10 to 20 minutes before removing the stencil slowly to maintain sharp lines.
Hand-lettering delivers unique, creative style. Use paint pens or fine brushes with steady, deliberate strokes. Practice your chosen font style on paper before working directly on the sign. Use a pencil guideline to keep letters straight and evenly spaced. Personal touches like names, slogans, or dates stand out best with contrasting colors and moderate thickness.
Eco-Friendly Painting and Material Options
Look for low-VOC (volatile organic compound) or zero-VOC paints to reduce harmful emissions during and after painting. Brands often label their products as environmentally friendly. Water-based acrylic paints generally have fewer chemicals than oil-based, making them safer indoors. Some brands offer natural pigment options for earth-tone colors.
For the sign base, sustainably sourced wood or recycled pallets minimize environmental impact. Vinyl scrim, available in durable 13 oz or 18 oz weights, can be a long-lasting option for indoor and outdoor signs and is recyclable through some programs. Using eco-friendly sealants like water-based polyurethane ensures protection without harsh solvents.
Applying Durable Finishes
Finish your bar sign with a clear, protective coat to guard against scratches, fading, and moisture. Polyurethane or polycrylic sealants are common choices. Apply two to three thin coats, letting each coat dry 2 to 4 hours before the next. Brush-on finishes allow control but can leave brush marks; spray sealants dry smoothly but require spraying outdoors or in a well-ventilated area.
For outdoor signs, use exterior-grade sealants labeled UV-resistant to prevent color fading from sunlight. Maintain your sign by cleaning gently with a damp cloth and avoiding abrasive cleaners. Repair scratches with touch-up paint and reapply sealant as needed to keep your design crisp.
How to Add Functional and Decorative Extras to Your Bar Sign
Adding functional and decorative extras can make your bar sign both eye-catching and practical. One popular option is 3D letters, which stand out from the background and give your sign depth. To create these, cut letters from wood or thick foam board about ½ inch to 1 inch thick, then attach them securely with wood glue or screws. Paint or stain the letters before attaching for a polished look. This method costs under $20 for materials if you already have paint and glue on hand.
Adding a bottle opener to your sign blends usefulness with style. Metal or wooden wall-mounted bottle openers cost around $10 to $20 and easily screw into the wood of your sign. Position the opener at a comfortable height with enough clearance for the bottle cap to fall clear of the sign. For extra durability, pre-drill pilot holes to avoid splitting the wood. This addition saves you counter space and keeps everything within reach.
Hooks are another easy way to increase functionality. You can add small hooks underneath your sign to hang bar towels, bottle caps, or even bar tools like corkscrews. Screw-in hooks sized about 1 to 2 inches are affordable and simple to install. Space them evenly for a neat look and consider finishing the hooks with clear lacquer to prevent rust if the sign will be near moisture.
- 3D letters: Cut from wood or foam (½, 1 inch thick), attach with glue or screws
- Bottle opener: Metal or wooden, mounted with screws in pre-drilled holes
- Hooks: Small screw-in hooks for towels or tools, spaced evenly
- LED lighting: Battery-operated LED strips or puck lights mounted behind or along edges
- Chalkboard paint section: Create a spot for changing messages or drink specials
- Decorative elements: Small shelves for mini liquor bottles or shot glasses
- Weatherproof coatings: Use if the sign is outdoors to protect extras from damage
Installing LED lighting can add dramatic effects to your bar sign, especially in low-light settings. Battery-operated LED strip lights available for around $15 to $30 are flexible and easy to mount with adhesive backing. Place them behind the edges of the sign or under 3D letters for subtle backlighting. Ensure the batteries are easily accessible for replacement. For a brighter or color-changing option, choose LED puck lights or smart bulbs that can be controlled remotely.
Pre-drill holes before attaching metal accessories like bottle openers or hooks to prevent cracks and ensure a secure fit.
Whatever extras you choose to add, balance between decoration and function helps keep your sign attractive and useful. Consider where you’ll place the sign and how these features will hold up in that environment. Functional add-ons like openers and hooks improve your bar’s organization, while lighting and 3D letters boost visual appeal and help set the mood.
Mounting and Placing Your Bar Sign for Best Effect
Mounting a bar sign securely depends on the material of both the sign and the surface where it will hang. For wooden signs, use heavy-duty picture hangers with nails or screws that penetrate at least 1 inch into the wall or mounting surface. Mounting on drywall without studs requires anchor fasteners such as toggle bolts or wall anchors rated for the sign’s weight to avoid it falling. Signs made from lighter materials, such as thin metal or acrylic, can typically be secured with self-adhesive hooks rated for outdoor use or easily removable mounting strips, but these are less reliable outdoors or in humid environments.
Choosing the right fasteners also depends on the mounting surface. For brick or concrete walls, masonry screws or anchors with a hammer drill are needed. Wood surfaces allow screws directly, but pre-drilling pilot holes the size of the screws’ shank is important to prevent splitting. Use stainless steel or galvanized fasteners outdoors to resist rust and corrosion, which extends your sign’s lifespan. Generally, expect to spend about $5 to $15 on hardware for a standard 12-by-18-inch wooden sign, a small investment for safety and durability.
Placement affects both visibility and longevity. Position the sign at eye level or slightly above, approximately 60 to 72 inches from the ground, to maximize readability from a standing or seated position, such as near your bar stools or entrance. Aim for areas sheltered from direct sunlight or heavy rain to avoid fading and water damage. For outdoor placement, mounting under an overhang or awning is recommended. This shielding helps prevent warping and prolongs paint or finish integrity. Avoid placing signs where sprinklers or frequent water exposure occur, as moisture can penetrate untreated wood and cause swelling or rot.
Outdoor durability starts with preparation. Before mounting, apply a clear exterior sealant or varnish to wooden signs, covering all edges and surfaces. Repeat sealing every one to two years depending on weather exposure and local climate. Use UV-resistant paint or finishing products to reduce sun damage. Signs not treated properly can warp as humidity causes the wood fibers to expand and contract unevenly. This warping often shows as curling edges or bowing panels and can loosen fasteners over time.
To prevent damage, avoid mounting signs directly against hot metal gates or surfaces that expand and contract significantly with temperature changes. Leaving minimal clearance, around 1/4 inch, between the sign and the wall can allow airflow, reducing moisture buildup. Screwing through both the sign and an additional backing board screwed to the wall increases strength and helps keep the sign flat. Check mounts every 6 to 12 months, tightening screws or replacing worn anchors as needed to maintain stability.
For indoor bar areas or covered patios, fasteners can be lighter and sealing less critical, but moisture from spills or steam can still affect untreated wood. A mounting checklist to follow: confirm surface type, select appropriate fasteners rated for the sign’s weight, drill pilot holes where needed, seal the sign if outdoors, leave small clearance for airflow, and check fasteners periodically. Following these steps ensures your bar sign stays in place, resists weather damage, and remains an attractive part of your space for years to come.
Common Mistakes When Making Bar Signs and How to Fix Them
Making a bar sign at home can be rewarding, but several common mistakes can cause frustration or damage to your project. Warping wood, unclear lettering, and safety hazards during crafting are frequent issues to watch for. Addressing these problems early means you’ll create a sign that lasts and looks great.
Warping happens when wood loses or gains moisture unevenly. To avoid this, pick well-seasoned wood that has been dried properly, ideally with less than 8% moisture content. You can check this using a moisture meter, often costing $20 to $50, available at hardware stores. After cutting your pieces, seal all sides with a polyurethane finish or wood sealer. This helps lock in moisture and keeps the wood stable. Allow the finish to dry fully, usually 24 hours, before painting or mounting.
Lettering that’s hard to read can ruin your sign’s impact. Choose high-contrast colors, like black on light wood or white on dark wood. Use stencils or vinyl lettering to keep lines clean unless you have steady freehand skills. Testing your layout on paper at full scale helps spot spacing issues in advance.
- Not sanding the wood thoroughly before painting, causing rough surfaces and poor paint adhesion.
- Using non-waterproof or unsuitable paints, leading to fading and peeling when exposed to humidity.
- Skipping protective finishes, increasing the risk of scratches and moisture damage.
- Poor ventilation while painting, allowing harmful fumes to build up indoors.
- Ignoring safety gear, like gloves and masks, when handling sprays, stains, or power tools.
Proper sanding is essential. Start with 120-grit sandpaper and finish with 220-grit for smooth surfaces. Select exterior-grade acrylic or enamel paints for durability. After painting, coat your sign with at least two layers of spar urethane or exterior varnish for weather resistance.
Safety matters throughout your project. Wear protective goggles when cutting or sanding wood to keep dust and particles out of your eyes. Use a dust mask or respirator, especially when spraying paints or stains. Ensure good airflow by crafting near an open window or outside. Keep your workspace clean and free of clutter to avoid trips or accidents. Lastly, unplug power tools when not in use and read all product labels to follow the recommended handling instructions.
Following these steps will help your DIY bar sign stay attractive and sturdy for years. Proper preparation, protection, and safety not only improve the final look but prevent costly mistakes that waste time and materials.
How to Choose Between DIY and Buying a Custom Bar Sign
Choosing between making your own bar sign and buying a custom one depends on your budget, timeline, and design preferences. A DIY sign costs between $20 and $60 on average, mostly for materials like wood, paint, and stencils. Pre-made custom signs typically start around $75 and can go much higher depending on size and complexity. Making your own gives you full control over the design and personalization, which can match your home bar’s vibe exactly. Buying custom saves you time and ensures professional durability, especially if you need the sign quickly or want weather-resistant materials.
Time is a key factor. Crafting a sign yourself usually takes at least a few hours, plus drying or curing time for paint and finishes. You want a bar sign for an upcoming party and don’t have days to spend, so buying a pre-made or custom foamboard sign can get you a stylish option within a few days. Foamboard signs cost less than wood and are ready to use immediately, though they may not last as long in humid bar areas.
Durability varies too. Hardwood signs you make are strong and can be sealed for years of use, ideal if you want a permanent fixture. Commercial signs often use sealed materials and offer warranties, which can protect against wear from spills or direct sunlight. However, if you prefer frequent seasonal changes or themed signs, DIY options let you swap styles without much cost.
| Consideration | DIY Bar Sign | Custom Pre-Made Sign |
|---|---|---|
| Cost | $20 to $60 for wood, paint, and supplies | Starts at ~$75, varies by size and material |
| Time | Several hours to days (allow for drying) | Arrives ready to hang, usually within days |
| Customization | Complete design control, unique style | Custom options but less hands-on |
| Durability | Long-lasting with proper sealing | Often weather-resistant and warrantied |
| Best for | Hobbyists wanting a personal touch | Those needing fast, durable signs |
To decide, first set your budget and how soon you need the sign. Choose DIY if your priority is a custom design and you can spend a few hours crafting. Choose buying when you want convenience, higher durability, and a professional finish you can rely on. When time is short but you want some personalization, ordering a custom foamboard sign online offers a good balance between speed and style.
Allow paint and sealants to fully dry for at least 24 hours before hanging a DIY wooden bar sign to avoid smudges and ensure durability.
Step-by-Step Action Plan for Your Bar Sign
Follow these steps to create your custom bar sign from start to finish, ensuring a polished and personalized result.
- Before you start: Choose your wood and gather tools. Confirm all materials match your design needs to avoid last-minute changes.
- Day 1: Sketch the exact layout of your sign on paper and transfer it to the wood. Use a pencil so corrections are easy, ensuring your design fits perfectly.
- Day 2: Cut and sand the wood edges smooth. Run your hand along edges to check for splinters or roughness.
- Day 3: Apply your base paint coat evenly. Let it dry completely, test by touch to ensure there’s no tackiness.
- Day 4: Add lettering and decorative painting by hand or stencil. Check that all letters are clear and evenly spaced.
- Day 5: Seal your sign with a clear coat for durability. Wait at least 24 hours; the surface should feel hard and dry.
- Day 6: Attach hooks or mounting hardware securely. Tug gently to confirm they hold firmly.
- Day 7: Hang your bar sign in the chosen spot. Step back and assess visibility and style impact.
Frequently Asked Questions
What Size Should I Make a Bar Sign for a Home Bar?
A bar sign measuring between 12 and 18 inches wide suits placement above a bar cart or keg, while smaller 8 to 10-inch signs show best when displayed in sets of three or more to create a classic pub-style effect.
Can I Use Materials Other Than Wood for a Bar Sign?
Yes, metal, acrylic, and reclaimed materials are popular for durability and style. Choose based on your bar’s theme and where you’ll hang the sign.
How Can I Weatherproof a Bar Sign for Outdoor Use?
Seal your sign with a waterproof clear coat or exterior-grade paint. This protects against moisture and sun damage if your sign is near a patio or pool.
What Are Easy Ways to Add Lighting to a DIY Bar Sign?
Install LED strip lights or battery-powered fairy lights behind or around the sign. Lighting highlights your design and creates ambiance without complex wiring.
Can I Repurpose Household Items to Make a Bar Sign?
Definitely. Old wooden crates, picture frames, or pallet wood can be painted and personalized to create unique bar signs at low cost.
How Long Does It Usually Take to Complete a DIY Bar Sign?
It typically takes a few hours spread over two to three days, including drying time for paint and sealant. Planning time depends on the complexity of your design.
The Bottom Line
Creating your own bar sign lets you add a personal touch that matches your space and style better than anything store-bought. Start by selecting materials that feel right for you and your decor. Take your time transferring and painting your design to get the best results. Grab a piece of wood and sketch your idea today to begin making a bar sign that’s truly yours.