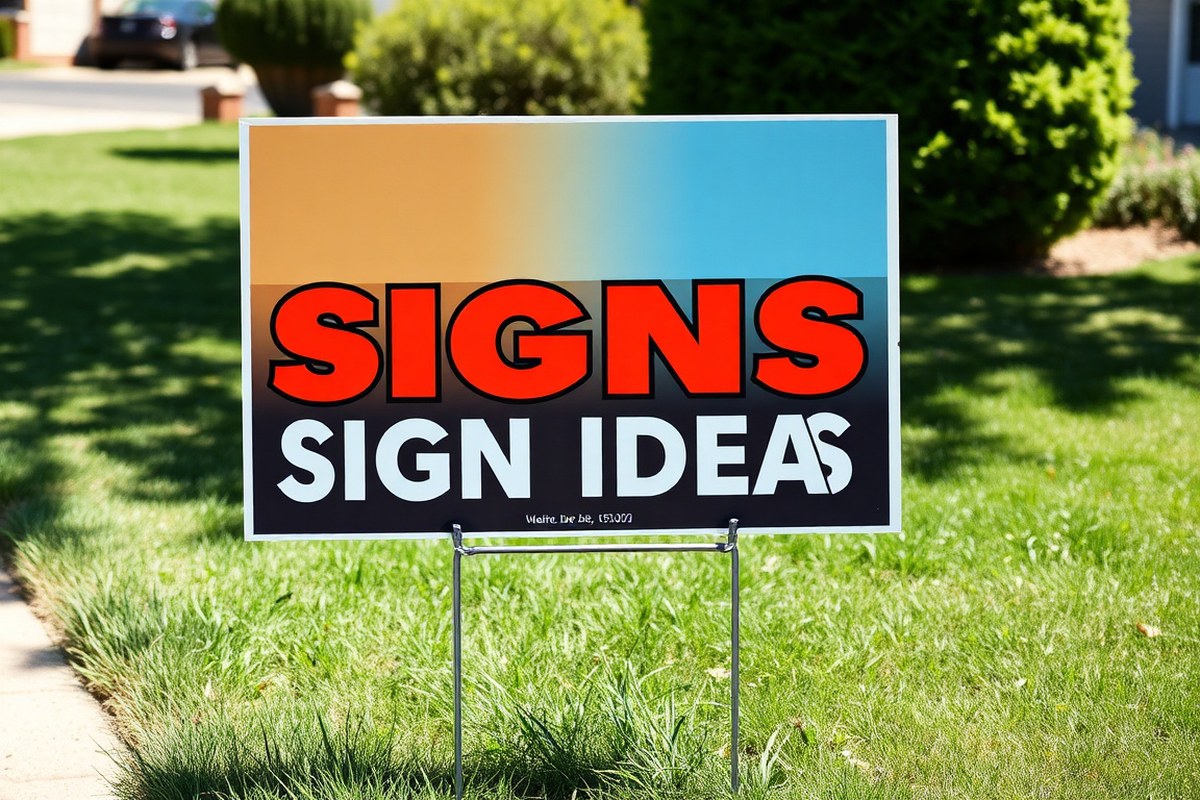
Coroplast Sign Ideas: Creative Uses, Design Tips & DIY Projects That Work
Coroplast sign ideas often focus on versatility and visual impact for events, marketing, or temporary displays. Using coroplast’s lightweight and durable nature, you can create 3D displays or colorful yard signs that grab attention. Start by choosing a bold, simple message and the right size to maximize readability from a distance.
Key Takeaways
- Choose 24″x18″ or 24″x36″ sizes for maximum visibility in outdoor or event spaces.
- Use 4mm coroplast for short-term signs, like political campaigns or yard signs, to save cost.
- Select 10mm thickness when you need extra sturdiness for long-term or high-traffic areas.
- Create 3D displays by arranging multiple coroplast signs into shapes like boxes for product promotion.
- Add vibrant, sharp graphics printed on coroplast using advanced printers for increased impact.
- Repurpose leftover coroplast into spinner wheels or standees for trade shows to maximize material use.
What Are Coroplast Signs and Why Use Them?
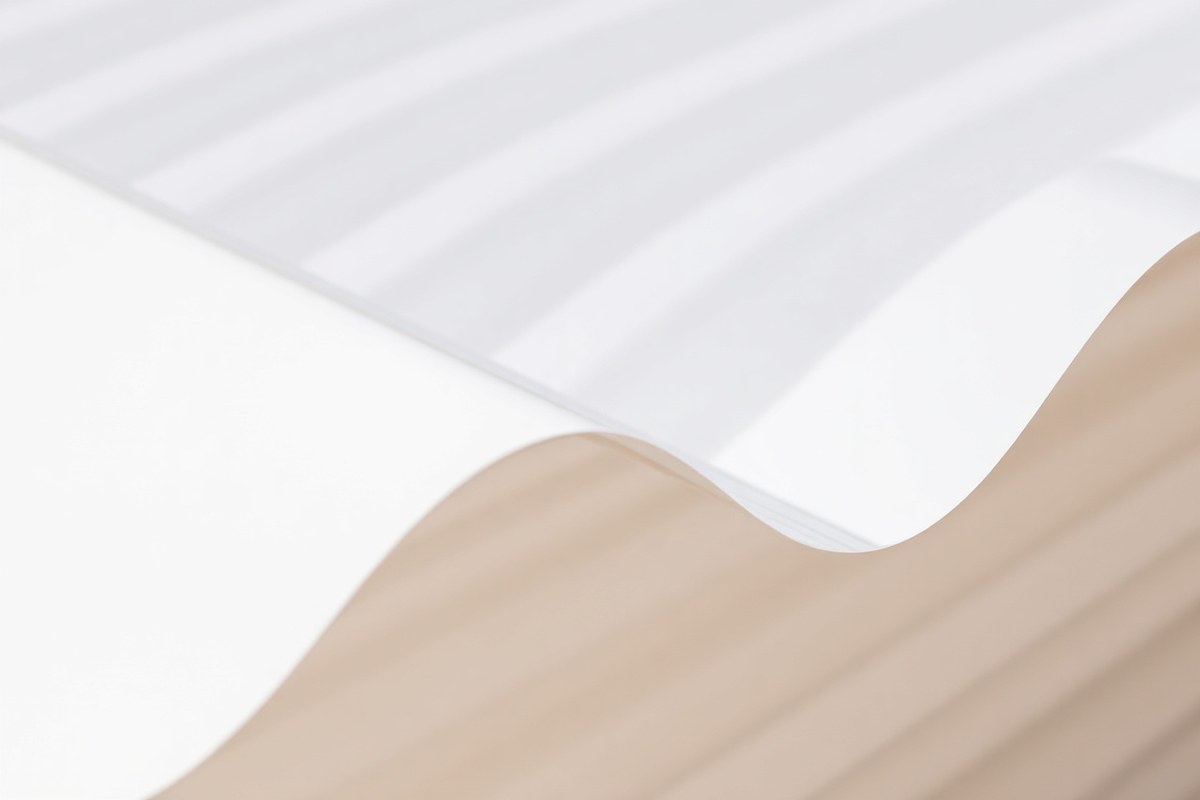
Coroplast is a type of corrugated plastic material used to make lightweight and durable signs. It consists of a fluted plastic core sandwiched between two flat plastic layers, giving it strength and rigidity without adding much weight. This structure makes coroplast signs weather-resistant and able to withstand outdoor conditions for short to medium periods. They usually come in thicknesses like 4mm for temporary use or 10mm for more rigid, longer-lasting signs.
People often choose coroplast signs because they offer a cost-effective way to produce bright, vibrant graphics for outdoor events, real estate listings, political campaigns, or construction sites. While materials like aluminum work better for permanent signs, coroplast suits temporary or seasonal needs. It is less expensive than rigid acrylic or metal while being stronger and more durable than paper or cardboard. Coroplast signs can be printed on one or both sides, allowing you to double your message’s visibility without increasing cost significantly.
Typical uses include yard signs, directional markers at events, temporary advertising displays, and construction site signage. Indoor applications are common too, especially where lightweight temporary signs are needed, like trade show booths or retail promotions. Their ability to handle moisture and outdoor exposure without warping or tearing makes them ideal for environments that might otherwise damage paper or fabric signs.
To use coroplast signs effectively, decide on the thickness based on how long your sign needs to last and where you will place it. For example, use 4mm coroplast for political signs active a few weeks or months, while 10mm works better for signage in high-traffic outdoor areas or longer campaigns. Print your message with bold colors and large fonts to ensure visibility from a distance. Mount your signs on stakes, frames, or tie them to fences using zip ties or ropes through pre-punched holes. These methods help keep signs secure and visible.
Costs vary, but coroplast signs generally start at a few dollars per square foot depending on size, quantity, and printing quality. While they hold up well for short-term outdoor use, extended exposure to harsh weather like strong sun, heavy rain, or wind can cause fading or damage over time. Coroplast is recyclable and often used alongside other materials to create multi-functional signage solutions, such as combining with foam core for indoor use or aluminum for permanent outdoor posts.
Design Tips for Eye-Catching Coroplast Signs

Designing impactful coroplast signs depends on clear visuals, readable fonts, and concise messages. Using high-contrast colors, legible typefaces, and straightforward wording ensures your sign attracts attention and communicates effectively, even at a distance.
Choosing Colors and Contrast
High-contrast colors make your coroplast signs easier to read from far away. Dark text on a light background or bright colors against neutral tones work best. For example, black lettering on white or yellow backgrounds often grabs the eye and provides excellent visibility.
Avoid using similar shades or busy patterns that reduce clarity. Consistent use of brand colors can help reinforce recognition, but prioritize legibility over matching every exact shade. Using spray paint on coroplast can also produce vibrant options if you want a custom look.
Colors impact emotions and attention, so consider the setting where your sign will appear. For outdoor signs near busy streets, bold and simple palettes cut through distractions effectively.
Selecting Fonts and Text Size
Choose fonts that are easy to read, such as sans-serif styles like Arial, Helvetica, or Open Sans. These fonts work well for short-term signage since they maintain clarity even at smaller sizes. Avoid script or overly decorative fonts that can confuse readers quickly passing by.
Text size should be proportional to the viewing distance. A good rule of thumb is that each inch of letter height provides about 10 feet of readability. For example, 3-inch letters are visible roughly 30 feet away. For yard signs, keep primary messages in 3 to 6-inch letters.
Limit your font types to one or two per sign to maintain a clean and professional appearance. Use bold fonts for headlines or calls to action to direct viewers’ attention.
Crafting Clear Messages
Short-term coroplast signs work best with concise messages. Use brief, direct phrases that convey your main point quickly. For example, “Sale Today,” “Open House,” or “Join Us Here” are easy to understand at a glance.
Include a clear call to action and essential details only. Overloading your sign with information reduces effectiveness and can confuse viewers. Prioritize the most critical content that motivates immediate response. Here is a checklist to keep your message clear and effective:
- Use 5 words or fewer for the main text
- Include bold headlines and simple subtext
- Keep contact details minimal or include a QR code
- Place logos or graphics subtly to not distract
- Avoid all caps for entire text; use it only for emphasis
- Choose short URLs or phone numbers if needed
Short, clear messages improve response rates and reduce confusion. Tailor your wording to your audience and the sign’s context for the best results.
Test your design at actual size by viewing it from your target distance to ensure readability and impact.
DIY Projects: Creative Ways to Repurpose Coroplast Signs
Repurposing old coroplast signs offers a practical and creative way to extend their life while saving money. With a few common tools and some household items, you can transform these lightweight, weather-resistant sheets into useful objects. The projects below are suited for beginners and provide clear instructions, so you can start crafting with confidence.
Making a DIY Drawer Organizer
Turn your unused coroplast signs into custom drawer organizers to keep small items tidy. Their rigidity and lightweight nature make them ideal for this purpose. You only need scissors or a utility knife, a ruler or measuring tape, and adhesive like hot glue or double-sided tape.
- Measure the dimensions of your drawer to determine the size of the organizer sections.
- Cut coroplast sheets into strips or squares, keeping edges straight for a clean fit.
- Arrange the pieces into compartments according to your desired layout.
- Use hot glue or strong double-sided tape to attach the pieces together, forming the partitions.
- Place the organizer into the drawer and adjust as needed to ensure a snug fit.
Using coroplast for drawer organization works well because it withstands occasional moisture and is easy to clean. You can customize sizes to fit anything from office supplies to crafts. Avoid cutting too quickly or unevenly to keep the sections uniform and neat.
Building a Bicycle Seat Bag
Create a lightweight and weather-resistant seat bag for your bike by repurposing coroplast signs. This project combines durability with low cost, using household items like velcro strips, fabric glue or strong adhesive, and scissors. The flexible yet firm coroplast protects your gear from rain and road grime.
- Trim the coroplast into two rectangular panels matching the approximate size of your bike seat base.
- Cut fabric or nylon strips to create side panels, allowing the bag to hold some volume.
- Attach the side panels to the coroplast using fabric glue or a strong all-purpose adhesive.
- Fix velcro strips to the top and underside panels for easy closure and to secure the bag under your seat.
- Let all adhesives dry fully before testing the fit on your bike seat.
- Optional: Decorate the bag with paint or tape to increase visibility during nighttime rides.
Coroplast’s resistance to outdoor elements makes it an excellent material for bike storage accessories. This bag keeps items dry without heavy weight. Adhesives should be chosen for strength and curing time, aiming to finish setup in a few hours.
Creating Yard Art and 3D Displays
Old coroplast signs can become colorful yard art or three-dimensional displays for events or promotions. Their light weight means easy installation, and with household supplies like paint, scissors, and glue, you can customize shapes and images. Contact paper adds decorative flair and weather protection.
- Sketch out your design ideas on paper, then use a marker to draw shapes directly on the coroplast.
- Cut the shapes carefully with scissors or a utility knife for sharper edges.
- Paint or glue images, using contact paper to protect painted surfaces from weather damage.
- Attach stakes or poles to the back for yard installation, using zip ties or strong tape.
- Set up the pieces outside, arranging them for maximum visibility and stability.
- Refresh the display by repainting or repositioning as needed for seasonal promotions or events.
Yard art made from coroplast benefits from the material’s durability and light weight, allowing for easy transport and storage. Using multiple signs can build layered, 3D effects to catch attention. Avoid cutting too close to compromised edges, which could reduce stability.
Choosing the Right Size and Thickness for Your Sign
Choosing the right size and thickness for your coroplast sign affects durability, visibility, and cost directly. For outdoor use, 4mm thickness is the best choice because it withstands wind, rain, and sunlight better than thinner options. Thinner coroplast (around 2mm) works well for indoor signs or short-term outdoor events but may buckle or warp quickly when exposed to harsh weather. Thicker coroplast also adds weight and stiffness, which helps your sign stay stable when displayed outdoors.
Size selection depends largely on the sign’s purpose. Yard signs, like real estate or political campaign signs, tend to be smaller, typically 18 inches by 24 inches, making them easy to place and read from a few feet. Event banners and larger promotional displays usually range from 24 inches by 36 inches up to 48 inches by 96 inches or larger to attract attention from greater distances. Larger signs increase visibility but cost more to produce and may require sturdier installation methods.
Sign size influences printing cost because printers charge more for larger prints and use more ink and material. High-quality print technology, such as HP Latex R2000 printers, offers sharp images even at large sizes, but larger dimensions will still raise your budget. For yard signs, moderate size balances readability and affordability, while banners demand bigger formats for maximum impact but come with higher costs. Use the following decision table to help select the right coroplast sign size and thickness based on your needs:
| Sign Type | Typical Size | Recommended Thickness | Durability | Visibility Distance | Estimated Cost Factor* |
|---|---|---|---|---|---|
| Yard Sign (Real Estate, Political) | 18″ x 24″ | 4mm | Good for outdoor use up to 6 months | Up to 20 feet | Low |
| Event Sign (Temporary Outdoor) | 24″ x 36″ | 4mm | Good for short-term outdoor events | Up to 30 feet | Moderate |
| Construction Site Board | 48″ x 96″ | 4mm | Durable and weather-resistant | Up to 50 feet | High |
| Indoor Display Sign | 12″ x 18″ to 24″ x 36″ | 2mm | Not weather resistant | Up to 10 feet | Low |
*Cost factor is relative based on material, print size, and thickness, with higher costs for longer-lasting and larger signs. Thicker coroplast improves sign durability outdoors by resisting warping and damage from wind or moisture. Thin coroplast costs less but may bend or degrade quickly under outdoor conditions. For visibility, a sign should be no smaller than what your intended audience can easily read from their typical viewing distance. Consider size along with your budget, making sure the sign material can handle exposure if your display lasts several weeks or more.
Large signs need more ink and printing time, which increases cost, but quality printers like the HP Latex R2000 can maintain sharp images even at big sizes. Always match sign size to expected use: opt for smaller, thicker signs for short-term yard campaigns or longer-term outdoor use, and scale up size with proportionally thicker coroplast for wide-area visibility needs like construction or event advertising.
Installation and Display Tips for Maximum Impact
Securely mounting coroplast signs outdoors requires selecting the right method based on your sign’s size, location, and exposure to weather. Common mounting options include zip ties for fences, stakes for ground placement, and screws or grommets for wall or post attachments. Grommets added to coroplast signs allow you to use bungee cords or rope for easy hanging, especially when you want to reuse or move the sign frequently. Stakes work well for lawn signs, but choose sturdy metal or heavy-duty plastic stakes to prevent wind from toppling the sign.
Where you place your coroplast sign heavily impacts how well it grabs attention. Position signs at eye level, typically between 4 and 6 feet from the ground, ensuring they are not blocked by bushes, parked cars, or other objects. Place signs near high-traffic areas such as walkways, entrances, or by roads where vehicles and pedestrians slow down. Bright colors and clear fonts boost visibility, but so does proper lighting, so consider positioning signs where natural or artificial light highlights them. Experimenting with a few locations can help you identify the best spot with the highest visibility.
Weatherproofing and vandalism protection extend the life and effectiveness of your coroplast signs. Apply a UV-resistant laminate to the print side to reduce fading from sun exposure. Use waterproof spray or sealant on unprinted edges to prevent water infiltration that can warp the corrugated plastic. For added protection, place signs in less vulnerable spots such as under eaves or behind protective barriers. If vandalism is a concern, consider thinner signs attached with tamper-proof screws or relocate signs out of easy reach. Here is a simple installation checklist to help you mount coroplast signs effectively:
- Choose durable mounting hardware based on surface, zip ties for fences or stakes for soil
- Install grommets in corners before mounting for versatile hanging options
- Position signs between 4 and 6 feet high and clear of obstructions
- Select high-traffic, well-lit areas for maximum exposure
- Apply UV laminate or waterproof sealant to protect sign surfaces
- Secure signs firmly to prevent wind damage
- Inspect signs periodically for weather and vandalism damage
Protect the edges of coroplast signs from water by sealing them with clear waterproof tape or paint to prevent bending or deterioration.
Expect outdoor coroplast signs to last several months up to a year with proper installation and care. Without protective coatings, sun and rain can cause them to fade and become brittle. Monitoring and repositioning signs based on environmental wear will help keep your message visible and impactful. Cost-wise, basic stakes can be found for under $5, while UV lamination or sealant applications may add $1 to $3 per sign, a worthwhile investment to preserve your investment’s appearance and function.
Coroplast Versus Other Sign Materials: A Comparison Guide
Coroplast signs stand out as a budget-friendly option among signage materials, especially when you need multiple signs at once. Made from corrugated plastic with a fluted core between two plastic layers, coroplast is lightweight and reasonably durable for short-term use. It holds up well enough outdoors for weeks or a few months but is less resistant to long-term weathering and heavy impacts compared to metals or thicker plastics like acrylic.
Choosing coroplast over aluminum or acrylic comes down to your sign’s purpose and lifespan. Aluminum signs are weather-resistant and sturdy, lasting years without fading or warping, making them ideal for permanent outdoor displays. Acrylic signs offer a glossy, professional appearance and strong resistance to UV damage but are more fragile and costly. Coroplast is better when cost is a concern, and you only need signs for events, real estate, or temporary promotions lasting a few weeks to a couple of months.
Comparing coroplast to vinyl and mesh clarifies which fits best for specific environments. Vinyl signs can be applied to various surfaces and last longer outdoors due to their resistance to moisture and UV light. They’re also flexible and suitable for banners or vehicle wraps. Mesh signs allow wind to pass through, reducing damage in breezy areas, but the material and printing processes typically cost more than coroplast. Coroplast is easier to handle and cut for DIY projects but doesn’t perform as well under strong winds or extended exposure to rain.
| Material | Cost (per sq. Ft.) | Durability (Outdoor lifespan) | Weight | Best Uses |
|---|---|---|---|---|
| Coroplast | $0.50 – $2.00 | 1-3 months | Lightweight | Temporary signs, events, real estate, political campaigns |
| Aluminum | $5.00 – $10.00 | 5+ years | Medium weight | Permanent outdoor signs, business signage |
| Acrylic | $10.00 – $15.00 | 3-5 years | Heavier than coroplast | Indoor displays, professional-grade signage |
| Vinyl | $3.00 – $8.00 | 6 months – 3 years | Flexible, lightweight | Banners, vehicle wraps, decals |
| Mesh | $6.00 – $12.00 | 6 months – 2 years | Lightweight, wind resistant | Banners in windy locations |
Here’s a quick look at the pros and cons to decide when coroplast fits your needs:
- Pros: Very low cost, easy to cut and print on, lightweight for simple installation, good for short-term use.
- Cons: Less durable in harsh weather, may warp or fade if left outside too long, not suitable for wind-prone areas.
Use coroplast signs when you need economical, lightweight options for short-term projects like yard sales, temporary directions, or promotional advertising. Avoid coroplast for signs needing to withstand storms, direct sunlight for months, or where a polished, glossy look matters, aluminum or acrylic would be better options there.
Common Mistakes When Using Coroplast Signs and How to Fix Them
Coroplast signs often fade or warp because they’re exposed to sunlight, heat, and moisture over time. UV rays break down the plastic material and printed ink, causing colors to dull and edges to curl, especially if the signs are made from thinner, less durable corrugated plastic. Warping is more common when signs are taped or mounted loosely, allowing wind or rain to stress the material.
Weak installations and poorly designed signs can reduce visibility and durability. For example, using weak plastic ties or tape for mounting means signs may flap in the wind or fall down. Designs with overly small fonts or low contrast between text and background can make signs hard to read, wasting your investment and missing your audience.
- Using low-quality coroplast or inappropriate thickness for the location
- Mounting with weak fasteners like thin tape or small zip ties
- Exposing signs directly to harsh sun without UV protection
- Designs with low contrast or tiny fonts that reduce readability
- Not securing signs tightly, allowing movement and warping
- Improper storage causing creases or bends before installation
- Ignoring weather conditions that may reduce sign lifespan
To counter fading and warping, choose coroplast with a thickness of at least 4mm for outdoor use; it holds up better in wind and rain. Add a UV laminate or spray-on coating before installation, these can cost between $0.50 and $2 per square foot but extend color vibrancy noticeably. Secure signs with durable zip ties or specialized sign clips rather than tape to prevent movement. For better design, use high-contrast colors and fonts bigger than 1 inch tall to keep text readable from a distance.
Before installation, keep coroplast signs flat and stored indoors away from heat or bulky stacking that could bend the board. If reusing signs, inspect for cracks or dents to avoid weak points that worsen over time. When mounting in windy areas, add grommets to the corners so zip ties don’t tear through the plastic. Tighten all fasteners enough to keep signs still but avoid over-tightening which could crack the material.
Following these steps helps your coroplast signs stay bright, clear, and secure, cutting replacement costs and maximizing your message’s visibility. Simple prevention efforts like stronger mounts and UV protection add up to more professional and long-lasting signage for your event, business, or marketing needs.
Extending Coroplast Sign Life with Maintenance and Care
Coroplast signs last longer when you clean them carefully, store them properly, and add protective features like lighting or coatings. These steps help keep your signs looking good and functioning well for both indoor and outdoor use.
Proper Cleaning Techniques
Use gentle methods to clean coroplast signs without damaging the material or print. Start with a soft cloth or sponge and mild soap mixed with water. Avoid harsh chemicals, abrasive scrubbers, or high-pressure washers that can scratch or fade the surface.
For outdoor signs, clean off dirt, bird droppings, and pollen as soon as you notice them to prevent staining. Wipe in gentle circular motions, then rinse with clean water and let the sign air dry. For tougher grime, a solution of 70% isopropyl alcohol diluted with water can help but test on a small area first.
Never use bleach or solvents like acetone on coroplast signs, as they can dissolve the plastic and ruin your graphics.
Best Storage Practices
Store coroplast signs flat or upright in a dry, cool area away from direct sunlight to prevent warping and color fading. Keep them away from heavy objects that could crease or dent the material. When stacking signs, use thin sheets of foam or cardboard between them to avoid scratches.
For longer indoor storage, wrap signs loosely in breathable materials like paper or light fabric to protect them from dust and moisture. Avoid plastic wrap that traps condensation. In addition, store signs where they won’t be exposed to temperature extremes, ideally between 50°F and 80°F.
- Keep signs out of direct sunlight when not in use
- Store in a dry, temperature-controlled environment
- Place padding between stacked signs to prevent damage
- Wrap in breathable materials to minimize dust accumulation
- Keep away from sharp objects and heavy loads
Proper storage can extend the life of your coroplast signs by months or even years, preserving your investment for future campaigns or events.
Improving Signs with Lighting
Lighting improves the visibility and appeal of coroplast signs, especially outdoors at night. LED strip lights or portable floodlights offer energy-efficient illumination without the heat that could warp the plastic. For permanent installations, solar-powered lights provide a low-maintenance option that avoids wiring.
Adding a clear protective coating before installing lighting can shield the sign from UV rays and moisture. Options include a spray-on UV protectant or a clear acrylic sealer. These coatings cost between $10 and $25 per can and require applying two thin, even coats with drying time of about 1 hour each.
Test any protective coating on a small corner of your sign before full application to check for adverse effects on print quality.
Using lighting along with regular maintenance makes your coroplast signs more durable and keeps them effective over longer periods, supporting your marketing goals.
Step-by-Step Action Plan for Your Coroplast Sign Project
Follow these steps to create, install, and maintain an effective coroplast sign that fits your needs and lasts.
- Before You Start: Choose the sign size and thickness based on your location and message visibility; make sure it fits your display area and budget. You’ll know you’re ready when you have the exact measurements and desired durability level.
- Day 1: Design your sign with bold fonts, high-contrast colors, and minimal text to ensure readability from a distance. Confirm the design looks clear by doing a mockup on your computer or printing a small test section.
- Day 2: Print your design on coroplast or order a professional print. Check that the colors and text are sharp and legible before finalizing your order or printing yourself.
- Day 3: Prepare your installation site by cleaning surfaces and planning mounting points. You’ll know it’s ready when the surface is dry, smooth, and accessible for securing your sign.
- Day 4: Install the sign using appropriate fasteners, zip ties, or stakes depending on the location. Test the visibility and stability by viewing it from different angles and walking distances.
- Week 1: Monitor your sign daily for any damage like bending, fading, or loose attachments. Immediate action on issues shows your proactive care.
- Every Month: Clean your coroplast sign with mild soap and water to remove dirt and debris without damaging the material. A clean, vibrant sign signals successful maintenance.
- Every Six Months: Inspect for wear and consider repositioning or replacing the sign for the best visual impact and durability in changing environments.
Frequently Asked Questions
What Are Some Unique Uses for Coroplast Signs Beyond Advertising?
Coroplast signs work well as 3D product displays or spinner wheels at events, adding interactive elements that draw attention and engagement. Their durability makes them ideal for temporary, creative installations like trade show standees.
How Can You Make a Coroplast Sign Stand Out in Crowded Spaces?
Use bold, clear messages and bright contrasting colors to make your sign readable from a distance. Strategic placement where foot traffic gathers further boosts visibility and impact.
Can Coroplast Signs Be Customized for Different Events?
Yes, coroplast is versatile for event signage, allowing easy customization with graphics that suit conferences, campaigns, or fundraisers. You can repurpose them quickly by updating designs or combining multiple signs into creative shapes.
What Tools Do You Need for DIY Coroplast Sign Projects?
Basic tools include scissors, a hole punch, and zip ties. These help you cut, shape, and assemble signs into new forms like boxes or stands for creative displays.
Is Coroplast Environmentally Friendly or Recyclable?
Coroplast is recyclable in many areas since it’s made from polypropylene plastic, but recycling availability varies by location. Check local recycling rules to dispose of or reuse coroplast responsibly.
How Does Thickness Affect Coroplast Sign Durability and Use?
Thicker coroplast offers better durability and wind resistance, ideal for outdoor use or longer campaigns. Thinner sheets are lighter and easier to handle but better suited for short-term or indoor signs.
The Bottom Line
Making the most out of your coroplast signs involves thoughtful design, proper installation, and ongoing care. Start by choosing the right size for your space and focus on clear, bold visuals that draw attention. Maintain your signs regularly to extend their life and effectiveness. Begin today by sketching your design with the key message you want to share, then take the next steps to bring your sign to life.


