How to Install a Photocell on a Sign: Complete Steps and Tips for Reliable Lighting
Installing a photocell on a sign requires integrating it with the sign’s current lighting system by aligning matching wire colors and using a compatible twist-lock receptacle. Begin by taking off the shorting cap, then firmly twist the photocell sensor into place, making sure the wiring is correct to guarantee dependable automatic operation. This arrangement allows your sign lighting to switch on at dusk and off at dawn automatically.
Key Takeaways
- Choose a photocell sensor compatible with your sign’s voltage and fixture type, such as a 120-277 V twist-lock model.
- Use a twist-lock photocell shorting cap to safely disconnect power before installing the new photocell.
- Match the black, white, and red wires from the photocell to your sign’s wiring for proper operation.
- Mount the photocell where it receives unobstructed natural light to avoid false triggers.
- Ensure all wiring inside the fixture is rated for at least 90°C to handle heat safely.
- Consider using a 7-pin twist-lock photocell if you plan future upgrades for dimming or data control.
How to Install a Photocell on a Sign in 5 Simple Steps
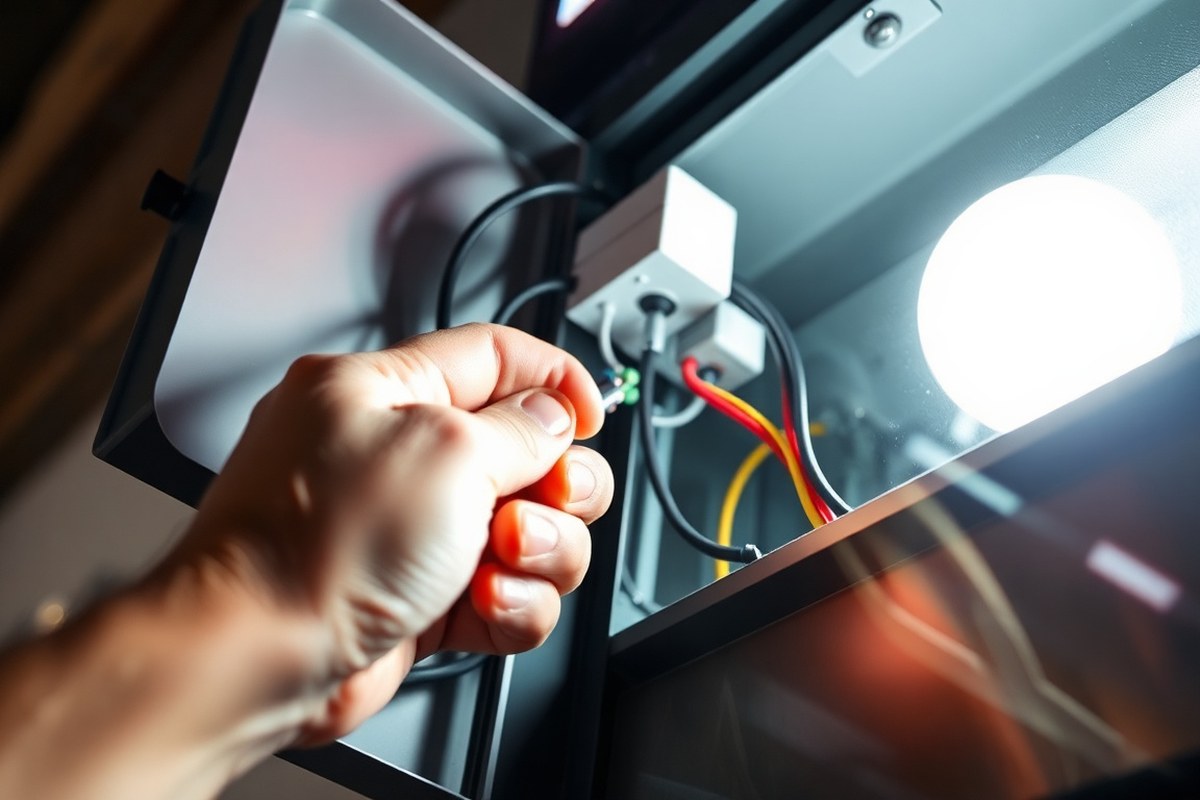
Installing a photocell on a sign ensures your outdoor lighting operates automatically by turning on at dusk and off at dawn, saving energy and extending bulb life. The process requires careful wiring and safety precautions to avoid electrical hazards and ensure reliable sensor operation. Follow these exact steps to install your photocell safely, connect the wires correctly, and test the setup to confirm proper function.
- Turn off power to the sign’s lighting circuit. Locate your outdoor lighting breaker and switch it off to cut power. Use a voltage tester to confirm there’s no live current at the sign’s wiring before handling wires. This step is critical for your safety.
- Access and disconnect the existing wiring. Open the sign’s lighting junction box or fixture housing to reach the wires you will connect the photocell to. Carefully disconnect or loosen the existing wires to prepare for new connections, keeping track of their colors and positions.
- Identify and prepare photocell wires. Most wire-in photocell sensors have three wires: black (line input), red (load output), and white (neutral). Remove about ½ inch of insulation from each wire if needed, and twist the copper strands for a clean connection. Use wire nuts rated for outdoor use.
- Connect the photocell wires to the sign wiring. Match colors securely: connect the black wire from the photocell to the live supply wire (usually black or red), the red wire to the wire feeding the sign’s light fixture, and the white wire to the neutral wire (usually white). Twist wires together and cap them firmly with waterproof, weather-rated wire nuts. Double-check for a tight, secure fit without exposed copper.
- Mount the photocell securely in its chosen location. Place the sensor where it will receive ample natural light and stay free from obstructions, such as shaded parts or direct stray light from the fixture itself. Attach it using screws or brackets that come with the device, ensuring it is weatherproofed as required.
- Seal all wire connections with waterproof materials. Wrap each wire nut and exposed wiring with electrical tape or a waterproof sealant to prevent moisture intrusion. This protects against corrosion and short circuits, especially in outdoor settings exposed to rain and humidity.
- Restore power and test photocell operation. Turn the breaker back on and observe the sign’s lighting behavior. Cover the photocell sensor briefly to simulate darkness; the light should turn on. When uncovered, it should switch off in daylight. If it does not respond correctly, inspect wiring for loose connections or contact a professional electrician.
Choosing the Right Photocell Sensor for Your Sign

Choosing the right photocell sensor depends on the sign’s power requirements, voltage compatibility, and intended use. Different types of photocells suit various applications, from small residential signs to larger commercial installations. Matching the sensor’s voltage rating with your sign’s circuit voltage is important to avoid damage and ensure proper function.
Wire-In vs Twist-Lock Photocells
Wire-in photocells connect directly to the wiring inside the fixture, offering a compact and straightforward solution. They usually handle standard voltages between 120 and 277 volts and are common in smaller or custom installations. Twist-lock photocells plug into compatible receptacles, making them easy to install and replace without wiring changes. These are preferred for commercial and municipal outdoor signs, where maintenance speed is important.
Twist-lock models often support higher voltages, including up to 480 V, accommodating industrial-grade lighting systems. For most small businesses and residential signs, a twist-lock sensor rated for 120, 277 V is sufficient and provides reliable dusk-to-dawn control. Wire-in types may be better if you want a less visible, built-in sensor with fewer mechanical connections.
Voltage Ratings and Load Capacities
Always confirm the photocell’s voltage rating matches your sign lighting circuit. Common control voltages include 120 V, 208 V, 240 V, 277 V, and 480 V. The typical wattage rating for tungsten (incandescent) loads is 1000 watts or more, while LED lighting or ballast loads are rated in volt-amperes (VA), usually between 500 and 1000 VA. Selecting a sensor that supports your LED or ballast load is key because those loads behave differently from incandescent lamps. Here’s a comparison of photocell types with their voltage ratings and key features:
| Model | Type | Voltage Range | Features |
|---|---|---|---|
| LT124 | Twist-lock | 120, 277 V | Economical, reliable dusk-to-dawn control |
| LT134 | Twist-lock | 120, 277 V | 8A LED load, IP66 rated, zero-cross switching |
| LT154 | Twist-lock | 120, 277 V | 10-year warranty, fail-on mode, heavy-duty |
| LT210 | Wire-in | 120, 277 V | Compact thermal type, simple wire-in installation |
Using a photocell with a voltage rating below your voltage circuit can cause the sensor to fail prematurely. Choose a photocell designed to support the lighting load type and wattage. This prevents flickering and sensor burnout.
Check that the white lead connects to neutral or Line 2 as specified for your voltage family to ensure safe operation.
Special Features and Advanced Models
Some photocell sensors offer fail-on modes ensuring lights stay on if the sensor fails, which is important for security lighting. Advanced models may have IP66 or better ratings for dust and water resistance, essential for harsh outdoor environments. Zero-cross switching photocells help prevent electrical noise and extend the lifespan of LED drivers.
For commercial signs, selecting a photocell with a long warranty and rugged housing protects your investment. Residential signs generally benefit from simpler, cost-effective sensors that provide reliable dusk-to-dawn operation without added complexity.
Consider smart or integrated sensors compatible with newer fixture standards like ANSI/NEMA sockets or Zhaga Book 18 interfaces if you plan to upgrade to smart city lighting systems. These may cost more upfront but offer future-proofing and easier system integration.
Wiring a Photocell on a Sign: Colors, Configurations, and Safety
Connecting a photocell to your sign lighting follows specific wire color codes and wiring configurations to ensure proper operation and safety. Typically, the black wire connects to the line (live) power, the white wire to neutral, and the red wire to the load, which controls the sign’s lighting. Following strict electrical safety practices during installation minimizes risks of electrical shock or damage.
Wire Color Codes and Their Functions
Photocell wiring typically involves three main wire colors that have standard functions. The black wire serves as the line or hot wire, carrying the live current from the power source. The white wire acts as the neutral wire, completing the circuit back to the power source. The red wire is used as the load wire, supplying power to the sign lighting fixture controlled by the photocell.
Some photocells may also include a green wire for ground connection, which is necessary for safety in installations where grounding is required. Always refer to the photocell’s manufacturer wiring label, as some models may vary.
Common Wiring Configurations for Photocells on Signs
Correctly connecting the photocell involves joining its wires to the corresponding wires in the sign’s lighting system. Generally, the photocell’s black wire connects to the incoming power source’s black wire, the white wire connects to the neutral line shared by the lighting system and building, and the red wire connects to the sign’s lighting load wire. Here are step-by-step wiring instructions:
- Turn off the circuit breaker supplying power to the sign to ensure safety.
- Strip about ¾ inch of insulation from each wire to prepare for connection.
- Connect the photocell’s black wire to the black (line/hot) wire from the power source using a wire nut.
- Join the photocell’s white wire with the white (neutral) wires from the power source and the sign’s lighting fixture, securing them with a wire nut.
- Connect the photocell’s red wire to the black wire leading to the sign’s lighting load.
- If your photocell has a green ground wire, connect it to the ground wire of the sign or building’s grounding system.
- Secure all wire nuts with electrical tape for added insulation and strain relief.
- Mount the photocell in its designated position and restore power at the breaker.
Electrical Safety Precautions to Follow
Always prioritize safety when wiring a photocell on a sign. Start by switching off power at the main circuit breaker before handling any electrical connections. Use insulated tools, and avoid working in wet or damp conditions. Confirm that all wiring matches the color codes and manufacturer instructions before finalizing connections.
Double-check that line and neutral wires are correctly identified to prevent electrical faults. Use wire nuts rated for outdoor use and adequately insulate wire splices. Ground the photocell if a ground terminal is present to protect against electrical shocks or interference. Never attempt electrical work beyond your skill level, consult a licensed electrician if uncertain.
Where and How to Mount a Photocell on Outdoor Signs
Install the photocell sensor on the sign where it can directly see the open sky or the area you need to track for natural light. Aim the sensor’s lens away from the sign’s LEDs to prevent it from reacting to the sign’s own light. Select a height that lets the sensor detect changes in daylight without interference from shadows cast by nearby objects like trees or poles. Usually, mounting the sensor between 8 and 12 feet above ground is effective, depending on the surrounding environment and your sign’s design.
Avoid mounting the photocell under eaves, inside recessed areas, or on surfaces that could shade the sensor in the evening or early morning. These conditions can cause the sensor to misread ambient light levels, resulting in lights turning on too early or staying off after dark. Also, keep the sensor away from artificial light sources like street lamps or other nearby illuminated signs, which may confuse the photocell. Using a shielded photocell model can further cut down on interference by preventing stray light from activating the sensor.
Use mounting hardware supplied with the photocell or compatible brackets designed for outdoor use. Choose corrosion-resistant materials such as stainless steel or UV-resistant plastic to withstand weather exposure over time. A sturdy mounting bracket with adjustable angles lets you fine-tune the sensor’s direction after installation. Secure the photocell tightly so it won’t move with wind or vibrations, which would affect its accuracy. For cable management, use weatherproof clips or conduit to protect wiring and maintain a clean installation.
Before finalizing the placement, conduct a daylight test by observing the sensor’s response during dusk and dawn. The lights should activate only when natural light falls below the preset threshold, without flickering due to shadows or artificial light interference. Move the sensor slightly to a different location with less shade or fewer obstacles if it triggers incorrectly. Photocell sensors compatible with your sign’s voltage rating ensure reliable operation and reduce the chance of overload damage.
Costs for mounting hardware typically range from $5 to $15 depending on the bracket style and material quality. Basic photocells come with mounting accessories, but upgrading to a shielded photocell or a more adjustable bracket may add $10 to $20. Proper placement ensures your outdoor sign lighting operates automatically, saving energy and reducing manual switching. Incorrect mounting causes the most common issues like premature switching on or failure to turn on at night, which mounting the sensor as described will largely prevent.
Weatherproofing and Protecting Photocell Wiring Connections
Preventing moisture and oxidation from damaging photocell wiring connections is essential to maintain reliable operation of your outdoor sign lighting. Using the right materials and proper sealing techniques keeps water out, stops corrosion, and extends the lifespan of the photocell. Start with clean, tight wire connections, then apply dielectric grease inside the wire nuts. Follow that by sealing all exposed wiring and the photocell base with silicone caulk to block any entry points for moisture. Here’s a checklist of essential materials for weatherproofing your photocell wiring connections outdoors:
- Dielectric grease to protect metal contacts from moisture and oxidation
- Silicone caulk rated for outdoor use and UV exposure
- Waterproof wire nuts or connections rated for exterior applications
- Electrical tape (optional) for extra bundling before caulking
- A clean cloth or alcohol wipes to prepare wire surfaces
Follow these steps to properly weatherproof and protect your photocell wiring:
- Ensure all wire connections are tight and correctly matched. Loose or mismatched connections can cause failure even if sealed.
- Apply a liberal amount of dielectric grease inside each wire nut before twisting on. This seals the metal contacts from air and moisture, drastically reducing corrosion risk.
- Secure the wire nuts firmly and bundle the wires neatly. Keep the connection compact to simplify sealing.
- Use electrical tape around the wire nuts if extra reinforcement is desired. This step is optional but can add durability.
- Apply a continuous bead of outdoor-rated silicone caulk around the wire nut assemblies. Cover all exposed wiring and overlap slightly onto the conduit or cable surface.
- Seal around the photocell base where it meets the mounting surface. Prevent water from seeping behind the sensor by laying a bead of silicone carefully along the edges.
- Allow the silicone to cure fully, typically 24 hours, before exposing to rain or moisture. Follow the caulk manufacturer’s cure time instructions for best results.
- Inspect the sealed connections after extreme weather events. Reapply silicone if cracks or gaps appear to maintain protection.
Avoid using standard wire nuts alone outdoors; even rated ones need dielectric grease plus silicone sealing to prevent moisture penetration that causes failures within 18 to 24 months in high-humidity environments.
Common sealing mistakes include applying too little silicone, missing gaps around wires or the sensor base, and neglecting to use dielectric grease inside wire nuts. Skipping any of these steps can let water in, leading to oxidation and photocell failure sooner than expected. The upfront effort and cost for dielectric grease and silicone caulk, usually under $20 total, can save you time and replacement costs down the road. Proper sealing results in stable photocell operation and extends your sign’s lighting reliability through seasons of rain, dew, or coastal humidity.
Testing and Troubleshooting Photocell Operation on a Sign
Testing your photocell after installation ensures it senses light changes properly and controls your sign lighting as expected. Troubleshooting common problems like lights staying on or off helps you fix wiring or sensor issues promptly. Following these steps prevents wasting energy or leaving your sign unlit at critical times.
Basic Functionality Tests
Begin by switching on the power to the sign controlled by the photocell. The light turning off after a few seconds indicates the photocell detects daylight and functions properly. Use opaque tape to cover the photocell sensor temporarily, mimicking darkness; the light should then switch on quickly, showing the sensor responds correctly to low light.
Check your sign light’s response at different times of day by observing if it turns on automatically at dusk and off at dawn. Manually turning the fixture on and off while observing the photocell’s behavior helps verify consistent switching. Also inspect the sensor and wiring for visible damage or loose connections that might impact operation.
Common Failure Modes and Solutions
The table below summarizes typical issues with photocell operation, common causes, and recommended fixes:
| Problem | Possible Cause | Fix |
|---|---|---|
| Light stays on all day | Photocell shorting cap installed instead of sensor | Replace with proper photocell sensor |
| Light remains off at night | Poor wiring or faulty sensor | Check and correct wiring; replace photocell if damaged |
| Flickering or intermittent light | Loose connections or dirty photocell surface | Tighten wiring; clean photocell lens |
| Photocell never switches light off | Fail-on photocell design or sensor failure | Verify sensor specs; replace if faulty |
| Photocell fails prematurely | Exposure to water or poor weatherproofing | Re-seal connections; install weatherproof housing |
Ensure wiring matches color codes and connection instructions exactly. Some photocells are designed to fail with the light left on for safety, so knowing your model’s behavior matters. Weatherproofing connectors and checking for corrosion prevents common failures in outdoor environments.
When to Replace the Photocell
Replace the photocell if testing shows no change in the light when covering or uncovering the sensor, indicating a nonresponsive device. Frequent flickering, erratic switching, or a light that never turns off despite proper wiring also suggest the sensor is failing. Photocells typically last several years, but harsh conditions or physical damage can shorten their lifespan.
Troubleshooting that fails to fix ongoing issues after checking installation and wiring suggests replacing the photocell is a sound step. Professional installation usually takes less than an hour and guarantees secure, code-compliant wiring and mounting. A properly functioning photocell maintains sign visibility and conserves energy efficiently over its lifetime.
Safety Precautions and When to Hire a Professional
Working with electrical sign installations involves specific dangers that require careful attention. Electrical shock and short circuits are the most common risks when installing a photocell. Before touching any wiring, always use a voltage tester to verify that the power is completely off. Turning off the circuit breaker that controls the sign’s power supply is essential to prevent accidental electrocution. Never rely solely on the switch at the fixture or a lamp switch; the breaker is your safest option.
Some installation steps demand extra caution or professional handling. Connecting the photocell wires to the main power source and the sign’s lighting circuit requires precise knowledge of wiring colors, configurations, and local electrical codes. Mistakes in these connections can cause wiring shorts, damage to the photocell sensor, or even fire hazards. It is critical to double-check connections and ensure weatherproofing measures are correctly applied to prevent moisture-related failures and premature sensor breakdowns, especially in outdoor environments where temperature swings and rain are common.
An electrical safety checklist before starting any installation includes confirming the power is off, inspecting the wiring for damage, using insulated tools, wearing rubber-soled shoes, and avoiding working alone. Having someone nearby is recommended in case assistance is needed during the job. Following your local electrical codes and safety protocols is necessary to ensure compliance with regulations and long-term reliability.
Knowing when to hire a professional electrician can reduce risks and save time. A qualified electrician can identify all components that need connection, evaluate potential hazards, and perform the wiring correctly. Seek professional help if you are unfamiliar with electrical systems, have never worked with wiring inside a breaker panel, or if your installation involves modifying existing circuits or adding new breakers. Professional electricians carry the appropriate licensing and insurance to protect you and your property. The cost to hire an electrician for a simple photocell installation typically ranges from $75 to $150, varying by region and complexity.
In cases where local laws require it, only licensed electricians should perform electrical wiring work. Improper wiring can lead to persistent malfunctions or damage that void warranties and increase maintenance costs later on. Photocell installations with improper inrush current handling or insufficient weatherproofing often fail early, underscoring the value of professional evaluation. When you feel uncertain about any part of the installation or lack the right tools, it is safer and more efficient to call a professional rather than risk injury or damage.
Maximizing Energy Savings and Maintenance Tips for Photocell Signs
Installing a photocell on your outdoor sign can cut energy use significantly, often by 50 to 80 percent, depending on your lighting setup and hours of operation. Photocells automatically turn the lights on at dusk and off at dawn, reducing unnecessary power consumption and helping you comply with local energy codes. The savings from switching to photocell-controlled LED lighting typically cover the installation cost within months, making it a practical upgrade.
Even though photocell sensors require minimal upkeep, regular maintenance keeps them working properly to ensure those energy savings last. Dirt, debris, and extreme weather can affect sensor sensitivity and performance, leading to inconsistent lighting or early sensor failure. A simple maintenance routine helps prevent these issues and extends the photocell’s life, avoiding the cost and hassle of early replacement.
- Clean the sensor lens every 3 to 6 months with a soft cloth and mild detergent to remove dust and grime.
- Inspect the mounting position twice a year to confirm the sensor remains unobstructed by trees, signs, or building features.
- Check wiring connections annually for corrosion or looseness and tighten or replace as needed.
- Look for sensor damage such as cracks or discoloration, especially after extreme heat or cold spells.
- Test sensor function seasonally, especially after storms or power outages, to ensure it turns lights on/off correctly.
- Consider replacing photocells every 5 to 7 years, depending on manufacturer recommendations and environmental conditions.
Maintaining your photocell involves a bit of hands-on care, but the process is straightforward and does not usually require professional help. Start by turning off power to the sign for safety before cleaning or inspecting the sensor. You’ll want to avoid harsh chemicals or abrasive materials on the lens to protect its light sensitivity. If you notice irregular light operation after cleaning, double-check shading or faulty wiring before deciding if a replacement sensor is necessary.
Keep sensors shaded from direct sunlight during peak heat; prolonged excess heat can shorten their lifespan and cause malfunctions.
Regular cleaning and inspection of the photocell help it respond accurately to ambient light changes, maximizing energy savings while preventing downtime. Following a maintenance checklist on a seasonal timeline supports consistent operation and helps you spot small problems early before they become costly repairs.
Step-by-Step Action Plan for Installing Your Photocell on a Sign
Follow these steps to ensure your photocell is installed correctly and your sign lights operate automatically and efficiently.
- Before you start: Gather all materials including the photocell sensor, waterproof connectors, and proper wiring based on your sign’s electrical needs. Confirm your power is off before handling any wiring to stay safe.
- Day 1: Mount the photocell sensor on the sign or nearby surface where it can receive natural light without shadows. Test the location by covering the sensor briefly; the sign’s light should turn off or on accordingly.
- Day 1: Wire the photocell following the color codes: usually black for live, white for neutral, and red or blue for load (the sign’s light). Use waterproof connectors and check polarity carefully.
- Day 1: Seal all connections with electrical tape or silicone to protect against moisture and weather damage. Inspect for secure, tight connections before restoring power.
- Immediately after installation: Turn the power back on and observe the photocell’s operation around twilight or by simulating darkness. The sign should automatically power on in low light and off in daylight.
- After 1 week: Check the photocell sensor and wiring for any signs of wear, corrosion, or loose fittings. Re-seal or tighten as needed to maintain reliable operation.
- After 1 month: Adjust or reposition the photocell if you notice inconsistent on/off timing due to changing sun angles or nearby obstructions.
Frequently Asked Questions
Can I Install a Photocell on a Sign Myself or Should I Hire a Professional?
You can install a photocell yourself if you have basic electrical skills, but hiring a professional electrician is always safer and ensures correct installation, especially for commercial signs with complex wiring.
How Do I Avoid False Triggering of the Photocell on My Sign?
Avoid placing the photocell near other light sources like streetlights or security lights, as this can cause false triggers and affect operation. Position the sensor where it detects natural daylight only.
What Voltage Should the Photocell on My Outdoor Sign Be Rated For?
Use a photocell rated for the voltage of your sign’s lighting system, typically 120V or 240V, matching the fixture’s requirements to prevent damage or failure.
Can I Use the Same Photocell for Multiple Outdoor Signs?
It’s possible but not ideal because different signs may be exposed to varying light levels. Individual photocells ensure more precise control and consistent lighting for each sign.
What Maintenance Is Required for a Photocell Installed on a Sign?
Regularly clean the sensor lens and inspect wiring for damage to keep it functioning properly. Dirt or debris can block light detection and cause faulty operation.
How Long Does a Typical Photocell Last When Installed on an Outdoor Sign?
Photocells generally last around 1.5 to 2 years due to exposure and frequent on/off cycling, but this varies with quality and environmental conditions.
Final Thoughts
Installing a photocell on your outdoor sign automates lighting for convenience and energy savings. Taking precise steps from mounting to wiring and sealing ensures your setup functions reliably through weather changes. Start today by choosing the right sensor location and following safety rules to protect yourself and your equipment.