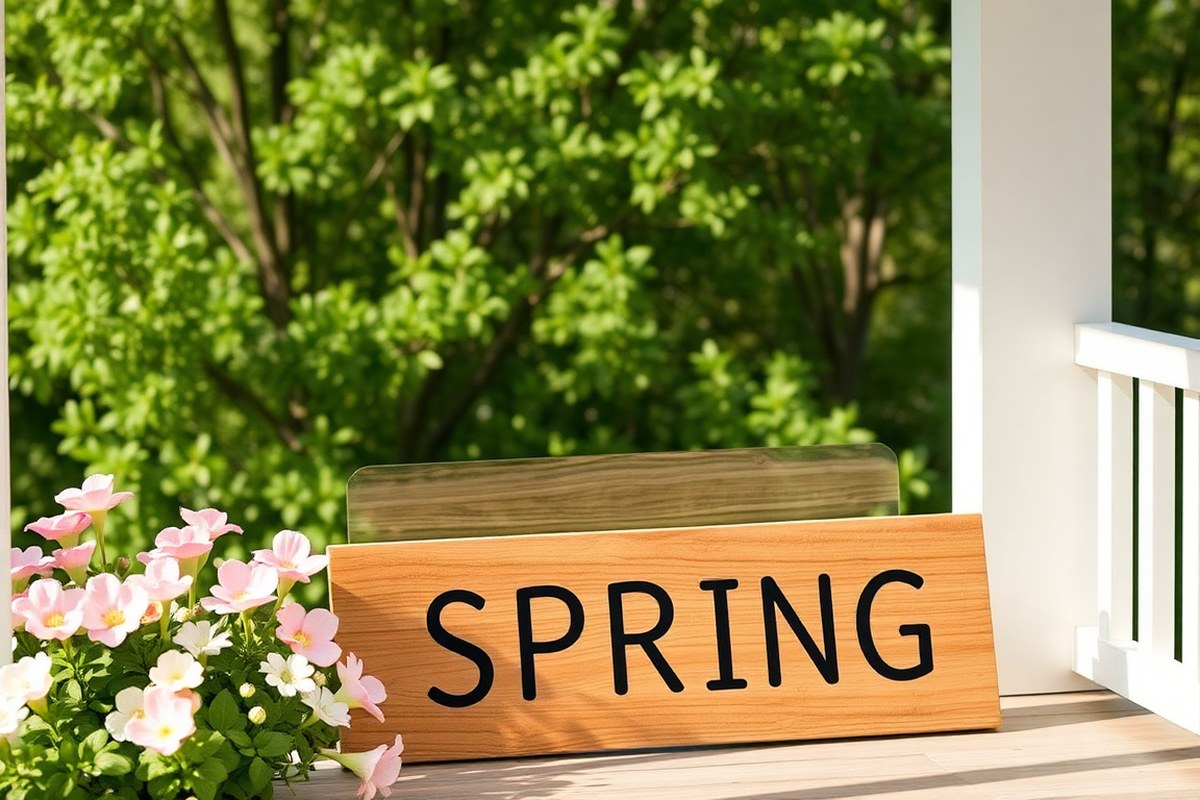
Spring Sign Ideas That Inspire: 12 Creative DIY and Display Tips
Spring sign ideas brighten your home with fresh, seasonal charm through easy projects and stylish designs. Choose materials like wood or chalkboard for versatility and start with a simple, 24-inch wide board for your first sign. Adding flowers or nature motifs brings spring’s energy indoors or outdoors with eye-catching detail.
Key Takeaways
- Cut cedar or pine boards around 12 by 36 inches for sturdy, eye-catching spring signs.
- Use 3D raised wooden letters to add depth and sophistication to your signage.
- Mix fonts carefully by pairing script with sans-serif for readable, attractive typography.
- Add a narrow 6-inch deep shelf beneath your sign to display small pots or decorations.
- Seal outdoor signs with matte spray paint or weatherproof finishes to protect against moisture.
- Incorporate seasonal flowers and nature motifs for authentic, inviting spring-themed signs.
What Makes a Great Spring Sign?

Spring signs are decorative items designed to celebrate the season’s arrival by visually capturing its essence. These signs often feature cheerful messages like “Welcome Spring” or “Bloom Where You’re Planted,” complemented by colorful imagery such as flowers, butterflies, bees, and other nature motifs. Their purpose goes beyond mere decoration: they refresh your space, create a welcoming atmosphere, and signal renewal, making your home feel lighter and more vibrant after winter.
Choosing the right themes and colors is key to making a spring sign effective and appealing. Colors should be bright and lively, typically including pastels like soft pink, lilac, yellow, mint green, and sky blue. Using color combinations that reflect freshly blooming flowers or clear skies helps immediately convey the season. For instance, a sign framed in light, natural wood with black lettering and a small tulip illustration can look both chic and spring-relevant. Such a contrast highlights the message clearly without overwhelming the design.
Visually conveying spring on a sign requires balance between imagery and typography. Floral patterns, bees, butterflies, and green grass are common visual cues. Simple silhouette shapes or detailed illustrations can both work well depending on your style, but make sure that the visual elements don’t crowd the sign’s main message. Opt for playful or hand-lettered fonts that don’t feel too rigid, adding warmth and personality. Mixing letter sizes and colors, like using mismatching brightly colored letters, can attract attention and improve the cheerful appeal.
Materials and design choices influence not only the look but also the longevity of your sign. Wooden signs are popular because they offer a natural warmth and can be easily painted or stained to suit spring hues. Chalkboards offer flexibility for changing messages as the season progresses. For indoor placement, heavier or more delicate materials are fine, but outdoor signs require weather-resistant finishes to maintain brightness and prevent damage.
Creating an appealing spring sign doesn’t have to be costly or time-consuming. Simple designs, like a painted wooden sign with green letters and red blooms, can be completed within two hours and require minimal supplies, paint, brushes, and a wood plaque costing as little as a few dollars. Adding texture with three-dimensional elements, like a twine bow on a carrot-shaped sign, adds charm and can be achieved without specialized tools. Avoid overcrowding your sign with too many colors or images, which can make it hard to read from a distance and reduce its welcoming effect.
Good results look like a sign that complements your existing decor, draws the eye, and instantly evokes the fresh, joyful feeling of spring. Signs that are visually balanced, easy to read, and themed with seasonal motifs encourage a positive response from everyone who sees them. Signs that fail often have overwhelming or dull colors, cluttered designs, or unclear messages, which can create confusion or go unnoticed. Keeping the design simple, vibrant, and seasonally relevant usually delivers the best appeal for spring decoration purposes.
Popular Styles and Themes for Spring Signs

Spring signs come in several popular styles that fit different home decors. Farmhouse, rustic, vintage, shabby chic, and minimalist styles each offer unique colors, materials, and motifs. Choosing a style that matches either indoor or outdoor settings helps create harmony in your spring decorating.
Farmhouse and Rustic Styles
Farmhouse and rustic spring signs are among the most common choices for both indoors and outdoors. They usually feature natural wood finishes or weathered materials, often painted with green or white tones and decorated with simple flower motifs. These signs bring warmth and charm and work well on porches, kitchens, or garden areas.
Typical elements include rope hangers, wood plaques, or stained frames combined with calligraphy or block letters. For example, a rustic sign with green lettering and a single white bloom looks natural and inviting outside. These signs often cost $20 to $50 for DIY materials and take a few hours to assemble using basic paint, wood, and brushes. Weatherproof though rustic signs are, using sealants will improve longevity outdoors.
Vintage and Shabby Chic Options
Vintage and shabby chic spring signs incorporate soft colors, distressed paint finishes, and nostalgic design themes like old seed packets or window frames. A large vintage sign made from an old window frame adds character to farmhouse or vintage spaces. Shabby chic signs might use soft blues, taupes, or muted pastels with black or faded lettering for a worn look.
These styles suit indoor spaces such as kitchens or living rooms, bringing a cozy, aged feeling. They typically use materials like wood and chalkboards framed in rustic wood. Making such signs might take 3 to 6 hours depending on detail and cost between $25 and $60 in supplies. Careful sanding and layering paint for a distressed effect create authentic shabby chic signs.
Minimalist and Modern Spring Signs
Minimalist spring signs focus on clean lines, limited color palettes, and simple typography. Usually, they use white backgrounds with a few pastel or single-tone colors and straightforward messages like “Hello Spring.” Acrylic or metal signs with laser-cut motifs give a sleek and durable look, ideal for modern homes or patios.
These signs work well indoors or in covered outdoor spaces where weather exposure is minimal. The cost tends to be higher, $40 to $100 for materials like acrylic sheets, paint, and metal hooks. Creating minimalist signs requires precision tools or cutting machines but results in signs that fit sharply in modern décor schemes.
Color and Motif Choices by Style
Colors and motifs are important to match your chosen style and place for the sign. Farmhouse and rustic signs often feature natural wood tones, greens, whites, and soft yellows with floral or bird motifs. Vintage and shabby chic use muted blues, taupe, and pastels with faded lettering and nostalgic elements like seed packets or birdhouses. Minimalist signs stick to whites, light colors, or monochrome with clean spring-related motifs. Consider these ideas as a quick reference:
- Farmhouse/rustic: natural wood, green letters, white blooms, rope accents
- Vintage/shabby chic: distressed paint, pastel blues and taupes, seed packets, old window frames
- Minimalist/modern: white backgrounds, single-tone pastels, acrylic or metal with laser-cut shapes
- Indoor-friendly: vintage and shabby chic, soft hues and delicate details
- Outdoor-friendly: rustic, durable wood, acrylic, metal with weatherproof coatings
Matching the color and motif to the setting improve the overall spring ambiance and ensures the sign complements existing décor.
Suitability for Indoor vs Outdoor Settings
Rustic and farmhouse spring signs are versatile; they suit porches, gardens, and kitchens well. They hold up outdoors if sealed against moisture but look equally warm indoors where natural wood blends with other décor. Vintage or shabby chic signs are usually better indoors where delicate paints and distressed finishes won’t degrade quickly. They add a cozy, classic look to spaces like living rooms or breakfast nooks.
Minimalist and modern signs made from acrylic or metal work well indoors or under covered outdoor areas. These materials resist fading and moisture better than wood alone and usually require fewer maintenance steps. Considering exposure to elements and maintenance needs will help decide which style fits your sign’s location best.
Weatherproof any wooden or chalkboard spring sign with at least two coats of outdoor sealant to protect colors and prevent warping if you place it outside.
Choosing Materials: Wood, Metal, Chalkboard, and More
Choosing the right material for your spring sign impacts its look, durability, and cost. Wood, metal, chalkboard, and acrylic each offer distinct advantages depending on where you want to place your sign and how you plan to decorate it. Wood lends a warm, natural feeling but requires treatment to endure outdoor weather. Metals provide strong weather resistance but can be pricier and need protective coatings to avoid rust. Chalkboards offer versatility for changing messages and simple artistry but work better indoors or covered areas.
| Material | Good For | Watch Out For |
|---|---|---|
| Cedar or Redwood | Signs that sit in the weather | Costs more upfront |
| Pine | Covered porches, budget signs | Needs full sealing to resist moisture |
| Marine or MDO Plywood | Flat painted signs | Seal the cut edges to prevent water damage |
| Heat-Treated Pallet Wood | Free rustic-style signs | Check the heat-treatment stamp for safety |
Wood types vary in cost and maintenance. Cedar and redwood are naturally resistant to rot and insects, ideal for signs exposed to rain and sun. Expect prices above $15 for a small board, but this investment pays off with longevity. Pine is more affordable but absorbs moisture unless sealed with polyurethane or weatherproof paint. A well-sealed pine sign can last a season or more but might need resealing annually. Marine plywood is great for smooth surfaces and painting but requires you to seal edges carefully to avoid delamination.
Metal signs, including those made from galvanized or reclaimed steel, can stand up to elements longer than many woods without warping. They often come powder-coated or painted, which adds weather resistance and color options. Metal signs tend to run from $20 up but return value through durability, making them excellent for porch or garden entrances. Reclaimed metal also adds an environmental benefit and rustic charm.
Chalkboard signs let you update your message throughout spring easily, perfect for welcoming guests or changing seasonal quotes. However, chalkboards work best indoors or in covered spaces to avoid rain washing away your design. For outdoor use, consider a chalkboard spray sealant or use liquid chalk markers to extend wear time. Chalkboard boards start around $10 and offer an inexpensive way to customize your spring decor each week.
Acrylic is another solid option for sleek, modern signs. It’s weatherproof, lightweight, and comes in various colors and thicknesses. Acrylic suits sharp lettering or etched designs and generally resists fading. Prices for acrylic sheets begin near $20, varying by size and thickness. For best results, attach your acrylic sign firmly to stabilize it in wind or rain.
Popular Shapes and Sizes for Spring Signs
Popular spring signs come in a variety of shapes and sizes to fit different spaces and purposes. Choosing the right dimensions depends on where you plan to place the sign and how visible you want it to be. Vertical signs suit narrow or small areas, while larger horizontal signs work well for porches and outdoor seating zones.
Common Sizes and Their Ideal Uses
Spring signs typically range from small accents around 3.5 by 7 inches to larger pieces measuring 18 by 24 inches or more. Small signs, such as a 3.5 x 7 inch wooden sign featuring a spring motif like a truck carrying carrots, fit perfectly on mantels, kitchen counters, or shelves without overpowering the space. Medium sizes around 12 by 18 inches are versatile and create a focal point on indoor walls or entry tables.
Larger signs, often 18 by 24 inches and above, work best on porches and outdoor seating areas. These dimensions allow letters and decorations to be seen from a distance, making a welcoming statement for guests. Bigger signs typically require sturdy materials and finishing to handle outdoor exposure and maintain visibility over time.
Vertical vs. Horizontal Spring Signs
Vertical spring signs are popular for narrow locations like small balconies, porch pillars, or beside door frames. Their shape allows them to anchor areas without taking up much horizontal space. For instance, a tall vertical sign decorated with bright faux blooms and simple lettering can add height and color to a porch without crowding it.
Horizontal signs work better for mantel displays, wider porch areas, or walls above furniture. They provide room for landscape-style artwork such as bird houses and floral scenes. Matching sign orientation to your available space helps keep the display balanced and ensures all elements are visible at eye level.
Matching Sign Size to Placement and Visibility
Consider viewing distance and available surface area when selecting your sign size. A sign on a porch should be large enough for passersby to read easily, ideally at least 18 inches wide with bold lettering. Inside, where viewers are closer, smaller signs can have intricate details and softer colors without losing impact.
Above a mantel, a sign around 12 by 18 inches complements other decorations like flower arrangements and smaller framed arts. Measuring your placement space before buying or crafting a sign helps avoid a design that feels too cramped or too sparse. For example, print a sample in paper at the intended size to visualize the fit.
Design Balance in Small Spaces
Small spaces benefit from vertical or compact signs since they maximize visual interest without clutter. Vertical signs placed in tight corners or next to doorways add seasonal style while leaving room for other decorations. Using simple, clear lettering and bright seasonal colors improve legibility in these constrained areas.
Pairing small signs with complementary elements such as wreaths or potted blooms creates layered decorations that feel complete. Avoid oversized signs in small rooms or narrow hallways to prevent overwhelming the area or blocking walkways.
Incorporating Flowers, Nature Motifs, and Seasonality
Adding flowers and nature motifs instantly brings the fresh spirit of spring to your signs. Use floral accents, leafy patterns, or silhouettes of birds and butterflies to create a welcoming seasonal vibe. Real or faux greenery can be attached around your sign’s edges or incorporated into wreaths to frame your message and add texture.
Choosing between real and faux flowers depends on durability and maintenance. Faux flowers are more durable, especially for outdoor signs exposed to weather, maintaining their shape and color through heat, moisture, and wind. Real flowers offer natural fragrance and authenticity but require regular replacement and protection from wilting, making them best for short-term indoor displays.
For the best effect, keep the floral design balanced and cohesive with your sign’s theme and colors. Bright faux blooms combined with rustic ribbons or bows add vibrance, while greenery in shades of mint or natural green softens the look, creating a modern yet cozy appearance.
- Attach faux flower garlands around a wooden board with a spring greeting like “Hello Spring.”
- Use hand-painted floral accents in bright colors such as blue, pink, or yellow to add energy.
- Incorporate faux leaves and greenery inside a mint green bow for an alternative to a heavy wreath.
- Add small floral or bird silhouettes engraved or painted directly onto the sign surface.
- Try a seasonal mix like a yellow wreath with a blue bow and potted greenery for a rustic feel.
- Create an Easter-themed sign using whitewashed planks accented by floral bunnies and egg garlands.
- Mix burlap polka dot ribbons with paper flowers for a cost-effective, cheerful accent.
Using a mix of textures, such as fabric, cardboard letters, or mesh bows, with your floral elements helps the sign stand out. Budget for faux flower stems at about $5 to $15 per bunch online or at craft stores, and expect to spend 30 to 60 minutes assembling a simple floral frame or wreath. For real flowers, factor in cost and replacement roughly every 3 to 7 days depending on the flower type and conditions.
Secure faux flowers and greenery firmly with hot glue or floral wire to prevent pieces from falling off, especially for outdoor signs.
Seasonal updates to your signs keep your decor feeling fresh. Swapping winter decorations for floral and leafy motifs refreshes your home’s mood without needing complete sign replacement. Choose flower colors and types that complement your existing décor to create a harmonious spring look that welcomes the season’s renewal through your informed floral designs.
Easy DIY Spring Sign Projects for Beginners
Easy DIY spring signs can be made quickly with basic tools and affordable materials. Choose a simple wooden board or repurpose an old item as your base, then add colorful paint and a short spring-themed phrase. These projects generally take one to two hours to complete, even for beginners.
Selecting a Base Board
Start with a flat, lightweight surface about 24 inches wide for a balanced look. An old fence board, pallet wood, or even a cutting board from a discount store can work well. Recycled materials save money and add character but make sure they’re smooth enough to paint on. Avoid boards with too many splinters or cracks unless you plan to sand them.
If you want a smaller sign, choose a piece around 6 by 30 inches and consider tracing simple shapes like a carrot for a spring motif. A satin grey spray paint base can help colors stand out vividly, especially for floral designs.
Painting and Lettering Techniques
Use acrylic or craft paints that dry quickly, typically within 15 to 30 minutes per coat. Spray paint can give a smooth, even base layer but work in a well-ventilated area. For lettering, stencils simplify the process and ensure neat edges. Alternatively, hand-paint letters with a medium-sized brush for a personal touch.
Keep phrases short and seasonal, such as “Hello Spring” or “Bloom and Grow.” Use bright colors like pastels or vibrant greens and yellows to evoke the season. Allow all paint to dry completely before adding more layers or details to avoid smudging.
Adding Decorations and Final Touches
After painting the background and letters, add simple decorations like painted flowers or vines with a fine brush. You can also glue on small artificial flowers or craft elements like buttons for texture. Seal the sign with a clear acrylic spray to protect it, especially if it will be displayed outdoors.
For assembly, attach a picture hanger or twine to the back if you plan to hang the sign. Let the sign cure for 24 hours to ensure the paint is fully set before handling extensively. Follow these steps to create an easy spring sign:
- Choose a flat board about 24 inches wide or repurpose a wooden item with a smooth surface.
- Apply a base coat of spray paint or acrylic paint and let it dry (15 to 30 minutes).
- Use stencils or freehand to paint a short spring phrase with bright colors.
- Add painted flower designs or glue small decorations as accents.
- Let the paint dry completely between each addition.
- Seal the entire sign with a clear acrylic spray to protect it.
- Attach hanging hardware or twine to the back if needed.
- Allow the sign to cure for 24 hours before displaying or handling.
Typography Tips: Mixing Fonts and Letter Styles
Mixing typography styles on a spring sign can add personality and make your message stand out. Combining fonts with different weights, shapes, and sizes creates visual interest and highlights key words or phrases. For spring-themed signs, pairing a playful script font with a clear, simple sans serif font often works well. For example, use a flowing calligraphy style for words like “Welcome” or “Spring,” and a straightforward font for additional text. This contrast keeps the sign easy to read while adding charm and seasonal energy.
Start by selecting two or three fonts that complement each other. Avoid using more than three to prevent clutter. Choose a bold or decorative font for the main message and a simpler font for secondary text or details. Spacing is critical: leave about 0.1 to 0.3 inches (2.5 to 7.5 mm) between letters in the simpler font for clarity, and slightly tighter spacing for script fonts to maintain their flowing look. Keep line height around 1.2 times the letter height to prevent the text from looking squished, especially on smaller signs.
Size hierarchy plays a major role in guiding the viewer’s eye. Make your main message at least twice as tall as any supporting text. For example, if your main spring greeting letters are 3 inches tall, keep any tagline or smaller text at 1.5 inches or less. This helps highlight important words, such as “Bloom” or “Spring,” while still allowing extra details like dates or sayings to be read easily. Larger letters are easier to spot on outdoor signs, especially from a distance.
When layering different font styles, balance is key. A sign with an ombre white to green background and gold letters benefits from restrained font mixing, such as a stylish serif font combined with a delicate script. This pairing improve the softness of spring blooms without overwhelming the design. Alternatively, a bright green sign with bold branches and a playful bird image pairs well with stenciled, straightforward letters, combining organic shapes with crisp typography.
Watch out for font choices that clash or reduce readability, such as mixing two intricate scripts or combining fonts that look too similar. Test your design by printing a small sample card or using design software to see the spacing and font interaction. The cost of experimenting is mostly your time and project materials, like paint or vinyl letters, which generally range from $5 to $20 for basic DIY projects. This upfront care reduces the chances of having to remake the sign due to confusing text or poor visual flow.
For better legibility and a clean finish, consider hand-painting or using vinyl cutouts to apply your typography. Stenciled letters offer precision, but they require patience to space correctly. A helpful method is marking your sign with light pencil guidelines spaced evenly to keep letters straight and balanced. Pencil marks erase easily or disappear under coats of sealant. This approach is important for signs placed outdoors, where clarity under changing light conditions matters.
Weatherproofing Signs for Outdoor Display
Protecting your spring sign from rain, sun, and wind requires choosing the right materials and applying a suitable sealant. Outdoor signs face constant exposure to moisture and UV rays, which can cause fading, warping, and peeling if left untreated. Use high-quality exterior paints designed for outdoor use, such as acrylic latex paint, which resists cracking and fading even under harsh sunlight. After painting or decorating, apply a clear weatherproof sealer to add a protective barrier against moisture and UV damage. Polyurethane and spar urethane are popular choices because they provide a durable, water-resistant finish that remains flexible as temperatures change.
Wooden signs benefit the most from weatherproofing steps because wood absorbs moisture, leading to swelling and rot if untreated. Before painting, sand the surface smooth, and then use a wood primer made for exterior use to improve paint adhesion and extend durability. After painting, apply at least two topcoats of a clear sealer, allowing 24 hours to dry between coats. For metal signs, rust-resistant primers and paints help prevent corrosion. Chalkboard signs intended for outdoor use require a sealant designed for chalk surfaces to prevent fading, smudging, and water damage.
Some materials hold up better outdoors without as much treatment. For example, weather-resistant PVC or recycled plastic boards are naturally water-resistant and less prone to cracking or warping. Metal signs like aluminum or steel with rust-resistant coatings also last longer, though they still benefit from a topcoat sealant. Choosing eco-friendly, plant-based paints and sealants helps protect the environment while keeping your sign intact.
- Use exterior-grade acrylic latex paint or plant-based outdoor paint for vibrant colors that last.
- Apply a clear polyurethane or spar urethane sealer after painting for water and UV protection.
- Prime wooden surfaces with exterior wood primer to prevent moisture absorption before painting.
- Consider PVC, metal, or recycled plastic signs for better inherent weather resistance.
- Allow each coat of paint or sealer to dry fully, usually 24 hours, for best adhesion.
- Reapply sealant annually in areas with harsh weather for ongoing protection.
- Use non-toxic finishes and eco-friendly paints to minimize environmental impact.
Before applying sealant, make sure the sign is completely clean and dry, or the finish won’t stick properly and can peel off prematurely.
Cost varies depending on materials and sealants. Exterior acrylic paints often range from $15 to $30 per quart, while clear waterproof sealers average about $10 to $20 per quart. Although sealing adds an upfront investment, it can preserve your sign’s appearance for several years. Signs left unprotected may quickly fade, chip, or crack, requiring frequent repainting or replacement. Regularly inspecting your sign for worn spots and resealing as needed will prolong its life and keep your outdoor space looking fresh throughout spring and beyond.
Adding 3D and Interactive Elements to Spring Signs
Adding 3D raised letters or shapes to your spring signs helps create eye-catching depth that draws attention. To do this, you can use materials like craft foam, wood cutouts, or resin letters. Cut the shapes or letters using a craft knife or a laser cutter for precise edges, and paint them with weatherproof paint if the sign will be outdoors. Attach these raised elements using strong adhesives like outdoor-grade hot glue or waterproof epoxy. Allow the glue to fully cure for 24 hours in a well-ventilated area to ensure the letters stay securely in place through temperature changes and moisture.
Interactive features make your spring sign more engaging and fun. One popular idea is to add small elements that people can move, like a rotating flower or a swing-style bird figurine. Lightweight components attached with small hinges or swivel mounts work best. For example, use a screw eye hook and a tiny chain link to hang a miniature wooden bird that swings gently in the breeze. Magnetic pieces are another option if you want removable parts for customization. These interactive elements encourage close-up viewing and add playful motion that captures the spirit of spring.
Securing additional decorations properly is important for longevity, especially outdoors. Use screws or nails for heavier objects when mounting on wooden signs, but keep in mind that repeated exposure to rain or sun may loosen fasteners over time. For lighter decorations, industrial-strength double-sided tape or glue dots can work but test them for your specific materials and environment first. Silicone adhesive sealants provide waterproof bonds, perfect for attaching faux flowers or vinyl cutouts around the edges of your sign. Always press firmly and dry the adhesive in a dust-free environment for best results.
Achieving good results with 3D and interactive spring sign elements also depends on balance and proportion. Overcrowding a small sign can look cluttered, while too few features might lack impact. Try spacing raised letters evenly and placing interactive parts where they do not interfere with readability. Weatherproofing acrylic shapes or metal letters with a clear outdoor varnish helps maintain color and prevents fading. Staying within a budget of $10 to $30 for additional materials is realistic for most DIY projects, depending on whether you choose handmade or pre-cut components. Avoid heavy decorations that increase wind resistance, which can cause damage or detachment over time.
Avoiding Common Mistakes When Creating Spring Signs
Many spring sign projects run into avoidable problems with design, painting, and materials. One frequent error is poor paint application, leading to drips, smudges, or uneven coverage. This usually happens when paint is too thick or brushes and rollers are overloaded. Use thin, even coats and let each layer dry fully, typically 30 minutes to an hour depending on paint type and temperature, to prevent smudging. Fix minor smudges by gently sanding the area with fine-grit sandpaper once dry, then repaint only that spot.
Lettering spacing can also be a challenge. Crowded or uneven letters reduce readability, making your sign less effective. Before painting, plan your lettering layout on paper or use painter’s tape or stencils on the sign surface to map spacing. For text fixes, carefully scrape off paint with a craft knife or nail file, then repaint spaced letters correctly.
Material choice impacts sign durability and appearance. Signs made from materials like untreated wood often warp or crack with fluctuating spring temperatures and humidity. Avoid warping by sealing wood with a moisture-resistant primer and outdoor paint or using weather-resistant wood types like cedar or pressure-treated lumber. For metals, check for rust-proof coatings or paint them with rust-inhibiting spray.
UV fading and weather damage are major concerns for outdoor signs. Using UV-protective clear coats after painting adds a layer of protection against fading and moisture. Choose paints designed for outdoor use to reduce cracking and peeling. Place signs in locations shielded from intense afternoon sun or heavy rainfall to extend lifespan.
- Apply thin, even paint coats and wait for full drying to avoid smudging.
- Plan your lettering layout with stencils or painter’s tape before painting.
- Seal wood with a primer and weatherproof paint to prevent warping.
- Use rust-inhibiting spray on metals for outdoor durability.
- Apply UV-protective clear coat to guard against fading and moisture.
- Fix paint mistakes by gentle sanding or scraping and repaint selectively.
- Place signs in shaded or protected locations to reduce weather damage.
Paint quality and technique make a visible difference in the final look of your sign. For outdoor projects, use acrylic latex paints rated for exterior use, typically priced around $15 to $30 per quart, which cover about 350 square feet. Starting with a smooth surface helps paint adhere better and reduces peeling. Smooth any rough spots with sandpaper before painting and wipe off dust.
Correct spacing and color contrast improve sign visibility, especially for dark lettering on light backgrounds like pastel tones. Walls painted in neutral or soft, muted shades such as shiplap white or gray can make your spring sign stand out. Take extra care with alignment and spacing for multi-word signs, like placing “hello” above “spring” neatly, to maintain balance and impact. These details contribute to a polished and welcoming spring sign that lasts through the season.
Best Indoor and Outdoor Placement Ideas for Spring Signs
Indoor spring signs work best in places where they can brighten your daily routine and complement fresh spring décor. Entryways and hallways welcome guests and shift the seasonal tone from winter to spring. You can also place signs prominently in kitchens or dining areas where family gathers, reinforcing the cheerful atmosphere. Sunrooms become perfect indoor gardens with botanical-themed signs, improving the space’s natural feel.
Outdoor spring signs thrive on porches, garden walls, and near flower beds where they catch the eye and tie into the natural surroundings. Personalized wooden signs add a warm, customized touch by the doorway or attached to a garden fence. Opt for vibrant signs with bold typography if your goal is to create a striking focal point in your garden. The porch railing or steps offer ideal spots for smaller signs, allowing a layered look when combined with potted plants or seasonal décor.
Spring signs can complement other seasonal decorations by blending with floral wreaths, pastel-coloured cushions, or outdoor lanterns. Coordinating signs with these elements often creates a cohesive theme that makes the space feel thoughtfully designed without extra effort. It also leaves room to refresh decorations gradually, phasing out winter pieces without a rushed overhaul.
- Mount a wooden “Welcome” sign inside a spring wreath on the front door.
- Position botanical-themed signs in windows facing inward to brighten indoor spaces.
- Arrange small signs along porch steps combined with potted tulips or daffodils.
- Attach larger garden signs at eye level on fences or garden walls.
- Place signs near outdoor seating areas to improve cozy spring vibes.
- Use wall hooks or removable adhesive strips for easy indoor placement and seasonal swaps.
Signs displayed at about eye level typically draw more attention and avoid being overlooked. For outdoor use, ensure your signs are weatherproofed to prevent fading or damage caused by sun and rain over the spring months. Indoor signs on smooth surfaces hung with removable hooks protect your walls and allow quick updates each season. Cost ranges vary from under $10 for DIY paper or chalkboard signs to $40-$100 for custom wooden outdoor pieces. Good placement is evident when signs feel like a natural part of your space and receive compliments. Poorly placed signs get lost behind clutter or too small a display area.
Test your chosen outdoor spot for at least a couple of days to see how weather and sunlight affect the sign’s visibility before permanently mounting it.
When to Make vs. Buy a Spring Sign
Deciding whether to make or buy a spring sign depends largely on your available time, budget, and desire for personalization. Crafting your own sign can take anywhere from a couple of hours to a full day, depending on the complexity of the design and drying times for paints or adhesives. This option suits you if you enjoy hands-on projects and want to add a custom touch like your family name at the bottom of a wooden sign. Materials for DIY signs can be very budget-friendly, especially when using items from places like Dollar Tree, where individual craft supplies often cost around $1 each. These signs offer a unique charm and reflect your personal style, such as incorporating a carrot shape that captures both spring and Easter themes.
On the other hand, buying a ready-made spring sign saves a lot of time. You can simply pick one up and place it in your porch or garden to quickly switch to a spring vibe. Store-bought signs typically cost between $15 and $40, depending on size and material. This route is ideal if you want a polished look without investing time or if you need the sign immediately for an event or decoration refresh. The designs often use eye-catching vertical height to draw attention and make porch spaces feel larger, which is a useful trick if your outdoor area is cozy.
Personalization matters when you want your spring sign to feel unique or serve as a family-friendly statement. Hand-painted options allow adding names or special greetings, making the piece truly your own. If personal touches are less important or you prefer a consistent style across your decor, ready-made signs offer quality and variety with minimal effort. Consider your schedule, skill level, and the specific space you’d like to decorate. Crafting might appeal if you have a free weekend and enjoy creative tasks, while buying fits better if you want an instant refresh.
Costs may vary based on materials. For example, wooden blanks and paint for a DIY sign might cost $10 to $20 total, but you’ll need brushes and stencils if you don’t already have them, which is a one-time investment. Ready-made signs factor in design, finishing, and usually come weatherproofed, which adds value but is reflected in the price. Weatherproofing your own sign will take extra time and materials. Weigh these factors carefully before choosing. A DIY project can offer great satisfaction and savings, but buying is more convenient and delivers predictability in appearance and durability.
Step-by-Step Action Plan for Creating Your Spring Sign
Use this plan to design and display a spring sign that brightens your space and reflects the season.
- Before you start: Choose your theme and style based on whether the sign is for indoors or outdoors. This helps narrow down materials and design choices.
- Day 1: Select your materials, wood, metal, or chalkboard, matching your location needs and finish. Confirm the surface works well for your tools and paints.
- Day 2: Pick your shape and size considering the wall or area where you’ll place the sign. Measure the space to ensure a good fit.
- Day 3: Sketch your design, incorporating flowers, nature motifs, and seasonality. Decide on fonts and 3D elements to add visual interest.
- Day 4: Prepare your materials by sanding and priming wooden or metal surfaces. This step ensures longevity and a smooth finish.
- Day 5: Paint or assemble your sign, mixing typography styles carefully. Check the colors for spring-appropriate vibrancy and legibility.
- Day 6: Apply a weatherproof sealant if your sign will be outdoors. Test dryness and durability by gently touching after curing time.
- Day 7: Install your sign in the chosen spot. Observe it at different times of day to confirm visibility and impact.
Frequently Asked Questions
What Materials Work Best for Spring Signs in Humid Climates?
Use weather-resistant materials like treated wood or metal to withstand moisture. Seal wood with waterproof paint and apply a protective topcoat to prolong the sign’s life outdoors in humid areas.
How Can I Create a Spring Sign That Doubles as Home Decor Year-Round?
Choose neutral colors and simple nature motifs that evoke freshness without specific seasonal cues. This approach allows the sign to blend with various decor styles beyond spring.
What Are Some Cost-Effective Ways to Update Old Spring Signs?
Refresh old signs by sanding the surface and applying new paint or decals. Adding small floral accents or changing the lettering style can give an inexpensive sign a fresh look.
Can I Use Fabric for DIY Spring Signs, and How Durable Are They?
Fabric can add texture but isn’t very durable outdoors without protection. Use it on indoor signs or cover with a clear sealant to prevent fading and wear.
How Do Lighting Options improve Spring Signs in Outdoor Spaces?
String lights or solar-powered LEDs highlight signs after dark, increasing visibility and charm. Choose warm white bulbs for a cozy feel without harsh brightness.
What’s the Easiest Way to Personalize a Spring Sign Without Special Tools?
Use stencils and acrylic paint for clean lettering and simple graphics. This method doesn’t require cutting machines and offers consistent, professional-looking results.
Wrapping Up
Spring signs add a fresh, seasonal touch to your home and garden. Creating your own lets you tailor the look to your style and space. Take your first simple step today by selecting a material and sketching a basic design that fits a spot you want to brighten for spring.