How Much Does a Banner Cost? A Complete Guide with Price Breakdown & Tips
How much does a banner cost? On average, expect to pay about $2.50 per square foot for a standard vinyl banner, with a typical 8 by 4-foot banner costing around $75 before extras. Optional features and order quantity can significantly change the final price. Start by calculating your banner’s area to estimate a base cost quickly.
Key Takeaways
- Banner prices usually range from $3 to $8 per square foot, depending on materials and print quality.
- Vinyl is the most common banner material, offering durability and weather resistance for about $1.40 to $5 per square foot.
- Grommets, hemming, and wind slits add extra fees, expect about $10 to $30 more depending on size.
- Ordering in bulk lowers the cost per banner significantly due to shared setup and production fees.
- Local delivery charges vary widely, adding $20 to $60 based on distance from the print shop.
- Larger or higher-quality print files typically increase design and production costs.
How Much Does a Banner Cost on Average?
Banner costs typically range from about $20 for a small banner to several hundred dollars for larger or custom sizes. The size of the banner has the most direct impact on the base price since prices usually depend on the area in square feet multiplied by a cost per square foot. For example, many vendors charge between $3 and $8 per square foot, with an average around $4 to $5 for standard vinyl banners. Smaller banners might start at a base price near $20 to $30, while larger banners, such as 8 feet by 3 feet (24 square feet), can cost roughly $75 to $120 before extras.
Calculating banner costs follows a simple formula: multiply the width by the height to get the area in square feet, then multiply that by your cost per square foot. For example, an 8′ x 3′ banner is 24 square feet. At $3 per square foot, the base cost would be 24 × $3 = $72. A larger banner measuring 10′ x 5′ (50 square feet) at $4 per square foot would cost approximately 50 × $4 = $200. These examples show how size increases the total cost as the printing material and ink use scale accordingly.
The average price per square foot varies but typically falls between $3 and $6, depending on material quality and vendor. Some printers offer lower rates for very large banners or cheaper materials, where prices can drop as low as $1.40 per square foot. Keep in mind that some vendors use tiered pricing, smaller banners may have a higher per-square-foot cost, while large, heavy-duty banners can cost more due to extra material waste but may also benefit from volume pricing.
Purchasing banners in large quantities lowers the price per unit through volume discounts. For instance, a single 3′ x 6′ banner might cost $45, but ordering ten reduces the price to about $30 each. This savings happens because fixed expenses like setup and design fees are distributed across more items. For example, ordering ten 8′ x 3′ banners at $3 per square foot, along with a $50 design charge and $25 finishing fee, results in a total of (10 × 24 × $3) + $75 = $795. Dividing $795 by ten means each banner costs around $79.50, which is less than buying just one banner that includes the entire design cost.
Which Banner Materials Affect Pricing Most?
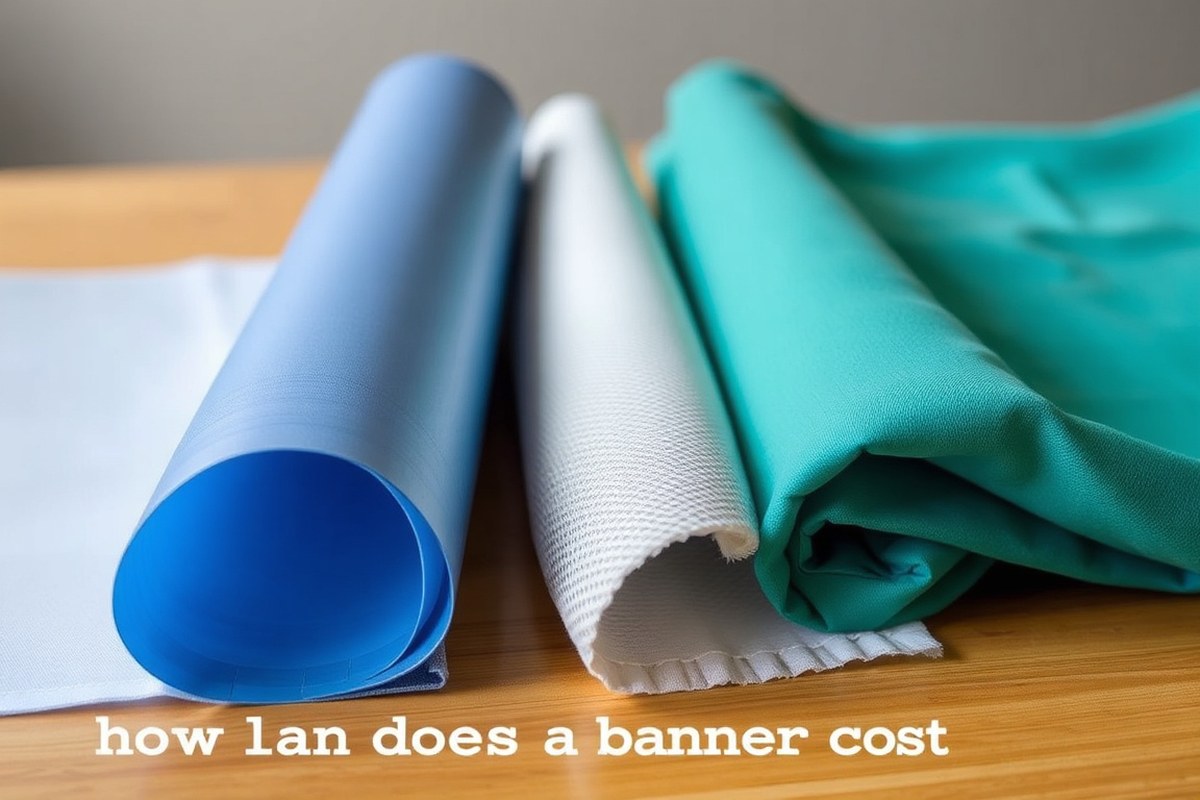
Banner material choice directly impacts both the price and suitability for your needs. Vinyl banners, especially the standard 13 oz type, are the most affordable option, costing about $3.00 per square foot. They offer good durability, lasting up to two years outdoors with UV protection, water resistance, and fade resistance. Mesh vinyl is pricier, around $5.00 per square foot, but worth it for windy outdoor areas like fences or scaffolding because its tiny holes reduce wind drag. Fabric banners cost about $7.00 per square foot, nearly double the standard vinyl, and provide a premium look ideal for indoor use such as trade shows or photo backdrops. The extra cost comes with a softer feel and higher resolution print quality.
| Material | Price per Sq Ft | Cost for 8 × 3 ft Banner | Durability | Best Uses |
|---|---|---|---|---|
| Standard 13 oz Vinyl | $3.00 | $72.00 | Up to 2 years outdoor with UV protection | General outdoor and event banners |
| Heavy-duty 15 oz Vinyl | $4.50 | $108.00 | Longer outdoor runs, larger spans | Extended outdoor use, large banners |
| Mesh Vinyl | $5.00 | $120.00 | Durable in windy conditions | Windy sites, fences, scaffolds |
| Premium 18 oz Vinyl | $6.00 | $144.00 | Blockout and double-sided printing | Premium outdoor displays |
| Fabric | $7.00 | $168.00 | Indoor use, less weather resistant | Indoor backdrops, trade shows |
Vinyl remains the workhorse for most small businesses and events due to its balance of cost and weather resistance. Heavy-duty vinyl suits longer-term outdoor campaigns or large-scale banners, but costs increase accordingly. Fabric banners give you a polished appearance indoors, especially in areas with lower risk of moisture or rough handling. Avoid fabric outside unless you plan to keep the banner sheltered to prevent fading or damage.
Opt for mesh vinyl when hanging banners in exposed, windy locations where a solid vinyl might tear or pull away. While the price per square foot is higher, mesh reduces wind resistance and improves longevity, potentially saving replacement costs later. For everyday outdoor advertising or event signage, standard vinyl still produces reliable results at a budget-friendly price.
Tip: Choose mesh only if you expect significant wind exposure; otherwise, standard vinyl offers good durability for most outdoor uses at a lower cost.
What Optional Features Add to Banner Costs?
Basic finishing like hems on all four sides and grommets every 2 feet usually come included in the banner price. Optional features such as pole pockets, double-sided printing, wind slits, and webbing often add 10% to 30% more to the total cost depending on the size and complexity. Choosing the right finishing touches depends on how and where you plan to display your banner and the display’s durability requirements.
Standard Finishing Features Included
Most vinyl banners come professionally finished with hems sewn along all edges. These hems reinforce the banner and prevent fraying, ensuring a longer lifespan. Grommets, typically spaced every 2 feet, are installed inside the hem to provide sturdy, rust-resistant holes for hanging or mounting.
You usually don’t pay extra for these standard finishes because they are part of the printing and fabrication process. The grommet count varies by banner size; for example, a 4-foot by 6-foot banner may have around 10 grommets, while a smaller 2-foot by 4-foot banner might have 6. This count ensures you can securely hang the banner without strain or tearing.
Popular Optional Finishes and Prices
Several finishing options can improve your banner’s performance or aesthetics but typically come at extra cost:
- Pole Pockets: Fabric pockets sewn into edges, usually 2″ to 4″ wide, allow poles to pass through for a taut, flat display. Adding pole pockets generally increases the price by about 10%.
- Wind Slits: Vertical cuts reduce wind resistance outdoors but are not commonly recommended as they may weaken material strength. Some printers offer them at a small additional charge.
- Double-Sided Printing: Printing on both sides roughly doubles the printing cost because it uses twice the material and ink.
- Custom Grommet Placement: Providers can place grommets at custom intervals or locations for an additional fee.
- Webbing or Reinforced Corners: Extra fabric reinforcement adds durability to stress points, costing extra depending on size and placement.
- Velcro Edges: Sewn-in Velcro helps attach the banner to frames or surfaces more easily and raises the cost modestly.
Choosing these options depends on display conditions. For example, pole pockets are well worth the extra cost for banners meant to hang on vents or poles to avoid sagging.
When to Upgrade to Double-Sided Printing
Double-sided printing is worth the higher price if you want your message visible from both sides without moving the banner. This is particularly useful for banners suspended in open spaces, hanging from ceilings, or displayed in windows where passersby could see either side.
Costs for double-sided prints can be 80% to 100% more than single-sided banners because they require twice the ink and nearly double the material thickness to prevent show-through. For smaller banners under 3 feet wide, the price gap may be less steep. Evaluate your budget and intended use: if visibility from both sides will boost engagement or sales, the extra expense can be justified.
Be aware that double-sided banners tend to be thicker and heavier, which might require stronger mounting supports. Always confirm with your printer if your chosen finishing options are included in the base price or incur additional fees, especially for custom grommet placement or pole pockets.
How to Calculate Your Banner’s Total Price Step-by-Step
Calculating your banner’s total price involves measuring its size, multiplying by a rate per square foot, then adding fees for finishing touches and shipping. This method ensures you understand each cost element and can predict your final expense accurately. Follow the steps below to break down the total cost clearly.
Measuring Your Banner Dimensions
Start by measuring the banner’s width and height in feet. This gives you the total banner area, which many printers charge for on a per-square-foot basis. A precise measurement is essential since even a small difference can change your final cost noticeably.
Some printers apply a minimum banner size for billing, so confirm if your printer has such a policy. Also, if printing on both sides, measure each side separately and multiply the total area by two.
Applying Cost per Square Foot
Next, determine the rate your printer charges per square foot. Rates vary widely, from about $2.50 for basic vinyl to $8 or more for specialty materials or smaller runs. Multiply the banner area by this rate to get the base printing cost.
For instance, a 6-foot wide by 5-foot tall banner equals 30 square feet. At a $5 per square foot rate, that base print cost is 30 × $5 = $150. Many printers offer discounts on larger orders, but if not, multiply by quantity to get total print cost.
Adding Finishing and Shipping Fees
Finishing options like hems, grommets, or pole pockets add cost but ensure durability and ease of use. Installation or design fees may also apply. Add these fees to the base print cost. Then include shipping, which depends on size, weight, and speed.
Rush printing or expedited shipping increases the price. For example, a $150 base cost plus $30 for finishing and $25 shipping results in a total of $205. Always check your printer’s specific charges to avoid surprises. Follow these steps to calculate your banner’s total cost precisely:
- Measure the width and height of your banner in feet and multiply the two to find the total square footage.
- Check the printer’s rate per square foot for your chosen material and multiply it by the banner area to get the base cost.
- Add any finishing fees such as hems, grommets, or pole pockets to improve banner function and longevity.
- Include additional charges like design or installation fees if applicable.
- Calculate shipping costs based on your banner’s size, weight, and delivery timeframe.
- Add any rush or expedited fees if you need faster production or delivery.
- Sum all components: base print cost + finishing fees + design/installation + shipping + rush fees to reach your total price.
By following this process, you gain control over budgeting your banner project and can compare pricing quotes with confidence.
How Does Order Quantity Impact Banner Pricing?
Ordering multiple banners at once typically lowers the per-banner cost because fixed setup fees get spread across all units. Setup or design fees often remain the same regardless of quantity, so when you buy in bulk, these costs dilute. For example, a single banner might cost $90 including a $15 setup fee. Ordering 10 banners could cost around $795 total, which comes out to about $79 each.50 each. The printing cost doubles if you order double-sided banners, but that fee increases per unit rather than per order.
Setup fees cover one-time expenses like preparing the printer, proofing your design, or cutting materials, which do not multiply with each additional banner. This means ordering a single banner means you pay those full setup fees yourself. But adding nine more banners adds mostly just materials and printing time, both cheaper per unit. Some printers may advertise bulk discounts on top of this, but the main cost advantage is often from the fee dilution.
For small businesses or event organizers needing multiple banners, such as trade show backdrops measuring 8 × 10 feet or larger, ordering in quantities of 5 or 10 can significantly reduce your cost per banner. The exact threshold for when ordering multiples is worth it depends on your project deadlines and budget, but generally, once you need more than a handful of identical banners, multiple orders save money. Banners with different designs or sizes can make pricing more complex, since setup fees might be charged for each design or size batch.
Some online banner pricing tools show you unit costs that include fixed fees distributed across quantities, while others may add automatic or fictitious bulk discounts. It helps to ask the printer for a detailed breakdown so you see clearly where savings come from, whether from spreading setup costs or genuine volume discounts. This transparency allows you to compare quotes effectively and avoid mistaken assumptions about savings.
Check if your supplier charges setup fees per design or per order before placing a bulk banner order to ensure you get the best per-unit price.
What Regional Factors Influence Banner Costs?
Banner costs vary significantly depending on regional factors. Labor rates, shipping distance, and local economic conditions can add to the final expense differently across urban, suburban, and rural areas. Urban centers often report higher prices due to increased wages, tighter logistics, and improve demand. Rural locations may benefit from lower base printing costs but face higher delivery charges because of longer distances or less frequent courier routes.
The Northeast and West Coast tend to have higher pricing owing to both labor costs and local taxes. Many print shops in these areas incur overhead expenses that push sticker prices upward. Suburban areas usually fall between rural and urban markets, offering moderate labor and shipping fees. Considering shipping, distance plays a direct role. Longer routes increase fuel and handling expenses, which print providers pass on to customers, sometimes with added regional surcharges.
Below is a table summarizing typical regional pricing differences for a 3′ x 6′ single-sided vinyl banner with a basic gloss finish and standard shipping. The base price includes labor and material but excludes optional features and design service fees.
| Region | Base Printing Cost (USD) | Average Labor Rate (%) | Typical Shipping Cost (USD) | Additional Regional Fees |
|---|---|---|---|---|
| Urban Northeast | $230 | 20% | $45 | Local tax, environmental fees |
| Urban West Coast | $240 | 22% | $50 | Higher state taxes, surcharges |
| Midwest Suburban | $210 | 15% | $30 | Minimal |
| Rural Midwest | $190 | 12% | $60 | Fuel surcharge |
| Rural South | $185 | 10% | $65 | Delivery access fee |
Labor rates shown represent the typical markup on base material costs in each region. These markups reflect wages, rent, and utility costs influencing print shop pricing. Shipping costs depend on distance and delivery speed. For example, urban Northeast shipping is often cheaper than rural Midwest delivery, which may require longer transport and fuel surcharges.
Local economic conditions affect supply chain efficiency and material availability. Print shops in high-demand urban markets might face increased material costs compared to those in rural areas. However, rural providers may offset this by charging more for shipping or a delivery access fee if the location is difficult to reach.
To reduce banner costs in higher-priced regions, consider ordering with extended lead times to avoid rush fees and choose larger quantities to lower unit prices. Also, if available, arrange in-store pickup to cut shipping charges. Planning for a simple design and avoiding urgent delivery can help keep regional surcharges manageable.
How Long Does Banner Production Usually Take?
Banners typically take about 24 hours to produce under standard conditions. Rush and same-day services may be available for an extra fee, often depending on the size, material, and printing complexity. Planning your timeline carefully helps avoid extra costs and ensures the quality of the finished banner.
Standard Banner Production Times
Most standard banner orders are completed within 24 hours of finalizing artwork and confirming details. This timeline suits banners printed with standard 1- or 2-color designs on stock materials like 9oz or 10oz vinyl. Production includes printing, drying, hemming, and adding grommets or other finishing touches.
This 24-hour turnaround applies mainly to domestic production facilities handling common sizes such as 2′ x 4′ or 3′ x 6′. Larger custom sizes or specialty materials might require up to 2-3 business days under standard processing.
Expedited and Rush Printing Options
Many print shops offer expedited services that speed up production to next-day or same-day turnaround. Next-day rush orders typically need to be submitted before a specific cut-off time, commonly around 10 a.m. Local plant time, to qualify.
Same-day rush printing is often reserved for smaller banners or simpler designs and usually costs an additional 25% to 100% above the standard price. This fee covers extra labor shifts and priority use of equipment.
- Next-day rush cut-off time usually 10 a.m. Local plant time
- Same-day rush sometimes available for smaller banners
- Rush fees range from 25% to 100% of base banner cost
- Rush orders may limit customization or size options
- Heavy-duty materials like 15 oz or 18 oz vinyl often need more time
Ordering early in the day with approved artwork maximizes the chance for same-day service. Make sure your design files meet printer specs to avoid delays.
Factors Affecting Production Speed
The choice of banner materials affects how quickly your order can be completed. Heavy-duty fabrics with blockout layers or double-sided printing usually require more time to handle properly. Complex designs with full-color photo-quality or multiple layers tend to increase processing time.
Other factors include the order quantity, finishing features like reinforced hems or installed stands, and the print shop’s workload. Local production plants with high demand may slow down even expedited orders. To help ensure a timely turnaround:
- Approve artwork and proof promptly
- Choose standard sizes and materials when possible
- Submit orders early in the day to meet rush cut-offs
- Avoid last-minute design changes
- Communicate clearly with the printer about deadlines
Which Design and Artwork Factors Affect Banner Price?
Image resolution directly influences the printing price of your banner. Files prepared with at least 150 dpi (dots per inch) give clear, sharp images and usually print without issues. Lower resolution images can look pixelated or blurry, which forces the printer to spend extra time fixing or recreating artwork, often adding charges. Providing a high-resolution file avoids rework fees and delivers professional-looking results, saving money in the long run. For effective file setup, use vector graphics when available and ensure bitmap images meet or exceed 150 dpi at the final print size.
Color complexity also impacts the cost. Banners with simple color schemes, like one or two colors, cost less than those requiring numerous shades or gradients. Full-color photographic prints consume more ink and require longer print times, which increases expenses. If your design uses spot colors or special effects like metallic or fluorescent inks, expect extra charges due to specialty materials and setups. Keep your artwork’s color palette as simple as your message allows to manage costs effectively.
Printing shops often charge for design services separately or include them in the printing price. These fees cover creating or modifying artwork to meet print specifications. For example, converting a low-res logo into vector format or adjusting layouts to fit banner dimensions involves staff time and software use. Design fees are usually one-time and do not increase with the number of banners, so investing in quality artwork upfront can reduce additional costs later. Getting proper design help early ensures your banner prints correctly the first time.
Poor artwork preparation causes avoidable expenses. Common issues include incorrect file formats, missing fonts, unsupported colors, and non-bleed designs. Each problem can cause delays or require manual fixes by the printer’s design team, adding setup charges or rush fees. A well-prepared file follows printer guidelines exactly: save as PDF, EPS, or AI formats; embed or outline all fonts; convert colors to CMYK; and include a bleed area of at least 0.125 inches (1/8 inch) outside the trim edge. This precision reduces errors and streamlines production.
Practical design preparation tips include confirming your file resolution matches banner size, limiting colors to what fits your budget, and communicating clearly with the printing service about artwork needs. Sending proof samples or previews can catch errors before printing. Avoid last-minute design changes to keep production costs down. Those who supply clean, print-ready artwork typically pay less than those who submit incomplete or incorrect files.
Submitting low-resolution or unprepared artwork can double your costs due to extra design and printing corrections, always check resolution and file specs before ordering.
Your Banner Cost Action Plan
Follow these steps to estimate and manage your banner costs effectively for your business or event.
- Before you start: Determine your banner’s purpose and size to help narrow material choices. Check if pricing fits your budget as you research.
- Day 1: Choose the banner material based on where you’ll display it, vinyl for outdoors or fabric for indoor use, and note how prices vary accordingly.
- Day 2: Decide on optional features like grommets or pole pockets that match your display needs. Add their costs to your quote.
- Day 3: Review your design elements, including artwork complexity and colours, which can influence pricing. Simplify your design if you want to save.
- Day 4: Contact suppliers for quotes and compare bulk order discounts if you need multiple banners. Look for how order quantity shifts unit price.
- Day 5: Confirm production time frames with the printer to align delivery with your event date or campaign launch.
- After purchase: Inspect the finished banner for quality versus cost. Confirm it meets specifications to avoid reorders and extra expenses.
Frequently Asked Questions
Can Banner Cost Vary by Printing Method?
Yes, digital printing usually costs less than screen printing. Digital suits short runs and detailed designs, saving money on small orders.
Do Design Revisions Affect Banner Price?
Small changes may be free, but multiple revisions can add design fees. Clarify revision policies before ordering to avoid surprises.
Are Rush Orders More Expensive for Banners?
Yes, expedited production can increase costs by 20-50%. Confirm timing and fees upfront to budget correctly.
Do Weatherproof Features Increase Banner Price?
Yes, coatings or lamination for UV and water resistance raise costs. Useful for long outdoor use to extend banner life.
Can Custom Sizes Significantly Change Banner Price?
Custom sizes usually affect total cost based on area, but oddly sized banners might have extra setup fees. Ask for quotes on non-standard dimensions.
Is Professional Installation Included in Banner Cost?
Installation is rarely included and usually requires an additional fee, especially for large or high placements. Plan for separate installation costs when budgeting.
The Bottom Line
Knowing how material, design, optional features, order size, and timing affect banner costs lets you plan your budget better and pick the best product for your needs. Start by deciding your display setting and size, then get pricing from a few local or online printers. Taking this step soon helps avoid surprises and makes your banner purchase smoother and more cost-effective.