How to Make a Floating Frame Sign: A Complete Step-by-Step Guide
How to make a floating frame sign starts by choosing wood pieces slightly larger than your canvas to create a visible gap between the canvas and the frame. Cut 1×2 boards with 90° miters, attach inner spacers for the floating effect, and assemble sturdy corner braces for stability. Finish by sanding and applying a protective finish, then securely mount your canvas inside the frame with picture wire and hooks.
Key Takeaways
- Cut your 1×2 lumber to frame dimensions about 1.75 inches larger than the canvas width and height.
- Use a consistent gap of 1/4 to 1/2 inch between canvas and frame for the floating effect.
- Prepare inner spacers from ¾-inch square dowels to lift the frame off the canvas evenly.
- Secure frame corners with 6-7 inch corner braces cut at opposing 45° angles for added strength.
- Allow finishes to cure 24 to 48 hours before handling the frame to ensure durability.
- Use picture wire rated to hold at least 30 pounds along with hooks of similar capacity.
What Materials and Tools Are Needed for a Floating Frame Sign
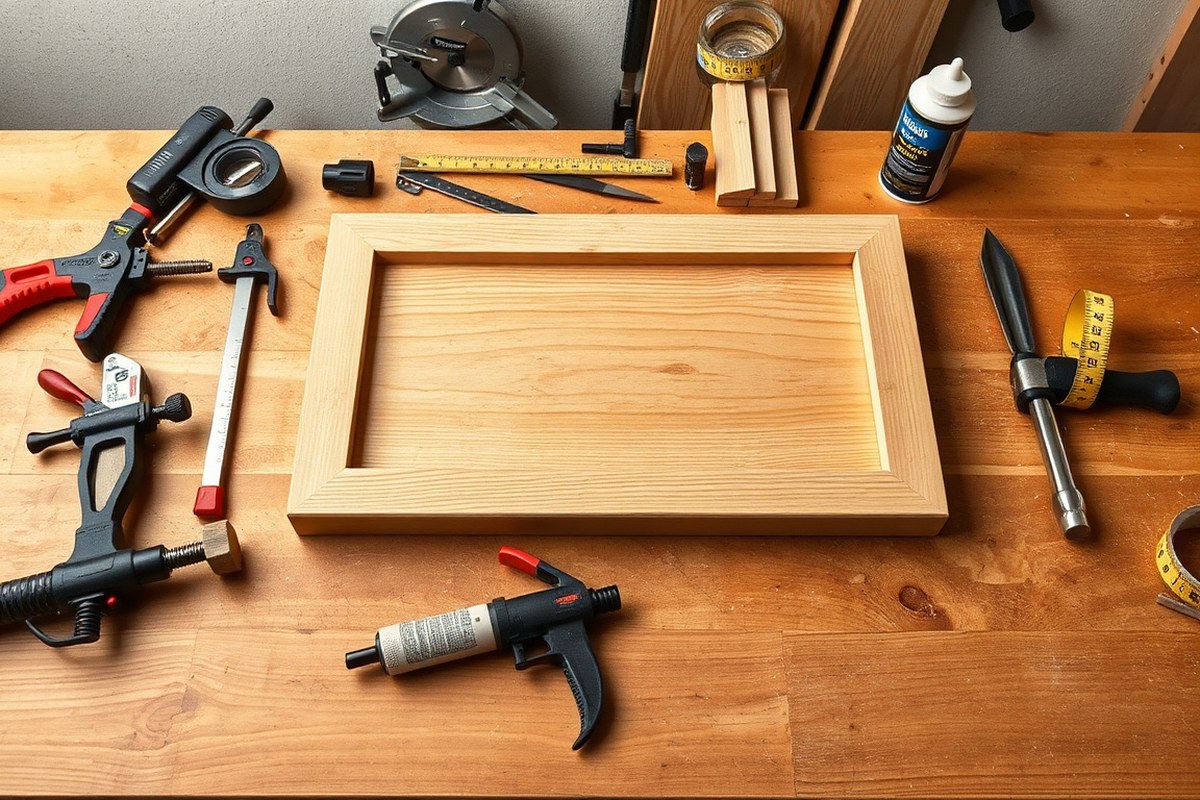
Choosing the right materials and tools sets the foundation for a successful floating frame sign project. Wood selection is particularly important because it affects both durability and appearance. Pine offers a budget-friendly, lightweight option ideal for beginners, while hardwoods like maple or poplar provide a more polished, sturdy frame. Look for boards that are ¾ inch thick, which strike a good balance for stability and ease of handling. Avoid warped or knot-filled wood, as these can complicate cuts and weaken the frame.
A miter saw or hand saw is essential for clean, accurate cuts on the wood boards. A miter saw speeds up the process and produces consistent angled edges needed for the frame corners. A drill paired with the correct drill bits lets you attach the pieces securely using screws without splitting the wood. Wood glue adds an extra strong bond at joints. For the floating effect, thin spacer strips are required to create the gap between the canvas and frame, usually ranging from 1/4 to 1/2 inch thick.
- Wood boards: ¾” thick pine, maple, or poplar for the frame and backing
- Miter saw or hand saw for precise cutting of frame pieces
- Drill and drill bits for making pilot holes and driving screws
- Wood glue and screws to secure corners and backers
- Spacer strips (1/4” to 1/2” thick) to create floating gap
- Sandpaper (120 to 220 grit) for smoothing edges before finishing
- Safety gear: eye protection and dust mask to guard during cutting and sanding
Scrap wood can be a convenient, cost-effective alternative if it meets thickness and quality criteria. You need boards wide enough to accommodate your canvas dimensions plus at least a 1/8 to 1/4 inch gap on all sides for the floating effect. For example, a 16”x20” canvas might need frame pieces cut to about 18”x22”. Clamps help hold pieces steady while glue dries, improving joint strength. After assembly, sanding removes rough spots and prepares the wood for staining or painting, which improve the final look.
Spending a little more on quality wood often pays off with a neater appearance and fewer issues like cracking or warping. Safety equipment like goggles and masks protect your eyes and lungs from sawdust during cutting and sanding, making the work safer and more comfortable. Having all these tools and materials ready before you start helps avoid interruptions and keeps your project on track.
How to Measure and Cut Wood Pieces for Your Frame

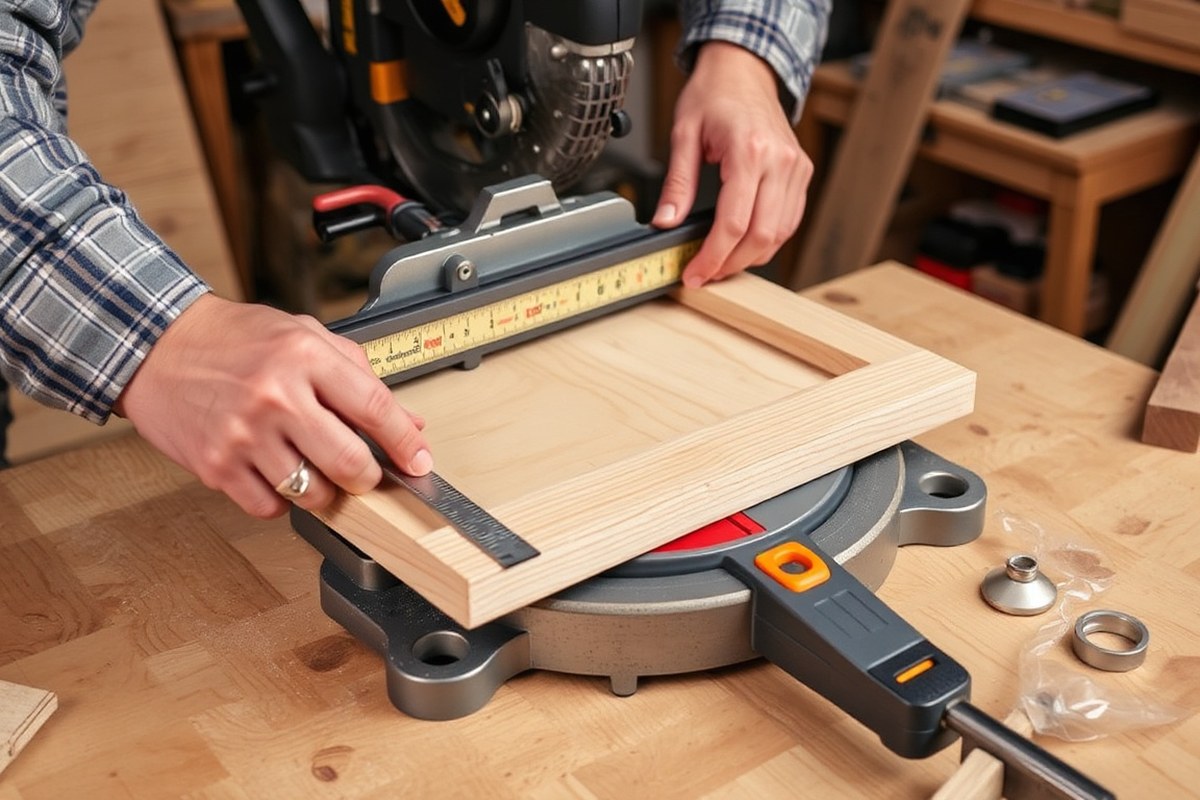
Measuring and cutting wood pieces accurately sets the foundation for a clean floating frame sign. Measure your canvas, add the floating gap and wood thickness, then cut your wood strips to those precise lengths using mitered corners for perfect joints.
Measuring Canvas and Adding Floating Gaps
Start by measuring the length and width of your canvas exactly. To get the floating frame size, add a small gap, typically between 1/8 inch and 1/4 inch, to each side; this gap creates the signature floating effect. Next, add the thickness of the frame wood (usually 3/4 inch) to each dimension. This final number determines how long each frame piece should be when cut with mitered corners.
For example, a 30×40-inch canvas with a 1/4-inch gap and 3/4-inch-thick frame wood results in a frame size of 31.5×41.5 inches (30″+ 2×(0.25″ + 0.75″)). Cut the wood strips so their outside edges measure this length from tip to tip at the 45-degree mitered ends.
Marking and Preparing Wood for Miter Cuts
Use a pencil and tape measure to mark your cut lines on 1 5/8-inch-by-width wood strips. Make sure to mark both the length and the angle of each miter cut. Position the marks on the side of the wood that will be visible once assembled to ensure neat corners. Follow these steps to prepare and cut your pieces:
- Measure the canvas length and width.
- Add 1/8 to 1/4 inch floating gap per side.
- Add the wood thickness (usually 3/4 inch) twice per dimension.
- Mark lengths on wood strips from longest tip to tip.
- Set saw blade or saw guide to 45 degrees for miter cuts.
- Cut each piece precisely to the measured length with 45-degree ends.
- Label each piece to remember its position around the frame.
Tip: Cut the longest sides first, then fit and trim shorter pieces; this helps achieve tight-fitting corners.
Choosing Between Miter Saw and Hand Saw
A miter saw is best for these cuts because it guarantees clean, precise 45-degree angles. This power tool can cost anywhere from $70 for a basic model to over $200 for more advanced saws, but its accuracy speeds up the process and reduces mistakes. With a miter saw, you simply set the angle, position the wood, and make the cut.
A hand saw with a miter box is a budget-friendly alternative, usually under $20. It guides your saw to the correct 45-degree angle but requires steady hands to ensure clean, even cuts. This option is slower and less precise, so expect to fine-tune cuts with sandpaper or a file.
| Tool | Cost Range | Accuracy | Speed | Best For |
|---|---|---|---|---|
| Miter Saw | $70 – $200+ | Very High | Fast | Frequent or precise framing |
| Hand Saw with Miter Box | $10 – $20 | Moderate | Slower | Budget or occasional use |
Best Practices for Assembling and Securing the Floating Frame
To assemble a strong and square floating frame sign, start by carefully aligning and clamping the corners at exact 90-degree angles. Use wood glue for a tight bond and strengthen the joints with finish nails or screws for long-lasting durability. Reinforcing corners with braces or dowels prevents loosening over time and helps maintain the frame’s clean, polished look.
Applying Wood Glue and Using Clamps
Wood glue creates a solid joint that holds your floating frame pieces together firmly. To ensure proper alignment, apply glue evenly to the mitered edges before pressing the corners together. Clamps help keep the pieces tightly joined and square during drying, preventing any shifting that could ruin the frame’s appearance.
A corner clamp or band clamp is ideal for holding the frame at a precise 90-degree angle. Work in one direction around the frame to keep it flush and avoid uneven joints. Let the glue dry fully, which typically takes 24 hours for most wood glues, before removing clamps to avoid weakening the bond.
- Spread a thin, even layer of wood glue on both mitered edges of the corner pieces.
- Press the two pieces together firmly, ensuring the edges line up without gaps.
- Clamp the joint using a corner clamp or band clamp to hold a perfect 90-degree angle.
- Repeat the gluing and clamping process for all corners moving clockwise or counterclockwise.
- Wipe away any excess glue scraped out from the joint with a damp cloth before it dries.
- Allow the glue to cure fully for at least 24 hours before handling or adding fasteners.
Nailing and Screwing for Stability
Wood glue provides strong adhesion, but pairing it with nails or screws boosts the frame’s durability, especially for larger or heavier signs. Finish nails (also called brad nails) driven into the corners keep the pieces from shifting while the glue sets. Screws add even more reinforcement but must be short enough to avoid piercing through the frame’s surface.
Drive two nails per corner into the timber members to secure joints firmly. Position nails into the top and bottom frame pieces only to avoid splitting the wood. Small screws can replace nails if you prefer added holding power, pre-drill pilot holes to prevent wood splitting.
- After the glue has set, position the frame on a flat surface for nailing.
- Use a nail gun or hammer to drive two finish nails into each corner, aiming for the top and bottom pieces.
- If using screws, pre-drill holes smaller than the screw diameter to avoid wood splitting.
- Drive short screws (about 1 inch) into the same spots as nails without penetrating the front face.
- Check that the frame remains square while fastening to prevent distortion.
- Remove any stray glue or nail holes with fine sandpaper for a clean finish.
Adding Corner Braces or Dowels
Corner braces and dowels provide extra mechanical support that helps prevent the frame corners from loosening over time. Small wooden braces cut from scrap 1×2s with opposing 45-degree angles fit neatly inside corners on the back side of the frame. Attaching these with wood glue and finishing nails locks joints securely.
Dowels work similarly by reinforcing the joint from within the mitered edges. Drill matching holes into both frame pieces at the corner and glue dowels into place before assembly. This adds internal strength without visible hardware. Using corner braces or dowels is especially helpful for large floating frames or those exposed to frequent handling.
- Cut four corner braces about 6 to 7 inches long with 45-degree angles on each end to match the frame corners.
- Apply wood glue to the brace’s contact surface and align it flush on the back of each frame corner.
- Secure the braces with two angled finish nails per end, driven through the brace into the frame edges.
- Alternatively, drill holes at the miter joint and glue wooden dowels into both adjoining frame pieces before clamping.
- Clamp and nail or clamp and let the glue dry fully to achieve strong reinforcement.
- Check the frame thoroughly for squareness after installing corner braces or dowels.
How to Prepare and Attach Inner Spacers for the Floating Effect
Spacer strips inside a floating frame create the gap that makes the canvas appear to float within the frame. These spacers maintain the gap on all sides and provide a secure support surface for mounting the canvas, ensuring it does not sit flush against the frame. Proper material choice, size, and placement of these strips are key to achieving a clean, professional floating effect.
Spacer Material and Size Recommendations
Use thin wood strips such as lattice or quarter-round moulding for spacers, typically around 1/4 inch thick. This thickness strikes a good balance by providing enough depth to create the floating gap without pushing the canvas too far back inside the frame. The wood should be smooth and free of splinters to avoid damaging the canvas or backing.
Spacers typically measure about 3/4 inch in width to create a stable surface for attaching the canvas. The length of each strip should match the interior length and width of your frame pieces, cut precisely to fit flush along the inside edge. Adjust the thickness based on your canvas depth, especially if using gallery-wrapped canvases, to make sure the canvas sits evenly and securely.
Positioning Spacers Inside the Frame
Attach spacer strips directly to the inside face of each frame side. They should run along the perimeter, creating a recessed ledge about 1/4 to 1/2 inch away from the frame edges. The canvas will rest on these ledges, leaving the gap that creates the floating look.
Place the spacers so that they project outward from the frame back toward the canvas. This lifts the artwork slightly above the frame backing, allowing space for shadow and depth. Ensure the strips are evenly positioned and level to keep the canvas aligned uniformly.
How Spacers Support Secure Mounting
Spacers create a secure surface to attach offset clips or screws that hold the canvas firmly in place inside the frame. Without spacers, the canvas would rest directly against the frame backing, losing the floating effect and risking instability.
Use 1/4-inch screws to fasten the canvas to the spacer strips or wooden support strips attached to them. This setup maintains the gap and prevents the canvas from shifting or falling. The spacers also protect the canvas edges by preventing contact with the frame sides.
Step-by-Step Guide to Cutting and Fitting Spacer Strips
Follow these exact steps to prepare and install spacers for a clean floating frame effect:
- Measure the inside length and width of your assembled frame where the canvas will sit.
- Cut four spacer strips to these inside dimensions using a miter saw or fine handsaw, ensuring clean 90-degree ends for corner fit.
- Sand the spacer strips lightly to smooth any rough edges and ensure safe handling.
- Apply wood glue evenly to the back of each spacer strip.
- Position each spacer strip flush against the inside face of the frame, forming a releasable ledge recessed about 1/4 inch from the frame edge.
- Clamp or hold the strips firmly in place until the glue sets, or use small finishing nails for extra hold.
- Once dry and secure, check that the ledges are level and consistent all around the frame perimeter.
- Attach offset clips or screws through the spacer strips to prepare for mounting the canvas securely with the desired floating gap.
Visual Guide: Spacer Placement Relative to Frame and Canvas
| Element | Position | Dimensions/Notes |
|---|---|---|
| Main Frame | Outer perimeter | Depth varies, but must accommodate canvas depth plus spacer thickness |
| Spacer Strips | Attached inside the frame, flush with inside frame face | Thickness: 1/4 inch; width: ~3/4 inch; positioned 1/4 to 1/2 inch from frame edge |
| Canvas | Resting on spacers | Recessed about 1/8 inch from frame front edge; 1/4 inch floating gap all sides |
| Offset Clips or Screws | Fastened through spacers into canvas back | Use 1/4-inch screws for secure hold |
Finishing Techniques for a Professional Floating Frame Look
Start by sanding any rough edges and corners of your frame using medium-grit sandpaper, such as 120 grit. This step removes any splinters or uneven spots, especially at the joints where wood pieces meet. Next, switch to a finer grit like 220 and sand the entire frame to create a smooth surface that’s ready for staining or painting. Sand lightly before applying any finish to help it adhere better and avoid uneven color or texture. Proper sanding sets the foundation for a professional and polished floating frame look.
Choosing the right stain or sealer depends on your desired look and protection level. Oil-based stains offer deep, rich tones and tend to soak into the wood more, providing lasting color but take longer to dry, usually around 6 to 8 hours. Water-based stains dry quicker, typically in 1 to 2 hours, with less odor and easier cleanup. If you want to highlight the natural grain, clear stains or wood oils like tung or Danish oil work well, though they might need periodic reapplication. For sealing, polyurethane provides a hard, durable finish protecting against scratches and moisture; available in gloss, semi-gloss, or satin finishes. Polyurethane dries within 4 to 6 hours but curing fully takes about 24 hours. Other sealers like shellac dry faster (about 30 minutes) but may be less durable over time. Consider the environment where the frame will hang, high humidity or direct sunlight calls for tougher sealants.
| Finish Type | Drying Time | Durability | Look |
|---|---|---|---|
| Oil-Based Stain + Polyurethane | 6-8 hr + 4-6 hr | High | Rich, Warm Gloss |
| Water-Based Stain + Polyurethane | 1-2 hr + 4-6 hr | High | Natural, Matte to Satin |
| Tung Oil (Multiple coats) | 4-6 hr each coat | Moderate | Natural Grain Enhancement |
| Shellac | 30 min | Low to Moderate | Glossy, Traditional |
Apply your stain or sealer evenly with a brush or lint-free cloth. Wipe away excess stain promptly if needed to avoid blotches. Let the first coat dry fully before assessing if a second or third coat is necessary for color depth or protection. After sealing, allow at least 24 hours for the finish to cure before mounting your artwork inside the frame. This prevents fingerprints, smudges, or scratches that happen if the finish is still tacky. Proper drying also ensures the finish hardens evenly, which helps maintain the frame’s aesthetic and longevity.
A smooth, clean surface with sealed edges defines the floating look, supporting both the artwork’s appearance and its safety. Avoid rushing sanding or drying steps; skipping these can leave rough spots or a finish that’s vulnerable to damage. A well-prepared and finished frame resists moisture and wear, preserving your canvas art’s presentation over time.
Lightly sand between coats of finish with 220 grit sandpaper to maintain a smooth surface and help additional coats adhere better.
How to Mount and Secure Your Canvas Inside the Floating Frame
Mounting and securing your canvas inside a floating frame requires careful attention to maintain the signature gap around the artwork and avoid damaging the edges. Using backing materials like wooden blocks or frame clips helps support the canvas firmly, ensuring it stays in place without pressing directly against the frame. The right hardware, mainly flat head screws sized around #6 or #8, lets you secure the canvas with minimal risk of protruding parts that could scratch walls or interfere with the frame’s look.
Follow these steps to position and attach your canvas properly, keeping an even floating gap for a professional finish. The process includes adding inner spacers or braces first, then fixing the canvas and backing securely with screws applied to blocking pieces or corner braces behind the canvas. This method applies well for stretched canvases that may not be perfectly flat, so multiple securing points matter.
- Place inner spacers or braces inside the frame. These create the floating gap. Make sure the spacers have uniform thickness, usually 1/2 inch to 3/4 inch, and are aligned along all four sides of the frame’s interior.
- Set the canvas on the spacers. Position your canvas so its edges hover evenly above the spacers, preserving the floating effect. Check the gap with a ruler; it should measure consistently between 1/4 inch and 1/2 inch.
- Attach small wooden blocks or corner brackets behind the canvas. Cut 1- to 2-inch blocks from scrap wood and place them at intervals along the back edges of the canvas stretcher bar. Use corner brackets at the frame’s inside corners if additional stability is needed.
- Pre-drill pilot holes in the wooden blocks or braces. Use a drill bit slightly smaller than your screws (for #6 or #8 flat head screws, a 1/16 to 3/32 inch bit works well). This prevents wood splitting while ensuring a strong grip.
- Screw the wooden blocks or brackets to the frame. Use 6 to 8 flat head screws spaced evenly, aiming for the stretcher bars and frame sides. The flat heads keep the mounting flush and avoid contact with walls or furniture when hung.
- Add frame clips if you prefer a removable backing. These clips hold a backing board tight against the frame edges, offering extra support without permanent fastening. Attach clips about every 6 to 8 inches around the frame perimeter.
- Double-check the floating gap and canvas alignment. Ensure the canvas edges remain centered and improve within the frame. Adjust or loosen screws slightly if the canvas presses against the frame or is off-center.
Using wooden blocks behind the canvas stretcher bars prevents the canvas from warping or shifting over time, essential for preserving your artwork’s look. Frame clips provide an alternative for those who want to swap canvases easily in the future. Flat head screws reduce the chance of scratching walls and provide a secure fit without bulky heads. Overall, aim for firm support at multiple points to handle canvases that aren’t perfectly flat while protecting the canvas edges and maintaining the floating frame’s clean gap.
Common Mistakes When Making Floating Frames and How to Fix Them
Uneven gaps and crooked frames often come from inaccurate measuring or cutting. Check your wood pieces with a square tool before assembly. A quick way to test squareness is the 3-4-5 method: measure 3 inches on one side, 4 inches on the adjacent side, and the diagonal between them should be 5 inches. Adjust until all corners line up properly. Small discrepancies can cause the frame to look off-kilter once put together.
Too-large or too-small gaps usually mean the inner spacer boards aren’t the right thickness or weren’t placed evenly. Use calipers or a ruler to measure your spacer wood, aiming for consistent width all around the canvas. Gaps that are uneven can be fixed by gently sanding thicker spots or adding thin shims to thinner areas. Consistent gap sizes are important to achieve that clean floating effect and prevent the canvas from shifting over time.
Loose or weak corners compromise the frame’s durability and appearance. Wood glue alone might not hold long, especially on heavier frames. Reinforce joints with corner braces or finish nails. Use clamps to hold poorly attached corners tight while the glue dries, which typically takes about 30 minutes to an hour for initial set and 24 hours for full cure. Check each corner by pressing gently to detect flexibility or wobble before moving on.
- Verify cut wood pieces with a carpenter’s square before assembly
- Use the 3-4-5 measuring method to confirm frame corners are square
- Measure inner spacers carefully for consistent gap width around the canvas
- Sand or shim spacers to fix uneven gaps
- Apply wood glue and add corner braces or finish nails for stronger joints
- Clamp frame corners firmly during glue drying to avoid misalignment
- Test frame sturdiness by gently pressing corners before painting or mounting
To salvage an imperfect frame, disassemble any shaky joints and re-cut or sand pieces as needed. Adding extra adhesive or fasteners can improve weak spots without needing a full rebuild. Some minor unevenness can be camouflaged by paint or stain, but structural issues should be fixed first. Taking these careful steps ensures your floating frame sign looks professional and holds up well over time.
Safety Tips and Time Expectations for Floating Frame Projects
Wearing personal protective equipment is essential throughout the floating frame project. Always use safety glasses to protect your eyes from dust and wood particles, especially when cutting or sanding. Hearing protection like earplugs or earmuffs helps prevent damage from loud power tools. Gloves can prevent splinters and improve grip, but avoid wearing loose gloves near spinning blades to reduce risk of accident. A dust mask or respirator is recommended to avoid inhaling sawdust, particularly if you use power saws or sanders indoors.
Before beginning any cutting or assembly, check your tools following a safety checklist. Ensure blades are sharp and securely mounted, power cords are intact and away from wet areas, and adjust guards properly. Keep your workspace clean and well-lit to reduce tripping hazards or miscuts. Clamp your wood pieces firmly before cutting to prevent movement. Double-check measurements before cutting to avoid wastage, since replacing wood or fixing errors can add extra time and expense.
Expect the project timeline to vary by skill and setup, but a typical floating frame sign takes about 4 to 6 hours of active work. Measuring and cutting pieces usually require 1 to 1.5 hours, depending on the complexity of miters and length of frame parts. Assembly and securing the frame take another 1 to 2 hours, involving glue application and clamping. Attaching the inner spacers for the floating effect, which must be precise for proper gap spacing, takes around 30 to 45 minutes. Allow about 1 hour for any sanding between steps to smooth edges and surfaces.
Drying and curing time are important and often overlooked. After gluing frame corners and inner spacers, allow at least 24 hours of drying before handling or painting. This helps the glue fully set and reduces the need for nails or screws, which can alter the frame’s clean appearance. Paint or finish coatings also require drying; depending on the product and room temperature, that can take 2 to 4 hours or longer. Rushing to assemble or finish without proper drying risks loosening joints or smudged surfaces, leading to rework.
To pace the project for best results, plan your work in stages that fit your available time and environment. For instance, measure and cut in one session, then assemble and clamp in another, leaving frames to dry overnight. Follow up with sanding and painting the next day. This approach improves accuracy and avoids hurried mistakes. If working in colder or humid conditions, expect drying times to extend, so adjust scheduling accordingly. Weather and ventilation also affect drying speeds, especially for finishes.
Always make sure your hands and clothing are clear of blade paths before turning on power saws to prevent injury.
Step-by-Step Action Plan to Make Your Floating Frame Sign
Follow these steps in order to complete your floating frame sign efficiently and with good results.
- Before you start: Gather all materials and tools, making sure wood, spacers, nails, and finish supplies are ready. Verify that your workspace is clear and safe.
- Day 1: Measure your canvas and calculate frame piece lengths including inner spacers to ensure proper floating effect. Double-check dimensions before cutting.
- Day 2: Cut wood pieces carefully using a miter saw or handsaw, adding clean 45-degree cuts at corners. Check each piece fits the calculated measurements precisely.
- Day 3: Assemble the frame by attaching corners with wood glue and finishing nails, securing the frame square and tight. Use clamps to hold pieces as glue dries for a stable bond.
- Day 4: Prepare inner spacers by cutting and sanding, then attach them flush inside the frame edges. Confirm spacers create even gaps for the floating look.
- Day 5: Apply your chosen finish, paint, stain, or sealant, following label instructions for drying times. Inspect for a smooth, even coat without drips or missed spots.
- Day 6: Mount your canvas inside the frame using mounting brackets or adhesive strips, checking the canvas floats evenly without touching the frame edges.
- After 1 week: Inspect the finished frame and canvas mount. Address any looseness or finish flaws before displaying your sign.
Frequently Asked Questions
What Size Gap Should I Leave Between the Canvas and Floating Frame?
Leave a gap between 1/8 and 1/4 inch around all sides of the canvas. This small space creates the illusion that the artwork is floating inside the frame, improving its visual appeal.
Can I Use Materials Other Than Wood for a Floating Frame?
Yes, you can use materials like metal or plexiglass for the frame. These alternatives offer different aesthetics but require specialized tools and techniques compared to wood frames.
How Do I Avoid Warping in My Floating Frame?
Use kiln-dried wood and seal it with paint or varnish to prevent warping. Properly securing all frame corners also helps maintain structural stability over time.
What Type of Finish Works Best on Floating Frames?
Satin or matte finishes work best to reduce glare and complement most artworks. Avoid glossy finishes that can distract from the canvas and highlight frame imperfections.
How Can I Make My Floating Frame Adjustable for Different Canvas Sizes?
Use removable or adjustable inner spacers that can be repositioned. This allows you to swap out canvases without rebuilding the entire frame.
Is It Necessary to Pre-Drill Holes When Assembling a Floating Frame?
Pre-drilling holes is recommended to avoid splitting the wood and ensure clean screw placement. It also improves the frame’s overall strength and longevity.
Wrapping Up
Making a floating frame sign involves careful measuring, precise cutting, and patient assembly to achieve the desired look. Taking time with each step ensures your canvas gains the striking depth a floating frame provides. Start by gathering your materials and measuring your canvas today to set your project in motion.