Baby Shower Sign Ideas: Expert Tips, Custom Styles & Size Guide
Baby shower sign ideas can quickly transform your celebration by welcoming guests and setting an inviting tone. Choose signs sized 16×20 inches or larger for entrance displays to ensure easy readability from a distance. Start by placing your welcome sign near the main entry to create a warm, memorable impression for everyone arriving.
Key Takeaways
- Signs smaller than 16×20 inches work best as table displays, since they’re hard to read beyond 8 feet.
- Narrow hallways under 6 feet wide call for tabletop signs sized 16×20 or smaller instead of floor easels.
- Order custom baby shower signs at least 3 weeks ahead to allow time for design, printing, and delivery.
- Choose materials like sturdy cardstock or wood for lasting signs that hold up throughout the event.
- Professional design services start around $30 and offer polished, unique customizations tailored to your theme.
- Coordinate your signs’ style and colors with venue decor and the overall baby shower theme for cohesive appeal.
Choosing the Best Baby Shower Sign Size and Placement
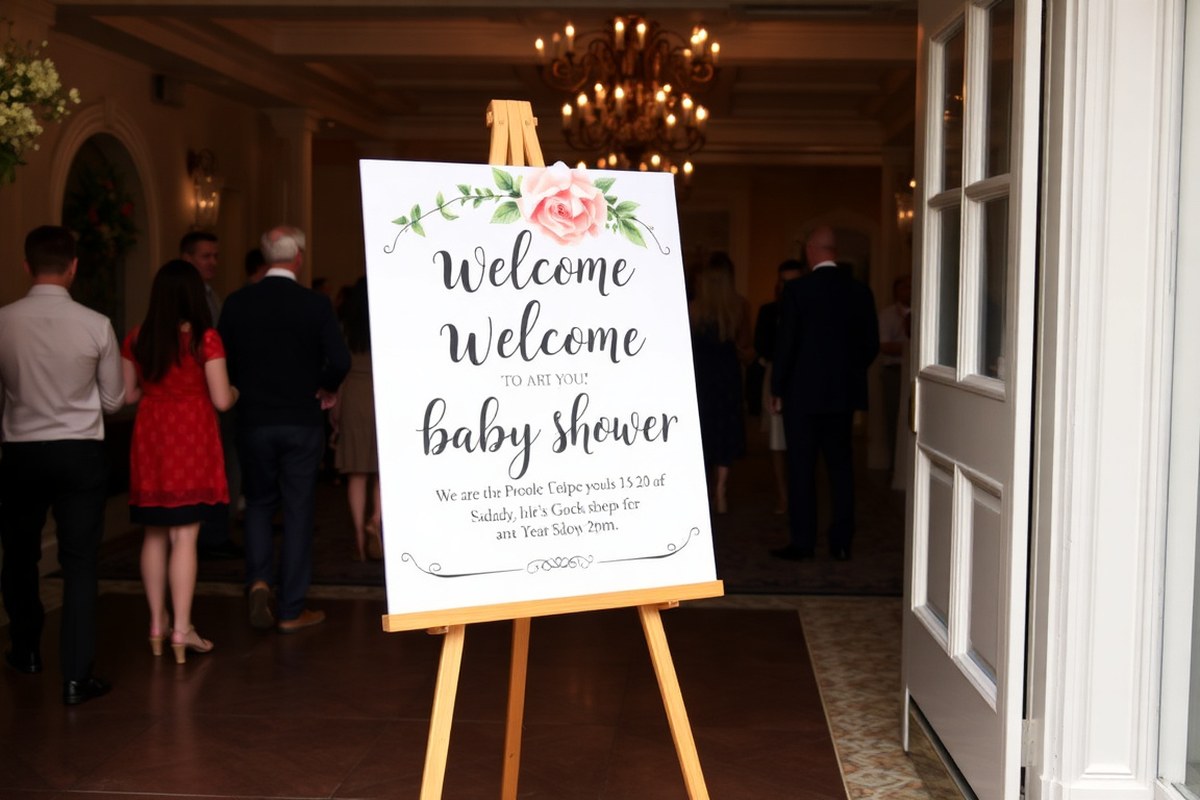
Choosing the right size for a baby shower welcome sign depends mainly on the venue’s space and how visible you want the sign to be. A common size for entrance signs is around 18 by 24 inches. This size works well because it can be easily read from about 6 to 10 feet away, giving guests enough time to notice and appreciate the welcome message before entering the party area. Larger signs, such as 24 by 36 inches, are better suited to open venues like garden patios or spacious banquet halls where sightlines are longer, allowing guests to read the sign from 10 to 15 feet away.
In narrow hallways or smaller indoor spaces, a smaller sign around 11 by 14 inches may be more appropriate. This prevents overcrowding the space and keeps the welcome area tidy. However, smaller signs require guests to be closer, typically within 3 to 5 feet, to read the wording clearly. That means placing the sign right at eye level near the doorway or on a nearby wall where guests naturally pause.
Placement significantly affects how well your sign is noticed and read. The best location is usually near the entrance, either on an easel or mounted on a stand, so guests see it as soon as they arrive. Position the sign directly across from or beside the door, avoiding corners or behind objects. Ensure the sign is at eye level, roughly 4 to 5 feet from the ground for average adult height, to make the message easy to read. For outdoor or open-air venues, secure the sign to a sturdy easel or weighted stand to prevent tipping from wind or passing guests.
Easels and stands come in various styles and materials to match your sign size and venue. Lightweight tripod easels work well for smaller signs and indoor use because they’re easy to move and adjust. For heavier or larger signs, like wooden boards or foam core 24×36-inch signs, stable A-frame or metal stands provide better support. Renting or purchasing a stand designed for heavier signs may cost between $20 and $50, but it helps maintain a polished appearance and protects your sign from damage.
When deciding between two sign sizes, use the venue’s dimensions as a guide. In tight or narrow spaces, smaller signs that fit comfortably without blocking traffic flow work best. This avoids guests feeling cramped or missing the sign because it’s tucked away. For wide or open spaces, opt for a larger sign to grab attention from a distance and set a festive tone right at the entrance.
Proper sizing and placement ensure your baby shower welcome sign captures guests’ attention and communicates your message clearly. Signs that are too small or poorly positioned risk being overlooked, while excessively large signs in small areas may overwhelm the space or cause visual clutter. Matching the sign size to your venue and placing it where guests naturally look creates a warm, inviting impression that starts your celebration on the right note.
Popular Baby Shower Sign Styles and Themes
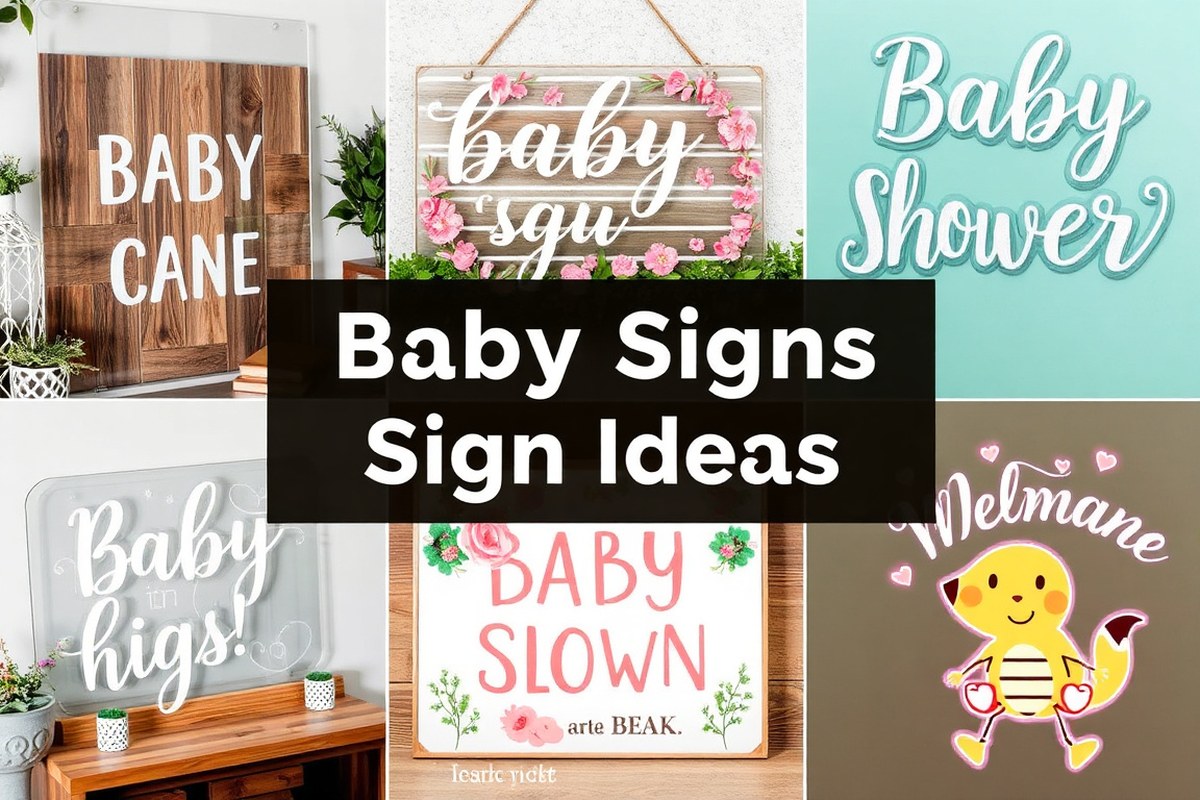
Trendy baby shower sign styles vary widely to suit different party themes, from rustic and elegant to whimsical and modern. Design choices should complement your overall theme, helping set the right tone and improving the atmosphere of the event. Selecting the appropriate style not only creates a pleasing aesthetic but also ensures the sign functions well for invitations, directions, or interactive elements.
Rustic and Woodland Signs
Rustic signs often use natural materials like wood or faux wood finishes to evoke a warm, outdoorsy feel. These signs fit perfectly with woodland, fall, or farmhouse-themed baby showers. You can add textures such as twine, burlap, or dried floral accents to reinforce a cozy, handmade vibe. Wooden signs also serve as keepsakes, lasting long after the event in the nursery.
For themes like woodland or fall baby showers, incorporate earthy tones and explore layering with elements like dreamcatchers or pinecones. A popular option is a whitewashed wooden board with hand-painted sayings like “Welcome Little One” or thematic phrases such as “Ahoy, It’s a Boy” for rustic nautical styles. The tactile nature of wood contrasts nicely against soft fabric or paper elements you might already have.
Modern and Minimalist Designs
Modern baby shower signs lean toward clean lines and simple typography, often using materials such as acrylic or foam board. Clear or frosted acrylic adds a contemporary, sleek look and pairs well with glam or minimalist themes, reflecting light and blending with metallic accents. Foam board is versatile and budget-friendly for indoor events without strong wind.
Minimalist signs typically stick to neutral or pastel colors, with minimal text and subtle graphic elements. For example, a frosted acrylic sign saying “Welcome Baby” in a sans-serif font matches perfectly with modern nursery colors and décor. Keep text concise to maintain the clean aesthetic.
Whimsical and Character-Based Signs
Whimsical signs include playful illustrations or characters such as teddy bears, balloons, or storybook motifs. These are ideal for classic, nostalgic baby showers or themes aimed at sparking a joyful, lighthearted mood. Bright colors, fun fonts, and cute images make these signs eye-catching and warm.
Often made from cardstock or laminated poster paper, whimsical signs can be easily customized with themed characters, and work well for labeling areas like the food table or activities. Incorporate nursery rhymes or gentle humor to add personality.
Floral and Garden-Inspired Signs
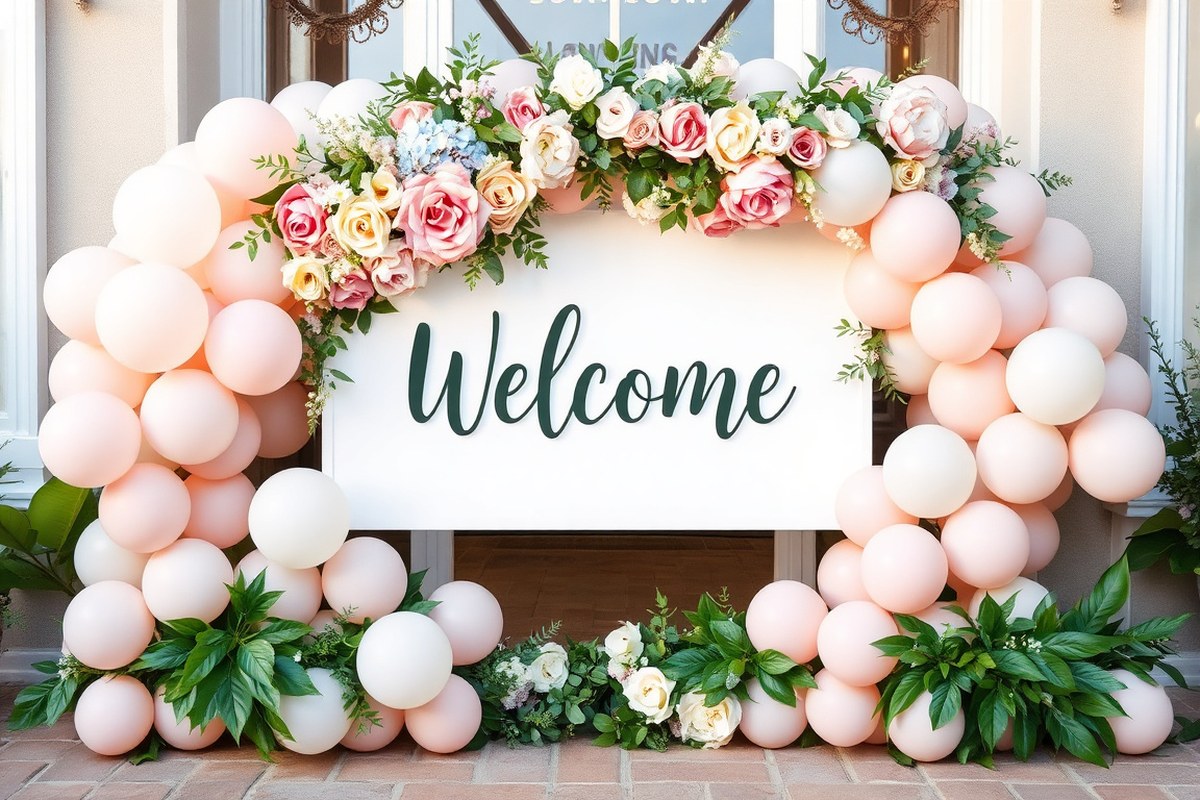
Floral-themed signs often feature pastel watercolor-style flowers or real floral accents. These work especially well with garden or spring baby showers where elegance and softness are priorities. Integrating a sign within a floral arch or backdrop creates a striking focal point at the entrance or gift table.
These signs typically use high-quality cardstock or lightweight foam board to support delicate designs without damage. Floral accents can be real or artificial, and adding subtle glitter or foil details improve the celebratory feel without overpowering the natural vibe.
Themed Interactive Game Signs
Interactive signs encourage guest participation and engagement through baby shower games or activities. These signs often include playful prompts, such as “Donut Guess the Baby’s Birth Date & Weight,” placed at dessert bars or game stations. Clear instructions and cute graphics help guests know how to join in.
Use sturdy materials like foam board or poster paper for durability during the event. Incorporate the party’s overall aesthetic so interactive signs feel smooth part of the décor rather than an afterthought. This approach can turn signage into an entertaining element itself.
- Rustic signs pair best with wood and natural textures featuring warm tones
- Modern signs benefit from acrylic or foam board with simple fonts and neutral palettes
- Whimsical signs use colorful illustrations and playful characters to engage guests
- Floral signs combine pastel watercolors and real or faux flowers for elegance
- Interactive signs incorporate games and guest participation prompts
- Choose materials suited for your venue, foam board indoors, fabric or wood outdoors
- Coordinate sign style with the main theme to build cohesive event design
Choose sign materials and styles that withstand your venue’s conditions to avoid warping or damage, especially for outdoor showers where humidity or wind can affect fragile options.
Materials for Durable and Attractive Baby Shower Signs
Choosing the right material for your baby shower signs depends on whether the event is indoors or outdoors, your budget, and how much customization you want. Outdoor signs need to resist weather, while indoor signs can focus more on style and ease of transport. Materials like wood, acrylic, and chalkboard vary widely by weight, cost, and flexibility in personalization.
Wood: Warmth and Rustic Charm
Wood signs offer a warm, rustic look perfect for boho or outdoor baby showers. They’re durable enough for outdoor use, especially if sealed properly. Wood can handle light moisture and wind but should be protected from heavy rain or extreme humidity to prevent warping.
Wood is heavier than paper or acrylic, so transport requires some care, especially with larger signs. On the plus side, it’s easy to customize with paint, stain, or vinyl decals, letting you create personalized designs that feel hand-crafted and special. Budget-wise, solid wood signs generally cost $20 to $50 for small to medium sizes.
Acrylic: Sleek and Modern
Acrylic signs bring a sleek, polished look that fits modern or minimalist baby showers. These signs are lightweight but sturdy, making them easy to move around and suitable for indoor events. Acrylic resists moisture, so it can work outdoors for events with short exposure to the elements, but prolonged sun can sometimes fade colors.
Customization is straightforward with printed vinyl overlays or direct UV printing, allowing vibrant colors and intricate details. Acrylic signs typically start around $30 and can go up to $70 or more, depending on size and complexity.
Chalkboard: Versatile and Reusable
Chalkboard signs offer the flexibility to change messages easily, ideal for multiple uses or interactive baby showers. They are mainly suited for indoor use since rain and humidity can ruin chalk writing.
These signs are generally lightweight but can be bulky depending on frame size. They cost about $15 to $40 for basic boards. To customize, use chalk markers or traditional chalk; messages can be erased and rewritten, helping you update information quickly during the event.
High-Quality Paper and Cardstock
Paper and cardstock signs are cost-effective options best kept indoors due to their vulnerability to wind and moisture. They are very light and easy to transport or hang in multiple locations.
Printing on thick cardstock, ranging from 80 lb to 130 lb weight, gives a professional finish. Costs can range from $5 to $20 per sign depending on size, print quality, and whether you add embellishments like foil or embossed lettering. Customization is simple through online printable templates or professional print shops.
Eco-Friendly and Alternative Materials
Eco-friendly materials like recycled cardstock, bamboo, or biodegradable boards suit hosts aiming to reduce waste. These options vary in durability: recycled paper products work well indoors, while bamboo can be durable enough outdoors if treated.
Costs for eco-friendly signs may be slightly higher, starting around $15 due to sustainable sourcing and production methods. To ensure your sign lasts through the event, seal or laminate biodegradable signs, especially if placed outdoors. Personalization techniques include eco-safe inks and hand-painted designs. Below is a comparison table summarizing key factors for each material:
| Material | Durability | Cost Range | Weight | Customization Ease | Best Use |
|---|---|---|---|---|---|
| Wood | Water-resistant if sealed; durable outdoors | $20, $50 | Heavy | High (paint, vinyl decals) | Outdoor rustic or boho themes |
| Acrylic | Moisture-resistant; short outdoor use | $30, $70+ | Lightweight | High (printed vinyl, UV print) | Indoor modern; some outdoor |
| Chalkboard | Indoor only; sensitive to rain/humidity | $15, $40 | Medium | Medium (writable/erasable) | Indoor, reusable sign |
| Paper/Cardstock | Indoor only; fragile outdoors | $5, $20 | Very light | High (print shops, DIY) | Indoor and temporary signs |
| Eco-Friendly | Varies; bamboo durable, recycled paper less so | $15, $40+ | Light to medium | Medium to high (eco inks, hand paint) | Eco-conscious indoor/outdoor |
Choosing the right material depends on your event location and style. For outdoor showers, sealed wood or bamboo boards provide durability without sacrificing charm. Indoor events allow for delicate, light materials like cardstock or acrylic where transport and ease of hanging matter most.
How to Personalize Baby Shower Signs Perfectly
Personalizing baby shower signs makes them memorable and welcoming for everyone attending. Start with clear wording that fits the event. At a minimum, include the type of celebration, such as “Baby Shower” or “Sprinkle,” followed by the guest of honor’s name and the date. For example, a classic template could read: “Welcome to [Name]’s Baby Shower, [Date].” Adding family names like “Honoring Sarah & Chris” adds warmth and connection, making guests feel part of the special occasion.
Choosing the right wording depends on the theme and tone you want. For a playful, energetic vibe, try something like: “Get Ready for [Baby’s Name], Our Little Powerhouse!” This matches a lively, superhero-inspired design. For a gentle, seasonal feel, use phrases themed to nature, such as “Sweet Little Clementine on the Way” for a spring or summer shower with citrus artwork. Tailor the message to suit both the parents’ style and the event atmosphere.
Color choice ties the whole look together. Select palettes that complement popular themes such as soft pastels for classic baby showers, or vibrant greens and oranges for a fresh, summer feel. For a fall shower, consider red, sage green, and cream, which pair beautifully with apple-inspired artwork and warm balloon garlands. Stick to two or three colors at most to keep the sign from looking busy and to make the text stand out clearly against the background.
Fonts play a key role in readability and style. Choose strong, blocky fonts for bold statements, especially if planning a dynamic, action-packed theme. Script fonts add elegance and fit softer themes, but should stay easy to read at a glance. Avoid overly decorative fonts for main text; instead, use them sparingly for names or special words to highlight. Ensure the font size is large enough to see from a distance, generally at least 2 to 3 inches tall on the sign for average room size venues.
Coordinate your sign with the room’s decor by matching font styles and color palettes with other elements like table linens, balloons, and floral arrangements. This creates a cohesive look that feels thoughtfully planned. For instance, if your baby shower has watercolor orange illustrations, carry those colors into the sign’s font and background accents. This harmony improve the atmosphere and ensures your sign doesn’t feel out of place.
Before finalizing, use a checklist: confirm the event name, date, guest of honor’s names, and any themed phrases. Pick two to three coordinating colors based on the shower’s overall palette. Test font choices at actual size to guarantee it’s easily readable. Examples of wording templates include “Welcome to [Name]’s Baby Shower,” “Honoring [Parent Names],” or themed lines like “Our Little Powerhouse Arriving Soon!” Adjust the wording length to avoid crowding, a shorter message keeps the sign clear and visually appealing.
DIY Baby Shower Sign Ideas and Quick Creation Tips
Creating a DIY baby shower sign can be quick and simple with the right approach. Use straightforward tools and materials to craft a charming welcome sign that fits your theme. Adding decorative accents like greenery or balloons improve the look while keeping the process efficient.
Gathering Supplies and Choosing Materials
Start with a sturdy base such as foam board, wood panel, or thick poster board, depending on your time and access. Foam board is lightweight, budget-friendly (around $5 to $15 per sheet), and dries quickly, ideal for last-minute projects. Pick acrylic paint or permanent markers for fast drying and vibrant color. For lettering, stencils or paint pens work well without needing advanced skills. Collect simple tools like scissors, a ruler, painter’s tape, and glue, hot glue is preferred for attaching decorations quickly.
Choose a sign size that fits the greeting spot, commonly 18 by 24 inches for good visibility without being cumbersome. Select colors matching the baby shower theme, for example, blush pink with champagne and cream balloons or sage green with metallic gold accents for a botanical look.
Basic Painting and Lettering Techniques
Clear space and gather your sign materials before starting to paint. Lightly sketch your message, such as “Welcome Baby [Name]” or “Baby in Bloom,” with pencil or chalk. Use stencils for uniform letters or freehand with a fine-tipped brush or paint pen for a personal touch. Apply 1-2 coats of acrylic paint; each coat dries in 15-30 minutes indoors at room temperature.
For a quick finish, use paint pens with vivid pigment that dries faster than brush-applied paint. Adding simple illustrations like teddy bears or hot-air balloons improve a baby boy theme or ties into your chosen style.
Adding Floral and Balloon Accents
Decorative accents make your sign stand out and complement your shower décor. Use faux flowers like roses, peonies, or eucalyptus in colors matching your palette, attached along the borders with hot glue or double-sided tape. Fresh flowers can be fastened with floral wire but require gentle handling to avoid damage.
Balloons in cluster arrangements of 3 to 5 work well framing the sign. Choose complementary colors such as blush pink and cream or sage green with metallic gold. Use balloon tape strips or twist tie clusters around wooden stakes or balloon columns next to the sign for secure placement.
Finishing Touches and Protecting Your Sign
Seal painted elements with a clear matte spray sealer for durability if the sign will be outside, allowing it to dry for at least 20 minutes. Add final decorative touches such as delicate fabric bows or small ribbons in your theme colors to soften the edges.
Mount the sign on an easel, frame it lightly if desired, or attach wire loops for hanging. Avoid placing the sign in direct sunlight or moisture if using paper materials, as this can cause warping or color fading.
- Choose your sign base (foam board recommended for quick drying and light weight).
- Sketch the message and design layout lightly on the surface.
- Apply lettering using paint pens or acrylic paint with stencils or freehand.
- Allow paint to dry fully between coats, typically 15-30 minutes.
- Attach faux or fresh florals around the edges using hot glue or floral wire.
- Create balloon clusters in coordinating colors and secure them near the sign.
- Seal the sign with a clear spray if outdoors, then add bows or ribbons for softness.
- Mount or hang the sign securely at the party entrance or gift table.
Use quick-drying materials like acrylic paint and paint pens to speed up your project, and avoid overloading your sign with heavy decorations that could cause damage or tipping.
Coordinating Signs with Venue and Baby Shower Decor
Matching your baby shower sign with the venue and overall decor ensures a polished look and improve guest experience. Coordinate your sign’s colors, style, and size with key decorations like balloon arrangements and floral displays. For example, choose sign colors that complement or contrast pleasantly with balloons and flowers, creating visual balance without overwhelming the space.
Sign size depends heavily on the venue type. At home or in a cozy indoor spot, an 18×24 inch sign fits well without crowding the area. For outdoor events or larger venues, a 24×36 inch sign increases visibility from a distance. Smaller rooms benefit from tabletop signs or hanging signs that don’t use floor space, making sure your sign doesn’t interfere with traffic flow or seating.
Consider how and where to mount signs based on your venue’s surfaces. Use removable adhesive hooks or command strips for painted walls to avoid damage. For outdoor setups on grass or soil, stakes or easels work well. Hanging signs can go from ceilings or doorways if you have hooks or sturdy fixtures. Always check surface rules at your venue to avoid fines or damage fees.
- Choose sign colors matching or contrasting with main balloon and flower tones.
- Use 18×24 inch signs indoors or at home, 24×36 inch for larger or outdoor venues.
- Tabletop signs suit small, limited spaces better than floor-standing signs.
- Use command strips or removable hooks on smooth, painted surfaces.
- Outdoor signs can use stakes or portable easels for stability.
- Hang signs from hooks or ceiling fixtures where available.
- Plan signs so they can be removed and reused as room decor post-event if desired.
Planning ahead about the venue’s physical characteristics and existing decor helps you select signs that improve the event atmosphere instead of cluttering it. For example, a nautical-themed baby shower could feature signs with ropes or wood textures coordinating with shells and blue balloons. This creates a cohesive vibe guests will notice and appreciate.
Reusing signs after the event saves money and effort. Choose neutral designs or ones that fit nursery decor styles, allowing you to repurpose them in the baby’s room or for future family celebrations. Avoid overly specific wording or one-time graphics if reuse is a priority.
Overall, good coordination takes time to plan but pays off in a unified and welcoming space. Take measurements of your venue and key decor pieces before ordering or making signs. Test mounting options in advance, especially for delicate or unique surfaces. Results look best when signs complement the atmosphere without blocking sightlines or crowding walkways.
Ordering Custom Baby Shower Signs: Timing and Budget
Ordering a professional custom baby shower sign requires planning your timeline and budget carefully to avoid last-minute stress or extra costs. You should place your order at least three weeks before the shower date. This lead time covers the design process, production, and shipping, which together can easily take two to three weeks depending on the vendor and shipping method. Faster options sometimes exist but expect to pay more for expedited turnaround.
Production times vary based on the material and size of the sign. For instance, standard vinyl or foam board signs typically require 5 to 7 business days to produce, while wood or acrylic custom signs might need 7 to 10 days. Shipping usually adds 3 to 7 days unless you select priority shipping. When your event is scheduled for a holiday or weekend, include extra days since many manufacturers close during those times.
Cost is one of the biggest factors in choosing a custom sign. On average, a professional baby shower sign starts around $30 for small, simple printed designs on lightweight materials. Larger signs or those using higher-end materials like wood or acrylic generally range from $75 to $150 or more. The price usually scales with size and complexity. For signs over 24 by 36 inches or requiring intricate designs, expect the upper end of the price range. Design service fees are a separate cost that many companies charge if you want a custom look beyond the provided templates. These fees often start around $30 and can go up to $40 or higher depending on the designer’s experience and the level of customization.
Using professional design services is recommended when you want a unique theme or personalized features but lack the graphic skills or time to create the artwork yourself. These services typically include layout, typography matching, color coordination, and file preparation to ensure your sign looks polished and prints well. Being comfortable with design software and having a clear vision allows you to create your own digital file and upload it, saving money. However, skipping design help increases the risk of errors like blurry images, misspellings, or awkward layouts.
| Step | Timeframe | Typical Cost |
|---|---|---|
| Order Placement | At least 3 weeks before event | Free |
| Design Service (Optional) | 1, 5 days | $30, $40+ |
| Production | 5, 10 business days | Included in sign cost |
| Shipping | 3, 7 days | $5, $20, varies with speed & location |
Deciding between DIY and professionally ordering a custom sign depends on your priorities and resources. A tight budget combined with access to a good printer or craft materials lets you DIY for more control and potential savings, but it requires more time and skills. For an easy experience with consistent quality, professional custom signs justify the cost and early ordering effort.
Common Mistakes When Choosing Baby Shower Signs
Choosing the wrong size for a baby shower sign can make it ineffective or cause clutter. Signs smaller than 11×14 inches may be hard to read from a distance, especially in larger spaces. Conversely, signs larger than 18×24 inches placed in narrow hallways can block traffic and create hazards. Stick to sizes that match your space: smaller signs for tabletops or entrance tables and larger ones for open areas where guests can see them without crowding.
Readability is often compromised by using fonts that are too small or decorative, or by adding too many words. Avoid fonts smaller than 24 points for main messages. Long paragraphs or excessive information can overwhelm guests. Use short, clear phrases focusing on essential details like welcome messages, directions, or event hashtags.
- Choosing oversized signs that obstruct walkways, use smaller sizes (up to 18×24 inches) in tight spaces.
- Using overly decorative or script fonts that reduce legibility, pick clean, simple fonts at least 24 points in size.
- Overloading signs with too much text or graphics, limit text to 5 to 10 words and use clear icons if needed.
- Placing signs where lighting causes glare or shadows, test lighting before the event and adjust placement accordingly.
- Matching signs poorly with the shower theme or color scheme, choose designs that complement existing decor to maintain cohesion.
- Ignoring traffic flow when positioning signs, set signs to the side of pathways, not in the middle, to avoid bottlenecks.
- Failing to have backups or quick fixes for last-minute changes, keep extra printed signs or markers on hand for updates.
Signs that appear too busy or don’t fit the party’s theme can distract from the event. If the sign has many fonts, colors, or images competing for attention, guests may not notice important details. Keep designs consistent with your baby shower theme, using only two or three complementary colors and one or two font styles.
Sign placement affects visibility and flow. Avoid placing signs in front of doors or narrow entrances, where they can cause congestion. Floor easels are useful but only for signs up to 18×24 inches in areas wide enough to avoid blocking pathways. Use tabletop signs at check-in stations or guestbook areas to save space.
Double-check sign placement and lighting at least an hour before the event begins to catch and fix visibility issues early.
Last-minute issues like missing signs or damage require quick fixes. Keep blank signs or materials and a waterproof marker to write necessary messages on-site. Having a digital file of your design saved on your phone or tablet lets you reprint or recreate signs with local print shops if needed. Planning these backups saves stress and ensures your signs communicate clearly throughout the event.
Step-by-Step Action Plan for Your Baby Shower Signs
Follow these steps to create and place baby shower signs that welcome guests and complement your party theme perfectly.
- Two months before: Choose your baby shower theme and sign styles to ensure all decorations match well. Confirm this choice with the host or parents-to-be.
- Six weeks before: Decide on sign sizes and key locations at the venue. Verify the selected areas are visible and accessible during the event.
- One month before: Select materials that suit your venue conditions, like waterproof signs for outdoor showers. Test sample materials for durability and look.
- Three weeks before: Personalize your signs with names, dates, or fun messages. Share drafts with the parents or organizer for approval.
- Two weeks before: Begin DIY sign creation or place orders for custom signs. Check that production deadlines align with the event date.
- One week before: Inspect finished signs for quality and accuracy. Make any last-minute adjustments or touch-ups needed.
- Day of the event: Install signs according to your placement plan. Confirm all guests can easily see and read the signs.
Frequently Asked Questions
What Are Some Unique Themes for Baby Shower Signs?
Unique themes include woodland creatures, nostalgic teddy bears, or playful animals like silly geese. These themes add personality and charm that match various party moods from classic to whimsical. Consider your overall shower style when picking a theme for coherence.
Can Baby Shower Signs Include Interactive Elements?
Yes, signs can have interactive parts like QR codes linking to gift registries or games. Adding this element engages guests and makes the sign serve both decorative and functional roles. It also helps keep the party organized.
How Can Lighting improve Baby Shower Signs?
Lighting can highlight your sign and create ambience by using spotlights, fairy lights, or LED strips. Proper lighting makes your sign more visible and attractive, especially for evening events or dimly lit venues. Test lighting placement beforehand.
Are Reusable Baby Shower Signs Cost-Effective?
Reusable signs can save money over time, particularly if you host multiple events. Choose durable materials like acrylic or metal and neutral designs to use beyond one shower. They also reduce waste and storage needs.
What Wording Is Best for Baby Shower Signs?
Simple, warm phrases like “Welcome Baby [Name]” or “Celebrate the Mum-to-Be” work well. Keep text clear and concise for easy reading. Matching wording to the shower tone, such as formal or playful, improve the guest experience.
Can Baby Shower Signs Match the Invitation Design?
Matching sign and invitation designs creates a polished look and builds excitement. Use similar colors, fonts, and motifs to tie the event details together visually. Coordinate with your printer or designer for best results.
Key Points to Remember
Artful baby shower signs set a welcoming tone and tie your décor together effectively. Focus on matching your signs to the theme and venue for a polished look. Start planning your sign choices today to make your event memorable and inviting.