How to Remove Vinyl Lettering: 8 Steps for Clean, Damage-Free Removal
How to remove vinyl lettering starts with softening the adhesive using gentle heat. Apply low-level heat evenly for 10 to 15 seconds to loosen the glue, then peel the vinyl slowly at a shallow angle to avoid tearing. Work in small sections and use the right tools to protect the surface during removal.
Key Takeaways
- Wait 30 to 60 days after painting before removing vinyl lettering to avoid surface damage.
- Use a heat gun or hairdryer on low to medium heat, moving continuously to prevent overheating.
- Cover vinyl with a cotton cloth before applying heat to protect the surface underneath.
- Peel back vinyl at an angle of around 45 degrees to reduce the risk of tearing or scratches.
- Work in small sections, approximately 6 to 12 inches at a time, for better control.
- After removal, clean surfaces with mild soap and water to remove any adhesive residue safely.
1. How to Remove Vinyl Lettering Safely and Effectively

Removing vinyl lettering safely and effectively involves gently warming the adhesive to loosen it, peeling the vinyl carefully at the right angle, and then cleaning off any leftover glue without harming the surface underneath. Using controlled heat softens the pressure-sensitive adhesive, making the vinyl easier to remove without tearing or damaging paint, glass, or other materials. Follow these precise steps to handle the process with minimal risk.
Preparing the Area
Before starting, clear the surrounding surfaces to prevent accidental scratches or spills during removal. Protect any nearby trim, paint, or rubber seals with painter’s tape. Wearing rubber gloves will help avoid skin irritation from adhesives or solvents. Having the right tools on hand also improves safety and results, so gather a heat source like a hair dryer or heat gun, and plastic scrapers to lift the vinyl edges gently.
Applying Heat to Loosen Adhesive
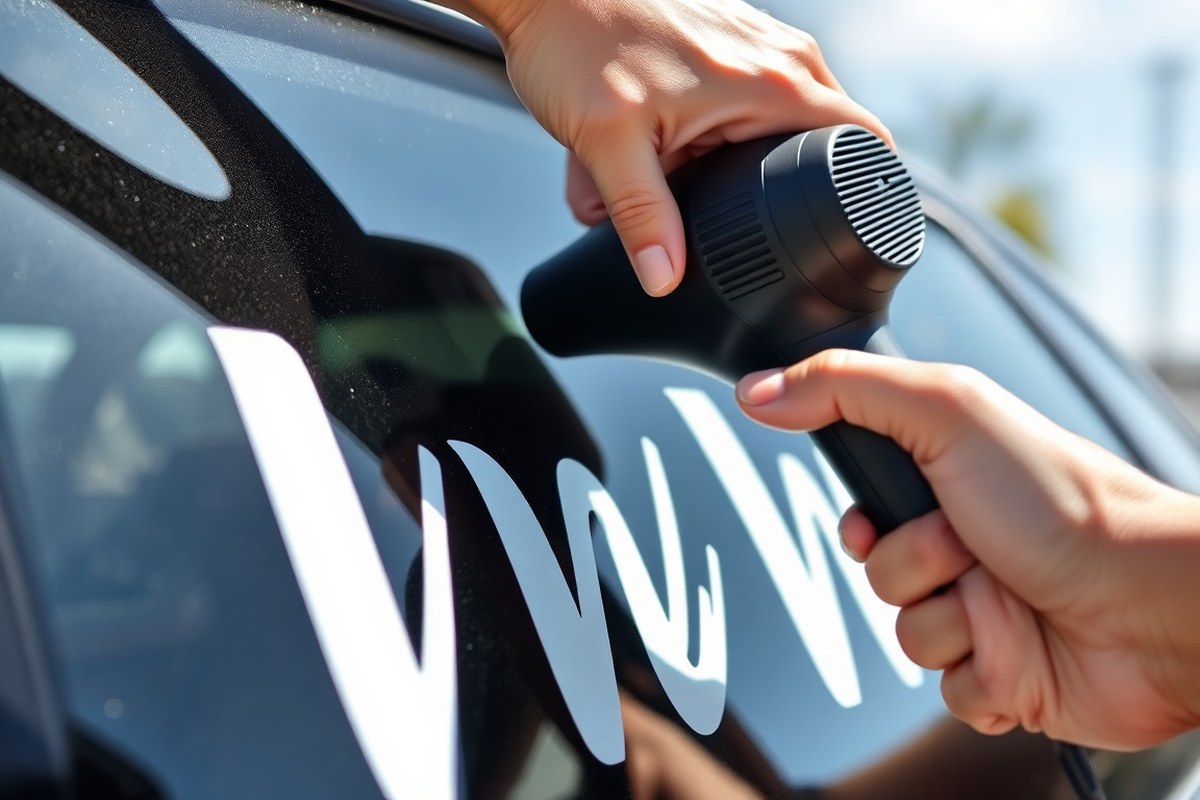
Applying gentle heat loosens the glue beneath vinyl, allowing it to peel off without harming the surface. Set a heat gun to low or use a hair dryer on medium. Keep the device 6 to 12 inches from the lettering, moving it steadily back and forth. Warm each 3 to 6 inch section for 30 to 60 seconds to loosen the adhesive without overheating. Avoid focusing heat too long in one place to prevent paint or plastic damage.
Peeling the Vinyl Lettering
Start peeling the vinyl while the adhesive is still warm. Use a plastic razor blade or scraper to gently lift a corner or edge, aiming for a 45-degree angle to reduce tearing. Slowly pull the vinyl back over itself rather than straight upward to minimize stress on the surface. Work in small sections, reheating only as needed when the vinyl stiffens or breaks into chips. Take your time and avoid rushing to maintain clean strips and avoid peeling off paint or coating underneath.
Cleaning Adhesive Residue
After peeling off vinyl, leftover sticky residue often remains and needs cleaning for a smooth finish. Lightly moisten a microfiber cloth with 70% or 90% isopropyl alcohol, then rub the residue gently to break it down. For tougher adhesive, apply a commercial remover like Goo Gone, following its directions carefully. Avoid scrubbing hard to prevent scratches or dulling. Finish by wiping with a clean, dry microfiber cloth to clear any cleaner left behind.
- Patch nearby areas with painter’s tape to protect paint, glass, or trim.
- Heat a small section of vinyl lettering with a hair dryer or heat gun for 30-60 seconds.
- Use a plastic scraper to lift an edge at a 45-degree angle once warmed.
- Slowly peel the vinyl back over itself, reheating as necessary in small sections.
- Stop peeling if the vinyl breaks or becomes difficult, then reapply heat before continuing.
- Once all vinyl is removed, apply isopropyl alcohol to a microfiber cloth and rub away adhesive residue gently.
- For tough residue, use an adhesive remover cautiously, then wipe the surface clean with a dry cloth.
2. Tools and Materials Needed for Vinyl Lettering Removal
Removing vinyl lettering requires a mix of the right tools and materials tailored to your surface and the vinyl type. For smooth surfaces like glass, use a razor blade scraper carefully to lift edges; metal ones work best here because glass resists scratching. For delicate paint or plastic surfaces, prefer plastic scrapers to avoid gouges. Heat guns or hair dryers help soften adhesive, making peeling easier and reducing damage risk.
Adhesive removers vary widely. Commercial adhesive solvents like Goo Gone or isopropyl alcohol (70% or higher) break down sticky residues effectively and are generally safe on most surfaces if tested first on a small hidden spot. Household alternatives include cooking oil or vinegar for mild adhesive but may leave oily residues that require follow-up cleaning. Always allow removers 5 to 10 minutes to work before scraping gently.
- Glass: razor blade scraper, hair dryer or heat gun, isopropyl alcohol
- Painted surfaces: plastic scraper, heat gun (low setting), Goo Gone or vegetable oil
- Metal: plastic scraper or razor blade with caution, adhesive remover solvent
- Plastic: plastic scraper only, avoid heat over 120°F to prevent warping
- Furniture/wood: plastic scraper, mild adhesive remover like rubbing alcohol
- General cleaning cloths: microfiber or lint-free for residue cleanup
Price-wise, a basic razor blade scraper costs about $5 to $10, plastic scrapers are $3 to $7, and adhesive removers range from $5 to $15 per bottle. Heat guns vary but you can use a $20 hair dryer instead for small jobs. Testing tools on less visible areas prevents costly damage and saves time.
Always test adhesive removers and heat on a hidden spot first to check for surface damage or discoloration before full application.
Plastic scrapers perform better on painted or plastic surfaces, minimizing scratches, but razors excel for glass. Solvents that dissolve adhesive reduce scraping effort, lowering the chance of damage. Know your vinyl type, cast vinyl is harder to remove and may require more heat and solvent than removable vinyl. Adjust your toolkit depending on vinyl age and surface condition for best results.
3. Using Heat Correctly to Loosen Vinyl Adhesive
Heat helps soften the adhesive under vinyl lettering, making removal easier and reducing the risk of surface damage. Use a hairdryer or heat gun set to low heat, warming each small section for about 30 seconds. Avoid overheating by keeping the heat moving steadily to prevent warping or discoloration of the surface.
Choosing the Right Heat Source
A hairdryer or heat gun is best for loosening adhesive beneath vinyl lettering. Hairdryers are widely available and less likely to damage surfaces due to their lower maximum temperature, usually reaching up to 140°F (60°C). Heat guns offer more power and adjustable heat settings but should be used carefully to avoid overheating.
Pick a device with variable temperature control if possible. For glass or metal surfaces, a heat gun at low settings works well. For painted or plastic surfaces, a hairdryer reduces the risk of heat damage.
Setting Temperature and Timing
Keep the heat source at about 140°F to 160°F (60°C to 70°C) for best results. This temperature range is hot enough to soften vinyl adhesive without damaging common surfaces like glass, metal, or paint. Higher temperatures increase the risk of warping plastic or fading paint finishes.
Heat each small section of vinyl for 20 to 30 seconds at a distance of 6 to 8 inches. This short, focused heating loosens the adhesive just enough to ease peeling without burning the vinyl or surface.
Proper Heat Application Technique
Move the heat source continuously in slow, even strokes to avoid overheating one spot. Hold the heat tool 6 to 8 inches away, never too close, to keep temperature steady and safe. Let the vinyl feel warm but not hot to the touch before attempting to lift a corner. Follow these steps for safe and effective heating:
- Plug in and set your heat source to the low or medium heat setting (hairdryer or heat gun).
- Position the heat source 6 to 8 inches from the vinyl lettering surface.
- Move the heat source back and forth slowly over a small section about 3 to 4 inches wide.
- Heat the section evenly for 20 to 30 seconds until warm to the touch.
- Test lifting a corner gently with a plastic scraper or your fingernail.
- If the vinyl resists, apply heat for another 10 to 15 seconds and test again.
- Work gradually around the lettering, repeating until all sections are warmed and loosened.
- Avoid overheating any spot by keeping the heat moving and taking breaks as needed.
4. Peeling Vinyl Lettering Without Tearing or Surface Damage
Peeling vinyl lettering correctly involves pulling it back slowly at a low angle to prevent tearing and protect the surface underneath. Maintaining a gentle pace and using heat when needed helps the vinyl come off in one clean piece. Following these steps reduces damage to both the lettering and the material below.
Optimal Peeling Angle and Speed
Keep the peeling angle shallow, generally around 45 degrees or less relative to the surface. This helps reduce stress on the vinyl and the surface, minimizing tears and scratches. Pulling too steeply can cause the vinyl to snap or damage the paint or glass.
Work slowly and deliberately. Rapid pulling risks tearing brittle or older vinyl. A slow approach lets the adhesive soften under heat and gives you control over the vinyl’s movement. Pull steadily, but don’t rush, moving too fast may cause uneven detachment.
Managing Vinyl That Resists Peeling
Vinyl that resists lifting or tears easily needs more care. Older vinyl, especially over three years old, often becomes brittle and breaks apart instead of peeling cleanly. When you encounter resistance, apply more heat to soften the adhesive.
Try reheating in small sections and continue peeling slowly. Folding the vinyl back on itself carefully can reduce tension and prevent further tearing. Avoid forcing the vinyl if it’s not separating easily; more heat and patience usually help.
How to Safely Use Scrapers to Lift Edges
Use a plastic razor blade or a similar plastic scraper to lift the vinyl’s edge gently. Avoid metal blades, which can scratch or damage delicate surfaces like car paint or glass. Plastic tools help you start the peeling without risking harm.
Begin by warming the vinyl with a hair dryer or heat gun. Then, slide the plastic tool under the vinyl’s edge slowly to lift it just enough to grab with your fingers or tweezers. Lift carefully, ensuring the scraper doesn’t dig into the surface.
When to Reheat During Peeling
Apply heat again when the vinyl pauses in peeling or seems to resist. Heat helps soften stubborn adhesive, preventing tears and making it easier to pull the vinyl off in larger sections. Heat only small sections at a time to avoid overheating and damaging the surface underneath.
Test lifting the edge after each heating session to see if the vinyl begins to release. Not successful? Reheat and make another attempt. Keeping the vinyl warm during peeling can improve the results significantly. Follow these detailed steps to peel vinyl lettering smoothly and safely:
- Warm a small section of the vinyl lettering with a hair dryer or heat gun on low to medium heat for about 15 to 30 seconds.
- Use a plastic razor or scraper to gently lift one corner or edge of the warmed vinyl without scratching the surface.
- Grip the lifted edge with your fingers or tweezers and begin peeling the vinyl back slowly at a low angle, keeping it near or below 45 degrees from the surface.
- Continue peeling steadily, pulling the vinyl back onto itself rather than straight away from the surface.
- When you reach vinyl that resists or feels brittle, stop peeling and apply heat again to that smaller section.
- Repeat reheating and slow peeling as needed, folding the vinyl carefully to avoid breaks.
- When the vinyl tears, lift the torn part using plastic tools, then keep heating and gently peel the rest.
- Once all vinyl is removed, inspect the surface for leftover adhesive and prepare for cleaning.
5. Removing Adhesive Residue Safely and Completely
Removing adhesive residue left after peeling vinyl lettering requires both effective solvents and care to protect your surface. Solvents like rubbing alcohol, acetone, and lacquer thinner can dissolve sticky adhesives, but chose based on the surface’s sensitivity. For instance, glass tolerates lacquer thinner well, while painted or plastic surfaces may suffer damage.
Household liquids such as rubbing alcohol work well for mild residue and are generally safe on many surfaces. Vinegar is less effective as an adhesive remover and may require longer application, increasing the risk of surface damage. Once the residue softens, use a plastic scraper or a razor blade held at a low angle to gently lift it without gouging. Always test a small hidden area first.
| Adhesive Remover | Surface Safety | Effectiveness | Approximate Cost |
|---|---|---|---|
| Rubbing Alcohol (Isopropyl 70%) | Safe on glass, metal, sealed wood | Good for light to moderate residue | Under $5 for 16 oz |
| Lacquer Thinner | Safe on glass and metal, avoid plastics and painted surfaces | Very effective on stubborn residue | $7, $12 per quart |
| Commercial Adhesive Remover | Varies, check label (usually safe on multiple surfaces) | Designed for tough adhesive removal | $8, $15 per bottle |
| Dish Soap + Warm Water | Safe on all surfaces | Best for initial cleaning after solvent use | $3, $6 per bottle |
| Vinegar | Safe on glass and sealed surfaces | Weak adhesive removal ability | Under $3 per bottle |
Apply the chosen solvent to a microfiber cloth or cotton ball, then gently rub the adhesive residue in a circular motion. Avoid soaking the surface as excess liquid can affect finishes or seep under paint. For stubborn areas, let the solvent sit for a minute before rubbing. Repeat until the residue diminishes.
Follow solvent use by cleaning the entire treated area with dish soap and warm water. This removes leftover chemical traces and prevents streaks or surface dulling. Dry the surface thoroughly with a clean microfiber towel to check for any lingering residue, repeating solvent application only where needed.
Always test any adhesive remover on a small, hidden area of your surface before full application to avoid unintended damage or discoloration.
6. Surface-Specific Considerations for Vinyl Removal
Removing vinyl lettering requires adapting your approach based on the surface to avoid damage. Glass is one of the easiest surfaces to clean, as it’s non-porous and resistant to scratches when using a plastic scraper or a strong rubber wheel specifically designed for vinyl removal. Applying gentle, consistent heat around 140°F (60°C) using a heat gun or hairdryer softens the adhesive, allowing for smooth peeling without scratching the glass. Avoid metal or razor blades on glass since these can leave permanent marks.
Vehicle paint demands far greater caution. Most vinyl on vehicles adheres strongly to painted metal, but paint chips or peeling paint often result from using harsh scrapers or excessive force. Using heat is helpful but should be limited to avoid damaging the clear coat layer. A plastic or rubber-edged tool is safest for lifting edges, combined with slow, steady peeling. Avoid metal blades and aggressive scrubbing, especially if the paint is older or non-factory quality. Applying an adhesive remover formulated for automotive paint after removal helps clear residue without harming the surface. Test any solvent on a small hidden area first.
Fabric and clothing vinyl, typically heat-applied PVC, require a more delicate approach since direct scraping isn’t possible and harsh chemical solvents can ruin textiles. Instead, gently peeling is best done by warming the area slightly with an iron on low heat and using your fingers or tweezers to lift the edge carefully. Avoid high heat, which can melt or deform the fabric and vinyl. Commercial fabric adhesive removers or rubbing alcohol might help soften residual adhesive, but always test on a concealed spot to prevent discoloration. Washing afterward helps remove leftover residues.
Other surfaces like painted walls or older wood signs can be tricky. Vinyl adhesion might lift paint if it’s flaking or poorly bonded, so proceed cautiously. Testing a small section by warming and lifting can prevent costly damage. Using the rubber wheel tool or plastic scraper slowly and applying heat can aid removal without stripping paint. For porous materials, avoid aggressive solvents and rely more on mechanical removal combined with mild cleaning agents.
The key is selecting tools and methods matched to each surface’s hardness and vulnerability. Glass and metal tolerate plastic scrapers and mild heat well, while fabric needs low heat and no scraping. Painted surfaces require gradual warming, soft tools, and caution with chemicals to protect finishes. Taking time to test methods in inconspicuous areas minimizes risk of damage, preserves appearance, and prepares surfaces for new lettering or finishing. Patience, appropriate heating temperatures, and tool choice make all the difference in successful vinyl removal across various surfaces.
7. Common Mistakes and How to Fix Them
Applying too much force while peeling vinyl lettering often leads to surface damage or tearing the vinyl repeatedly. Take your time and use a heat gun or hair dryer set to around 120°F to soften the adhesive before peeling. This reduces resistance and lowers the risk of both tearing and scratching the surface. Move slowly and peel at a low angle, roughly 45 degrees, instead of pulling straight up or sideways.
Scratches are common when using blade tools improperly. Avoid using knife blades directly on surfaces like painted metal or glass. Use plastic scrapers or putty knives with a thin edge instead. If you must use a razor blade on smooth surfaces like glass, hold it at a very shallow angle and keep it flat to the surface, only lifting gently to scrape adhesive residue. Always inspect the tool before use to ensure no nicks or burrs are present, as these can cause scratches.
Another common mistake is skipping the cleaning step before removal. Dirt and dust act as abrasives, creating fine scratches when you rub or scrape the vinyl. Clean the area well with soap and water or a mild cleaner, then dry it thoroughly before you start removal. This preparation is important, especially for glass and clear plastic surfaces.
Sometimes adhesive residue won’t come off, no matter how much you scrape or rub. In such cases, try applying isopropyl alcohol or a commercial adhesive remover. Let it sit for 5 to 10 minutes to soften the residue before wiping or scraping gently. Always test any solvent on a small hidden area to ensure it won’t damage the surface finish.
- For repeated tearing: heat the vinyl longer and peel slowly at a low angle.
- To prevent scratches: use plastic scrapers and hold razor blades flat and shallow.
- When residue resists removal: apply isopropyl alcohol or adhesive remover, wait 10 minutes, then scrape.
- Never skip cleaning before removal to avoid abrasive damage.
- Avoid pulling vinyl too fast; this increases chances of surface damage or leftover residue.
Using the correct technique costs little more than patience and basic tools but produces much better results. Rushing or skipping these steps often means more work repairing damage or repeating removal later. Taking these simple precautions ensures a clean surface and saves time overall.
8. When to Call a Professional for Vinyl Removal
You should consider calling a professional if the vinyl lettering is very old, brittle, or has been exposed to harsh weather for several years, making it prone to tearing or leaving residue that is difficult to remove. Professionals have access to specialized heat guns, industrial-grade adhesives removers, and tools that can prevent damage to delicate surfaces like painted metals or glass. Using these tools properly requires experience, so hiring a professional reduces the risk of costly repairs.
Professional removal is also wise when dealing with large or complex vinyl lettering on vehicles or storefront windows. Equipment such as infrared heat panels can evenly warm the vinyl without overheating the surface beneath, which common home heat guns cannot guarantee. If you’re unsure whether your project needs this level of technical care, use this decision checklist: the vinyl is older than 5 years, the surface shows signs of wear or damage, the vinyl covers a large area over 3 square feet, or previous DIY attempts have failed. Meeting any one of these means a professional can save time and reduce the risk of errors.
Finding a trustworthy service often starts with local vehicle wraps or sign shops that list vinyl removal as part of their offerings. Check online reviews on platforms like Google or Yelp and ask for before-and-after photos of their work. Request a clear estimate that includes removal and any surface restoration, such as polishing or repainting. Pricing typically ranges from $50 to $150 per hour, depending on job complexity and location, with average removals falling between one and three hours. Be clear about your expectations and confirm they use methods suitable for your specific surface to avoid surprises.
Professional removal benefits include clean surfaces ready for new decals or paint without adhesive residue or surface damage. Poor DIY attempts often leave scratch marks, leftover adhesive, or uneven surfaces requiring additional work to fix. By investing in experienced professionals, you’ll improve the outcome and avoid repeated removals, which can be costly and damaging over time. Keep in mind that some situations, like delicate paint finishes on collector vehicles, practically require expert intervention to preserve value.
Test a small hidden area of the vinyl and surface before starting any removal to gauge how brittle the vinyl is and how the surface reacts to heat or solvents.
Step-by-Step Action Plan for Removing Vinyl Lettering
Follow these clear steps to remove vinyl lettering without damaging your surface. Each phase ensures you’re progressing safely and effectively.
- Before you start: Gather all necessary tools like a heat gun, plastic scraper, adhesive remover, and clean cloths. Confirm your surface type to choose the right method.
- Day 1: Apply heat evenly over the vinyl lettering using a heat gun set to low or medium. The vinyl should soften and lift slightly.
- Day 1: Gently peel the vinyl lettering using your fingernail or a plastic scraper. Stop if you feel resistance to avoid surface damage.
- Day 1: Apply adhesive remover to any sticky residue left behind. Wait a few minutes, then wipe with a clean cloth until the surface looks smooth and clean.
- After removal: Inspect the surface for scratches or leftover residue. Repeat adhesive removal if needed, but avoid harsh scrubbing.
- Within a week: Clean the surface with mild soap and water to remove any chemical residues and allow it to dry fully.
- After one week: Evaluate the surface’s condition. Should damage or tough residue remain, consult a professional for restoration or a more thorough cleaning.
Frequently Asked Questions
How Long After Painting Should I Wait to Remove Vinyl Lettering?
Allow paint to cure for 30 to 60 days before taking off vinyl lettering, which helps prevent peeling or damage during removal.
Can Vinyl Lettering Be Removed Without Damaging Glass?
Yes, but it requires a careful approach with the right tools and techniques. Heat and a razor blade help loosen stubborn vinyl without scratching the glass.
What Is the Best Technique for Removing Old or Stubborn Vinyl Lettering?
Use a back-and-forth rhythm applying heat and gentle peeling. This method works especially well on aged or stubborn vinyl to avoid tearing or surface damage.
How Does Exposure to Sun and Rain Affect Vinyl Lettering on Car Windows?
Exposure can make vinyl tougher to remove because the adhesive hardens. You might need stronger heat or adhesive removers for cleanup.
Can I Remove Vinyl Lettering from Furniture to Sell It?
Yes, removing vinyl graphics from furniture is possible. Use heat and gentle scraping to protect the furniture’s surface and improve resale value.
Why Might I Consider Professional Removal of Vinyl Lettering?
Professionals have tools and experience for safe removal, especially on sensitive or damaged surfaces. Call them if DIY attempts risk costly damage.
The Bottom Line
Successfully removing vinyl lettering relies on careful heat application and gentle peeling to protect your surface. Taking your time with adhesive cleanup prevents leftover mess or damage. Start your removal process with the tools ready and work slowly to keep surfaces intact. Encounter unusual resistance or damage? Stop and seek expert advice to prevent costly errors.