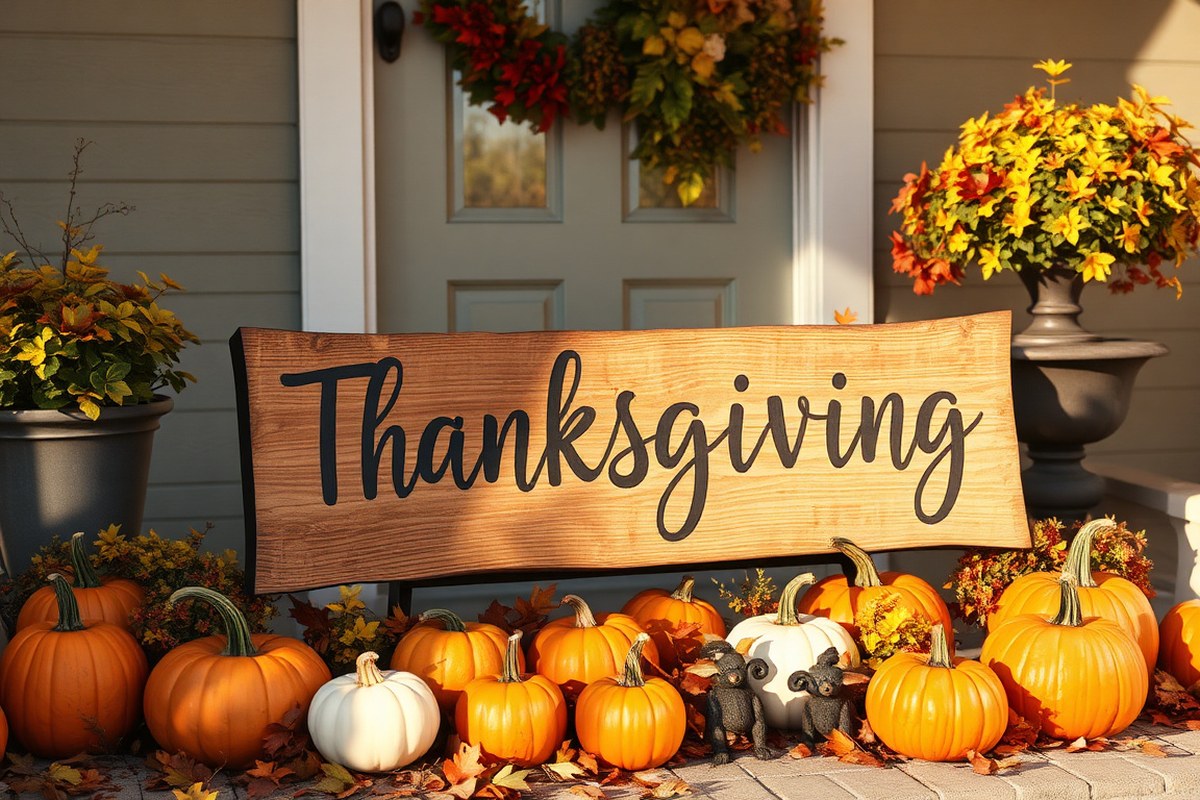
Thanksgiving Sign Ideas: 12 Creative DIY & Decor Tips That Work
Thanksgiving sign ideas can brighten your home and add a festive touch with simple DIY projects that suit any style. Choose popular themes like gratitude messages, autumn leaves, or harvest motifs to create an inviting atmosphere. Starting with the right materials, such as wood boards or chalkboards, ensures your sign looks great and lasts throughout the season.
Key Takeaways
- Use wood boards sized around 22 by 13 inches for durable and easy-to-handle Thanksgiving signs.
- Incorporate frame trim pieces to add a polished, professional look to your DIY sign.
- Choose reversible designs to maximize use beyond just the Thanksgiving season.
- Quick projects can take less than 15 minutes, ideal for last-minute decorating.
- Try chalkboard surfaces for customizable and reusable Thanksgiving messages.
- Pair your sign with seasonal elements like pumpkins or wreaths to improve visual impact.
Popular Thanksgiving Sign Themes and Messages

Choosing a message for your Thanksgiving sign helps set the tone for your holiday decor and reflects the gratitude and warmth you want to share with family and guests. Popular Thanksgiving sayings often express thankfulness, togetherness, and the joy of the season, creating a welcoming atmosphere that matches your home’s style.
Common themes include gratitude for family, food, and the season. A simple phrase like “Be Thankful” or “Give Thanks” conveys the holiday spirit clearly and suits almost any decor style. Rustic farmhouse signs often feature words that evoke warmth and home, such as “Gather” or “Thankful & Blessed,” which work well in spaces with natural wood, warm tones, or vintage accents.
For those who prefer something more playful or unique, sayings like “Merry Feast” or “Thankful for the Mess” add humor and personality to your display. Inspirational messages such as “Always Stay Humble and Kind” give a timeless value that extends beyond Thanksgiving, making your sign a year-round reminder of gratitude.
- “Give Thanks”, a classic phrase that fits any decor and clearly expresses gratitude.
- “Gather”, invites togetherness, perfect for dining areas or entryways.
- “Be Thankful”, simple, direct, and adaptable to rustic or modern styles.
- “Thankful & Blessed”, emphasizes appreciation and warmth, great for farmhouse themes.
- “Merry Feast”, festive and joyful, ideal for lively eat-in kitchens or dining rooms.
- “Always Stay Humble and Kind”, an inspirational choice that works beyond the holiday.
- “Thankful for the Mess”, adds humor, suitable for casual and family-oriented spaces.
The key to selecting the right message is to consider the mood and style of the room where the sign will hang. Warm, rustic themes pair well with traditional or farmhouse phrases. More modern or minimalist settings benefit from clean, concise wording that matches sleek lines or neutral palettes. You can also create reversible signs with interchangeable messages that switch between Thanksgiving and Christmas, maximizing your decor investment.
Crafting your own sign lets you personalize these messages further by choosing fonts, colours, and materials that fit your home’s décor. Whether you choose reclaimed wood for a nostalgic, budget-friendly vibe or bright marquee letters for a dramatic effect, the message you pick will help convey the sentiment that matters most during the holiday season.
Best Materials for Making Thanksgiving Signs

Wood is the most popular material for Thanksgiving signs, favored for its natural warmth and durability. A wood pallet or distressed barn wood offers a rustic, farm-style look that fits well with fall decor. This material is suitable for both indoor and outdoor use if sealed properly. Wood signs typically require a bit more preparation, like sanding and sealing, but they can last for many years, making them a worthwhile investment. Their sturdiness allows you to add paint, stencils, or even nail on elements such as wood pumpkins or leaves.
Chalkboard signs provide a flexible option for those who want to rearrange messages or change the design each year. They offer a classic look and are perfect for indoor settings like kitchens or dining rooms. Chalkboard’s disadvantage is that it’s prone to smudging and damage from moisture, so it’s less ideal for outdoor use unless kept sheltered. Creating a chalkboard sign usually involves buying a chalkboard panel or painting a wooden board with chalkboard paint, which costs about $10 to $20 for a 12×16-inch size.
Fabric signs, like those made from burlap or canvas, bring a cozy and casual vibe to your decor. They are lightweight and easy to hang on doors or walls, but they lack the rigidity of wood or chalkboard, which can make them less striking from a distance. Fabric is best for indoor areas away from pets or kids who might easily damage it. You can personalize fabric signs with paint, iron-on transfers, or even embroidery, but fabric can fade or wrinkle over time. Cost varies widely, typically around $5 to $15 for enough fabric to make a 12×18-inch sign.
| Material | Advantages | Disadvantages | Best Use | Cost Estimate |
|---|---|---|---|---|
| Wood | Durable, natural look, versatile for paint/stencils | Needs sealing for outdoors, heavier | Indoor & Outdoor | $10-$30 per board |
| Chalkboard | Reusable designs, classic style | Smudges easily, less weather-resistant | Indoor (sheltered outdoor possible) | $10-$20 for panel or paint |
| Fabric | Lightweight, easy to hang, cozy look | Less durable, prone to wrinkles/fading | Indoor only | $5-$15 per yard |
Choosing between these materials depends on where you want to display your sign and how much effort you want to invest. A wood sign takes more time and supplies but lasts much longer, especially outside. Chalkboard signs are great for changing up your message every year but require careful placement to avoid damage. Fabric signs demand less setup and weight but don’t hold up well outside and need gentle handling. For modular looks, wooden plaques painted or stenciled with Thanksgiving themes are a common, stylish choice that blends with other autumn decorations.
Seal wood surfaces with a waterproof varnish before using them outdoors to protect your sign from moisture and extend its life.
Step-by-Step Simple DIY Thanksgiving Sign Tutorial
Creating a Thanksgiving sign at home is a simple and rewarding project that brings a warm, personal touch to your seasonal decor. With basic materials like wood, paint, and stencils, you can craft a beautiful sign that expresses gratitude and adds charm to your space. Following clear steps from prepping your wood to sealing the finished piece ensures professional-looking results without much experience.
Preparing Your Wood Base
Start by selecting a wood plank that fits your desired sign size, commonly 12 by 18 inches for a manageable project. Pine or plywood boards usually cost between $5 and $15 at craft stores and offer a smooth surface for painting. Sand your wood with 120-grit sandpaper to eliminate any rough edges and splinters. Wipe the surface with a damp cloth afterward to remove dust. A clean, smooth base helps paint adhere better and prevents smudging. For beginners, keeping the wood raw or applying a base coat of white acrylic paint creates a blank canvas that highlights colors and lettering.
Painting and Lettering Techniques
Using acrylic paints provides durability and a wide palette of colors. Apply one or two coats of your chosen background color, allowing each coat to dry for about 30 minutes at room temperature. For lettering, use letter stencils or printed templates taped to the board to guide your design. Position your seasonal message such as “Give Thanks” or “Be Grateful” centered and evenly spaced.
Fill in letters using a small, flat paintbrush or a sponge applicator. To avoid smudging, paint gently and let the paint dry completely before removing stencils. For a glittery effect, lightly brush on glue over the lettering once dry, then sprinkle fine glitter and shake off excess. This adds sparkle and catches the eye among your other decorations.
Sealing and Finishing Your Sign
Finish the sign with a clear acrylic sealer spray to protect paint from scratches and moisture, especially if your sign will be displayed outdoors. Hold the spray can 8 to 12 inches away and apply a light, even coat. Let it dry for at least one hour before handling. For added durability, apply a second coat after the first dries.
Adding simple hanging hardware like sawtooth hangers or sturdy twine glued and stapled to the back allows easy mounting on walls or doors. Take care not to add too much weight that could sag the sign. Proper sealing and hanging extend your sign’s life and keep it looking fresh throughout the holiday season.
- Choose and cut your wood plank to your desired sign size.
- Sand the wood surface to create a smooth base and clean off dust.
- Paint the wood with your chosen background color; allow 30 minutes drying time.
- Position your stencils or templates, and paint your Thanksgiving message carefully.
- Let the lettering dry completely before removing stencils.
- Optional: apply glue and sprinkle glitter over letters for extra sparkle.
- Seal the entire sign surface with a clear acrylic spray; allow at least one hour to dry.
- Attach hanging hardware on the back for easy display.
Choosing Between Reversible and Single-Season Signs
A reversible sign is a decorating piece designed with two different displays, one on each side, allowing you to flip it depending on the holiday you want to celebrate. For example, a Thanksgiving-Halloween reversible sign might feature autumn leaves and a turkey on one side, and pumpkins or spooky motifs on the other. These signs save space since you only need one item instead of two. Crafting a reversible Thanksgiving and Christmas farmhouse sign works similarly, with autumnal themes on one side and classic Christmas imagery like pinecones or snowflakes on the other. This design versatility is practical if you want to switch your décor quickly without storing multiple signs.
To design a dual-purpose sign, start with a sturdy base material such as wood or thick MDF board that can hold paint or vinyl lettering on both sides. Choose complementary color palettes and fonts that suit both holidays, but avoid overly specific details that belong solely to one celebration. For instance, using warm earth tones with neutral typography works well for fall and smooth transitions into the muted greens and reds of Christmas. Paint or apply vinyl decals on each side, ensuring graphics don’t overlap or bleed through. Sealing the sign with a clear, weather-resistant finish improves durability, especially if placed outdoors. Typically, reversible signs cost slightly more upfront, about 20% to 30% more in materials and time, due to the need to treat both sides equally, but the convenience often offsets this extra expense.
Reversible signs make decorating easier if you plan to reuse the same décor piece through multiple holidays without crowding your storage space. However, when you want highly detailed or theme-specific designs, single-season signs might be a better choice. Single-season signs often feature intricate or elaborate elements that perfectly capture the essence of a holiday but won’t translate well to other seasons. For example, a sign with a turkey carving scene or a Santa Claus image doesn’t work well for other occasions. Also, if you tend to leave your signs outside for long periods, single-season signs can be more effective because you can store them properly after use, reducing weather wear on a dual-faced surface.
Designing a reversible sign starts with measuring and cutting the base to a manageable size, usually between 12 and 18 inches wide and 8 to 12 inches tall, to keep it light enough to flip easily. Next, lightly sand each side before painting, and allow at least 24 hours to dry between coats. Use painter’s tape to section off borders or create clean lines for text. For lettering, stencils or adhesive vinyl make the process cleaner and quicker than freehand painting. Allow another 12 to 24 hours for all decorative paint or finishes to cure fully before sealing the piece. Hanging hardware or a stand should allow easy flipping without removing the sign from its spot.
In summary, a reversible Thanksgiving sign offers a practical way to celebrate multiple holidays with one decoration while saving space and reducing the number of items you store or buy. Opt for a reversible sign when you want simple, adaptable décor that stretches across seasons like fall, Halloween, and Thanksgiving or Thanksgiving and Christmas. Single-season signs come into play when your décor priorities focus on intense seasonal detail or elaborate designs better suited for a limited timeframe and display.
Creative Styles of Thanksgiving Signs Explained
Choosing the right style for your Thanksgiving sign can set the tone for your holiday decorations and complement your home’s existing design. Popular styles such as rustic, farmhouse, modern, and chalkboard each bring a unique vibe, matching different tastes and spaces. Understanding their characteristics helps you pick or create a sign that feels personal and fits your setting perfectly.
Rustic Wood and Nature-Inspired
Rustic signs often use natural materials like worn wood or distressed metal to evoke a cozy, nostalgic atmosphere. The wood’s texture and imperfections add warmth, giving a handmade feel. Incorporating elements like twine, pinecones, or autumn leaves improve the nature-inspired look, which suits cabins, country kitchens, or any space that embraces an earthy feel.
To make a rustic sign, start with a wooden board. Lightly sand it, then apply a stain or paint in warm, earthy tones like deep browns, burnt oranges, or muted yellows. Hand-painted or stenciled messages such as “Give Thanks” or “Harvest Blessings” work well. Adding accents like burlap ribbons or small wooden cutouts of pumpkins or leaves will add texture and depth.
Modern Minimalist Typography
Modern Thanksgiving signs focus on clean lines and simple fonts, using neutral or monochromatic palettes to blend with contemporary decor. They avoid busy designs in favor of straightforward messages displayed prominently. These signs work great in urban apartments, sleek kitchens, or minimalist living rooms. You can use framed prints or smooth wooden plaques painted in whites, greys, or blacks.
The exact approach involves selecting a smooth surface and painting or printing a message in sans-serif fonts. Common phrases include “Grateful,” “Thankful,” or “Gather.” Keep letters large and spaced out. Consider painting the background matte white with black lettering or using metallic paint for subtle sheen. This style demands precision but yields a sophisticated look.
Farmhouse Charm with Distressed Finishes
Farmhouse-style Thanksgiving signs combine the rustic with a soft, inviting aesthetic. They often use distressed wood or metal to create an antique or weathered appearance, adding character. Typography choices lean toward cursive or vintage-inspired fonts, offering a handcrafted vibe. This style pairs well with cozy kitchens or living rooms decorated with natural fibers and warm color schemes.
Creating this look involves painting a wooden board in a base color like cream or light grey, then sanding edges and surface spots to reveal the raw wood underneath. Messages like “Bless This Home” or “Welcome Fall” in black or dark brown can be stenciled or hand-painted. To add charm, attach simple embellishments such as miniature wreaths made from twigs or sprigs of dried flowers.
- Use sandpaper (100-150 grit) to distress paint for an authentic weathered look
- Choose paint colors that complement interior hues, such as soft beige, sage, or warm white
- Select fonts that mimic handwritten or vintage print styles
- Add farmhouse-style accessories like burlap, lace, or jute string
- Seal with matte, water-based varnish to protect without losing rustic appeal
- Plan your layout on paper before painting to avoid mistakes
- Consider reversible designs with seasonal messages on each side for versatility
Distressing too aggressively can weaken thin wood boards, so sand gently and test on a scrap piece first.
Chalkboard and Handwritten Signs
Chalkboard signs provide flexibility with a casual, personal touch. You can change messages or update designs each season, making them ideal for homes that enjoy varying decor. These signs fit in kitchens, entryways, or dining rooms where handwritten greetings add warmth without overwhelming the space. They often use dark backgrounds with white or colored chalk.
Start with a flat wooden or metal board coated in chalkboard paint. Use chalk markers or regular chalk for lettering. Popular phrases include “Happy Thanksgiving,” “Give Thanks,” or seasonal menu listings. The imperfect, hand-drawn look makes each sign unique, but requires a steady hand or stencils for clarity. Chalkboard signs cost under $20 to create if you buy paint and markers and can last multiple holidays with proper care.
Tools and Supplies Checklist for Thanksgiving Sign Projects
Getting your workspace and tools ready is important for smooth Thanksgiving sign crafting. Start with a clean, flat surface covered by newspaper or a craft mat to protect from paint spills. Good lighting helps you see details clearly, and organizing supplies before you begin avoids interruptions. Select a work area with ventilation if you’re using paint or stains to ensure safety and comfort.
Basic tools typically include painter’s tape to create sharp lines and protect sections you don’t want painted, and a variety of paintbrushes, flat brushes for broad coverage and small round brushes for details or lettering. Sandpaper or a sanding block is essential if you’re working on wood to smooth rough edges or prep the surface for paint or stain.
- Painter’s tape
- Paintbrush set (flat and detail brushes)
- Sandpaper or sanding block (medium and fine grit)
- Jigsaw or handsaw (for cutting wood boards or pallets)
- Fabric and twine (for crafting banners)
- Permanent markers or paint pens (for crisp lettering and accents)
- Wood stain or clear sealant (to protect finished wood signs)
Specialty supplies can improve your Thanksgiving signs’ appearance. Wood stain adds a rustic charm that fits the holiday’s cozy vibe, while clear sealants protect your work from smudging and wear, especially for outdoor displays. Permanent markers or paint pens give you neat, uniform letters when freehand painting feels tricky. Fabric and twine suit banner projects, lending a soft texture and easy hanging ability.
Preparing your workspace means more than just clearing a table. Keep water or paint thinner handy based on your paint type for quick cleanup. Have paper towels or cloth rags within reach to wipe brushes between colors or correct mistakes quickly. Organize supplies in small containers to keep similar items together, helping you maintain focus and avoid frustration. Allocating around two to three hours for setup, painting, drying, and sealing will accommodate most projects comfortably.
How to Decorate with Thanksgiving Signs Indoors and Outdoors
Place Thanksgiving signs where they can be easily seen and complement the surrounding space. Inside the home, walls in dining areas or kitchens offer great spots since these rooms often host holiday gatherings. Tables and counters also work well for signs that stand alone or lean against a wall. Outdoors, the front door is a classic location that greets guests with a warm message. If you use the front porch, consider hanging a basket framed as a sign filled with fall flowers to add texture and color.
Matching your Thanksgiving signs with other décor helps create a unified festive look. Coordinate colors in your signs with pumpkins, garlands, and table settings in autumn shades like burnt orange, deep reds, browns, and golds. Layer your decorations by placing signs next to candles, pinecones, or vases filled with seasonal elements such as dried corn or leaves. This combination increases visual interest without crowding the space. Aim for balance so the sign stands out but feels part of a broader decorating scheme.
Outdoor signs must withstand weather conditions, especially rain and wind. Signs placed on the front door or porch should have a waterproof finish or be made from weather-resistant materials like treated wood, metal, or plastic. Protect cloth or paper signs with clear sealants or cover them with a transparent plastic sleeve. Secure signs firmly using strong hooks or brackets to prevent wind damage. Expect to replace natural elements like fresh flowers used in baskets every few days, as cooler temperatures and moisture can shorten their lifespan.
To create a cozy ambiance, add warm lighting near your signs both inside and outdoors. Battery-operated string lights or flameless candles work well without risking fire hazards. Position lights to highlight the sign’s message but avoid glare or shadows that obscure words. Inside, soft lighting pairs well with rich colors and textured fabrics such as burlap or knit throws. Outdoors, subtle uplighting illuminates signs and surrounding fall arrangements, welcoming visitors with charm.
Choosing spot size depends on the sign’s dimensions and available space. For example, a sign around 12 by 18 inches fits nicely on a kitchen wall or entryway table, while larger signs require wall space free of other decor to avoid a cluttered look. Signs meant for doors or porches should not block door handles or locks and must allow easy entry. Proper placement improve visibility and maintains the flow of movement, both key for maintaining a festive, inviting environment.
Customizing Thanksgiving Signs for Family and Guests
Adding names or special phrases to your Thanksgiving signs creates a heartfelt welcome that resonates with family and guests. Personalizing a sign might mean featuring your family’s last name, a meaningful holiday quote, or a unique phrase like “Gathered Here with Grateful Hearts.” Begin by choosing a clear font that matches your sign’s style, such as a warm script for a rustic look or block letters for something modern. Use stencils or printable templates available online as guides to keep your lettering neat and consistent. For example, you could write, “The Johnsons Give Thanks,” followed by a tagline like, “Home is Where the Turkey Is.”
Incorporating creative elements like dried flowers, twine, or fallen leaves adds texture and a natural touch that echoes the season. Attach these elements with a hot glue gun or strong craft adhesive, placing them around the text or along the borders. Handmade wooden signs benefit from layering these organic materials on the corners or as part of a fall wreath around the edges. This technique brings depth and visual interest to your sign while reflecting the autumn atmosphere.
Including family traditions in your sign’s design makes it especially meaningful. Think about your holiday rituals, whether it’s the traditional pumpkin pie, a favorite saying passed down from grandparents, or a thankfulness ritual you share. Write a short message inspired by those experiences, like “Always Pumpkin Pie and Laughs at the Table.” You can also add symbols of these traditions, such as small painted pumpkins, turkeys, or corn stalks. For a family that gathers from afar, a sign reading, “Miles Apart, United in Thanks,” acknowledges their effort in coming together and adds emotional warmth.
For a smooth process, use a basic script template like this: “Welcome to Our Home, The [Family Name]’s Thanksgiving Feast, Grateful Hearts Gather Here.” Customize the phrases and names to fit your family style. Depending on the sign size (typically 12 to 18 inches wide for door or wall display), allocate 2 to 3 inches per line of text to ensure readability from a distance. Paint, vinyl lettering, or weather-resistant markers work well for permanent personalization on wooden or metal signs. If you prefer a temporary message that can be updated yearly, chalkboards or dry-erase surfaces offer flexibility.
Personalizing your sign means balancing visual elements with readability and seasonal spirit. Overcrowding with decorations or too many words can make signs hard to read and distract from the message. Simple, clear designs with a few well-placed adornments tend to draw smiles and set a warm tone when family and guests arrive. Handmade signs that celebrate your unique family story invite connection and joy during Thanksgiving celebrations.
Use waterproof sealant on outdoor signs with organic materials to protect your personalized touches from damp weather and preserve their natural charm.
Quick and No-Paint Thanksgiving Sign Ideas
Creating Thanksgiving signs without paint saves time and effort while still offering a warm and festive look. You can make attractive signs using materials that require minimal tools, perfect for busy decorators. Materials like kraft paper, pre-stencilled wooden boards, chalkboards, and vinyl lettering sheets deliver quick results with little setup. These options let you focus on assembling rather than intricate decorating, reducing your project time to 20 to 40 minutes. Costs usually stay low, around $5 to $15 per sign, depending on materials.
One easy approach is crafting a sign with kraft paper and twine. Cut a large piece of brown paper, fold or layer it for durability, and attach simple messages using stickers, stamps, or pre-cut letters. This method avoids paint and brushes, keeping cleanup simple. You can hang the finished sign with twine or attach it to a wooden frame for a rustic vibe. The key is choosing clear, bold fonts or large letters so your message shows well from a distance.
Chalkboards add versatility for last-minute signs as well. Write Thanksgiving phrases using chalk markers or white chalk, allowing you to erase and change messages seasonally. Chalkboards range from small sizes suitable for tabletops to large porch displays at about $10 to $25 each. Maintaining legibility means using broad strokes and avoiding overly intricate fonts that can smudge easily.
- Use pre-stencilled wooden boards from craft stores for instant rustic charm
- Apply vinyl lettering or stickers for clean, paint-free text application
- Write with chalk or chalk markers on chalkboards for simple reuse
- Create layered paper signs using kraft or cardstock, adding ribbons or twine
- Stamp messages with rubber stamps and ink pads on natural paper
- Print messages on adhesive-backed paper and stick onto plain boards
- Repurpose old picture frames by adding a festive printed message inside
Good results rely on strong contrasts between text and background. Dark letters on light paper or white chalk on a blackboard ensure readability. Simple wording such as “Give Thanks” or “Grateful” works well because it’s easy to position centrally and requires less precision. Watch out for smudging on chalk or stickers peeling off if surfaces aren’t clean. To avoid this, prepare your base surface by wiping it down and considering a light spray of fixative on paper signs for durability. This no-paint strategy offers a fast way to bring seasonal cheer without specialized tools or mess, making it ideal for quick festive decorating.
Common Mistakes in Making Thanksgiving Signs and How to Fix Them
Uneven paint or lettering often happens when the workspace isn’t properly prepared or the tools aren’t suited for the job. Surface dust, bumps, or moisture can make the paint or marker skip or spread unpredictably. To fix uneven paint, lightly sand the area once it’s dry, then apply thin, even coats using a small brush or stencil for controlled edges. Lettering can be corrected with a fine paint pen or touch-up brush after the base layer has dried. Avoid thick paint layers that run or clump by working slowly and letting each coat dry fully before adding more. Proper drying times usually range from 30 minutes to an hour, depending on paint type.
Durability problems come from using the wrong materials or not sealing the sign correctly, especially if you plan to display it outdoors. Wood can warp or crack if it’s not properly primed and sealed. Signs made from untreated plywood or cardboard are prone to moisture damage and fading. Use weather-resistant paints and apply a clear sealer with UV protection to extend the sign’s life. You can spray or brush on polyurethane or an outdoor-grade clear coat. Each layer should dry for at least two hours before applying another. Indoor signs last longer without this step but still benefit from a light seal. Common pitfalls in DIY Thanksgiving signs include:
- Skipping surface prep like sanding and cleaning the board.
- Using inappropriate brushes or markers too large for detailed work.
- Applying paint too thickly, causing drips and long drying times.
- Neglecting to protect paint with a sealer, leading to fading and damage.
- Not measuring or sketching lettering, resulting in uneven spacing and crooked lines.
- Choosing materials unsuitable for the sign’s intended location.
Most of these problems are easy to avoid by taking a bit more time upfront. Sanding smooths the surface and helps paint adhere better, costing only a few dollars for sandpaper sheets or a sanding block. Use small angled brushes or paint pens for lettering, they give you control without mess. Draft your design on paper and mark your board lightly with pencil gridlines before painting to keep spacing even.
Ensuring your sign lasts through the season means selecting materials and finishes that match your display conditions. For outdoor signs, pressure-treated wood or weather-resistant composites paired with exterior-grade acrylic paint and a quality clear coat typically cost around $20 to $50 depending on size and brand. For indoor signs, standard craft paint on a properly primed surface covers most needs. These extra steps add durability and help your Thanksgiving sign maintain its warmth and character through autumn celebrations.
Repurposing Old Materials into Unique Thanksgiving Signs
Reusing old wood, pallets, and other reclaimed materials offers a sustainable way to create unique Thanksgiving signs. These materials provide a rustic charm that fits perfectly with Thanksgiving décor and help reduce waste. With simple preparation and creative design, you can turn leftover or discarded wood into standout pieces for your holiday celebration.
Selecting Reusable Materials
Good choices include old wooden boards, weathered pallets, and wood scraps. These materials are readily available and often have the natural wear that improve a rustic Thanksgiving look. Avoid materials with signs of rot, mold, or excessive splintering, as they can compromise the sign’s durability and safety.
Besides wood, you might find metal sheets, thin acrylic panels, or even reclaimed barn wood suitable for your project. Each material adds a different texture and style, so pick one that matches your home’s décor and your crafting skills. Pallet wood tends to be especially popular due to its affordability and pre-cut dimensions.
Cleaning and Preparing Surfaces
Proper preparation of reclaimed materials ensures your Thanksgiving sign lasts and looks its best. Removing dirt, dust, and old finishes helps paint or stain adhere evenly. Also, sanding down rough edges prevents splinters and creates a smooth workspace. Here’s a straightforward method to prepare your reclaimed wood or pallet before crafting:
- Inspect the wood for nails or staples and carefully remove them with pliers.
- Clean the surface using a stiff brush and mild soap mixed with water to remove grime and mildew.
- Rinse with clean water and allow the wood to dry completely, ideally for 24 to 48 hours in a well-ventilated area.
- Sand the surfaces and edges to remove rough spots and splinters. Use medium-grit sandpaper (around 120 grit) for large areas and fine-grit (220 grit) for finishing touches.
- Decide whether to leave the wood natural for a rustic effect or apply a clear sealant or stain for protection.
Wear gloves and a dust mask during sanding to avoid skin irritation and inhaling dust particles.
Design Ideas for Repurposed Signs
Rustic Thanksgiving signs look great with simple, bold lettering and seasonal motifs like pumpkins, leaves, or turkeys. You can either paint designs by hand, use stencils for precision, or apply vinyl decals. Intricate cuts, such as pumpkin shapes or autumn leaves, work well with thin planks or slices of wood.
Stick to styles that improve the natural look of the material. For example, a pallet sign with hand-painted “Give Thanks” in white or gold paint maintains an inviting farmhouse vibe. Incorporating botanical elements like painted branches or attaching real dried leaves adds texture and interest without overpowering the sign.
For a more modern take, combine metal letters or geometric shapes with the reclaimed wood background. This contrast of materials highlights the reclaimed wood’s warmth while giving the sign a fresh appearance.
Step-by-Step Action Plan for Your Thanksgiving Sign Project
Follow these steps to create and display your Thanksgiving sign with confidence and style.
- Before you start: Choose a sign theme and style that matches your home and guest preferences. Confirm the space where you’ll display it to select the right size and materials.
- Day 1: Gather all tools and supplies based on your chosen material and design to avoid interruptions. Knowing everything is ready means smoother progress.
- Day 2: Prepare your workspace and repurpose any old materials you want to use. Successful prep looks like a clean, organized area with all parts accounted for.
- Day 3: Begin crafting your sign, starting with base construction or priming, depending on materials. Progress is good when the shape and structure are complete.
- Day 4: Add lettering and decorations, using the no-paint techniques if preferred. The sign should clearly display your message with neat, secure finishes.
- Day 5: Customize for your family by adding names or personal touches. Check that these additions are permanent enough for the season.
- Day 6: Decide on indoor or outdoor placement, ensuring weather protection for outdoor signs. A successful step shows the sign installed safely and visibly.
- After Thanksgiving: Store or repurpose your sign for next year, cleaning and repairing as needed. Signs that are well cared for will last multiple seasons.
Frequently Asked Questions
What Are Unique Materials to Use for Thanksgiving Signs Beyond Wood and Chalkboard?
Unique materials include fabric scraps, pressed leaves, and burlap, which add texture and a rustic touch to your signs. These options allow creative textures and natural colors that improve the holiday’s warmth and charm.
Can Thanksgiving Signs Be Safely Used Outdoors in Wet Weather?
Some outdoor signs can withstand wet weather if sealed with a waterproof finish or made from weather-resistant materials like treated wood or plastic. Always check the durability of materials and apply protective coatings to ensure longevity.
How Do I Personalize Thanksgiving Signs for Kids to Help Decorate?
Personalize signs with kids’ names, handprints, or simple drawings to involve them and create memorable decor. Using washable paints or markers makes this both fun and mess-free for younger children.
What’s a Cost-Effective Way to Create Multiple Matching Thanksgiving Signs?
Use inexpensive materials like cardboard or foam board and repeat a simple design or message for a coordinated look. Purchasing bulk supplies and using stencils can save time and money while making several signs.
Can I Make Thanksgiving Signs That Double as Place Cards?
Yes, small-sized signs or ones with clips can serve as place cards at the dining table. Personalize each with guests’ names and a festive message for a dual-purpose decoration.
Are Battery-Operated Lights a Good Addition to Thanksgiving Signs?
Battery-operated LED string lights add a warm glow without electrical hazards, perfect for indoor or outdoor signs. They improve visibility and create a cozy atmosphere, especially in dim settings.
The Bottom Line
Your Thanksgiving sign brings warmth and personality to your holiday decor, making your gathering feel more special. Start by picking a simple message and material that fits your skill level and space. Let your sign show off your creativity and welcome guests with a seasonal touch they’ll appreciate.