Backyard Sign Ideas That Inspire: 12 Creative & Practical Types That Work
Backyard sign ideas bring personality and purpose to your outdoor space, improving both decoration and functionality. Selecting creative yet practical signs helps express your style while serving clear roles, like guiding guests or labeling plants. Start by choosing designs that match your backyard’s theme and meet visibility standards for the best impact.
Key Takeaways
- Use letter heights of at least 1 inch per 10 feet of expected viewing distance for clear outdoor sign readability.
- Keep font sizes above 3 inches tall for signs meant to be seen from the street or across larger yards.
- Choose weatherproof materials like treated wood, metal, or outdoor canvas to ensure sign longevity in various climates.
- For DIY signs, birch plywood with wood-burning tools or laser engraving adds a rustic, durable touch to plant labels.
- Place signs where they complement landscaping but don’t cover over 25% of any window area, complying with local rules.
- Light boxes or chalkboard menu signs double as décor and functional elements for backyard events or dining areas.
Top Backyard Sign Ideas for Decoration and Use
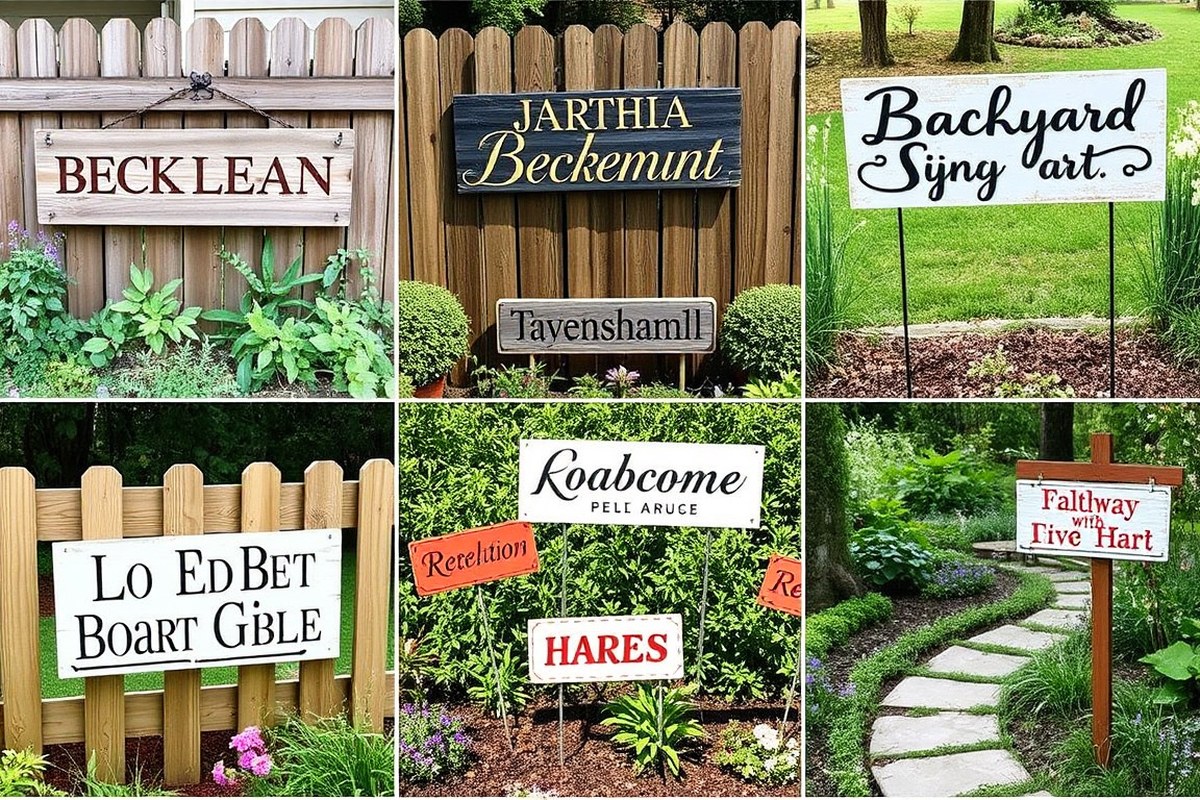
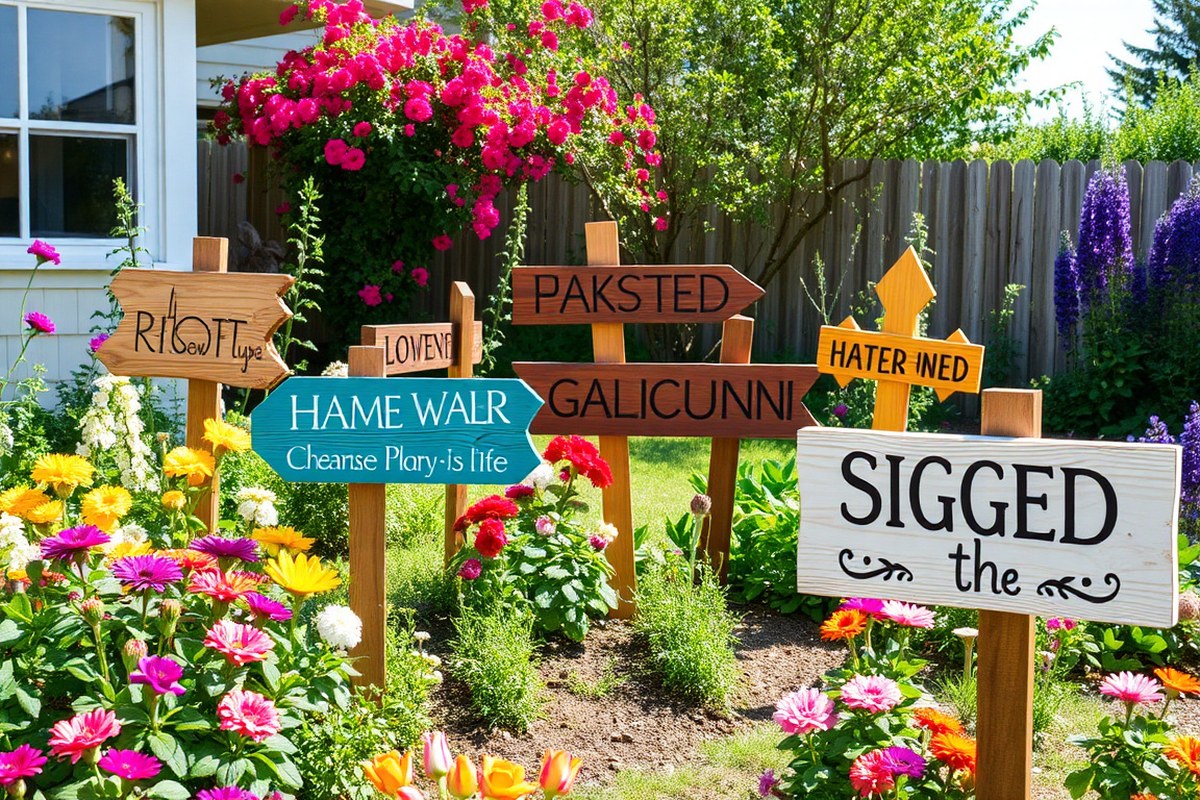
Popular backyard signs range from decorative to functional, and personalized designs add a unique touch that reflects your style and improve your outdoor space. Decorative signs, like wooden arrows pointing to “Rose Garden” or “The Pumpkin Patch,” introduce charm and direction, making your garden feel welcoming and playful. These can be paired with themed garden gnomes or other lawn ornaments for extra personality. Rustic wooden signs with hand-painted letters or a matte clear coat finish create a warm, inviting vibe that’s perfect for backyard farmers or garden enthusiasts.
Functional signs serve practical purposes. Chalkboard menu signs, for instance, are popular for backyard events. They list food and drink options clearly, helping guests feel at ease while adding to the decor. Personalized plant markers offer organization by labeling different herbs or flower beds, combining usefulness with style. Luminescent signs improve safety and visibility during evening gatherings, blending function with decoration easy.
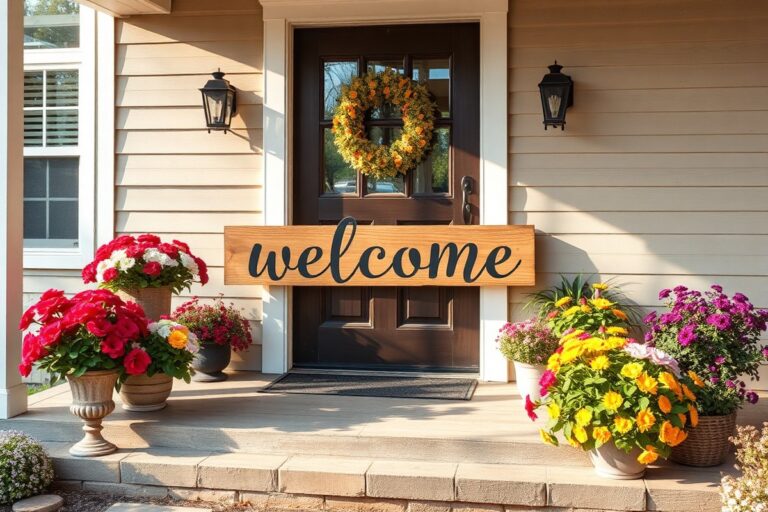
Personalized signs like custom monogrammed garden plaques bring a touch of elegance and identity. These signs can incorporate favorite motifs or colors, matching your landscape’s theme, whether nautical, whimsical, or classic. Using acrylic craft paint to add unique details, like raffia “hair” and a mini sign reading “It’s Fall Y’all,” adds seasonal flair and casual friendliness. Round welcome signs are another popular choice, immediately setting a decorative tone at the yard’s entrance.
To make these signs effective, choose durable materials such as treated wood, metal, or weather-resistant composites to handle outdoor conditions. Finishing with weatherproof paint or a clear coat protects colors and textures. Attach signs securely to stakes, fences, or posts to ensure stability, especially in windy areas. Keep sign size appropriate, not larger than a few square feet, to maintain visibility without overwhelming your yard. For example, a 12-by-18-inch sign works well for plant markers, while a 24-by-36-inch sign suits welcoming or directional purposes.
Costs vary from about $10 for simple DIY plant markers to $50 or more for custom wooden signs, depending on size and detail. Creating a collection of seasonal signs can make your yard feel festive year-round without needing major yard changes. Combining humor and personal quotes, especially puns or friendly sayings, fosters conversation and makes the space feel lived-in and inviting.
Watch out for local signage rules like window area coverage limits to avoid breaking ordinances, and remember that placing too many signs clumped together can reduce impact. Spread multiple signs around your yard or along paths to build visual interest without clutter. Good results show in a balanced, coordinated look that adds character and guides visitors comfortably through your outdoor environment.
Choosing the Best Materials for Outdoor Signs
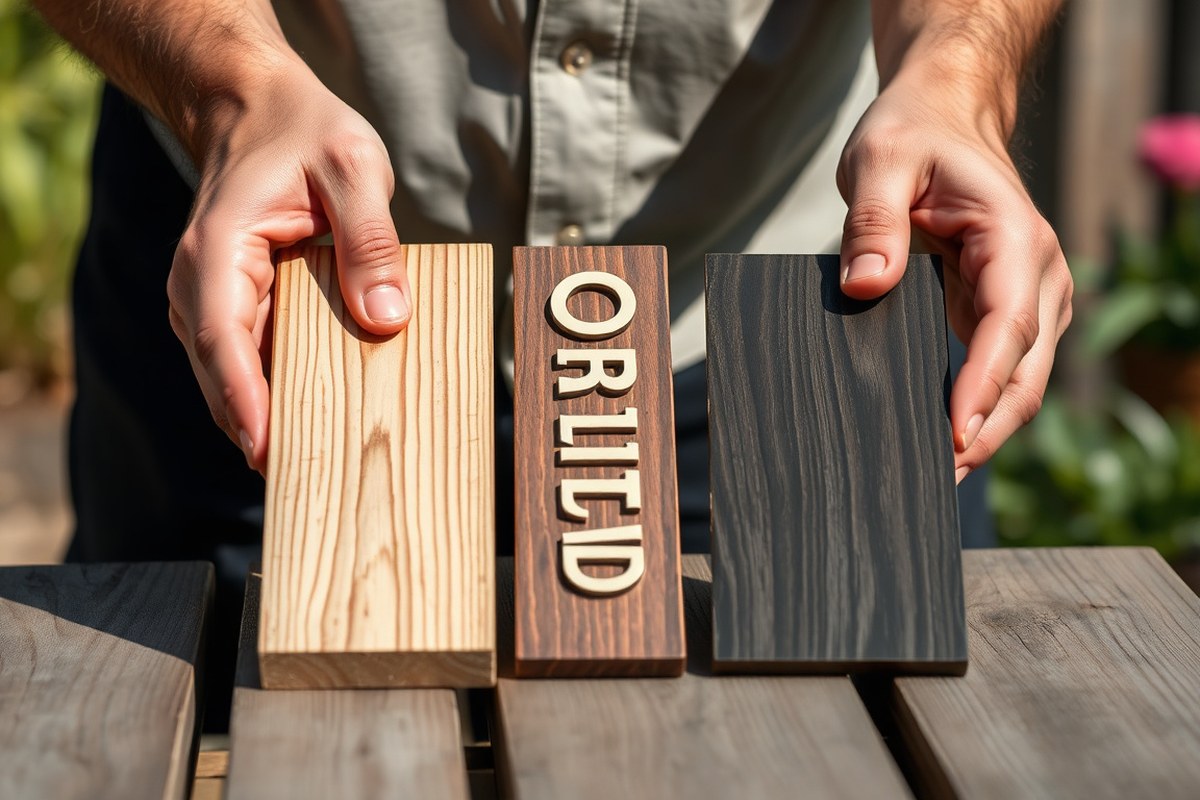
Choosing the right material for backyard signs depends heavily on balancing durability and style to suit your yard’s weather conditions and desired aesthetic. Wood, metal, plastic, and fabric each offer distinct advantages and challenges. Picking the best option involves considering how the material holds up outdoors, matches your garden’s look, and fits the sign’s location and function.
Wood Signs: Rustic Charm with Weather Considerations
Wood delivers a warm, rustic feel that complements natural garden settings well. Reclaimed wood adds a unique, eco-friendly touch, improving a rustic look with rich textures and history. However, wood’s main drawback is vulnerability to weather. Untreated wood can warp, crack, or rot within 1 to 3 years under rain and sun exposure.
To increase wood sign longevity, use weather-resistant woods like cedar or redwood, and treat them with sealants or outdoor varnishes. Expect to spend around $15 to $40 on modest-sized wood signs, plus extra for sealants. Results look polished when the wood grain shows through and paint stays vivid. Avoid placing wood signs in full sun or areas with frequent moisture unless properly sealed to prevent fading or damage.
Metal Signs: Modern Durability and Visual Appeal
Metal signs are highly durable, usually lasting 10 years or more outdoors without significant wear. Corrugated metal provides a nice balance by combining rustic texture with modern industrial style. Powder-coated or galvanized steel resists rust and fading effectively, excellent for areas that face varied weather conditions like snow, rain, and strong sun.
Metal signs cost between $25 and $70 for mid-sized options, reflecting materials and finishing quality. Their sleek, clean surface suits contemporary and minimal garden themes. The downside is metal signs can get hot in direct sun and may dent if hit hard. Position metal signs where they get some shade or away from heavy impacts to keep them looking sharp.
Plastic Signs: Budget-Friendly and Versatile Options
Plastic signs offer the best resistance to water and UV rays, often made from materials like PVC or acrylic. Lightweight and easy to clean, plastic works well for vibrant colors and detailed prints. Its versatility makes it suitable for informal, playful backyard designs. These signs typically last 5 to 8 years outdoors under normal weather.
The cost ranges broadly, from $10 for basic signs up to $50 or more with customized printing and finishes. Plastic can look less natural than wood or metal, which might not suit rustic themes. It also tends to become brittle in extreme cold over many seasons. Use plastic signs in areas needing bright, standout visuals or where you want a low-maintenance solution.
Fabric Signs: Flexible but Shorter Lifespan
Fabric signs, usually made from polyester or canvas with weatherproof coatings, offer great flexibility and portability. These are popular for seasonal messages or event-specific signs since they can be hung, draped, or swapped out easily. Fabric can last 1 to 3 years outdoors if coated and maintained well, but exposure to wind and moisture can cause fraying and fading.
They usually cost $20 to $60 depending on size and quality. Fabric fits casual, welcoming backyard spaces better than permanent fixtures. Avoid placing fabric signs in windy or rainy spots unless you bring them indoors when not in use, to extend lifespan.
How to Decide Material Based on Location and Purpose
Choose wood for shaded, low-moisture areas when you want a warm, rustic look that blends with the natural surroundings. Use metal in exposed locations or high-traffic areas where strength and modern style matter. Plastic fits well on fences or posts needing bright graphics with easy upkeep. Reserve fabric signs for patios, pergolas, or covered porches where they can be changed seasonally or for specific events.
The decision rule is: prioritize durability when the sign must last for years with minimal care, and lean toward aesthetics and flexibility for temporary or decorative needs. Locating the sign where it avoids direct, harsh weather can also let you pick materials more for style than toughness.
| Material | Durability Outdoors | Best Aesthetic | Typical Cost | Ideal Locations |
|---|---|---|---|---|
| Wood (cedar, reclaimed) | 1-3 years untreated, longer with sealing | Rustic, natural garden feel | $15 – $40 | Shaded, dry spots, garden beds |
| Metal (corrugated, galvanized) | 10+ years with coating | Modern industrial, rustic accents | $25 – $70 | Exposed areas, high-traffic zones |
| Plastic (PVC, acrylic) | 5-8 years UV resistant | Vibrant colors, casual styles | $10 – $50 | Sunny fences, posts, playful yards |
| Fabric (polyester, canvas) | 1-3 years coated | Temporary, festive looks | $20 – $60 | Covered patios, seasonal displays |
Weather exposure varies greatly; regularly check signs for fading or damage and refresh coatings or replace fabric to keep your backyard looking its best.
How to Size and Design Backyard Signs for Visibility
Outdoor signs need to be easy to read from the distance at which viewers are likely to see them. A general rule is to use at least 1 inch of letter height for every 10 feet of viewing distance. For example, if you want the sign to be readable from 30 feet away, the letters should be at least 3 inches tall. Fonts should be clear and simple, favoring sans-serif styles like Arial or Helvetica that reduce visual clutter. Avoid scripts or overly decorative fonts, which can be difficult to decipher outdoors or from afar.
Contrast between text and background colors plays a major role in legibility. Black or dark-colored letters on a white or light background offer the highest contrast for easy reading. For more creative or colorful signs, use combinations like white text on dark blue or yellow on black, while steering clear of green on red or other low-contrast pairs. The contrast should ensure the sign can be understood within about three seconds, so visitors don’t have to pause or strain to read it.
Sign placement affects visibility as well. Mount signs where they naturally fall into the line of sight based on expected foot or vehicle traffic. For lawn or garden signs, placing them about 3 to 5 feet above ground, angled toward the viewer, and avoiding obstruction by plants or décor helps maintain clear visibility. If the sign is intended to be read from 100 feet or more, such as on a driveway or street-facing post, use even larger fonts and ensure placement is free of shadows or glare at different times of day.
The materials for mounting also contribute by holding the sign steady and at the correct height. Heavy-duty posts or bamboo garden sign boards offer durable solutions that keep signs upright through weather changes. In some areas, check local municipal regulations about maximum sign height and area to avoid fines or removal.
Prioritize bold, simple messages with a minimal number of words to reduce reading time. A sign that communicates quickly outperforms one that is visually complex but slower to understand. Test your sign’s effectiveness by viewing it from the intended distance and timing how long it takes you to read. Adjust the font size, color contrast, or placement as needed.
For different settings, the approach varies. Signs for close-up viewing, like near a garden bed, can have smaller fonts (around 2-3 inches), while signs meant for wider spaces such as yard entrances require letters 6 inches or taller. Bright daylight conditions or shady spots may demand different background and text combinations to maintain contrast.
Confirm your font is no smaller than 3 inches tall for signs meant to be read from the street or driveway beyond 30 feet. Consider using a whitewashed post with clear, eye-catching arrows or text to guide visitors easy through your backyard. This placement supports both readability and aesthetic appeal without overwhelming your garden’s natural look.
Step-by-Step Guide to DIY Backyard Signs
Creating a backyard sign yourself lets you customize the style and message while controlling costs. Using basic tools and materials suited for outdoor use ensures your sign lasts through changing weather. Follow a step-by-step process to prepare, paint, and seal the sign safely and effectively.
Materials and Tools Needed
Start with a wooden slat board around 6 by 18 inches, such as a whitewashed pine board, which provides a smooth surface and rustic look. Outdoor acrylic paint works best for colors that resist fading in sunlight. Use a small paintbrush, about 1/4 inch or smaller, to paint lettering or designs clearly. You’ll also need sandpaper (medium and fine grit), painter’s tape for clean lines, and outdoor-rated sealant or clear polyurethane to protect your work.
Additional helpful tools include a pencil for sketching, a ruler or stencil for lettering guides, and gloves to keep paint off your hands. You might want to choose an outdoor canvas fabric sign around 12 by 18 inches, which you can paint or decorate with iron-on transfers. Fabric glue or basic sewing supplies finish the edges securely to prevent fraying. Expect to spend $20 to $40 on these basic materials, depending on what you already own.
Painting and Sealing Process
Proper preparation and sealing are important for a long-lasting sign. Start by sanding the board smooth to remove rough spots that can tear brushes or cause uneven paint coverage. Lightly sand between paint coats to get a polished look. Use pencil or painter’s tape to outline your lettering and design, then fill inside with carefully applied outdoor acrylic paint.
Let each paint layer dry fully before adding another; drying time can range from 30 minutes to a few hours depending on temperature and humidity. After the paint is completely dry, apply two coats of a clear outdoor sealant or polyurethane, following label directions for drying time. This locks out moisture and sunlight while preventing peeling or fading.
- Sand the wooden board smooth using medium then fine grit sandpaper.
- Sketch your design or use painter’s tape to mark areas for painting.
- Apply outdoor acrylic paint carefully with a small brush.
- Allow paint to dry fully between coats and add additional coats as needed.
- After the final paint coat, apply a clear outdoor sealant or polyurethane.
- Let the sealant cure fully, usually 24 to 48 hours before placing outside.
Installation Tips and Safety
Choose a mounting spot away from direct contact with soil and water to avoid accelerated wood decay. Use stakes, hooks, or brackets rated for outdoor use. Space signs at least a few feet apart so each is visible and readable, especially if placed along a pathway. For route-based placements like garden paths, spacing signs 200 to 300 feet apart allows viewers to absorb each sign before the next one.
Wear gloves and eye protection while sanding and painting to avoid irritation. Work in a well-ventilated area, especially when applying sealants with strong fumes. Store leftover paint and sealants safely out of children’s reach. Follow all manufacturer instructions on paint and sealant cans to prevent damage or safety hazards. You should check with a licensed professional to understand the best installation methods and the local rules for outdoor signs.
Creative Themes and Messages for Backyard Signs
Popular backyard sign messages often strike a balance between warmth, humor, and inspiration. Family signs that showcase names or welcoming phrases like “The Johnsons’ Garden” or “Welcome to Our Outdoor Oasis” create a personal touch while inviting visitors to feel at home. Motivational quotes such as “Bloom Where You Are Planted” or “Grow Through What You Go Through” add an encouraging vibe to your green space. These phrases work well on rustic wooden signs or chalkboards, bringing charm and positivity to your backyard.
Custom family or event signs become special conversation starters and celebration markers. To create one, start with a weather-resistant blank sign made of wood or metal. Use permanent markers, paint pens, or chalkboard markers for a seasonal twist. A simple script to personalize a family sign could be: “The [Family Name]’s Garden, Est. [Year]” or “Gather Here, Family and Friends Welcome.” For events, tailor messages like “Summer BBQ 2024, Let the Good Times Grow” or “Welcome to the Smiths’ Garden Party” to mark special gatherings with a festive flair.
Humorous sayings are a popular choice to add personality and lightheartedness to backyard decor. Phrases such as “Plant Whisperer at Work,” “Garden Rules: Eat, Play, Grow,” or “Don’t Stop Be-Leafing” complement plant markers or standalone signs. Seasonal sayings work well to update ambiance throughout the year. For example, a chalkboard sign can display “Spring Has Sprung,” “Summer Fun Zone,” “Fall Harvest Fest,” or “Winter’s Resting Spot,” changing the message as the seasons shift. Using weather-resistant chalkboard markers lets you update your sign easily without repainting, making seasonal customization convenient and affordable.
Adding accessories like wrought iron hanging brackets can give your signs a stylish, sturdy display, keeping them visible yet charming while swaying gently in the wind. Placing a humorous sign on an old stump gives a natural vibe and extra creativity to your garden space. Personalized rustic wooden signs provide warmth and lasting beauty, reflecting your unique style and care. Expect to invest $20 to $50 for quality blank signs and markers or $40 to $100 for custom engraved wooden signs. Clear lettering with a bold font ensures readability from a distance. Poorly chosen fonts or colors that clash with your garden backdrop can make signs hard to read or unappealing.
Use weather-resistant materials and test your markers on a small area before applying the final message to avoid smudging and fading over time.
Weatherproofing Techniques for Long-Lasting Signs
Protecting your backyard signs from the sun, rain, and wind starts with choosing the right sealants and finishes. Outdoor signs benefit most from clear acrylic sealants designed for UV protection, which prevent fading and cracking caused by sun exposure. A typical spray-on sealant costs between $10 and $20 and requires at least two coats, applied in dry weather and allowed to cure for 24 to 48 hours. For signs made of wood, use a marine-grade spar urethane, which remains flexible as temperatures change, reducing the risk of peeling or chipping. Metal signs do well with rust-inhibiting primers followed by weather-resistant enamel spray paint, which adds a durable protective layer.
Applying these finishes correctly matters a lot. Always sand wooden signs smoothly before sealing to help the finish stick better. Paint or seal in multiple thin layers rather than one thick coat to avoid bubbles and runs. Avoid applying sealants during extreme heat or high humidity, as that can interfere with drying and cause a cloudy or sticky finish. You’ll notice a well-applied sealant by a slightly glossy or matte protective surface that repels water and resists scratches. Signs left unsealed often show peeling paint and wood warping within six months in harsh climates.
Different materials need slightly different approaches. For plastic or acrylic signs, a UV-resistant clear spray is usually sufficient. Avoid using oil-based paints or heavy primers on these materials, as they can cause distortion or clouding. If your sign includes vinyl lettering, apply a vinyl-compatible clear coat to keep colors bright without sticking or bubbling. Aluminum signs with powder coating already have some protection, but a clear automotive-grade sealant can extend their life further, especially near salt air or heavy rain.
Placement plays a key role in weatherproofing and extending the life of your signs. Position them in shaded or partially sheltered areas, such as under eaves, pergolas, or large trees. This reduces direct sun exposure and limits rain damage. Avoid spots directly facing prevailing winds, especially if your sign is lightweight or mounted on a post, to prevent loosening or bending. Signs placed near garden features like flower beds or beehives benefit from gentle protection but still require sealants because moisture levels can rise there.
Signs placed before a decision point, like garden path junctions or driveway entries, should be highly visible but also shielded if possible. Mounting a sign a few inches below the top of a fence or behind a low shrub can block harsh weather while keeping it noticeable. The key is balancing visibility with protection. Also, use sturdy hardware like stainless steel screws and weatherproof anchors to secure signs firmly against wind damage.
Weatherproofing backyard signs takes time and some investment but pays off with longer-lasting, attractive displays. Expect to spend a few hours applying multiple coats and a total of $15 to $50 on sealants and proper paints, depending on size and material. Regularly check your signs at least once a year for cracks, fading, or loose mounts, resealing or repainting as needed. Well-protected signs can maintain bold colors and structural integrity for several years, even in areas with strong sun, frequent rain, or wind. Signs left unprotected show signs of damage in a season or less, requiring full replacement more often and increasing costs over time.
Where and How to Place Signs in Your Backyard
Placing signs strategically in your backyard ensures they catch attention while blending naturally with your outdoor space. Choose areas where foot traffic is highest or where people tend to pause, such as near entryways, garden paths, or seating areas. Placing signs before a decision point, like a fork in a path or near a gate, helps visitors understand the layout without confusion. Signs labeling specific garden zones or milestones add charm and clarity to your space and invite exploration.
Maintain aesthetic harmony by spacing signs evenly and avoiding visual clutter. Aim to place signs at least 6 to 8 feet apart to give each sign room to stand out without overwhelming the eye. Aligning signs at consistent heights also creates a cohesive look. Most local regulations set height limits for signs between 6 and 10 feet without a permit, so sticking to around 5 to 7 feet ensures you stay compliant and the signs remain readable. When placing multiple signs, a simple checklist helps keep your layout tidy and effective:
- Identify high-traffic areas and natural pauses for visitors.
- Place signs before decision points to guide clearly.
- Space signs 6 to 8 feet apart to avoid clutter.
- Keep sign heights between 5 and 7 feet for readability and compliance.
- Use one clear direction or message per sign to reduce confusion.
- Ensure materials and colors complement surrounding plants and decor.
Costs involved in placement mainly consist of stakes, mounts, or fasteners suitable for your sign material and outdoor conditions. Simple metal or wooden stakes typically cost $5 to $15 each and keep signs stable. Anchoring signs securely prevents tilt or damage from wind and weather.
Good results look like signs that are easy to see and read without distracting from your garden’s natural beauty. Poor placement includes overcrowding signs, putting them too low or hidden among tall plants, or positioning them after decision points, which can confuse visitors and reduce their usefulness. Following these placement rules helps create an inviting and functional backyard with clear guidance for guests, improving their experience and your garden’s personal story.
Lighting Options to improve Outdoor Sign Visibility
To keep your backyard signs visible at night or in shady spots, consider lighting options like backlit signs, solar LEDs, and spotlights. Each works best with different materials and offers distinct advantages. Backlit signs use built-in light sources behind translucent materials such as acrylic or frosted plastic, creating a glow that improve readability after dark. These signs often require electric wiring and can cost between $100 to $300 depending on size, but they provide consistent, even illumination and a polished look.
Solar-powered LED lights offer a practical choice for wood, bamboo, or metal signs without built-in lighting. These small fixtures install nearby or clip onto the sign frame, charging during the day to illuminate after sunset. Solar LEDs usually cost $15 to $50 each and avoid wiring, simplifying installation and reducing energy costs. They depend on sunlight exposure; install them where they receive direct sun for at least 6 hours daily to ensure reliable brightness.
Spotlights serve well for larger signs or those made of opaque materials like wood or metal that can’t use backlighting directly. Mount low-voltage LED spotlights on nearby posts or trees, angled to highlight the sign face. These typically require outdoor-rated electrical connections and might cost $50 to $150 per light fixture, plus installation expenses. LEDs are energy efficient, producing bright light while using only a fraction of the electricity of incandescent bulbs. Low-voltage wiring improve safety by reducing the risk of shocks.
Installing solar or electric lighting safely demands attention to placement and hardware. Solar lights should be firmly attached to prevent wind damage and positioned in sun-rich areas to maintain battery charge. For electric lighting, outdoor-rated cables, weatherproof connectors, and ground fault circuit interrupters (GFCI) are essential to prevent hazards. Whenever you run new wiring, follow local electrical codes or hire a licensed electrician to ensure safety and compliance.
Testing your setup in the evening shows whether the illumination is enough. A well-lit sign will be easy to read from typical viewing distances, usually 10 to 20 feet for backyard signs, without glare or shadows obscuring text. Avoid placing lights that cast harsh, uneven beams or cause reflections on glossy surfaces. Combining subtle backlighting with ambient garden lighting often provides the best balance of visibility and atmosphere.
Choose lighting fixtures certified for outdoor use and ensure solar panels or lights have direct sun exposure of at least 6 hours daily to maintain brightness and battery health.
Using Signs for Events and Seasonal Celebrations
Customizing signs for birthdays, holidays, graduations, and community events can add a personal touch and make your backyard celebrations more memorable. Using the right materials and designs helps distinguish temporary event signs from permanent ones. Timely setup and removal ensure the signs stay relevant and maintain your yard’s appearance.
Event Sign Material Choices
Temporary event signs often use lightweight materials like corrugated plastic, vinyl banners, or fabric flags. These options are cost-effective, easy to handle, and weather-resistant for short-term outdoor use. Permanent event signs typically involve more durable materials such as painted wood or metal to withstand the elements and repeated use.
Choosing the right material depends on how long the sign will stay up and the type of event. For example, plastic signs are ideal for a single birthday party or graduation weekend, while wooden or metal signs suit annual holiday displays or community event announcements.
Design & Customization Tips
Using bold fonts and bright, contrasting colors ensures your message is easily readable. For birthdays, incorporate festive icons like balloons or cakes, while holidays call for themed motifs such as pumpkins, snowflakes, or flags. Graduation signs often feature school colors and caps, and community events might use logos or consistent branding.
Quick customization tools include stencil sets, waterproof markers, adhesive vinyl letters, and printable iron-on transfers for fabric banners. Graphic design software with ready-made templates helps create professional-looking signs you can print or have produced locally. Here’s a simple template script for a birthday sign:
“Happy 10th Birthday, [Name]! Join us for cake and fun: [Date], [Time] [Address or Directions]
For holidays, keep messages concise, like “Welcome Spring” or “Happy 4th of July,” along with seasonal imagery.
Installation and Removal
Proper timing and method make sure signs look their best without lingering too long. Set up event signs 1 or 2 days before the occasion to build anticipation. Remove or switch them out within 24 to 48 hours after the event ends to avoid clutter and weather damage.
Use stakes, grommets, zip ties, or weighted bases depending on the sign’s material and size. For temporary plastic signs, metal or plastic stakes driven into the grass work well. For banners, attach grommets to hooks or poles. Follow these steps to install and remove your event signs efficiently:
- Choose a visible location near the event area with good foot or vehicle traffic.
- Check the weather forecast and avoid setup during heavy wind or rain.
- Secure the sign using stakes, hooks, or weighted bases suitable for the sign’s material.
- Inspect the sign for stability and visibility from multiple angles.
- After the event, detach any hardware carefully to avoid damage.
- Store signs flat or rolled to prevent bends and preserve graphics.
Common Mistakes in Backyard Signs and How to Fix Them
Common problems with backyard signs often arise from choices that hurt readability and durability. Signs with overly ornate fonts, too many words, or poor color contrast can be hard to read from a distance. For example, using thin script fonts on a busy or dark background makes it difficult for visitors to quickly understand the message. Opt for bold, sans-serif fonts and high-contrast colors like white text on dark wood to improve visibility. Keep messages short, three to five words, for an instant impact. Avoid crowding signs with unnecessary information.
Mounting signs incorrectly causes damage to both the sign and your backyard structures. Using nails or screws without proper support can crack wooden signs or loosen over time. To prevent this, attach signs using weather-resistant brackets or sturdy hooks designed for outdoor use. Place signs on surfaces like fences or garden stakes installed firmly at least 2 feet deep in the soil to withstand wind without tipping. When hanging lightweight signs, use stainless steel chains or coated wires to resist rust. Check the attachment points every few months to catch loosening early.
Signs exposed to sun, rain, or fluctuating temperatures degrade faster. UV rays can fade colors, and moisture can warp wood or peel paint. Refresh or replace signs every 2 to 3 years, depending on your local climate and materials used. When refreshing, gently clean the surface with mild soap and water, let dry, then sand lightly before repainting with outdoor-rated paint or sealant. For replacements, choose materials like cedar or weatherproof composites that resist rot and fading better. Regular maintenance keeps your signs looking sharp and effective.
Test your sign’s legibility by stepping back to where most people will view it. Signs should be readable from 10 to 20 feet for small backyard spaces and up to 50 feet for larger gardens. Ensure the height places the sign at or slightly below eye level, typically 4 to 5 feet from the ground, avoiding locations where plants block the view over time. Mark areas where your herbs or flowers will grow to prevent covering the signs later.
Checklist for improving backyard signs includes choosing simple, bold fonts and high-contrast colors, limiting text length, using weatherproof materials, mounting signs with secure hardware on stable posts or brackets, regularly inspecting mounts for wear, and refreshing paint every couple of years. Following these steps balances strong appearance with durability, so your backyard signs remain clear and attractive for seasons to come.
Integrating Backyard Signs with Plants and Landscaping
Selecting sign colors and styles that complement your plants requires balancing vibrancy with subtlety. Neutral colors such as soft beige, muted greens, or weathered metal tones blend well into garden surroundings, letting your plants take center stage. For a welcoming atmosphere, pick cheerful colors like yellows or light blues that match flower hues without overwhelming the view. For example, a pale blue “Butterfly Haven” sign near bright orange marigolds can create harmony without clashing. Avoid overly bright or neon colors that disrupt the calm natural palette.
The shape and size of signs are important to fit garden beds without competing with plant growth. Smaller signs around 6 to 12 inches wide work well for herb patches or small flower beds. Oval or rectangular wooden signs fit neatly among taller plants, while stakes with narrow, pointed ends are good for edging pathways or pots. Larger signs, over 18 inches, should stand back from dense plantings to avoid shading or crushing leaves. A vintage metal sign mounted on a simple post can anchor an entryway without overwhelming delicate foliage.
Protecting both your plants and signs involves thoughtful positioning and ongoing care. Avoid placing signs too close to plants; leave at least 4 to 6 inches of clearance to prevent rubbing or interference with growth. Use mounting hardware designed for outdoor use, such as wooden frames with corrosion-resistant screws, which allow signs to be easily repositioned if plants spread. When watering nearby beds, angle sprinklers away from wooden or metal signs to reduce deterioration. Seasonal checks help catch fading paint or rust early, which can otherwise detract from your garden’s appearance.
The way signs integrate with landscaping differs by situation. In a small herb garden, use stake-mounted wooden labels that can be moved seasonally to match shifting plant arrangements. For flower beds with taller perennials, choose sturdier signs mounted on posts that sit just behind the tallest blooms, ensuring visibility without blocking sunlight. In mixed vegetable patches, group related signs such as “Tomatoes” or “Peppers” together on a rustic board to guide visitors while streamlining maintenance. Cost varies by material but expect modest hand-painted wooden or metal signs to range between $25 and $75 each.
Position signs where they won’t shade or damage plants, leaving at least 6 inches of space, and check regularly for deterioration caused by watering or weather exposure.
Budget-Friendly Versus Premium Backyard Sign Options
Low-cost backyard signs often feature basic materials like untreated wood, inexpensive plastic, or standard metal sheets. These signs usually rely on simple, hand-painted designs or printed vinyl decals applied to the surface. You can expect such signs to cost anywhere from $10 to $50, depending mainly on size and materials used. Their lifespan tends to be limited, typically lasting one to two seasons outdoors without weather treatment, as exposure to rain, sun, and wind can cause fading, warping, or cracking. Customization with low-cost signs is flexible in a DIY sense, you have control over design and messaging, but the appearance may look less refined and the durability falls short of higher-end options.
Premium backyard signs often come from professional manufacturers who use durable materials like treated hardwood, weather-resistant metals such as aluminum or steel with powder coating, or high-grade composite materials. These signs usually feature precision-cut lettering, professional-grade paint or engraving, and protective finishes. Price ranges for premium signs typically start around $100 and can exceed several hundred dollars, reflecting their longer lifespan of 5 to 10 years or more under outdoor conditions. The appearance is smoother and more polished, and many companies offer advanced customization options, including custom fonts, logos, and multi-color designs that maintain vibrancy over time.
Choosing between budget-friendly and premium signs depends on several factors. Consider how long you want the sign to last and how much wear it will endure in your specific backyard environment. Ask yourself how important crisp appearance and intricate designs are to your goals. Low-cost signs might be perfect for seasonal displays, temporary messages, or if you enjoy crafting your own signs regularly. On the other hand, premium signs make sense when you want a permanent feature that withstands weather without frequent replacement or touch-ups and projects a more polished look that complements sophisticated landscaping.
Use this simple decision rule to decide: If your signage is meant for short to medium term use (under 2 years) and your budget is under $50, opt for DIY or inexpensive options. For signs intended as permanent backyard focal points, signs that face heavy sun or rain exposure, or if your budget exceeds $100, invest in premium signs. Here’s a basic comparison for typical backyard signs:
| Aspect | Budget-Friendly Signs | Premium Signs |
|---|---|---|
| Cost | $10, $50 | $100 or more |
| Materials | Untreated wood, plastic, basic metal | Treated wood, powder-coated metal, composites |
| Durability | 1, 2 seasons outdoor | 5, 10+ years with weather exposure |
| Customization | DIY painted or printed decals | Professional engraving, multi-color, custom fonts |
| Appearance | Basic, less polished | Smooth, sharp, professional grade |
To get good results with budget-friendly signs, use weatherproof paints or spray sealants to extend lifespan up to a year or two. Avoid locations with constant moisture or intense sun, or plan on replacing signs seasonally. For premium signs, always request samples or proof of weather resistance and consider signs with UV protection coatings. Keep a little extra budget for installation hardware or posts designed for outdoor longevity. Your choice should align with how much time and money you want to spend overall versus how striking or lasting the sign should be.
Step-by-Step Action Plan for Your Backyard Sign Project
Start creating or choosing the right backyard signs by following these clear steps to ensure your signs look great and last long.
- Day 1: Choose the purpose of your sign (decorative, directional, event) to guide your design and material choices. Confirm it suits your backyard’s style.
- Day 2: Select materials based on durability and weather resistance, such as treated wood or weatherproof metal. Test for sturdiness by feeling the weight and finish quality.
- Day 3: Decide on size and design elements for visibility, including font style and color contrast. Check readability from your common viewing distance.
- Week 1: Create or purchase your sign following your planned design. Ensure it matches your initial vision and fits the chosen space.
- Week 2: Apply weatherproofing methods like sealants or UV-resistant coatings. Confirm that the coating is even and dry before installation.
- Week 3: Install the sign in a location that complements your landscaping and ensures visibility. Stand back to verify it’s easy to see and blends well.
- Week 4: Add lighting if desired, using solar or low-voltage options for nighttime visibility. Test the lighting in the evening to check for adequate illumination.
- After 1 Month: Check for wear or fading and repair or touch up as needed. Signs should still look appealing and readable after initial exposure.
Frequently Asked Questions
What Are Some Unique Materials I Can Use for Backyard Signs?
Unique materials for backyard signs include reclaimed wood, metal sheets, and slate. These choices add texture and character, making your signs stand out while blending well with natural outdoor settings.
Can I Combine Multiple Sign Functions in One Backyard Sign?
Yes, combining functions like a welcome message with a chalkboard section offers decoration and practical use. This approach saves space and adds interactive elements for guests during backyard events.
How Can I Update Backyard Signs Seasonally Without Buying New Ones?
Use removable vinyl lettering or chalkboard surfaces on signs to change messages easily. This allows you to reflect seasons or holidays without purchasing new signs every time.
What Font Styles Work Best for Outdoor Sign Readability?
Choose clean, sans-serif fonts that are easy to read from a distance, with letters at least 3 inches tall. This improves visibility during day or night and suits most backyard themes.
Are There Safe Lighting Options to Highlight Signs Without Disturbing Neighbors?
Solar-powered LED lights provide a soft, energy-efficient glow that highlights signs without harsh brightness. They reduce electricity costs and minimize light pollution, keeping neighbors comfortable.
Can I Integrate Digital Elements into Backyard Signs?
Yes, small solar-powered digital display lights or programmable LED panels can add dynamic messages. Keep them weatherproof and discreet to maintain your backyard’s natural vibe without overpowering the space.
Before You Go
Backyard signs can add personality, information, or festive spirit to your outdoor space when carefully planned and crafted. Start by selecting a sign goal and material that fits your environment, then follow a clear installation and maintenance routine. Your next step is to pick your sign’s purpose today and take one small action toward designing or buying it.