Hanging Sign Ideas: A Complete Guide to Designs, Materials & Installation
Hanging sign ideas often focus on making your message clear and eye-catching in limited space. Simple designs with durable materials help ensure your sign stands out and lasts longer. Starting with a sturdy material like ARMOUR-Wood, which is half an inch thick, provides excellent durability for both indoor and outdoor use.
Key Takeaways
- Choose 3D sign designs for better visibility and impact indoors and outdoors.
- Use ropes leaving about 20 inches of slack in the middle to hang signs securely.
- Consider hiring a graphic designer on platforms like Fiverr for a custom design as low as $5.
- Wooden signs can be made by cutting three equal 14-inch pieces, marked 1.5 inches from each end for alignment.
- Budget-friendly signs like A-frame models can cost under $50, excluding design fees.
- Allow at least 24 hours for adhesives like Mod Podge to dry before hanging signs.
What Defines a Hanging Sign and How It Works

A hanging sign is a type of sign designed to be suspended, usually from a horizontal bracket or frame, so it hangs freely in the air rather than being mounted flush against a wall or standing on the ground. This suspension method allows the sign to be visible from multiple directions, which is why hanging signs commonly appear outside businesses on sidewalks or store fronts. The way they function involves securing the sign to a strong support using chains, ropes, or brackets, enabling some movement with the wind while maintaining visibility.
Hanging signs differ from other sign types primarily in their placement and method of display. Unlike flat wall-mounted signs or pole signs that extend vertically from the ground, hanging signs usually extend outward perpendicular to a building facade, catching the attention of people passing by from either side. This positioning makes them particularly effective in areas with foot traffic, such as retail shops, cafes, salons, and small businesses, where visibility at street level is important to drawing customers inside. For indoor use, hanging signs can serve as decorative elements or wayfinding guides within commercial spaces or workshops.
The materials used for hanging signs are chosen based on where they will be displayed and how long they need to last. For outdoor use, lightweight yet durable options like Alumalite or coroplast with grommets offer weather resistance and ease of installation. More traditional choices like sandblasted redwood or Dura-Wood provide natural beauty and durability but can be heavier and require more secure mounting hardware. When making your own hanging sign, use wood glued with strong adhesives like Bostik No More Nails and hang it with sturdy rope. This approach fits rustic or DIY styles and keeps costs low. Customization options include engraving, painting, and adding trim caps that frame the sign while protecting the edges from weather damage.
Effective hanging signs are usually sized to balance visibility with practical installation constraints; signs too large can sway excessively in the wind or risk damage to their supports, while those too small may not catch enough attention. It’s common for business hanging signs to range between 12 inches by 18 inches to about 24 inches by 36 inches. This size allows passersby to quickly read and recognize the business or message from a short distance. Costs vary widely depending on size, materials, and whether the sign includes features like backlighting or neon elements, which improve visibility particularly at night. Professional graphic designs for hanging signs can be affordable, with freelance designers on platforms like Fiverr offering custom layouts starting around $5, making it accessible for small businesses to achieve a polished look.
Understanding how hanging signs work and what makes them different helps you pick the right type for your space. You might want a durable outdoor sign to attract foot traffic or a unique decorative piece inside your store. The hanging design provides flexibility and visibility that other sign types may lack. Installation usually involves securing brackets to strong supports such as building walls or posts and attaching the sign with appropriate hardware to safeguard against weather and movement. Paying attention to size, materials, and mounting methods ensures that your hanging sign will function effectively for your intended use and environment.
Choosing the Best Materials for Durable Hanging Signs

| Material | Durability | Best Environment | Cost & Weight | Key Advantages & Disadvantages |
|---|---|---|---|---|
| Wood (Sealed, Redwood, ARMOUR-Wood) | High, if sealed and maintained; resistant to splitting and warping, especially redwood | Best outdoors with protection from extreme moisture; also works indoors for rustic or classic looks | Moderate to high cost; mid-weight | Offers natural aesthetics and traditional appeal; heavy and needs sealing or finishing to resist weather and insects |
| Metal (Powder-Coated, Aluminum, Dibond) | Very high; rustproof, waterproof, and rot-resistant when coated | Ideal outdoors for long-term use and indoors for industrial style | Moderate to high cost; heavy but thinner panels like Dibond reduce weight | Strong and durable with sleek modern look; can dent or scratch but resists corrosion better than wood |
| Acrylic (UV-Resistant) | Moderate; resin-based but can discolor or crack under very harsh sun | Primarily indoor and outdoor in shaded or moderate sun exposure | Affordable; lightweight | Clear and customizable with 3D layering possible; less durable against impact and sun damage than wood or metal |
Choosing the right material for your hanging sign affects how long it lasts and where you can place it. Sealed wood signs offer a timeless, natural look, especially if you use redwood known for being less prone to warping, splitting, or chipping. ARMOUR-Wood signs, which are 1/2″ thick, provide added durability while maintaining that classic appearance. These wooden signs do best outdoors when regularly sealed and protected from direct heavy rain or prolonged moisture, or indoors where humidity is controlled. Wood tends to be heavier, so installation needs to support its weight securely.
Metal signs, especially powder-coated aluminum or composite materials like Dibond, excel in outdoor settings where you want rustproof and waterproof solutions. Dibond is a composite with a solid wood core surrounded by aluminum sheets, creating tough, weather-resistant signs that won’t rot or corrode. These signs hold up well to wind and rain and have a modern industrial style. While metal signs can be heavier and more expensive than acrylic, they provide superior longevity and require little maintenance beyond occasional cleaning.
Acrylic signs stand out for their clarity and affordability. They are made with UV-resistant acrylic that protects against fading, although extended direct sunlight can eventually cause some discoloration or cracking. Acrylic is much lighter than wood or metal, making installation easier. It allows for layering multiple thicknesses to create dimensional effects, appealing for upscale indoor signs or sheltered outdoor spots. The tradeoff is less impact resistance than wood or metal, so avoid locations where the sign might get hit or scratched often.
Make sure to match your hanging sign’s material to its location: wood and metal for exposed environments needing durability, acrylic for budget-friendly and designer indoor or shaded outdoor use.
Popular Hanging Sign Styles and Design Ideas
Hanging signs come in various styles that catch the eye and suit both business and home settings. Popular designs include rustic wood, sleek metal, and colorful seasonal themes, all customizable with text and graphics. Choosing the right style depends on the message you want to convey and the environment where the sign will hang.
Rustic and Wooden Themes
Wooden hanging signs offer a timeless, warm look ideal for businesses like cafes, boutiques, or craft shops, and for homes wanting a charming touch. Redwood is a common choice, thanks to its durability and ability to age gracefully with minimal maintenance. These signs often feature hand-painted or carved designs that give a personal, handcrafted appeal. Creating a rustic wooden sign involves selecting a quality wood panel, sanding it smooth, then applying weather-resistant paint or stain. Expect costs to range from $100 to $400 for a custom piece depending on size and finish, with production taking roughly one to two weeks. This style works best outdoors or in rustic-themed interiors where a natural texture stands out.
Failing to seal wood properly can lead to fading or warping, especially in harsh climates. Proper installation with hooks or chains ensures the sign stays level and secure, preserving its look over time.
Modern Metal and Acrylic Designs
Metal and acrylic signs project a polished, contemporary image fitting for tech companies, salons, or modern homes. Metals like aluminum or steel provide strength and resistance to weathering, often finished with powder coating for vibrant, lasting colors. Acrylic signs bring a glossy, glass-like appearance with sharp edges and the option for transparent or frosted effects. These materials allow crisp, digital graphics that stand out under varying light conditions. To achieve a sleek metal or acrylic sign, work with a sign shop that uses laser cutting and digital printing. Costs typically start around $250 and can go much higher depending on complexity and size, while lead times average two to four weeks.
Choosing bold, contrasting colors and simple shapes improves visibility from a distance. Rectangular or custom-cut shapes break monotony, making your shop or home signage more memorable. Avoid overly intricate designs that can blur or chip easily on metal surfaces.
Seasonal and Event-Inspired Signs
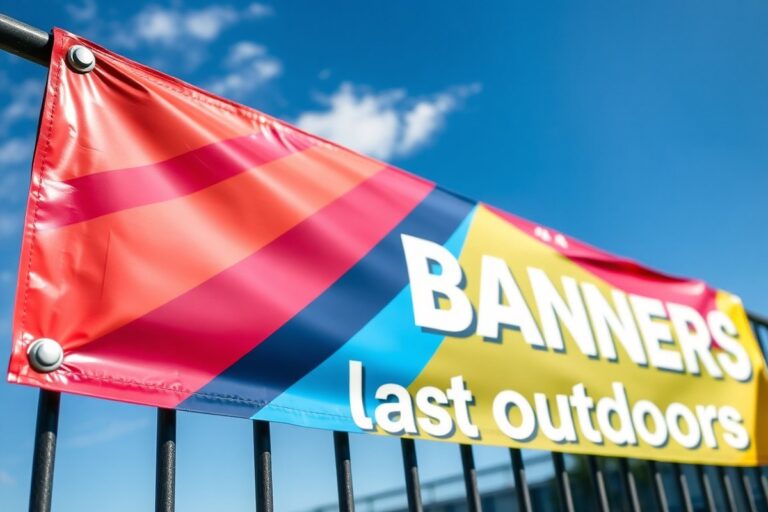
Signs crafted for holidays, seasonal sales, or special occasions use vibrant colors and thematic graphics to grab attention and create excitement. Materials here range from vinyl banners to lightweight plastic or wood that you can reuse yearly. Bright reds and greens work well for Christmas, while pastels suit spring events. Seasonal signs allow small businesses and homeowners to display timely messages without a permanent installation. You might print your design digitally or paint basic shapes by hand. These signs cost between $50 and $200 depending on size and quality and generally take a few days to produce.
For best results, store seasonal signs in dry, dark places to prevent fading or cracking. Use removable hooks or wall-safe adhesives for damage-free hanging during events. This approach prevents weather damage to your main signage and adds festive flair that customers and guests notice.
Personalizing with Text and Graphics
Adding custom text and graphics tailors your hanging sign perfectly to your brand or personal style. Select fonts that are clear and large enough to read from 10 to 20 feet away, typically with letter heights of at least 3 to 6 inches, depending on the viewing distance. Simple sans-serif fonts work great for modern signs, while script or serif fonts can complement rustic styles. Use contrasting colors between text and background for visibility, such as white text on dark wood or black on bright metal.
Graphics like logos, icons, or decorative borders can improve your sign’s message while reinforcing brand identity. A professional designer can help digitize logos and prepare images with the right resolution for printing, typically 300 dpi or higher. For home signs, you might add family names, welcome messages, or artistic motifs that reflect your personality. Most custom sign shops provide design proofs and allow changes before final production, helping you get exactly the look you want.
Poorly chosen fonts or colors can make signs difficult to read or look cluttered. Keep wording concise and focus on one main message to maximize impact. Clear graphics and balanced layouts contribute to a sign that attracts attention and serves its purpose long-term.
Types of Hanging Signs: Blade, Trade, and Directional
Hanging signs come in different types suited to various business needs and venues. The main types include blade signs, traditional hanging shop signs, and directional signs. Each serves a specific purpose, whether to attract foot traffic from a distance, display store branding prominently, or guide visitors through a space.
Blade Signs Explained
Blade signs are a popular form of hanging sign that projects perpendicular from a building facade. Unlike traditional flat hanging signs, blade signs extend outwards and are usually double-sided, making them visible from both directions along a sidewalk or street. This visibility helps increase foot traffic by catching the eye of pedestrians approaching from either direction.
They typically mount on metal brackets attached to the building and can be made from materials like aluminum or PVC. Expect to invest between $200 and $600 depending on size, thickness, and customization. Blade signs work well for retail businesses in busy shopping districts. Because they hang at eye or head height, they effectively grab attention without blocking walkway space. Double-sided graphics maximize exposure, which is essential for businesses aiming to stand out on crowded streets.
Traditional Hanging Shop Signs
Traditional hanging signs often hang from chains or brackets below awnings or over entrances. These signs tend to be flat or dimensional and may feature raised letters, logos, or images. Common materials include alumalite, dibond, and thicker PVC sheets, which provide durability and a professional look. Thickness options usually range from ¼ inch to ½ inch, allowing you to balance sturdiness and weight depending on installation points.
These signs provide a classic feel, ideal for venues like cafes, salons, or boutique shops. They can either swing gently with the breeze or remain fixed, depending on mounting style. Custom shapes and sizes can be ordered, with costs generally starting around $150 and rising with complexity. Traditional hanging signs are typically double-sided as well, ensuring visibility from multiple angles in tight or indoor spaces such as shopping malls or covered walkways.
Directional and Informational Signs
Directional hanging signs are designed to guide customers and visitors through complex venues, such as markets, malls, or event spaces. These signs emphasize clear, easy-to-read text and symbols rather than elaborate graphics. They mount overhead or on posts and often use lightweight materials for quick installation and changeability.
Because they focus on functionality, these signs are usually single- or double-sided with plain rectangular or arrow shapes. Using bold colors and reflective or illuminated surfaces improves visibility in dimmer settings. Businesses with large footprints or multi-tenant buildings benefit from installing directional signs to reduce confusion and improve customer flow. The prices for these are lower, often ranging from $50 to $200 per sign, depending on size and material.
Indoor vs. Outdoor Hanging Signs: What You Need to Know
Indoor and outdoor hanging signs differ primarily in materials, durability, design, and mounting due to their environment. Outdoor signs face weather conditions like rain, sun, and wind, so they require materials that resist rust, fading, and warping. Indoor signs don’t need this level of protection and offer more flexibility in design and materials, as they face less wear and tear.
Outdoor hanging signs often use aluminum or other metals with weather-resistant coatings to prevent damage. For example, aluminum signs come in several thicknesses, allowing you to pick one suited for harsh climates or exposed mounting locations. Using factory-sealed aluminum with a high gloss can improve durability while keeping the sign visually appealing. Wood signs outdoors are typically sealed or combined with aluminum to extend their lifespan. Mounting hardware for outdoor signs must be heavy-duty, such as custom brackets or scroll brackets designed to hold signs firmly in place against strong winds. Stainless steel mounting kits provide corrosion resistance, which helps maintain a professional look over time.
Indoor hanging signs can be made from lightweight materials like acrylic or untreated wood because they aren’t exposed to rough weather. Acrylic signs are popular indoors for their sleek appearance and ease of installation. Indoor mounting hardware can be simpler, such as ceiling hooks or lightweight brackets, since the supporting structures don’t need to withstand much stress. Driftwood signs or decorative wooden signs are more common indoors where craftsmanship and aesthetic matters more than ruggedness.
| Feature | Outdoor Hanging Signs | Indoor Hanging Signs |
|---|---|---|
| Materials | Weather-resistant aluminum, treated wood, steel with coatings | Acrylic, untreated wood, lightweight metals, driftwood |
| Durability | High resistance to sun, wind, rain, rust; requires sealed surfaces | Low durability needed; protected from elements |
| Design | Bold, clear for visibility from street and sidewalk; larger sizes | More artistic, decorative, smaller size flexible |
| Mounting | Heavy-duty brackets, corrosion-resistant hardware, secure fixtures | Lightweight hooks, simple brackets, easy ceiling mounts |
| Maintenance | Periodic cleaning of dirt, rust prevention, repainting or recoating | Minimal cleaning, dusting, occasional polishing |
Costs vary depending on materials and size, but expect outdoor signs to be pricier due to tougher materials and mounting gear. For instance, metal brackets made for outdoor use can cost more than simple indoor hooks, and the thicker aluminum needed outdoors may increase material expense. Installation takes more care outside because of the need to securely anchor signs against wind loads and follow local codes. Indoor signs can often be installed faster and with simpler tools.
Using mounting hardware designed specifically for the sign’s weight and environment prevents damage or accidents and keeps your sign looking professional longer.
Size, Shape, and Visibility Factors for Hanging Signs
Choosing the right size for your hanging sign plays a key role in attracting attention and ensuring readability. A sign that is too small will fail to catch the eyes of pedestrians or drivers, while one that is too large can overwhelm the storefront or violate local sign codes. A good rule of thumb for small businesses is to select a sign with a width between 24 and 36 inches and a height of 18 to 24 inches. This size balances visibility from a reasonable distance, usually around 30 feet, and fits well in most storefront areas. Adjust sizes higher for locations with fast vehicle traffic, where signs may need to be bigger to be legible in a few seconds.
Shape influences how much your hanging sign stands out on a busy street. Rectangular signs with bold edges often communicate professionalism and clarity, making them ideal for breweries, retail stores, or offices. Soft-edged shapes like ovals, circles, or rounded rectangles lend a relaxed, approachable vibe, which works well for spas or cafes. For example, a wooden oval sign with smooth edges can create a calm, inviting impression, while a metal rectangle may project strength and reliability. Choosing a shape that reflects your business style improve the sign’s ability to convey your brand at a glance.
Placement affects how effectively your sign grabs attention and serves its purpose. Signs hung perpendicular to the building facade, often called blade signs, catch the eyes of foot traffic from both directions on a sidewalk. A height of 7 to 10 feet above the ground is typical, ensuring clearance for pedestrians while keeping the sign within natural line of sight. In locations with high pedestrian volume, like downtown areas, mounting your sign here maximizes impact. Be mindful of local regulations that may specify limits on sign height and dimensions to comply with safety and community standards.
Combining size, shape, and placement with effective design elements such as high-contrast colors, legible fonts, and simple messaging further improve visibility. For instance, a 30-by-20-inch rectangular acrylic sign with white lettering on a navy background is clear and easy to read. Budget-wise, custom signs in this range typically cost between $150 and $400 depending on materials and whether they are single-sided or double-sided. Keeping your design simple and the message concise prevents overcrowding, which can make your sign difficult to read quickly.
Some signs benefit from double-sided designs, especially those hung perpendicular to the storefront. This doubles visibility and can provide two different messages or complement other signage. Adding mounting accessories like chains or brackets securely fastens the sign, which is essential to withstand outdoor conditions. Poor mounting, overly large signs, or overly complex shapes might reduce visibility or increase risk of damage during bad weather.
In summary, a sign sized between 24 and 36 inches wide and 18 to 24 inches tall, matched with a shape that suits your business identity, mounted at 7 to 10 feet on a pole or bracket perpendicular to foot traffic offers a balance of visibility and style. Tailoring these factors to your specific business location and adhering to local sign codes ensures your hanging sign makes a strong, effective statement to customers and passersby alike.
Step-by-Step Guide to Installing Hanging Signs Safely
Properly installing a hanging sign involves selecting the right hardware, assessing the mounting surface, and following safety and legal requirements. Doing the job right ensures your sign stays secure, looks professional, and complies with local regulations. A clear checklist of tools, mounting options, and permit considerations helps you install your hanging sign safely and effectively.
Tools and Hardware Needed
To install a hanging sign, you’ll need basic tools like a drill, measuring tape, a level, screwdriver, and a ladder. The hardware depends on your sign’s weight and mounting surface. Lightweight signs, such as those made from dibond or banner material, often use eye bolts, chains, or brackets paired with sturdy wall anchors. For heavier signs, steel cables and heavy-duty anchors or toggle bolts provide additional strength. Using rust-resistant hardware is especially important for outdoor signs exposed to weather.
Before installation, you also want to gather protective gear like gloves and safety glasses. When your sign has lighting or electrical parts, hire a licensed electrician to manage the wiring safely. Having a helper can simplify the process, especially when lifting or positioning the sign during installation.
Mounting Techniques for Various Walls
The type of wall you’re mounting on dictates the best fastening method. For brick or concrete walls, drilling pilot holes and using expansion anchors or sleeve anchors gives a secure hold. Mountings into drywall or plaster require finding studs to support weight or using toggle bolts and wall anchors designed for hollow walls. Wood surfaces allow screws or lag bolts directly into the wood, offering excellent support.
Outdoor hanging signs need extra consideration for wind and weather. Use brackets that hold the sign away from the wall to reduce impact from air movement. Signs mounted on porch ceilings or under awnings often use chain hangers or strong eye bolts screwed into ceiling joists to safely distribute weight. Measuring carefully for level placement and double-checking all hardware tightness before finishing helps prevent leaning or falling signs later.
Safety Tips and Permitting Requirements
Working at heights requires careful attention to safety. Use a stable ladder placed on firm ground and avoid overreaching to prevent falls. Wear appropriate protective equipment, and if the job requires heavy lifting, get assistance. Check for electrical wiring or plumbing behind walls before drilling, and follow all label instructions on hardware for weight limits.
Many cities require permits for outdoor hanging signs to ensure codes related to size, placement, and safety are met. Contact your local building department before installation to find out what paperwork and inspections may be needed. When permits apply, skipping them for sign installation may result in fines or removal, which could cost more than the permit fees. Hiring a professional installer who handles permitting and site surveys can simplify the process and guarantee your sign meets all legal standards.
How Long Does It Take to Make or Order a Hanging Sign?
Making a hanging sign by hand usually takes one to three days, depending on your experience and the materials used. Basic wooden signs with hand-painted lettering can be done within a day if you prepare the wood in advance and allow time for paint to dry properly, which typically takes a few hours. More detailed designs, such as sandblasted redwood signs, will require additional time for carving and finishing, which can extend the project to up to a week. Finishing touches like custom trim caps or scroll brackets add time but improve the overall appearance and durability.
Ordering a custom professional sign generally involves a longer timeline, often ranging from one to four weeks. This includes the design phase, where you approve mockups or proofs, and a production phase that depends on the material. For example, alumalite signs with custom trim caps typically take about two to three weeks to produce, accounting for cutting, painting, and finishing. Sandblasted wooden signs need extra curing and drying time, which lengthens the process. The installation timeline also varies, but many sign shops coordinate this as part of the order.
Faster options exist if you need a hanging sign quickly. Some sign companies offer rush or express services that can cut turnaround to a few days, sometimes at an additional cost. Quick delivery is common for simpler designs on materials like aluminum or plastic, which are easier to fabricate. Keep in mind that expedited production may reduce the chance for detailed customization or require you to choose from standard templates. Shipping times for custom orders depend heavily on your location and the shipping method selected.
Starting a DIY hanging sign project saves money but requires more hands-on time and planning. Gathering materials, like quality wood or alumalite panels, and allowing for drying and curing is essential for durability. Professional signs trigger less direct time commitment but factor in design approvals and communication with the supplier. Both methods benefit from budgeting extra time to prevent rushed or low-quality results. For lasting signs, quality finishes and hardware should never be rushed.
Allow extra drying time for paint and finishes during DIY projects; rushing this step can lead to peeling or fading signs.
Cost Factors and Budgeting for Custom Hanging Signs
Costs for custom hanging signs vary mainly due to materials, size, design complexity, and installation requirements. Common materials range from budget-friendly coroplast, which offers options like glossy or matte finishes, to aluminum, a more durable and effective but still affordable choice. Coroplast signs often start as low as $16, making them a practical option for businesses or events aiming to keep expenses minimal without sacrificing visibility.
Size has a direct impact on the cost because larger signs require more material and may involve more intricate design work to ensure the message remains clear and readable. For instance, small directional signs measuring 12-by-18 inches cost less than custom blade signs that take up an entire storefront wall. Larger signs also have more installation challenges, often requiring professional mounting, which adds to the total cost.
Design complexity affects pricing since custom fonts, logos, or multi-color graphics involve more production time and higher printing expenses. Simple, bold designs with minimal colors stand out and reduce costs. This is especially true with digital printing, where every added colour slightly increases the price.
Installation costs depend on mounting methods and the sign’s location. Signs installed outdoors or in hard-to-reach places might need special brackets or scaffolding, usually requiring licensed professionals to meet safety codes. Inside, self-installation is often possible, saving money if you follow step-by-step guidelines and use the right hardware.
| Cost Factor | Typical Price Range | Impact on Budget |
|---|---|---|
| Material (Coroplast) | $16 – $50 | Low cost, less durable, suited for short-term use |
| Material (Aluminum) | $50 – $200+ | Higher durability, suitable for long-term outdoor use |
| Size (Small: 12″x18″) | $20 – $75 | Less material and design space, affordable |
| Size (Large: Wall size) | $200 – $1,000+ | More material and complex installation needed |
| Design Complexity | $0 – $100+ extra | Costs increase with colors, custom fonts, and logos |
| Installation | $0 (DIY) – $300+ | Professional installation adds to cost, DIY saves money |
You can stretch your budget by choosing affordable materials like coroplast for indoor or short-term signs. Keep designs simple and limit colors. For smaller signs, consider installing them yourself, following specific instructions for mounting and safety. When a durable, professional look is important, such as outdoors or high-visibility locations, investing in aluminum and professional installation will pay off with longer service life and better brand presentation.
Budgeting for these factors starts with deciding the sign’s purpose and expected lifespan. For a seasonal promotion, inexpensive coroplast with straightforward graphics fits well. For permanent store identification, plan for materials and installation that withstand weather and carry a sharp look. Request quotes from multiple suppliers to compare, and always check what installation costs you might face beyond the sign price. Taking these steps helps avoid surprises and lets you control spending while getting a hanging sign that meets your needs.
Lighting and Visibility Enhancements for Hanging Signs
Lighting significantly boosts the visibility of hanging signs, helping your business stand out day and night. Backlighting is a popular choice that involves placing lights behind a translucent sign surface. This technique creates an eye-catching glow that makes the sign readable in low light. Light box signs, which are essentially illuminated panels, work well as hanging signs when mounted like flag signs. They provide consistent lighting and are effective at grabbing attention from different angles.
Neon signs deliver a bold visual impact with their bright, glowing tubes that can be shaped into custom fonts and logos. Neon blade signs, like those used by Shanghai Beer Garden, offer a clean and vivid glow that’s hard to miss at night. They are ideal for businesses wanting a premium feel and a retro or artistic look. However, neon signs usually cost more initially and need careful installation to handle fragile glass tubes and high voltage transformers safely.
For a more budget-friendly option, LED signs offer excellent brightness and energy efficiency. They function well for displaying short messages such as business slogans or open hours. LEDs can be used as edge lighting around the sign or incorporated behind translucent elements to create a backlit effect similar to neon but with less customization. LED lighting requires less maintenance and has a longer lifespan, typically tens of thousands of hours. While LEDs lack the artisanal touch of neon, their lower cost and versatility make them perfect for many hanging sign applications.
Installing lighting with hanging signs calls for attention to safety and durability. Securely attach all light fixtures or panels to the sign frame using weather-resistant hardware, especially for outdoor signs exposed to wind or rain. Use properly rated electrical components and waterproof connectors to prevent hazards. For power, route wiring through protected conduits or channels along the mounting bracket to avoid accidental damage. Gooseneck fixtures are another option, mounted above or below the sign with bent arms to shine light onto the sign face without direct attachment. This option can be easier to maintain and replace than integrated light boxes.
Costs vary depending on the lighting type and size of the sign. Neon installations typically start around several hundred dollars and can rise to a few thousand for custom designs. LED solutions can be as low as $100 to $500 for small signs and increase with complexity and brightness. Expect to spend additional amounts on professional installation to ensure electrical safety and code compliance. Determining your budget and intended visibility hours helps choose the best lighting method that balances impact, maintenance, and cost.
Common Mistakes When Creating or Installing Hanging Signs
Common mistakes with custom hanging signs often start with poor design choices that hurt visibility and message clarity. Using overly small text or complicated fonts makes reading difficult from a distance, especially for storefronts or exterior signs meant to attract attention. Choose simple typefaces and sizes that suit typical viewing distances, generally, letters should be at least 1 inch tall for every 10 feet of distance you expect viewers to be. Avoid including too much information; keep text concise so your sign quickly communicates its core message.
Mounting errors are another frequent problem. Signs installed unevenly or on unstable fixtures can appear unattractive or even become safety hazards. To fix a crooked sign, first check that your mounting brackets or chains are level with a carpenter’s level. Adjust fastening points or replace old hardware that has loosened over time. Use durable materials like galvanized steel chains or stainless steel hooks for better longevity, especially outdoors. Installing a secondary safety wire helps prevent the sign from falling if one attachment fails.
Material choice can also reduce a sign’s effectiveness. Lightweight materials like PVC work well indoors but may warp or degrade when used outside without proper weatherproofing. For exterior signs, durable materials such as treated wood, metal, or weather-resistant plastic provide better longevity and maintain visual appeal. Engraved signs offer a crisp look and resist wear, but they may cost $100 to $300 depending on size and complexity. Neon or LED-lit signs boost visibility but require proper electrical installation and weatherproofing to avoid electrical hazards or damage.
Designs that do not contrast enough with their background cause legibility issues. Signs with colors too similar to their mounting surface can blend in, making it hard to notice or read. Select contrasting colors for text and background, dark letters on a light background or vice versa work best. Matte finishes reduce glare, improving readability in bright sunlight, while glossy surfaces, although attractive, often reflect light and hinder visibility.
Trying to create highly detailed custom signs yourself can lead to costly mistakes or extra time spent fixing errors. Professional sign shops usually offer guidance on design, material, and mounting choices to prevent common pitfalls. For DIY projects, draft rough sketches and measure mounting areas carefully before cutting materials. Doing a test install with a lightweight prototype can reveal fit or positioning problems without wasting resources.
Always check the weight limits and clearance heights of your mounting location before installing a hanging sign to avoid falls and damage.
DIY Tips and Checklists for Making Your Own Hanging Sign
Start by gathering your tools: you’ll need sandpaper (medium and fine grit), outdoor wood paint or weather-resistant acrylic paints, a paintbrush set, a pencil, measuring tape, and drill with screws or hooks for hanging. Choose a sturdy wooden board like cedar, pine, or repurposed wood for the base. Cedar resists rot and insects, making it a good option for outdoor signs. For a weather-resistant finish, opt for paint labeled for outdoor use and a waterproof sealant like polyurethane.
Prepare the board by sanding it smooth with medium grit sandpaper, then finish with fine grit to avoid splinters. This makes the surface ready to hold paint and slows moisture absorption. Sketch your design lightly with pencil to get placement right before painting. Use at least two coats of paint for solid coverage and durability, letting each coat dry completely, usually about 2 hours. After painting, apply a clear waterproof sealant on all sides of the sign, including edges, to prevent water damage. Let it cure for 24 to 48 hours as per instructions.
For hanging, drill evenly spaced holes near the top corners. Insert screw eyes or hooks rated to hold at least double the sign’s weight to keep it secure. Use sturdy twine, chain, or wire to hang from a bracket or hook on your wall or post. Ensure the hanging material can withstand weather exposure if outdoors, stainless steel wire or coated chains work well. Check that your mounting surface can hold the sign’s weight safely.
Beginner-friendly projects can start simple: use a 12-by-18-inch repurposed wooden board and paint a short welcoming phrase or your business name. Plan your colors ahead using a basic palette of two or three paints. Allow 3 days for the whole project, including drying time. Costs usually stay under $30 if you already have some supplies, mostly for paint and sealant. Good results look clean and vibrant with smooth paint layers and a sealed surface free from cracks.
Common mistakes include skipping sanding, which causes uneven paint adhesion, or applying inadequate sealant, leading to peeling or water damage. Using the wrong hanging material might let the sign fall in wind or rain. If the sign is indoors only, you can skip waterproof sealant but still use durable paint for longevity.
Here’s a simple step-by-step to follow word for word: Sand the board thoroughly, paint your base coat and let dry completely, paint your design freehand or with stencils, allow drying and add a second paint layer if needed, apply outdoor sealant on all sides, dry for 24 hours, attach hanging hardware, and hang securely with strong wire or chain. With these steps and tools, your DIY hanging sign will look professional and last through changing weather conditions.
Step-by-Step Action Plan to Get Your Hanging Sign Ready
Follow this plan to make sure you choose, create, and install the perfect hanging sign for your business or project.
- Day 1: Define Your Goal. Decide the main purpose of your sign, whether it’s to attract customers, guide visitors, or decorate. Success means you have a clear message in mind.
- Day 2: Select Your Material. Choose materials suitable for your sign’s location, such as weather-resistant composites for outdoors or lightweight wood for indoors. Confirm your choice by researching durability and maintenance needs.
- Week 1: Design Your Sign. Sketch or use software to create a design focusing on readability and style. Know it works when the letters and images are clearly visible at your intended viewing distance.
- Week 2: Order or Gather Supplies.Place your order with a reputable sign maker when buying custom. For DIY, gather tools and materials following your design specs. Preparation is right when all parts and resources are ready to go.
- Week 3: Install Your Sign. Set up mounting hardware according to safety guidelines and test for stability. The sign hangs securely without wobbling when you’ve done this step properly.
- Week 4: Add Lighting if Needed. Install appropriate lighting to improve visibility during low-light hours. Test by checking that the sign is easy to read in the dark.
- After Installation: Monitor and Maintain. Regularly inspect your sign for damage and clean it as needed to keep it effective and attractive. Success means your sign continues to meet your goals over time.
Frequently Asked Questions
What Are Some Creative Custom Shapes for Hanging Signs?
Custom-shaped hanging signs grab more attention than traditional ones. Consider shapes related to your business theme for a unique look.
Can Hanging Signs Incorporate 3D Elements for Better Impact?
Yes, 3D elements add depth and make signs stand out indoors and outdoors. Raised letters and logos create a lasting impression on passersby.
Are Neon Hanging Signs Suitable for Both Indoor and Outdoor Use?
Neon signs work well inside and outside, offering bright, eye-catching visibility. They make excellent hanging signs for businesses wanting attention day and night.
How Can I Make a Hanging Sign More Noticeable in Low Light?
Adding lighting like LED or neon improve visibility after dark. Good illumination ensures your sign stays effective during evening hours.
What Types of Trim Caps Improve the Look of Hanging Signs?
Trim caps in custom colors either contrast or blend with your sign. This small detail can help your sign appeal visually and look polished.
Can Hanging Signs Double as Indoor Decor for My Store?
Hanging signs serve as attractive indoor decor that reinforces branding. Choose styles like dimensional or neon signs to complement your interior design.
Key Points to Remember
A well-chosen and carefully installed hanging sign can boost your visibility and attract the right attention to your business or space. Start by defining what you want the sign to say and where it will go, and take it step by step from material choice to mounting. Your next move is to draft your design or consult a local sign maker to explore options tailored to your needs and budget.