How to Make a Family Name Sign with 8 Simple Steps for Lasting Results
How to make a family name sign starts with choosing the right materials and design to fit your style and budget. Using affordable supplies like a Baltic birch wood round from a family name sign kit and simple tools, you can create a unique and lasting decoration. Begin by selecting a font and size that make the family name clear and visually appealing.
Key Takeaways
- Use a Baltic birch wood round with ¼” thickness for a sturdy, smooth base for your sign.
- Select a font like BetterFly for clear, attractive lettering on your family name sign.
- Order a family name sign kit that includes pre-cut letters to save time and ensure precision.
- Prepare paint, paint brushes, ribbon, and seasonal decor to personalize your sign’s finish.
- Apply Beacon Adhesives 3-in-1 glue for strong, reliable adhesion of letters on your sign.
- Use an xTool P2 or similar cutting machine for sharp, clean letter cuts if making your own.
1. Essential Materials and Tools for Your Family Name Sign
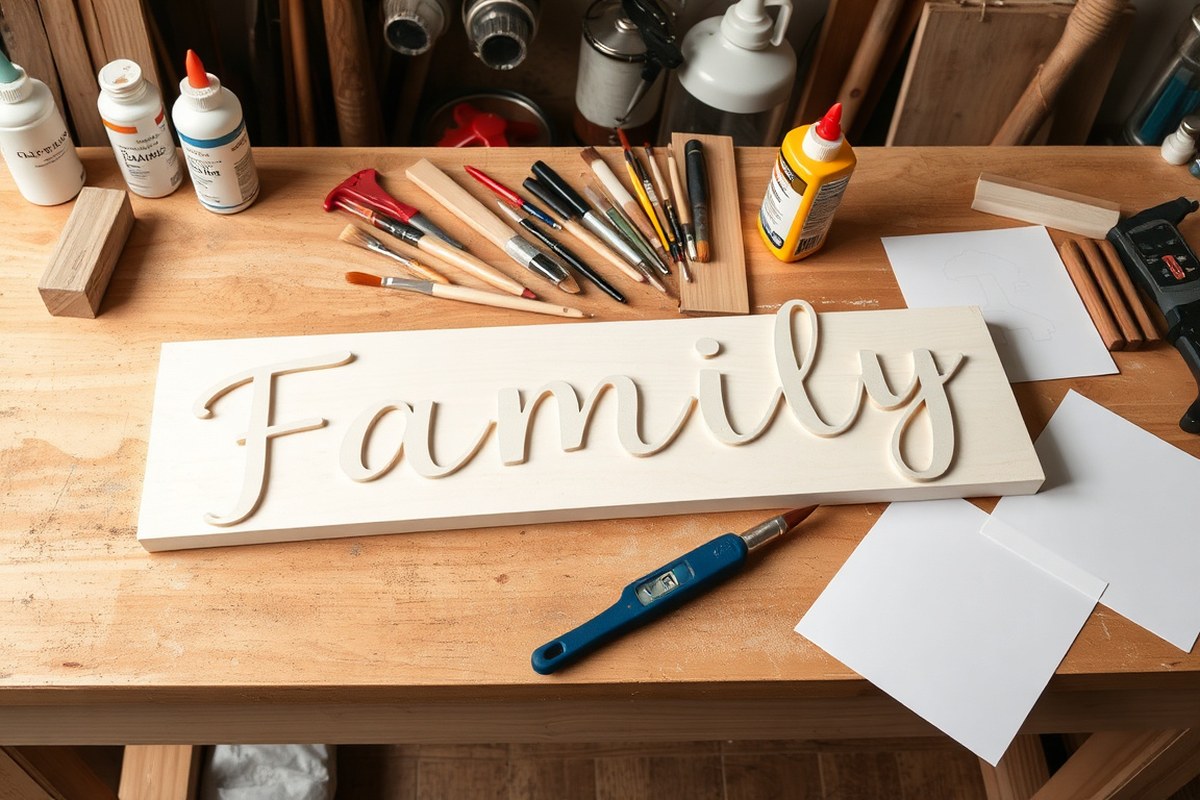
To make a family name sign, you’ll need a few key materials and tools that vary depending on your experience level and the look you want. Choosing the right wood or alternative material makes a big difference in durability and finish. Baltic birch plywood is a popular choice for laser-cut signs because of its smooth surface and stability. It costs around $20 to $30 for a 12×12-inch piece of ¼-inch thickness, offering a clean, professional look and lasting quality.
| Material | Cost & Size | Durability | Appearance | Notes |
|---|---|---|---|---|
| Baltic Birch Plywood | $20-$30 for 12×12″, ¼” thick | High; resists warping and cracking | Smooth, light-colored, ideal for paint/stain | Best for precise cutting and painting |
| Cedar Wood | $15-$25 per 12×12″ piece | Good; naturally resistant to decay | Rustic look with natural grain | May need sealing if outdoor use |
| MDF Board | $10-$15 for similar size | Moderate; prone to swelling if wet | Smooth surface but less natural | Good for indoor signs, paintable |
| Canvas (stretched) | $10-$20 for 12×12″ | Moderate; fabric may fade outdoors | Textile texture, lightweight | Great for painterly, artistic style |
Your basic materials list should include:
- Your chosen base (e.g., Baltic birch plywood or canvas)
- Paints (acrylic or chalk paint recommended for durability)
- Paintbrushes in various sizes
- Adhesive such as Beacon Adhesives 3-in-1 glue for attaching letters or embellishments
- Optional decorations like ribbons or seasonal accents
Tools needed depend on whether you’re a beginner or more advanced. Beginners will do well starting simple with hand tools like sandpaper for smoothing edges, painters’ tape for masking off areas, and craft paintbrushes. A pencil and ruler help with measuring and sketching your design on the sign.
For more experienced crafters, power tools such as a jigsaw or scroll saw speed up cutting letters and shapes. A wood burner or laser cutting machine offers precision and professional detail but costs more upfront. Sanding tools like a detail sander improve finish quality faster than hand sanding. Always prep your materials by sanding them lightly to remove rough spots and help paint adhere better.
Choosing the right materials and tools affects both your project’s budget and final look. For example, assembling a rustic pallet wood sign might cost under $10 using reclaimed wood and simple brushes, while a precise laser-cut Baltic birch sign runs higher but lasts longer and looks polished. Your choice depends on whether you want a quick, casual creation or a keepsake with a refined finish.
2. Designing Your Family Name Sign for a Personalized Look
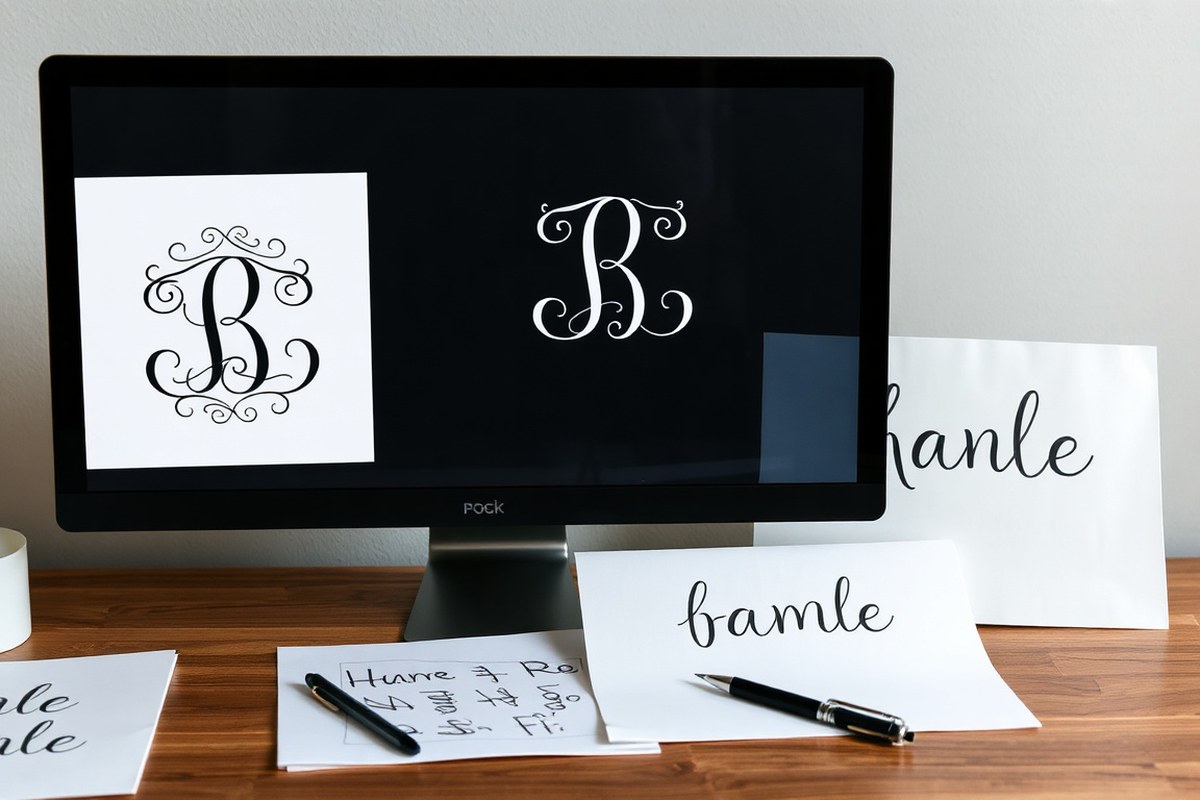
Creating a personalized look for your family name sign involves carefully selecting fonts, colors, and design elements that reflect your style. Thoughtful planning of the layout and incorporating meaningful details like established dates or monograms can make your sign stand out with a professional touch. Starting with a clear design plan ensures your finished sign fits your home décor theme perfectly.
Choosing the Right Font and Colors
Fonts set the tone for your sign, so picking the right style is key. For a polished look, choose fonts that are easy to read from a distance and fit your chosen theme. Mixing one or two complementary fonts can add visual interest but avoid more than two to keep it clean. Colors should contrast well with your background; for example, white or cream letters look great on darker woods, while black or charcoal works well on lighter surfaces.
Start with neutral or classic color schemes like black, white, gray, or navy for a timeless feel. Add subtle accent colors that match your home’s palette or seasonal décor to personalize further. Use online tools to preview font and color combos before finalising.
Incorporating Established Dates and Monograms
Adding your family’s established date adds character and history to your sign. Place the date in a smaller font below or beside the family name to balance the design. Some prefer “Est. 2024,” which clearly marks the year your family started or moved in. Monograms can serve as a focal point; large initials in the center or corner personalize the sign and complement your letters.
Online monogram generators can create custom designs with your family’s initials. Print your chosen monogram to the size that fits your base material. Use this printout for transferring or laser cutting, then paint or stain to match the rest of your sign’s style.
Selecting a Style: Rustic, Modern, or Farmhouse
| Style | Description | Font & Color Suggestions | Additional Elements |
|---|---|---|---|
| Rustic | Warm, cozy look often on rough wood or pallets. | Distressed serif or script fonts; earthy tones like browns, creams, faded reds. | Buffalo check ribbons, distressed paint finish, natural twine. |
| Modern | Sleek, minimalist with clean lines and simple shapes. | Sans-serif fonts like Helvetica or Futura; monochrome or bold accent colors like black, white, metallics. | Geometric shapes, minimal embellishments, smooth finish. |
| Farmhouse | Blends rustic charm with simple, bright elements. | Handwritten or casual script fonts; whites, soft blues, greens, warm neutrals. | Wooden frames, floral or greenery accents, chalkboard paint. |
Choose the style that suits your home and personal taste, then match the fonts, colors, and decorative elements accordingly. The chosen aesthetic will guide all other design decisions. Follow these steps to create your family name sign design:
- Decide on the overall theme or style for your sign (rustic, modern, farmhouse).
- Choose 1 or 2 fonts that fit the style and are legible from a distance.
- Pick a color scheme with high contrast between letters and background.
- Design or generate a custom monogram using a free online monogram maker.
- Decide if you want to add an established date and its placement.
- Create a layout draft combining the family name, monogram, and date.
- Print a template or digital mock-up to preview your design sized to your sign.
- Adjust spacing and font sizes to ensure a balanced, cohesive final look.
Make sure your font size is large enough to read from where you plan to hang the sign; small details can get lost if it’s too far away or the letters too tiny.
3. Methods to Transfer Your Design Onto Wood or Canvas
Choosing the right method to transfer your family name design onto wood or canvas depends on your tools, budget, and desired end result. Common options include stencil painting, freezer paper transfer, carbon paper tracing, and decal or vinyl application. Each method has advantages and drawbacks in terms of precision, cost, and durability.
| Transfer Method | What It Is | Pros | Cons | Estimated Cost | Best For |
|---|---|---|---|---|---|
| Stencil Painting | Cutting letters/shapes from paper or plastic to paint over | Low cost, no special tools needed, customizable | Potential for paint bleed, less precision | Under $5 (materials) | Simple designs, beginners |
| Freezer Paper Transfer | Using freezer paper as temporary stencil ironed onto the surface | Good precision, minimal tools, washable stencil | Works best on smooth wood/canvas, practice needed | Under $3 (freezer paper roll) | Moderate detail, low budget |
| Carbon Paper Tracing | Placing carbon paper under design printout and tracing | Simple, no power tools required | Less accurate, smudging risk, manual effort | About $5 for carbon paper pack | Rough designs, beginners |
| Vinyl or Decal Transfer | Cutting vinyl letters or decals using a machine or by hand | High precision and professional look, durable | Requires vinyl cutter or purchasing pre-cut vinyl, costlier | $3.50 to $10+ depending on design | Detailed designs, long-lasting signs |
For stencil painting, start by printing your design and cutting it out of stencil material. Secure it to the sign surface using removable tape or spray adhesive. Apply paint in thin layers with a stencil brush, rotating the brush vertically rather than brushing across the stencil to reduce bleed. Let each layer dry before adding more for solid coverage. When dry, carefully peel off the stencil for your design.
Freezer paper transfer involves printing the design backwards onto the paper’s plastic side. Cut out the design and iron the plastic side onto wood or canvas, which temporarily adheres it. Paint or draw over the stencil, then peel away the paper once finished. Practice on scrap wood helps prepare for good adhesion and clean lines.
Carbon paper tracing requires placing carbon paper face down on the wood, then the paper with your design on top. Trace over the lettering with a pencil to transfer the design onto the wood’s surface. You can then paint or stain following the traced lines. This method is inexpensive but may produce less precise edges.
Vinyl or decal transfers deliver the best precision and durability but typically need a cutting machine like the xTool P2 or Cricut. After cutting, weed out excess vinyl and use transfer tape to apply the letters onto the wood or canvas. This results in a clean, professional finish that lasts. Vinyl designs from resource libraries usually cost between $3.50 and $10, far cheaper than custom laser cutting services.
Deciding which method to use depends on your available tools and budget. For beginners or those without machines, stencil painting or freezer paper offer effective, inexpensive ways to achieve detailed lettering. Carbon paper suits quick, rough drafts. When precision and longevity are priorities, investing in vinyl decals or laser-cut letters pays off.
4. Cutting and Crafting the Letters and Elements
Cutting and crafting the letters and decorative elements for your family name sign requires precision and the right tools. You can cut letters by hand or use a machine, add 3D layers for depth, or work with premade kits depending on your skill level and available equipment. Follow clear steps and tips to achieve clean cuts and smooth edges for a polished look.
Cutting Letters by Hand or Machine
Using the right tools affects the accuracy and safety of your cuts. Hand cutting tools like jigsaws or scroll saws work well for beginners with wood or plywood. For smoother, more precise cuts, especially with intricate fonts, consider a laser cutter or a Cricut machine. These machines cut through thin wood or vinyl cleanly and reduce the chances of mistakes.
Start by transferring your design to your material using carbon paper or printed stencils. When working by hand, secure your material to a flat surface and take your time cutting slowly to avoid splintering or breaking. Sand the edges after cutting to smooth any rough spots and prepare for painting or staining.
- Transfer the letter or element design onto your wood or canvas using stencil or carbon paper.
- Secure the material to your workbench using clamps to prevent movement.
- Choose a saw appropriate for your material thickness: scroll saws work for thinner wood, jigsaws for thicker pieces.
- Cut slowly along the design lines, following curves carefully to avoid splintering.
- Smooth edges with medium-grit sandpaper (120-150 grit), then finish with fine-grit (220 grit) for a clean surface.
- Remove dust from sanding before painting or finishing.
Adding Depth with Layered and 3D Letters
Layering letters or adding 3D elements gives your sign more visual interest and makes the family name stand out. For example, you can cut multiple identical letters or decorative shapes from thin plywood or MDF and glue them together to build thickness. Another option is mounting letters on a raised backer board made from leftover 2″x4″ wood, cut to the desired thickness.
Use a strong craft or wood glue to assemble layers, clamp them if possible, and let the glue dry fully, usually 1, 2 hours. Sand edges between layers if needed to keep your shapes sharp. Consider painting or finishing each layer separately for clean lines. Adding a 45º beveled edge with a miter saw creates a professional look on layer edges but requires more skill and equipment.
Using Kits and Pre-Cut Letter Sets
Premade kits or pre-cut letters are ideal for beginners or those short on time. These kits often include wooden or MDF letters, decorative elements, and sometimes stencils or templates. Using kits eliminates the cutting step and reduces errors, ensuring uniform letter size and shape. Prices vary from about $10 to $40 depending on size and material quality.
Templates included in kits can guide lettering placement and even decoration, helping you focus on assembly and finishing. For personalizing a kit, paint or distress the letters and elements to match your style. Choose kits that fit the size of your sign and check that the letter style matches your design for cohesive results.
5. Painting and Finishing Techniques for a Professional Look
Choosing the right paint and finish plays a huge part in making your family name sign look professional and last longer. For most signs, use acrylic paint because it works well on wood and canvas, dries quickly, and resists cracking. Interior acrylic paint suits indoor signs, while exterior acrylic paint adds durability against weather if the sign will hang outside. Spray paint can offer smooth, even coats and is great for larger areas or letters but needs to be applied outdoors or in a well-ventilated space.
Painting neat letters and backgrounds requires steady techniques and the right tools. Use fine brushes for detail work on letters and wider brushes or foam rollers for background areas. Applying several thin coats instead of one thick coat helps avoid drips and uneven coverage. Let each coat dry fully, usually about 30 minutes to 1 hour, before adding the next. For a rustic finish, lightly sand the edges or the surface after painting to reveal some wood grain or previous layers. To achieve a smooth, modern look, sand the wood before painting and apply a primer to create an even base.
Sealing the sign is important to protect it from wear, moisture, and UV damage, especially for outdoor displays. Use a clear acrylic sealer or polyurethane finish depending on your surface and paint type. Satin or matte finishes keep a natural look, while gloss sealers add shine but may show scratches more easily. Here’s a step-by-step process to paint and finish your family name sign for the best results:
- Prepare the surface. Sand the wood or canvas smooth with 120- to 220-grit sandpaper, wiping away dust with a tack cloth.
- Prime the surface (optional but recommended). Apply a coat of primer if using wood, especially for bright or light-colored paint, and let it dry 1-2 hours.
- Paint the background. Use a wide brush or foam roller, applying 2-3 thin coats of your chosen acrylic paint; let each dry for 30-60 minutes.
- Paint the letters. Use fine detail brushes or spray paint, applying thin layers and carefully following your transferred design.
- Add distressing for a rustic look (optional). Lightly sand edges or parts of the letters once paint is dry to reveal wood grain or underlayers.
- Apply a protective sealer. Spray or brush on a clear acrylic or polyurethane finish, using 2 thin coats for coverage; wait 2-4 hours between coats.
- Seal edges and backside. Apply sealer to all exposed sides to reduce warping and wear, especially for outdoor signs.
Use thin paint layers and let each dry completely; thick coats can cause bubbling and uneven texture that ruins the sign’s look.
6. Assembling and Securing Your Family Name Sign
Securing your family name sign so it lasts and looks great requires careful assembly and choosing the right adhesives or fasteners. Proper attachment keeps letters and decorations stable over time, especially if you’ll hang the sign outdoors. Adding a sturdy backing or frame supports the pieces, prevents warping, and makes the sign easier to display.
Adhesive types vary, but wood glue gives a strong bond for wooden letters and shapes. Use a quality wood glue like Titebond, applying a thin, even layer and clamping letters for at least 30 minutes to an hour. For a faster or additional hold, clear-drying glue guns work well; however, hot glue tends to be less durable outside or on heavier elements. Construction adhesive, such as Loctite PL Premium, bonds wood, metal, and plastic and is weather resistant but requires clamps or weights and cures over 24 hours.
Mechanical fasteners like small finishing nails or brads add extra strength, especially for dimensional letters or heavier decorations. Nails spaced about 1 to 2 inches apart along the edges help prevent lifting. To avoid splitting, pre-drill holes with a drill bit slightly smaller than the nail diameter.
Building or adding a frame improves durability and presentation. Use 1×2 or 1×3 lumber cut to fit around the sign edges and secure with wood glue and 1¾-inch nails or screws. For backing, a ¼-inch plywood panel or MDF cut to the exact sign size provides even support. Attach backing with wood glue and nails spaced every 6 to 8 inches along edges.
- Lay out all components face up on a clean surface and arrange letters and decorations in their final positions to confirm spacing and fit.
- Apply wood glue to the backs of letters or decorations, then press them firmly onto the sign’s base. Use clamps or place heavy books on top for at least 30 minutes to set the bond.
- Optionally, reinforce with finishing nails by pre-drilling small holes through letters and into the base, then drive nails in flush or slightly countersunk. Use a nail set to avoid surface damage.
- Attach your backing panel by spreading wood glue evenly over the back of the main sign, then press the backing panel in place. Secure it with nails every 6 to 8 inches along edges, pre-drilling if needed.
- Construct the frame by cutting 1×2 lumber to the perimeter dimensions. Use wood glue along the mitered corners and nail or screw the frame onto the backing or sign edges. Pre-drill pilot holes to prevent splitting.
- Let the entire assembly cure for at least 24 hours, ensuring adhesives fully set and nails are secure before handling or hanging your sign.
Signs fully cured feel solid with no movement of individual parts. Avoid rushing assembly or skipping clamps, which can lead to peeling or loose letters. For outdoor signs, choose waterproof glues and galvanized or stainless steel nails to resist rust. Using a frame and backing adds weight but protects your work and helps maintain shape over time, improving durability.
7. Styling and Display Ideas for Your Finished Family Name Sign
Displaying your family name sign in the right spot makes it a standout feature and helps welcome guests warmly. Inside, consider hanging the sign above the fireplace mantel, entryway, or in the dining room where family gathers. These locations draw attention and showcase your personal style. Outdoors, sturdy signs made with weather-resistant materials work well above the front door, on a porch wall, or near a garden gate. Make sure the sign can handle sun, moisture, and temperature swings without fading or warping.
Seasonal decorations improve your family name sign while keeping it fresh and festive throughout the year. Wrap garlands of greenery, faux pine branches, or eucalyptus around the edges for a natural look. Adding a thin strand of LED string lights brightens it up during darker months and holidays. You can also attach removable ribbons or small ornamental accents like pine cones for winter, flowers for spring, or miniature pumpkins for fall. The key is to use lightweight, easy-to-remove items to avoid damaging the sign’s surface or paint.
Styling ideas depend on your sign’s design and the home’s decor style. Rustic and pallet wood signs fit perfectly with farmhouse or country-style interiors. Complement them with burlap runners, woven baskets, and natural textures. Modern or minimalist signs made with sleek fonts and muted colors pair well with metal accents, clean lines, and monochrome decorative objects. Coastal-themed signs look great alongside driftwood accents, seashell collections, and ocean-hued pillows or throws.
- Indoor locations: above fireplace mantel, entryway wall, dining room wall
- Outdoor spots: porch wall, front door area, garden gate post
- Add seasonal touches like greenery garlands, LED string lights, or seasonal ribbons
- For rustic signs, use burlap and woven baskets to match farmhouse style
- Pair modern signs with metal decor and simplified color palettes
- Coastal signs look great with driftwood and beach-themed accessories
When arranging your sign with other decor, keep balance in mind. Avoid overcrowding the space around it so your family name remains the focal point. Secure any added decorations well, especially outdoors where wind and rain can dislodge them. The effort to tailor your styling to the sign’s character and your home’s vibe makes your family name sign a personal and inviting statement piece.
8. Avoiding Common Mistakes and Ensuring Safety While Crafting
Crafting a family name sign can be rewarding, but common mistakes in measuring, cutting, and finishing could spoil your project. Taking safety precautions with sharp tools and adhesives protects you from injuries. Checking the final alignment and finish before hanging your sign ensures a polished, professional look.
Top Crafting Mistakes and How to Fix Them
One common mistake is inaccurate measurement, which leads to uneven spacing or misaligned letters. Always double-check your measurements with a ruler or measuring tape before cutting or painting. Leaving insufficient drying time between paint coats causes smudging or uneven finish; allow at least 2 hours drying time per coat at room temperature.
Using the wrong adhesive can weaken the bond, especially between different materials like wood and metal. Choose an adhesive suitable for your materials, such as wood glue for wood or a strong epoxy for mixed surfaces. Another error is ignoring surface preparation, sanding and cleaning the wood surface promotes better paint adhesion and a smooth finish. Run a fine-grit sandpaper (220 grit) over the wood and wipe off dust before painting.
- Measure twice, cut once to avoid sizing errors.
- Let paint dry fully between coats to prevent smudges.
- Use material-specific adhesives for secure bonds.
- Sand surfaces lightly before painting for smoothness.
- Test paint color on a scrap piece to check the shade.
- Avoid rushing steps like assembly to maintain alignment.
Fixing errors early, such as re-sanding rough edges or repainting a blemished section, saves time and improves your sign’s appearance.
Essential Safety Gear and Precautions
Handling tools and materials safely prevents injuries that can stall your project or cause lasting harm. Always wear safety goggles to guard against flying wood chips or paint splashes. Gloves protect your hands from cuts and chemical exposure when using adhesives or stains. Use a dust mask when sanding to avoid inhaling fine particles.
Ensure your workspace is well-ventilated when using paints, stains, or adhesives to reduce exposure to fumes. Keep sharp tools like utility knives and saws in good condition and store them properly when not in use. Switch off power tools immediately after use and keep cords away from your working area to prevent trips and accidental cuts.
- Wear protective goggles and gloves at all times.
- Use a dust mask during sanding.
- Work in a well-ventilated area for painting and gluing.
- Keep tools sharp and stored safely when idle.
- Disconnect power tools when changing blades or not in use.
These precautions reduce injury risk and keep your crafting space organized and safe.
Never skip protective gear, even for quick tasks, as accidents often happen unexpectedly.
Final Quality Checks Before Display
Before sealing or hanging your family name sign, check the alignment and finish quality thoroughly. Place your sign flat on a level surface and verify the letters line up evenly without gaps or overlaps. Use a ruler or straightedge across the text for precise verification.
Inspect the painted surface under good light to spot uneven spots or drips. Lightly run your finger over the finish; it should feel smooth and consistent without sticky or rough areas. If the finish is flawed, sanding lightly and applying a fresh clear coat can improve durability and appearance.
Ensure all glued parts are firmly attached by gently pressing each element and watching for movement. Test the hanging hardware or stand’s stability before positioning on your wall or shelf. Investing a few minutes in these checks prevents embarrassing errors and prolongs your sign’s lifespan.
Step-by-Step Action Plan for Making Your Family Name Sign
Follow these clear steps to create your custom family name sign and enjoy the satisfaction of personalized home decor. Each step builds on the last to ensure a polished final piece.
- Before you start: Gather all essential materials and tools, such as wood or canvas, paints, brushes, and cutting tools. Confirm you have everything so the project flows smoothly.
- Day 1: Sketch or print your design to fit the size of your sign surface. Check that the layout feels balanced and clearly shows your family name.
- Day 2: Transfer your design onto the wood or canvas using your chosen method like carbon paper or stencils. Ensure the lines are visible but light enough to paint over easily.
- Day 3: Carefully cut or carve the letters and design elements if using wood. Test that each piece fits well and has clean edges before painting.
- Day 4: Paint your sign with chosen colors and finishes. Apply multiple coats if necessary and let each dry completely for a professional look.
- Day 5: Assemble your sign by securing all the elements in place with nails, screws, or strong adhesive. Confirm everything is firmly attached and level.
- Day 6: Add optional touches like a protective sealant or decorative hooks. Check for durability especially if your sign will be displayed outdoors.
- After 1 week: Find the ideal spot to hang or display your family name sign where it complements your home’s style. Step back to admire your work and make minor adjustments if needed.
Frequently Asked Questions
What Type of Wood Works Best for a Family Name Sign?
Baltic birch wood is a top choice because it’s sturdy, smooth, and easy to paint. Its ¼-inch thickness offers solid support without being too heavy for easy hanging.
Can I Use Stencils Instead of Freehand Painting on My Sign?
Yes, stencils provide cleaner and more precise lettering, especially if you’re not confident with freehand. Use a stencil brush to avoid paint bleeding for crisp edges.
What’s the Best Paint Type for Outdoor Family Name Signs?
Acrylic paint is ideal because it resists fading and weathering outdoors. Seal with a clear outdoor varnish to protect the sign from moisture and sun damage.
How Can I Add Decorative Elements Like Ribbons or Seasonal Decor?
Use a strong adhesive like Beacon 3-in-1 glue to attach ribbons and seasonal items; this keeps everything secure without damaging the wood.
What’s an Easy Method to Transfer a Design Onto Wood?
Print your design and use carbon paper to trace it onto the wood for accuracy. This saves time and avoids mistakes in freehand drawing.
How Can I Display My Family Name Sign on Different Surfaces?
Signs can be hung with ribbon, mounted with nails, or placed on easels depending on the surface. Choose secure hardware that matches your wall type.
The Bottom Line
Creating your own family name sign lets you add a personal and inviting touch to your home. Start with a clear design and take your time during each phase to ensure quality. Begin today by selecting your materials and drafting your custom design to bring your vision to life.