How to Use Transfer Paper Correctly: Steps, Tips, and Best Practices
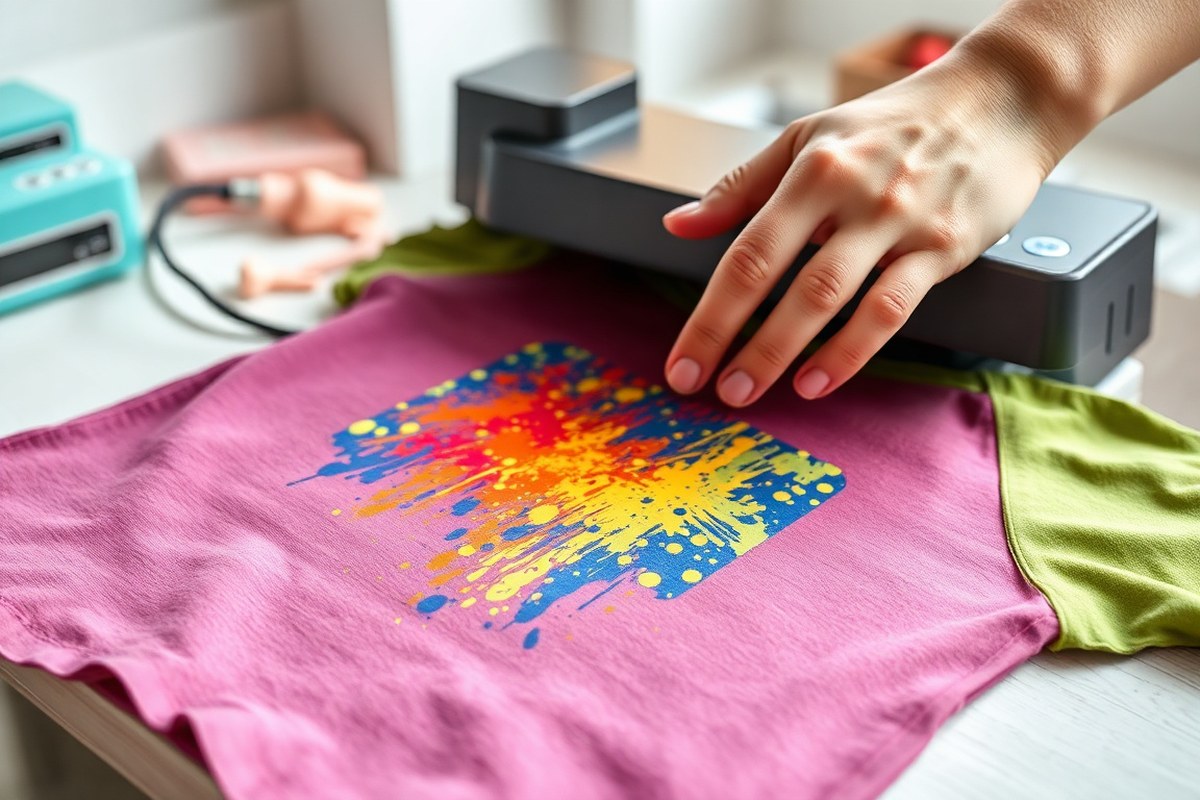
How to use transfer paper starts with picking the right paper and preparing your printed design carefully. You print your image with an inkjet printer and then press it onto fabric using heat and pressure. Waiting for the design to dry before applying heat ensures better transfer and durability.
Key Takeaways
- Cut the transfer paper to size before applying it to avoid overlapping or wasted material.
- Place the transfer paper with the dark printed side facing down on your fabric for proper image transfer.
- Apply heat between 270°F and 375°F using a heat press or iron for 3, 5 minutes with a parchment paper cover.
- Cool the transfer completely for 2, 3 minutes before peeling the backing paper to avoid smudging or tearing.
- Wait at least 24 hours before washing and turn garments inside out to extend print durability up to 30 washes.
- Use masking tape or drafting dots to secure the paper if tracing your design to prevent shifting.
How to Use Transfer Paper: Step-by-Step Process
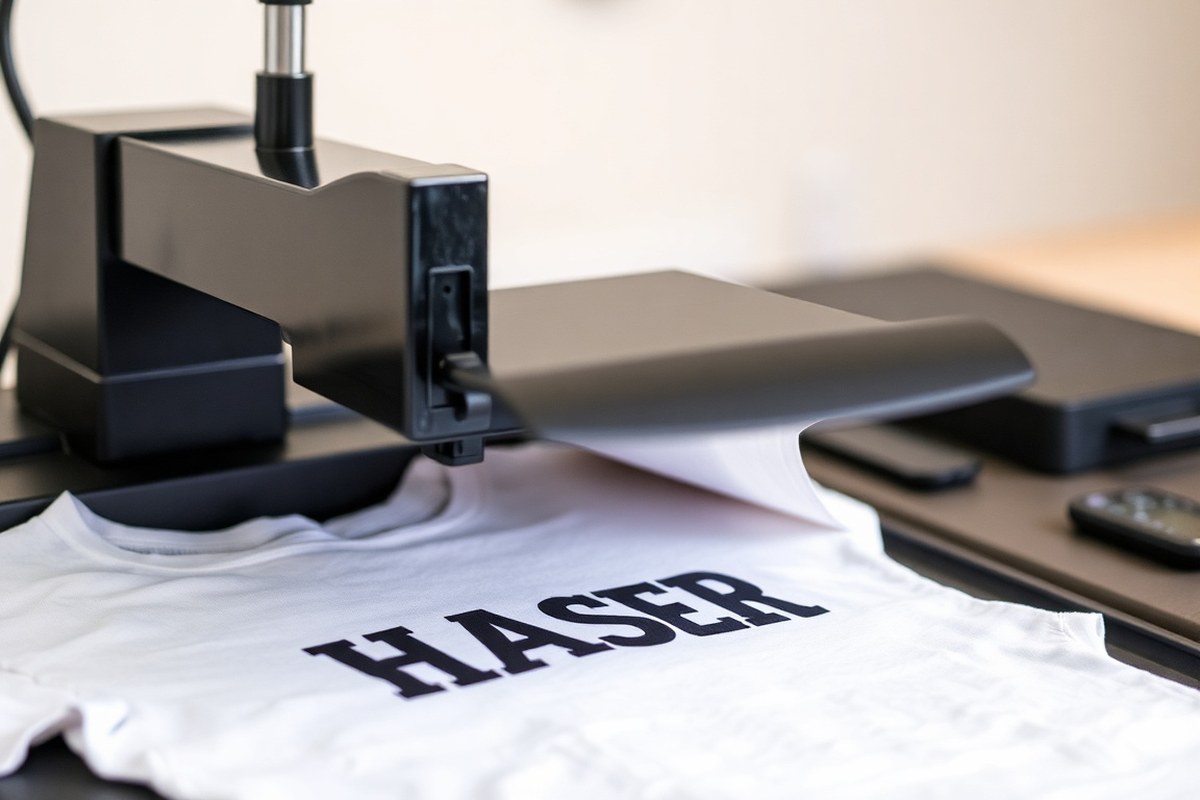
Applying transfer paper to fabric requires careful preparation and precise steps to ensure a clean, durable design. First, print your design using an inkjet or laser printer on the correct side of the transfer paper. Positioning the transfer paper accurately on your fabric and applying the right amount of heat, pressure, and time is critical for full adhesion. Peeling the paper at the right moment after pressing and performing proper finishing steps contribute to a long-lasting, vibrant image. Follow these steps to achieve the best results when using transfer paper:
- Print your design onto the transfer paper using an inkjet or laser printer, depending on the paper type. Make sure you select the correct print side, usually the white or glossy side, and print in mirror image if the paper or instructions specify.
- Position and align the paper with the printed side against the fabric. Place the paper carefully on the fabric, ensuring that it is smooth and flat. Use a ruler or heat-resistant tape to secure the edges, which prevents shifting during pressing.
- Set your heat press or iron to the required temperature, pressure, and timing based on your fabric and transfer paper instructions. Typical temperatures range from 325°F to 375°F and pressing times from 15 to 30 seconds, but check your specific product’s guidelines to avoid issues like cracking or incomplete transfers.
- Apply heat and pressure evenly across the entire design. Use firm, consistent pressure if using an iron and follow the recommended temperature and duration for a heat press. Avoid moving the iron back and forth as it can cause ghosting or blurring.
- Peel the transfer paper carefully after pressing. Depending on the product, this step may require a hot peel (remove the backing immediately) or a cold peel (wait for the paper to cool). Follow the transfer paper instructions exactly to avoid peeling off parts of the design.
- Perform a curing press if recommended by your transfer paper manufacturer. This usually involves pressing the fabric again without the transfer paper for a few seconds to set the design more firmly into the fabric fibers.
- Allow the fabric to cool completely before handling or washing. Cooling helps the design fully adhere and prevents smudging or distortion.
Properly following these steps reduces common transfer problems like ghosting, peeling, and faded colors. Using the correct heat settings, pressure, and timing for your specific fabric and transfer paper is key. For example, too little heat or pressure can cause peeling, while excessive heat may crack the design after washing. Cleaning up involves gently folding away the transfer paper after peeling and ensuring your printed design remains intact. Careful handling after pressing helps your custom apparel or craft project maintain its vibrancy and durability.
Choosing the Right Transfer Paper for Your Project
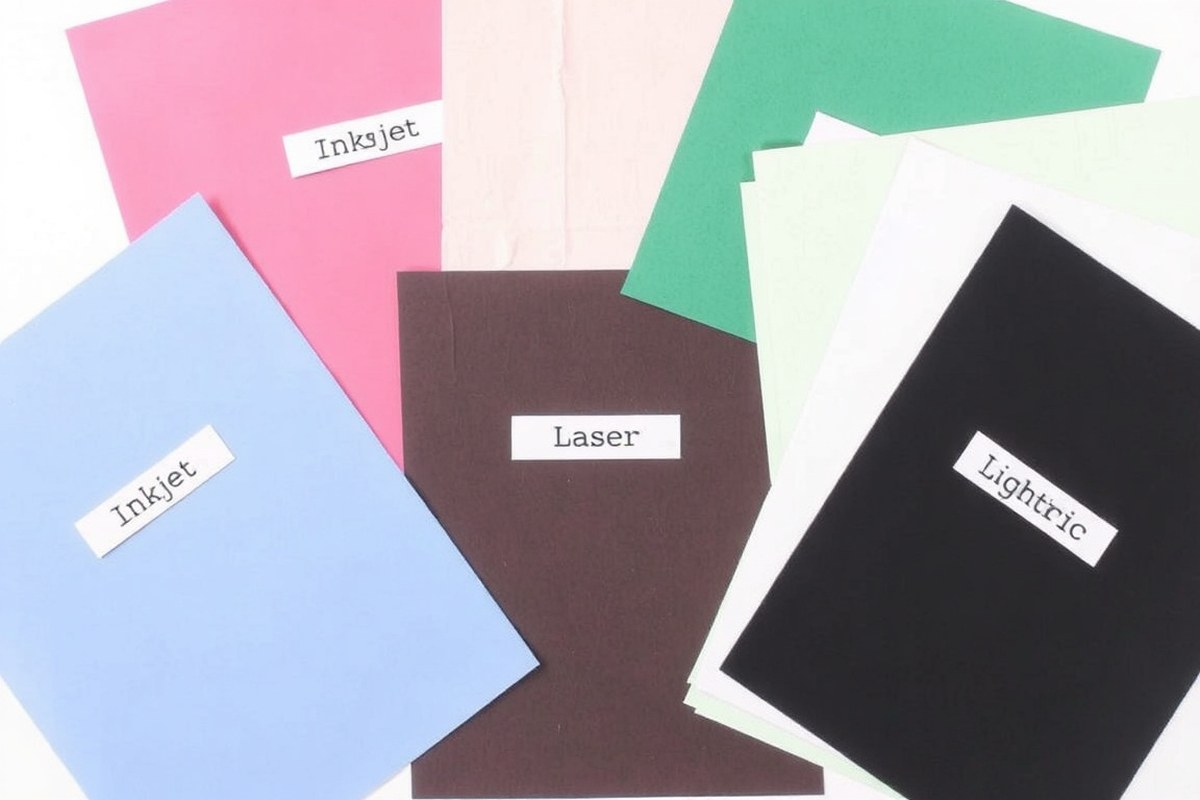
Choosing the right transfer paper depends on the type of printer you have and the material you want to customize. Transfer papers vary mainly by compatibility with inkjet or laser printers, and by whether they are made for light or dark fabrics. You’ll also find papers specifically designed for materials like polyester, wood, and canvas.
Transfer Paper Types by Printer Compatibility
Transfer paper designed for inkjet printers uses a coating that absorbs ink and releases it when heat is applied. Laser transfer paper requires a laser printer and uses toner that bonds with the paper’s surface under heat. Standard inkjet transfer paper will not work on laser printers, and vice versa.
Light fabric transfer papers are available for both inkjet and laser printers. These produce transfers that appear vibrant on white or light-colored fabrics. Dark fabric transfer papers include a special white backing, which helps designs stand out on darker fabrics by blocking fabric color from showing through. Using the wrong transfer paper for your printer can result in poor image quality or transfer failure.
Surface-Specific Transfer Papers Explained
Beyond fabrics, some transfer papers are made for unique surfaces. Sublimation transfer paper is designed for polyester fabrics and specially coated items like mugs and phone cases. The dye in sublimation paper turns into gas under heat and bonds with polyester fibers, creating durable and vibrant designs.
Direct-To-Film (DTF) transfer paper works on a variety of fabrics, including cotton and blends, offering flexibility. There are also paper varieties suited for wood, canvas, and ceramics, though results often vary based on surface preparation.
Choosing the right paper for your project involves matching the printer type, fabric color, and surface material. Using light transfer paper on dark fabrics will result in weak, washed-out images, and using inkjet paper with a laser printer can cause toner smudging or no transfer at all.
Pros and Cons of Popular Transfer Papers
| Transfer Paper Type | Best Printer Type | Suitable Surfaces | Heat Setting (°F) | Peel Type | Typical Time (sec) |
|---|---|---|---|---|---|
| Inkjet Light Fabric | Inkjet | Light-colored cotton, blends | 375 | Warm or Cold* | 15-20 |
| Laser Light Fabric | Laser | Light-colored cotton, blends | 375 | Warm or Cold* | 15-20 |
| Inkjet or Laser Dark Fabric | Inkjet or Laser | Dark-colored cotton, blends | 350 | Cold | 20-25 |
| Sublimation | Inkjet with Sublimation Ink | Polyester, polyester blends, coated mugs | 270-300 | Cold | 10-15 |
| DTF (Direct-To-Film) | Inkjet or Laser | Cotton, blends, various fabrics | Varies | Warm or Cold | Varies |
| Specialty Papers (Wood, Canvas) | Inkjet or Laser | Wood, canvas, ceramics (coated) | 375 (canvas) | Warm | 25-30 (canvas) |
Light transfer papers are popular for their bright colors but require peeling when warm or cold depending on brand, typically after 2-3 minutes cooling. Dark fabric papers hold up well on colored backgrounds but often require higher heat and pressure. Sublimation papers provide durable, high-quality finishes on polyester but cannot be used on cotton. DTF offers versatility on different fabrics but may require special powders and curing steps.
Tip: Always use the transfer paper recommended for your printer type to avoid poor transfers or damage, inkjet paper on a laser printer can ruin both the paper and your printer.
Preparing Surfaces and Designs for Transfer
To get a successful transfer, you must prepare both the fabric or craft surface and the design file carefully. Clean, dry surfaces free of wrinkles and lint help the ink or film adhere evenly. Also, mirror your design if your transfer paper type requires it, and let inkjet prints dry fully before applying them. Using alignment aids like tape can improve accuracy and prevent shifting.
Cleaning and Preparing Fabric or Surfaces
Start by washing your fabric according to the manufacturer’s instructions. This removes sizing or chemicals that block ink absorption and ensures a smooth surface. After washing, dry the fabric completely since any moisture can cause the transfer to bubble or not stick well. Iron the fabric to remove wrinkles and create a flat surface, using the appropriate heat setting for the fabric type.
For other craft surfaces such as wood or paper, clean off dust and debris using a dry cloth. Smooth or lightly sand rough wood to prevent texture from affecting the transfer. Avoid using wet cleaners unless they fully dry before the transfer process.
Design Setup: Mirroring and Printing Tips
Most transfer papers designed for light-colored fabrics require you to mirror your design before printing. This flips the image horizontally so it appears reversed on the paper but correct when transferred onto the fabric. Dark transfer paper generally does not need mirroring; print your design as it appears on screen.
Always print on the film side of the transfer paper to ensure the ink lies correctly for transfer. For inkjet prints, allow your design to dry completely for at least 10 to 15 minutes before applying heat; wet ink can smear or not adhere properly.
- Mirror design horizontally before printing for light transfer papers
- Print on the film side of the paper
- Let inkjet prints dry 10-15 minutes after printing
- Cut out your design with a small border for neat edges
- Check transfer paper instructions for any specific printing details
Cutting out your design carefully helps avoid transferring unwanted background areas, especially for complex or multi-colored images.
Using Tape and Tools for Precise Alignment
To keep your design from shifting during transfer, use a low-residue tape like masking tape or drafting dots to hold the transfer paper in place. Position the paper on the fabric, making sure the dark or adhesive side faces the fabric. Tape the edges onto a flat surface before applying heat to avoid any movement.
When working on larger or more detailed projects, using alignment tools such as rulers or clear grids can help place designs accurately. Some crafters mark fabric lightly with tailor’s chalk to line up transfers on seams or garment edges. Stability and precision at this stage reduce mistakes and improve final results.
Heat, Pressure, and Timing: Settings by Fabric Type
Getting the right temperature, pressure, and timing when using transfer paper improves the durability and clarity of your design. Cotton and polyester respond differently to heat because of their fibers. Cotton can handle higher temperatures, around 375°F (190°C), which helps the transfer bond firmly. Polyester, being a synthetic material, needs gentler heat, typically closer to 270°F to avoid melting or distortion. Pressure should be firm enough for good contact but not so hard that it damages the fabric or transfer paper.
Timing depends on whether you use a heat press or household iron, and also on fabric color. Light-colored fabrics usually require a warm peel, meaning you peel the backing while it’s still warm to avoid cracking. Dark fabrics often use a cold peel, letting the transfer cool fully before peeling to stop smudging or ghosting. These variations protect your design and keep colors vibrant. Dark transfer papers tend to need longer pressing due to thicker layers.
The table below shows recommended settings for common fabrics and transfer types. Adjust based on your specific paper’s instructions for best results. Do a test run on a scrap fabric piece to avoid ruining your project. Use the highest heat setting on your iron but turn off steam to prevent smearing. Pressure in a heat press usually means firm, while for household irons, pressing hard with your body weight is necessary. Check transfer paper brand guidelines like Neenah or Forever for slight variations.
| Fabric Type | Temperature (Heat Press) | Pressure | Time | Peel Method |
|---|---|---|---|---|
| Cotton, Light Colors | 375°F (190°C) | Firm | 20, 30 seconds | Warm peel |
| Polyester, Light Colors | 270°F, 300°F (132°C, 149°C) | Firm | 25, 30 seconds | Warm peel |
| Cotton, Dark Colors | 375°F (190°C) | Firm | 30 seconds | Cold peel |
| Polyester, Dark Colors | 270°F, 300°F (132°C, 149°C) | Firm | 30 seconds | Cold peel |
| Household Iron (any fabric) | Highest Heat, No Steam | Press hard with body weight | 30, 60 seconds (multiple passes) | Follow transfer paper directions |
This table gives a solid baseline but keep in mind your heat press model and transfer paper brand might require tweaks. Too much heat or time can cause cracking, while too little may make the design fade or peel off. Firm pressure ensures the transfer inks embed into the fibers properly, and skipping steam is important because moisture can blur the image. Using a heat press ensures consistent heat and pressure, while household irons need slower, careful application with extra passes.
Common Transfer Problems and How to Fix Them
Peeling or cracking after washing usually happens when the transfer paper wasn’t pressed long enough or at the right temperature. For example, pressing with too low heat or pressure leads to weak adhesion, causing the design to lift or crack over time. Proper pressing seals the ink or vinyl into the fabric, so aim for consistent heat and firm pressure according to the paper type.
Incomplete or faded transfers often result from uneven heat distribution or poor surface compatibility. Some transfer papers require specific fabrics, so using the wrong one can cause poor adhesion and faint designs. Check compatibility beforehand and make sure the surface is clean, flat, and prepared properly.
Ghosting or shifting happens when the transfer paper moves during pressing. Secure the transfer firmly before applying heat. You can use a bit of light adhesive spray or strong tape on the edges to keep the paper in place. Pressing firmly and waiting slightly before peeling the backing helps ensure the design stays put.
Transfer paper sticking to itself or tearing often occurs if peeled too early or when the paper is either too hot or too cold. Some types peel best warm, others cool, so follow the manufacturer’s advice for timing. If tears happen, avoid pulling forcefully and try reheating to soften the adhesive.
For re-pressing a failed transfer, place parchment paper over the design and apply heat again for 5, 10 seconds with firm pressure. This final step can help smooth out edges or re-adhere areas that lifted. Avoid overpressing too long, or you risk discoloring or burning the fabric.
| Common Issue | Typical Cause | How to Fix | Approximate Time/Settings |
|---|---|---|---|
| Design Peeling or Cracking | Insufficient heat or pressure | Press longer with firm pressure; check heat press settings | 3, 5 minutes at recommended fabric temperature |
| Incomplete or Faded Transfer | Uneven heat or incompatible surface | Use compatible fabric; ensure flat, clean surface; adjust heat | Follow paper instructions for fabric and heat |
| Ghosting or Shifting | Transfer paper moves during pressing | Secure with tape; press firmly; peel slowly | Firm pressure; peel backing slowly and carefully |
| Transfer Paper Sticks or Tears | Peeling too early or at wrong temperature | Peel warm or cool as recommended; reheat gently if torn | Timing depends on paper, typically immediate or after cooling |
| Salvaging a Failed Transfer | Partial adhesion or lifted edges | Cover with parchment paper; repress 5, 10 seconds firm | Press again for 5, 10 seconds with parchment cover |
Always check the transfer paper’s recommended peeling temperature to avoid tearing or sticking; peeling too soon or too late can ruin your design.
Using parchment paper over your design during pressing protects the fabric and the transfer from direct heat, which can cause burning or uneven transfer. After peeling off the backing, pressing once more for a few seconds seals the design for better durability. Avoid smudging by not moving the paper during heat application, and always adjust your pressing time and temperature if you notice fading or incomplete areas.
Can You Use an Iron Instead of a Heat Press?
You can use a regular household iron as a substitute for a heat press when working with transfer paper. This is common for beginners and hobbyists who don’t own a heat press machine. An iron can provide the heat needed to transfer ink and designs onto fabric, but it has limitations compared to a heat press.
Irons generally do not apply as consistent or even pressure as a heat press. Proper pressure is key to bonding the transfer well with the fabric, so uneven pressure from an iron may cause parts of the design to lift or not adhere fully. The maximum temperature on most household irons tops out around 400°F (204°C), which is enough for many transfer paper types but may not reach the high, constant heat of some heat presses. Always check the transfer paper manufacturer’s recommended temperature and timing before starting. Use the following settings and techniques when using an iron for transfer paper:
- Set your iron to the cotton or linen setting, usually about 400°F, and turn off steam to avoid moisture interfering with the transfer.
- Place the fabric on a hard, heat-resistant surface like a wooden table or ironing board with a hard layer underneath to ensure even pressure.
- Cover the transfer paper with a thin cloth or parchment paper to protect the design and iron surface.
- Press firmly and evenly, applying strong constant pressure but avoid sliding the iron around, which can blur the design.
- Hold the iron in place for 20 to 30 seconds over each section, pressing repeatedly until you’ve covered the entire design, which might take 2 to 3 minutes total depending on size.
- Allow the transfer to cool before peeling any protective backing to avoid smudging or partial lifting.
Not all transfer papers respond the same to irons. Inkjet-based heat transfer papers for light- or dark-colored fabrics often work well with irons. Direct-to-film (DTF) transfers and some specialty vinyl transfers usually require a heat press for consistent temperature and pressure and may not bond well with iron use. Verify that the transfer paper packaging or instructions specify iron compatibility.
Risks when using an iron include uneven heating causing blotchy or incomplete transfers and burning the fabric or transfer paper if the iron is left too long in one spot or set to too high a temperature. A heat press has a digital timer and pressure gauge that control these factors better. You should avoid rushing the process or moving the iron too quickly to compensate for less pressure.
Iron use can cost nothing beyond your existing household appliance, making it a practical option for small personal projects or testing designs. If you do many transfers or aim for professional results, investing in a heat press will improve consistency, durability, and ease of use. However, your iron is sufficient if you take care to apply proper heat, pressure, and timing as outlined.
How to Care for and Maintain Transfer Paper Garments
Wait at least 24 hours before washing a garment with a freshly applied transfer design. This gives the adhesive time to fully cure and prevents early peeling or cracking. After that, wash your items inside out to shield the design from direct friction with other fabrics or the washing machine drum, which helps maintain the image quality.
Choose cold water and a gentle cycle when washing transfer paper garments. High temperatures, either in water or the dryer, can weaken the bond between the transfer and fabric, leading to design fading or damage within as few as 3 to 5 washes. Avoid bleach and fabric softeners since they can degrade the transfer layer.
Air drying is preferable to using a heat dryer. Excessive heat from dryers can cause peeling or cracking over time. If you use a dryer, set it to low heat. Designs made with transfer paper usually last between 10 to 20 washes before noticeable fade or wear occurs, but careful washing can extend that lifespan close to 30 washes.
- Wait 24 hours before washing newly transferred garments
- Turn garments inside out to protect the design during washing
- Use cold water and a gentle washing cycle
- Avoid bleach, fabric softeners, and harsh detergents
- Air dry or tumble dry on low heat
- Follow any manufacturer instructions for peel time and cooling
- Store garments away from direct sunlight to prevent fading
Using detergents formulated for delicate or colored fabrics can reduce chemical stress on transfers, preserving design vibrancy longer. Always try to follow the specific washing and peeling instructions provided by your transfer paper manufacturer since improper peeling or washing can severely reduce design quality. Regular care and proper washing habits can allow your custom transfers to look good for months or even years in some cases, despite transfer paper’s shorter lifespan compared to other methods like heat transfer vinyl.
Using Transfer Paper Beyond Fabric: Other Surfaces Explained
Transfer paper works on more than just fabric. With adjusted techniques and the right type of paper, you can apply designs to wood, canvas, ceramics, and plastic. Each surface requires different preparation, transfer methods, and finishing steps to ensure the design adheres well and lasts.
Wood and Hard Surfaces
Wood is a common material for craft projects like signs, ornaments, and decorative art. Transfer paper helps trace or apply detailed images onto wood surfaces, but the process needs modification from fabric transfers. Using carbon or graphite transfer paper is ideal for tracing outlines directly onto wood before painting or finishing. For printed design transfers, laser-specific hard-surface transfer paper works better than inkjet paper.
Preparation is key for wood projects. The wood surface should be clean, sanded smooth, and free of dust or oils. Applying a light coat of clear acrylic sealer before transferring helps the design stick while preventing wood grain from bleeding through the image. After the transfer, sealing the design with a clear varnish or polyurethane protects it and adds durability.
- Sand wood surface smooth for even transfer
- Use carbon or graphite paper for tracing
- Choose laser-specific transfer paper over inkjet on wood
- Apply a thin coat of clear acrylic sealer before transfer
- Seal finished design with varnish or polyurethane
- Keep transferred design away from moisture
- Use firm but gentle pressure to avoid wood dents
Avoid heavy pressure during transfer on wood to prevent denting or uneven imprinting.
Removing transfer markings from wood after applying art or letters is difficult and might require light sanding, but this can alter the wood’s finish.
Canvas, Tote Bags, and Accessories
Canvas and accessories like tote bags offer excellent surfaces for transfer paper, especially with printed images. Most transfers on these materials use heat-activated transfer paper designed for fabrics, but canvas often needs extra heat time or higher temperature due to its thickness. Tote bags made from cotton or cotton blends handle heat transfers similarly to t-shirts.
Preparing canvas involves pre-washing if possible to remove sizing and ensure the design adheres fully. Use a heat press set around 350°F (175°C) for 15 to 20 seconds, applying firm pressure. After pressing, allow the transfer to cool before handling to avoid smudging. For tote bags and similar accessories, verify the fabric content and adjust heat settings accordingly to prevent scorching. Sealing transfers on canvas isn’t typically required, but if the bag will see heavy use or washing, consider a clear fabric medium or protective spray.
Ceramics and Plastic Projects
Ceramics and plastic require special transfer papers and finishes because their non-porous, smooth surfaces don’t absorb ink or toner like fabric. Sublimation transfer paper only bonds with polymers or coated ceramics, so uncoated ceramics need a polymer coating first. Laser toner-based transfer papers designed for hard surfaces or waterslide decal paper work best on plastics and uncoated ceramics.
Prepare ceramics and plastics by cleaning the surface with alcohol to remove oils and dirt. After transferring the design, curing might include baking in an oven or air drying depending on the product instructions. Sealing with a clear acrylic spray or epoxy resin ensures durability and protects the design from scratching or peeling.
- Clean surface thoroughly with isopropyl alcohol
- Use polymer-coated ceramics for sublimation transfers
- Choose laser toner transfer or waterslide decal paper for plastics
- Cure transfers by baking or air drying per paper instructions
- Seal with clear acrylic spray or epoxy resin
- Avoid exposure to sharp or abrasive contact
- Test compatibility of plastic type with transfer method
Not all plastics tolerate heat transfer processes well; test a small piece first to prevent melting or warping.
Step-by-Step Action Plan for Using Transfer Paper
Follow these steps to confidently transfer your design onto fabric or other surfaces with good results.
- Before you start: Choose the right transfer paper for your project surface (fabric, wood, ceramic, etc.) and design. This ensures compatibility and proper adhesion.
- Preparation phase: Clean and prepare your surface, making sure it’s smooth and dry. This helps the transfer stick evenly without bubbles or peeling.
- Printing step: Print your design onto the transfer paper using the recommended printer type and settings. Confirm the ink looks sharp and fully covers the intended areas.
- Cutting and trimming: Trim excess transfer paper around your design to reduce waste and avoid unwanted transfer marks.
- Heat application: Apply heat using an iron or heat press, following the temperature, pressure, and time guidelines for your fabric or surface. Check that the design has fully adhered without gaps.
- Cooling period: Let the transfer cool as instructed before peeling off the backing paper. Proper cooling prevents smudging or incomplete transfers.
- Post-transfer check: Inspect the design for any peeling or defects and do a touch-up if necessary by applying additional heat briefly.
- Aftercare setup: Follow specific washing or cleaning instructions for your garment or item to maintain design longevity.
Frequently Asked Questions
Can You Reuse Transfer Paper for Multiple Prints?
No, transfer paper is designed for one-time use only to ensure image clarity and proper adhesion. Using it again can result in poor transfer quality or incomplete images.
Does Transfer Paper Work with Laser Printers?
Most transfer papers are made for inkjet printers and may not work well with laser printers. Check your transfer paper packaging for printer compatibility before starting.
What Fabric Colors Are Best for Transfer Paper Designs?
Light-colored fabrics usually give the best results with transfer paper, as colors appear more vibrant and clear. Dark fabrics often need special transfer paper meant for dark surfaces.
Can You Add Multiple Layers of Transfer Paper on One Garment?
Applying multiple layers can cause the design to become bulky and peel off over time. It’s better to create a single, well-planned design for lasting results.
Is Cutting Around the Design Necessary Before Transfer?
Yes, trimming transfer paper close to the design helps reduce leftover film edges and produces a cleaner look. It also prevents peeling around the design after washing.
How Long Should You Wait Before Washing a Fabric with a Fresh Transfer?
Wait at least 24 hours before washing to allow the transfer to fully set. Washing too soon can weaken the bond and cause the design to crack or peel.
The Bottom Line
Using transfer paper effectively lets you create custom designs on a variety of surfaces with confidence. Start by selecting the right paper and practicing heat application on a test piece. Once you’ve mastered the technique, your projects will look professional and last longer. Try your first design on scrap fabric to see your skills in action today.