How to Make a Bathroom Sign: Complete DIY Guide with Design & Legal Tips
How to make a bathroom sign starts with choosing the right material and design for clear, durable use. You’ll need to follow legal mounting rules, like placing the sign 48 inches above the floor on the latch side of the door. Begin by selecting a material that suits your bathroom’s humidity and decor style for the best long-term results.
Key Takeaways
- Use moisture-resistant materials like acrylic or sealed wood to prevent damage in bathroom environments.
- Design signs with clear, contrasting text for easy readability, using fonts simple enough for quick recognition.
- Mount bathroom signs roughly 48 inches from the floor on the door’s latch side to meet ADA standards.
- Consider adding playful or personalized text to give your bathroom sign a unique, friendly touch.
- Apply waterproof paint or vinyl lettering to protect your sign from wear caused by humidity.
- Use transfer paper to accurately place vinyl letters on your sign without bubbles or misalignment.
How to Make a Bathroom Sign at Home: Essential Steps
Making a bathroom sign at home requires just a few simple materials and clear steps to ensure it turns out durable, readable, and visually appealing. Start with a sturdy base like a small wooden board or a canvas, which can be found at craft stores for around $5 to $15. Choose weather-resistant paint or permanent markers to ensure your text or graphics stay sharp and don’t fade with moisture. Preparing the base properly by sanding and priming helps the finish last longer. You can achieve the best results with a painted or printed design by applying patience and care throughout the process.
- Gather Your Materials: Collect a wooden board or canvas (approximately 8×10 inches), sandpaper (120-220 grit), primer or white acrylic paint, waterproof paint or permanent markers, painter’s tape, stencils or printed templates for lettering, and a clear sealant spray. These basic supplies keep costs low and work well for indoor bathroom conditions.
- Prepare the Base: Lightly sand the wooden board or canvas with fine-grit sandpaper to smooth the surface and remove splinters or bumps. Wipe off dust with a damp cloth. Then apply one or two coats of primer or white acrylic paint to create a clean, even background. Let it dry thoroughly, about 1 to 2 hours at room temperature, to ensure paint adheres well.
- Plan Your Design: Use painter’s tape to mark margins if you want borders. Painting freehand can be tricky; instead, try printing your sign’s text or graphics in your chosen font and size to match your base. Cut out letters or use stencils as guides for a crisp look. Position them lightly with tape to check spacing before applying permanent ink or paint.
- Apply the Text or Graphics: Trace or paint your letters using a fine brush or permanent marker. For a printed method, transfer the design onto tracing paper and then onto the sign by rubbing the back with a pencil to leave a light outline. Fill in carefully to avoid smudges or uneven lines. Multiple thin coats of paint typically look cleaner than one thick layer; allow paint to dry between coats, usually 15-30 minutes.
- Let It Dry Completely: After finishing the text, allow your sign to dry in a dust-free area for 4 to 6 hours. Avoid touching the surface during this time to prevent smearing or fingerprints.
- Seal the Sign: Spray or brush on a clear waterproof sealant to protect your design from humidity and cleaning products. Two thin coats are better than one thick coat. Allow the sealant to cure according to product instructions, often 24 hours, before handling or hanging your sign in the bathroom.
Choosing the Right Material for Your Bathroom Sign
Choosing the right material for your bathroom sign depends on your bathroom environment, budget, and style preferences. Wood, metal, acrylic, and vinyl each have different strengths. For indoor bathrooms prone to moisture, materials that resist humidity without warping or rusting perform best. Cost and ease of crafting also impact your choice, especially when working on a DIY project. The table below compares popular materials by key factors like cost, durability, and style versatility:
| Material | Cost (Approx.) | Durability in Bathrooms | Ease of Use for DIY | Style Considerations |
|---|---|---|---|---|
| Wood | $5 – $20 (scrap or small board) | Moderate; can warp or stain if untreated | Easy; paint or use Cricut software with transfer paper | Rustic, classic, or quirky styles; adds warmth |
| Metal | $10 – $30 (small sheet or plate) | High if sealed; resists moisture but may rust if exposed | Moderate; requires tools to cut or engrave | Modern, industrial; adds depth with color scheme |
| Acrylic | $10 – $25 (small sheet) | High; moisture-resistant and easy to clean | Moderate; needs special cutting tools or can be ordered cut | Modern and sleek; works well with bright or nautical themes |
| Vinyl | $0 – $5 (transfer paper only) | Low alone; best applied to another surface | Very easy; uses Cricut or similar machines | Very versatile; perfect for adding text or decorative details |
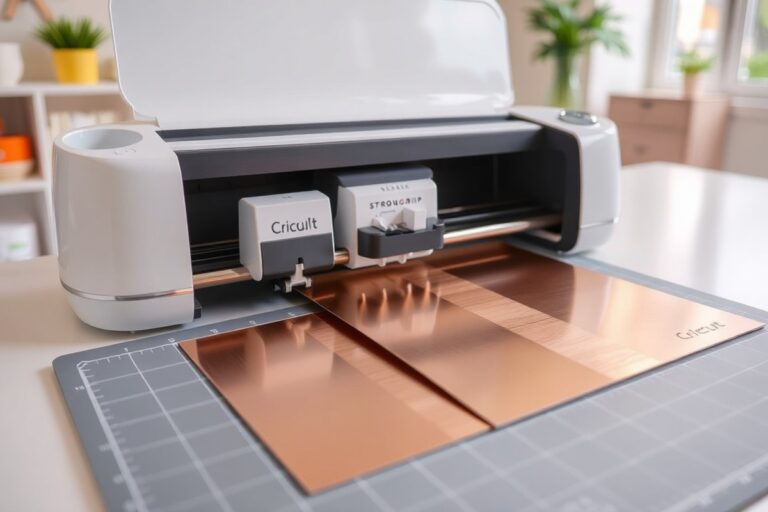
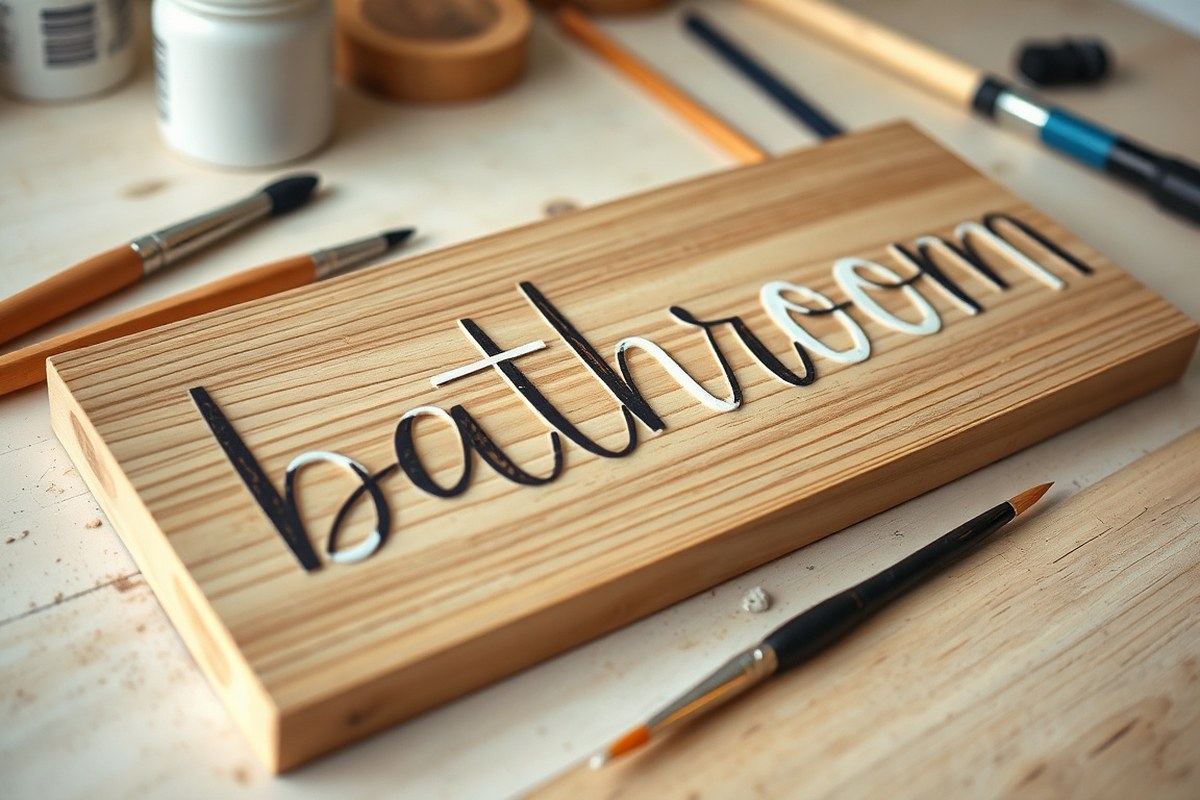
Wood is a popular choice if you want a warm, charming sign, especially with a rustic or nautical theme. Using scrap wood can keep costs low. Apply a waterproof sealant to protect it from bathroom moisture. You can personalize wood signs using Cricut software and transfer paper for vinyl lettering, which gives a clean finish without complex equipment.
Metal and acrylic both offer durability against humidity and provide a professional look. Metal signs need to be sealed to avoid rust, while acrylic is ready to handle moisture and easy to clean, making it ideal for bathrooms with tiled or patterned walls. Use color schemes that tie in with your existing décor for best results.
Vinyl is an excellent material for adding lettering or decorative elements to a base material. It’s budget-friendly since transfer paper costs very little. However, vinyl signs alone might not hold up well to moisture over time unless applied to a sturdy backing. Combine vinyl with wood or acrylic for a functional and attractive sign.
Always seal wooden signs with a waterproof finish to prevent warping or staining in moist bathroom environments.
Designing Bathroom Signs for Clarity and Style
Designing bathroom signs with clear fonts, suitable icons, proper size, and strong color contrast helps visitors quickly identify the restroom without confusion. A thoughtful design balances readability with style, making your sign both functional and visually pleasing. Use a simple design worksheet to plan font choices, iconography, size, and colors before creating your sign.
Selecting Readable Fonts and Sizes
Choose fonts that are simple and easy to read from a distance, avoiding overly decorative or script styles that can confuse readers. Sans-serif fonts like Helvetica, Arial, or Verdana offer clear letter shapes best suited for bathroom signs. Starting with your preferred font, print sample texts at different sizes to test visibility in your bathroom space. Sign text should generally be at least 5/8 inch tall for ADA compliance, but for smaller bathrooms or decorative signs, 1 inch or larger ensures good readability.
Keep letter spacing moderate and avoid all uppercase letters for easier reading, except for initials or very short words. Try a design worksheet where you list your font name, font size, and sample wording to compare options side by side. This process helps make sure your message is legible and aligns with your style preference before final production.
Choosing Effective Bathroom Icons
Adding icons or symbols provides quick recognition and universal understanding, especially in shared or public bathrooms. Common symbols include male and female silhouettes, wheelchair accessibility icons, or simple images like a toilet or handwashing graphic. Choose icons that are universally recognizable to avoid confusion, avoiding overly stylized or abstract designs. Icons should be proportionate to the text, generally about the same height as the main title or slightly larger for emphasis.
Decide on icon style early in your design worksheet, noting the icon type and size in proportion to the text. You can also include Braille or tactile symbols for accessibility if relevant. Remember that icons serve as visual cues; pairing them with clear text makes your bathroom sign more inclusive for guests from various backgrounds and abilities.
Using Contrast to Maximize Visibility
Strong color contrast between the background and lettering ensures your sign stands out and reads clearly in different lighting conditions. Use light-colored text on dark backgrounds or dark text on light backgrounds. High contrast improves legibility and meets ADA recommendations for visibility. Avoid similar shades or busy patterns behind the letters that might reduce contrast and blur your message.
Plan your color scheme on your worksheet by listing both background and text colors side by side. Check your choices by printing a draft or viewing on screen in different light settings to confirm clarity. For bathroom signs, black text on a white or beige background is a safe, classic choice. Using bold colors like navy, forest green, or deep red for backgrounds also works well with neutral text colors.
Matching Your Sign to Bathroom Decor
While clarity is key, your sign can complement the bathroom’s overall style to improve your space’s look. Match your font style, icon design, and color palette to existing decor elements like wall color, tiles, or fixtures. For example, a French country style bathroom benefits from elegant serif fonts and muted pastels, while a modern bathroom suits clean sans-serif fonts and monochrome colors.
Use a virtual room mockup tool or sketch your bathroom layout with your design worksheet details to see how your sign fits with other decor items. Signs also layer well when framed or paired with decorative objects like plants or candles to create a cohesive look. Balancing function and aesthetics lets your bathroom signs be both informative and an inviting part of your decor.
Understanding ADA Compliance for Bathroom Signs
Bathroom signs in public or commercial spaces must follow specific ADA rules to ensure they are accessible to everyone, including those with disabilities. These regulations cover where and how the signs are placed on the door, their size, font style, and visibility features. For homeowners, ADA rules generally don’t apply, but understanding them can help make your bathroom signs more user-friendly and inclusive, especially if visitors with mobility or vision challenges use your space.
Mounting Height and Location Requirements
ADA guidelines require that bathroom signs be placed on the side of the door with the handle, rather than the hinges. This makes it easier for visitors to find the sign as they reach or move toward the door. The sign’s bottom edge should be about 48 inches from the floor, allowing it to be seen clearly by people sitting in wheelchairs and those standing. Signs installed above or below this height risk being hard to read for some users.
When installing the sign yourself, use a measuring tape to mark 48 inches on the latch side of the doorframe, then secure the sign firmly at that height. Avoid placing decorations or objects near the sign that could block or distract from it. Proper placement creates a clear, accessible path to the restroom with no physical or visual barriers.
Sign Size and Character Contrast
Bathroom signs must use a font size and style that are easy to read from a short distance. Letters should generally be at least 5/8 inch tall, with spacing that prevents crowding. High contrast between the text and background is also required. For example, black letters on a white or light-colored background, or white letters on a dark background, provide the best visibility and meet ADA guidelines. Avoid using complex fonts or decorative elements that reduce legibility.
A good DIY bathroom sign uses stencils or vinyl lettering to maintain neat, clear characters. Including Braille tactile characters below the text is also required in public settings to accommodate those who read by touch. Installing signs without contrast or with small fonts can make the signage ineffective and non-compliant, especially in commercial settings.
When ADA Compliance Is Necessary
ADA compliance is mandatory for all signs marking restrooms in public, commercial, or multi-family residential buildings, as required by law. This means businesses, offices, schools, and apartment complexes must follow these rules to remain accessible and avoid fines. Homeowners are generally exempt from ADA regulations, so your bathroom sign choices can be more flexible when decorating your private space.
That said, including ADA-like features in home bathroom signs can benefit guests with disabilities or elderly family members. Using clear lettering, proper mounting height, and tactile elements can make your home bathroom easier to find and use. When creating signs for public or commercial use, always check local building codes alongside the ADA to ensure full compliance and safety.
Creative Text and Styles to Personalize Your Bathroom Sign
Bathroom signs offer a quick way to express style while helping guests handle the space. Popular texts range from straightforward labels like “Restroom” or “Powder Room” to witty slogans such as “Wash Your Hands and Say Your Prayers” or “This Is a No-Singing Zone.” Script templates for a minimal yet elegant look include the classic serif font style: “Bath” or “Refresh” set in Times New Roman or Garamond. These formal fonts work well in traditional or vintage-themed bathrooms with polished wood or marble decor.
For a kid-friendly or humorous bathroom sign, use playful fonts like Comic Sans or Handwriting Dakota paired with catchy lines. Examples include “Little Splash Zone” or “Please Seat Yourself”. Incorporate bright colors or cartoon icons to improve the fun atmosphere. A bathroom word search sign can also add an interactive element while matching casual or eclectic interiors. This adds personality without overwhelming the overall space.
Different decor styles benefit from various text and design choices. Rustic or farmhouse bathrooms might use distressed wood signs with stenciled block letters or script. Modern bathrooms suit minimalist signs with clean lines, sans-serif fonts like Helvetica, and monochrome palettes. For coastal or nautical themes, blue and white color schemes with cursive scripts evoke a relaxed vibe.
- Choose humor or formality by selecting font styles that match your bathroom’s decor.
- Keep text concise for readability: 1, 3 words or short phrases work best.
- Use high-contrast colors for easy visibility, especially in smaller spaces.
- Try mixing a contemporary sign next to a classic framed version for visual interest.
- Consider adding icons like water drops or toilet paper for extra clarity and fun.
- Apply outdoor sealant or varnish for wood signs to protect from moisture damage.
- In kid bathrooms, laminating signs helps with durability and cleanability.
Combining text with fitting materials and finishes produces a cohesive and appealing sign. For example, painting a simple “Wash Up” on a light-colored wooden plaque with a script font and sealing it with polycrylic costs about $10, 15 in supplies. Expect to spend 30, 60 minutes per sign including drying times. Avoid cluttered fonts or too much text, as that reduces legibility and impact.
Check your font size and contrast by printing a test page before applying paint or vinyl to ensure your message stands out clearly from a typical viewing distance of about 3 feet.
Painting, Printing, and Finishing Techniques for Bathroom Signs
Painting, applying vinyl, and finishing are key ways to bring your bathroom sign’s design to life while ensuring it stands up to moisture and use. Each method has its strengths depending on your budget, skill level, and the look you want. Proper finishing protects your work and extends the sign’s lifespan in a humid bathroom environment.
Hand Painting Letters on Wood or Metal
Hand painting offers a classic look and full control over style. For best results, use acrylic paint because it dries quickly and resists moisture better than water-based paints. Start by sanding your wood or metal surface smooth, then apply a primer made for the material to help paint stick evenly. Sketch your letters lightly with pencil or use a stencil.
Paint thin layers with fine, angled brushes, allowing each coat to dry before adding details or a second coat. This method takes patience but creates a textured, handcrafted effect that vinyl or printing can’t quite match. Painting costs can stay low since a small tube of acrylic paint ranges from $3 to $7, enough to cover multiple signs. Common issues include uneven brush strokes or paint peeling if the surface isn’t prepped well or the room is very humid.
Using Vinyl Cutouts and Transfers
Vinyl offers a clean, modern look without the mess of paint. Printable vinyl sheets or cut vinyl decals can be applied directly to smooth wood, glass, or metal surfaces. After cutting your design on a vinyl cutter or printing it, place transfer tape over the vinyl, peel the backing off, and press the design onto your sign. It helps to use a scraper tool or a credit card to smooth the vinyl and remove bubbles.
Check adhesion about 40 seconds after application to ensure the vinyl sticks well, especially on wood. Printable vinyl is affordable, often around $10 for a pack of sheets, and lets you create detailed images and fonts with a computer. Iron-on transfers work best on fabric but can sometimes be used on wooden signs with a heat press or iron set to medium heat, though results vary and may not be as durable in bathrooms.
Applying Protective Coats for Longevity
Protecting your finished bathroom sign from moisture is critical because bathrooms are humid and prone to splashes. Choose a clear sealer like polyurethane for wood or a clear acrylic spray for metal and painted signs. These protective coats create a waterproof barrier and help prevent fading, peeling, and damage.
Apply multiple thin coats according to the product instructions, typically two to three coats with 1 to 2 hours drying between each. Use a brush or spray in a well-ventilated area and avoid thick layers which can cause bubbling. For vinyl signs, a clear spray sealer helps lock down edges and adds durability without yellowing. Some sealers cost about $8 to $15 per can and last for several signs. Avoid oil-based sealers in bathrooms due to longer drying times and stronger fumes.
Proper Installation and Mounting of Bathroom Signs
Secure and correct mounting of bathroom signs ensures durability, visibility, and compliance with ADA guidelines. Different surfaces require specific hardware for stability without damaging walls or doors. ADA standards usually put signs on the latch side of the door, 48 to 60 inches from the floor, so they are easy to read and reach for everyone. Installing signs in the right spot prevents accidents or wear and gets rid of the guesswork involved in placement.
Use screws and anchors for drywall to hold heavier signs safely. For tile, a drill with a masonry bit and anchors designed for ceramic or porcelain is best. Wooden doors take self-tapping screws or mounting strips with strong adhesive if you want to avoid drilling. Double-sided foam tape works well on smooth, clean surfaces like glass or metal, but it’s not recommended for heavy signs or textured walls since it might fail over time.
To avoid damage, clean the surface with rubbing alcohol and allow it to dry before mounting. Mark holes with a pencil, then drill slowly at the right drill speed for the material to prevent cracks or splits. Check that the sign is level before securing fasteners. If you’re mounting a framed sign, use wall hooks or brackets rated for the sign’s weight.
For signs placed above toilets or on shelves, choose wall-safe adhesives or picture hangers instead of nails or screws. This keeps tile and paint intact while still keeping the sign visible and easy to clean around. Clear paths for bathroom users and avoid mounting where water splash or cleaning chemicals can dull or warp the sign.
- Measure and mark placement: On the latch side of the door or between 48-60 inches from the floor on the wall, measure to find the center height.
- Choose the right hardware: Pick screws and anchors for drywall, masonry bits and anchors for tile, or adhesive strips for wood and smooth surfaces.
- Prepare the surface: Clean with rubbing alcohol and let dry to help adhesive or screws grip better.
- Drill pilot holes carefully: Use a drill bit suitable for the surface material; drill slowly to avoid surface damage.
- Attach mounting hardware: Insert anchors if needed, then fasten screws or apply adhesive strips according to package instructions.
- Hang or fix the sign: Secure the sign on the mounting hardware, check that it is level, and adjust if necessary.
- Avoid common mistakes: Don’t mount signs where water or heat will cause damage; avoid uneven or insecure mounting.
Good installation looks clean, stable, and aligned with door handles or at eye level. Signs should stay firmly in place through regular cleaning and bathroom humidity without peeling or loosening. Watch out for loose screws, cracked tiles, or adhesive that pulls paint off when removing the sign, which indicate poor installation or mismatched mounting methods.
Troubleshooting Common Mistakes in DIY Bathroom Signs
One common mistake in DIY bathroom signs is using fonts or colors that reduce readability. Overly decorative fonts or low-contrast colors can make the text hard to see, especially from a distance. Stick to clear, simple fonts like Arial or Helvetica and choose dark text on a light background or vice versa to maximize visibility. Paint colors also matter; avoid glossy finishes that reflect light and cause glare.
Another frequent error is uneven paint application or smudging, which affects the sign’s professionalism and durability. To fix this, apply multiple thin coats of paint instead of one thick layer. Use painter’s tape to create clean edges, and allow each coat to dry fully, generally 1-2 hours depending on the paint type and temperature (ideal room temperature is between 65°F and 75°F). A sealant or clear coat designed for your sign material can protect the paint from moisture common in bathrooms.
Installation problems often involve poor mounting choices or incorrect placement. Signs mounted with weak adhesives or without proper anchors risk falling off or tilting. Use wall anchors or screws appropriate for the surface type (e.g., drywall anchors for drywall). Position signs at eye level, roughly 60 to 66 inches from the floor, and away from direct water spray or steam to prevent damage.
Durability issues arise from using the wrong materials or neglecting finishing steps. For example, wood signs without waterproof sealing will warp or discolor over time in a bathroom setting. Use waterproof sealants and moisture-resistant materials like acrylic or metal designed for humid environments. Regularly check signs for fading or damage and refresh paint or sealant as needed every 2-3 years to maintain clarity and protection.
- Choose high-contrast text and background colors for readability
- Apply paint in thin, even coats with drying time between layers
- Use painter’s tape for sharp edges and clean lines
- Select mounting hardware suited to your wall’s material to secure the sign
- Install signs between 60 and 66 inches from the floor to meet typical line-of-sight range
- Seal signs with moisture-resistant coatings appropriate to the material
- Regularly inspect and maintain signs to address wear caused by humidity
Make sure your mounting surface is clean and dry before attaching the sign to improve adhesion and longevity.
Fixing a sign that lacks clarity or durability often involves repainting with better materials or redoing the mounting with stronger anchors. Assess the cause carefully to avoid repeating the same problem. Planning for these factors upfront reduces wasted time and costs, which can range from a few dollars for paint and tape to $10-$20 for mounting anchors, depending on the hardware type.
Step-by-Step Action Plan
Follow these steps to create and install a functional and stylish bathroom sign that meets both your aesthetic goals and legal requirements.
- Day 1: Choose your material based on durability and location (wood for warmth, metal for modern looks). Confirm it’s suitable for bathroom humidity.
- Day 2: Draft your design focusing on clear, high-contrast text with ADA-compliant fonts and sizes to ensure accessibility.
- Day 3: Select creative elements like lettering styles and icons that align with your bathroom’s decor and improve readability.
- Day 4: Execute painting or printing carefully, using weather-resistant paints or professional printing services to maintain longevity.
- Day 5: Apply a protective finish to resist moisture and wear. Check the surface for smoothness and full coverage.
- Day 6: Prepare the installation site by cleaning and marking mounting points at an accessible height according to ADA guidelines.
- Day 7: Mount your sign securely using appropriate anchors. Test stability by gently pressing; it should not wobble or shift.
- After 1 week: Inspect your sign for any wear or fading, adjusting maintenance plans as needed for long-term appearance and compliance.
Frequently Asked Questions
How to Make a Bathroom Sign?
Start with choosing your material and design, then paint or print your text before finishing with a protective coat. Ensure the sign fits your bathroom style.
What Are Some Affordable Materials for Bathroom Signs?
Wood scraps, hessian fabric, and printable paper are budget-friendly materials that allow creative designs without overspending.
Can I Use a Printable Template for My Bathroom Sign?
Yes, printable templates are a quick way to create signs, especially if you want a clean, professional look and easy DIY updates.
Where Is the Best Place to Hang a Bathroom Sign?
Above the toilet is a popular spot because it’s visible without obstructing bathroom fixtures or storage areas.
How Do I Add Personality to a Bathroom Sign?
Use creative fonts, colors, or themes like nautical psalm 93:4 or funny phrases to match your bathroom’s atmosphere.
Can I Make an Interactive Bathroom Sign?
Interactive signs, such as word searches or trivia panels, can engage guests and add a playful touch to your bathroom decor.
Before You Go
Creating a bathroom sign that combines style, clarity, and legal compliance is achievable with careful planning. Start by selecting materials and designs that suit your space and meet accessibility standards. Next, complete each step methodically to ensure your sign looks professional and lasts. Pick one phase to begin today, such as designing your sign or choosing materials, to get your project underway.