How to Distress a Wood Sign: 8 Proven Techniques for Authentic Charm
How to distress a wood sign means giving it an aged, weathered look by adding textures, marks, and finishes that mimic natural wear. You achieve this by using sanding, scraping, and sometimes chemical treatments to roughen the surface and fade paint. Start by preparing the wood properly, since clean, dry wood takes distressing techniques more evenly and authentically.
Key Takeaways
- Use coarse sandpaper (60-80 grit) to create deep scratches and worn spots on bare wood surfaces.
- Swing a hatchet at a 45-degree angle to make authentic, deep cuts mimicking years of wear.
- Let the wood sit in the sun for 6+ hours to naturally age and dry it before distressing.
- Choose strong hydrogen peroxide (above 3%) and freshly opened for chemical aging of wood.
- Dry brushing with minimal paint creates a faded, vintage look on painted wood signs.
- After distressing, lightly sand with 220-grit sandpaper to smooth splinters without removing details.
What Does It Mean to Distress a Wood Sign?
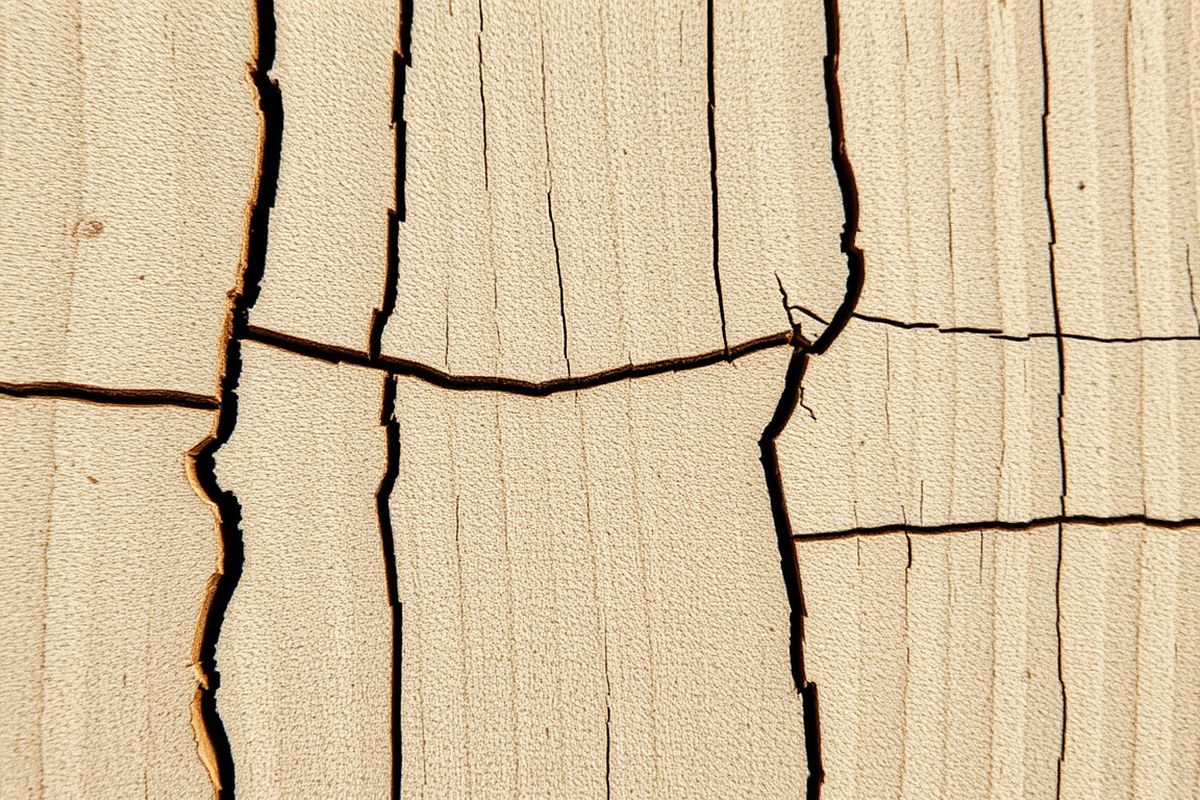
Distressing a wood sign means intentionally creating the appearance of age and wear on new or relatively fresh wood. This process involves using physical techniques like sanding, denting, and scraping, as well as layering and partially removing paint, or applying chemical treatments that darken or weather the wood. The goal is to mimic the natural effects of years of exposure to sunlight, moisture, and use, giving the sign a rustic, vintage, or barnyard charm that fits farmhouse and rustic décor styles.
Creating this aged look matters because it adds character and warmth to your wood signs, making them feel like treasured vintage pieces rather than fresh, unfamiliar boards. Distressed wood exhibits certain key characteristics, such as uneven surfaces with slight indentations or chips, areas where paint has worn away to reveal the wood grain beneath, and subtle color variations caused by weathering or oxidation. These traits give each piece a unique authenticity that factory-made signs lack.
The distressing process typically starts with choosing softer woods like pine, cedar, or fir because their grain and texture respond well to wear. You’ll want to roughen the surface using coarse sandpaper, 60 grit is a popular choice, to create random scratches and smooth away sharp edges. Sand selectively, focusing near corners, edges, and raised lettering to simulate natural wear patterns. Adding dents and small holes with a hammer or screwdriver also boosts the realism of age.
Painting your wood sign with a base color sets the stage for further distressing. Apply paint with a foam brush held parallel to the surface, letting the color become the dominant tone for your sign. After the paint dries, gently sand across the surface, especially on raised areas or details, to remove some paint layers and reveal wood or underlying colors beneath. This layering and sanding technique reproduces the look of old paint peeling or rubbing off over time.
For an added aged effect, some woodworkers use vinegar and steel wool solutions to chemically alter the wood’s color. This method speeds up the oxidation process, producing a dull gray or weathered patina similar to beach driftwood. Distressing doesn’t have to be uniform, as real wear is uneven and unpredictable. Combining physical wear with paint layering and chemical darkening achieves a complex, natural look without forcing a perfect pattern.
Distressing your sign properly takes time and patience. Avoid overdoing it, or your wood can look artificially ruined instead of charmingly worn. Checking your work periodically and stepping back to view the overall effect ensures the right balance between new and aged. Finished signs typically show a mix of bare wood, softened edges, light scratches, and thin paint patches that create an inviting, antique appearance fitting various home décor styles.
Choosing the Right Wood and Preparing Your Sign
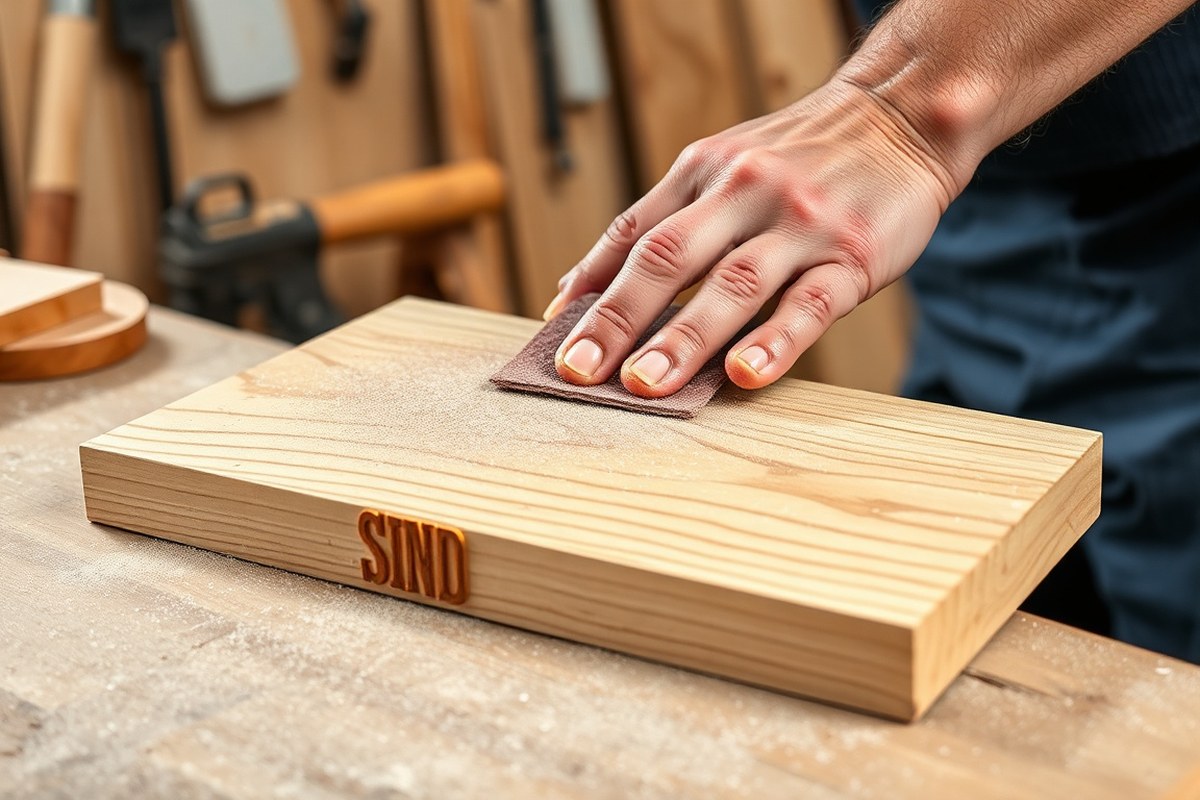
Selecting the right wood and preparing it properly are key steps to achieving a convincing distressed look on your wood sign. Softer woods and those with visible grain work best for distressing. Proper cleaning and sanding create the ideal surface to highlight your distressing techniques without damaging the wood.
Best Woods for Distressing
Softwoods like pine and fir are among the easiest to distress because their softer fibers respond well to sanding, denting, and other distressing methods. These woods display wear and dents naturally, which adds to the aged look. Hardwood choices like oak or maple can work too but require more effort due to their density and tight grain.
Look for wood with visible grain patterns or knots; these features gain character as you distress them. Inexpensive, knotty pine is a popular choice for wood signs because it takes paint and stain well and shows marks and scratches nicely. If you want a rustic, weathered look, softer woods that sand down easily will save time and effort.
Cleaning and Sanding Procedures
Before distressing, cleaning and sanding your wood sign is essential for a smooth base and to avoid uneven distressing. Dirt, oils, or residues can prevent paint or stain from adhering properly, causing blotchy or faded patches. Sanding removes old finishes and smooths rough edges while allowing you to create softer corners and worn spots. Follow this step-by-step process to clean and sand your wood sign properly:
- Wipe the wood with a damp cloth to remove dust and grime.
- Let it dry completely, especially if the wood was wet.
- Use medium-grit sandpaper (around 120 grit) on flat surfaces to smooth rough areas.
- Switch to a finer grit (220 grit) for edges and corners to soften them.
- Sand corners and edges more aggressively to round them, prepping for a worn look.
- Remove all sanding dust with a tack cloth or vacuum brush attachment.
- Inspect the wood for any splinters or sharp patches that might affect your distressing.
Over-sanding flat areas can remove too much surface and hide natural wood features, so focus sanding on edges and corners for a natural worn effect.
Final Prep Tips Before Distressing
Once cleaned and sanded, examine your sign for spots that might need light filling or additional sanding to avoid uneven distressing. Skip primer if the sign will have a heavily distressed or weathered look, especially with softwoods, since you want the paint layers to peel and reveal the wood underneath. Consider this checklist before beginning distressing:
- The wood surface is dry, clean, and free from oils.
- Edges and corners are softened to mimic natural wear.
- Sanding dust is completely removed to allow paint and stain to adhere properly.
- Decide whether to apply a base coat or start with raw wood depending on your distressing method.
With these steps complete, your wood sign will be ready to take on a variety of distressing techniques that bring out the beauty of aged wood.
Essential Tools and Materials for Distressing Wood
You’ll need specific tools and materials to distress your wood sign properly, depending on the method you choose. For texture, sanding or hitting tools work best, while paint choices and brushes matter for layering and aging looks. Chemical aging requires steel wool and vinegar for a genuine weathered effect.
Hand Tools to Create Texture
Distressing with hand tools means adding physical wear to your wood sign. Start with sandpaper of various grits, medium (around 120 grit) for general distressing and fine (220 grit) for smoothing edges after. You can also use blunt tools like a hammer, nail, or screwdriver to create dents and dings without splitting the wood.
Using sharper tools can damage the wood excessively or cause splinters, so begin with blunt ones to avoid mistakes. Steel wire brushes can rough up the surface and grain for an aged look. Sanding removes paint layers and softens edges, important if your sign has multiple paint coats.
- 120 and 220 grit sandpaper
- Blunt hammer or screwdriver
- Steel wire brush
- Scraper or putty knife for chipping paint
- Mallet (wood or rubber) for gentle dents
After distressing, brush off dust thoroughly before moving to painting or chemical aging.
Painting and Staining Supplies
Paint choice affects how well your sign endures wear and the final aged appearance. Enamel paint suits outdoor or heavily used signs because of its durability. Use two contrasting paint colors for layered distressing, start with a darker base coat and follow with a lighter top coat. After drying, sand selectively to reveal the base layer or bare wood underneath.
Foam brushes lay paint unevenly to mimic natural wear better than smooth bristle brushes. Paint colors can be layered unevenly or dabbed on randomly for authentic weathered effects. Stains penetrate wood for a deeper color and can complement distressing after sanding.
- Enamel paint for outdoor durability
- Two contrasting paint colors (light and dark)
- Foam brushes for textured application
- Wood stain for color depth
- Clear matte or satin sealant for protection
Let paint fully dry between coats and before distressing to avoid peeling or uneven wear.
Chemical Aging Materials
Chemical aging darkens wood and highlights grain texture, simulating years of weather exposure. The classic combination is fine steel wool (#0000 grade) soaked in white vinegar. The vinegar breaks down the steel wool, creating a solution that reacts with the tannins in the wood, turning it gray or black.
Soak the steel wool in vinegar for 24 to 48 hours, then strain the liquid before applying it with a brush or rag. Test on a scrap piece of wood first to check color changes and timing, as results vary based on wood type. This method is ideal for bare, untreated wood, not painted surfaces.
- #0000 grade steel wool
- White vinegar
- Glass jar for soaking
- Strainer to remove steel particles
- Protective gloves and eyewear
Apply the mixture evenly and allow wood to dry. Multiple coats can increase darkness. Always work in a well-ventilated area and follow safety guidelines because vinegar can irritate skin and eyes.
Basic Distressing Techniques for Wood Signs
You can distress a wood sign by adding dents, scratches, sanding certain areas, and applying paint with a dry brushing technique. These steps give your wood an authentic worn look that mimics age and weathering. Each method changes the texture and appearance of the wood in a unique way, helping you create a custom distressed piece.
Creating Dents and Scratches
Adding dents and scratch marks introduces imperfections similar to those found on aged wood, contributing to a natural, old look. Use hammer blows, chains, screws, or a wire brush to create these marks. The size and depth of dents can vary, from small nicks to larger hammered spots, which add character to the sign. Follow these steps to create dents and scratches effectively:
- Place the wood sign on a stable surface.
- Use a hammer or the back of a screwdriver to tap random spots on the wood and create dents.
- Drag a wire brush or steel chain across the wood surface to add scratch marks and texture.
- Add extra scratches in areas that would see natural wear, like edges and corners.
- Inspect the wood and add more marks if the surface feels too uniform.
After creating dents and scratches, sanding these areas smooths the wood edges for a more natural worn effect and helps the paint or stain penetrate uneven spots better.
Using Sandpaper Strategically
Sanding is essential for removing paint layers and smoothing rough edges without eliminating the wood’s rustic character. Start with rough grit sandpaper like 60-grit to work on an unpainted surface or heavier distressing. For painted signs, use medium grit sandpaper, around 120 to 150, to carefully wear down paint in spots without sanding through completely. Here’s how to sand your wood sign for a natural worn look:
- Choose the sandpaper grit based on your distressing goal (coarser for heavy distressing, finer for subtle wear).
- Sand along the wood grain to avoid unnatural scratch marks.
- Focus on edges, raised areas, and spots where natural wear would occur.
- Use fine grit sandpaper or a sanding sponge to lightly go over painted areas to create smooth worn patches.
- Remove dust with a dry cloth before continuing with paint or finish.
Using an orbital sander is not recommended because it can leave circular marks that don’t look authentic. Instead, sand by hand or use a sanding block for better control.
Dry Brushing Paint for Texture
Dry brushing adds subtle paint texture that improve the worn appearance of a wood sign. The technique involves loading very little paint on a dry brush and applying it lightly to highlight raised grain or edges. It’s useful for layering a lighter or darker color over a base coat without full coverage. To dry brush on your wood sign, follow these steps:
- Dip a stiff-bristle brush into the paint.
- Wipe about 99% of the paint off on a napkin or cloth, leaving just a trace on the brush.
- Lightly drag the brush across the wood surface, focusing on high spots like edges and grain.
- Apply multiple light passes rather than one heavy coat.
- Let the paint dry completely before deciding if you want additional layers.
This method works well over darker bases with a lighter paint color or vice versa. It creates a soft, natural look where paint clings to raised sections, mimicking weathered paint that has rubbed off unevenly over time.
Advanced Methods: Chemical Aging and Layered Painting
The vinegar and steel wool method creates a chemical solution called iron acetate that reacts with the tannins in bare wood, producing a natural aging effect that darkens the wood from gray to deep brown. Start by soaking a #0000 steel wool pad in white vinegar for 24 hours until fully dissolved. Apply this mixture evenly on clean, bare wood before adding any finishes. The iron acetate penetrates the wood grain, highlighting dents and texture where the finish will later settle, which mimics natural wear. Testing on a scrap piece of the same wood is essential since tannin content varies, affecting the final color.
After applying the iron acetate solution, allow the wood to dry completely, typically 24 hours in a well-ventilated area at room temperature. Drying times vary with humidity and temperature, so avoid applying paint or stain too soon. For an added aged look, brushing on a strong tea layer after the vinegar mixture dries can deepen color variation, improving the sign’s character. Use gloves and ensure good ventilation to minimize skin contact and inhalation of vinegar fumes.
Layering paint and stain adds dimension and authenticity to your wood sign’s aged appearance. Begin by selecting a lighter base paint color and apply it thinly, allowing it to dry thoroughly, this may take several hours or overnight, since wood paint dries slower than other surfaces. Once dry, lightly sand or use wax resist to create subtle distress marks where the base color shows through. Next, brush on a contrasting stain or darker paint layer using a dry brush technique, focusing on edges and dents to simulate years of wear.
For multiple paint layers, repeat this process two to three times using progressively darker shades or contrasting tones to build depth. Each coat must be fully dry before adding the next to prevent peeling and uneven drying. You can also rinse or lightly sand areas after the final paint layer to reveal sections of underlying paint and natural wood, which improve the aged effect. Combining stain with paint layers works well when you want the wood grain to remain partially visible beneath the color.
Always test vinegar and steel wool mixtures on scrap wood to check color results before applying to your project, and allow each layer of paint and stain to dry completely to avoid smudges or peeling.
Finishing and Sealing Your Distressed Wood Sign
To protect your distressed wood sign and keep its character intact, apply a finish that preserves the look while providing durability. Polyurethane is a popular choice because it locks in the distressing and reinforces the wood against wear, especially for outdoor signs. The finish settles into the grooves and grains, improving the aged appearance instead of hiding it. Clear satin or matte polyurethane works best, as high gloss can give a shiny, less authentic look.
Before applying any sealer, make sure the distressed wood is clean and dry. Lightly dust off any debris from distressing techniques such as sanding or scraping. Sealers should be brushed or wiped on after the paint or stain fully dries, usually after 24 hours, to avoid trapping moisture. Applying too soon can cause bubbling or uneven drying, which detracts from the finish.
You can apply polyurethane with a foam brush or a high-quality synthetic bristle brush, using long, smooth strokes along the grain. One to two thin coats usually provide good protection. Allow the first coat to dry for 4 to 6 hours at room temperature before lightly sanding with 220-grit sandpaper to remove any raised grain or dust nibs. Then wipe off the sanding dust with a tack cloth before applying the second coat. For outdoor signs, three coats offer extra protection against the elements.
Wax finishes also preserve distressing while adding a soft, warm sheen to the wood surface. Apply paste wax with a round wax brush in circular motions to reach deep into nooks and crannies of the distressed texture. After letting the wax dry for about 10 to 15 minutes, buff it with a clean, soft cloth for a subtle sheen. Wax does not add as strong a protective layer as polyurethane but can be polished as needed and is easier to touch up.
- Choose clear satin or matte polyurethane to maintain the distressed look
- Always let paint or stain dry fully before sealing
- Apply two to three thin coats of polyurethane for best durability
- Lightly sand between coats to ensure smooth finish
- Use round wax brush for even wax application in distressed areas
- Buff wax after drying for a soft sheen without gloss
- For outdoor use, prioritize polyurethane for weather resistance
Sealers can slightly darken the wood, which usually suits the distressed style by improving the aged effect. However, too many coats or thick layers can fill in cracks and reduce the texture you worked to create. Testing finishes on a scrap piece of the same wood and distressing method helps determine how much colour or shine the finish will add. If you want to keep the look as authentic as possible, a satin finish polyurethane or wax is best, avoiding glossy finishes that change the character.
Distressing Painted Wood Signs: Tips and Techniques
Distressing a painted wood sign adds character but requires care to preserve designs and lettering. Light sanding exposes natural wood beneath while leaving details intact. Paint types play a key role: chalk and milk paints distress nicely, sanding off cleanly, while latex paint tends to smear or peel unevenly, making it harder to control the aged look. Using wax or petroleum jelly as a resist protects specific areas and carved details from sanding, maintaining sharpness.
When distressing lettering or carved features, apply a wax layer over these areas before sanding. This method prevents paint from fully lifting off the raised or recessed portions, keeping the design legible and well-defined. Light hand sanding or using 220-grit sandpaper with a random orbital sander helps remove top layers of paint gently in random spots, simulating natural wear without erasing the artwork completely.
- Choose the right paints. Use chalk or milk paint for the base and top coats, as they sand away quickly and cleanly. Avoid latex paint unless you plan additional techniques like crackling or glazing.
- Paint your sign in layers. Apply a base color, then a contrasting top coat. Let each dry completely to produce distinct layers that reveal themselves during distressing.
- Apply wax resist on details. Rub candle wax, beeswax, or petroleum jelly on carved lettering or key design elements you want to protect from full sanding.
- Start sanding with 220-grit sandpaper. Use a random orbital sander or sand by hand in random, uneven areas where natural wear would occur. Avoid sanding over waxed details to preserve them.
- Check your progress frequently. Remove dust and inspect how much paint is coming off. Stop sanding each spot before exposing bare wood completely unless that is your goal.
- Sand fine edges and corners by hand. Use fine-grit sandpaper to gently distress tight areas or raised lettering that machines might damage.
- Clean the surface. Wipe away sanding dust with a damp cloth and dry the sign before adding any finish or sealant to lock in the aged look.
Following these steps will help you soften painted surfaces and bring out layered colors without obliterating fine designs. The wax resist technique allows detail preservation by creating a barrier against paint removal. Random sanding mimics natural aging patterns, adding authenticity. Take your time sanding, as overdoing it causes loss of detail and an unnatural appearance. Costs remain low; basic sandpaper and wax products usually total under $10, making this an accessible project for most DIY enthusiasts.
Common Mistakes and How to Fix Them When Distressing Wood
One common mistake when distressing a wood sign is over-sanding certain areas, causing uneven wear or thin spots that look unnatural. This often happens when sanding too aggressively or for too long, especially on soft woods like pine. To fix over-sanded spots, gently apply a wood filler that’s tinted to match your wood color. After it dries, sand lightly with fine-grit sandpaper (around 220 grit) to blend the repair with the surrounding surface. Then, distress the repaired area again by lightly tapping with a hammer or using other distressing tools to recreate natural wear.
Another frequent error involves using chemical aging agents without proper safety precautions. Failing to wear gloves, masks, and working in a well-ventilated area can expose you to harmful fumes or skin irritation. Avoid this risk by checking the chemical’s label for specific instructions, wearing nitrile gloves, and using a respirator rated for organic vapors if needed. Work outdoors or near an open window to ensure fresh airflow during application. Also, test a small scrap piece of wood first to see how the chemical reacts before applying it to your sign.
Making deep gouges or cuts with heavy tools like a hatchet can damage the sign beyond repair if not done carefully. Striking at a wrong angle or too forcefully may split the wood unpredictably. To avoid this, you should swing the hatchet at about a 45-degree angle in one smooth motion. Practicing on scrap wood helps you control the depth and placement of cuts. If a cut is too deep or uneven, fill the area with epoxy tinted to match your wood, then sand and distress that spot to match the rest of the sign.
Overdoing the distressing techniques without planning can lead to a chaotic, unbalanced look that detracts from your sign’s charm. It’s best to work gradually, alternating sanding, scraping, and denting in layers. Step back regularly to assess the wear pattern and symmetry. You can always add more distressing, but reversing over-distressing often requires significant repair work that changes your timeline and budget.
Using the wrong sandpaper grit is another pitfall. Coarse grits (below 80) may leave deep scratches that are difficult to disguise, while extremely fine grits (above 320) won’t give enough texture for an authentic worn look. Stick to a medium grit range between 100 and 180 for most distressing projects. Sand in the wood grain direction and apply uneven pressure to create natural variation.
Always wear protective gear and test chemicals on scrap wood before applying them to your project to avoid damage and health risks.
Step-by-Step Action Plan for Distressing Your Wood Sign
Follow these steps to start distressing your wood sign with confidence, ensuring each phase builds on the last for the best results.
- Before you start: Select a soft or medium-density wood and prepare the surface by sanding it smooth. This sets the foundation, check that the surface feels even and free of splinters.
- Day 1: Apply your base paint or stain layer and let it dry completely. Use a damp cloth to make sure the paint has set without being sticky.
- Day 2: Use sanding blocks or wire brushes to wear down edges and surfaces lightly. Stop when you see wood grain showing through or achieve your desired scratched look.
- Day 3: If using layered paint, add the top paint color, let it dry, then crack it slightly with a heat gun or use a chemical aging product carefully following safety instructions.
- Day 4: Distress the painted top layer by sanding corners and flat surfaces where natural wear would occur. Test on a corner to confirm the right amount of reveal.
- After 1 week: Seal your sign with a matte or satin clear coat to protect the distressed finish. Check that the sealant is dry and no glossy spots remain.
- After 2 weeks: Inspect for any uneven wear or too-shiny areas and apply light sanding or an additional clear coat as needed to keep the look natural.
Frequently Asked Questions
What Grit Sandpaper Works Best for Distressing Signs Between Letters?
Using 60 grit sandpaper is effective for distressing areas between and even over letters on wood signs. It roughens the surface enough to create a weathered look without removing too much material.
Can Pallet Wood Be Easily Distressed for Home Décor Signs?
Yes, pallet wood is a popular choice for distressing because its soft texture and natural wear make it easy to create an aged barnyard look on signs.
Is Dark Wax a Simple Way to Distress Wood Signs?
Applying dark wax is easier than expected and can deepen the aged appearance on your distressed wood signs. It adds subtle shading and improve texture after distressing.
How Important Is Matching the Distressed Sign to Existing Décor?
Matching your distressed sign with other weathered wood pieces, like a pallet wood family values sign, creates a cohesive rustic look in your space.
What Role Does Layering Paint Colors Play in Distressing Wood Signs?
Layered painting helps to achieve depth by showing underlying colors beneath the top coat, making the sign look naturally aged over time.
Can Foam Brushes Be Used Effectively on Painted Distressed Wood Signs?
Yes, holding a foam brush parallel and lightly brushing gray paint over white gives a soft, worn effect that improve distressing.
Before You Go
Distressing a wood sign adds character and charm that store-bought finishes can’t match. Start by preparing your wood carefully, then use these steps to layer paint, distress, and seal for a durable vintage look. Begin your project today with just one small section of your sign to practice the sanding and layering techniques before tackling the full surface.