How to Hand Letter a Wood Sign: Simple Steps and Expert Tips for Perfect Results
Knowing how to hand letter a wood sign means mastering the art of carefully painting or carving letters directly onto wood surfaces. The key is to start with a smooth, clean wood base and use the right tools like paint pens or chisels depending on your desired finish. Preparing your wood well ensures the lettering lasts longer and looks professional.
Key Takeaways
- Choose 3/4″ birch plywood for a smooth and durable base for your wood sign projects.
- Use paint pens instead of tiny brushes for easier, cleaner lettering on wood surfaces.
- Sand the wood surface smoothly and wipe away dust before applying any letters.
- Transfer your design onto wood by tracing with carbon paper for precise outlines.
- Allow painted letters to dry at least 24 hours before sealing to avoid smudging.
- Seal finished signs with a clear coat held 8-12 inches away for an even protective layer.
What Is Hand Lettering on Wood and How Does It Work?

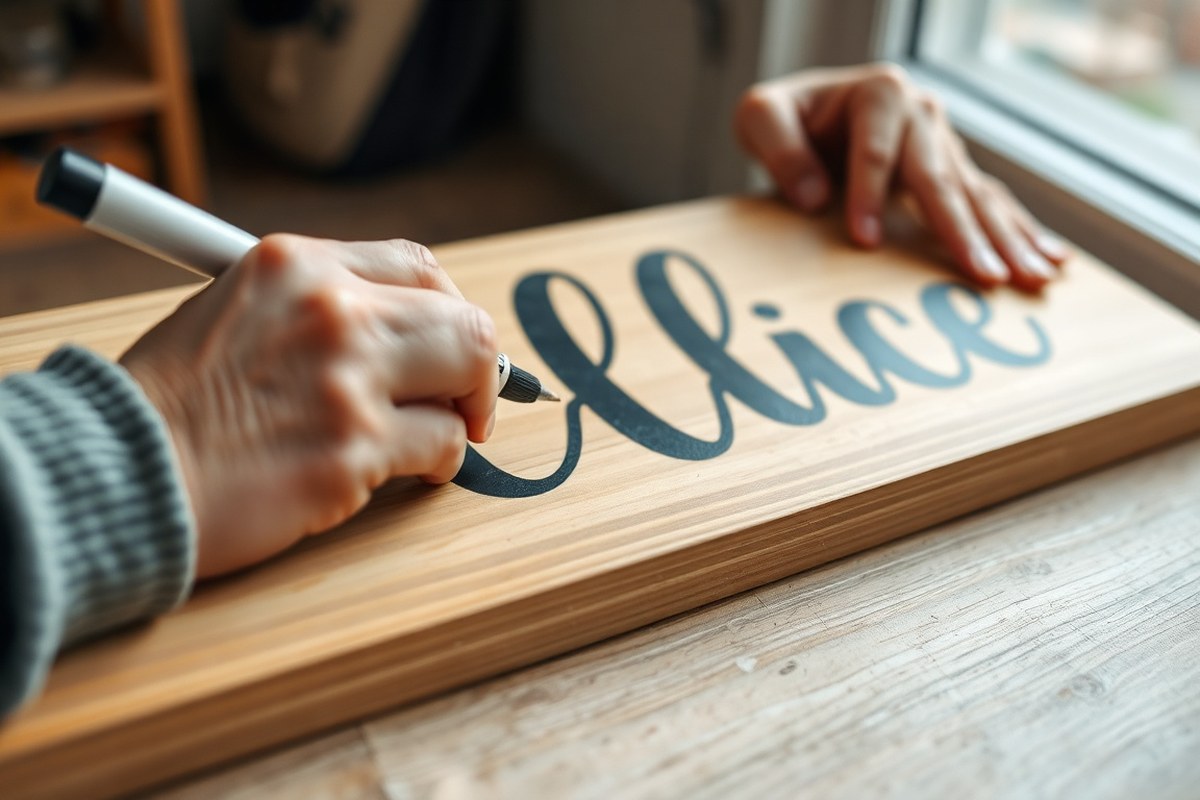
Hand lettering on wood is the art of creating custom-designed letters directly on a wooden surface using paint, pens, or markers applied by hand. This technique involves drawing or painting each letter with a brush or pen rather than using pre-made decals or mechanical methods. It allows you to add personalized, unique designs that can range from casual and playful scripts to clean, precise block lettering. Unlike carving, where letters are cut or chiseled into the wood, hand lettering sits on the surface and can be adjusted easily with paint or ink.
The main difference between hand lettering and carving lies in the tools and results. Carving uses chisels and mallets to remove wood material, creating a tactile, three-dimensional design, which can be more permanent but also requires woodworking skills and more time. Hand lettering requires fewer tools, just paint, brushes, or paint pens, and it offers flexibility to correct mistakes or experiment with styles. Using vinyl is another popular method but it involves cutting a design from adhesive vinyl and sticking it onto the wood. Vinyl produces crisp, uniform letters without the brushstroke texture you get from hand lettering, and it can be less time-consuming but also less personal.
Hand lettering on wood can achieve a wide range of finished looks depending on your technique and materials. You can create rustic and weathered appearances using rough wood and dry brush paint methods, or polished and modern designs with smooth surfaces and steady, fine brushes. Light coats of paint applied slowly help avoid drips and create a smooth appearance. For example, using a small round brush for detailed scripts or a flat brush for bold block letters gives different finishes. The process generally involves preparing the wood by sanding it smooth, lightly sketching your lettering with a pencil, and then painting over the sketch carefully, allowing paint to dry between coats.
This method typically costs less than carving or vinyl by requiring only basic supplies: paint pens or brushes priced between $5 to $15, and wood signs starting at around $10 for small blanks. You also avoid the need for woodworking tools like chisels or vinyl cutting machines. Good results show clean, legible lettering with consistent paint application and minimal bleeding or smudging. Common issues include uneven paint coverage, drips, or shaky lines, usually fixable by using the right brush size and applying paint in thin layers. Hand lettering invites creativity and a personal touch, easily suited to beginners wanting custom wood signs for home décor or gifts.
Essential Tools and Materials Needed for Hand Lettering Wood Signs
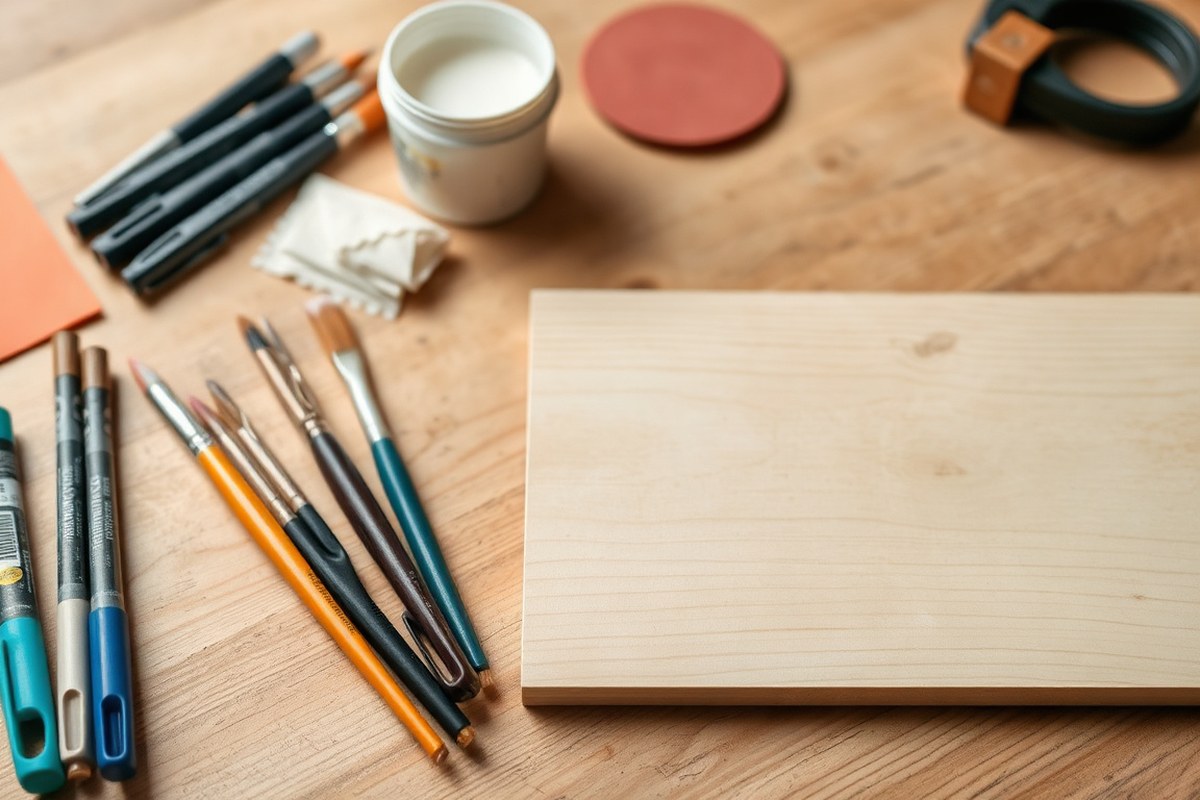
For hand lettering wood signs, start with selecting smooth, flat wood, such as 3/4-inch birch plywood. Birch is popular due to its fine grain and stable surface, which helps paint and markers apply evenly without bleeding. Other good options include pine or poplar boards, but they might require more surface preparation to avoid roughness. Avoid woods with heavy knots or uneven grain as they make lettering challenging.
Before applying your lettering, prepare the wood by sanding it lightly with 220-grit sandpaper to smooth the surface and remove any splinters. Whether you need primer or stain depends on your desired look. Use a water-based wood primer if you want a clean, bright background to make your letters pop, especially for darker or more vibrant colors. Alternatively, a light stain can add warmth and depth to the wood while allowing the grain to show through, but this sometimes dulls paint colors.
The tools you choose affect the precision and style of your lettering. For beginners, paint pens are often easier to control than brushes. Sharpie oil-based paint pens are highly recommended for DIY signs, especially for crisp white lettering, because they dry quickly and resist smudging. These pens range from about $5 to $10 each, and you might want at least two tip sizes: fine for outlines and details, medium or bold for filling in larger areas.
Brushes work well for more artistic designs or if you want a hand-painted look. Synthetic round brushes sized 0 to 6 offer versatility. Paint brushes take more skill with steady hands and are messier, but they allow blending and texture effects paint pens can’t create.
- Wood: 3/4-inch birch plywood or pine, sanded smooth
- Primer: water-based, applied in thin coats
- Paint pens: Sharpie oil-based for durability and ease of use
- Paint brushes: synthetic round brushes in various sizes
- Craft paint: acrylic for vibrant colors, dries in about 20-30 minutes
- Pencil and ruler: for sketching and measuring your layout
- Transfer paper: if you want to copy a printed design onto the wood
Use a sharp pencil to lightly sketch your letters or to trace designs transferred from paper. Applying consistent pressure helps avoid indentations that show through paint. After lettering, allow ample drying time, often 24 hours, before adding a sealer or handling the sign.
Test your paint pens or brushes on scrap wood before starting your main sign to ensure colors appear as expected and your tools deliver the level of control you want.
Preparing Your Wood Surface for Smooth and Lasting Lettering
Properly preparing the wood surface ensures your hand lettering adheres well and lasts longer. Sanding removes roughness and imperfections, cleaning clears dust, and applying a primer or stain creates a smooth base that helps paint stick evenly. Skipping these steps often leads to poor paint adhesion and a less professional finish.
Sanding the Wood Surface
Begin by smoothing the wood surface with medium to fine sandpaper, usually between 120 and 220 grit. This step removes any old coating, rough patches, or tiny splinters that might make the paint skip or peel later on.
When sanding carved letters, use 80- or 100-grit sandpaper to smooth sharp edges gently. Avoid sanding carved details too aggressively, or you might lose sharpness. Sand all surfaces and edges until the wood feels smooth to the touch.
Cleaning and Removing Dust
Once sanding is complete, wipe the wood carefully with a soft or tack cloth to clear away dust and particles. Leaving any debris can result in patchy paint coverage or bubbling.
Make sure to clean all crevices, especially in carved letters, where sawdust can settle. Avoid using water-based solutions for cleaning unless the wood is completely dry afterward, as moisture can cause warping or swelling.
Applying Primer or Stain Options
Applying a primer is essential for a smooth, long-lasting finish on your wood sign. Primer seals the wood pores, creating a uniform surface that improve paint vibrancy and durability. Use a wood primer suitable for the type of paint you’ll apply. Apply it evenly with a small brush in light coats to avoid drips.
Staining wood before lettering is optional. Applying wood stain is the step to take after sanding and cleaning, but before putting on any primer, when you want a natural or color-tinted wood finish. Choose stains that dry fully before adding primer and lettering, usually allowing 24 hours. Some prefer staining after carving rather than before lettering to keep the letters crisp. Avoid stains if you plan to use light or transparent paints, as they may bleed or spot unevenly.
Tips for Avoiding Warping or Cracks
Wood warping and cracking are common issues when prepping wood for painting. Use wood that’s properly dried and stored to minimize moisture content, ideally below 12%. Avoid soaking wood in water or cleaning solutions that add moisture. Keep your workspace well-ventilated, but away from direct heat or sunlight that may cause rapid drying and cracking.
When sanding, do it evenly on both sides if working with thin boards to prevent uneven stress. When applying stain, spread it uniformly across the wood without letting it soak in too much to ensure an even tone. Use a sealer or primer to lock in moisture and provide protection before painting. These steps help maintain a flat, stable surface that supports your hand lettering.
- Sand the entire wood surface, starting with 120-grit sandpaper, then progress to 220-grit for a smooth finish.
- Gently sand carved letters with 80- to 100-grit sandpaper to smooth edges without losing detail.
- Wipe the surface with a tack cloth or soft dry cloth to remove all dust and debris.
- Optionally, apply a wood stain evenly if you want a colored base. Let it dry for at least 24 hours.
- Apply a wood primer with a small brush in thin coats, letting each coat dry according to the primer’s instructions (typically 1-2 hours).
- Lightly sand the primed surface with 220 grit sandpaper once dry to ensure smoothness, then clean off dust again.
Methods for Transferring Lettering Designs Onto Wood
Transferring lettering designs onto wood is an essential step to ensure your hand lettering looks polished and accurate. Four popular methods include carbon paper tracing, freehand sketching, stencils, and vinyl transfers. Each has advantages and drawbacks depending on your skill level, the look you want, and the tools you have available.
Carbon paper tracing is great if you have a printed design. Simply place a piece of carbon transfer paper between your design and the wood. Slowly trace the outlines of your letters with a pencil, pressing firmly to transfer the lines onto the wood surface. This method delivers precise results and is fairly easy for beginners. Use a MONO sanding eraser to gently remove any leftover transfer stains. Carbon paper usually costs around $5 to $10 and can be found at office supply stores or online.
Freehand sketching lets you draw your design directly onto the wood without any transfer tools, making it ideal if you want more artistic control or a rustic look. Beginners may find it challenging to get the proportions right, but practicing with a pencil allows you to erase and adjust before committing with paint or carving. This method requires no extra cost beyond a pencil.
Stencils provide pre-designed letter templates you can trace onto your wood, helping achieve clean, consistent lettering. Stencils are beginner-friendly and save time while ensuring a professional appearance. A set of reusable stencils costs about $10 to $20. They work well if you do repeated signage or want uniform fonts but are less flexible for custom designs.
Vinyl transfers combine design flexibility and precision. You can create or buy lettering designs, cut them with a craft machine like Silhouette or Cricut, and apply the vinyl letters onto your wood. Use the vinyl as a stencil by painting over the edges. This method yields crisp edges and allows complex fonts but requires a vinyl cutter or purchasing pre-cut designs. It typically costs more upfront (around $80 for a basic cutting machine plus vinyl sheets at $15 or more).
| Method | Process | Cost | Skill Needed | Best For | Drawbacks |
|---|---|---|---|---|---|
| Carbon Paper Tracing | Place carbon paper between design and wood; trace with pencil | $5, $10 for paper | Beginner | Accurate replication of printed fonts | Can leave stains; requires steady tracing |
| Freehand Sketching | Draw letters directly on wood with pencil | Minimal (pencil only) | Intermediate | Artistic freedom; rustic look | Hard to achieve precision; requires practice |
| Stencils | Trace pre-made letter templates onto wood | $10, $20 per set | Beginner | Clean, consistent letters; fast | Limited custom design options |
| Vinyl Transfers | Cut vinyl letters and apply as stencil | Machine: ~$80+; Vinyl sheets $15+ | Intermediate to advanced | Complex fonts; crisp edges | Requires craft machine; higher cost |
To choose the right method, think about your project goals. Use carbon paper for printed fonts and good accuracy without special machines. Pick stencils if you want speed and uniformity without freehand drawing. Freehand works when you prefer a casual style or want complete artistic freedom. Opt for vinyl transfers when you want the sharpest, most complex designs and have access to a cutting machine.
Step-by-Step Guide to Hand Lettering on Wood
Hand lettering on wood involves careful steps to create crisp, clear letters that last. Using the right tools and layering techniques helps prevent paint bleeding and smudging. Follow these instructions to develop accuracy and smooth results.
Choosing the Right Paint and Tools
Select acrylic paint for its versatility, quick drying time, and wide color options. It’s a favorite because it adheres well to wood and dries in a few hours, though waiting 24 hours before handling improves durability. For tools, a fine-tipped paint pen is easiest for beginners aiming for clean lines. Small, angled brushes around 1/8 to 1/4 inch wide allow more control for detailed work than larger brushes.
Maintain steady pressure and use thin brushes for thin strokes. Avoid heavy coats that cause drips or uneven texture; light coats give a smooth finish. To practice stroke techniques, try making lines on scrap wood before starting your sign.
Painting Letter Outlines and Fill-Ins
Start by outlining your letters gently, either tracing a transferred design or freehand. A paint pen provides control and clean edges for this step. Once outlines dry, fill letters with thin layers of paint. Use multiple light coats instead of one heavy coat to avoid paint pooling or smudging.
Use small, steady strokes working from the edges inward for a crisp fill. Let each layer dry completely before adding the next. This layering builds opacity while maintaining smooth lines.
- Transfer or sketch your lettering onto the prepared wood surface.
- Outline the letters carefully with a fine paint pen or small brush.
- Let the outline dry completely, about 30 minutes to 1 hour depending on paint thickness.
- Apply the first thin coat of paint inside the letters using a small brush with light pressure.
- Allow the first coat to dry fully, usually 1 to 2 hours.
- Add a second or third thin layer if needed for opacity.
- Inspect letters for uneven areas or smudges as paint dries.
Always use light paint coats and let each dry completely to prevent bleeding and achieve sharp edges.
Correcting and Touching Up Letters
Small mistakes or uneven lines are common and fixable. Use a damp brush or cotton swab to gently erase wet paint edges before drying. For dried errors, lightly sand the affected area with fine-grit sandpaper, then repaint.
To sharpen edges, re-outline letters with a paint pen after fill paint has dried. This step can improve letter clarity and fix slight smudges or uneven fills.
Allowing Proper Drying Between Coats
Let paint dry fully between coats to avoid smearing or mixing. Acrylic paint usually dries to the touch in under an hour but can take up to 24 hours to cure fully. Plan on waiting at least 1 to 2 hours between light coats, and overnight before sealing or handling.
Drying times vary with temperature, humidity, and paint thickness. Cooler, humid conditions may require longer wait times. Patience ensures crisp letters and a finished sign that holds up well.
Finishing and Sealing Your Hand Lettered Wood Sign
Sealing your hand lettered wood sign is essential to protect your paint from fading, chipping, and weather damage. Applying a clear coat or sealant after the paint has fully dried ensures durability, especially for outdoor signs. Timing the application correctly and choosing the right sealant helps maintain your sign’s appearance for years.
Choosing a Clear Coat or Sealant
Clear acrylic polyurethane is a common choice for sealing painted wood signs because it creates a strong protective barrier without yellowing over time. Varnish is another option, often used for outdoor signs, although some varnishes can slightly tint the surface. Make sure the sealant is suitable for both wood and paint to avoid reactions that could damage the lettering.
Consider whether the sign will be indoors or outdoors, as outdoor applications require sealants with UV protection and water resistance. For outdoor use, a spar urethane or marine-grade polyurethane offers extra durability against moisture and sunlight. Indoor signs can work well with water-based polyurethanes that dry faster and have lower odors.
Proper Application Techniques
Applying the sealant evenly is important to prevent streaks or bubbles that affect the finish. Use a high-quality synthetic brush or a foam brush designed for polyurethane or varnish. Avoid a roller or spray unless you have experience, as these can lead to uneven coverage.
The best process includes applying multiple thin coats rather than one thick coat. Allow each coat to dry before lightly sanding with 220-grit sandpaper to smooth the surface and improve adhesion of the next layer.
- Ensure the painted surface is completely dry, usually 24 to 48 hours after painting.
- Lightly sand the painted letters with fine-grit sandpaper to remove any imperfections and help the sealant stick.
- Clean off dust with a tack cloth or a damp microfiber cloth and let dry.
- Apply the first thin coat of clear polyurethane or varnish with a steady brush stroke following the wood grain.
- Let the first coat dry, typically 4 to 6 hours for water-based sealants, or longer for oil-based ones.
- Lightly sand the dry coat to remove any raised grain or bubbles.
- Wipe away sanding dust and apply a second coat, repeating sanding and cleaning if a third coat is desired.
- Allow the final coat to cure fully before handling or exposing the sign to the elements.
Drying and Curing Times
Drying times depend on the type of sealant used. Water-based polyurethanes typically dry enough to recoat within 2 to 4 hours and cure fully in about 24 to 48 hours. Oil-based and varnish products can take up to 8 hours to dry between coats and may require several days to cure completely.
Waiting the full recommended curing time before mounting or placing the sign outside is critical. Rushing this step can trap moisture and cause the sealant to become cloudy or peel. Keep the sign in a dust-free, well-ventilated area during drying.
Maintenance Tips for Longevity
Even with proper sealing, wood signs exposed to outdoor conditions may need resealing every 1 to 3 years depending on weather exposure. Inspect your sign periodically for signs of wear such as fading or cracking of the clear coat.
Gently clean sealed signs with a soft cloth and mild soap solution to remove dirt without damaging the surface. Avoid harsh chemicals or abrasive scrubbing that can break down the sealant layer.
Safe Techniques and Tips for Carving Letters into Wood
Carving letters into wood can be safe for beginners as long as you take the right precautions and use proper techniques. Choosing the right tools and wearing safety gear reduce the risk of injury. Holding tools correctly and working slowly help you avoid common mistakes like slips or uneven cuts.
Start with a sharp carving knife or chisels designed for wood, along with a mallet if needed. A rotary tool with engraving bits can be an alternative but requires steady control. Wear safety goggles to protect your eyes from wood chips. Use a carving glove or thumb guard on the hand that holds the wood to prevent cuts. Work on a stable surface and secure your wood with a clamp to avoid accidental slips.
Begin carving only after transferring your lettering design onto the wood. Take shallow cuts, no more than 1/8 inch deep at a time, to maintain control and prevent gouging the wood. Carve away from your body and fingers, and keep your hands behind the tool’s cutting edge. Go slowly and pause frequently to check your progress and make sure the letters are even and clear. Follow these steps to carve letters safely and effectively:
- Wear safety goggles and a carving glove on your non-dominant hand.
- Secure your wood with a clamp on a stable work surface.
- Hold the carving tool firmly with your dominant hand, keeping fingers away from the blade.
- Make shallow cuts around the letters’ outlines, less than 1/8 inch deep.
- Carve slowly, following the letter lines carefully to maintain accuracy.
- Work away from your body and fingers to avoid injuries.
- Clean wood chips frequently to maintain a clear view of your work area.
- Repeat shallow cuts to deepen the letters gradually until you reach the desired depth.
Beginner carvers should use soft woods like pine or basswood because they are easier to carve and less likely to splinter. Avoid pushing too hard; using multiple gentle passes achieves cleaner letters and lowers injury risk. Keep your tools sharp, as dull blades require more force, increasing slip chances and poor results. Expect basic equipment costs, safety goggles and gloves can cost $10 to $20, carving tool kits range from $20 to $50, plus clamps around $10. Good results feature clean, consistent letter edges, while mistakes often show as uneven depths, splintered wood, or slips causing gouges.
Troubleshooting Common Hand Lettering Mistakes on Wood
Smudges, paint bleeding, and uneven lines are common issues you can run into when hand lettering a wood sign. Smudges typically happen when the paint doesn’t dry fast enough or if your hand brushes over the fresh paint. Paint bleed occurs when the paint seeps beyond the edges of your lettering, often due to paint that’s too thin or an unsealed wood surface. Uneven lines are usually caused by inconsistency in brush pressure or unsteady hand movement, making your letters look less polished.
Fixing smudges depends on how wet the paint is. For wet smudges, gently blot the area with a dry brush or paper towel without rubbing. If the paint has dried, wait for it to fully dry then lightly sand the smudge with fine-grit sandpaper (around 220 grit) and repaint that section precisely. This method avoids damaging the surrounding paint and preserves your work.
To prevent paint bleed, seal your wood before painting. Using a clear wood sealer or a thin layer of Mod Podge helps create a barrier. Also, apply paint in thin layers with a small brush rather than overloading it with paint. You can also try using paint pens designed for crafts, which offer more control and reduce bleeding. When fixing existing bleed marks, wait for the paint to dry, sand lightly, and touch up with the base wood color before repainting the letter.
- Use a high-quality, fine-tip brush to improve line control.
- Work in thin paint layers, allowing each to dry for 15, 20 minutes.
- Practice steady, light pressure strokes on scrap wood before starting.
- Keep your hand steady by resting the pinky or side of your hand on the work surface.
- Seal your wood surface to prevent paint soak-through that causes bleed.
- Avoid painting in humid or cold conditions; ideal is 65, 75°F and low humidity.
- Use painter’s tape to mark straight guidelines if letters look uneven.
Keep a damp cloth nearby to quickly wipe up any accidental drips before they dry.
Uneven lines become less of a problem with targeted practice. Create simple shapes and strokes on spare wood pieces to build muscle memory for steady brush pressure and smooth movements. Adjust the angle of your brush and slow down your pace. Lettering smaller signs often requires finer control than larger signs, so practicing at your intended size helps. You might also try tracing printed letters onto wood with graphite paper to get the shape consistent, then slowly paint over that guideline.
Good results mean clear, crisp lines without extra paint pooling, and letters that appear balanced without thick or thin sections where there shouldn’t be. A well-prepared and sealed wood surface combined with thin, dry paint layers reduces smudges and bleed. Being patient with drying times and using a brush suited to your lettering style improve your overall finish. Each attempt can teach you how your materials behave, speeding up your progress toward neat, professional-looking signs.
Step-by-Step Action Plan to Start Hand Lettering Your Wood Sign
Follow this plan to create your first hand lettered wood sign with confidence and clear checkpoints.
- Before you start: Gather all essential tools like wood, pencils, paint or markers, sealant, and your chosen lettering design. Check that your work area has good lighting and ventilation.
- Day 1: Sand the wood surface smoothly using fine-grit sandpaper. Run your hand over it to confirm it’s even and free of splinters.
- Day 2: Transfer your lettering design onto the wood using graphite paper or freehand sketching. The design should be clearly visible but light enough to paint over.
- Day 3: Use paint or markers to carefully fill in the letters. Let the first coat dry completely and apply a second coat if coverage looks uneven.
- Day 4: Apply a clear sealant in thin layers after the paint fully dries. Test the sealant on a small corner to ensure no smudging or discoloration.
- Day 5: Inspect your sign for any touch-ups needed on letters or edges. Correct any flaws with fine brushes for letters or sandpaper for edges.
- After 1 week: Place your wood sign in its intended spot, indoors or outdoors, and monitor how it holds up to light and humidity before deciding on any further protective coatings.
Frequently Asked Questions
Can I Use Acrylic Paint for Hand Lettering on Wood Signs?
Acrylic paint works well for hand lettering on wood because it adheres smoothly and dries quickly. Use a fine brush and practice steady strokes to get clean lines for a professional look.
How Do I Prevent Paint from Peeling on an Outdoor Wooden Sign?
Seal your painted wood sign with a clear, outdoor-grade sealant to protect against moisture and UV damage. Apply multiple thin coats and let each dry fully for best durability.
Is It Necessary to Sand Wood Before Hand Lettering?
Light sanding smooths the wood surface and helps paint or ink adhere better, improving your final design. Use fine-grit sandpaper and wipe the surface clean before starting.
Can I Use a Stencil for Hand Lettering on Wood Signs?
Using a stencil is a great way to get precise lettering, especially if you’re new to hand lettering. Secure it firmly and use a sponge or brush with minimal paint to avoid bleeding.
How Long Should I Wait After Painting Before Applying a Sealer?
Wait at least 24 hours for the paint to fully dry before applying a clear sealer to avoid smudging or lifting the lettering. This timing ensures a lasting finish.
What Type of Brush Is Best for Hand Lettering on Wood Signs?
Fine-tipped synthetic brushes provide good control and smooth lines for hand lettering. Avoid natural bristles that may absorb too much paint and cause uneven strokes.
Wrapping Up
Creating a hand lettered wood sign takes attention to detail but yields a rewarding, personalized result. Start by preparing your wood and transferring your design carefully; each small step adds to the quality. Pick one small project and focus on mastering that process to build your confidence and skill. The key is to take your time and enjoy the process of crafting something unique with your own hands.