How to Etch Glass for Signs: A Complete Guide with Expert Tips
How to etch glass for signs involves using an etching cream or similar method to create a frosted design by selectively removing a thin layer of glass surface. The most effective way is to apply a stencil and carefully follow etching cream instructions, usually leaving it on for 10 to 20 minutes at room temperature. Start by cleaning your glass with 91% isopropyl alcohol to ensure the stencil adheres properly and the cream reacts evenly.
Key Takeaways
- Clean glass thoroughly with 91% isopropyl alcohol to avoid residue that blocks etching.
- Keep workspace and glass at about 70°F for consistent etching cream performance.
- Apply etching cream evenly and leave it on for 10 to 20 minutes depending on the glass type.
- Use vinyl stencils for precise, repeatable designs on glass signs.
- Practice on inexpensive glassware, like wine glasses, before moving to pricier pieces.
- Wear gloves and work in a well-ventilated area to protect skin and avoid inhaling fumes.
How to Etch Glass for Signs Step-by-Step
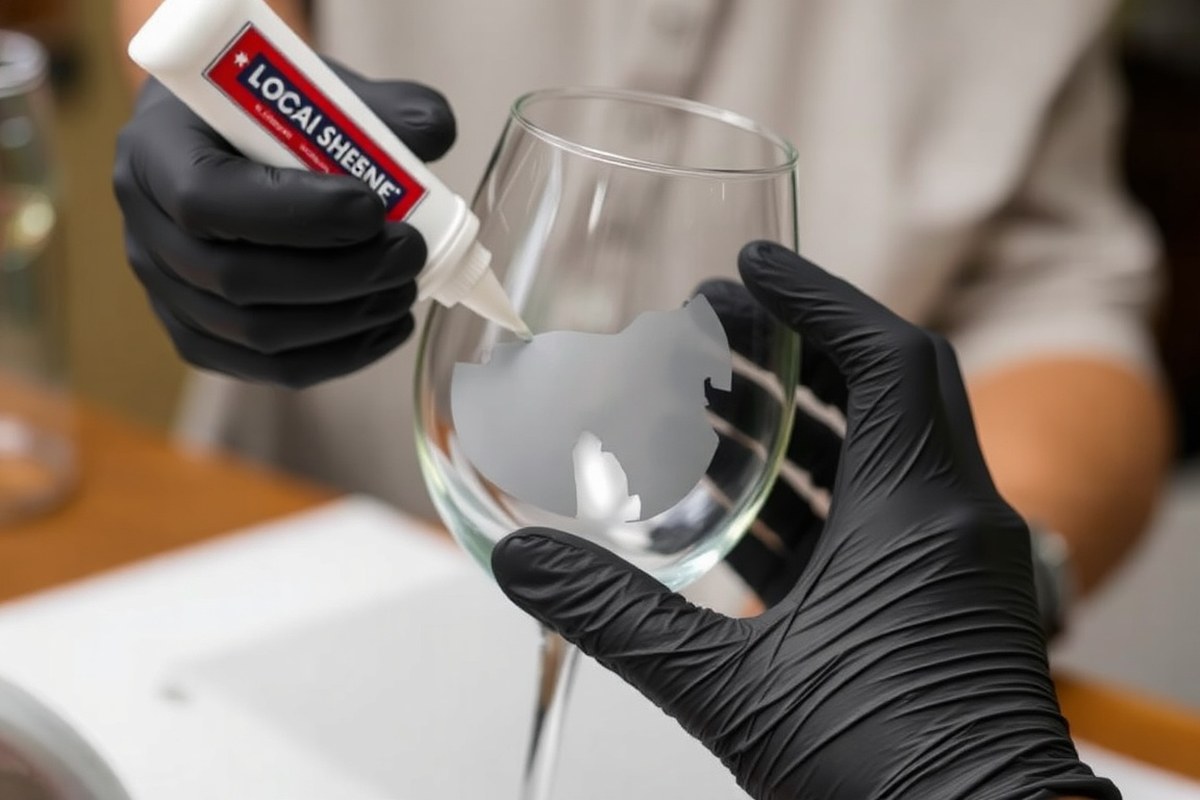
Etching glass for signs using etching cream is a straightforward process that produces a permanent frosted design on your glass surface. This method works best for smaller pieces like glassware, mirrors, or small windows. The cream chemically reacts with the glass surface to create the etched effect, which is deeper than simple surface frosting. Taking the right steps ensures sharp, clean etching without damaging your piece or your stencil.
Use a stencil that fits your design and make sure your workspace is well-ventilated. Wearing disposable nitrile gloves protects your skin from the cream’s chemicals. The cream should be applied carefully, covering only the areas where you want the etching to appear. Timing is important: too short a time will give you a faint etch, while leaving the cream too long can scorch the glass.
- Clean the glass thoroughly. Remove any dirt, oils, or fingerprints to ensure the stencil adheres properly. Use rubbing alcohol for the best results and dry the glass completely.
- Position and secure your stencil. Apply your decal or stencil to the glass, pressing firmly to seal the edges and prevent the cream from bleeding underneath.
- Put on disposable nitrile gloves. Always protect your hands before handling etching cream to avoid chemical burns or irritation.
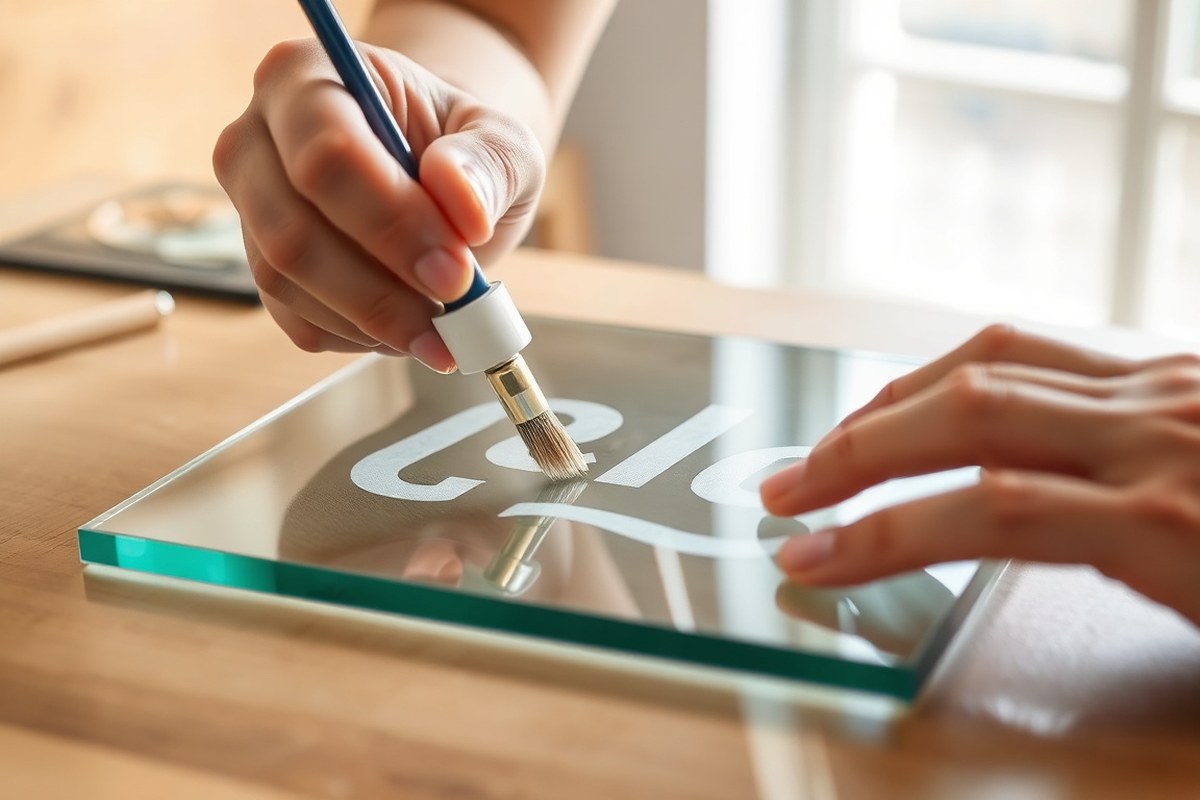
- Apply a thick layer of etching cream. Use a small paintbrush or popsicle stick to spread the cream evenly over the exposed stencil areas. Work in small sections, no larger than 1 inch by 1 inch, to control coverage.
- Let the cream sit for 1 to 10 minutes. Most manufacturers recommend about 1 minute, but leaving the cream up to 10 minutes intensifies the frostiness. Avoid exceeding 10 minutes to prevent glass scorching or stencil damage.
- Rinse off the etching cream under running water. Keep wearing gloves and rinse gently, using water to dilute and wash away the cream. Do not wipe dry with a cloth as this can spread remaining cream and erase or blur your design.
- Remove the stencil and dry the glass. Pat dry with a soft cloth, then inspect your etched design. It should appear frosted and permanent with no smearing or discoloration.
This process typically costs about $10 to $15 for a 3-ounce bottle of etching cream, which lasts for multiple projects. Adjust the time the cream sits based on your test etch on a similar glass piece to find your preferred frosted effect. Cleaning the glass and ensuring stencil seals are tight will avoid unwanted spots or blurry edges in your finished sign.
Essential Materials and Tools Needed for Glass Etching
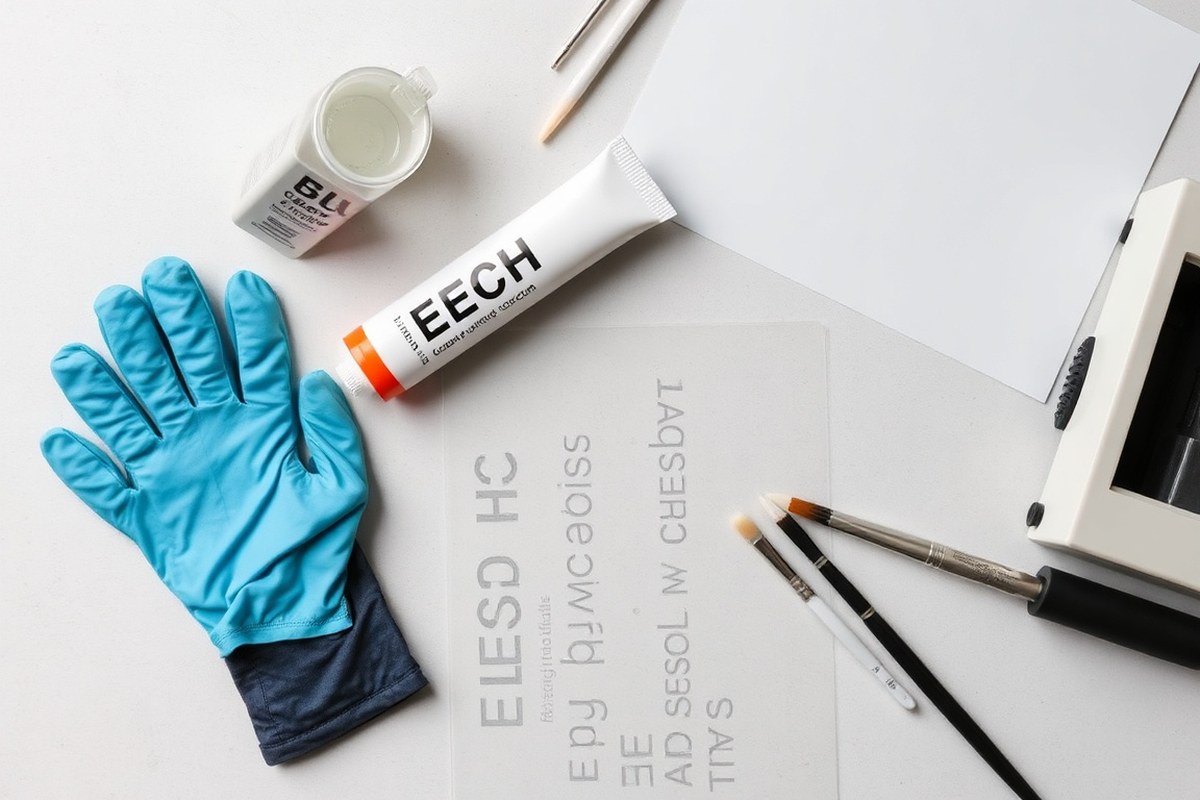
To etch glass signs successfully, you need a set of specific materials and tools that ensure precision, safety, and lasting results. Your primary item is Etching cream, like Armour Etch, which comes in 3-ounce bottles priced between $10 and $15. This cream permanently reacts with glass surfaces to create that frosted, etched effect. Note that etching cream works best on small areas no larger than 1 inch by 1 inch, so it suits detailed designs rather than broad coverage.
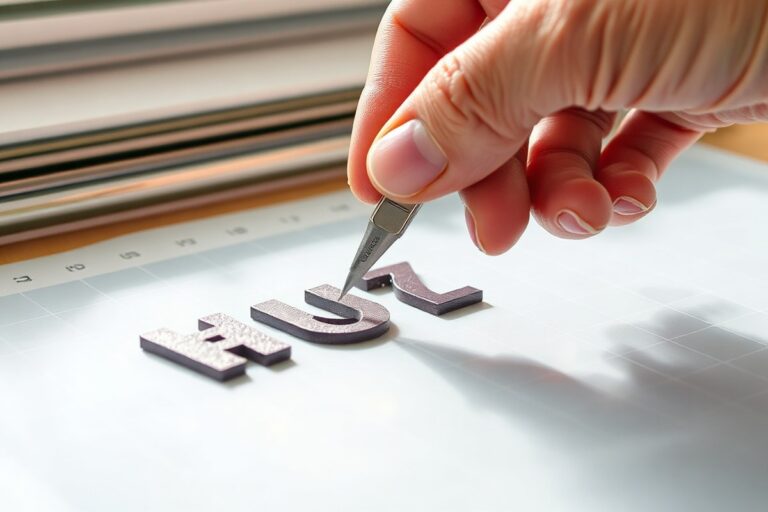
Choosing the right stencil material is essential for sharp, clear designs. Pre-made glass etching stencils are available in sets with themed patterns such as hummingbirds or butterflies, priced around $8 to $12 per set. Alternatively, self-adhesive vinyl sheets can double as custom stencils, often costing roughly $10 for a 12 x 12-inch sheet, letting you cut your unique designs with scissors or a craft knife.
- 3 oz bottle of Armour Etch glass etching cream ($10-$15) from craft stores or online retailers like Amazon
- Glass etching stencil sets or adhesive vinyl sheets ($8-$12) from craft supply shops or Etsy
- Isopropyl alcohol (91% strength) to clean glass surfaces before etching, about $5 per bottle at pharmacies
- Protective gear: latex gloves, a long-sleeve shirt, and an apron to shield skin from acid exposure
- Soft cloth or lint-free towels for cleaning and drying the glass
- Scissors or craft knife for cutting stencils to size
Proper surface preparation is critical. Cleaning the glass with 91% isopropyl alcohol removes residues that household glass cleaners often leave behind, helping the cream etch more evenly. The glass and room temperature should ideally be around 70°F to maintain the cream’s effectiveness. Avoid using etching cream on leaded crystal or large flat sections, as it may not work well and can cause uneven results.
Protective gear is non-negotiable. The etching cream contains acids potent enough to irritate or burn skin. Wear latex gloves before handling the cream and protect your arms and clothes with a long-sleeve shirt and an apron. Work in a well-ventilated area and keep any children or pets far away. Proper safety gear prevents exposure to chemicals and helps you focus on making neat, permanent designs safe from harm.
Always put on your gloves and apron before opening the etching cream container to avoid accidental skin contact.
Preparing Your Glass and Workspace for Best Etching Results
Preparing your glass and workspace carefully before etching makes a big difference in achieving sharp, clean results. The key steps involve thoroughly cleaning the glass with 91% isopropyl alcohol to remove oils and dust, and setting up a room-temperature, well-ventilated workspace to allow safe, effective etching.
Cleaning the Glass Surface with Alcohol
Removing all dirt, grease, and fingerprints from the glass surface is essential for the etching cream to work evenly and prevent blotches or missed spots. Using 91% isopropyl alcohol or a quality glass cleaner ensures the surface is free from contaminants without scratching it. A simple routine can prep your glass reliably every time:
- Wash the glass with warm water and mild detergent to remove loose dirt.
- Rinse thoroughly and dry with a lint-free cloth.
- Apply 91% isopropyl alcohol on a clean microfiber cloth.
- Wipe the glass surface fully, covering the entire area to be etched.
- Allow the alcohol to evaporate completely, which usually takes 1 to 2 minutes at room temperature.
- Inspect for any remaining smudges or dust and repeat cleaning if necessary.
Avoid using abrasive scrubbers that can scratch your glass. Clean carefully to ensure the etching cream bonds uniformly over the surface, producing crisp designs.
Setting Up a Well-Ventilated, Room Temperature Workspace
Glass etching involves chemicals that can release fumes. Working in a well-ventilated area prevents inhaling these fumes and promotes safer handling of the materials. The ideal temperature for your workspace is about 70 °F (21 °C), which helps etching cream function consistently.
Open a window or use a fan to keep air circulating. Avoid direct sunlight or very cold conditions, as extreme temperatures can alter how the etching cream reacts. Position your work area near a water source so you can rinse off mistakes promptly. Having stable, flat surfaces allows you to apply cream evenly and keep stencils securely in place.
Protecting Your Work Area and Yourself
Prevent damage to your workspace and ensure personal safety by covering surfaces with disposable plastic or newspapers before applying etching cream. Wearing gloves and a mask protects your skin and lungs from harsh chemicals.
Gloves also prevent oils from your hands from contaminating the cleaned glass. Keep paper towels or damp cloths on hand to quickly clean spills and avoid letting cream dry on unintended surfaces. Cleaning up promptly limits damage and keeps your project neat.
Creating and Applying Stencils for Precise Glass Etching
You can create stencils for glass etching by using pre-made options or making your own with cutting machines or simple materials like contact paper and vinyl. Applying your stencil carefully ensures clean, sharp designs without etching cream bleeding under the edges. The right stencil method depends on your equipment, budget, and the complexity of your design.
Buying Pre-Made vs DIY Stencils
Pre-made stencils offer convenience and a variety of designs, usually available online or in craft stores starting around $5 to $15 each. These stencils save time and reduce setup errors but limit you to existing designs. Etsy sellers often provide unique options if you want something artistic without making it yourself.
DIY stencils cost less in materials but require either a cutting machine or patience for hand cutting. Contact paper and adhesive vinyl sheets are reasonable materials, about $5 to $10 per roll or pack, and both serve well as stencil bases. Vinyl is stickier and better for curved glass, holding firmly without lifting, while contact paper is easy to cut by hand but less durable.
Choosing between buying and making stencils hinges on your project frequency, design customization, and access to tools. Craft stores also sell stencil vinyl masking films designed for easy alignment and clean lines, priced around $10 to $20 per sheet, which can be reused for multiple projects.
Using Cutting Machines Like Cricut for Custom Designs
A cutting machine such as Cricut Maker, Cricut Explore, or Silhouette Cameo lets you produce precise custom stencils from digital designs. The software that comes with these machines provides design templates or allows you to upload images to cut your desired pattern on vinyl or contact paper.
Start by selecting or creating your design on the computer, then load your chosen stencil material into the cutting machine. The machine cuts the design accurately, leaving a stencil ready for application. These machines cost $200 to $400, which is an investment, but they minimize freehand errors and save time on intricate patterns.
You can also create your stencil by taping the design onto contact paper and cutting it out using scissors if no cutting machine is available. This process takes longer and is less precise, better suited for simple shapes rather than detailed artwork.
Tips for Applying Stencils Smoothly Without Air Bubbles
Applying the stencil flat and bubble-free is important to avoid etching cream seeping underneath, which ruins the sharpness of your design. Follow these steps to apply your stencil for the best precision:
- Clean the glass surface thoroughly to remove dust, oils, or moisture, ensuring better stencil adhesion.
- Carefully peel the backing paper off your stencil or vinyl to expose the adhesive side.
- Position the stencil on the glass exactly where you want your design.
- Start smoothing the stencil from the center outwards using a flat tool like a credit card to push out air bubbles.
- Press the edges firmly, especially around detailed areas, to seal the stencil completely against the glass.
- Double-check there are no gaps or lifted sections where the cream could leak.
- Apply your etching cream in a thick, even layer over the stencil area while wearing gloves to protect your skin from the acidic cream.
- Leave the cream for the recommended time and then rinse and carefully remove the stencil.
For curved glass, premium self-adhesive vinyl works best because it conforms without lifting. Avoid standard vinyl or contact paper on curves, as they can cause gaps for cream to seep through. Using a transparent stencil vinyl with a matte finish helps you align detailed designs accurately before pressing down.
Understanding Which Glass Types Work Best for Etching
Not all glass etches with the same ease or effectiveness. Standard glass types like soda-lime glass, often found in windows and bottles, work well with etching cream. This cream chemically removes a thin surface layer, creating a frosted look. For signs, clear flat glass is ideal since it etches evenly and predictably.
Specialty glass varieties such as Pyrex or crystal can behave differently. Pyrex kitchenware, especially older or colored pieces, often resists most etching creams because it is chemically fortified or has coatings designed to protect against heat and chemicals. This resistance means the cream won’t create the etched effect even after repeated applications.
The thickness of the glass does not directly affect etching success, but thin or fragile glass might crack or break during prep or cleaning. Most common glass thicknesses for household items (around 1/8 to 1/4 inch) etch well if handled carefully. Larger sheets of glass for signs should be supported properly but still can be etched if clean and uncoated.
| Glass Type | Etching Compatibility | Notes |
|---|---|---|
| Soda-lime Glass (standard window, bottle glass) | High | Etches evenly; common for DIY signs |
| Clear Float Glass | High | Flat, smooth surface works well for detailed etching |
| Pyrex (older or colored) | Low | May resist etching cream; chemical resistance; heat-treated or coated |
| Crystal | Moderate | Etches but may require longer application; fragile |
| Coated or Laminated Glass | Very Low | Coatings block etchant; difficult to etch |
| Colored Glass | Variable | May or may not etch; test sample first |
The process demands a clean surface free from fingerprints or oils, as these will prevent the cream from reacting with the glass. Test small areas first, especially on Pyrex or colored glass, to check if the cream works. Expect permanent results on standard glass; resistant types will show little to no change.
Test a hidden spot before you etch your whole sign, especially with Pyrex or colored glass, to avoid disappointing results.
For thickness, anything less than about 1/8 inch risks cracking from handling, but this doesn’t affect how well etching cream works. Keep in mind: glass with coatings, laminations, or plastics won’t etch properly because the etchant can’t reach the surface beneath. Avoid trying to etch resin or plastic substitutes, they won’t yield the clear, frosted look of true glass.
Common Glass Etching Mistakes and How to Fix Them
Uneven or blotchy etching usually happens when your stencil or glass surface isn’t fully clean or when the etching cream isn’t applied consistently. Common glass cleaners often leave a thin, invisible film that stops the etching cream from working evenly. To fix this, wash the glass thoroughly with soap and water, then wipe it down with isopropyl alcohol before applying your stencil. Avoid sprays or cleaners with additives. Applying the etching cream in a smooth, even layer also helps. Some artists gently tap or swirl the cream after spreading it to keep it consistent and prevent blotchy spots.
Blurred or faded designs occur when the stencil moves or lifts during the etching process. This reduces the sharpness of your design’s edges. To prevent this, firmly press the stencil onto the glass, especially around the edges, and secure it with painter’s tape if needed. Your stencil might lift, letting some cream bleed under and cause blurred lines. Rinse the cream off right away and carefully reapply the stencil before trying again. Using a higher quality adhesive stencil can also improve edge sharpness if you plan many projects.
Accidental spills of etching cream on areas you don’t want etched can be tricky. Rinse the cream off right away with cool water, since once the cream etches the glass, the effect is permanent. To protect against spills, mask off the surrounding areas of your glass with painter’s tape or plastic sheeting. Use a glass cleaner and a gentle scrubbing pad on any spots with over-etching or dried cream residue to smooth roughness and brighten the glass.
- Clean glass with soap and water, then wipe with isopropyl alcohol to remove residue that causes uneven etching
- Apply etching cream in a consistent, even layer and occasionally tap or swirl it gently for better coverage
- Secure stencils firmly to prevent lifting and blurred edges; cover edges with painter’s tape if needed
- Rinse off spills immediately with cool water to avoid permanent marks in unwanted areas
- Use painter’s tape or plastic sheeting to protect areas around your design
- For over-etched spots, gently scrub with a non-abrasive pad and glass cleaner to reduce roughness
- Practice helps, perfect results improve as you learn to control cream application and stencil placement
Uneven etching can also come from applying cream for too long or too short a time. Follow the manufacturer’s instructions, generally leaving cream on the glass for about 5 to 10 minutes, depending on the product and design complexity. Leave the cream on longer for deeper results, but watch closely to prevent over-etching. Over-etching creates rough, pitted surfaces that might scatter light and fade details.
Safety Precautions When Etching Glass Signs
When etching glass signs, personal safety and a well-prepared workspace are essential to prevent injury and ensure a clean, precise finish. Protective gear shields you from corrosive chemicals, while proper ventilation keeps harmful fumes away. Handling and storing etching cream carefully minimizes risks and extends product usability.
Wearing Gloves, Eye Protection, and Protective Clothing
Etching cream contains acids that can cause severe burns or eye damage on contact. Wearing chemical-resistant gloves is important to protect your skin from accidental splashes. Use safety goggles or a face shield to prevent cream from reaching your eyes, and consider wearing a breathing mask to avoid inhaling any fumes. Long sleeves or an apron can protect your arms and clothing from spills.
For the best protection, choose nitrile gloves designed for chemical use rather than thin disposable ones. ANSI A5 cut-resistant gloves help avoid injuries from broken glass when handling your glass signage. Always check your gloves for holes before starting and replace them if damaged.
Ensuring Proper Ventilation and Workspace Setup
Working in a well-ventilated area keeps fumes from etching cream from accumulating to dangerous levels. Ideally, etch in a workspace with active mechanical ventilation or near an open window and door to maintain fresh airflow. Avoid confined spaces without ventilation to reduce inhalation risks.
Keep a water source nearby for quick rinsing if the cream contacts your skin or spills. Clear your workspace of unrelated items and cover surfaces with disposable plastic or newspaper to catch drips and make cleanup easier. A clean, organized workspace also reduces the chance of contamination that could interfere with the etching process.
- Choose a workspace with good air circulation
- Keep water nearby for rinsing spills or skin contact
- Cover work surfaces with disposable protection
- Remove unrelated items to avoid contamination
- Use a brush to apply etching cream precisely
- Keep cleaning supplies and first aid within reach
After applying etching cream, avoid breathing near the treated glass until you rinse it off to limit fume exposure. Dispose of used rags and brushes safely according to chemical guidelines. Promptly wash your hands and any exposed skin after finishing your project.
Safe Disposal and Storage of Etching Cream
Store etching cream in its original container with the lid tightly closed to prevent leaks or spills. Keep it out of reach of children, pets, and away from heat or direct sunlight to maintain its effectiveness and reduce hazards. A cool, dry, and well-ventilated cabinet or workshop shelf is best.
Dispose of empty containers or leftover cream according to your local hazardous waste regulations. Never pour unused etching cream down the drain or into the soil. Contact your local waste management facility for guidance on hazardous chemical disposal. Following these steps keeps your workspace safe and helps you avoid accidents or damage while crafting your glass signs.
Comparing Etching Cream, Sandblasting, and Laser Etching for Signs
Etching cream, sandblasting, and laser etching each offer different advantages and challenges for making glass signs. Etching cream is a chemical method that slowly eats away at the glass surface where applied. It’s affordable and easy for beginners but works best for smaller projects with simpler designs. Sandblasting uses high-pressure air mixed with abrasive material to blast away the glass surface. This method provides deeper, more pronounced etching, suitable for larger or more durable signs but requires specialized equipment and safety gear. Laser etching uses a focused beam of light to remove the glass surface with precision. It is ideal for detailed or delicate work as it does not physically touch the glass and reduces breakage risks. Laser machines cost more initially but offer fast and consistent results.
Choosing the right method depends on your budget, the level of detail in your design, and available tools. Etching cream is the cheapest, with total costs possible as low as $4.25 per wine glass, making it great for hobbyists. Sandblasting setups need investment in equipment and a controlled workspace. Laser etching typically requires access to a machine through a local maker space or professional service unless you have a machine at hand.
| Method | How It Works | Cost Range | Equipment Needed | Best Use | Results |
|---|---|---|---|---|---|
| Etching Cream | Chemical process that eats glass surface | Under $5 per small item | Etching cream, stencil, applicator | Small, simple signs; beginners | Light, shallow frosted effect; less detail |
| Sandblasting | Pressurized abrasive blasting | $200+ for equipment; cost varies | Sandblaster, compressor, safety gear | Large, durable signs; deeper engraving | Bold, deep etching; textured finish |
| Laser Etching | Non-contact light beam vaporizes glass | $2,000, $10,000+ for machines; service fees | Laser etching machine, computer design | Highly detailed, delicate or small designs | Precise, clean, consistent lines; minimal breakage |
Laser etching stands out for detailed glass signs because it applies no physical pressure, reducing breakage risk. Sandblasting excels at creating durable and visually deep signs for outdoor or high-traffic areas. Etching cream suits those who want a low-cost way to create light, elegant marks on wine glasses, picture frames, or small indoor signs. Testing etching cream in a small spot helps avoid uneven or damaged finishes caused by overapplication.
Always test etching cream on a hidden area before applying your main design to prevent unwanted damage.
Step-by-Step Action Plan for Etching Your Glass Sign
Follow these steps to get started with glass etching and create a clear, sharp sign safely and effectively.
- Before You Start: Gather all essential materials, glass, etching cream, stencil, gloves, and protective eyewear, and set up your workspace with good ventilation. Confirm your workspace is safe and organized before you begin.
- Day 1: Clean the glass thoroughly using soap and water, then dry it completely. Your glass surface should be spotless with no fingerprints or dust.
- Day 1: Apply your stencil carefully to the glass and secure it firmly. The stencil edges should be tight against the glass, with no gaps or bubbles.
- Day 1: Put on gloves and protective eyewear, then apply the etching cream as directed on the stencil area. Leave it on for the recommended time, usually 5 to 15 minutes, to see a frosted look develop.
- Immediately after Cream Application: Rinse off the etching cream thoroughly with water and remove the stencil. The etched area will be visibly frosted and textured.
- Day 2: Dry your glass sign and inspect the etched pattern closely. If any areas need touch-up, repeat the cream application selectively following the same safety steps.
- After Completion: Clean the entire glass sign again and remove any residue. Your etched sign will be ready to display or gift.
Frequently Asked Questions
What Is the Best Way to Clean Glass Before Etching?
Use 91% isopropyl alcohol to prep the glass; it removes oils and residues better than regular glass cleaner, ensuring the etching cream works evenly.
Can I Reuse Stencils for Multiple Glass Signs?
Yes, you can reuse stencils if cleaned properly, but delicate materials may tear. Vinyl or thicker plastic stencils last longer and yield more consistent results.
How Do I Fix Uneven Etching on Glass Signs?
Lightly sand uneven spots with fine-grit sandpaper, then apply etching cream again for a more uniform finish. Consistent application is key to avoid patchy areas.
Should I Wear Gloves When Etching Glass Signs?
Always wear nitrile gloves during etching to protect your skin from chemicals. Gloves also prevent oils from your hands interfering with the etching cream.
Can I Etch Glass Signs Outdoors?
Etching outside is fine if the weather is calm. Avoid windy or dusty conditions that can contaminate the etching cream and stencil adherence.
How Long Does Etching Cream Need to Stay on Glass?
Etching cream typically stays on for about 5 to 15 minutes depending on the product. Follow the cream’s instructions closely for optimal results and safety.
Key Points to Remember
Creating your own etched glass sign is manageable when you follow safety steps and use the right tools. Testing each step and paying attention to timing and cleanliness helps you achieve crisp, lasting designs. Try your etched sign on different glass types next to find which fits your style best.