How to Get Crisp Lines When Stenciling Wood: 8 Essential Techniques for Perfect Results
How to get crisp lines when stenciling wood depends on careful preparation and precise paint application. Start by sanding your wood surface smooth with 220-grit sandpaper to remove rough spots and wipe away all dust for a clean base. Using the right tools, such as a dense foam pouncer or stencil brush with off-loaded paint, prevents bleeding and keeps edges sharp.
Key Takeaways
- Sand wood with 220-grit or finer sandpaper before stenciling to create a smooth, even surface.
- Wipe the sanded wood clean of all dust to ensure paint adheres properly.
- Secure stencils firmly using painter’s tape or stencil adhesive to prevent shifting and smudging.
- Dip your brush or pouncer into the paint, then remove most of it by pressing on a paper towel until about 90% is gone before spreading paint onto the wood.
- Apply paint using gentle, upright tapping motions instead of brushing to avoid paint bleeding under the stencil.
- Let paint soak into wood fibers for 2-3 minutes before carefully lifting the stencil to maintain crisp edges.
How to Achieve Crisp Stencil Lines on Wood Surfaces
Stencil bleeding on wood happens when paint seeps under the stencil edges, ruining clean lines and making the design look smudged or fuzzy. This mainly occurs because of excess paint applied to the brush or roller, uneven pressure on the stencil, or a poorly stuck stencil that allows paint to slip underneath. Wood’s porous surface can also pull paint outwards, increasing the chance of bleed. Moisture in the paint and the texture of the wood can change how the paint flows, so managing those variables is important for sharp results.
Achieving crisp stencil lines depends on controlling paint load and securing the stencil firmly. Using a brush or foam applicator with just enough paint is key. To test the amount, dab your brush on the back of your hand, when it feels dry and no paint transfers, it’s ready. This technique, called off-loading, prevents excess paint from pooling around stencil edges. Applying paint in light, controlled taps rather than strokes stops paint from creeping beneath the stencil.
A dry, smooth, and stable surface is essential because rough or dusty wood increases bleeding risks. Although sealing the wood can help, your paint’s viscosity and how much you load it matter more here. Acrylic craft paint or latex paint work well when applied in thin layers. Thick or watery paint is more likely to bleed.
To lock the stencil in place, use painter’s tape or stencil adhesive spray. This creates a tight seal that stops paint from slipping underneath. The stencil should not lift or shift while you apply paint, which can blur your lines.
Five key ways to get sharp stencil edges are: secure the stencil with tape or adhesive spray to stop sliding; lightly dry your brush or roller before adding paint; tap or pounce paint on using a small foam brush or roller instead of brushing; keep a damp paper towel or a butter knife with one nearby to quickly clean spills before they set; and build the design with several thin layers instead of a heavy one. These methods reduce paint excess and keep the stencil stable, which helps prevent paint bleeding.
Your goal is to see sharp, defined edges exactly matching the stencil cutout, with no paint spreading beyond. Edges should look crisp without fuzzy halos or splotches. Patchy or blurred lines indicate paint overload or a loose stencil. In cases of rough wood grain or open pores, multiple light coats and a good-quality stencil adhesive become even more critical. Dry times between layers also help avoid pushing wet paint around and ruining crispness.
The right balance of surface preparation, paint control, and stencil fixation influences your success. Following these methods consistently will produce professional-looking wood stencils with sharp lines, improving your crafting projects.
Preparing Wood: Sanding, Cleaning, and Sealing for Sharp Stencils
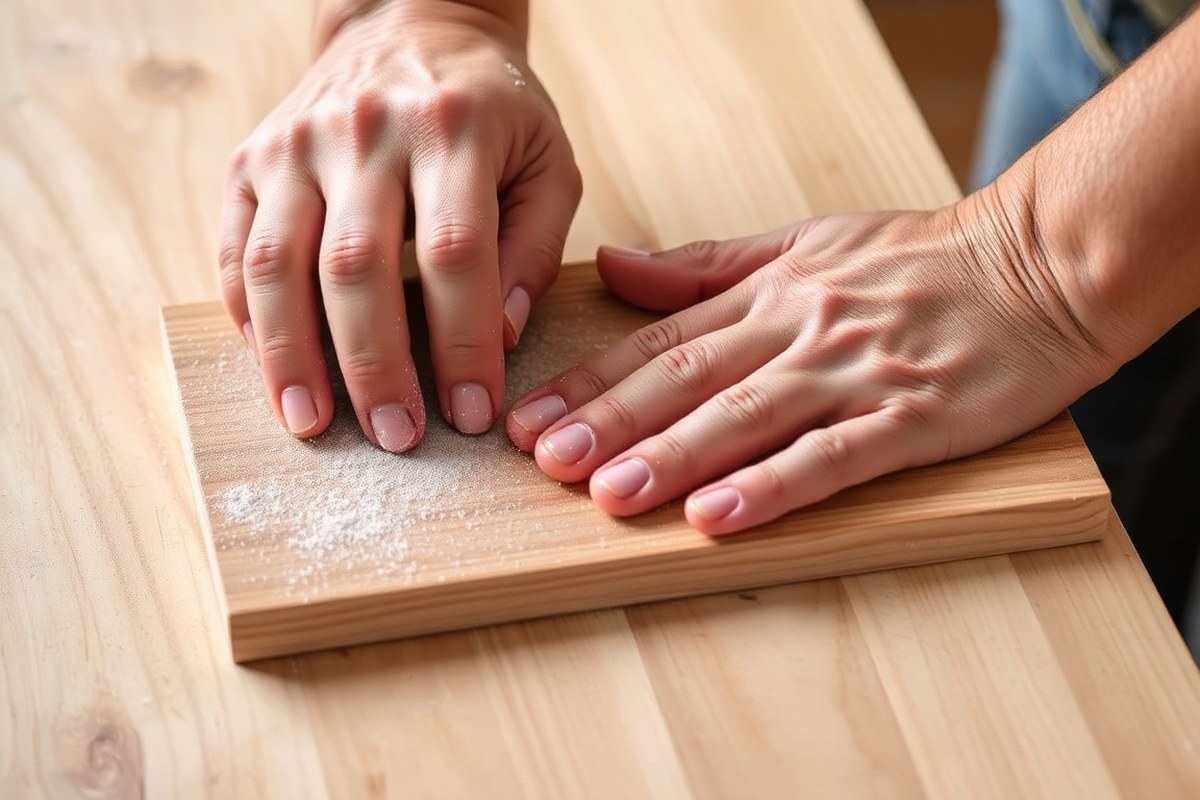
Preparing wood properly before stenciling is essential to get crisp, clean lines. A smooth surface prevents paint from bleeding beneath the stencil edges, while thorough cleaning removes dust and grease that can interfere with paint adhesion. Sealing porous or raw wood creates a uniform base, stopping paint from soaking in unevenly and fuzzing the stencil outlines. Follow these detailed steps to sand, clean, and seal your wood so your stencil work looks sharp and professional:
- Sand the wood surface smooth. Start with 120-grit sandpaper for rough or raw wood, then finish with 220-grit sandpaper to create a fine, even surface. Sanding should remove splinters and irregularities but avoid sanding through any existing paint or finish. Smooth wood ensures paint sits on the surface instead of soaking in, which helps stencil edges stay sharp.
- Remove all sanding dust. Wipe the wood with a tack cloth or use a vacuum with a brush attachment to pick up fine particles. Sanding dust can cause paint to clump or lift under the stencil, resulting in bleed marks and fuzzy edges.
- Clean off grease and oils. Use a lint-free cloth dampened with rubbing alcohol or a mild, grease-cutting soap solution to wipe the surface. This step removes natural oils and residue that block paint adhesion. Allow the wood to dry completely before moving on.
- Seal porous or raw wood with a clear matte sealer or Mod Podge. Apply a thin, even coat using a foam brush, covering the entire area where you’ll stencil. Let it dry for at least one hour following the manufacturer’s instructions. This layer reduces paint bleed by preventing paint from absorbing unevenly into the wood grain.
- Lightly sand the sealed surface. Use 400-grit sandpaper very gently to smooth out any raised grain or brush marks from the sealer. Then remove dust with a tack cloth to restore a clean, flat base for your stencil.
- Optionally, apply a base coat of acrylic paint. Choose a single, matte color that contrasts well with your stencil paint. Applying and drying a base coat first can improve paint coverage and add durability to your project.
Use a foam brush for sealing and base coats to avoid brush strokes that could cause stencil bleeding.
Checklist of tools and materials for preparation:
- 120- and 220-grit sandpaper
- 400-grit sandpaper (for final smoothing)
- Tack cloth or vacuum with brush attachment
- Lint-free cloth
- Rubbing alcohol or mild soap solution
- Clear matte sealer or matte Mod Podge
- Foam brushes
- Acrylic base coat paint (optional)
Taking the time to sand, clean, and seal creates a solid foundation that defines the crispness of your stencil lines. Skipping these steps or only sanding roughly can cause paint to blur, bleed, or take on a fuzzy texture with uneven edges. Proper surface preparation typically requires a few hours, including drying time, but it pays off by giving you sharp, professional-looking wood stencil art.
Choosing the Right Paint and Tools to Avoid Bleeding
Choosing the right paint and tools makes a big difference in getting crisp lines when stenciling on wood. Acrylic paint is often the best choice because it adheres well to wood and dries quickly, which reduces the risk of paint bleeding under the stencil edges. Latex paint is more prone to bleeding due to its thinner consistency, while chalk paint can give a softer, distressed look but requires careful application to avoid feathering.
Using the correct brushes or sponges helps control paint application. Stencil brushes with short, firm bristles allow you to dab the paint in small amounts, preventing excess that can seep beneath the stencil. Round stencil sponges provide gentle, controlled coverage, especially on rough or porous wood grains. Foam brushes tend to hold more paint, so they need careful off-loading (removing extra paint) before applying. Rollers can work for larger designs but might cause bleeding if the paint layer is too thick. The table below compares acrylic, latex, and chalk paints in terms of texture, drying time, paint finish, and best stencil uses on wood surfaces.
| Paint Type | Texture & Consistency | Drying Time | Finish | Best Stenciling Uses |
|---|---|---|---|---|
| Acrylic | Medium thickness; smooth application | 20-30 minutes to touch dry | Satin to matte; durable and flexible | Sharp lines; intricate and bold designs |
| Latex | Thin to medium; more fluid | 30-60 minutes to dry | Matte to semi-gloss | Large simple shapes; less detailed stencils |
| Chalk | Thick, creamy texture | 30 minutes to 1 hour | Matte with chalky finish | Distressed or vintage look; selective stencil work |
For brushes and applicators, here’s a quick list with pros and cons to help you decide:
- Stencil Brushes: Short, stiff bristles provide control and minimize bleed. Best for detail work. Requires off-loading paint before dabbing. Costs about $4-$8 each.
- Round Stencil Sponges: Soft and absorbent; can create softer edges if over-applied but great for textured wood. Inexpensive, around $1-$3 per sponge.
- Foam Brushes: Holds a lot of paint, so off-load thoroughly to avoid blobs. Good for quick coverage but risky for fine lines. Usually under $2 each.
- Mini Rollers: Efficient for large areas but can cause bleeding if paint is too thick. Choose rollers with smooth foam and use thin paint layers. Prices vary from $3-$10.
Apply paint sparingly by dabbing or rolling lightly. Off-loading excess paint onto a paper towel before applying will keep paint from puddling under stencil edges. Let the paint soak into the wood fibers for 2-3 minutes before carefully removing the stencil to preserve sharp lines. If the wood is rough or porous, layering thin coats helps build up opacity without bleeding.
How to Secure Stencils: Tapes, Adhesives, and Placement Tips
Firmly securing your stencil on wood is key to preventing movement and paint bleed, which helps produce crisp lines. Painter’s tape and repositionable spray adhesive are the two main methods to hold stencils in place. How you combine or choose between them depends on your project size, wood surface texture, and whether you want to reposition the stencil during painting.
Using Painter’s Tape Effectively
Painters tape is a common and affordable way to hold stencils on wood. Use a high-quality, low-tack painter’s tape to avoid pulling up wood fibers or paint finish. Tape around the stencil’s outer edges, pressing firmly to ensure the edges stick well. Wider tape (1 to 2 inches) provides better hold and reduces chances of paint bleeding under the edges.
Tape works especially well when stenciling on flat, smooth wood surfaces and smaller projects. Costs typically range from $5 to $8 per roll (60 to 180 yards). Proper taping creates a barrier that limits paint seepage but only at the taped spots, so small lifting might still happen between tape pieces.
Benefits of Repositionable Spray Adhesive
Repositionable spray adhesive is designed to lightly tack the stencil on wood, securing the entire stencil surface and delicate cutouts. Spray a thin, even coat on the back of the stencil, wait about 15 to 30 seconds for it to become tacky, then carefully place it on the wood. This adhesive seals the edges better than tape alone, reducing bleed significantly.
The repositionable property lets you lift and reposition the stencil without damage or residue. It works best on smooth to moderately textured wood and larger projects where frequent stencil repositioning saves time. Prices for stencil adhesive sprays range from $7 to $15 per can, which covers several medium-size projects.
- Painter’s tape: inexpensive, easy to remove, best for small or simple designs
- Spray adhesive: improves edge sealing over the whole stencil, allows repositioning
- Combination approach: tape outer edges plus spray adhesive on back for maximum hold
- Low-tack tape prevents damage to wood finish
- Use spray adhesive in a well-ventilated area due to fumes
- Test adhesive on scrap wood to check for residue or finish reaction
- Replace stencil adhesive if it becomes less tacky after multiple uses
Strategically Taping One Side
Taping only one side of the stencil creates a hinge, allowing you to lift and reposition the stencil easily without fully removing it. Attach painter’s tape along one long edge, firmly pressing it down. This method offers control over stencil placement, especially on complex or multi-layer designs.
After securing the hinge side, use spray adhesive lightly on the back of the other stencil areas for added hold. This approach balances the benefits of both techniques, helping maintain sharp stencil edges and preventing paint seepage during detailed work.
Mastering Paint Application: Off-Loading and Layering for Clean Edges
Off-loading paint means applying very little paint on your brush or sponge before you stencil. This technique prevents paint from seeping under the stencil edges, keeping your lines crisp. Building up several thin layers instead of one thick one ensures good coverage without bleeding.
Loading and Off-Loading Paint Correctly
Start by dipping your applicator lightly into the paint, then remove most of it before you touch the stencil to the wood. This step is called off-loading, and it helps control how much paint you use. Too much paint leads to bleeding and fuzzy edges.
Use a paper towel, palette, or scrap wood to dab off the excess paint until the applicator holds just a thin, almost dry layer. The applicator should feel almost dry to the touch but still have some pigment for coverage.
- Dip your brush or sponge tip into the paint for less than one second.
- Swipe or dab the applicator against a paper towel or palette to remove extra paint.
- Check that the paint is barely visible on the applicator before applying.
- Hold the stencil firmly or secure it and press down straight with the applicator without sliding.
- Apply paint using small, gentle tapping or dabbing motions rather than brushing back and forth.
- Reload and off-load paint frequently to keep layers light.
Too much paint on your tool increases the risk of bleeding, so always off-load often, even if it slows your work.
Building Thin Paint Layers Gradually
Use two to three thin layers to get a solid, opaque look without risking bleeding. Thick single coats trap liquid that can seep under stencil edges. Each layer should dry almost fully before adding the next, usually 20 to 30 minutes for acrylic paint on wood at room temperature.
Light layers let you correct small mistakes early. If you notice any paint pooling or bleeding starting, stop and gently blot before continuing. Layering also gives a cleaner edge because paint doesn’t push against the stencil’s edges strongly enough to slip underneath.
Choosing the Right Applicator Tool
Dense foam pouncers are best for wood stenciling because they hold paint evenly and release it in controlled dabs. Use the sponge tip straight down and avoid squeezing it wet, or paint will splatter and cause bleeding.
Stencil brushes work but require more skill to apply paint upright with gentle taps using the bristle tips. Brushes tend to pick up more paint, so off-loading is even more essential to avoid drips or smudges.
Small foam rollers can cover area quickly but usually deposit too much paint under stencils, risking bleed. Rollers suit larger backgrounds or when using stencil creme but not for crisp stencil edges on detailed woodwork.
The best results on wood come from dabbing tools that control paint application, not brushing or rolling that risks pushing paint sideways under the stencil.
Timing and Stencil Removal: When and How to Lift Stencils Cleanly
Wait at least 24 hours before removing stencils painted with latex on wood surfaces. This timing allows the paint to dry enough to avoid smudging while still being soft enough to prevent peeling or lifting from the wood. Removing the stencil too soon, while the paint remains wet or tacky, risks bleeding and blurry edges. On the other hand, waiting too long might cause the paint to bond tightly to the stencil, making it difficult to lift without damaging crisp lines.
Begin stencil removal by lifting one corner slowly and gently pulling it back at a low angle, close to the wood surface. Avoid pulling the stencil straight up, as this can cause paint to lift off the wood or smear. Use steady, controlled motions rather than quick jerks. If the stencil sticks, pause and wait longer before trying again. Applying gentle heat from a hairdryer on low, held at a distance, can sometimes soften stubborn stencil paint without drying it fully, making removal easier. Be careful not to overheat, which can cause distortion or tackiness.
Drying times differ based on paint type and environmental conditions. Oil-based paints usually require longer curing times, sometimes 48 hours or more. Checking the manufacturer’s instructions on your paint and stencil packaging gives the most reliable guidance. Humidity, temperature, and wood porosity also affect drying speed. Cooler or more humid conditions slow drying, so add extra drying time in such environments. Stencils lifted before the paint dries fully often cause faint lines or blurred edges, decreasing the sharpness of your design.
For multiple stencil layers, allowing complete drying between coats is essential. Applying a second stencil over wet or tacky paint can trap moisture and lead to bleeding or uneven edges. Ensure each layer dries per the paint’s recommendations, generally at least 24 hours for latex. Increasing ventilation and maintaining a steady, warm room temperature between layers can help speed drying safely.
Following these guidelines requires patience but ensures those perfect, crisp lines you want. Removing the stencil too early or too forcefully risks smudges or peeling paint, undermining your work. Gently lifting the stencil after the paint reaches a semi-dry but not fully cured state maximizes crisp edges and clean lines. Sticking to the timeline and gentle removal technique is key to professional-looking wood stenciling without touch-ups or repainting. This care takes just a day or two but preserves all your effort in crafting sharp, beautiful wood designs.
Fixing Stencil Bleeding and Imperfections on Wood
Paint bleeding or fuzzy edges can spoil the clean look of your wood stenciling project. Correcting these imperfections without repainting the entire surface saves time and keeps your design sharp. Common stencil bleeding issues include excess paint pooling around edges, small bleed spots, and minor imperfections like smudges or uneven lines.
Begin by removing any extra paint while it’s still wet or a bit sticky. Use a damp paper towel wrapped around the tip of a butter knife to lightly trace the stencil’s edges, picking up stray paint without dragging it across the design. This technique keeps the edges sharp and the stencil’s interior paint intact.
Small bleed spots that have dried on the wood require a more precise touch-up. Dip a small straight pin or a toothpick into the surrounding wood color or base paint, then carefully paint over the bleed spots to blend them back into the background. This technique works well for tiny imperfections because it allows you to apply very small amounts of paint exactly where needed.
- Use a damp paper towel or butter knife for wiping wet excess paint.
- Dip a toothpick or small straight pin in base paint for tiny bleed spots.
- Touch up minor imperfections with a toothpick dipped in matching stencil paint.
- Wait until stenciled paint dries before performing touch-ups for better accuracy.
- Keep cleanup materials handy: cotton swabs, small brushes, and clean cloths.
- Seal edges with Mod Podge before painting next time to reduce future bleeding.
Touch-ups demand patience and a steady hand. Use a thin, fine-tip brush or toothpick for the best control. Avoid overloading the brush with paint, as too much paint can cause new bleeding. Let each repaired spot dry fully to check if additional correction is needed. In some cases, lightly sanding rough edges after drying can smooth out irregularities before applying more paint or a clear topcoat.
Having these tools handy, small brushes costing around $3 to $5, toothpicks or straight pins readily available at low cost, and mild paint removers or water if using water-based paints, makes quick corrections simple. Clean workspaces and good lighting also improve your ability to see imperfections while touching up. This thoughtful approach preserves the wood finish and helps maintain the sharpness and clarity of your stencil design without repainting the whole section.
Stenciling on Different Wood Textures and Project Types
Wood grain, texture, and the size of your project significantly affect how crisp your stencil lines turn out. Adjusting your technique means choosing the right surface prep, paint load, and stencil size based on these factors to avoid bleeding and blurred edges.
Smoother vs. Rough Wood Surfaces
Smoother wood surfaces give you the best chance of sharp stencil lines because paint sits evenly without seeping into deep grain. Rough or heavily textured wood can cause paint to bleed underneath the stencil edges, resulting in fuzzy or inconsistent lines. In those cases, use less paint and dab or stipple carefully with a sponge or a dry brush to control application.
For rough wood, sanding to a medium grit (around 120-150) before stenciling helps reduce texture without removing all character. A light seal coat, such as a water-based sealer or primer, also fills small pores and smooths out irregularities, making paint sit on the surface instead of soaking in.
| Wood Texture | Stencil Prep | Paint Application | Expected Edge Crispness |
|---|---|---|---|
| Very smooth (planed or sealed) | Minimal sanding; clean surface | Standard brushes or sponges; moderate paint | Sharp, clean edges |
| Moderate grain (light sanding, unsealed) | Sand to ~150 grit; optional seal coat | Dry brush or light sponge tapping | Mostly crisp; minor edge softness |
| Rough grain (deep texture, unfinished) | Sanding difficult; seal coat recommended | Very light dry brushing or pouncing; multiple layers | Edges may be soft; extra care needed |
Painting on unsealed, rough wood is riskier for clean lines but doable with patience and layers of light paint. The goal is to avoid flooding paint into wood pores and pushing it under stencil edges.
Stenciling on Curved and Rounded Wood
Curved surfaces and rounded edges create challenges because stencils will not sit flush without wrinkling or lifting. Use smaller stencil sections instead of a big one that you must stretch or bend. Applying spray adhesive with low tack helps hold stencil edges snug without damaging the wood.
Instead of brushing or rolling paint, tapping or pouncing motions with a sponge reduce the risk of paint pooling or running. For tight curves, trim the stencil into smaller pieces to fit contours better and apply paint in multiple passes, allowing slight drying between each.
Tip: Avoid pressing too hard on curved surfaces; a light touch prevents paint bleed beneath the stencil edges.
Approach for Large vs. Small Wood Projects
Choosing the right stencil size is key. Large stencils work well for furniture or big signs where a bold look is needed. Small stencils work better on crafts or detail areas where too much pattern would overwhelm the surface.
Large wood pieces with expansive flat areas allow you to experiment with bigger designs or combine multiple smaller stencils in a pattern. However, they often require extra preparation like sealing or light sanding to maintain crispness over the whole area. Smaller projects are easier to control paint-wise but demand precise paint application because the stencil’s details are more visible.
Larger projects benefit from multiple thin coats of paint using dry brushing or light pouncing, allowing each layer to dry quickly before adding the next. This reduces runs and bleeding especially on textured wood.
Step-by-Step Action Plan for Crisp Stencil Lines on Wood
Follow these steps carefully to get sharp, clean stencil results on your wood projects.
- Before you start: Sand and clean the wood surface thoroughly until the wood feels smooth and free of dust, ensuring paint will adhere well.
- Before painting: Apply a clear primer or sealer to the wood and wait until it’s fully dry, which helps prevent paint bleed through the grain.
- Preparation phase: Secure your stencil firmly with painter’s tape or repositionable adhesive and confirm it does not shift when lightly touched.
- Paint application: Load a small amount of paint on your brush or sponge, off-load excess on a paper towel, and apply with a gentle, tapping motion to avoid paint pooling.
- Layering: Allow the first paint layer to dry completely before adding any additional layers to maintain crisp edges.
- Timing for removal: Remove the stencil while paint is slightly tacky, not wet or dry, to prevent smudging.
- Post-paint touch up: Use a fine brush to fix any minor paint bleeding or uneven edges once the paint has dried.
- After your project: Let the wood cure fully, usually 24 to 48 hours, to protect your crisp stencil work during handling or finishing.
Frequently Asked Questions
How Do I Use the Paint Vinyl Paint Peel (PVPP) Method for Crisp Stencil Lines?
The PVPP method involves applying paint over a vinyl stencil, then peeling it off once dry. This technique helps prevent bleeding and produces sharp edges on wood surfaces. It’s especially useful for detailed stencil designs on smooth wood.
Can I Use Spray Paint to Get Crisp Stencil Lines on Wood?
Spray paint can work for sharp lines if applied lightly and evenly. Use a stencil adhesive to hold the stencil in place and spray from a distance to avoid paint bleeding under the stencil edges. Practice on scrap wood to control spray coverage.
What Role Does Stencil Material Play in Getting Crisp Lines on Wood?
Stencil material affects paint bleeding and edge sharpness. Vinyl or polyester stencils cling well to wood, reducing paint seepage. Choose reusable, sturdy stencils designed for wood projects for better control over crisp lines.
How Can I Prevent Paint from Pooling Behind Stencil Edges on Wood?
Use a small amount of paint and apply with an off-loading technique, dabbing excess off the brush or sponge. This prevents paint buildup that can seep under the stencil edges and cause blurry lines. Multiple thin layers are better than one heavy coat.
Are There Differences in Pressure Application for Brushes vs. Sponges When Stenciling Wood?
Yes, brushes require a light tapping or stippling motion to avoid pushing paint under stencil edges. Sponges need gentle dabbing rather than rubbing. Adjust the pressure based on tool type to maintain crisp lines.
How Does Temperature or Humidity Affect Stencil Paint Drying and Crisp Lines on Wood?
High humidity slows drying times, increasing risk of paint bleeding under the stencil. Cooler temperatures also slow drying. Working in a dry, moderate climate or using fast-drying paint can help maintain sharp stencil lines.
Final Thoughts
Getting crisp stencil lines on wood hinges on good preparation, careful paint use, and precise timing. Start with sanding and sealing your wood, then use the right paint and techniques to control bleeding. Your next step is to practice this process on a small wood sample to fine-tune your stencil placement and paint application before tackling larger projects.