
How to Cut Wood for Signs: A Complete Guide with Tools, Tips & Methods
How to cut wood for signs requires picking the right tools and using proper techniques to get clean, precise cuts. Using a jigsaw works well for letters over 3 inches tall with wood up to 2 inches thick. For thinner wood or detailed shapes like script fonts, a scroll saw or Cricut Maker is better suited. Start by preparing your wood surface and selecting a cutting method matched to your design’s size and detail level.
Key Takeaways
- Use a jigsaw for cutting large letters in wood up to 2 inches thick for faster, cleaner cuts.
- A scroll saw is ideal for intricate script fonts and wood thinner than 1/2 inch, especially plywood.
- The Cricut Maker can slice balsa wood as thick as 3/32 inch, creating detailed letter shapes up to 11.5 inches across.
- Prepare wood by sanding smooth before cutting to improve edge quality and reduce splintering.
- Allow paint or stain to dry fully, usually at least 24 hours, before cutting for best results.
- CO2 laser engravers deliver crisp cuts and deep engravings with minimal finishing effort.
Best Tools and Methods to Cut Wood for Signs
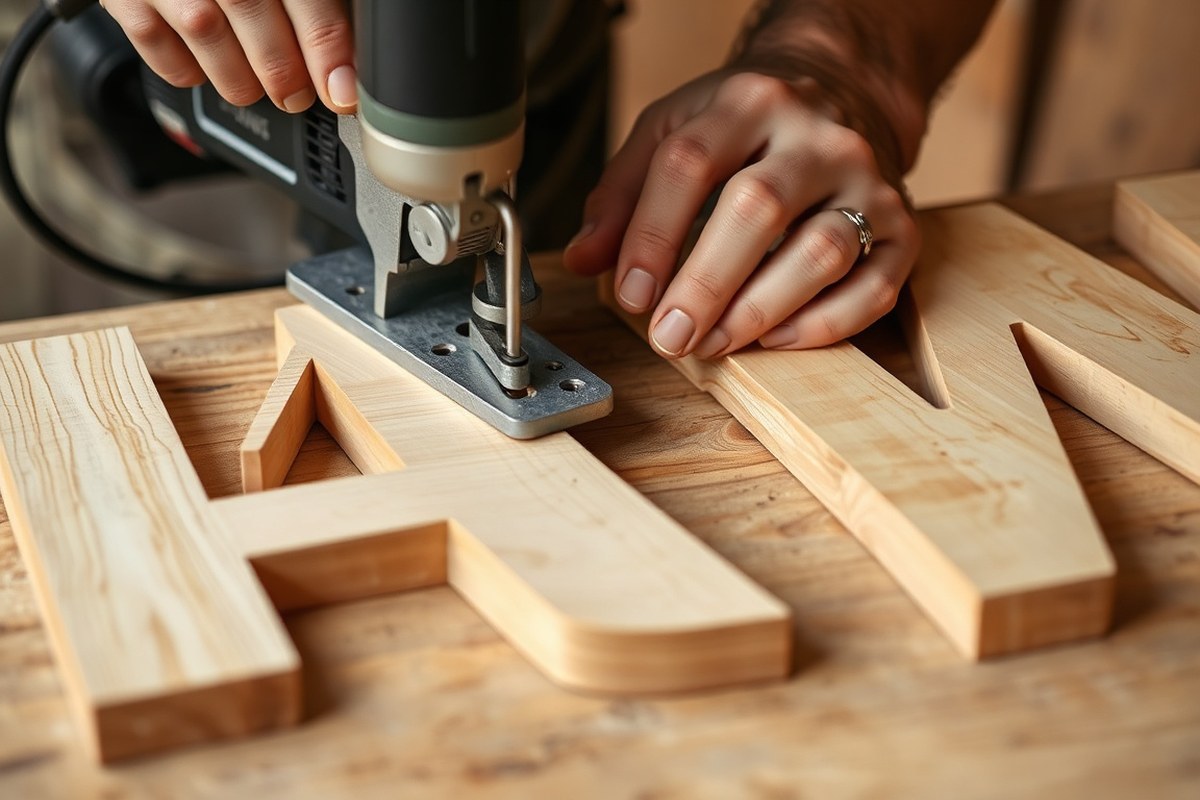
Choosing the right cutting tool for wood signs depends on the size, shape, and thickness of the wood you plan to use. For wood thicker than 3/4 inch, power tools like a jigsaw, router, or CNC router are essential because hand tools like coping saws or scroll saws will bog down. Thin balsa wood under 3/32 inch can be cut with specialized machines like the Cricut Maker, but it won’t handle thicker or harder wood. Intricate shapes and tight curves require more precise methods such as scroll saws, CNC routing, or laser cutting.
The table below summarizes common tools and their best uses, maximum wood thickness, typical cost, and precision on tight curves. This comparison helps clarify which tool fits your project.
| Tool | Best For | Max Wood Thickness | Typical Cost | Precision on Tight Curves |
|---|---|---|---|---|
| Coping Saw (hand) | One-off letters, no power tools | Up to 3/4 in | $9, $20 | Low, wide curves only |
| Jigsaw | Larger letters, thicker stock, fast cuts | Up to 2 in | $25, $100 | Moderate, struggles on tight inside corners |
| Scroll Saw | Script fonts, tight curves, stacked cutting | Up to 1.5 in (stacked) | $100, $400 | High, can follow a pencil line |
| CNC Router | Multiple identical signs, detailed cuts | Varies, often over 2 in | Hundreds to thousands | Very high |
| Cricut Maker | Very thin wood, simple designs | Up to 3/32 in (balsa wood) | $250, $400 | High for thin materials |
| Laser Cutter | Engraving and cutting thin wood | Up to 1/4 in (depending on power) | $400, $4000+ | Very high |
Hand tools like a coping saw work well for simple, single letters on thinner wood, but they’re slow and limited in precision. Jigsaws handle thicker stock up to 2 inches but have moderate accuracy with tight curves. Scroll saws provide excellent precision for script fonts and smaller pieces, ideal for signs under 1.5 inches stacked thickness. CNC routers and laser cutters offer clean cuts and sharp detail, best for multiple identical signs or very intricate designs, but they require a larger investment and setup.
For household use, a jigsaw or scroll saw covers most sign-cutting needs with wood thicknesses between 1/2 inch and 1.5 inches. Start by drilling small starter holes inside closed letter shapes, this step keeps cuts clean and prevents cracking. Large letters over 3 inches tall generally suit jigsaw use, while fine script and small detailed letters benefit from a scroll saw’s precision. Avoid using tools like the Cricut Maker for anything thicker than very thin balsa wood because it can’t cut through denser or thicker materials.
For best results, clamp your wood securely, trace your design clearly, and use a sharp blade. Experiment on scrap wood to find the right speed and blade type. With these considerations, you can select the best tool that balances precision, cost, and convenience for your specific wooden sign project.
How to Prepare Wood Before Cutting for a Smooth Finish
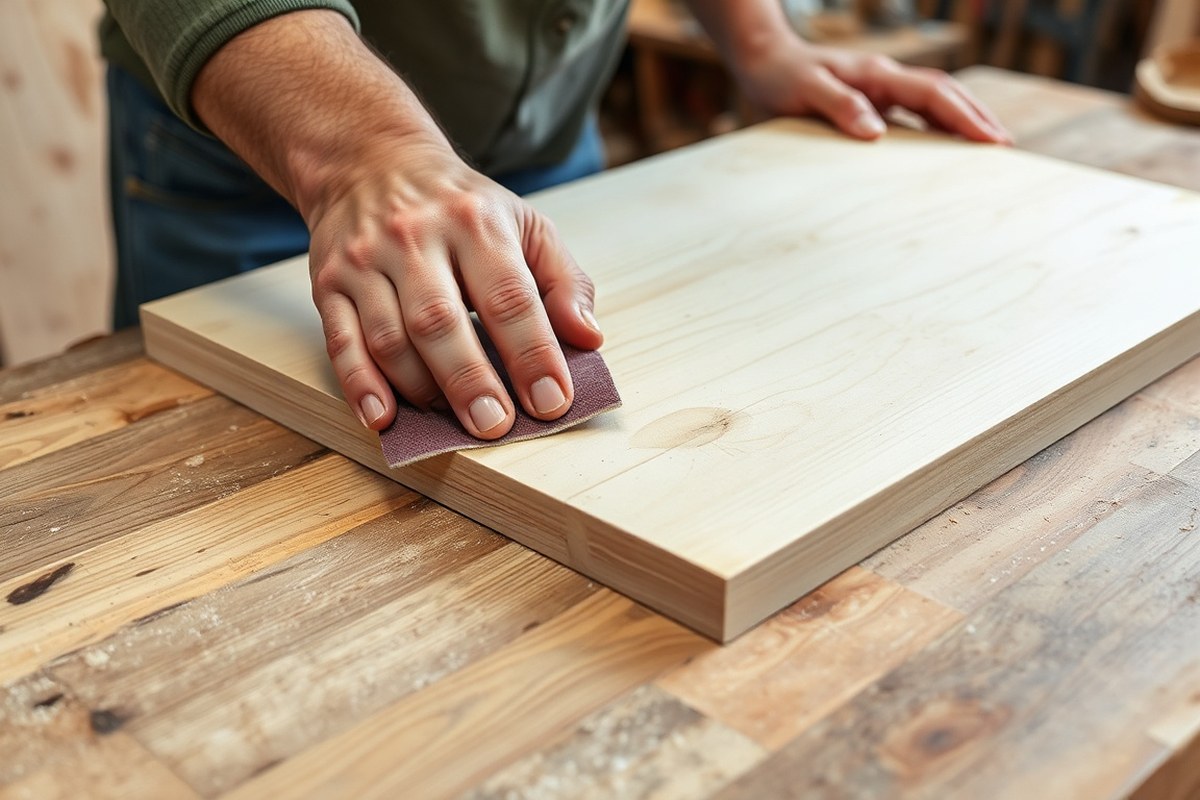
Preparing wood before cutting ensures clean, precise cuts and a lasting finish on your wooden signs. Proper preparation includes choosing the right wood, sanding the surface smooth, and inspecting for any defects like knots or warping that might interfere with your cutting process.
Selecting the Right Wood Type and Board Thickness
Start by selecting wood suited for signs, such as pine, birch, or poplar, which typically balance workability with aesthetics. Choose a thickness that fits your design needs, generally between ¼ inch and ¾ inch for DIY signs. Thicker boards offer durability but can be harder to cut precisely with tools like a laser cutter or jigsaw.
The wood’s moisture content should be low, ideally under 10%, to prevent warping after cutting. Avoid boards with visible defects that could weaken the sign or distort when cut. Different wood types also affect the final look after staining or painting, so factor in the finish you plan to apply.
Sanding and Smoothing the Wood Surface
Sanding preps the wood surface to accept paint, stain, or vinyl smoothly and helps avoid rough edges after cutting. Start sanding with 120-grit sandpaper to remove any rough patches or mill marks from the surface and edges.
Finish with 220-grit sandpaper for a finer, smooth surface that improves paint or stain absorption. This two-step sanding method reduces splinters and creates an ideal base for vinyl or paint adherence.
- Sand the entire board with 120-grit sandpaper, focusing on rough spots and the edges.
- Follow by sanding with 220-grit sandpaper for a smooth finish.
- Wipe the wood down with a damp cloth or tack cloth to remove all sanding dust.
Skipping fine sanding can cause paint or vinyl designs to peel or look uneven on your sign.
Checking for Defects and Marking Cut Lines
Thoroughly inspect the wood for knots, cracks, warping, and other imperfections that make clean cuts difficult or reduce structural integrity. Lay the wood flat on a surface to check for any bowing or twisting. Warped boards can shift during cutting and cause inaccuracies.
Mark your cut lines lightly with a pencil or masking tape before cutting. This visual guide helps ensure precise, straight cuts or accurately placed curves and letters. Adjust or discard boards with significant defects that will complicate cutting or affect the finished sign’s strength.
Optional Wood Conditioning for Better Results
Conditioning or sealing wood before cutting is generally not necessary unless using delicate finishes afterward. If you plan to apply stain or paint directly after cutting, conditioning with a wood conditioner helps achieve even absorption and reduces blotching.
However, avoid sealing the wood before cutting if using vinyl-based designs or heat transfer vinyl on your signs, as these require a smooth painted or stained surface that is properly dried but not sealed. Sealing may interfere with adhesion.
- Decide if you will apply stain or paint after cutting; if yes, apply a wood conditioner on bare wood after sanding.
- Allow the conditioner to dry according to the product instructions, usually 15 to 30 minutes.
- Proceed with cutting on the conditioned surface once completely dry.
Apply wood conditioner only if staining; sealed wood resists vinyl adhesives and heat transfers.
Techniques for Cutting Intricate Letters and Shapes
Cutting intricate letters and shapes in wood requires precision tools, steady control, and choosing the right blades. Techniques like scroll sawing and jigsaw use, combined with stencils or templates, help produce clean, detailed cuts without splintering the edges. Adjusting blade type and cutting speed reduces tear-out for crisp, professional results.
Using Scroll Saws for Fine Detail
Scroll saws are one of the best tools for cutting fine letters and detailed shapes because their thin blades navigate tight curves accurately. They allow you to control the speed and direction steadily, reducing splinters on delicate parts like script fonts or small letter components. A key tip is to make starter holes inside closed shapes before turning the blade to cut outward to the design lines.
Clamp your wood securely and let the blade reach full speed before starting your cuts to avoid dragging the wood or splitting fibers. Hold the wood flat against the saw’s table, moving it slowly around curves. Using painter’s tape over the cut lines can hold surface fibers in place and prevent tear-out along edges.
Jigsaw Tips for Larger Lettering
Jigsaws work well for cutting larger and less detailed letters or shapes on wooden signs. Their thicker blades aren’t as precise as scroll saw blades but offer versatility with various blade types. Use a fine-tooth blade (20 TPI or more) for better control and cleaner cuts, especially on curved or script styles. Slow, steady movements keep the letter edges smooth and reduce splintering.
Cut the outer letter outline first, then move to interior details if needed. Support the wood firmly and avoid forcing the jigsaw, let it do the cutting. Painter’s tape applied over the cut lines helps protect the wood’s surface fibers.
Employing Templates and Patterns
Templates or stencils ensure precise, repeatable lettering and shapes. You can print or draw your design on stiff paper, plastic, or thin wood sheets, then trace it onto your wooden sign. Following the traced lines closely with your saw or carving tools helps keep cuts neat and consistent across multiple signs.
Reusable vinyl stencils cut with a machine like a Cricut Maker allow fast production of uniform letters and shapes. For individual letters, you can also download or create word-for-word letter templates to transfer via carbon paper or adhesive spray. Secure the stencil firmly with tape and cut slowly along the edges for accuracy.
- Use carbon paper to copy complex designs easily
- Clamp templates to the workpiece to prevent slipping
- Apply painter’s tape over cut lines on delicate wood grains
- Choose reusable vinyl stencils for batch productions
- Mark interior holes before cutting with starter drill bits
Templates help novices maintain clean edges and consistent font shapes, while saving time when making multiple signs.
Blade Selection and Cutting Speed Advice
Choosing the correct blade type is critical to clean, splinter-free cuts. For intricate work, blades with a fine tooth count (20 TPI or higher) create smoother edges and reduce tear-out. Scroll saw blades designed for piercing cuts handle interior holes and interior letter shapes well.
Keep cutting speed moderate; too fast can cause burning or splintering, too slow may tear fibers if the blade stalls. Using painter’s tape over cut lines further protects the surface, especially for soft or porous woods like pine or balsa. For machines like the Cricut Maker, remember the maximum wood thickness it can cut cleanly is 3/32 inch (2.4 mm) of balsa wood, hardwoods and plywood require specialized tools like a CNC router or plunge router.
Step-by-Step Safety Guidelines When Cutting Wood
Wearing the right safety gear is critical when cutting wood to protect yourself from injuries and health hazards. You must always wear safety glasses to shield your eyes from flying wood chips and splinters. A dust mask is equally important to prevent inhaling fine wood dust, which can cause respiratory problems over time. Gloves help protect your hands from cuts and splinters, but avoid bulky gloves that could get caught in power tools. Hearing protection is recommended if you’re using loud saws for extended periods.
Setting up your workspace carefully reduces accidents. Use a sturdy workbench with clamps to securely hold the wood while cutting. Keep the area clean of debris and tools to prevent tripping or slipping. Good lighting helps you see the cutting line clearly and avoid mistakes. Ensure your tools are in good working order and placed safely when not in use. Position yourself so you have full control over the tools, and avoid awkward or unstable postures.
- Wear safety glasses, dust mask, and snug-fitting gloves
- Secure wood with clamps before cutting
- Maintain a clean and well-lit workspace
- Check tools for damage and sharpness before use
- Keep hands away from cutting blades at all times
- Follow manufacturer instructions for power tools
- Use hearing protection when operating loud machinery
Wood dust can irritate your eyes, skin, nose, and lungs. Prolonged exposure may cause allergies or more severe respiratory issues, especially when cutting hardwoods or treated woods. Splinters can cause painful wounds and introduce bacteria, so treat any skin injuries promptly with cleansing and protection. To minimize these risks, always use a dust mask rated for fine particles and clean your workspace after each session.
Proper tool maintenance ensures safer cutting and cleaner results. Keep blades sharp, as dull blades increase the chance of binding or kickback, which can cause injury. Regularly check for loose parts or damaged cords on power tools before each use. Clean sawdust and resin buildup from blades and tool guards. When not using tools, store them in a dry place out of reach of children.
How to Transfer Designs Onto Wood for Cutting
Transferring a design onto wood is a key step for accurate cutting and engraving, ensuring your sign looks professional. Several straightforward methods work well depending on your tools and the complexity of your design. Techniques like carbon paper tracing, stenciling, printing on transfer paper, and digital machine alignment offer reliable ways to move your design from paper or screen to wood.
Using Carbon or Graphite Paper
Carbon or graphite paper is a classic and budget-friendly way to transfer a design onto wood. It works by placing the paper between your printed design and the wood surface. Tracing over your design presses graphite onto the wood, creating clear lines to follow when cutting or carving.
Choose graphite paper designed for art or crafts, available online or at craft stores, usually for around $5 to $10 per sheet pack. It’s best for simple or intricate designs where you want a precise, pencil-like outline. Avoid moving the paper or design while tracing, as this can blur the transfer.
- Lay the wood on a stable surface, sanded smooth and clean.
- Place a sheet of carbon or graphite paper shiny side down onto the wood.
- Center your printed design on top of the graphite paper.
- Secure both with tape to prevent slipping.
- Use a pencil or ballpoint pen to firmly trace the design lines.
- Remove the papers carefully to reveal the transferred graphite lines on the wood.
- Refine any faint lines with a pencil before cutting or engraving.
Use firm, even pressure when tracing to avoid incomplete lines, but do not press so hard you damage the wood surface.
Projecting or Stenciling Designs
Stenciling allows clear, repeatable outlines on wood, ideal for both cutting guides and painting. You can create stencils by hand-cutting vinyl sheets or buying premade ones. For intricate letters, stencils help maintain consistent shapes and spacing.
Alternatively, you can project your design onto the wood using an overhead projector or smartphone projector, then trace the image directly. This method works well on large boards or irregular shapes where paper transfers aren’t practical.
Make sure your stencil or projection is securely aligned before marking. Using stencil vinyl and transfer tape offers clean edges for painting or engraving without messy lines.
- Prepare your wood surface by sanding and wiping clean.
- Create or purchase a vinyl stencil of your design sized to the wood panel.
- Apply transfer tape over the stencil and press it onto the wood, smoothing out air bubbles.
- Carefully peel off the backing paper, leaving the stencil vinyl on the wood.
- Paint or trace inside the stencil outlines to mark your design.
- Remove the stencil before the paint dries for crisp edges or keep it for a cutting guide.
Double-check stencil alignment at multiple points to avoid crooked or uneven designs.
Printing Directly on Transfer Paper
Printing your design directly onto special transfer paper can streamline the process for more complex or detailed artwork. Transfer sheets compatible with inkjet or laser printers can then be pressed onto the wood surface using heat or moisture, transferring the full image or text.
This method suits projects requiring crisp, professional-looking graphics without hand tracing. Transfer paper typically costs between $10 and $20 for a pack of 10 to 20 sheets, and you’ll need access to a compatible printer. Test the process on scrap wood first, as different woods and finishes absorb ink or toner differently. Follow the transfer paper instructions carefully for pressing temperature, time, and peeling technique to avoid smudging or incomplete transfers.
- Select transfer paper designed for wood and your printer type (inkjet or laser).
- Print your design at correct size on the transfer sheet, reversing the image if required.
- Place the printed side onto the prepared wood surface.
- Apply heat using an iron, heat press, or hairdryer according to the instructions, usually between 250°F and 300°F for 2 to 5 minutes.
- Allow to cool briefly, then gently peel the backing paper away.
- Check the transferred image for completeness and touch up if needed with a fine paintbrush.
Ensure your wood is clean, dry, and smooth to prevent uneven transfer or ink bleeding.
Using Software and Machines for Registration
Digital tools like CNC routers, laser engravers, and vinyl cutters can directly transfer or cut your design with high precision. Upload your design file to software such as Cricut Design Space or Silhouette Studio, align your wood piece within the machine, and let it register the image for cutting or engraving.
These machines typically cost several hundred dollars for entry-level models, and software guides you through positioning to ensure your design matches the wood area exactly. Registration marks or printed guides help align the wood physically with the digital template for perfect placement.
Precision in setup reduces waste and errors, especially for repetitive or complex signs. If you don’t own a machine, local maker spaces or print shops often offer access for a fee.
- Design your sign in compatible software, scaling it to your wood size.
- Sand and clean the wood, then secure it in the machine bed or jig.
- Upload your design file and follow software instructions to position the design.
- Use registration tools or markers to align the wood surface with the digital outline.
- Start the machine to engrave or cut the design directly on the wood.
- Remove the wood and clean off debris before painting or finishing.
Calibrate your machine and perform test runs to avoid misalignment or partial cuts on your final piece.
How to Achieve Smooth, Professional Edges When Cutting Wood
Smooth, professional edges are key to making wooden signs look clean and well-crafted. Splintering can spoil your work’s appearance and make painting or staining uneven. To avoid splintering when cutting wood signs, use a sharp blade that suits the material, like a fine-toothed saw for plywood. Cut slowly and steadily with firm support under the wood. Applying painter’s tape along the cut line helps hold the wood fibers in place, reducing splinters. For plywood or layered wood, which tends to splinter at edges, score the cut line lightly with a utility knife before cutting to seal the veneer layers.
After cutting, sanding is essential to remove roughness and any leftover splinters. Start sanding with medium-grit sandpaper (around 120 grit) along the edges to smooth out rough spots. Move to fine-grit sandpaper (180 to 220 grit) for a clean finish. Sanding by hand is common for small signs and detailed edges, but using a sanding block keeps pressure even and helps avoid rounded corners. A detail file or sanding sponge can help reach tight corners or curves on layered signs.
For plywood or layered wood, pay attention to the edges because they may show gaps or uneven layers after cutting. Sand lightly between layers to avoid rounded edges that lose sharpness. You can also apply wood filler to any gaps and then sand smooth for a smooth look. This step prepares the wood sign’s edges for painting or staining, ensuring the finish adheres evenly without blotches caused by rough or porous surfaces.
After sanding, wipe the edges with a damp cloth or tack cloth to remove dust before finishing. Some woodworkers like to seal edges with a coat of clear wood sealer or sanding sealer to prevent raised grain, especially on softer woods like pine. This extra step takes about 15 minutes to apply and dry but is beneficial if you plan to paint your sign for a crisp, professional look.
For laser-cut wood signs, small amounts of ash or soot often remain on edges after cutting, which can be brushed away gently with a soft brush or wiped off with a slightly damp cloth. If using power sanding tools, choose the lowest speed setting to avoid burning or rounding off delicate edges. Proper edge preparation results in smooth surfaces ready for painting with stencils or staining, producing a finished sign that looks polished and crisp.
Comparing Wood Types for Cutting Ease and Aesthetics
Choosing the right wood species is key to balancing cutting ease, final appearance, and durability for your signs. Softwoods like pine or cedar are easier to cut and shape, making them good choices if you want to work quickly or are new to cutting techniques. Hardwoods such as maple or walnut give a richer grain and longer-lasting signs, but they require sharper blades and more effort to cut cleanly.
Grain direction plays a big role in both how the wood cuts and how it looks. Straight-grained woods cut more smoothly and reduce tear-out around edges. They also provide a clean, uniform background that highlights lettering or designs. Woods with more distinct grain patterns, like oak or walnut, offer visual character but might show cutting marks more easily and need finer finishing. For consistent results, veneers or engineered woods like birch plywood offer a smooth surface and uniform grain, ideal for laser cutting or intricate designs.
| Wood Type | Cutting Ease | Durability | Grain Appearance | Recommended Thickness | Typical Uses |
|---|---|---|---|---|---|
| Pine (Softwood) | Easy | Moderate; less weather-resistant | Light, straight grain | 1/2” to 3/4” for signs; thinner (1/8” to 1/4”) for raised letters | Indoor signs, rustic styles |
| Cedar (Softwood) | Easy | High; naturally rot-resistant | Fine, straight grain with knots | 3/4” standard; thinner for letter cutouts | Outdoor signs, weather-exposed uses |
| Maple (Hardwood) | Moderate; sharper tools needed | High; durable | Fine, consistent grain, light color | 3/4” typical for base; 1/8” to 1/2” for letters | Indoor and polished signs |
| Walnut (Hardwood) | Moderate to hard; dense wood | High; long-lasting | Dark, rich grain patterns | 3/4” common base; thin layers for raised details | Premium, elegant signs |
| Birch Plywood (Engineered) | Easy to moderate | Moderate; can delaminate outside | Consistent grain, smooth surface | 1/4” to 3/4” sheets | Signs requiring clean cuts, painted or stained |
Selecting thickness depends on your cutting method and sign style. Base boards usually stay between 1/2” and 3/4” thick to support durability without being bulky. Raised letters often use thinner cuts between 1/8” and 1/2” for layering effects. Thickness impacts cutting time and blade wear, denser woods at greater thickness need slower feed rates and sharper blades.
For outdoor signs, consider cedar or treated hardwood that can handle moisture and sun exposure. For indoor signs with detailed engraving or laser cutting, birch plywood and maple provide clean, consistent surfaces with good durability. Identifying your project’s priorities lets you pick the wood that suits your budget, tools, and aesthetic goals while avoiding problems like splintering, uneven cuts, or a finish that fades fast.
Troubleshooting Common Cutting Mistakes and How to Fix Them
Rough or splintered edges usually happen when the blade is dull or cutting against the wood grain. Dull blades tear the wood fibers instead of slicing cleanly, causing jagged edges that need sanding or re-cutting. To fix this, replace or sharpen your blades regularly. When cutting, align your blade to follow the grain direction to minimize splintering. Using a finer-toothed blade can also improve edge quality.
Misaligned cuts often result from the wood moving during cutting. Securing wood firmly with clamps or double-sided tape prevents shifting, ensuring straight and precise cuts. Warped wood can cause uneven cuts or difficulty in holding the wood stable. Flatten warped pieces by placing them under weights for a day or two before cutting, or select straighter pieces for better results.
Burn marks on wood edges happen when the blade speed is too slow or the blade is dull, generating excess heat. This discoloration not only spoils your sign’s look but may also weaken the wood. Avoid burns by increasing blade speed moderately and using sharp blades. Also, try making slower passes rather than pushing the blade too fast through the wood.
Blade dulling or breaking can interrupt your project and worsen finish quality. Having spare blades on hand for your jig saw or cutting tool avoids delays. Replace blades if you notice resistance or rough cutting. For blade breaks, inspect tool blade holders to ensure proper alignment and reduce strain that causes damage.
- Replace or sharpen blades after every 3 to 5 hours of cutting for consistent performance
- Always secure wood with at least two clamps to prevent shifting during cutting
- Cut with the grain direction to reduce splintering and achieve cleaner edges
- Use a fine-toothed blade for delicate or intricate signs
- Check blade speed settings to avoid overheating and burning the wood
- Store spare blades to quickly swap out dull or broken ones mid-project
Check your blade sharpness frequently and secure your wood firmly before each cut to save time and get smoother results.
Following these tips helps you avoid common cutting mistakes and maintain smooth progress on your wooden signs. Paying attention to blade condition, wood placement, and cutting technique improves edge quality and accuracy, making your crafting more satisfying and professional-looking.
Step-by-Step Action Plan for Cutting Wood Signs
Start your wooden sign project with focused steps that build your skills and confidence. Following this plan helps you cut wood safely and achieve clean, professional results.
- Before You Start: Gather the correct tools for your design and wood type, such as a jigsaw for curves or a circular saw for straight cuts. Make sure your tools are sharp and in good condition to avoid splintering.
- Day 1: Prepare your wood by sanding and cleaning the surface. This ensures smoother cuts and better paint or stain adhesion.
- Day 2: Transfer your design onto the wood using carbon paper or a stencil. A clear transfer helps keep your cuts precise.
- Day 3: Cut gently along your lines, using slow and steady movements to prevent mistakes. Stop if you feel the blade resisting or if the wood splinters.
- Day 4: Sand the edges and inside cuts carefully to smooth out any roughness. This improves the final appearance of your sign.
- After 1 Week: Apply paint or stain to your sign. Even coverage and clean edges show your cutting work nicely.
- After 2 Weeks: Review your technique by comparing your first sign to your next one, adjusting your cutting speed and tool choice if needed for better precision.
Frequently Asked Questions
Are There Shortcuts to Cutting Wood for Signs Without Saws?
Yes, pre-cut wooden plaques or boards from craft stores can save time and effort. They offer ready-to-use surfaces that only need finishing or decorating.
Can I Use Different Types of Vinyl on Wood Signs?
Permanent adhesive vinyl is best for wood as it bonds well and lasts long outdoors. Heat Transfer Vinyl (HTV) is another option but needs heat application and works best on sealed surfaces.
What Kinds of Wooden Plaques Are Good for Signs?
Hobby Lobby sells various wooden plaques suitable for signs, including smooth, pre-cut shapes in different sizes. Choose plaques that fit your design and finishing plans.
How Do I Transfer an Image to Wood for Sign Making?
Transfer images by cutting vinyl, using transfer tape, or applying heat with HTV. Clean, smooth wood surfaces help vinyl stick better and create sharp designs.
Is Laser Cutting Worth Trying for Making Wooden Signs?
Laser cutting produces precise, detailed designs quickly and is cost-effective for custom signs. It’s ideal if you want intricate artwork or repeatable patterns.
What Finishing Techniques Protect Vinyl on Wood Signs?
Applying a clear sealant like polyurethane over vinyl signs preserves the design and improves durability, especially for outdoor signs exposed to weather.
Before You Go
Cutting wood for signs is about matching the right tools and techniques to your project while prioritizing safety. Start by practicing on scrap wood to build your skill in controlling the cut and achieving a smooth edge. Once you’re comfortable, your next sign will look cleaner and more professional. Take a moment now to gather your tools and prepare your workspace so you’re ready to cut confidently and safely.