
DIY Door Hanger Sign Easy Tutorial with Materials, Tips & Sizes
A diy door hanger sign offers a simple way to personalize your front door with creativity and charm. Creating one involves choosing the right base, such as a wood round or a standard hanging shape, and decorating it with paint, vinyl, or cardstock for a unique look. Start by selecting the appropriate size and shape that fits your door and style preferences to ensure the best visual impact.
Key Takeaways
- The most common door hanger size is mini, measuring 3.5 by 8.5 inches, ideal for standard doors.
- Wood rounds between 18 and 24 inches provide a bold statement, but keep in mind larger sizes are heavier.
- A 12-inch wood round offers a versatile size that fits most front doors and accommodates various designs.
- Wait 2 to 3 hours for paint to dry before adding a second color to avoid smudging.
- Hobby Lobby supplies unfinished wood rounds and white wood signs in multiple sizes to simplify your project.
- Drill a 1.25-inch hole at the top center of the sign for easy hanging on doorknobs or hooks.
What Is a DIY Door Hanger Sign and What Materials Are Needed?
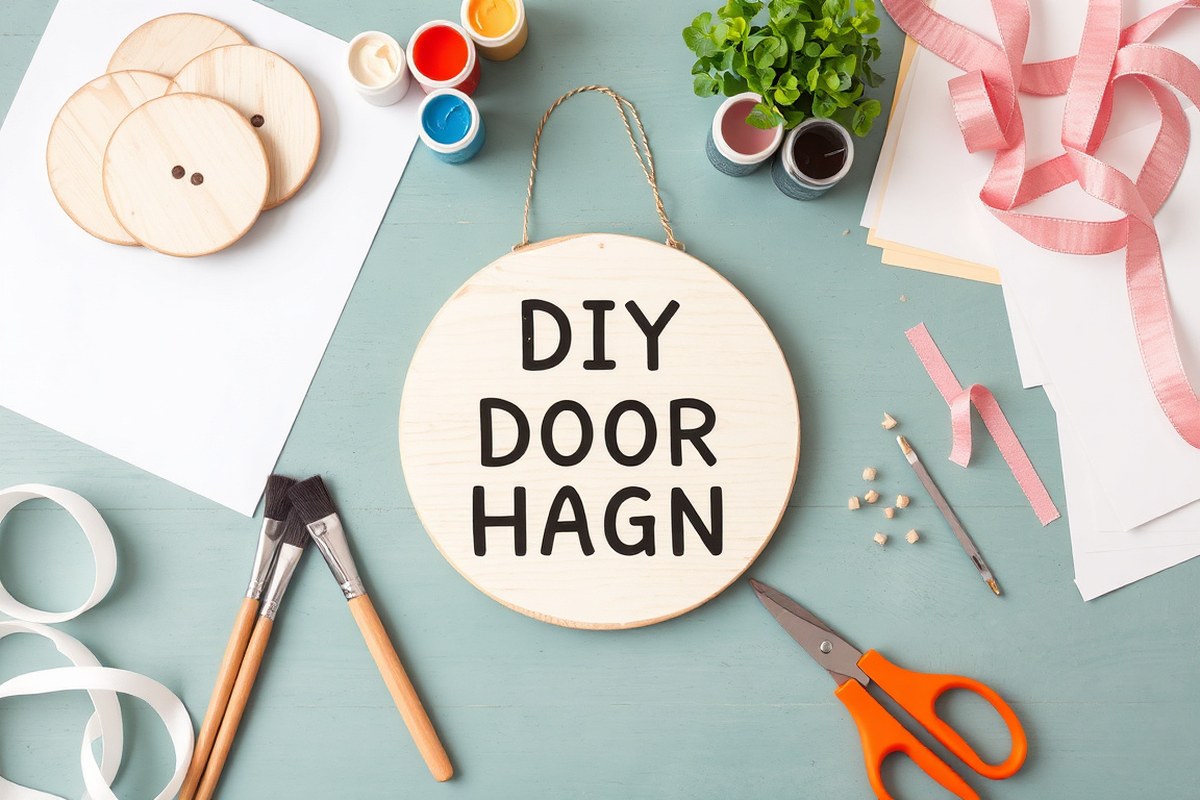
A DIY door hanger sign is a personalized decorative piece designed to hang on front doors, porches, or patios. Typically, it starts with a base material like an unfinished wood round, which is popular because it offers a sturdy surface and a natural look. Sizes vary, but a 12-inch wood round is often ideal for most standard doors, providing enough space to add creative designs without overwhelming the door itself.
Wood is a favored material for these signs because it can be painted, stained, and decorated easily, giving a durable, weather-resistant finish when sealed properly. Another common option is cardstock, which is lighter and works well for indoor or temporary signs. Cardstock paired with adhesive vinyl creates layered, colorful designs without needing advanced tools like lasers or saws. Vinyl itself is popular for adding precise lettering or graphic elements because permanent vinyl adheres well to wood and cardstock. To apply vinyl successfully, transfer tape is essential for keeping designs straight and firmly attached.
Starting your project means gathering a few basic supplies. First, select your base material based on where you plan to hang the sign, wood for outdoor durability or cardstock for lightweight, easy changing designs. You’ll need acrylic paint if you plan to paint or stain wood, as well as brushes or foam applicators for smooth coverage. For decorating, permanent vinyl sheets and transfer tape allow adding letters or images with clean edges. A cutting tool like scissors works for cardstock, while a craft knife or electronic cutting machine suits vinyl application better.
The cost varies depending on your choices. An unfinished 12-inch wood round may cost between $5 and $15, whereas vinyl sheets typically range from $1 to $3 each. Cardstock is generally inexpensive, around $0.10 to $0.50 per sheet. Keep in mind that painting supplies and sealing products add to the budget if you want long-lasting results outdoors.
For best results, plan your design on paper or digitally before starting. Choose a smooth wood surface and sand it lightly to remove rough spots if needed. Painting the wood base with a primer or base coat prevents paint from soaking in and helps colors pop. After the paint dries, apply vinyl with transfer tape, smoothing it carefully to avoid bubbles. On cardstock signs, layer vinyl elements directly, making sure each piece adheres well.
Common issues to watch out for include vinyl peeling off if the surface isn’t clean or if outdoor signs aren’t sealed against moisture. Also, lightweight cardstock door hangers may bend or tear outside, which is why those are best for indoor use or short-term decorations. Selecting the right base and decorative supplies for your specific location and style will make your DIY door hanger sign both charming and durable.
Standard Door Hanger Sizes and Shape Options Explained

Door hanger signs come in various sizes and shapes to suit different messages and door spaces. The most common size is the mini door hanger, typically measuring 3.5 by 8.5 inches. This size works well for short messages or simple designs, making it a popular choice for hotels and brief announcements. To include more details or a larger design, choose the medium size (4.5 by 11 inches) or jumbo size (5.5 by 17 inches) offers more space. Large signs, such as 18 to 24 inches, bring greater visibility but add weight, which may require sturdier hanging materials or hooks.
Beyond the standard rectangular shapes, wood rounds have become popular for DIY door hangers. A 12-inch round wood sign is commonly available, and sizes vary depending on where you shop. These rounds give a rustic, unique look that works well for personalized crafts or gifts. When using wood rounds, first select a circle template matching your wood diameter and size your design accordingly. They often come with twine for hanging, making the finishing steps simpler.
| Type | Size (inches) | Shape | Pros | Cons |
|---|---|---|---|---|
| Mini | 3.5 x 8.5 | Rectangular | Compact, easy to handle, cost-effective | Limited space for message or design |
| Medium | 4.5 x 11 | Rectangular | More space for text and decoration | Takes more wall space; heavier |
| Jumbo | 5.5 x 17 | Rectangular | Highly visible; ideal for large messages | Heaviest; may need stronger hanging method |
| Wood Round | 12 diameter (common) | Round | Unique look; great for gifts, crafts | Design must fit circular shape; sizing design can be tricky |
| Oversized Wood Rounds | 18-24 diameter | Round | High impact; eye-catching for decoration | Costly; heavier, requires strong hanging setup |
Choosing the right size depends on your message and the door where you plan to hang the sign. For small messages like “Do not Disturb,” the mini size is ideal and saves space. Express longer messages or add decorations with medium or jumbo sizes, but check the door’s clearance and strength. Round wood hangers offer a charming twist but require careful design placement to fit the circular shape. Larger wood rounds can act as statement pieces but expect to pay more and use sturdy materials to hang them safely.
Tip: The hole for hanging standard rectangular door hangers is usually 1.25 inches wide, so measure your door hook or knob beforehand to ensure it fits securely.
Preparing Wood Round Bases for Door Hanger Crafting
To prepare your wood round base for a door hanger craft, start by selecting the correct size and shape. Sand the surface until it’s smooth to help paint adhere better, then apply a primer or base coat. Finally, drill or punch a hole at the top for hanging so your finished piece will be ready to decorate and display securely.
Choosing the Right Wood Round Size
Select a wood round that matches the scale of your design and the door size where it will hang. Common sizes range from 8 to 12 inches in diameter; for example, a 12-inch unfinished wood round works well for most door hangers. You can find these at craft stores like Michaels or hardware stores like Home Depot. Lock the circle size in design software or measure your actual wood round before starting.
A larger round gives you more space for detailed decoration but could be heavier or harder to hang. Smaller wood rounds are easier to handle and less expensive, but they limit your design area. Choose a size that fits your style and use case.
Sanding and Smoothing the Wood Surface
Sanding prepares the wood surface to accept paint evenly and prevents splinters. Use medium-grit sandpaper (around 120 grit) to remove rough patches, then finish with fine-grit sandpaper (220 grit) for a smooth finish. Sand along the grain of the wood to avoid scratches that show through paint.
Before priming, wipe the surface with a tack cloth or damp cloth to remove dust. This step improves paint adhesion and creates a clean base. Priming with a white or clear primer seals porous wood and helps your paint colors pop while extending the life of your finish.
- Start with 120-grit sandpaper and gently sand the entire surface and edges of the wood round.
- Switch to 220-grit sandpaper and go over the whole surface again until smooth.
- Wipe away sanding dust with a tack cloth or damp rag; ensure the wood is dry before the next step.
- Apply a thin coat of wood primer using a foam brush, covering all surfaces evenly.
- Allow the primer to dry for at least 1 hour or according to the label instructions.
Drilling or Punching the Hanging Hole
The hole for hanging should be centered at the top of your wood round and sized for your chosen hanging material, such as twine, ribbon, or a metal hook. A hole diameter of about ⅛ to ¼ inch typically works well to slide twine or ribbon through without splitting the wood.
Use a drill with a 1/8-inch or 1/4-inch drill bit to create a clean hole. Hold the wood steady on a flat surface and drill slowly to avoid cracking. If you don’t have a drill, some craft stores sell hand-hole punch tools designed for wood, but these usually only work on thinner rounds.
Painting and Staining Techniques for Long-Lasting Finish
Choosing the right paint or stain is essential for durable and attractive door hangers. For wooden door hangers, chalk paint offers a great base color. It adheres well to wood and gives you a smooth finish that dries fairly quickly, usually within one hour at room temperature. If you prefer a natural look, opt for an oil-based or water-based wood stain, depending on your preference for ease of cleanup and odor. Water-based stains dry faster, often in 1 to 2 hours, while oil-based options may need up to 8 hours to dry complete.
Apply chalk paint or stain using a foam brush for even coverage without brush marks. When layering colors, such as painting stripes or other designs, wait at least 2 to 3 hours after your first coats have dried completely. This drying time helps prevent colors from bleeding into each other and maintains clean, sharp lines. Using painter’s tape can also help you achieve straight, distinct stripes by blocking off areas that shouldn’t be painted. Remove the tape slowly after the top coat feels dry to the touch but before it is fully cured, usually after 1 hour, to avoid peeling any paint.
After painting or staining, sealing is necessary to protect your work from scratches, moisture, and fading. Apply a clear, water-based Polycrylic finish with a soft bristle brush for a durable, long-lasting coat. Wait until your paint or stain is fully dry before sealing: this typically means at least 4 to 6 hours for chalk paint and staining, though overnight drying is safer if time allows. Apply two to three thin coats of Polycrylic, letting each coat dry for about 2 hours. Lightly sanding with fine-grit sandpaper between coats improves adhesion and smoothness.
Good results show vibrant, even color with a smooth finish and sharp details on painted stripes or layered colors. Avoid applying coats too thickly, as this can cause drips and uneven drying. Not waiting long enough between layers can lead to smudging or bleeding. Over-applying sealant without proper drying can create cloudy or sticky surfaces. Drying times vary with indoor temperature and humidity, so working in a climate-controlled room helps maintain consistent drying and curing.
For a natural wood effect, choose a medium-tone wood stain and wipe off excess quickly to highlight the grain but keep the surface smooth. Follow this by sealing the stained surface to lock in color and protect the wood. Staining can be done quicker than painting, but layering colors and adding details is easier with paint. Both methods require patient drying and sealing to ensure your DIY door hanger remains beautiful and long-lasting for use on doors inside your home or as gifts.
How to Add Vinyl, Cardstock, and Other Decorative Elements
Vinyl decals and cardstock shapes can add vibrant, personalized details to your door hanger, whether it’s wood or paper. Using a cutting machine like a Silhouette makes precise designs easier and quicker. Proper preparation and careful application ensure smooth, bubble-free looks and firmly attached decorations.
Preparing Vinyl and Cardstock Pieces
Before cutting, select high-quality adhesive vinyl or thick cardstock suited for your project. Choose vinyl designed for outdoor use if your door hanger faces weather exposure. For cardstock, consider patterns or textures that complement your base.
Use a cutting machine such as a Silhouette or Cricut for accuracy and detailed designs. Load your chosen material and adjust settings based on thickness. For cardstock, set the blade depth to avoid tearing; vinyl requires a depth that cuts the vinyl layer but leaves the backing intact.
- Choose your design file or create your own on cutting software.
- Load vinyl or cardstock into the cutting machine according to manufacturer instructions.
- Set blade depth and cutting pressure suitable for each material type.
- Cut the design and carefully remove excess material (weeding).
- For vinyl, apply transfer tape over the cut design to prepare for application.
- Trim edges to fit your door hanger’s size and shape if needed.
Handle vinyl with clean, dry hands to prevent dust or oils from sticking, which can cause bubbles.
Applying Vinyl Decals Without Wrinkles
Vinyl adheres best to smooth, clean surfaces. Wipe your door hanger base with a damp cloth and let it dry to remove dust or oils. Avoid textured areas for vinyl applications or sand lightly to smooth imperfections.
To apply, position the vinyl on your surface using transfer tape. Start pressing down from one edge and slowly move across, pressing firmly with a squeegee or credit card to avoid air pockets.
- Clean and dry the door hanger surface thoroughly.
- Place the vinyl decal with transfer tape on the hanger, aligning edges carefully.
- Press down gently starting from the center or one edge using a flat tool.
- Squeegee firmly across the decal to push out airt bubbles or wrinkles.
- Slowly peel the transfer tape at a sharp angle, keeping the vinyl pressed on the surface.
- Check for any raised edges and press gently to re-adhere.
Peeling transfer tape too quickly or at the wrong angle can lift vinyl edges and cause wrinkles.
Attaching Cardstock Decorations with Adhesives
Use glue designed for paper and wood surfaces like Maker’s Magic glue for sturdy but smooth attachment. Apply glue sparingly to avoid paper warping. For layered cardstock, hold pieces in place briefly to set before stacking more layers.
To protect printed cardstock backgrounds and create a finished look, coat with a thin layer of clear sealer after glue dries. Avoid bulky adhesives that cause warping or uneven surfaces.
- Apply a thin layer of glue evenly on the backing side of your cardstock piece.
- Press the piece firmly onto the door hanger base and hold for 15-30 seconds.
- For layering, repeat steps with each successive cardstock shape, aligning carefully.
- Let glue dry completely, usually 10-15 minutes, before handling.
- Optionally, seal the finished cardstock layers with a clear spray or brush-on sealer.
Applying too much glue can cause bubbling and wrinkles; use a thin, even layer for best results.
Safe and Secure Ways to Hang Your Finished Door Hanger
Choosing the right hanging method depends mainly on the size and weight of your door hanger as well as the type of door you have. For lightweight wooden or cardstock signs, a ribbon hook is both attractive and functional. Use a ribbon that’s at least 2 inches wide and wired, as the wire helps the ribbon keep its shape and supports the sign without sagging. Staple the ribbon securely to the back of your sign, spacing the staples about 1/4 inch apart to ensure it won’t pull loose over time.
Twine loops offer a more rustic look and work well for medium-weight signs such as small painted wood rounds. Punch two holes near the top corners of your door hanger, thread your twine through, and tie the ends tightly into a loop. This loop should be about 6 to 8 inches long, allowing enough length to hang on standard door hooks or knobs. Make sure your twine is thick enough to support the weight without fraying; natural jute twine sizing around 3 mm is a good choice. Avoid thin string, as it can snap or stretch.
Wire hangers or beaded wire loops hold heavier or larger door hangers securely. Use a sturdy craft or floral wire gauge between 20 and 18 for signs that weigh more than 1 pound. The wire can be twisted to form a loop or even a small chain for hanging. Attach the wire loop by poking two small holes at the top of the sign, inserting one end of the wire through each hole, then twisting the ends together on the back. This creates a durable hanger that stays put on heavier doors or in outdoor windy conditions.
Doors made of metal or those with heavier finishes require special consideration. Adhesive hooks that damage paint or magnet strips may not hold securely or could ruin your door’s surface. Instead, use over-the-door hooks designed to fit snugly without causing scratches. These hooks can accommodate ribbons, loops, or wires without damaging the door. For heavy door hangers, reinforce by choosing a thicker wire or double ribbon ribbons, and avoid relying solely on flimsy materials.
For installation, the rule of thumb is to have your hanging loop about 1 to 2 inches longer than the thickness of your door if you’re using a knob or hook. Stapling ribbons or twisting wire firmly prevents slipping. Regularly check the stability of your hanger, especially on frequently used doors or exposed front doors where wind can be a factor. If you notice bending or wear, replace the ribbon or wire promptly to avoid damage to your sign or door.
Good results mean your door hanger stays level, shows no signs of warping or strain from its hanger, and doesn’t slide or fall off with door movement. Signs that tilt, wobble, or require constant adjustment may have hangers that are too short or too thin. Properly attaching your ribbon, twine, or wire with durable materials and matching the hanger type to the door ensures your creative effort lasts. A wired ribbon stapled solidly or a twisted wire loop can hold up to several pounds, while simple twine loops suit items under 1 pound for standard wood or composite doors.
Common DIY Door Hanger Mistakes and How to Avoid Them
Common mistakes in making a DIY door hanger sign mostly affect its appearance and how long it lasts on your door. Paint smudges happen when you apply too much paint or don’t let each coat dry fully before adding the next. To fix this, lightly sand the smudged area with fine-grit sandpaper (around 220 grit) after it’s dry and repaint with thinner layers. Avoid rushing the drying process by waiting at least 1 to 2 hours between coats under normal room temperature (65-75°F).
Lazy sanding is another issue that can ruin your sign’s texture and paint adhesion. Skipping sanding or sanding unevenly leads to uneven paint coverage and rough patches. Always sand the entire surface evenly before painting, using a sanding block or sponge for better control. This step might take 15-30 minutes but makes a big difference in the smoothness and durability of the finish.
Improper hanging holes can cause the door hanger to hang crooked or fall off altogether. Too large or off-center holes put stress on the wood and string, while holes too small can split the wood when inserting a hanging ring or ribbon. Drill a clean hole about 1/4 inch in diameter, centered near the top edge but not closer than 1/2 inch to the edge to avoid wood cracking. Use a drill bit designed for wood to reduce splintering. Add a metal grommet for extra durability if you expect frequent handling or outdoor use.
- Paint smudges fixed by sanding and applying thin coats
- Even sanding recommended before painting for good paint adhesion
- Drill proper-size, centered hanging holes 1/2 inch from top edge
- Use metal grommets to prevent hole damage on frequently hung signs
- Check design placement by measuring twice before attaching decorations
- Choose a door hanger size that fits your door and message clearly
- Avoid overcrowding text or embellishments to keep the sign readable
Design placement mistakes often happen when decorations or vinyl letters overlap edges or unevenly cover the surface, creating an unbalanced look. Measure the sign’s dimensions and mark the center lightly with a pencil to guide your layout. For vinyl, use transfer tape and apply slowly from the center outward to prevent bubbles and misalignment. If you make a mistake, peel off the vinyl carefully and reposition within 24 hours of application for easier removal without damage.
Choosing the wrong size for your door hanger can make your message hard to read or awkward to hang. The sign should be large enough to display your clear message and visible from a distance of 3 to 6 feet. Smaller signs with intricate decoration may not stand out, while excessively large ones can block door features or be heavy. Measure your door and plan the design’s scale accordingly before cutting or purchasing materials.
Ignoring these details often results in a door hanger that’s smudged, hanging poorly, or visually cluttered. Taking a bit more time to sand, carefully paint, drill precise holes, and plan your design ensures a polished, long-lasting sign you’ll be proud to display on your door.
Creative DIY Door Hanger Ideas for Holidays and Every Season
Door hanger signs become more inviting and meaningful when they reflect the changing seasons, holidays, or personal greetings you want to share. You can create designs that switch easily with the time of year or specific events, making your entryway a dynamic part of your home’s charm.
Seasonal and Holiday Themes
Popular themes vary throughout the year and capture seasonal moods. Spring designs might include pastel flowers, bunnies, or Easter eggs paired with messages like “Hello Spring” or “Bloom Where You’re Planted.” For summer, consider bright sun motifs, beach icons, or patriotic symbols around the Fourth of July. Autumn ideas often focus on pumpkins, leaves, and classic fall colors with phrases such as “Give Thanks” or “Happy Fall.” Winter and holiday signs can feature snowflakes, Santa hats, or Christmas trees, often using red, white, black, and grey chalk paint for a festive look, red for Santa themes, white for “Happy Holidays,” and black for details like Santa’s belt.
For less obvious holidays, customize signs for Halloween with spooky fonts and bats or for Valentine’s Day with hearts and soft reds and pinks. These designs usually only need minimal paint colors and simple shapes, which keeps costs around $5 to $15 for basic supplies like paint, brushes, and adhesive vinyl.
Welcome and Message Sign Ideas
Beyond seasonal decor, door hangers can serve as everyday welcoming signs or communicate specific messages like “Welcome Home,” “Hello Sunshine,” or “Home Sweet Home.” Including monograms or family names personalizes the sign while keeping it usable all year. Using neutral chalk paint colors such as grey or white creates a classic canvas that fits many styles and can be accented with hooks or magnetic strips to hold interchangeable decorations.
For functional messages, door hangers can also inform visitors of events like yard sales or open houses. Lettering should stand out, so choose dark paint or vinyl on a lighter painted board. Most DIYers spend about one to two hours creating these with straightforward lettering, making them a fast way to update your entry.
Reusing and Updating Your Door Hanger Design
To switch decorations for different holidays without making a new base every time, create a sturdy, neutral-colored wood round that you paint and seal once. Attach removable elements using velcro strips, double-sided tape, or small hooks. This way, you can swap out seasonal wreaths, signs, or cut-outs easily and store them separately. For example, after painting the base slate grey and sealing it, stick velcro patches to the surface and the back of holiday shapes so they peel off without damaging the sign.
Reusable door hangers save money and time while reducing waste. Painted bases typically cost $5 to $10 depending on paint brand and brush quality, while removable decor pieces may range from free (repurposed craft scraps) to a few dollars each. When storing decorations, keep them flat or cushioned to prevent bending or paint chipping. Test your attachment method with a small decoration first to ensure it holds firmly in outdoor conditions.
Use removable adhesive strips rated for outdoor use to swap decorations quickly without harming the door hanger’s finish.
Step-by-Step Action Plan for Your DIY Door Hanger Sign
Follow these steps to craft and display your personalized door hanger sign effectively. Each phase ensures your project moves forward smoothly from start to finish.
- Before You Start: Gather all materials, including wood rounds or other bases, paints or stains, decorative elements, and hanging hardware. Confirm you have everything to avoid disruptions.
- Day 1: Prepare your wood base by sanding and cleaning it well. Your surface should feel smooth and free of dust before painting or staining.
- Day 2: Apply your chosen paint or stain in thin, even coats. Let each coat dry fully to the touch, which usually takes a few hours depending on the product.
- Day 3: Add vinyl lettering, cardstock shapes, or other decorations. Ensure they adhere firmly without air bubbles or loose edges.
- Day 4: Seal your sign with a clear topcoat for long-lasting protection. After application, it should feel dry and smooth within 24 hours.
- Day 5: Attach your preferred hanger securely, checking that it can hold the sign’s weight without loosening.
- Day 6: Hang your finished sign on the door, making sure it sits straight and visible from the front.
- After 2 Weeks: Inspect your sign for any wear or loose parts. Touch up paint or decorations as needed to keep it looking fresh.
Frequently Asked Questions
What Types of Paint Work Best on Wooden Door Hanger Signs?
Acrylic paint works best because it adheres well and dries quickly. It also offers good coverage and durability for outdoor use.
Can I Use Recycled Materials for a Door Hanger Sign?
Yes, recycled wood or old signs can be repurposed with sanding and repainting. This saves cost and adds a unique, rustic charm to your door hanger.
How Long Should Paint Dry Before Adding Vinyl Decorations?
Let the paint dry at least 24 hours to ensure it’s fully cured. This prevents smudging and helps vinyl stick firmly to the surface.
Can I Make a Door Hanger That’s Weather-Resistant?
Using outdoor sealer over paint and vinyl can protect your sign. This helps prevent fading, peeling, and damage from rain or sun exposure.
What’s the Best Way to Store Unfinished Wooden Door Rounds?
Keep them in a dry, temperature-controlled space before use. This prevents warping and cracking that could affect your project.
Is It Necessary to Sand the Wood Before Painting?
Yes, sanding smooths the surface and helps paint and vinyl adhere better. Use fine-grit sandpaper for best results without damaging the wood.
Before You Go
A DIY door hanger sign adds a personal touch and charm to your home while allowing creative expression. Start by choosing a simple design that fits your style and skill level. Try crafting one this weekend using the plan above, and you’ll enjoy a warm welcome every time you open your door.


