What to Write on a Wooden Sign: Creative Ideas and Practical Tips
Wondering what to write on a wooden sign? Choose phrases that reflect your style, purpose, or message clearly and memorably. Popular picks include inspiring quotes, family names, or seasonal greetings to personalize your space or gift. Start by deciding the sign’s location and audience to guide your wording and tone.
Key Takeaways
- Use short, meaningful phrases like “As For Me and My House” or “Love is patient, love is kind” for timeless appeal.
- Select wood thickness based on sign placement: 1/8″ to 1/4″ for indoors, 1/2″ to 3/4″ for outdoors durability.
- Opt for 3/4-inch birch plywood for sturdy signs that easily hold hardware and frames.
- Engraving works best for outdoor signs due to its durability and weather resistance.
- Laser etching offers detailed, precise text and works well with custom fonts.
- UV printing produces vibrant colors quickly but needs protective coatings for outdoor use.
Best Words and Phrases to Write on Wooden Signs

Choosing the right words for a wooden sign depends largely on where you’ll display it and who will see it. Entryways often feature welcoming phrases or family names, setting the tone for guests. Kitchens benefit from warm, inviting terms that celebrate gathering and food, while bedrooms invite personal or calming expressions. Workshops or craft rooms shine with motivational or skill-themed sayings. Event signs usually include celebratory or directional messages tailored to the occasion.
Popular phrases for entryways include “Welcome,” “The [Family Name] Home,” or “Home Sweet Home,” which create a friendly atmosphere. In kitchens, consider words like “Gather,” “Eat Well, Laugh Often,” or “Farmhouse Kitchen” to add charm and warmth. Bedrooms work well with phrases such as “Dream Big,” “Goodnight,” or “Love Lives Here.” For workshops, phrases like “Create,” “Handmade with Love,” or “This is My Happy Place” suit the creative vibe.
Meaningful scripture and motivational quotes offer deeper sentiment, often chosen for both decor and inspiration. Bible verses such as “Be Still and Know” (Psalm 46:10) or “Faith, Hope, Love” (1 Corinthians 13:13) are common on signs meant for personal spaces or gifts. Motivational quotes can include simple maxims like “Believe You Can” or “Do What You Love.” It helps to select a phrase tied closely to the recipient’s values or the room’s function, improving the sign’s personal impact. For gifts, personalizing the text adds a thoughtful touch. Use templates like these to create meaningful inscriptions:
- “[Name], You Are Loved Beyond Measure”
- “Home Is Where [Name]’s Heart Is”
- “Together Since [Year]” for anniversaries
- “Welcome to Our Nest” for housewarmings
- “Made Just for You” followed by a short message
When selecting your words, the length and font size need to fit the chosen wood size and surface preparation technique. Short phrases work best on smaller signs and maintain legibility from a distance. Longer quotes might require careful spacing or multiple lines. Planning the text layout ensures the message stands out and the sign remains visually balanced. Avoid overly generic phrases unless they hold special meaning for the recipient or location.
Each phrase you choose can improve the sign’s purpose and appeal while reflecting the intended atmosphere. Thoughtful text selection combined with appropriate design and finish results in wooden signs that are both beautiful and meaningful, perfect for decorating your home or creating memorable gifts.
Choosing the Right Wood and Size for Your Sign
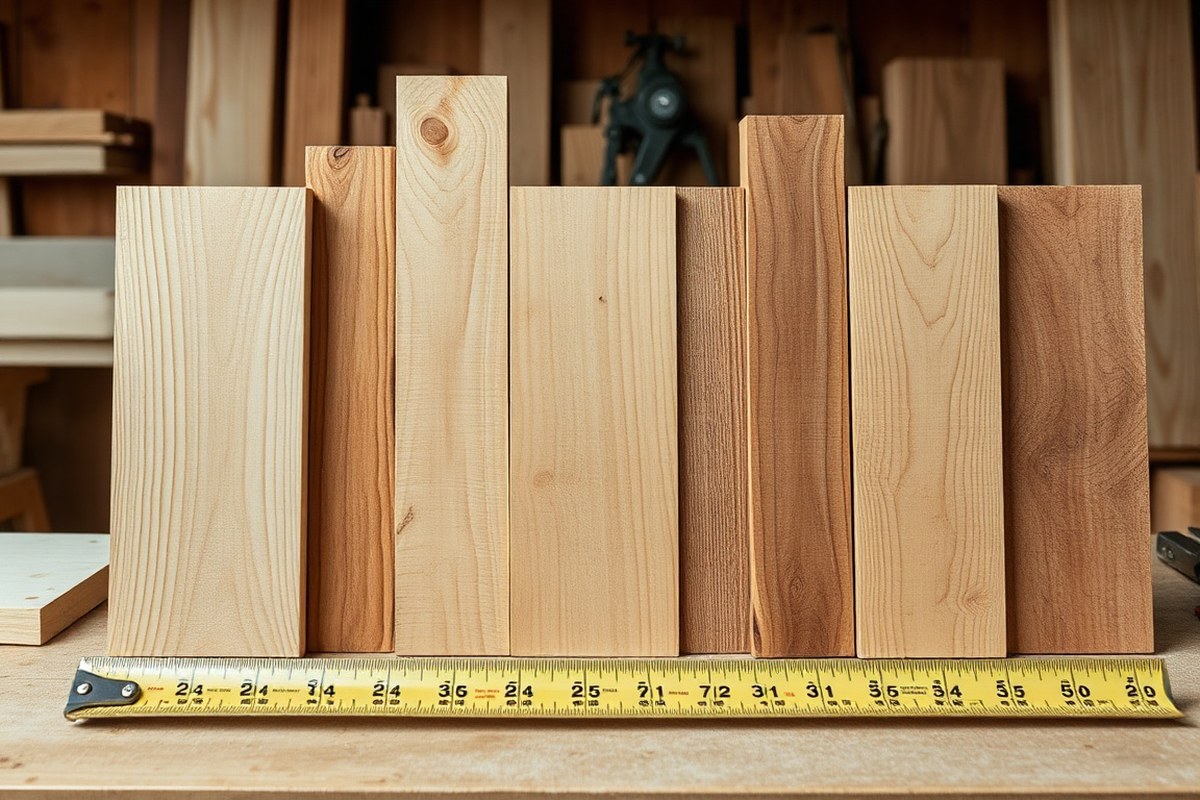
Your choice of wood type, thickness, and size influences your wooden sign’s durability, appearance, and how well it fits the space. For indoor signs, a thinner wood board, typically between 1/8″ and 1/4″ thick, provides enough strength without being heavy or bulky. Outdoors, thicker wood, usually from 1/2″ to 3/4″, protects against warping or cracking under weather exposure.
Solid pine and smooth plywood stand out as easy-to-work-with woods that take paint well. Pine is soft and affordable but may dent easily. Smooth plywood offers a flat surface, which suits painting and lettering. For outdoor signs, resistant woods like cedar or redwood last longer in moist or sunny environments but cost more.
| Wood Type | Best Use | Durability | Finish Notes |
|---|---|---|---|
| Pine | Indoor, painted signs | Moderate durability, soft so dents easily | Smooth surface, accepts paint well |
| Plywood | Indoor and outdoor signs | Good durability, depends on grade | Flat surface, ideal for painting and lettering |
| Cedar | Outdoor signs | High durability; resists decay and insects | Natural oils protect wood; paint adheres well |
| Redwood | Outdoor signs in harsh climates | Very durable and weather-resistant | Expensive but excellent for longevity |
When planning your sign size, match the dimensions to the location and reading distance. A sign placed on a mantel or desk suits an 8″ x 12″ size, with letters around 1 to 2 inches tall for reading at close range. Wall-mounted signs in entryways or living rooms often range from 12″ x 18″ to 24″ x 36″. For legibility from farther away, use larger lettering, generally, each inch of letter height corresponds to about 10 feet of optimal viewing distance.
Thickness affects durability and handling. For freestanding signs, choose thicker wood (1/2″ or more) to resist warping or support added structures like stakes or easels. Thin wood works well for wall mounts but requires secure hanging to prevent bending. Exterior signs benefit from sealing or painting both sides to minimize moisture absorption, extending their lifespan.
Tip: Always sand your wood surface starting around 80-grit sandpaper and finish with 220-grit to ensure paint or stain adheres evenly and the letters appear crisp.
Preparing Wood for Adding Words: Surface and Finish
Properly preparing the wood surface is essential to make sure your lettering adheres well and stays vibrant over time. Sanding the wood smooth, cleaning off debris, and applying suitable primers or sealants create the best foundation for paint, markers, or stencils to stick. Using the right eco-friendly products also helps protect the wood and your health.
Sanding for Optimal Smoothness
Sanding removes rough patches, old finishes, and any dirt to create a flat, even surface that lettering materials can grip securely. Starting with a coarse grit and finishing with a fine grit allows you to achieve a smooth finish without deep scratches. This makes paint edges crisper and reduces bleeding for clean, professional-looking letters. Follow these steps to sand your wood properly before adding words:
- Start with 80-grit sandpaper to remove any unevenness, rough spots, or old paint.
- Sand with medium-grit (120-grit) paper to smooth out the scratches from the coarse grit.
- Finish sanding with fine 220-grit paper for the smoothest surface.
- Use a sanding block or an orbital sander for even pressure and control.
- Wipe the wood with a slightly damp cloth or tack cloth between grits to remove dust.
- After the final sanding, clean the surface thoroughly with a dry cloth or vacuum to remove all dust.
Good sanding results in a surface that feels smooth but not slick, with no visible scratches or dents. Avoid sanding too aggressively near edges or corners, which can round them and distort painted letters.
Applying Primer, Stain, and Sealant
After sanding, prepare the wood by sealing or priming to improve paint adhesion and durability. Primers fill tiny wood pores and create a uniform base color that prevents paint from soaking unevenly. Stains improve wood grain but aren’t always necessary if you want a painted surface. Applying a sealant after lettering protects your design from wear, moisture, and sunlight. Here’s a checklist of materials and how to apply them:
- Primer: Choose a wood primer or acrylic primer designed for indoor or outdoor use. Apply with a brush or roller in a thin, even coat. Let dry for 2 to 4 hours depending on brand instructions.
- Stain: If improving natural wood grain, apply a thin coat of water- or oil-based stain with a brush or cloth. Wipe off excess quickly for an even finish. Wait 12 to 24 hours to dry.
- Sealant: Use a clear polyurethane or water-based acrylic sealer, applied after paint or marker ink is fully dry. Spray or brush on 1 to 3 thin coats, drying 1 to 4 hours between each.
Sealing is especially important for outdoor signs or those exposed to moisture. Test primer and finish compatibility on a scrap piece to ensure the final look meets your expectations.
Choosing Eco-Friendly Finishes
Using water-based and low-VOC (volatile organic compounds) finishes reduces harmful fumes and environmental impact while still providing strong protection. These options are safer for indoor use and for people sensitive to chemical smells.
Look for primers, paints, stains, and sealants labeled “water-based,” “low VOC,” or “eco-friendly.” They tend to dry faster and cleanup requires only soap and water. Some natural oils like tung oil or linseed oil can be used to treat wood surfaces but require longer drying times and multiple coats for effective sealing.
Eco-friendly finishes might cost more upfront, water-based sealers can range from $15 to $30 per quart, but they offer reduced toxicity and easier disposal. Testing finishes on scrap wood ensures the color and finish meet your standards without waste. Using reclaimed wood combined with these finishes adds another sustainable layer to your project.
Methods to Add Words on Wooden Signs Compared
Choosing how to add words to a wooden sign depends on your skill level, the desired durability, and whether the sign will be outdoors or indoors. Four popular methods include painting, engraving, vinyl lettering, and wood burning. Each has its own setup, cost, and finish, suiting different project needs and personal abilities.
Painting is the quickest and most straightforward approach. It involves using paint and brushes or stencils to apply letters directly on the sign. Materials are inexpensive, often under $15 for starter kits, and results can be vibrant and colorful. Painting suits beginners since mistakes can be corrected with sanding or paint remover. It takes a few hours including drying time. However, painted letters may fade or chip outdoors unless sealed with a weatherproof finish.
Engraving involves carving words into the wood using tools ranging from hand-held rotary engravers to laser etchers. Engraved signs provide a professional and long-lasting look, especially good for outdoor use. This method requires intermediate to advanced skills with power tools or access to laser cutting services. Engraving costs vary widely: a basic rotary tool costs about $30 to $100, while laser engraving services start around $20 per project. This method takes longer to learn and complete but ensures durability against weather.
Vinyl lettering uses adhesive vinyl cut into shapes or letters that stick onto the wood surface. It’s easy to apply and remove, making it good for temporary or frequently changed signs. Cost for vinyl sheets and a cutting tool can be about $20 to $50. This method requires some precision in applying without bubbles but minimal artistic skill. It’s less durable outdoors because vinyl can peel under harsh conditions unless covered with a protective layer.
Wood burning (pyrography) applies heat with a pen-like tool to burn letters into the wood surface. It creates an appealing rustic look and is semi-permanent. This method requires moderate skill and practice to control the pen and avoid burning mistakes. A wood-burning kit costs $20 to $40. Wood burning is best for indoor signs, as exposure to rain can cause wood to warp and burn marks to fade. Projects take 1 to 3 hours per sign depending on complexity.
| Method | Durability | Cost | Skill Needed | Time to Complete | Best for Outdoors | Beginners’ Tip |
|---|---|---|---|---|---|---|
| Painting | Moderate (needs sealing) | Low (<$15 materials) | Beginner | Few hours | Yes, with sealant | Use stencils to ensure clean letters |
| Engraving | High (very durable) | Medium to high ($30+ tools) | Intermediate to advanced | Several hours to days | Yes | Practice on scrap wood first |
| Vinyl | Low to moderate | Medium ($20, 50) | Beginner to intermediate | 1 to 2 hours | Limited; use protective coating | Apply slowly to avoid bubbles |
| Wood Burning | Moderate | Low to medium ($20, 40) | Moderate | 1 to 3 hours | No (better indoors) | Go slow and steady to control burn depth |
Applying words with paint is ideal for beginners wanting a quick craft with room for correction. Engraving suits those aiming for longevity and a professional touch, especially for outdoor signs exposed to weather. Vinyl lettering offers a smooth, easy way to create crisp text but needs protection outdoors. Wood burning appeals to those seeking a handcrafted rustic feel, best kept indoors due to moisture sensitivity. Trying each method on scrap wood helps determine what works best before committing to your final sign.
Designing Text Layouts and Fonts for Maximum Impact
Carefully planning text layout, font choices, and the integration of symbols will make your wooden sign clear and visually engaging. Selecting fonts that match your decor style, balancing text with imagery, and properly spacing elements all contribute to a sign’s effectiveness. Follow specific design rules and templates to ensure readability and a polished look.
Popular Fonts and Styles for Wood Signs
Choosing fonts consistent with your decor style sets the tone for your sign. Rustic and farmhouse styles often use hand-lettered or script fonts with a slightly distressed look. Classic decor pairs well with serif fonts that have elegant, timeless lines. For modern or minimalistic spaces, clean sans-serif fonts with uniform stroke widths work best.
Mixing font styles can add visual interest, but keep it simple. Pair a bold serif font with a lighter script for emphasis, or combine a chunky block font with a handwritten cursive for contrast. Avoid using more than two font styles to keep the design cohesive.
Font size depends on the sign’s viewing distance and wood size. Larger letters (at least 2 to 3 inches tall) improve readability for signs viewed from a few feet away. Prototype your layout at actual size to judge the balance between font weight and wood grain texture, especially if you’re engraving or painting.
Incorporating Icons and Symbols
Adding icons or small images can complement your text and reinforce the message or theme. For example, a farmhouse sign might include a simple leaf or barn silhouette beside the family name. Modern signs might feature geometric shapes or minimalist line art to keep the look clean.
Balance is key. Icons should not overpower text but serve as visual accents. Place symbols on one side or incorporate them as an underline or border element. Keep their size proportionate to words, typically no larger than half the height of your main text.
- Use icons to highlight or separate phrases
- Keep symbol details simple for clarity
- Match icon style to font style (hand-drawn with script, geometric with sans-serif)
- Use icons in a consistent color to unify with text
- Test icon placement on a paper mockup before transferring to wood
Do not overcrowd your sign with too many icons; simplicity improves impact and readability.
Text Placement and Spacing Tips
Center alignment works well for shorter messages, creating symmetry and a polished look. For longer text or lists, left alignment can improve readability and give a structured feel. Leave ample spacing between lines (line height around 1.2 to 1.5 times font size) to prevent crowding.
Keep margins around your text equal to at least 10% of the sign’s width and height to avoid a cramped appearance. Use a grid or ruler when mapping out letters to maintain straight lines and consistent spacing. Place emphasis by adjusting font size or style on key words, bold or script elements draw the eye. Here is a simple text layout template for a 24-inch wide wood plank:
- Top line: Main phrase in large serif font, 3-inch tall letters, centered
- Middle: Optional symbol or icon, about 5 inches wide, centered below
- Bottom line: Secondary phrase or year, smaller script font, 1.5-inch letters, centered
Adjust templates depending on your wood size and the amount of text. Testing your design on paper at full size reveals spacing issues and helps you decide if adjustments to font weight or spacing are needed.
Personalizing Wooden Signs for Gifts and Special Occasions
Creating personalized wooden signs for gifts and special occasions involves choosing thoughtful wording that reflects the event’s sentiment. Adding names, dates, and meaningful messages without overcrowding ensures the sign remains visually appealing. Finishing touches such as staining, sealing, or embellishments improve the handmade gift and protect it for long-term display.
Wedding and Anniversary Phrases
Signs for weddings and anniversaries often highlight love, commitment, and shared memories. Use short, heartfelt phrases combined with the couple’s names and significant dates. A good rule is to keep the main message prominent and place names and dates in smaller font sizes or at the bottom to avoid clutter. Aim for no more than 3 to 4 lines of text to retain balance. Templates for wedding signs include:
- “Together Forever, [Name] & [Name], [Wedding Date]”
- “Happily Ever After Starts Here, [Name] & [Name]”
- “Welcome to Our Wedding, [Name] & [Name], [Date]”
- “Love, Laughter, and Happily Ever After, Est. [Year]”
- “Our Vows, [Date]” (great for featuring excerpts or full wedding vows)
To make wedding and anniversary signs special, use a clear finish like polyurethane to protect the surface from moisture and handling. Adding decorative accents such as small floral motifs or laser-etched borders can improve the sentiment without overwhelming the design.
Graduation and Milestone Quotes
Graduation signs celebrate achievement and future potential. Incorporate motivational quotes along with the graduate’s name, school, and year. Limit text to key elements to avoid overcrowding; consider stacking text vertically or using contrasting fonts and sizes for emphasis. Here are example scripts for graduation or milestone signs:
- “Congrats [Name]! Class of [Year]”
- “The Future Belongs to Those Who Believe, [Graduate Name]”
- “Dream Big, Work Hard, [Name]’s Graduation [Year]”
- “Adventure Awaits, [Name] [Year]”
- “Well Done [Name]! Keep Reaching Higher”
Adding a light coat of clear varnish preserves the wood grain while allowing room for colorful painted accents like school colors or symbols. A ribbon or twine hanger can complete the gift for easy display.
Memorial and Tribute Wording
Memorial signs honor a loved one with respectful, concise text that emphasizes remembrance and love. Use simple phrases combined with the person’s name and dates of birth and passing. Spacing is important to maintain solemnity and avoid overcrowding; choose a legible serif or script font that suits the tone. Common wording examples include:
- “In Loving Memory of [Name] (Year, Year)”
- “Forever in Our Hearts, [Name]”
- “A Life Well Lived, Remembering [Name]”
- “Gone But Not Forgotten, [Name] (Dates)”
- “Rest in Peace, [Name]”
Finishing touches for memorial signs often include weatherproof sealers to protect outdoor placement, and subtle embellishments like engraved symbols (e.g., a dove or heart) can add a personal touch without detracting from the message’s dignity.
Common Mistakes to Avoid When Writing on Wooden Signs
Lettering on wooden signs can smudge, fade, or peel if the surface isn’t properly prepared or the wrong materials are used. Writing on a damp or unfinished surface causes ink to run or blur. Make sure the wood is completely dry and fully sanded to a smooth finish before you start. Using pens or paint designed for wood will help the text hold up better outdoors or over time.
Uneven or overcrowded text usually happens when spacing isn’t planned carefully. Sketch out your design using pencil first, and measure the wood to ensure the text fits comfortably. Avoid squeezing too many words into a small area, which can make the sign hard to read. Consistent letter size and spacing create a polished look. Check alignment twice before applying permanent ink or paint, any mistake at this stage is hard to correct later.
Skipping surface prep shortcuts like skipping sanding or ignoring existing paint flaking under your letters leads to poor adhesion and a rough finish. Always clean the wood surface to remove dust and oils. Lightly sanding between coats if adding paint layers can prevent peeling. These steps take extra time but cost just a few dollars for sandpaper, and a few minutes extra can save redos.
- Write only after wood surface is dust-free and fully dry to prevent ink running
- Plan text layout with pencil and ruler; avoid crowding words or uneven letter sizing
- Use suitable lettering tools like paint pens made for wood instead of generic markers
- Sand the wood smooth before writing, and between paint layers for better adhesion
- Test your lettering on a scrap piece to check color and flow before the final sign
- Allow each paint or ink layer to dry fully before adding another or finishing
- Check alignment carefully by measuring twice before tracing permanent letters
Before applying a final finish, do a quality check that includes verifying dry and clean wood, consistent spacing, and smooth lettering without smudges. These checks help you catch issues early and avoid wasting costly sealants or topcoats. If you see uneven paint edges, smudged words, or misaligned letters, lightly sand that spot and correct the paint or pen work before sealing the wood. The goal is sharp, clean text that stays legible and attractive long term.
Maintaining and Protecting Wooden Signs with Text
To keep your wooden signs looking great and lasting longer, especially outdoors, applying a protective finish is essential. Exterior-grade sealers like spar urethane, marine varnish, or outdoor polyurethane shield the wood and paint from moisture, UV rays, and temperature changes. These coatings help prevent fading, cracking, or peeling of both the wood and the lettering. For indoor signs, a clear acrylic spray or water-based polyurethane protects against dust and minor spills without altering the sign’s appearance.
Before applying any finish, make sure the paint or lettering is fully dry, which can take 24 to 48 hours. Use a high-quality synthetic brush to apply thin, even coats. Outdoors, plan on at least two to three coats with 4 to 6 hours drying time between layers. This layering builds a durable, weatherproof barrier. For added longevity, consider reapplying a fresh coat every 1 to 2 years based on exposure to sun and rain.
Cleaning your wooden sign is a simple but important task. Dust or dirt can be wiped away with a soft cloth dampened with mild soapy water. Avoid harsh chemicals that might degrade finishes or paint. For outdoor signs, inspect the surface annually for signs of wear or damage. Scratches or small chips can be lightly sanded and repainted, then resealed to prevent moisture penetration.
- Apply outdoor finish only in temperatures between 50°F and 85°F for optimal drying.
- Store seasonal signs in a cool, dry place indoors during harsh weather or winter months.
- Use a soft brush or microfiber cloth for regular dusting to avoid scratching finishes.
- Touch up faded or peeling paint with matching outdoor acrylic paint before resealing.
- Check edges and corners for early signs of water damage; reseal those spots promptly.
Indoor wooden signs typically need less maintenance. Dust regularly, avoid direct sunlight to prevent fading, and clean gently with a dry cloth. If you want to refresh the finish, a light sanding and a coat of clear acrylic spray every few years can restore the shine and protection without heavy work.
Seal your wooden sign immediately after painting and allow full curing time to avoid trapped moisture that causes peeling.
Step-by-Step Action Plan for Creating Your Wooden Sign
Follow this simple plan to make a wooden sign with meaningful words that fit your style and space.
- Before you start: Choose your wood type and size based on where you’ll display the sign; test the wood’s smoothness by running your hand over it.
- Day 1: Sand the wood surface thoroughly to remove rough spots; check that the surface feels even and ready for paint or stain.
- Day 2: Select your text and font style that match your message and decor; print a mock-up on paper to ensure size and layout look right.
- Day 3: Transfer words using your chosen method (paint, vinyl letters, wood burning); verify letters are clear and well aligned.
- Day 4: Apply a protective finish suitable for indoor or outdoor use; confirm the finish is dry and doesn’t affect word visibility.
- After 1 week: Inspect the sign for any fading or chipping; touch up as needed to keep the design crisp.
Frequently Asked Questions
What Are Unique Ideas for Sayings on Wooden Signs Besides Common Quotes?
Try personalized messages like family names, important dates, or inside jokes. This adds a meaningful touch that standard quotes don’t offer.
Can I Use Materials Other Than Paint for Lettering on Wooden Signs?
Yes, wooden lettering, stencils, and metal letters can be attached to the wood for a textured look. These options create depth and a different style compared to paint or wood burning.
How Do I Choose the Best Room to Display a Wooden Sign?
Select a room that matches the message, like kitchen signs with food phrases or bedroom signs with calming words. Matching theme and location improve your sign’s impact and decor harmony.
What Should I Avoid Writing on Signs Intended as Gifts?
Avoid controversial or vague messages that might not resonate personally. Opt for warm, relatable phrases or the recipient’s name to make it thoughtful and suitable for gifting.
Is It Better to Write Directly on the Wood or Add Raised Letters?
Writing directly on the wood is simpler and faster, but raised letters add a unique, tactile effect. Choose based on the style you want and your crafting skill level.
How Do Weather Conditions Affect Wooden Signs with Text Outdoors?
Weather can fade paint and warp wood over time, so sealing and choosing durable wood types is essential. Protective finishes help maintain text clarity and sign longevity outdoors.
Wrapping Up
Choosing the right words and preparing your wooden sign carefully helps you create a lasting, attractive decoration or gift. Start by selecting a meaningful phrase that fits your space and mood. Your next step is to pick a wood piece and font that bring your vision to life. Taking these practical steps helps your sign do exactly what you want it to, a clear, welcoming message that lasts.