DIY Christmas Sign Ideas: 12 Easy Projects and Expert Tips That Work
A diy christmas sign offers a personal and festive touch to your holiday décor without costing much. Making one lets you customize designs, colors, and messages that match your style. Starting with a simple wooden plank and paint can quickly bring your creative vision to life.
Key Takeaways
- Choose wood for a rustic, durable base that suits indoor or outdoor Christmas signs.
- Gather basic tools like paintbrushes, stencils, sandpaper, and outdoor-safe paint for best results.
- Select designs that are easy to trace or stencil to simplify the painting process.
- Prepare wood by sanding smooth to improve paint adhesion and prevent peeling.
- Use mineral paint for a matte finish that adds charm and lasts through winter weather.
- Add 3D elements like wooden snowflakes or berries for depth and a festive feel.
What Is a DIY Christmas Sign and Why Make One?

A DIY Christmas sign is a homemade decorative piece usually made from wood, metal, or paper, featuring holiday themes like festive words, seasonal icons, or rustic designs. You create it yourself, often using paint, stencils, or simple crafting techniques, tailored exactly to your space and style. These signs can range from a small “JOY” plaque to a large wooden banner with a Christmas tree or red pickup truck image, each crafted to bring a personal and cozy feel into your holiday decor.
Making your own Christmas sign offers several clear benefits. Customization tops the list because you control the size, colors, fonts, and messages, matching your home’s style or holiday theme perfectly. This creative freedom means you can go rustic with distressed paint for a farmhouse look, or sleek with smooth finishes for a modern touch. Many DIY crafters use simple stencils or cut files, so even without advanced painting skills, you can produce a polished sign that stands out and feels unique.
Cost savings are another major reason to make a sign yourself. Buying ready-made holiday signs from stores often costs $30 to $60 or more depending on size and complexity. By using scrap wood, recycled metal, or craft paper combined with basic supplies like paint, sandpaper, and brushes, you can make a charming, handmade sign for under $15. Budget-friendly options like kraft paper scroll signs or wooden signs made from leftover boards keep expenses low without sacrificing festive style. This makes DIY signs a smart choice if you want to decorate multiple areas around your home or gift personalized items without spending a lot.
Creating a DIY Christmas sign also brings a special holiday charm. Handcrafted decorations add warmth and personality, and making the sign becomes part of the seasonal tradition that you can enjoy with family or friends. The time spent painting and assembling connects you deeper to your holiday preparations and lets you show off your creativity. Simple shapes and themes, such as “Farm Fresh Christmas Tree” or “Merry Christmas,” decorate your space with a look that bought signs just can’t match. Plus, you can switch up the design or add three-dimensional natural elements like pine cones and twine to make the sign even more festive.
Starting a DIY sign requires gathering materials like wood boards or metal sheets, paint, brushes, and stencils or templates. You pick a design you like, transfer it onto your surface with pencil or stencil, then carefully paint the letters and images. Proper preparation of the base, such as sanding wood to a smooth finish, helps the paint look crisp and last through the season. Allow drying time and consider sealing the sign if using outdoors to protect it from snow or rain. Expect the whole process to take a few hours, depending on the complexity of the design and drying times between coats.
Challenges sometimes include uneven paint coverage or smudges, but these can be fixed by lightly sanding and repainting or touching up mistakes with a small brush. Using stencils or cutouts helps maintain neat lines, even for beginners, making the process less daunting. With patience and simple tools, you can make DIY Christmas signs that add your own twist to holiday decorating while saving money and creating something truly special for your home.
Choosing the Best Materials for Christmas Signs
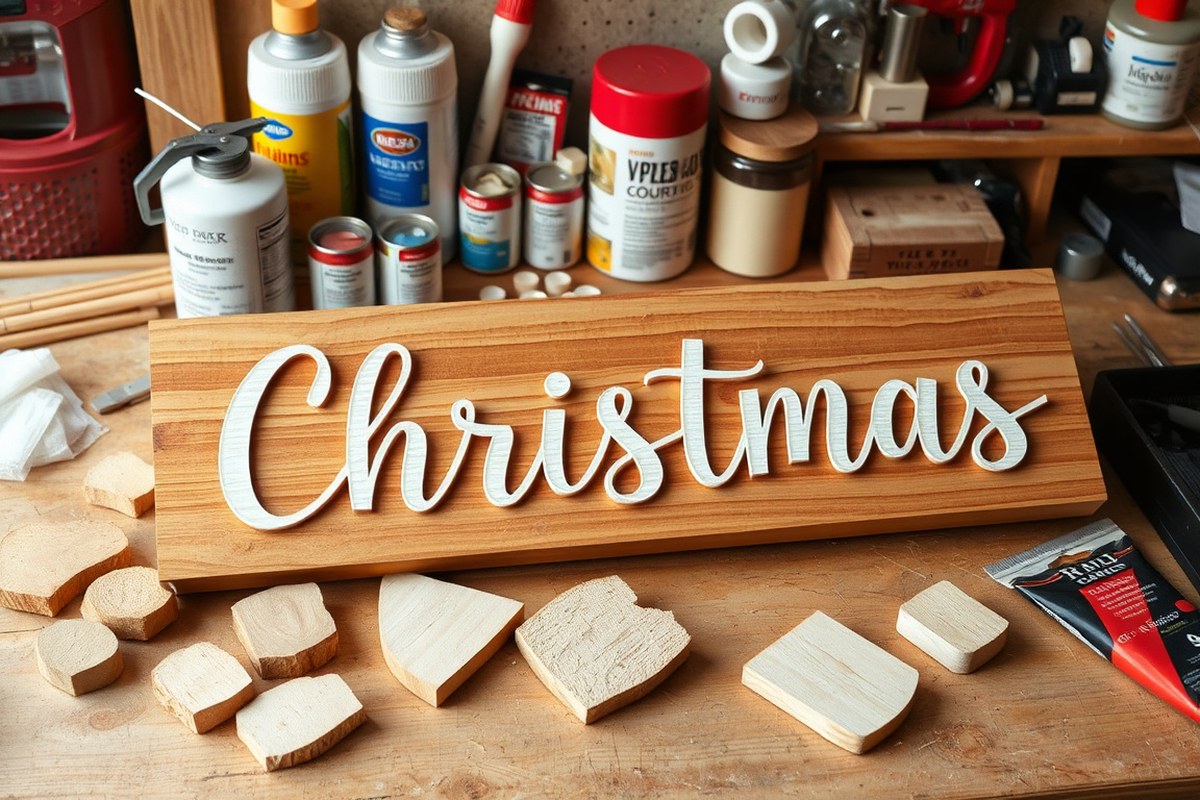
Choosing the right material for your DIY Christmas sign affects how it looks, how long it lasts, and the effort needed to make it. Pallet wood, plywood, canvas, and metal are popular because they each bring unique benefits and challenges. Pallet wood and plywood are affordable, easy to find, and fairly simple to work with, making them ideal for beginners aiming for a wooden, rustic look. Canvas offers a light and portable base perfect for painted or lighted signs, while metal signs add durability and a sleek finish but require more special tools and prep.
Natural elements like pinecones, branches, or wreaths add texture and charm, fitting well with wooden signs or canvas backgrounds. Combining materials, for instance, securing pinecones along a pallet wood sign, creates depth and festive appeal. Just make sure natural additions are securely attached and suited for indoor placement, as they may not withstand outdoor weather well.
| Material | Pros | Cons | Cost Range | Durability | Best For |
|---|---|---|---|---|---|
| Pallet Wood | Low cost, rustic charm, easy to paint and cut | May have rough surfaces, nails to remove | $0-$10 per sign (using recycled wood) | Moderate, indoors and covered outdoor use | Rustic, 3D effects with branches or cedar strips |
| Plywood | Smooth surface, affordable, uniform thickness | Edges can splinter, needs sealing outdoors | $10-$25 per 4×8 ft sheet | Moderate to high with proper sealant | Flat painted signs, stenciling, versatile shapes |
| Canvas | Lightweight, portable, works well with paint and lights | Fragile, less durable outdoors | $5-$20 per piece | Low outdoors, indoor display preferred | Lighted signs, hand-painted designs |
| Metal (thin sheets) | Durable, weather-resistant, modern look | Requires special tools, heavier, costly | $20-$50 plus tools | High durability outdoors | Long-lasting outdoor signs, sleek designs |
Pallet wood projects often involve cutting and attaching planks together with nails or wood glue, sometimes adding cedar strips or branches for a 3D tree effect. Plywood needs sanding and priming to create a smooth, paint-ready surface. Canvas can be stretched over a frame or bought pre-stretched and is great for bright, festive paints and adding string lights. Metal requires you to cut, sand edges, and possibly drill holes, good for experienced crafters comfortable with these tools.
Always sand and seal wooden signs before painting to prevent splinters and ensure paint sticks well, especially for outdoor use.
Natural elements suit pallet and plywood signs best, where you can secure pinecones or sprigs with hot glue or small nails. Remember that these materials add a cozy feel but may degrade if exposed to moisture or rough outdoor conditions. For outdoor signs, prioritize sealed wood or metal and keep natural add-ons sheltered or indoors.
Essential Tools and Supplies You’ll Need
Making a DIY Christmas sign requires a mix of basic tools, materials, and some optional supplies to match the style you want. The essentials help you cut, prepare, and decorate your sign, while optional items like special paints or stencils can simplify the process or add unique effects depending on your design.
Basic Tools for Wood and Surface Preparation
Start with tools to handle the wood or base material you choose. A hand saw or electric jigsaw works well for cutting wood into the desired sign shape and size. Sandpaper or a sanding block (grit 120 to 220) is necessary to smooth the surface, removing splinters and preparing it for paint. A tape measure or ruler helps keep dimensions accurate, which matters for symmetry and text placement.
You’ll also want a pencil for sketching your design before painting. While optional, clamps are useful to hold your sign steady while sanding or painting.
Paints, Brushes, and Finishing Supplies
For a classic painted sign, acrylic craft paints are the most common choice. They dry quickly and offer good coverage on wood or other surfaces. Basic sets with primary and neutral colors typically cost $5 to $15. Use flat or angled paintbrushes in sizes from 1/2 inch to 2 inches to cover broad areas and add details.
You might also consider outdoor or weather-resistant paints for signs kept outside. Clear acrylic spray sealer or varnish ($7 to $15) protects your sign from humidity, UV light, and wear.
Stencil and Lettering Tools
Stencils are optional but recommended if you want clean, professional-looking letters or patterns. Mylar stencils are durable, reusable, and can be found in Christmas-themed designs or alphabets. Companies like Funky Junk’s Old Sign Stencils add new holiday styles every year. Prices start around $10 per stencil set.
Alternatively, vinyl lettering or sticky decals can be applied directly or used as a guide for painting. For these, a cutting machine like a Cricut is useful, though not required if you buy pre-made vinyl.
Decorative and 3D Element Supplies
Adding texture and dimension is popular in Christmas signs. Gather hot glue guns and glue sticks to attach elements like faux berries, fabric bows, small ornaments, or wood cutouts. A 3D crate element or wooden shapes can serve as a base for these decorations, creating a layered look.
Natural touches like pine sprigs or twine also improve rustic or farmhouse signs. These require scissors and floral wire for shaping and fastening.
Essential Supplies Checklist
Here’s a quick list of items that cover most DIY Christmas sign projects with notes on options for your style:
- Wood board or alternative base (like repurposed pizza pans for unique shapes)
- Hand saw or jigsaw for cutting wood
- Sandpaper (grit 120 to 220) or sanding block
- Pencil and ruler or tape measure for layout
- Acrylic craft paints (plus outdoor/weather-resistant paints if outdoors)
- Paintbrushes in various sizes (1/2 inch to 2 inches)
- Clear acrylic spray sealer or varnish for protection
- Mylar stencils, vinyl lettering, or decals for precise text and patterns (optional but recommended)
- Hot glue gun and glue sticks for attaching decorations
- Decorative 3D elements such as berries, bows, ornaments, natural greenery (optional)
Using these tools and supplies, you can customize your sign’s look and feel. Basic tools cover cutting, smoothing, and painting. Stencils and vinyl lettering save time and improve accuracy for detailed designs. Decorative elements add festive depth and fit rustic or farmhouse themes.
How to Pick a Design and Style for Your Christmas Sign
Start by thinking about the overall look you want for your Christmas sign. The design and style should match your home’s existing decor and the space where you plan to display it. For example, a rustic wood sign pairs well with farmhouse or traditional decor, while a sleek painted board complements modern or minimalist spaces. Choose materials and colors that fit with these themes to create a cohesive feel.
Next, decide on a phrase or message. Classic sayings like “Merry Christmas,” “Joy,” “Noel,” or “Let It Snow” work for almost any style. You can also personalize your sign with family names or a short greeting like “Welcome Winter.” Popular themes include holiday cheer, winter motifs, or religious messages. Pick a phrase that suits your style and the mood you want to set. Keep the wording short enough to be easily readable from a distance, typically no more than three to five words.
Font selection plays a big role in how your sign looks. Script fonts create a cozy, handwritten feel and fit rustic signs. Bold block letters offer better visibility and suit modern or playful designs. Using one or two fonts at most usually works best to avoid clutter. Print your chosen phrase on paper first to compare how different fonts look on your sign size before committing to painting or stenciling.
Visual style includes color choices and any additional elements. Sticking to traditional Christmas colors like red, green, white, and gold gives a festive vibe. For something subtler, use soft pastels or a monochrome palette. Incorporate simple graphics such as holly berries, snowflakes, or stars if you want to add character while keeping the design clean. Avoid too many visual elements that can make the sign look messy or hard to read.
Consider how large your sign will be and where it will hang or stand. Smaller signs between 8 and 12 inches wide suit tabletops or shelves and usually feature one phrase and an icon. Larger signs, 18 to 24 inches or more, give space for more text or decorative details suitable for doors or walls. Planning size early helps balance font size and spacing for clear visibility.
Costs vary mainly by material and complexity. A simple plywood base and printed copy paper stencil cost under $10. Using more detailed stencils, specialty paints, or adding 3D elements adds to expenses and time. Choose a design level that matches your skill and budget. Starting with a simple statement in a neat font can look professional and takes less than a few hours.
A common mistake is picking a phrase or style that looks great on screen but doesn’t fit the physical sign or space. Printing your phrase on paper and laying it on the actual board before painting helps avoid size or spacing issues. Also, avoid overly ornate fonts or too many colors, which reduce readability and impact.
Try narrowing your choices by imagining your home’s current holiday decorations. Pick one sign style that complements rather than competes with your existing setup. This approach ensures your DIY Christmas sign boosts the festive mood without overwhelming the space.
Preparing Wood for a Smooth Paint Finish
Preparing wood properly before painting is essential for a smooth, professional finish on your DIY Christmas sign. Starting with clean, well-cut, and sanded wood ensures the paint adheres evenly and reduces the risk of rough, uneven surfaces. Sealing or priming the wood also protects it from moisture and helps paint last longer, especially if the sign will be displayed outdoors. Here’s a simple step-by-step process to prepare your wood for painting:
- Cut the wood to size. Use a saw to cut your wood planks or slice logs to the desired dimensions for your sign. A miter saw or circular saw works well for straight cuts, while a jigsaw is better for curves or irregular shapes.
- Sand the surface. Start with medium-grit sandpaper (around 120 grit) to smooth out rough areas and remove splinters. Then finish with fine-grit sandpaper (220 grit) for an even, smooth surface. Sand in the direction of the wood grain to avoid scratches.
- Clean the wood. Wipe away dust and debris with a damp cloth or tack cloth. This step prevents paint adhesion problems caused by leftover dust.
- Apply wood conditioner or primer. A wood conditioner helps soft woods like pine absorb stain or paint evenly, while primer blocks stains and prepares harder woods for painting. Use a brush or foam applicator to apply a thin, even coat. Let it dry according to the product instructions, usually 1 to 2 hours.
- Sand lightly after priming. Use fine-grit sandpaper (220 grit) to smooth any raised grain or brush marks. Wipe off dust before painting your design.
Sealing the wood before painting is especially important for outdoor signs or if you’re using a stain instead of paint. A sealant or primer prevents moisture from damaging the wood and keeps your sign looking fresh for years. Interior signs can sometimes skip the primer step if you’re using opaque acrylic paint, but primer usually leads to more even color and longer-lasting results.
Do not skip sanding between primer and paint layers; it’s key to a truly smooth finish that looks professional.
Painting Techniques for Perfect Christmas Signs
Painting techniques shape the look and durability of your Christmas sign. Stenciling, freehand lettering, distressing, and layering paint all offer different effects suited to your style and skill level. Choosing the right method helps prevent common issues like paint bleeding or uneven coats, which can make your sign look amateurish or require redoing.
Stenciling creates crisp, uniform designs especially useful if lettering precision matters. Use a stencil material like acetate or thick paper, then secure it to the wood with painter’s tape. Apply paint with a foam brush or sponge in light, dabbing motions to avoid paint seeping under the edges. Let each layer dry for 15 to 30 minutes to build accurate, clean lines. Stencils cost around $5 to $10 for basic sets and save time while improving consistency.
Freehand lettering delivers a personalized, handcrafted feel but takes steady hands and practice. Use a pencil to lightly sketch your design before painting to reduce mistakes. Select a fine, angled paintbrush with synthetic bristles for better control. Thin your paint slightly with water, about 5% by volume, so it flows smoothly but doesn’t run. Slow, deliberate brush strokes minimize uneven coverage. Freehand needs patience but results in a unique sign no one else has.
Distressing paint adds a vintage, rustic effect popular on holiday décor. After painting your base color and letting it dry for 24 hours, sand edges and flat surfaces lightly with 120-grit sandpaper. Focus on corners and raised details. Follow by wiping the surface with a dry cloth. This technique reveals layers underneath, giving a weathered look that fits farmhouse and shabby chic styles. Overdoing distressing can damage the wood or remove too much paint, so test on scrap pieces.
- Layer paint to add depth: start with a base color, dry, then add a second or third color in strategic spots
- Use acrylic craft paint for quick drying (20-30 min) and water cleanup
- Apply thin coats with a foam roller for even finishes on large areas
- Seal painted signs with matte or satin clear spray sealer for protection
- Work in a dust-free environment to avoid specks in wet paint
- Keep room temperature between 65-75°F to help paint dry evenly without cracking
- Rest brushes between coats by wrapping bristles in wet paper towels to prevent drying out
Layering paint works well for creating shadows and highlights on letters or borders. Start with a solid base coat and let it dry fully, usually 2-4 hours. Next, use a dry brush technique rubbing a slightly contrasting color sparingly, then soften edges with a clean, dry brush. Multiple thin layers build dimension without thick or blotchy paint. This takes time but looks more professional. Avoid rushing or thick coats, which cause cracking or peeling.
Prevent paint bleeding by using painter’s tape or painter’s putty along stencil edges. Press tape firmly to seal gaps. Use a dabbling motion instead of brushing back and forth. For freehand, practice even pressure and steady hand movements. Allow each painted area to dry completely before applying adjacent colors to avoid bleeding and smudging. Good lighting helps spot imperfections early, so work near a window or with bright lamps.
Adding 3D and Natural Elements to Your Sign
Adding 3D elements like wreaths or ornaments brings depth and interest to your DIY Christmas sign. You can attach a small wreath made of faux pine or eucalyptus around the edges or centered on the sign. Use hot glue or staple it securely, ensuring it lies flat without bending the wood. A small wreath about 6 to 8 inches in diameter works well on a 12×18 inch sign, balancing the space and adding texture. If using fresh greenery, keep the sign indoors or in a cool covered spot to prevent wilting and shortening its display life.
Wood cutouts are another popular way to add dimension. Saw or buy simple shapes such as trees, stars, or snowflakes that you can paint to match your design. Attach them with a strong wood glue or screws if you want a permanent fixture. Layer these cutouts over your painted sign words or in corners for a playful effect. For example, a “Noel” sign can be improve by gluing small wooden tree shapes around the edges. The cost for basic wood cutouts can be under $5 each if purchased pre-made or less if you cut them yourself from scrap wood.
Natural decorations like berries, pinecones, and twigs add rustic charm. Small artificial red berry sprigs can be glued in clusters for bright pops of color that contrast nicely with greens and neutrals. Pinecones should be small and light enough to affix securely with hot glue without pulling the sign wood down or damaging paint. Using these elements works best on thicker signs or wood plaques, as thin plywood might warp or crack under weight and moisture.
String lights offer a festive glow and can outline text or a wreath on your sign. Opt for battery-operated LED fairy lights to avoid visible cords and the risk of electric hazards outdoors. Wrap the lights loosely around a wreath or staple gently along the wood frame. Make sure the battery pack is easily accessible for on/off control and replacements. This addition works well indoors or on covered porches, but exposure to rain or snow will damage the lights unless they are rated for outdoor use.
When attaching 3D elements, prepare the wood surface by cleaning and lightly sanding to help glue or staples hold better. Test the weight and balance of heavier pieces before final attachment. Sometimes less is more; overcrowding can hide your sign’s message or make it look cluttered. Give each added decoration room to stand out, ensuring the sign remains eye-catching and easy to read from a distance.
Step-by-Step: Making a Classic Wooden JOY Sign
Making a classic wooden JOY sign is a straightforward project that combines basic woodworking and painting skills. It features the word “JOY” painted in bold letters on white wooden planks, with the letter “O” replaced by a charming DIY Christmas wreath. This sign fits well in festive home décor with a farmhouse feel and can be made with simple supplies including wood, paint, stencils, and a wreath.
Selecting Wood and Cutting to Size
Choose wood boards that are smooth and free from major cracks or knots for the best paint finish. Pine or cedar planks around 1/2 inch thick work well and keep the project lightweight. A common size for the sign is about 24 inches wide and 10 inches tall, using two or three planks joined side by side.
Cut the wood to match this size or your preferred dimensions. Sand all surfaces with 120-grit sandpaper to create a smooth base, focusing especially on edges and corners to prevent paint from peeling later.
Painting and Stenciling the Letters
Prime the wood with a coat of white paint or a paint primer to ensure even coverage and a bright background. After drying for about 2 hours, tape large mylar stencils of the letters J and Y onto the wood. Leave the middle space open for the wreath that will replace the “O”. Use acrylic paint in a bold color like red or black. Apply the paint with a foam brush or stencil brush by dabbing gently to avoid paint bleeding.
Let the paint dry fully, about 1 hour, then lightly distress the edges of the sign and letters with fine sandpaper or a sanding block. This step creates a vintage look characteristic of farmhouse décor and softens any harsh paint edges.
Finishing Touches and Assembly
Attach a small Christmas wreath to the center “O” spot using hot glue or small nails. Choose a wreath size that fits neatly between the J and Y, typically 6 to 8 inches in diameter. Finish with a clear matte sealant spray or brush-on polyurethane for protection if the sign will be displayed outdoors or handled regularly.
Include hanging hardware such as D-rings or sawtooth hangers on the back of the sign to make mounting easy. The project can be completed for roughly $20 to $35 depending on paint brands and wreath materials used.
- Cut and sand wood planks to 24″ by 10″.
- Prime wood with white paint and let dry 2 hours.
- Position and tape letter stencils for J and Y.
- Paint letters using colored acrylic paint, then dry 1 hour.
- Distress edges lightly with fine sandpaper.
- Glue or nail wreath in the center as the “O”.
- Apply sealant for outdoor protection, optional.
- Attach hanging hardware to the back.
Use painter’s tape to secure stencils firmly, preventing paint from bleeding under the edges and resulting in clean, sharp letters on your sign.
How Long Does It Take to Complete a Christmas Sign?
A DIY Christmas sign typically takes several hours to complete, but the exact time depends on your experience level and the complexity of your design. For beginners, expect the project to take around 4 to 6 hours, including drying time for paint and finishes. Experienced crafters might finish in 2 to 4 hours since they usually work more efficiently and are familiar with the steps involved.
Painting and drying are key parts of the process that affect the overall timeline. Most acrylic paints dry to the touch within 30 minutes to an hour at room temperature. However, for a fully dry and durable finish suitable for handling and applying additional coats, allow at least 2 to 4 hours. Using a glossy or protective finish like polyurethane or varnish extends drying times to 6 to 8 hours. Applying thin coats helps speed drying and reduce the risk of smudging.
Assembly also influences how long your project takes. Simple signs using pre-cut letters or stencils require less assembly time, usually 30 minutes to an hour to glue or nail pieces in place securely. More intricate signs that include layering 3D elements, ribbons, or natural components like pine cones may need extra time for careful positioning and adhering, sometimes adding an hour or more.
Temperature and humidity can impact drying times significantly. In cooler, humid environments, paint and finishes dry more slowly. Use a well-ventilated, warm room to help your project dry faster. Avoid rushing the drying process because smudges or uneven finishes can ruin the final look. When pressed for time, try fast-drying craft paints or spray finishes that cure in under an hour.
Good results come from patience and planning the timing carefully. For example, paint the wood base the day before adding letters or decorative accents the next day. This staged approach ensures each layer is fully dry and less prone to damage. Errors like uneven paint or loose attachments often happen when layers aren’t dry enough or when you try to assemble too quickly.
Budgeting your time ahead helps, especially during busy holiday seasons. Starting early in the season lets you space out drying and assembly steps comfortably. For a beginner trying a classic wooden “JOY” sign, plan to spend 1 to 2 hours prepping and painting the base and another 2 hours on decorating and waiting for everything to dry fully. Experienced crafters might complete these steps in less time while still achieving a polished look.
Avoiding and Fixing Common DIY Christmas Sign Mistakes
Common DIY Christmas sign mistakes include paint runs, uneven letters, and structural problems like warping or unstable bases. Paint runs happen when too much paint is applied or layering occurs before the previous coat dries. Uneven letters can result from rushed stenciling or inconsistent measurements. Structural issues arise if the wood isn’t properly prepared, leaving it prone to cracking or bending, especially for outdoor signs.
Fixing smudged paint starts with letting it dry fully, then lightly sanding the area with fine-grit sandpaper (220 grit is good). After sanding, clean off dust and reapply paint carefully with a small brush to avoid further runs. For crooked letters, carefully scrape off the paint with a craft knife or small detail brush and repaint using a stencil or painter’s tape for guide lines. This helps restore sharp edges and even spacing.
Structural problems like a warped sign can be minimized by selecting dry, flat wood and sealing it well before painting. If warping occurs after painting, try placing the sign under a heavy flat object for several days to flatten it out. To fix loose elements like 3D letters or decorations, use a high-quality wood glue or clear-cure epoxy and clamp or weight them until set, usually 15 to 30 minutes.
- Apply thin, even layers of paint, letting each coat dry 1, 2 hours.
- Use painter’s tape or stencils for sharp, straight lettering.
- Sand lightly between paint coats to smooth surfaces.
- Choose kiln-dried wood to prevent bending or warping.
- Seal the finished sign with clear outdoor varnish for weather protection.
- Work in a clean, dust-free area to avoid particles settling on wet paint.
- Keep a damp cloth nearby to quickly wipe accidental drips before drying.
Correcting paint runs quickly reduces the chance of uneven texture and colour pooling, which appear unprofessional. Taking extra time with prep and painting ensures letters stay crisp and the sign remains sturdy through the season. Not sealing a wooden sign designed for outdoor display can lead to peeling or water damage, so a quality sealer is a worthwhile investment costing about $10, 15 per quart and covering roughly 100 square feet. Simple fixes like sanding and touch-up painting often cost only a few dollars for supplies but dramatically improve your sign’s look.
Adapting Your Sign for Indoor or Outdoor Display
Using the same DIY Christmas sign for both indoor and outdoor display is possible, but it requires careful choice of materials and finishes to protect the sign from outdoor elements. Signs meant to stay outside must resist moisture, UV rays, temperature changes, and wind, while indoor signs face fewer risks. Adjusting your sign for its intended location helps keep it looking fresh and vibrant throughout the holiday season.
For outdoor signs, start with durable wood like cedar or redwood, which naturally resist rot and insects better than softwoods such as pine. Sealing a pine or plywood sign thoroughly is essential when you already have one. Apply a high-quality exterior wood primer first to block moisture and provide a good base for paint. After painting, use a clear, weatherproof polyurethane or spar varnish designed for exterior use. These finishes remain flexible and protect against cracking during temperature swings. You’ll want to apply at least two to three coats, allowing 24 hours drying time between each coat. Expect to spend around $15 to $30 on a quart can of exterior-grade sealer, which will cover multiple signs.
Indoors, a simple acrylic or chalk paint on untreated wood usually works fine because the sign doesn’t need moisture protection. A satin or matte indoor polyurethane finish can add subtle durability and cleanability if you like, but it’s optional. Indoor finishing products cost less and dry faster than those for outdoors, which often take days to fully cure. Avoid outdoor sealers indoors when possible, since some have strong odors and take longer to dry.
Hanging methods vary by location, too. Outdoor signs benefit from waterproof mounting options like stainless steel screws or heavy-duty outdoor hooks. Choosing nylon or coated metal wire is best when using wire or string because these materials won’t absorb water or rot. Make sure your hanging option can support the wind load if the sign will be exposed. Indoors, lightweight picture hanger nails or adhesive strips designed for walls can hold your sign without damage. For porch or garden posts, consider mounting the sign on a sturdy frame or stake that won’t easily tip over.
Protecting wooden signs from weather greatly extends their life and appearance. Check the signs regularly during winter for peeling paint or finish cracks and touch up as needed. Light sanding and a fresh coat of sealer every couple of years can keep outdoor wood from rotting or splitting. Signs with added 3D elements like pinecones or fabric need extra care, such as glue rated for outdoor use or occasional gentle cleaning to prevent mold build-up. Signs left unprotected outdoors risk peeling, warping, and faded colors within one or two seasons, costing more time and money to replace or repair.
Always use outdoor-rated finishes and hardware for signs exposed to rain or snow to avoid mold and structural damage.
Creative Ways to Personalize and Display Your Sign
Personalizing your DIY Christmas sign with family names, important dates, or messages makes it truly unique and meaningful. Combining the sign with festive garlands, lights, or wreaths can give your decor a fuller, holiday-ready look that captures attention. Placing your sign thoughtfully in your home or outdoors ensures it complements your other decorations and spreads seasonal cheer.
Techniques for Adding Custom Text
Adding names or messages to your sign gives it a personal touch that stands out. To do this, use stencils or vinyl lettering to transfer the text onto the wood surface before painting. Stencils are cost-effective, around $5 to $15, and reusable, which is great for multiple signs or future projects. For a smoother look, brush on paint with a foam or fine-tip brush after securing the stencil firmly. Let the paint dry for at least 30 minutes between coats for clean edges.
Another method is using adhesive vinyl letters or decals, which can be cut from a home cutting machine or bought ready-made. These apply easily and well to painted surfaces, but make sure the paint underneath is completely dry to avoid bubbling. To include dates or family names, plan your layout by measuring the sign’s width and dividing it evenly to center your text. For example, on a 24-inch-wide sign, center “The Johnson Family” by marking the midpoint at 12 inches, then align your text accordingly. This prevents a crowded or uneven design.
Using Seasonal Decor to Improve Your Sign
Pairing your Christmas sign with seasonal decor improve its impact. Garland wrapped around the edges of your wooden sign adds texture and a festive touch. You can use faux pine garlands with berries or pinecones for a natural look, costing about $10 to $20 per 6-foot strand. Battery-operated string lights with warm white LED bulbs can be woven through the garland or positioned around the sign for a cozy glow, typically running $8 to $15 depending on length and features.
Wreaths also complement signs beautifully. Position a medium-sized wreath, 18 to 24 inches in diameter, directly on or just above your sign as a frame. For easy attachment, use removable adhesive hooks or craft wire twisted through the sign and wreath base. This setup allows for quick seasonal updates without damaging the sign’s surface. Incorporate ribbon or bows in your chosen color palette to unify the decor elements.
- Wrap pine or berry garlands around the frame or edges of the sign
- Weave warm white LED string lights through garland or around the sign
- Attach a coordinating wreath above or around the sign using removable hooks
- Add fabric or burlap bows tied to garland or wreath for color and texture
- Use small pinecones or ornaments hot glued to garland for extra detail
- Secure decorations carefully to avoid obscuring your sign’s text
- Choose colors that match your existing holiday decorating scheme
Best Locations to Showcase Your Sign
Deciding where to hang or place your Christmas sign depends on whether it’s for indoor or outdoor display. Indoors, entryways, above the mantel, or on a prominent wall in the living or dining room offer good visibility. Mount your sign at eye level, generally 60 to 66 inches from the floor, to ensure it’s easily read and admired by guests.
Outdoors, porch walls, near the front door, or on the garage are common spots. Ensure your sign is weatherproof if it’s exposed to rain, snow, or freezing temperatures. Protective clear coat sprays can help shield paint and wood from moisture. Use sturdy hooks or outdoor-rated wire hangers to secure your sign against wind. If placing on a porch railing, consider leaning it against posts with decorative elements behind for stability.
Step-by-Step Action Plan
Follow these steps to create your own charming DIY Christmas sign efficiently.
- Before You Start: Choose your wood type and gather all tools and materials. Ensure your workspace is clean and well-lit for smooth work.
- Day 1: Prepare your wood by sanding it smooth. You’ll know it’s ready when no rough edges or splinters remain and the surface feels even to the touch.
- Day 2: Apply your chosen base paint coat using steady strokes. The paint should look even and dry without streaks or bubbles.
- Day 3: Use stencils or hand-paint your design carefully. Confirm the design looks clear and balanced before the paint dries.
- Day 4: Add 3D or natural elements like pine cones or ribbon using a strong adhesive. Check that all pieces are firmly attached and positioned as planned.
- Day 5: Apply a protective clear coat if your sign will be outdoors. The finish should be dry to touch and uniform across the surface.
- After 1 Week: Hang or display your sign proudly. Inspect for any loose parts or wear, and make small touch-ups if necessary.
Frequently Asked Questions
Can I Use Recycled Materials to Make a DIY Christmas Sign?
Yes, recycled materials like old wood or spindles add unique charm. They also help keep costs low and make your sign eco-friendly.
What Are Some Easy Fonts to Use for a Christmas Sign Stencil?
Simple block or script fonts work best for stenciling. They create clear, readable letters and reduce paint bleeding for a neat look.
How Can I Preserve My DIY Christmas Sign for Outdoor Use?
Use a weatherproof sealant to protect paint and wood. This helps guard against moisture and fading throughout the holiday season.
Can I Add Lights to My DIY Christmas Sign?
Yes, small LED string lights improve visibility and festive appeal. Make sure to use battery-operated lights for safety and convenience.
What’s a Quick Way to Fix Paint Mistakes on a Wooden Christmas Sign?
Lightly sand the area, then repaint once dry. This method smooths errors without damaging the wood’s surface.
Are There Budget-Friendly Alternatives to Professional-Grade Stencils?
Printable stencil sheets or DIY cutouts work well and cost less. They still guide your painting for a clean design finish.
The Bottom Line
Creating a DIY Christmas sign brings personalized holiday cheer to your home without a big expense. Start by picking a simple design that suits your style and gather your materials today. This small project will add a festive touch and a satisfying craft experience to your holiday season.