How to Laser Engrave Cutting Boards: Simple Steps for Fast, Food-Safe Results
How to laser engrave cutting boards starts with selecting the right wood and laser type, then preparing a clear design for precision. Use a CO2 or Diode laser on smooth, untreated hardwood or bamboo boards for the best results. Begin by choosing simple, high-contrast artwork to ensure clean engraving without burning or blotching.
Key Takeaways
- Choose bamboo or hardwood cutting boards for clean, detailed laser engraving results.
- Use a CO2 laser for professional-quality engraving and Diode lasers for smaller, lighter jobs.
- Set your laser to about 50% power and 50 mm/s speed with at least one pass for most wood boards.
- Prepare your design with high contrast and clean lines to avoid burnt edges and unclear details.
- Mask the board surface with blue painters tape to prevent scorch marks and ease cleanup.
- Perform test engravings on scrap wood before working on your final cutting board.
What Is Laser Engraving on Cutting Boards?
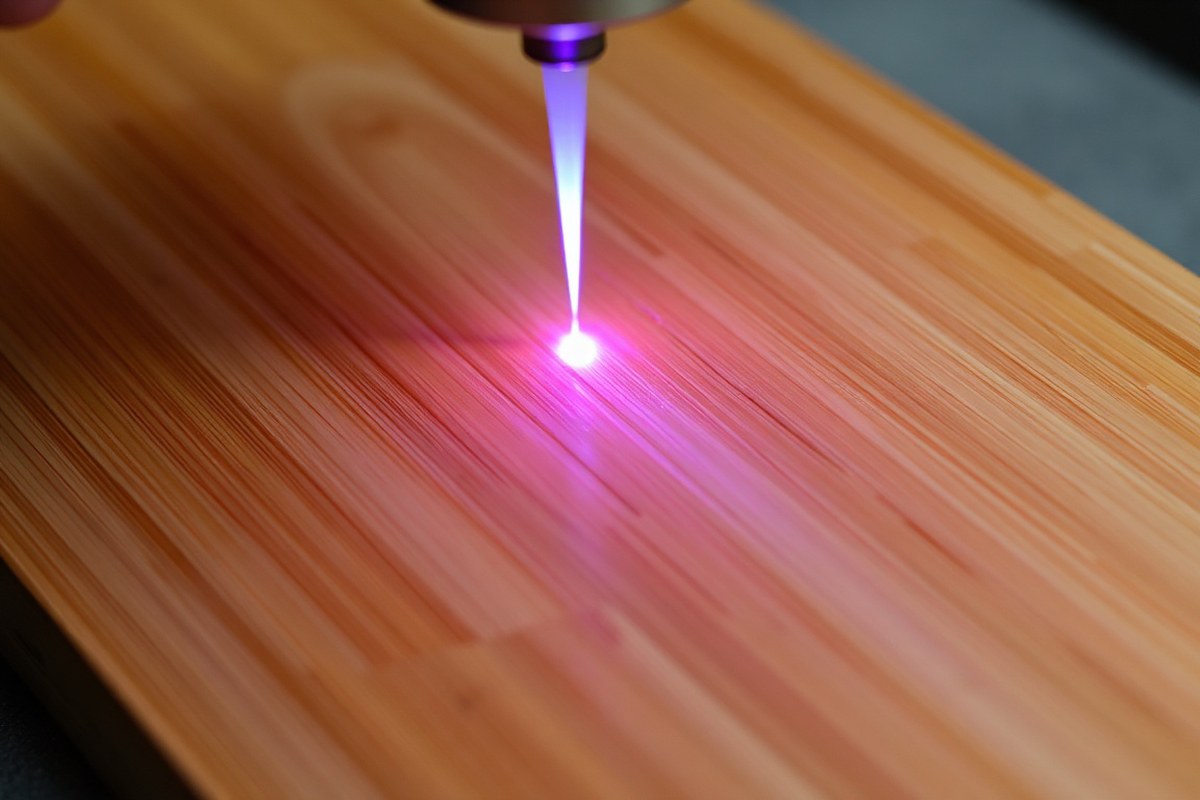
Laser engraving on cutting boards means using a focused laser beam to remove the wood’s surface layer, creating a permanent design. The laser heats the wood’s surface quickly, burning away a thin layer to reveal a darker, etched pattern in the wood grain. This process allows for detailed and precise imagery, logos, text, or custom designs to be embedded directly onto the cutting board without physically touching or damaging it beyond the surface.
Two main types of lasers are suitable for engraving wood cutting boards: CO2 lasers and diode lasers. CO2 lasers are the professional standard for this work because they offer higher power and can handle larger cutting areas. For example, a 60-watt CO2 laser provides enough heat and precision to create clean, sharp designs on various wooden surfaces, including thicker or denser cutting boards. Diode lasers, on the other hand, are generally lower in power and better suited for smaller, lighter production runs or hobbyists. They work well for simple or smaller designs but may struggle with finer details or deeper engraving on larger boards.
| Laser Type | Suitability for Cutting Boards | Power & Precision | Typical Use |
|---|---|---|---|
| CO2 Laser | Best for most woodworking projects | High power (e.g. 60W), high precision | Professional, detailed, large-scale engraving |
| Diode Laser | Good for small, simple projects | Lower power, less precision | Hobbyists, small production runs |
Choosing laser engraving over other personalization methods offers several benefits, especially for cutting boards. The engraved design becomes permanent and does not fade, peel, or wash away. Because the laser only alters a thin surface layer, it doesn’t weaken the board’s structure or create grooves deep enough to trap food particles, preserving safety for food prep. Laser engraving also allows for very intricate and consistent designs that manual methods can’t match. The natural wood grain can improve the engraved design’s look, giving each piece a unique, upscale appearance.
To get started, pick clean, untreated wood cutting boards or bamboo boards safe for food use. Avoid treated or glued woods to ensure the board remains safe after engraving. With a CO2 laser, you’ll use moderate power settings to burn the surface layer without charring the wood. Lower-powered diode lasers need slower speeds and possibly multiple passes for good results. Good engraving looks sharp and contrasts well with the wood, without excessive burn marks or smoke damage. Poor results often happen if the laser power is too high, causing burning beyond the design, or if the board surface isn’t smooth and clean before engraving.
Setting up a laser engraver requires an initial investment starting around $400 for entry-level diode models and going up to several thousand dollars for quality CO2 machines. The learning curve includes mastering design software and laser controls. Still, laser engraving is one of the most efficient, reliable ways to add custom designs to wooden cutting boards, making it worthwhile for hobbyists and small business owners aiming to create personalized kitchenware that lasts.
Best Woods and Cutting Boards for Laser Engraving
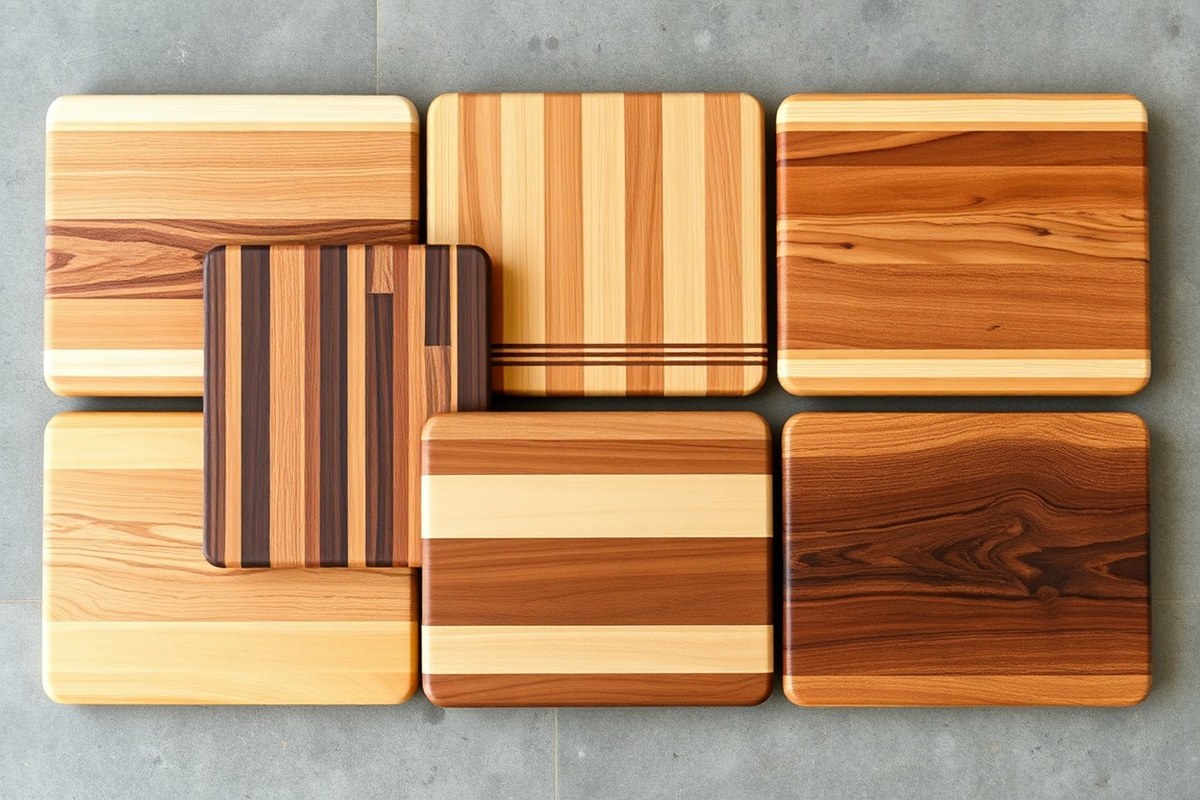
For laser engraving on cutting boards, hardwoods like maple, oak, cherry, walnut, and bamboo work best. These woods offer a natural texture that engraves with clear contrast, allowing your designs to stand out sharply against the wood grain. Maple and bamboo are especially popular because their light colors create dark, crisp engraving marks. Avoid woods high in resin or natural toxins such as pine or cedar, as they can emit harmful fumes and produce uneven engraving results.
Choosing the right cutting board also includes considering thickness and size. Boards between 0.75 inch and 1 inch thick offer enough depth for durable engraving without risking burn-through. Sizes around 12 by 16 inches or smaller are manageable on most desktop laser machines, balancing engraving area and material cost. Larger boards may require multiple passes or repositioning, adding time and complexity.
| Wood Type | Engraving Quality | Contrast | Durability | Recommended for Cutting Boards |
|---|---|---|---|---|
| Maple | High clarity | Light with dark engraving | Hard, resists knife marks | Yes |
| Bamboo | Clean engrave | Good contrast | Durable and eco-friendly | Yes |
| Walnut | Good detail | Medium contrast | Hard, aesthetic | Yes |
| Cherry | Fine detail | Warm contrast | Hardwood, ages well | Yes |
| Pine | Poor, resin affects | Low contrast | Soft, scratches easily | No |
| Cedar | Uneven engraving | Varies, resin-heavy | Soft, toxic fumes | No |
Select cutting boards marked as hardwood or bamboo to achieve optimal engraving outcomes. The Youke Ola 25-piece bamboo set stands out in laser engraving circles for its cost-effectiveness and durability. Pre-sized options ranging from 10 to 16 inches are widely available and compatible with most desktop laser machines. Boards around 1 inch thick offer a solid base and help prevent burns on the underside.
Before engraving, check that the board is untreated or finished with food-safe oil only. Avoid boards with synthetic coatings or paint layers, as these can damage your laser engraver and produce toxic fumes. Hand washing and routine oiling with butcher block conditioner or mineral oil help maintain the engraved design’s appearance over time.
Always verify the wood species and finish before engraving to avoid toxic fumes and damage to your equipment or project.
Choosing and Preparing Your Design for Engraving
Choosing and preparing your design carefully ensures your laser engraved cutting board looks clear and beautiful. You need to select or create artwork compatible with your laser software, adjust image quality to suit wood’s natural texture, and optimize design elements that stand out after engraving. Proper preparation affects engraving depth, detail, and durability.
Supported File Formats for Laser Engraving
Vector files work best for engraving because they offer clean lines and scalability without losing quality. Formats like SVG, AI (Adobe Illustrator), DXF, and CDR (CorelDRAW) are ideal. These allow the laser machine to follow precise paths for engraving, producing sharp and consistent results.
Raster files such as PNG, JPG, or BMP can be engraved but may require conversion and can produce less crisp edges. For photos and complex images, high-resolution (300 dpi or higher) raster files help maintain detail after engraving.
Design software like Adobe Illustrator, CorelDRAW, LightBurn, and LaserPecker Design Space support these formats. Always check which formats your laser engraver’s software accepts before starting your project.
Design Tips for Wood Engraving Clarity
Wood’s natural grain affects how designs appear, so simplicity and contrast are key. Bold lines, minimal fine detail, and high contrast areas work best, especially for maple and cherry, where lighter colors favor darker engravings.
Use black and white or grayscale for your design. Increasing contrast in your image editing software sharpens edges, boosting clarity after engraving. Avoid thin lines below 0.01 inch (0.25 mm) as the laser might not fully engrave them, causing breaks or fading.
Design with engraving depth in mind. Deep, heavily textured engravings can trap food debris, so limit depth for boards used with raw meat or food prep. Select lettering fonts that are thick and easy to read, like sans-serif or slab-serif styles, for personalization or recipes.
Preparing Photos and Handwritten Text
Photographs and handwritten recipes can be engraved but need careful file preparation to look their best. Convert photos to black-and-white or grayscale and increase contrast to define features clearly. Simplify images by reducing noise or background distractions using photo editing software.
For handwritten text, scan at a minimum resolution of 300 dpi, adjust brightness/contrast to make the letters bold, and clean any smudges or lines with basic image retouching tools. Trace the handwriting into a vector format if possible, which improves sharpness and smoothness.
Engrave samples on scrap wood to test how the texture, darkness, and detail appear. Adjust brightness and contrast based on results.
- Create or select a design in a vector format (SVG or AI preferred).
- Open the file in your laser software (LightBurn, CorelDRAW, or LaserPecker).
- Adjust image contrast and sharpness in photo editing software to emphasize edges.
- Convert images to black and white or grayscale for consistent engraving shades.
- Check lines widths; ensure any line is at least 0.01 inch thick for accuracy.
- Optimize text fonts for readability, choose bold, simple fonts.
- Save the file in a supported format compatible with your laser cutter.
- Test engrave on scrap wood and make adjustments before final engraving.
Step-by-Step Guide to Laser Engraving Cutting Boards
Laser engraving a cutting board requires careful preparation, precise machine setup, and a well-paced workflow. Taking these steps ensures clear, deep engraving without damaging your wood. The process typically lasts about 30 to 60 minutes from start to finish, depending on your design complexity and machine.
Preparing and Cleaning the Cutting Board
Start by selecting a clean, flat cutting board. Remove any dirt, dust, or oils with a damp cloth and mild soap, then dry it thoroughly. A smooth, dry surface allows the laser to etch evenly and prevents uneven burning or discoloration.
Lightly sanding the surface with fine-grit sandpaper (around 220 grit) can help remove any rough patches or finish that might interfere with the engraving. Wipe off sanding dust completely before placing the board in the machine. Avoid using boards with deep cracks or heavy resin spots since these can distort the engraving.
Adjusting Laser Power, Speed, and Focus
For a standard hardwood cutting board, start by setting your laser power around 50% and speed at 50 mm/s, and plan for a single pass. These settings fit many CO2 laser engravers, like the OMTech 60W model. Lower power or higher speed can result in faint markings; too high power or slow speed risks burning the wood deeply or charring the edges.
Next, focus the laser precisely on the wood’s surface. Most machines have an adjustable focus lens; use the built-in focus tool or focus gauge. Proper focus ensures sharp, detailed engraving lines. Recheck focus after placing the board on the engraving bed, as thickness may vary slightly.
Test your settings on a scrap piece of the same wood or an inconspicuous corner before starting the main design. Adjust power and speed in small increments to optimize depth and clarity without scorching.
Starting and Monitoring the Engraving Process
Begin by placing the cutting board flat and secure on the laser bed. Align it with the laser’s origin point using the machine’s positioning tool or software preview. Make sure no edges hang over or interfere with the movement of the laser head.
After confirming all settings and position, start the engraving job. Stay nearby to watch for smoke buildup or fire risk, especially during longer engravings. Most engraving takes 10 to 30 minutes depending on your design’s size and complexity.
Pause the machine immediately if you notice uneven engraving depth, excessive smoke, or movement of the board. Adjust settings or reposition the board if necessary, then resume. Once engraving finishes, allow the board to cool before handling or applying any finishes.
- Clean the cutting board with mild soap and water; dry thoroughly.
- Sand the surface lightly with 220-grit sandpaper and wipe off dust.
- Set your laser power to about 50%, speed to 50 mm/s, and prepare for 1 pass.
- Focus the laser on the wood surface using the machine’s focus tool.
- Place and align the cutting board flat on the laser bed, securing it.
- Run a test engraving on scrap wood or a corner to verify settings.
- Start the engraving process, monitoring closely for issues.
- Let the board cool before removing and finishing.
Recommended Laser Settings for Wood Cutting Boards
For laser engraving wooden cutting boards, specific power and speed settings depend on the wood species and the thickness of the board. The goal is to achieve crisp, clear engraving with good contrast without burning the wood or creating a deep gouge that weakens the surface. A typical setup for a 30-watt laser, like the Fusion Maker, uses 100% power and 50% speed at 1200 dpi to produce a deep, detailed engraving, especially for veneering techniques.
DPI (dots per inch) affects the detail of the engraving, the higher the DPI, the finer the detail. However, extremely high DPI settings can slow down the process and cause overheating or excessive burning on softer woods. Around 1200 dpi works well to balance detail and speed.
| Wood Type | Power | Speed | DPI | Passes | Notes |
|---|---|---|---|---|---|
| Maple (1/2 inch thickness) | 90-100% | 40-50% | 1200 | 1-2 | Hard wood, slower speed for deeper engraving |
| Walnut (3/4 inch thickness) | 85-95% | 50-60% | 1200 | 1 | Dark wood, adjust for contrast without overburning |
| Bamboo (1/4 inch thickness) | 70-80% | 55-65% | 1200 | 1-2 | Fast-growing, softer material; watch for scorching |
| Cherry (1/2 inch thickness) | 85-95% | 45-55% | 1200 | 1 | Medium hardness, good contrast, moderate speed |
Typically, one or two passes are sufficient for medium-thickness cutting boards to achieve good depth and contrast. Using multiple passes at lower power can reduce burning, but increases production time. Maintain a DPI around 1200 to keep the engraving fine yet efficient.
Start by testing on a scrap piece of the exact wood you plan to engrave. Adjust power and speed in small increments, lowering power or increasing speed helps prevent burning, while increasing power or lowering speed deepens the engraving. If you notice excessive charring around the edges, lower the power or increase speed. For uneven engraving depth, check laser focus and ensure the board surface is flat.
Run a few test engravings on scrap wood before committing to your project to dial in the perfect settings for your specific cutting board.
Fine-tuning these settings also depends on your laser machine’s wattage and optics quality. Desktop lasers below 30 watts may need slower speeds or multiple passes to match these results. Avoid over-engraving since it can weaken the cutting board’s surface, making it prone to damage during kitchen use.
Finishing and Maintaining Laser Engraved Cutting Boards
Properly finishing a laser engraved cutting board protects the design and keeps the surface food safe. Use food-grade mineral oil or cutting board conditioner to seal the wood after engraving. Regular cleaning and re-oiling maintain the board’s appearance and durability, ensuring the engraving remains clear over time.
Applying Food-Safe Mineral Oil or Conditioner
After engraving, lightly sand the surface to remove any charred residue and smooth the wood. Clean the board with a dry cloth before applying the finishing oil. Food-safe mineral oil or specialized cutting board conditioners are the safest choices because they penetrate the wood without forming a harmful surface layer. Avoid finishes like polyurethane or varnishes that are not food safe.
Apply multiple thin coats for the best protection and appearance. Each coat should soak in for several hours or overnight. The oil prevents the wood from drying out, which helps preserve the engraved areas and minimizes wear.
- Lightly sand the entire board with fine-grit sandpaper (220 grit) to remove char and smooth the surface.
- Wipe the board with a clean, dry cloth to remove sanding dust.
- Apply a generous coat of food-safe mineral oil or cutting board conditioner using a clean cloth or brush.
- Allow the oil to soak in for 6 to 8 hours or overnight.
- Wipe off any excess oil that does not absorb to prevent a sticky surface.
- Repeat the application 2 to 3 times, allowing drying time between each coat.
- Leave the board to cure for at least 24 hours before use.
Cleaning Tips for Engraved Surfaces
Cleaning engraved cutting boards requires gentle handling to avoid damaging the design. Use warm water and mild dish soap, washing the board by hand rather than soaking it. Avoid harsh scrubbing or abrasive pads that can wear down the engraving. Rinse thoroughly and dry immediately with a clean towel.
Do not put laser engraved cutting boards in the dishwasher. The intense heat and detergent can damage both wood and engraving. Proper cleaning keeps the design sharp and prevents bacteria buildup in the engraved grooves.
Routine Maintenance and Storage Advice
Reapply food-safe oil every 3 to 4 weeks, depending on use and exposure to water. A dry board will start to look dull, and the engraved design can lose definition if the wood cracks or dries out. Regular maintenance preserves the board’s appearance and food safety.
Store cutting boards upright in a dry, well-ventilated area. Avoid prolonged exposure to moisture or direct sunlight, which can cause warping or fading of the engraving. Using a food-safe finish like mineral oil ensures the product remains safe for food contact and extends the lifespan of your laser-engraved design.
| Maintenance Schedule | Task |
|---|---|
| Weekly / After use | Hand wash with mild soap and dry immediately |
| Every 3-4 weeks | Reapply food-safe mineral oil or conditioner (2-3 coats) |
| As needed | Light sanding if engraving looks worn or uneven |
Safety Precautions When Laser Engraving Cutting Boards
Protecting yourself and your workspace during laser engraving on wood cutting boards requires wearing proper safety gear. At minimum, use safety goggles designed for your laser’s specific wavelength to shield your eyes from harmful light. Gloves can protect your hands from splinters and hot surfaces, but avoid loose-fitting gloves that might get caught in the machine. Work in a well-ventilated area or with a fume extraction system to remove smoke and volatile compounds released by burning wood, which can irritate your respiratory system.
Ventilation is critical because engraving wood produces fine dust and smoke containing chemicals like formaldehyde. Place your laser engraver in a room with a window you can open or use an exhaust fan directed outdoors. Alternatively, a dedicated air filtration unit rated for laser cutter fumes helps maintain air quality. Lack of ventilation can cause hazards such as respiratory irritation, fire risks, or poor engraving results due to smoke residue on the cutting board’s surface.
Wood laser engraving presents several common hazards. Fire risk is significant since the laser can ignite wood chips or sawdust inside the laser cutter. Keep a fire extinguisher rated for electrical and wood fires within reach, and never leave the machine unattended while operating. Regularly clean the laser bed and lens to prevent buildup of combustible residue and maintain machine performance. Inspect electrical cords and connections for damage before use to avoid electric shock or short circuits.
- Wear laser-specific safety goggles and tight-fitting gloves
- Ensure proper ventilation or use a dedicated fume extractor
- Keep a suitable fire extinguisher nearby and never leave the laser unattended
- Clean the laser bed and lens after each session to prevent residue buildup
- Check electrical components and cords for damage before each use
- Maintain a tidy workspace free of excess wood dust and scraps
- Have an emergency plan including immediate power shutoff and evacuation routes
Follow a safety checklist before every engraving session. Confirm ventilation systems are running and fire extinguishers are accessible. Verify that safety gear is worn and laser settings match your wood type and thickness, since incorrect power can produce excessive smoke or burning. In case a fire does start, activate the emergency power shutoff switch on your machine, use your extinguisher, and evacuate if it grows rapidly. Calling the fire department is essential if you cannot control the fire quickly.
Good maintenance supports safety and performance. Schedule monthly deep cleanings of your machine’s ventilation ducts and optical components. Replace lenses or filters as recommended by the manufacturer, usually every 6 to 12 months depending on use. Routine upkeep costs vary but expect to spend around $50 to $150 annually on replacement parts and cleaning supplies. Following these guidelines reduces risks and leads to cleaner, sharper engravings on your wood cutting boards.
Common Laser Engraving Issues and How to Fix Them
Uneven or faint engraving usually results from inconsistent laser power, incorrect focus, or uneven board surfaces. To fix this, calibrate your laser by adjusting the focus lens to match the exact thickness of your cutting board. Place a scrap piece of the same wood in the machine and run a test pattern at gradually increasing power settings from 10% to 30%. This will help you identify the best balance between engraving depth and clarity. Also, ensure the cutting board is flat and securely positioned to prevent movement during engraving.
Burning or scorch marks appear when the laser power is too high, the speed is too slow, or the wood contains excessive oils or resins. Reducing power by 5% to 10% or increasing the speed by 10% to 20% often eliminates these marks. Using a masking tape like painter’s tape over the engraving area can further reduce surface burns. Avoid re-engraving over scorch marks, as this worsens the burn and weakens the wood.
The depth of engraving depends on laser power and speed settings. Too shallow means the laser didn’t remove enough material, often caused by low power or high speed. Too deep results from excessive power or slow speed, risking damage to the cutting board’s surface and longevity. Adjust power incrementally by 3% to 5% and tweak the speed in 5% steps based on your test outcomes. Remember, cutting boards require careful control to retain their usability after engraving.
Design distortion or misalignment arises when the board shifts during engraving or if the design file is not correctly scaled. Use clamps or jigs designed for your laser machine to hold the cutting board still. Double-check dimensions on your design software and perform a dry run without firing the laser to verify alignment. Avoid stretching designs disproportionately; maintain the original aspect ratio to prevent distortion.
Decision rules for re-engraving depend on the defect’s severity. If the engraving is simply faint, re-running the same design at slightly higher power or slower speed can deepen the lines. For partial misalignments or burnt areas, avoid re-engraving directly over damaged spots, as this may worsen them. Instead, consider altering the design slightly to cover defects or selecting a new area. Repeated re-engraving can degrade wood quality, leading to weaker boards that wear faster through cutting and washing cycles.
Test every setup on a matching scrap piece with incremental power changes before working on your final cutting board to avoid costly mistakes and wood damage.
Step-by-Step Action Plan for Laser Engraving Cutting Boards
Follow these steps to start laser engraving your cutting boards confidently and safely.
- Before you start: Select a suitable wood cutting board, such as maple or walnut, and prepare your design file in vector format. Check that it scales correctly to your board size.
- Day 1: Clean the board surface thoroughly to remove dust or oils. This ensures a clear, even engraving.
- Day 1: Set your laser engraving machine following recommended settings (around 300-400 mm/s speed, 50-60% power for 40W laser), test on scrap wood to confirm crisp lines.
- Day 1: Engrave a test pattern on the board corner to verify depth and detail quality before the full engraving.
- Day 1: Proceed with the full design engraving if the test passes, watching for any smoke or discoloration and pausing to adjust if needed.
- Day 1: After engraving, gently wipe the board with a damp cloth and let it dry. Avoid using harsh chemicals that could affect wood finish.
- Day 2: Apply a food-safe mineral oil or beeswax finish to the engraved cutting board to protect the wood and highlight the design.
- Ongoing: Store the board in a dry place away from direct sunlight and regularly reapply mineral oil to maintain the engraving and wood quality.
Frequently Asked Questions
Can I Use Any Laser Type for Engraving Cutting Boards?
CO2 or Diode lasers both work well for engraving cutting boards. CO2 lasers are popular for wood because they offer precise cutting and engraving, while Diode lasers tend to be cheaper but might need you to slow down the engraving speed.
Is Laser Engraving Safe for Food Prep Cutting Boards?
Yes, engraving on untreated, food-safe wood cutting boards is safe for food prep. Avoid treated or sealed woods to prevent chemicals from contaminating food.
How Do I Prevent Burning the Wood While Engraving?
Use moderate laser power and faster speed settings to avoid burning. Testing on scrap wood first helps dial in the right balance for clean, even engravings.
Can I Engrave Handwritten Recipes on Cutting Boards?
Yes, you can laser engrave handwritten recipes onto cutting boards using image conversion software to create an engraving-friendly file. It takes about 20-35 minutes per board, depending on size.
How Should I Finish a Laser Engraved Cutting Board?
Apply a food-safe finish like mineral oil or beeswax after engraving. This protects the wood and highlights the engraving without harming food safety.
What Causes Uneven Engraving Marks on Cutting Boards?
Uneven marks often result from improper focus, inconsistent wood thickness, or incorrect laser settings. Adjust the focus and test settings before final engraving to ensure consistency.
Wrapping Up
Laser engraving cutting boards lets you create personalized, lasting gifts or products with precision and style. Take time to test your machine settings and finish your work with safe, food-grade oils. The next step is to practice engraving on spare wood pieces before customizing your first cutting board. This keeps your final product professional and safe for kitchen use.