Rooftop Sign Ideas: 8 Creative Solutions for Visibility and Style
Rooftop sign ideas are essential when you want to make your venue or business stand out from above. Using bold, large-scale typography combined with unique shapes or icons boosts your visibility to both foot traffic and aerial views. Starting with clear, high-contrast visuals ensures your sign grabs attention swiftly even from a distance.
Key Takeaways
- Use large, simple fonts for easy readability on rooftop signs from far away.
- Incorporate recognizable shapes or brand logos to help your sign stand out visually.
- Choose color contrasts that work well in daylight and under artificial lighting.
- Improve signs with sturdy frames to keep them visible and secure against wind.
- Consider digital or LED elements to increase nighttime visibility and dynamic appeal.
- Align sign design with your venue’s style to create a cohesive look that attracts your target audience.
1. Top Rooftop Sign Ideas to Boost Visibility
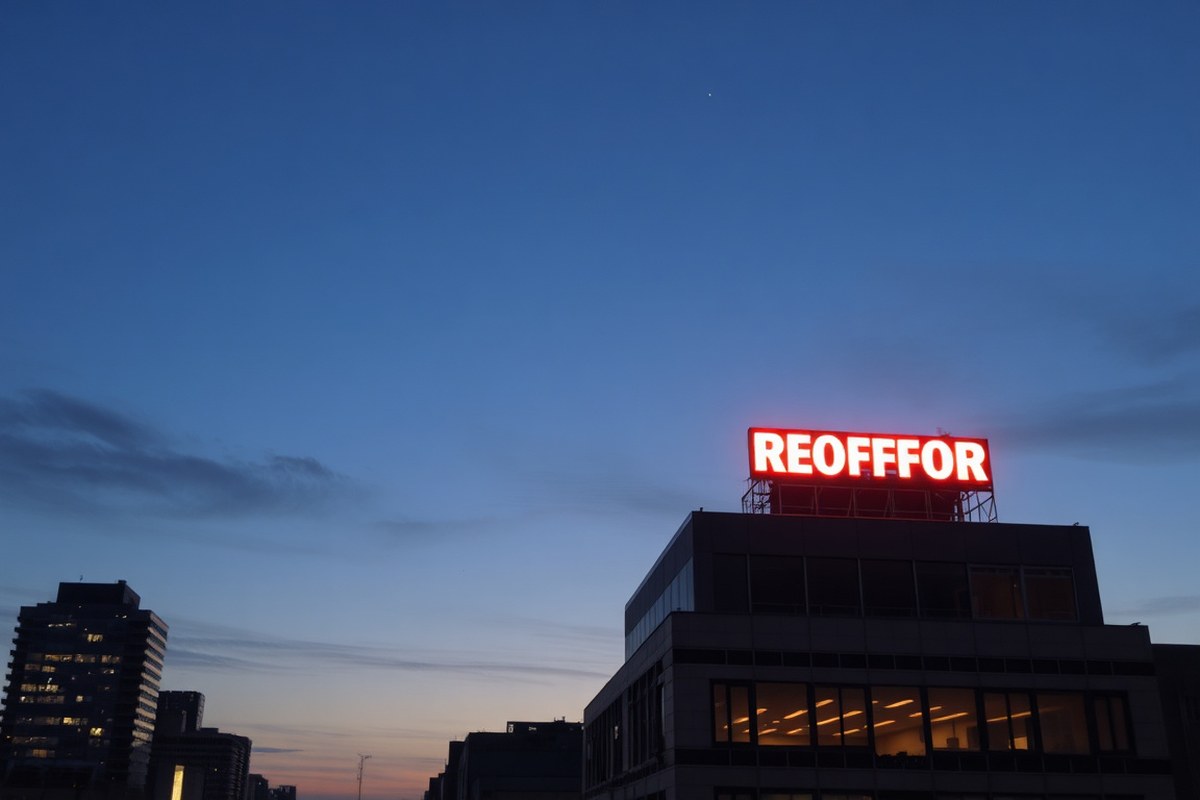
Popular rooftop sign designs include channel letter signs, neon signs, digital LED displays, and large vinyl or fabric banners. Channel letter signs are three-dimensional letters mounted on the roof that stand out well during the day and can be backlit or halo-lit for nighttime visibility. These signs cost roughly $100 to $150 per letter depending on size and lighting options. They are highly durable and offer a professional look suitable for rooftop bars or event venues that want simple but bold branding.
Neon signs create a retro, eye-catching effect and are especially effective for nightlife venues that operate mostly after dark. They typically cost $300 to $700 for custom words or symbols but consume more electricity than LED alternatives. Neon works well for small rooftop spaces where close-up visibility matters and adds vibrant color that grabs attention in dim settings. The downside is they are fragile and require regular maintenance to avoid outages.
Digital LED displays provide dynamic signage by showing changing messages, logos, or video content. They offer the best nighttime visibility and can boost a venue’s marketing by promoting events or menu specials in real time. Installation can exceed $10,000 depending on size and resolution, making this option better suited for high-traffic locations with consistent evening crowds, such as rooftop restaurants or rooftop concert venues. LED displays also generate heat, so they need proper ventilation to avoid overheating in hot summer months.
Large vinyl or fabric banners are a cost-effective way to cover extensive rooftop space with branded visuals or special event announcements. They generally cost between $5 and $15 per square foot. These banners can be mounted on railings or frames and changed seasonally to refresh the rooftop’s look. However, banners lack illumination, so they deliver limited visibility after dark unless paired with spotlights. They are also at risk during high winds, requiring heavy-duty grommets and secure anchoring to avoid damage.
Matching sign styles to venue themes helps improve impact. Sleek metal channel letters suit upscale rooftops that emphasize clean modern design. Neon signs complement retro-themed bars or venues hosting nighttime parties. LED displays fit entertainment and rooftop concert spaces needing to update messaging frequently. Vibrant banners work well for casual or seasonal rooftop decks that want flexible branding without a large upfront cost.
Optimizing visibility depends on size, color contrast, and lighting. Bright, contrasting colors help signs stand out against the sky and building backdrops. For example, white or yellow lettering on dark backgrounds improve readability. Nighttime venues should lean toward lit options, either integrated lighting in channel letters or external spotlights on banners, to maintain presence after sunset. For rooftop bars open until midnight, investing in electric or LED-lit signs increases patron awareness and safety.
Proper mounting is essential to keep signs secure through changing weather. Large channel letters require structural backing and corrosion-resistant fasteners, especially near coastal cities prone to salty air. Neon and LED signs must have weatherproof enclosures with added drainage to prevent moisture damage. Sites with frequent high winds should avoid lightweight banners or ensure professional-grade tension systems. Planning installation with expert consultation reduces risks and improve the sign’s lifespan and effectiveness.
2. Choosing Materials for Durable Outdoor Rooftop Signs
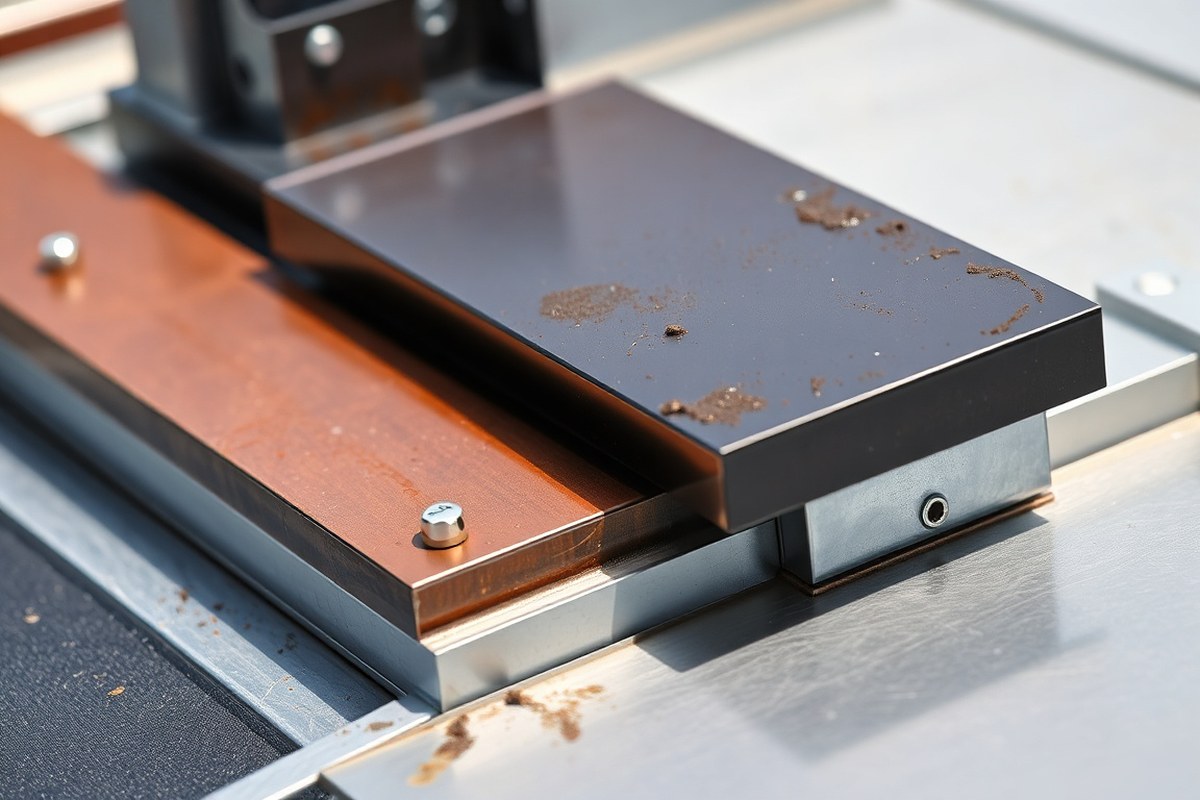
Choosing the right materials for rooftop signs is key to withstanding harsh weather and minimizing maintenance. Durable materials resist UV rays, wind, rain, and temperature swings, which can range from freezing cold in winter to intense summer heat on exposed rooftops. Lightweight materials often simplify installation, but they must still hold up against these elements without warping or fading.
Aluminum, acrylic, PVC, and composite panels are common options for rooftop signage. Aluminum offers strength and rust resistance, making it ideal for long-term use. Acrylic provides vibrant colors and clarity but can crack under extreme impact. PVC is affordable and weather-resistant but may discolor with prolonged sun exposure. Composite panels combine materials for extra durability and a modern, sleek look, though they tend to cost more upfront. Balancing cost, durability, and weight depends heavily on your rooftop’s size, structural support, and climate.
| Material | Durability | Approximate Cost | Maintenance | Weight |
|---|---|---|---|---|
| Aluminum | High (rust-resistant, withstands wind & rain) | $30 – $60 per sq ft | Low (occasional cleaning; may require repainting every 5-7 years) | Light to Moderate |
| Acrylic | Moderate (color vibrancy may fade; prone to cracking) | $25 – $50 per sq ft | Moderate (clean carefully to avoid scratches; replace if cracked) | Light |
| PVC (Polyvinyl Chloride) | Moderate (can discolor; resists moisture) | $15 – $40 per sq ft | Moderate (clean regularly; monitor for fading) | Light |
| Composite Panels | High (combines strength & weather resistance) | $40 – $75 per sq ft | Low (durable surface; minimal upkeep) | Moderate |
Rooftop signs made from aluminum hold up well over the years, particularly in environments with heavy wind or moisture exposure. They demand minimal maintenance beyond periodic cleaning and occasional repainting to preserve appearance. Acrylic signs capture attention with vivid colors but need more care to avoid damage from hail, debris, or temperature fluctuations. PVC signs suit budget-conscious projects but should be monitored for sun damage.
The weight of the sign material must align with your rooftop’s structural capabilities. Lightweight materials like acrylic and PVC are generally easier to install and reduce load on rooftop decks, but they might compromise durability. When choosing heavier materials such as aluminum or composites, confirming the rooftop supports the load safely is essential to avoid structural issues or accidents.
Tip: Always verify rooftop load limits and local building codes before selecting heavy signage materials to ensure safe installation and long-term performance.
3. Lighting Options for Eye-Catching Rooftop Signage
Choosing the right lighting for rooftop signs boosts visibility and attracts more attention, especially at night. Different lighting options like neon, LED, and backlit signs offer varied benefits for energy use, brightness, and overall impact on your rooftop advertising.
Neon Lighting for Classic Brightness
Neon signs use glass tubes filled with gases that glow when electrified. This lighting type is highly visible from a distance thanks to its vibrant colors and unique glow, making it a popular choice for creating eye-catching rooftop signs. Neon lights consume more energy than modern LEDs, with typical usage around 15 to 30 watts per foot of tubing, and require maintenance due to fragile glass tubes and gas leakage risks over time.
Neon signs cost between $200 to $500 per foot to produce and install, depending on complexity. Their brightness and distinct look are well suited for businesses wanting a retro or artistic vibe. However, neon is less energy efficient and can flicker or dim, especially in cold weather. For rooftop bars or venues aiming for a vintage style, neon can be an effective choice despite these tradeoffs.
LED Lighting for Energy Efficiency and Versatility
LED (light-emitting diode) lighting is the most energy-efficient and increasingly popular option for rooftop signs. LEDs use solid-state technology that consumes about 80% less energy than neon or incandescent lights. Their lifespan ranges from 50,000 to 100,000 hours, which leads to lower maintenance and replacement costs.
LED-based signs can produce adjustable brightness levels and color changes, allowing you to tailor your rooftop signage to different events or branding themes. Installation costs vary widely but typically run $100 to $200 per foot of sign. LEDs are better at handling extreme temperatures than neon and remain bright without flickering. For venues with long operating hours, LED signs reduce energy bills while maintaining excellent visibility.
Backlit Signs for Consistent Illumination
Backlit signage places lighting elements behind translucent or opaque materials to create glowing letters or graphics. This technique often uses LED panels or fluorescent tubes. These signs provide even, shadow-free illumination and good visibility under diverse weather conditions and angles.
Backlit rooftop signs are usually less flashy than neon but more refined, making them suitable for upscale bars, restaurants, or business rooftops that need clear but elegant branding. Energy consumption depends on lighting choice, with LED backlit signs consuming about 10 to 20 watts per square foot while fluorescent options are less efficient. The cost for backlit signs starts around $300 and can increase based on size and design complexity.
Selecting the Best Lighting Based on Visibility and Energy Use
Your choice depends on the style and budget constraints. Neon is brightest for static, artistic designs but uses more energy and needs upkeep. LEDs offer the best balance of brightness, durability, and energy savings, making them ideal for signs requiring all-night illumination or dynamic displays. Backlit signs provide clean, uniform lighting for professional looks and moderate power use.
In climates with extreme cold or heat, LED lighting performs better and requires fewer repairs. Check local electricity rates to calculate operational costs; LEDs typically cost one-third or less to run compared to neon. For a rooftop bar that wants to minimize energy bills while maintaining high visibility, LED backlit signs often present the best option.
Installation and Maintenance Considerations
Installing rooftop sign lighting calls for weatherproofing and secure electrical connections. LEDs are simpler to install with low-voltage setups and fewer components. Neon requires specialized technicians to handle fragile tubes, and backlit signs need precise panel mounting to avoid light leaks.
Proper maintenance includes cleaning lenses to keep brightness levels high and repairing wiring before weather damage worsens. Energy-efficient LEDs reduce the frequency of outages and replacements, lowering long-term costs. For businesses with limited maintenance resources, LEDs and backlit LED signs provide less hassle and more reliable night-time visibility.
4. How to Design Rooftop Signs for Different Business Types
Designing rooftop signs for bars, restaurants, retail stores, and offices requires tailoring elements like style, color, and layout to fit each business’s identity and appeal to its audience. Bars benefit from bold, dynamic designs with warm or neon colors, while retail stores often use clean, simple logos with bright or contrasting tones to attract shoppers. Offices typically opt for professional, minimalist signs that project reliability and trust.
Design Elements for Rooftop Bars and Restaurants
Rooftop bars thrive on lively, inviting aesthetics that match their social atmosphere. Use bold fonts with playful curves or script styles to create a relaxed, trendy vibe. Neon lighting or backlit panels in warm colors like reds, oranges, and golds draw attention during evening hours when rooftop bars are busiest. Incorporate iconic symbols linked to the bar’s concept, such as cocktail glasses or musical notes, positioned beside the name.
Restaurants benefit from signs that balance visibility with a touch of elegance, depending on cuisine type. Upscale dining might choose serif fonts in muted earth tones or deep blues to convey sophistication, while casual eateries can use brighter, friendly colors like emerald green or deep amber. Adding a subtle border or shadow can improve legibility from a distance, especially in cluttered city skylines. Dimensions around 6 to 10 feet wide work well for visibility without overwhelming rooftop space.
Rooftop Signage for Retail Stores
Retail signs work best when they clearly showcase brand logos and names with high contrast. Simple, geometric fonts ensure readability, paired with bright or contrasting color schemes such as white text on navy blue or black on yellow. This sharp contrast captures attention quickly, essential for shoppers scanning the skyline for familiar brands. Avoid overly decorative fonts or imagery that can confuse quick glances from a distance.
Highlighting seasonal promotions or product lines is effective through modular rooftop signs that allow swap-out panels or digital displays. Retailers targeting younger audiences may incorporate 2027’s trending colors, like Benjamin Moore’s favored shades of soft blush or muted lavenders, adding modern appeal. When budget allows, adding motion elements or digital LED signage can boost engagement but requires considerations for weatherproofing and power supply.
Professional Styles for Office Rooftop Signs
Offices should prioritize crisp, minimalist signage that reflects professionalism. Sans-serif fonts in neutral colors like dark gray, navy, or deep green communicate stability and trustworthiness. Rooftop signs are often paired with the company’s logo, which should be scaled clearly to maintain recognition from afar. An example script reads: “Acme Corporation” in bold navy text with a subtle silver underline beneath the name for a clean, polished look.
Consider materials like brushed aluminum or frosted acrylic for the sign’s face, which resist weathering and reduce glare. Avoid extravagant lighting; soft white or cool blue LED uplighting is enough to maintain visibility without clashing with the office building’s overall aesthetic. Ideal sizes range between 4 and 8 feet wide depending on rooftop size and surrounding skyline features.
Reflecting Brand Identity Through Colors and Fonts
Using colors linked to your brand’s core values amplifies the impact of rooftop signage. Bars often select vibrant warm shades such as reds and oranges because these colors evoke energy and excitement. Retailers tend towards bold blues, greens, or yellows which suggest reliability, affordability, or optimism, depending on the sector and target audience.
Fonts also send a message: casual script fonts feel approachable and relaxed, suitable for entertainment or food-related rooftops. Corporate or industrial brands benefit from clean, modern sans-serif fonts, which convey efficiency and professionalism. Test rooftop sign designs by viewing them at various distances and lighting conditions to ensure colors and fonts perform well under typical rooftop visibility challenges.
5. Legal and Safety Considerations for Rooftop Sign Installation
Before installing a rooftop sign, securing the proper permits is essential. Most cities require a sign permit for any rooftop installation, especially if the sign exceeds 10 feet in height or 32 square feet in area. Local zoning laws often dictate restrictions on size, height, illumination, and placement to ensure the sign does not pose a hazard or obstruct views. Contact your city’s building or planning department to obtain specific requirements, application forms, and fees, which typically range from $50 to $500 depending on the location and project scope.
Height and size restrictions vary significantly depending on the city or county. For example, many jurisdictions limit rooftop signs to less than 20 feet above the roofline and enforce setbacks from nearby structures to reduce wind load risks. Some areas also restrict brightness levels for illuminated signs to prevent light pollution. Failure to comply can lead to fines or the need to remove the sign after installation, costing you time and money.
Safety protocols during installation are critical due to the risks involved with working at height. Installers must use proper fall protection equipment such as harnesses anchored securely to stable points. OSHA guidelines recommend guardrails, safety nets, or personal fall arrest systems depending on the building and sign specifics. Electrical safety is also a priority when installing illuminated signs; only licensed electricians should handle wiring to comply with the National Electrical Code (NEC).
- Verify applicable zoning codes and obtain all required permits before starting.
- Confirm size, height, and lighting restrictions with local authorities.
- Hire licensed professionals for structural and electrical work.
- Ensure use of proper fall protection for all workers on the roof.
- Schedule inspections at key project stages as required by the permit.
- Document all compliance steps and keep copies of permits onsite.
Ignoring these steps can lead to legal trouble or unsafe installations. For example, underestimating wind loads without proper engineering can cause the sign to fail structurally. Poor adherence to electrical codes can create fire hazards or cause outages. An inspection checklist should include verifying permit approval, confirming installer certifications, inspecting safety equipment, checking structural supports, and ensuring electrical connections meet code. These actions reduce risk and protect your investment in rooftop signage.
Always confirm permit requirements and safety protocols several weeks before installation to allow time for approval and adjustments, avoiding costly delays or penalties.
6. Installation Steps for Effective Rooftop Sign Placement
Installing rooftop signs safely and effectively means careful planning, assessing the rooftop’s support capacity, using proper tools, and securing the sign to withstand weather and wind. Taking each step in order reduces risks and ensures your sign remains stable and visible over time.
Assessing Rooftop Structural Integrity
Start by evaluating the roof’s ability to support the sign’s weight and wind force. A rooftop sign adds significant load, especially if it includes metal or lighting. Checking structural integrity helps prevent costly damage or collapse. This requires reviewing the roof’s materials, load capacity, and fastening points.
Hire a licensed structural engineer or roofing professional to inspect load-bearing beams and surface materials. They can measure the roof’s maximum capacity, typically rated in pounds per square foot, and recommend whether reinforcement is needed. For example, many commercial rooftops support at least 20-30 pounds per square foot, but signs with heavy frames or electric components may require additional bracing.
Gathering Tools and Materials
Collect all necessary tools and materials before starting installation. Key items include a cordless drill, screwdriver set, measuring tape, level, wrenches, safety harnesses, scaffolding or ladders, and heavy-duty mounting brackets or anchors rated for outdoor use. Material choices such as stainless steel fasteners resist corrosion in rooftop environments.
Electrical tools and waterproof connectors are essential if your sign includes lighting. Plan for weatherproof seals and wiring rated for outdoor conditions to prevent shorts or failures. Ordering all components with a small margin for extra fasteners and cable ties prevents delays during work.
Mounting and Securing the Sign
Follow a clear series of steps for consistently safe installation. Confirm location and alignment based on visibility and wind exposure. Use a level to ensure the sign sits straight, and attach brackets firmly to structural supports rather than just roofing material.
- Measure and mark sign position, considering sightlines and roof edges.
- Drill pilot holes into load-bearing beams or parapet walls where brackets will attach.
- Fix mounting brackets using corrosion-resistant bolts and washers sized for expected loads.
- Secure the sign frame to the brackets, double-checking alignment and tightness.
- Add wind braces or guy wires if local wind speeds exceed 30 mph to stabilize the sign.
- Seal all exposed holes and joints with waterproof sealant to prevent leaks.
Using personal fall protection gear and having a second person assist improves safety, especially on high or slippery rooftops.
Electrical and Lighting Hookups
Signs with lighting require careful electrical installation to meet local codes and avoid hazards. Use weatherproof electrical conduit and gaskets to protect power lines from moisture on exposed rooftops. Mount lighting fixtures securely and route wires neatly to avoid trip hazards.
Consult with or hire a licensed electrician to install power feeds and connect lighting elements, ensuring proper grounding and circuit protection. Installing timers or photocells can control when the lights turn on, reducing energy costs and extending bulb life. Plan for convenient access to maintenance disconnects.
Inspection and Maintenance Planning
After installation, inspect all fasteners and electrical connections regularly, ideally every six months or after storms. Look for rust, loose bolts, or water damage. Perform basic cleaning to remove dirt and debris that can hide issues or reduce sign visibility.
Schedule preventive maintenance to tighten hardware and replace worn components. Keeping a maintenance log helps track repairs and extend the life of your rooftop sign. Addressing small problems quickly avoids costly replacements or unsafe conditions from structural failure or electrical faults.
7. Maintenance Tips to Keep Rooftop Signs Looking Great
Routine cleaning of rooftop signs should occur at least twice a year to maintain clarity and vibrant colors. Use a soft cloth or sponge with mild soap and water to remove dirt, bird droppings, and pollution residues. Avoid abrasive cleaners or strong solvents as these can damage paints and protective coatings. For signs with lighting, ensure all power is off before cleaning to prevent electrical hazards.
Protecting rooftop signs from weather damage requires regular inspection and preventive upkeep. Harsh sun, rain, and wind can cause fading, corrosion, or structural weakening. Applying UV-resistant sealants annually helps preserve paint and materials. Check for any water pooling or drainage problems around the sign base to prevent rust and mold growth, especially in humid climates or during rainy seasons.
Troubleshooting lighting and structural issues begins with visual and functional checks every 3 to 6 months. Inspect electrical wiring for wear or loose connections and replace any burnt-out bulbs promptly to maintain a professional appearance. Examine mounting hardware, brackets, and fasteners for rust, cracks, or loosening due to wind vibrations. Tighten or replace components as needed to keep the sign securely attached and avoid safety hazards.
- Spring: Deep clean surfaces; inspect for paint peeling or fading; apply protective coatings.
- Early summer: Check lighting systems and replace bulbs or LED modules; verify electrical components.
- Late summer: Examine structural supports; tighten mounts; clear drainage pathways around the base.
- Fall: Remove debris; clean surfaces; apply touch-ups on minor paint chips.
- Winter: Inspect for ice damage; ensure wiring insulation is intact; clear snow buildup promptly.
- Annual: Professional inspection for electrical safety and structural integrity, especially in regions with harsh weather.
Costs for basic cleaning supplies stay under $50 annually for most rooftop signs. Hiring professionals to perform deep inspections or repairs might cost $200 to $500 depending on sign size and complexity. Signs that show cracks, loose fittings, or dim lighting suggest maintenance delays and can impact visibility and customer perception.
Maintaining your rooftop sign improves its lifespan, keeps your branding sharp in outdoor conditions, and ensures safety for your patrons and staff below. Regular attention to cleaning, weather-proofing, and hardware checks helps avoid costly replacements or emergency repairs, especially for rooftop venues or busy commercial buildings.
8. Customizing Rooftop Signs for Seasonal and Branding Flexibility
Creating rooftop signs that adapt to seasonality, promotions, or brand changes requires choosing the right type of signage. Modular rooftop signs offer flexibility by using panels or sections that can be swapped out as needed. This lets you change messages or visuals without replacing the entire sign. For example, you might use interchangeable acrylic panels with clips or magnets to switch seasonal graphics every few months. This approach works well for businesses hosting events or launching frequent promotions, like rooftop bars updating happy hour details.
Another method is vinyl wraps or banners applied over a fixed sign base. You can remove and replace these every season or for special campaigns. The cost is lower than a full new sign and installation usually takes less than an hour with basic tools. However, vinyl can degrade over time under sun and wind exposure, so expect to replace it every 1 to 3 years, depending on local weather conditions.
Digital rooftop signs provide the highest level of adaptability. LED screens and programmable message boards allow instant changes via software. This is ideal for venues that need daily updates, such as live event schedules or dynamic branding tied to current promotions. The initial investment for digital signs ranges widely but often starts around $5,000 for a basic setup, excluding installation and electrical work. They use more energy and require periodic software updates and hardware maintenance but offer unmatched flexibility in messaging.
Choosing between fixed and flexible signage depends on your budget, frequency of message changes, and long-term branding plans. Fixed signs made from durable materials like metal or acrylic are cost-effective for static branding that doesn’t change much. Modular or vinyl options suit businesses that want moderate update capability without heavy digital investment. Digital signs suit high-traffic locations with frequent messaging demands. Consider safety and local sign ordinances before installing digital units, as some cities have restrictions on illuminated or electronic rooftop signs.
Good results come from planning your signage updates ahead. Modular systems with storage for extra panels keep you ready for every season. Digital signs require having design assets prepared to upload quickly. What goes wrong is often neglected maintenance or obsolete designs. Modular parts can get damaged or lost if not well managed, and digital signs can suffer from software glitches or power issues if not supported correctly.
Plan for easy access to your rooftop sign area to simplify swapping panels, banners, or maintaining digital equipment safely and efficiently.
Your First Steps: Quick-Start Plan for Rooftop Sign Success
Follow this simple action plan to get your rooftop sign project moving efficiently and effectively.
- Day 1: Check local zoning and permit requirements to avoid legal issues later; confirm with your city planning office.
- Day 2: Choose durable materials based on your climate and sign design to ensure your sign lasts; verify with a supplier about weather resistance.
- Week 1: Design your sign layout tailored to your business type and branding; preview with mockups or digital renders to confirm visibility and style.
- Week 2: Select lighting options that improve nighttime visibility without excessive energy use; test sample fixtures to see the brightness and angle.
- Week 3: Arrange professional installation focusing on safety and optimal placement; have the installer submit a safety checklist upon completion.
- After 1 Month: Inspect the sign for weather-related wear or lighting issues; schedule maintenance or adjustments as needed to maintain appeal.
- Seasonal Checkpoints: Update design elements or colors to reflect seasonal branding or events to keep the sign fresh; track customer feedback on changes.
Frequently Asked Questions
What Are Some Creative Rooftop Sign Ideas to Attract Customers?
Use bold, illuminated signs with your logo and clear messaging to boost visibility from afar. Incorporate unique shapes or movable parts to catch the eye and stand out among other rooftop signs.
How Can Rooftop Signs Be Designed to Withstand Harsh Weather?
Choose weather-resistant materials like aluminum or acrylic and apply UV-protective finishes. Regular inspections and maintenance also help signs resist wind, rain, and sun damage over time.
What Lighting Options Work Best for Rooftop Signs After Dark?
LED lighting offers energy efficiency and brightness that lasts for years. Consider backlit or halo-lit designs for better nighttime visibility without excessive power use.
Are There Size Restrictions for Rooftop Signs on Commercial Buildings?
Local zoning laws often limit sign size, so check with your city’s building department. Smaller signs may require less approval but might be less visible from a distance.
How Do Rooftop Signs Impact Local Building Codes and Safety Regulations?
Rooftop signs must comply with structural load limits and fire safety codes. Hiring a licensed professional to handle permits and installation reduces legal risks.
Can Rooftop Signs Be Customized for Seasonal Promotions or Events?
Yes, modular signs with interchangeable panels or digital displays allow for easy updates. This flexibility supports branding changes and targeted marketing campaigns throughout the year.
The Bottom Line
Rooftop signs give your business a unique opportunity to stand out and attract attention from afar. Starting with clear legal checks and material choices sets a strong foundation. Focus on good design and lighting for visibility every hour. Begin your rooftop signage project today by contacting your local zoning office and gathering material samples to make informed decisions.