How to Remove Old House Numbers Safely: 8 Effective Methods Explained
Knowing how to remove old house numbers safely starts with identifying how they’re attached, whether by screws, nails, or adhesive. The easiest method depends on their mounting style, and proper removal prevents damage to walls or siding. Begin by inspecting the numbers to choose the right tool and technique for clean removal without leaving marks.
Key Takeaways
- Inspect old house numbers closely to determine if they are attached with screws, nails, or adhesive before removal.
- Use a Torx driver for Torx security screws, commonly T20 or T25, to avoid stripping the fasteners.
- Apply penetrating oil and wait 10 minutes before loosening rusted or seized screws to prevent breaking them.
- Heat adhesive-mounted numbers with a hair dryer for 2 to 3 minutes on medium heat to soften glue.
- For adhesive residue, apply a solvent like Goo Gone or Krud Kutter and let it sit 1 to 5 minutes before wiping.
- Remove nails carefully with a claw hammer or pry bar to avoid damaging the mounting surface.
1. Assessing How Your Old Numbers Are Attached

Determining how your old house numbers are attached helps you pick the safest removal method and avoid damage. The most common fasteners are screws, nails, and adhesives. You can identify the type by visually inspecting and gently testing the numbers. Look closely for small round heads, which usually indicate screws. Spotting a flat head or rusty metal stuck straight into the surface without a screw slot usually means nails are holding the numbers. Finding no visible hardware suggests adhesive is keeping the numbers attached.
Try to wiggle a number slightly or pry at one edge with a thin tool, like a plastic putty knife. Movement around a hole or slot often points to screws or nails. A firm bond without any visible hardware hints adhesive mounting. Adhesives can vary, so noting the residue type helps with planning removal. Thick, rubbery residue suggests an oil-based adhesive; a clear, sticky layer usually means water-based or silicone adhesive; blistered paint around the numbers might indicate paint-on adhesive.
Choosing the right removal technique depends on this assessment. Screws tend to be the easiest to remove if you have the right screwdriver. Nails can be more challenging and risk surface damage if pried incorrectly. Adhesives require careful solvent use or heat but avoid scraping that could harm siding or paint. A common rule is: hardware fasteners are removed by unscrewing or prying gently, adhesives by softening or dissolving the bond first.
Here is a simple decision rule to follow: if you see and feel a fastener head, plan to unscrew or pry nails carefully, starting with a screwdriver or small crowbar. Should you not find hardware or adhesive, get ready to remove adhesive and test a small, hidden spot to figure out the residue type. Discovering thick, greasy residue means you’ll need oil-based solvents such as citrus cleaners. A thin sticky film calls for rubbing alcohol or specialized removers. Finally, if the paint looks bubbled or cracked around the numbers, approach removal with gentle scraping and solvent to avoid peeling paint.
The safety of your surface depends heavily on identifying the mounting method first. Using a screwdriver on adhesive-mounted numbers often results in gouges while trying to pry. Pulling nails from fragile siding can cause cracks or chips. Adhesive removal risks paint damage if solvents or scraping aren’t used right. This upfront assessment cost is mostly time, about 5 to 10 minutes, but it saves hundreds in potential repairs. Your results should leave the mounting surface intact and ready for cleaning before installing new numbers. Skipping this step increases the chance of damaging siding, brick, or painted areas, which adds repair costs and delays your project.
2. Removing Screw-Mounted House Numbers Safely
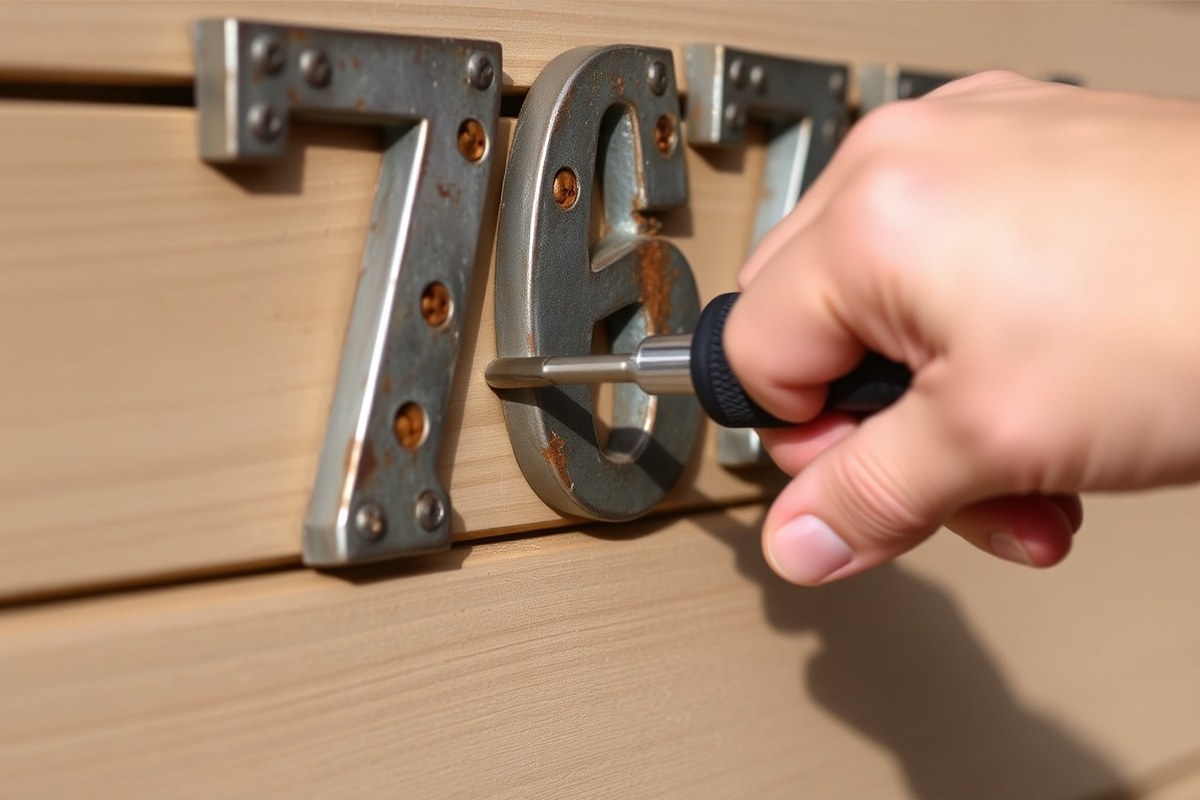
Removing house numbers secured with screws requires the right tools and careful handling. Using appropriate screwdrivers or drill bits, along with penetrating oil for stuck fasteners, ensures you can remove screws without damaging the wood or paint. Knowing the screw type helps you prepare for any special fasteners, like security screws, that might be in place.
Tools Required for Screw Removal
Gathering the correct tools makes removing screw-mounted house numbers straightforward and safe for your home’s surface. The most common tools include a set of screwdrivers with flathead and Phillips tips, a drill with interchangeable bits, and a Torx driver for specialized screws.
Most house numbers attach using 2 to 4 screws that typically need Phillips (cross-shaped) or flathead screwdriver heads. Some use T20 or T25 Torx security screws, requiring matching Torx drivers to remove. A $10 to $20 screwdriver set usually includes the types needed for most common screws.
Dealing with Rusted or Stuck Screws
Rust or corrosion can make screws difficult to turn and increase the risk of stripping the head. Applying penetrating oil such as WD-40 or a rust remover soak softens rust. Spray the oil on and let it sit for 10 to 15 minutes before attempting to turn the screw again.
To loosen a stubborn screw, gently tap the screwdriver or drill bit with a hammer. This can help free screws that won’t budge easily. For seized screws, heating the area with a hair dryer for a minute can expand the metal slightly, making removal easier without risking damage from direct flames.
Applying penetrating oil and allowing it sufficient time to work can save you from stripped screw heads or damage to your home’s paint.
Stepwise Removal Process to Protect Surfaces
Taking sequential, cautious steps protects your wood siding and paint from scratches or gouges during removal. Preventing damage starts with using the right driver bit and a moderate, steady turning force.
- Select the matching screwdriver or drill bit for the screw type to ensure a snug fit.
- Apply penetrating oil to any rusty screws and wait 10 to 15 minutes.
- Insert the driver securely and turn counterclockwise slowly and steadily to loosen each screw.
- Support the number plate gently with your other hand to prevent bending or dropping once screws are removed.
- Screws that resist removal should not be forced hard. Apply additional oil or lightly tap the driver handle with a hammer to ease the screw out.
- Remove all screws completely before lifting the house number plate away from the surface.
Types of Screws Used and Their Fasteners
House numbers typically attach with wood screws featuring Phillips or flathead slots. Some newer or more secure attachments use Torx screws. Torx is becoming a common choice for exterior fixtures because its star-shaped design reduces cam-out and stripping.
Security screws, like those with pin-in-the-center Torx heads, require specialized bits available at hardware stores. They provide extra theft resistance but can complicate removal. Identify the screw type before starting to ensure you have the right tools ready.
3. Techniques for Removing Adhesive-Mounted Numbers
Removing adhesive-mounted house numbers requires careful handling to avoid siding damage. Applying controlled heat softens glue, while chemical solvents break down adhesive residues. Gentle scraping removes remnants without harming the surface. Choosing the right method depends on the siding material and adhesive type.
Using Heat to Soften Adhesives
Applying heat carefully loosens adhesive, making it easier to remove numbers without peeling paint or cracking siding. A hair dryer set to medium heat, held about 6 to 8 inches away, works well for most surfaces. Heat the number or plate evenly for 2 to 3 minutes, which melts most adhesives without overheating the siding.
Heat application is especially helpful on vinyl siding, which can deform under high temperatures, so keep the dryer moving to avoid hot spots. Avoid heat on older, brittle paint or delicate materials like stucco, as excessive warmth can cause damage.
Chemical Solvents for Different Residues
Solvents break down glue residue after heat softening or when heat is not suitable. Choose solvents based on adhesive type and surface:
| Adhesive Type | Recommended Solvent | Heat Use |
|---|---|---|
| Water-based adhesives | Isopropyl (rubbing) alcohol | Moderate heat improve effect |
| Mineral deposit or light adhesives | White vinegar | Not necessary but safe |
| Strong commercial adhesives | Goo Gone, Krud Kutter, or 3M Adhesive Remover | Heat recommended to soften first |
| Paint-sensitive surfaces | Mild solvents only (avoid acetone or nail polish remover) | Use minimal heat |
Apply solvent directly to adhesive residue and let it sit 1 to 5 minutes as per product instructions, then wipe or gently scrape off with a microfiber cloth. Avoid strong solvents on painted areas to protect clear coats and finish.
Safe Scraping Techniques
After softening adhesive with heat or solvent, the residue often peels away with gentle scraping. Use a plastic scraper or old credit card to avoid gouging the siding or paint. Never use metal tools on vinyl or wood as they can scratch or chip the surface.
Keep the scraper at a low angle close to the surface and apply light pressure, lifting adhesive shards carefully. When adhesive resists removal, apply more heat or solvent instead of forcing it. Patience prevents surface damage.
Household Alternatives to Commercial Removers
Common household items can work for mild adhesive residue. Soaked paper towels with white vinegar or rubbing alcohol left on the residue for 10 minutes help loosen glue. Follow soaking with gentle rubbing or scraping to remove.
These methods are low cost and gentle but take longer than commercial products. They suit water-based adhesives on painted wood or brick but may not work on stubborn epoxy or outdoor glue. Testing a small hidden spot first prevents unexpected damage.
- Heat the number or plate evenly with a hair dryer on medium for 2 to 3 minutes.
- Use a plastic scraper to lift gently at the edges of the softened number or residue.
- When adhesive remains, apply an appropriate solvent directly to the residue.
- Let the solvent sit for the recommended time (1, 5 minutes).
- Wipe residue away with a microfiber cloth or gently scrape again.
- Repeat heating and solvent application as needed until all adhesive is removed.
- Clean the surface with mild soap and water once numbers and glue are gone.
- Inspect for any paint damage and repair if necessary before installing new numbers.
4. Handling Nails and Epoxy-Attached Numbers
Removing house numbers attached with nails can be trickier than screws because nails are usually driven flush with or below the surface, leaving no heads to grip easily. Use a flat pry bar or a cat’s paw tool to carefully lever the nail out. Place a thin scrap of wood between the pry bar and the siding to protect the surface from scratches and dents. Work slowly and wiggle the tool gently to avoid chipping surrounding brick or stone. For nails embedded in stone or brick, a small cold chisel and hammer allow you to tap under the nail head to loosen it, but take extra caution to avoid damage.
When epoxy is the adhesive, removal becomes more difficult since epoxy binds strongly and penetrates uneven surfaces like stone or stucco. Begin by softening the epoxy with a heat gun set around 250 to 300 degrees Fahrenheit; hold it several inches away to warm the area for 3 to 5 minutes, preventing paint or siding damage. Wear heat-resistant gloves and eye protection as epoxy fumes can be harmful. Once softened, scrape gently with a putty knife or a plastic scraper to avoid scratching. Chemical epoxy removers exist but test on a small hidden area first and use outdoors or in well-ventilated spaces due to toxic fumes.
Keep a checklist of precautions: always protect your eyes and hands, avoid excessive force that cracks siding or stone, heat in short bursts to prevent burn marks, and never use metal scrapers on softer surfaces like vinyl siding. Using padding under tools helps preserve finishes. Nails deeply embedded in siding and large areas covered with epoxy may make cutting out and replacing the damaged section more efficient. This is especially true when removal risks breaking the material or leaving a rough, unsightly surface. Replacement boards or panels usually cost between $10 and $40 depending on material, so factor that into your decision.
To summarize the approach, gather a pry bar, cat’s paw, small cold chisel, hammer, putty knife or plastic scraper, heat gun, and safety gear. Start by easing out nails with padded use, then soften and gently scrape epoxy residues with heat assistance. Proceed slowly, using protective layers to avoid damage. Excessive harm to brick, stone, or siding during removal suggests cutting out and patching the affected area instead. Proper handling preserves your home’s exterior and prepares the surface for new numbers installation.
5. Post-Removal Cleaning and Surface Preparation
Removing old house numbers often leaves behind glue, paint chips, or surface damage that can affect the look and durability of your new numbers or paint job. Proper cleaning and surface preparation ensure strong adhesion and a smooth finish. Different materials like painted wood, vinyl siding, or brick need specific care to avoid further damage or discoloration.
For painted wood, avoid harsh scrapers or strong solvents to prevent peeling. Use gentle adhesive removers and mild soap solutions instead. Vinyl and metal siding tolerate a wider range of cleaners, including specialized adhesive removers. Brick or stucco surfaces usually require brushing and rinsing to remove residue without damaging the texture. Follow these detailed steps to clean residue and prep your surface effectively:
- Remove loose debris. Use a soft brush or cloth to clear dirt, dust, and flakes of paint or adhesive from the area. This prevents scratching during deeper cleaning.
- Apply an adhesive remover cautiously. Choose a product suitable for your surface, such as Goo Gone for vinyl or mineral spirits for painted wood. Follow product directions carefully, testing on a small hidden area first. Let the remover sit for 5 to 10 minutes to soften stubborn glue.
- Gently scrub the residue. Use a nonabrasive sponge or plastic scraper to lift softened glue or paint chips away. Avoid metal tools that can gouge or scratch the surface.
- Wash the area. Prepare a solution of warm water and mild dish soap. Wipe down the surface thoroughly to remove chemical residues and dirt. For porous materials like brick, use a soft-bristle brush to clean crevices.
- Rinse with clean water. Use a hose or wet cloth to flush away soap and cleaner traces. Residue left behind can interfere with new paint or adhesive bonding.
- Dry completely. Allow the surface to dry fully before painting or installing new numbers. Drying can take 1 to 3 hours depending on weather and material. Use a fan or lightly blot with a dry cloth to speed the process if needed.
- Sand lightly on wood or smooth surfaces. If the surface feels rough or has uneven glue spots, sand with fine-grit sandpaper (220 grit) to create a smooth base. Do not sand textured siding like vinyl or brick.
- Apply primer if painting. For best paint adhesion on wood or metal, coat the area with a compatible primer after cleaning and drying.
Always test cleaning products on an inconspicuous spot before full application to prevent damage or discoloration.
6. Common Mistakes and How to Avoid Them
Many people rush when removing old house numbers, which can lead to gouged paint or damaged wood siding. Applying too much force with tools like screwdrivers or pry bars often causes visible scratches or dents. You can avoid these issues by using gentle, steady pressure and adding a protective layer like a cloth between the tool and the surface. This reduces the risk of marring the paint or the wood beneath.
Surface damage usually shows as scratches, peeling paint, or uneven areas where the numbers were attached. Cracks running from the removal site or flaking paint also indicate damage. Avoid this by first softening adhesive with heat or adhesive remover and by carefully unscrewing fasteners instead of forcing them out.
- Cover house numbers with a soft cloth before tapping or prying to prevent chipping
- Heat adhesive with a hair dryer for 1-2 minutes to loosen before peeling
- Use a putty knife or plastic scraper rather than metal to avoid gouges
- Remove screws slowly, backing them out completely before levering
- Apply painter’s tape around numbers to protect surrounding paint
- Test adhesive remover in a small spot first to check for paint reaction
- Wear gloves to avoid oils transferring onto clean surfaces
If paint lifts or cracks while removing numbers, stop and assess before continuing. Applying a primer or paint patch over the damaged area can prevent further peeling. For small gouges in wood siding, wood filler or exterior-grade putty can fill holes, sanding smooth once dry. This usually costs under $10 for materials and takes only a few hours including drying time.
Minor mistakes can often be repaired with quick touch-ups. However, extensive damage to wood or siding may require replacing a section, which is more time-consuming and costly. Protecting the surface during removal is the best way to avoid these higher repair costs. Taking your time and using the right tools minimizes the chance of costly damage and reduces the need for extensive clean-up after removal.
7. When to Call a Professional for Removal
Knowing when to call a professional for removing old house numbers can save you from costly damage and frustration. Consider expert help if your numbers are glued with strong industrial adhesive, embedded in fragile siding like stucco or plaster, or if electrical wiring behind the mounting could be affected. These scenarios pose risks of surface damage or personal injury, which may require specialized tools and skills beyond typical DIY methods.
Assess the risk of damage by checking how stubborn the numbers are and the condition of the wall or door surface. Pulling or prying that feels very resistant, or old numbers attached with both screws and epoxy, can increase the risk of damaging the surrounding area. Also, walls made from soft materials or delicate finishes are less forgiving. Signs like crumbling edges, paint peeling, or visible cracks mean you might need professional removal to avoid worsening the damage.
Typical costs for professional removal vary by location, complexity, and materials involved. Basic removal often ranges from $50 to $150. Complex jobs involving electrical work or restoration afterward can reach $250 or more. Getting an estimate upfront helps avoid surprises. Also, hiring a professional may include cleanup and minor repairs to leave the surface ready for your new house numbers.
To find the right expert, look for contractors or handymen with experience in exterior home improvements and finish carpentry. Check online reviews and ask for references. Confirm they have tools such as heat guns to soften adhesives, precision scrapers, and equipment for safe electrical disconnection if necessary. Before hiring, ask questions like: “Have you removed numbers attached with epoxy or other strong adhesives before?” and “What steps do you take to protect siding or paint during removal?” Inquire about insurance and warranty for their work to cover any accidental damage.
Use a decision checklist to guide your choice between DIY and professional removal. When the numbers come off easily by twisting or unscrewing, or if the surface is strong siding, you can probably handle the job yourself. Removal that includes risky adhesives, delicate surfaces, wiring, or several secure fastenings should be done by a professional. This approach limits damage, saves time, and ensures the surface remains intact for your next installation.
8. Preparing for New House Numbers Installation
Preparing the area after removing old house numbers ensures your new numbers will look aligned, stick well, and stay secure for years. Accurate measuring, thorough surface cleaning, and selecting the right fasteners or adhesives help avoid crooked placement, peeling, or difficult future removals.
Measuring and Marking Placement Accurately
Measure carefully to keep your new house numbers straight and centered. Marking placement before installation reduces mistakes and saves time by preventing re-drilling or shifting.
Use a tape measure and level to find the ideal height and horizontal positioning. Common placement is between 4 and 6 feet above ground for visibility. Mark these spots lightly with a pencil or painter’s tape. A template or stencil can help if you have multiple numbers to align evenly.
- Measure 4 to 6 feet above ground for optimal visibility.
- Use a level to mark a horizontal line where the bottom of the numbers will sit.
- Mark the exact spots for each number’s screws or adhesive pad.
- Double-check measurements and levelness before proceeding.
Take your time measuring. Even a 1/4 inch misalignment can be noticeable on house numbers.
Cleaning and Smoothing the Surface
Preparing a clean, smooth, dry surface improves new numbers’ adhesion and appearance. Leftover dirt, glue, or paint flakes can cause adhesives or paint to fail prematurely.
Remove all dust, grease, and remnants from the old numbers. For painted surfaces, gently sand around the mounting area to remove rough patches and create a slightly rough texture for better grip. Clean the area with soap and water, rinse well, and let it dry fully for at least 24 hours if possible.
Selecting Proper Fastening Methods
Choosing the right mounting hardware depends on your numbers’ style and the installation surface. Using suitable fasteners or adhesives ensures a secure hold without damaging your wall or complicating removal later.
Screw mounting offers strong durability, ideal for wood, brick, or siding. Use rust-resistant screws sized correctly to the numbers’ mounting holes and your surface. For adhesive-mounted numbers, select outdoor-rated, weatherproof adhesives designed for your exterior material.
To reduce future removal difficulty, consider mounting with removable adhesive strips or screws with plastic anchors. Avoid permanent epoxy unless the numbers won’t be changed to prevent damage during removal.
- Identify the surface material (wood, brick, vinyl, metal).
- Choose screws matched to the material (e.g., masonry screws for brick).
- For adhesives, select products rated for outdoor use and your surface type.
- Consider fasteners that allow easy removal if you plan to change numbers again.
Protecting the Surface Before Installation
Protecting your wall or door behind the numbers prevents moisture damage, rust stains, or peeling paint. Applying a primer or sealant extends finish and adhesive life, especially on porous or fresh-painted surfaces.
Use an exterior-grade primer or clear sealant around the marked areas. This helps the adhesive or paint bond better and prevents discoloration later. If you’re installing on wood, sanding and sealing exposed areas around screw holes can prevent moisture intrusion.
Never install numbers on a wet or freshly painted surface; wait at least 24 to 48 hours for proper curing before attaching anything.
Step-by-Step Action Plan for Removing Old House Numbers
Follow these steps to remove your old house numbers safely and prepare the surface for new ones.
- Before you start: Identify how your house numbers are attached, screws, adhesive, nails, or epoxy, and gather the appropriate tools like screwdrivers, heat guns, or putty knives.
- Day 1: Remove screw-mounted numbers by unscrewing them carefully. Confirm removal by checking for loose hardware and no damage around the holes.
- Day 1: Use a heat gun on adhesive-mounted numbers to soften glue, then gently pry them off with a putty knife. The surface should be free of numbers but might still have residue.
- Day 1 or 2: For nails or epoxy, carefully remove nails with pliers or apply an epoxy solvent following product instructions. Check the surface for small holes or rough spots.
- Day 2: Clean the surface using mild soap and water, then sand lightly to smooth any rough patches. The area should feel clean, smooth, and dry.
- Day 3: Fill any holes or gaps with exterior-grade filler or caulk. Ensure it dries completely and blends with the surface texture.
- Day 4: Prime and paint the area if needed to match your home’s exterior and protect the surface before installing new numbers.
- Day 5: Install your new house numbers following the manufacturer’s instructions for the best adhesion and durability.
Frequently Asked Questions
What Tools Do I Need to Remove Old House Numbers Easily?
You typically need a screwdriver, a putty knife, and adhesive remover. These tools help take off screws, pry numbers off gently, and clean leftover glue without damaging your wall.
Can Heat Help in Removing Adhesive-Mounted House Numbers?
Yes, applying heat softens the adhesive, making it easier to peel off numbers. Use a hairdryer on low to avoid damaging the paint or siding while loosening the glue.
How Do I Avoid Damaging Paint When Removing Nailed-In House Numbers?
Gently pry with a small crowbar or putty knife to loosen nails while protecting paint. Work slowly and stop if the paint starts cracking to prevent costly repairs.
Is It Safe to Remove Epoxy-Mounted House Numbers Myself?
Removing epoxy is tricky and risks damage if done incorrectly. Using a heat gun or adhesive remover helps, but consider a professional if epoxy is thick or hard to reach.
What Should I Do with Holes Left in Siding After Number Removal?
Fill holes with exterior-grade wood filler or caulk to prevent moisture damage and create a smooth surface. Sand and repaint to match your house for the best finish.
Can Removing Old Numbers Improve My Home’s Curb Appeal?
Yes, swapping outdated numbers for a modern style refreshes your exterior look. It’s a simple update that complements landscaping and paintwork, boosting your home’s first impression.
Wrapping Up
Removing old house numbers without causing damage depends on correctly identifying the attachment method and using the right removal techniques. Taking the time to clean and prepare the surface ensures your new numbers will look their best and last longer. Start by inspecting your current numbers and collecting the necessary tools to make smooth progress today.