How to Install Mailbox Numbers: A Complete Guide for Durable, Visible Results
Installing mailbox numbers begins with selecting a visible spot and durable materials. Place the numbers between 41 and 45 inches above the road, meeting USPS guidelines. Preparing the surface well and using sturdy glue or mounting tools helps the numbers stay secure and resist weather damage.
Key Takeaways
- Install mailbox numbers at least 41 inches from the road surface for clear visibility by mail carriers.
- Use outdoor vinyl or metal numbers designed to resist elements for longer durability.
- Clean and dry the mailbox surface thoroughly before applying numbers or adhesive.
- Mark placement carefully to center and align numbers for professional results.
- Allow adhesive to cure 24 to 72 hours before exposing numbers to weather.
- Use numbers at least 1 inch tall to meet USPS visibility standards.
How to Install Mailbox Numbers Step-by-Step

Installing mailbox numbers correctly takes careful preparation and steady application to ensure they stick well and remain visible. Use vinyl decal numbers designed for outdoor use, which typically last 5 to 7 years on clean, smooth surfaces. Preparation, accurate placement, and slow, even pressure during application help avoid common issues like bubbles and misalignment. Set aside about 30 to 45 minutes for the process, then allow 24 to 72 hours for the adhesive to fully cure before exposing the mailbox to harsh weather.
- Gather your tools and materials. You will need the new vinyl mailbox number decal with transfer tape, a clean cloth, isopropyl alcohol, a level or measuring tape, masking tape, and a squeegee or an old credit card to burnish the numbers down. Performing the installation in temperatures between 50°F and 90°F helps the adhesive bond properly.
- Clean the mailbox surface. Use a cloth soaked with isopropyl alcohol to wipe down the mailbox where the numbers will go. This removes dirt, oils, and debris that can prevent adhesion. Let the surface dry completely before proceeding.
- Position and mark your numbers. Use a level and measuring tape to determine the perfect, USPS-compliant placement, the numbers should be at least 1 inch tall, oriented horizontally, and centered on the flat area of the mailbox. Temporarily tape the decal down with masking tape to check alignment before committing.
- Apply the decal using slow, steady pressure. Peel the backing off the decal carefully, keeping numbers aligned on the transfer tape. Place the decal gently on the mailbox, then use a squeegee or credit card to press from the center outward. This gradual, outward pressure removes air bubbles and prevents wrinkles.
- Peel away the transfer tape. After firmly pressing the numbers down, slowly pull the transfer tape back at a sharp angle. If any digits lift, lay the tape back down and burnish again.
- Allow adequate curing time. Avoid touching or exposing the numbers to rain for at least 24 hours, and ideally up to 72 hours, to let the adhesive develop full strength. This ensures durability against wind, rain, and sun.
Applying your mailbox numbers with patience and precision will give you clear, professional results that improve both curb appeal and mail delivery accuracy. Avoid rushing, skip installations on cold or wet days, and always prepare the surface thoroughly to help the numbers last for years.
What Are USPS and Local Regulations for Mailbox Number Placement
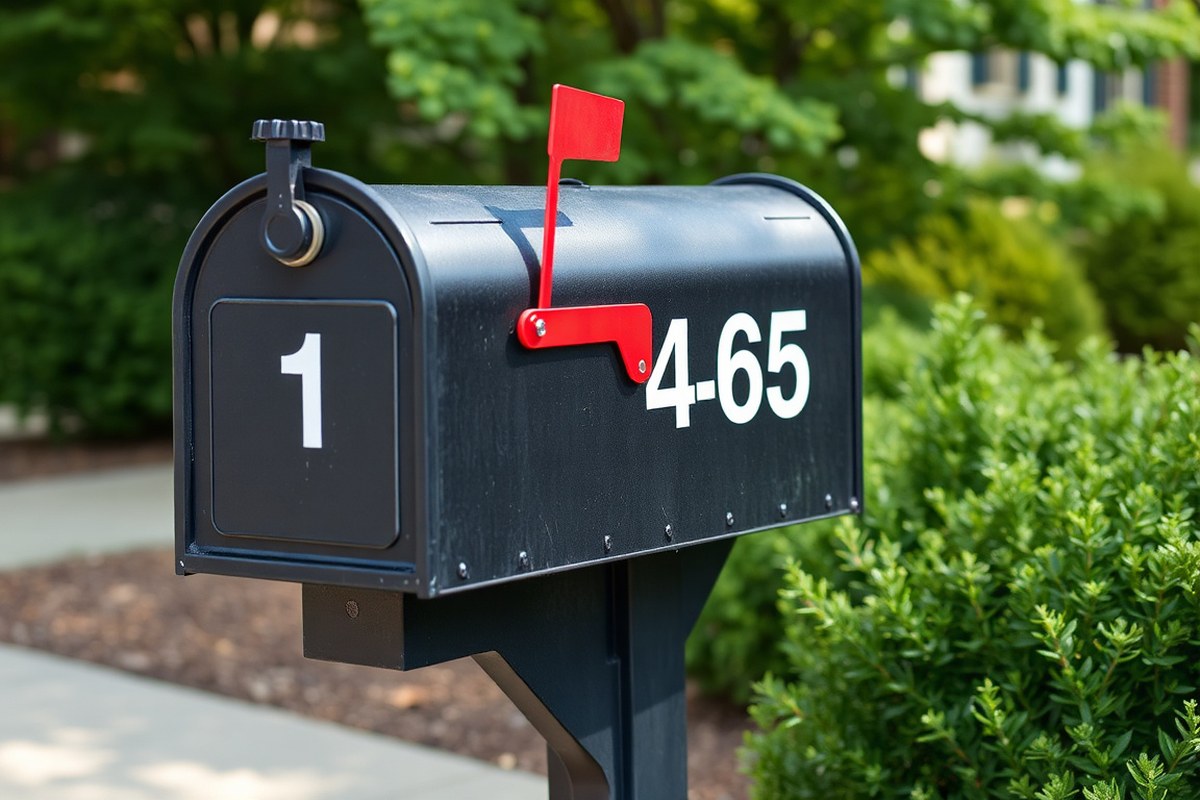
Mailbox numbers must follow certain guidelines to ensure they are easy to see for mail carriers and emergency responders. The United States Postal Service (USPS) sets a minimum height requirement for numbers at 1 inch tall. However, many local emergency response codes require larger numbers for quicker visibility, often recommending at least 4 inches tall with a stroke width of 0.5 inches. Using 2-inch numbers or larger is a common practice that balances federal rules with local safety standards.
The placement height for mailbox numbers is important. USPS specifies that numbers should be installed at a height ranging from 41 to 45 inches above road level. This range helps drivers and responders spot the numbers without straining. Also, the mailbox itself should be positioned close to the road edge, ideally about 6 to 8 inches behind the curb or road shoulder, depending on your local road design and regulations. This placement ensures mail carriers can deliver without leaving their vehicles while keeping the mailbox visible and protected from passing traffic.
Clear contrast between the mailbox color and numbers improves visibility. Choose light-colored numbers on a dark mailbox or dark-colored numbers on a light mailbox. Reflective vinyl or paint can also improve readability at night and in poor weather. Keep spacing consistent, with 0.5 to 0.75 inches between digits, to avoid crowding that makes numbers hard to distinguish from a distance.
- Use numbers at least 4 inches tall with 0.5-inch stroke width for emergency responder visibility.
- Install numbers 41 to 45 inches above road level for USPS compliance.
- Place mailbox 6 to 8 inches behind the road edge or curb.
- Ensure strong color contrast between numbers and mailbox background.
- Keep spacing between numbers consistent at 0.5 to 0.75 inches.
- Check local codes; some require larger or reflective numbers.
Before permanently attaching, hold the numbers in place and view from the street to confirm readability and proper positioning. The decision between 1-inch minimum and 4-inch recommended numbers should consider your street speed and visibility conditions. Higher speed roads or streets with low lighting benefit from larger, reflective numbers. Small numbers save space but increase the risk of undelivered mail or delayed emergency response.
Verify your numbers can be read easily from the road during the day and at night before final installation to avoid costly replacements.
Replacing faded or peeling numbers right away keeps your mailbox compliant and easy to spot. Some local municipalities have specific requirements for mailbox location and numbering, so check with your city or county codes to avoid fines. Choosing numbers and placement to meet or exceed these guidelines helps keep your mail delivery smooth and emergency help fast.
Choosing the Best Materials for Mailbox Numbers
Choosing the best material for your mailbox numbers depends on balancing durability, ease of installation, and visibility under your local weather conditions and mailbox surface. Vinyl decals offer a practical, affordable solution for most mailboxes, especially curved or smooth ones. Metal numbers provide long-lasting style and toughness but require more effort to mount. Magnetic numbers grant easy removal but only stick to metal surfaces and may fail in harsh weather. Painted numbers give you full customization but need upkeep and skill to maintain.
Vinyl Decals
Vinyl decals score high on popularity for mailbox numbers due to their low cost and simple, tool-free application. Made from cast vinyl using acrylic adhesives and UV-resistant lamination, they usually endure for 3 to 5 years in the Pacific Northwest climate, influenced by surface prep and installation care. Their slim profile, roughly 2 mils thick, allows them to fit smoothly on rounded mailbox shapes.
Vinyl has limits on textured plastic mailboxes; surfaces like Step2 models can prevent the adhesive from sticking properly. To get the longest wear, clean the mailbox thoroughly before applying a cast vinyl decal and smooth it out to avoid bubbles. Large, high-contrast numbers in vinyl stand out well from a distance, meeting most visibility needs.
Metal Numbers
Metal mailbox numbers offer maximum durability and an upscale look. Rust-resistant choices like brushed aluminum or powder-coated steel maintain their appearance for years, even in humid or rainy climates. Installing metal numbers involves drilling holes or using weather-proof adhesives, so you need more tools and time compared to decals.
This option suits homeowners prioritizing longevity and style who don’t mind mounting effort. Metal works well on textured or curved mailboxes when using the correct fasteners or adhesive. Prices run higher than vinyl decals but metal numbers can last a decade or more without fading or damage.
Magnetic Numbers
Magnetic mailbox numbers offer quick installation and removal without adhesives or drilling, making them ideal for renters or temporary use. These only work on metal mailboxes, so plastic or composite mailboxes are unsuitable. Magnetic strips can shift or fall off in strong winds or storms, especially in high-wind coastal or open plain areas.
They tend to be less durable and weather-resistant than vinyl or metal options, often developing rust or losing magnetism after a couple of years. Prices are generally affordable but you should consider the trade-off in stability.
Painted Numbers and Stencils
Painting numbers directly on your mailbox provides full control over size, style, and color. It is a low-cost method if you already have paint and stencils on hand. Success depends on your painting skills and using a weatherproof paint or sealant.
Painted numbers can wear down from sun, rain, or physical contact, sometimes fading after 1 to 3 years if unsealed. Regular touch-ups or using a clear protective spray help extend their life. This option is best when you want a custom look and are willing to upkeep the results.
Below is a comparison of common mailbox number materials covering durability, cost, and installation aspects. This helps identify what matches your mailbox surface and climate.
| Material | Durability (Years) | Cost Range (USD) | Best Surfaces | Installation |
|---|---|---|---|---|
| Cast Vinyl Decals | 3, 5 | $10, $30 | Curved, smooth metal/plastic | Peel-and-stick, no tools |
| Metal Numbers (Aluminum, Steel) | 10+ | $25, $70 | All surfaces with drilling or adhesive | Drilling or adhesive required |
| Magnetic Numbers | 1, 2 | $5, $20 | Metal mailboxes only | Stick on, no tools |
| Painted Numbers | 1, 3 | $0, $15 | Any surface, skill-dependent | Brush or spray, requires skill |
This comparison shows vinyl decals strike a good balance between price and durability for most homeowners, performing well on curved mailboxes and resisting Pacific Northwest weather up to 5 years. Metal numbers last longest but require more work and cost. Magnetic options suit metal mailboxes and short-term needs but risk weather problems. Painted numbers let you customize fully but usually need more maintenance and talent to look good years later.
How to Prepare and Clean Your Mailbox Surface for Installation
Removing old mailbox numbers is your first step in preparing a clean surface. Gently pry off the numbers using a flat tool, such as a putty knife, to avoid damaging the mailbox. Some old numbers may have stubborn adhesive or rust buildup. In that case, apply a small amount of isopropyl alcohol with a cloth to soften the adhesive, then scrape carefully. Avoid harsh chemicals that can damage the mailbox finish or paint.
After removal, clean the entire surface thoroughly. Dirt, grease, wax, and leftover adhesive all prevent new numbers from sticking properly. Use isopropyl alcohol to wipe the mailbox surface because it effectively removes residue without leaving a film. Avoid using soapy water or household cleaners, which can leave residues that weaken adhesion.
- Remove old numbers gently with a plastic or metal scraper
- Apply isopropyl alcohol to ease adhesive removal
- Wipe surface with clean cloth soaked in isopropyl alcohol
- Allow surface to dry completely before proceeding
- Check surface temperature, aiming for 70 to 90 °F
- Smooth rough spots gently with fine-grit sandpaper (metal mailboxes only)
Drying time is critical to ensure durability. Let the surface dry fully before attaching new numbers to avoid trapping moisture, which reduces adhesive strength. Drying usually takes about 10 to 15 minutes at room temperature, but humidity and chilly weather can increase this time.
For metal mailboxes, light sanding helps create a rough texture that improves adhesion, especially if the surface is glossy or oxidized. Use very fine sandpaper (around 220 grit) and sand lightly to avoid scratching deeply. Wipe away sanding dust with a clean isopropyl alcohol cloth afterward. Priming is generally unnecessary if the mailbox paint is in good condition and there is no rust. If rust appears, address it before installing numbers by sanding and applying a rust-inhibiting primer.
Following these steps closely sets your mailbox numbers up to stick firmly and last longer, even with exposure to weather and sun. Skipping cleaning, drying, or sanding often leads to numbers peeling or falling off prematurely. Taking 15 to 30 minutes for proper surface prep can prevent future headaches and ensure your mailbox remains easy to spot curbside.
Measuring and Marking the Perfect Placement for Visibility
The height, spacing, and alignment of mailbox numbers greatly affect their visibility and compliance with USPS recommendations. Positioning numbers between 41 and 45 inches from the road and spacing them half an inch to three-quarters of an inch apart helps drivers read them quickly. Properly centering and leveling the numbers also improves overall street readability.
Determining the Height from Ground
Numbers should be installed so the bottom edge measures between 41 and 45 inches from the road surface. This height range aligns with USPS guidelines to ensure mail carriers and drivers can easily spot your address from the street. Measuring from the ground rather than the curb ensures consistent placement even if curb height varies.
Using a tape measure, start at the road edge closest to your mailbox and mark the spot for the bottom of your numbers. Adjust the height based on how high your mailbox stands. If your mailbox is mounted higher than 45 inches, aim to place the numbers centered within the visible face of the box.
Spacing Between Numbers
Spacing your numbers between 0.5 and 0.75 inches edge-to-edge provides clear separation without crowding. Proper spacing makes each digit distinctly readable from a distance. Overly tight numbers can blur together, while too much space wastes valuable space and complicates reading at a glance.
Keep in mind the size of your mailbox face as well. Larger mailboxes can handle wider spacing, while smaller ones might need to use the tighter end of the range. Also, consistent spacing between all digits ensures a professional and balanced look.
Ensuring Level and Centered Alignment
Level and centered numbers look clean and improve visibility. A small tilt can confuse readers and reduce legibility, especially at driving speeds. Centering the numbers horizontally across the mailbox face balances appearance and maintains standard practice.
Using a spirit level and painter’s tape simplifies achieving perfect alignment. Painter’s tape on the mailbox face creates a straight guide line to place numbers accurately and keep them at a uniform height and level. Follow this step-by-step method to mark placement:
- Measure 41 to 45 inches from the road surface and mark a small pencil spot where the bottom of your numbers will sit.
- Apply a strip of painter’s tape along the mailbox face so it aligns with your bottom mark, creating a leveling guide.
- Calculate the total width needed for your numbers, including 0.5 to 0.75-inch spacing between each digit.
- Mark a center line on the mailbox face to help horizontally center your numbers.
- From the center line, measure half of the total number width to each side and lightly mark those points to guide placement.
- Position each number on the painter’s tape, spacing them evenly according to your measurements.
- Double-check that the numbers sit level on the tape and are centered before starting installation.
Use painter’s tape to resist shifting during installation, and double-check your level frequently, small misalignments reduce curb appeal and readability.
Common Mistakes to Avoid When Installing Mailbox Numbers
Applying mailbox numbers without proper surface preparation is a frequent cause of peeling or fading. Dirt, dust, and oils reduce the adhesive’s ability to stick securely. Take the time to clean and dry the mailbox surface thoroughly before installation, avoiding fingerprints on the adhesive side. Use isopropyl alcohol or mild soap and water, then let it dry completely to ensure the numbers adhere well and last longer.
Misalignment and poor spacing make your numbers harder to read and can look unprofessional. Proper measuring and marking before attaching the numbers help maintain even spacing and straight lines. Use a level or ruler during placement to achieve precise alignment. This step costs nothing but time and makes the difference between an easy-to-see address and one that frustrates visitors.
- Skipping surface cleaning causes weak adhesion and early peeling.
- Installing in direct sunlight can cause decals to dry unevenly and fade faster.
- Rushing adhesive cure time weakens the bond and leads to premature detachment.
- Using the wrong size or color reduces visibility and defeats the purpose of your numbers.
- Applying numbers in cold or wet weather slows adhesive curing and promotes failure.
Applying adhesive numbers or decals outdoors during cold or wet conditions slows the curing process. Full adhesive strength develops between 24 and 72 hours after application, according to Gorilla Glue. Installing when temperatures are below 50°F or if rain is expected within 24 hours can cause weak bonds. Avoid these conditions to help your numbers stay securely attached through seasonal weather changes.
Fixing installation errors is possible without damaging your mailbox. Warm the adhesive with a hair dryer or heat gun on a low setting to soften it. Carefully peel the number off, avoiding tearing. Clean any residue with isopropyl alcohol before replacing the numbers. This gentle method prevents damage and helps you correct spacing or alignment mistakes.
How to Maintain and Clean Mailbox Numbers for Longevity
To keep your mailbox numbers looking fresh and clear, clean them regularly with gentle products like mild dish soap, isopropyl alcohol, or plain water. Use a soft microfiber cloth to avoid scratches, and apply cleaning solutions one number at a time with a gentle touch. Avoid abrasive cleaners, harsh chemicals, or scrubbing pads that can damage vinyl or metal finishes. Thorough cleaning removes dirt and grime that reduce visibility and help preserve the adhesive bond for vinyl numbers.
Inspect your mailbox numbers about once a month to catch early signs of wear such as peeling edges, fading colors, or loose attachments. This simple routine lets you address problems before the numbers become hard to read or fall off. You can gently press any slightly peeling edges back down, but if fading or damage is clear, plan to replace those numbers promptly to maintain address visibility for mail carriers and emergency services.
In harsher climates, where sun, rain, snow, or extreme temperature swings occur, maintenance is especially important. After heavy weather, wipe down the numbers to remove residues like salt or sand that can accelerate wear. Living in a sunny area means checking for fading at least twice a year, since UV rays break down vinyl and painted metal over time. Applying a UV-protective spray designed for outdoor use (approved for your number material) can extend life, but verify product safety to avoid discoloration.
Minor peeling can usually be fixed by cleaning beneath the edge with isopropyl alcohol to remove dirt and re-pressing the adhesive firmly. For fading, replacement is often the best solution since cleaning won’t restore color. High-quality custom vinyl numbers generally cost between $5 and $15 per digit, making replacement affordable and straightforward. Metal numbers that are fading or rusting can be repainted using rust-resistant outdoor paint after properly preparing the surface.
Maintain a cleaning and inspection schedule where you clean the numbers monthly with mild soap and a soft cloth, inspect for damage or looseness, and perform touch-ups or replacements every 6 to 12 months based on condition. Keeping the mailbox surface smooth, dry, and free from peeling paint or rust also supports the longevity of your numbers. When applying new vinyl, avoid surfaces with wax, deep grooves, or leftover adhesive to ensure a strong, lasting bond.
Removing and Replacing Old or Damaged Mailbox Numbers
Removing old or damaged mailbox numbers requires care to avoid harming the mailbox’s paint or surface. Using heat to soften adhesive, gently peeling off numbers, and thoroughly cleaning residue ensures a smooth replacement. Proper preparation helps new numbers stick better and lasts longer.
Softening Adhesive for Easy Removal
Applying heat softens the glue under vinyl or adhesive-backed numbers, making them easier to remove without scraping off paint. A hair dryer set on medium heat is ideal. Hold it about 6 inches from the mailbox and move it slowly over the numbers for 30 to 60 seconds. This warms the adhesive evenly and loosens its bond with the surface. Take care not to overheat the mailbox, especially if it’s metal, as excessive heat might warp or damage the paint.
Peeling Off Old Numbers Gently
Start by lifting one corner of the number with your fingernail or a plastic scraper. Avoid metal tools to prevent scratches on the mailbox. Another option is a plastic card, like an old credit card, which can gently slide under the edge.
Lift the numbers slowly and evenly, pulling them back at a low angle. This reduces the risk of peeling paint off along with the adhesive. Work in small sections if the numbers are large or heavily glued.
- Heat the numbers for 30 to 60 seconds with a hair dryer to soften the adhesive.
- Use your fingernail or a plastic scraper to lift one edge of the number carefully.
- Slide the plastic card under the edge to separate the number from the mailbox.
- Pull the number slowly at a low angle, moving in small sections if needed.
- Remove any hardware, such as screws, with the appropriate screwdriver.
- Inspect the surface for peeling paint or rust and prepare for cleaning.
Using metal tools risks scratching the mailbox paint, so plastic tools are safer for gentle removal.
Removing Leftover Adhesive Residue
After peeling off the numbers, adhesive residue can prevent new numbers from adhering properly. Remove this residue using rubbing alcohol (isopropyl alcohol) or a commercial adhesive remover like Goo Gone, applied with a soft cloth.
Apply the remover liberally and allow it to sit for a minute to dissolve the residue. Then, wipe the area firmly but carefully until the surface is clean. Repeat as needed for stubborn glue spots.
Once residue is gone, wipe down the entire area with an alcohol wipe or a lint-free cloth dampened with isopropyl alcohol to remove oils and dirt. This prepares the surface for a strong bond with the new numbers.
- Apply rubbing alcohol or adhesive remover to a soft cloth.
- Rub the adhesive residue gently until it dissolves and lifts off the surface.
- Use a clean cloth to wipe the area and remove dissolved adhesive.
- Allow the surface to dry completely.
- Wipe the mailbox surface with an alcohol wipe or lint-free cloth with isopropyl alcohol.
- Inspect for clean, residue-free surface before installing new numbers.
A clean, dry surface free of residue ensures that new numbers adhere firmly and last longer.
Step-by-Step Action Plan
Follow these steps to install your mailbox numbers with clear visibility and lasting durability while meeting local requirements.
- Before you start: Check your local postal regulations for number size and placement to ensure compliance. Confirm you have the right materials and tools ready.
- Day 1: Clean your mailbox surface thoroughly using a mild detergent and cloth. The surface should be dry and free of dirt or grease to help the numbers stick well.
- Day 1: Measure and mark the exact spots for your mailbox numbers using a ruler and pencil. Accurate placement ensures optimal visibility from the street.
- Day 2: Install your numbers using appropriate hardware or adhesive following the manufacturer’s instructions. Numbers should feel secure and not shift when gently pulled.
- Week 1: Inspect the numbers for visibility from the street at different times of day. Make any minor alignment adjustments if necessary for best clarity.
- Month 1: Clean the mailbox numbers gently with a soft cloth to remove dirt buildup. Check for any signs of loosening or fading and tighten or replace as needed.
- As needed: Replace old or damaged numbers using the removal steps outlined. This keeps your address legible and helps mail delivery remain timely.
Frequently Asked Questions
What Tools Do I Need to Install Mailbox Numbers?
You mainly need a tape measure, a pencil for marking, and adhesive or screws depending on your number type. Having a level helps ensure your numbers are straight and easy to read.
Can I Install Mailbox Numbers on Any Mailbox Material?
Yes, but the surface should be clean, dry, and smooth for decals or adhesive numbers to stick well. Metal, plastic, and wood mailboxes all work if properly prepped.
How Long Does It Take to Install Mailbox Numbers?
Installation usually takes 10 to 20 minutes depending on surface prep and number type. Vinyl decals or magnetic numbers can be faster than drilling and screwing.
Should Mailbox Numbers Be Reflective?
Reflective mailbox numbers improve visibility at night or in poor weather. Materials with UV-resistant finishes also help maintain visibility over time outdoors.
Can I Install Mailbox Numbers Myself or Should I Hire a Pro?
Installing mailbox numbers is a straightforward DIY task for most homeowners. Pro help might be needed only for hard-to-reach or unusual mailbox setups.
How Should I Protect Mailbox Numbers from Weather Damage?
Choose numbers made from rust-resistant materials with UV protection, like aluminum with a finish. Regular cleaning also helps maintain their appearance and durability.
Wrapping Up
Installing mailbox numbers properly means your home is easy to find, keeping deliveries on track. Take the time to check local rules, clean your surface well, and measure carefully before securing your numbers. Start by gathering the materials and checking your mailbox’s condition today to ensure a smooth installation.