
How to Align a Laser Engraver for Precision Results: 8 Essential Steps
How to align a laser engraver involves carefully adjusting the beam path with mirrors and the laser tube so the beam is straight and hits the workpiece precisely. Start by setting the laser tube correctly, then check that the beam hits each mirror perfectly at the center. Proper alignment ensures sharp, accurate engraving and avoids material waste.
Key Takeaways
- Use a low power setting around 5-10% during alignment to safely observe the beam without damaging components.
- Begin alignment by confirming the red laser pointer aims directly at the first mirror’s center.
- Adjust mirror angles slowly until the beam path hits mirror centers and focuses correctly on the workpiece.
- Verify the laser tube is parallel and aimed correctly before fine-tuning mirrors for optimal beam path.
- Keep the 1.5mm nozzle clean and correctly installed to maintain beam size and direction.
- Look for a small, sharp pinprick laser dot as a sign of proper beam focus and alignment.
1. How to Align a Laser Engraver Beam Correctly

Aligning the laser beam and mirrors in a CO2 laser engraver ensures the beam consistently hits the center of each mirror and the focusing lens. This alignment maximizes cutting and engraving precision and power across the working bed. Start with mirror 1 closest to the laser tube and proceed sequentially to mirror 3 near the engraving head. Adjust mirror screws carefully, loosening the nuts just enough to move the mirror without losing control, and aim to center the beam spot on each mirror’s surface. A laser alignment target tape can help visualize beam positions during adjustments.
- Power on the laser and disable lid sensors or set power to a low visible level. This ensures you can see the laser beam spots without risk from full power, and the beam will show up on the alignment tape.
- Place laser target tape on mirror 1’s reflective surface. This tape shows the laser beam’s impact point clearly, making alignment visible.
- Loosen the nut(s) on the adjustment screws of mirror 1 slightly. This frees the mirror for precise movement but retains enough resistance to hold position.
- Adjust mirror 1 screws to move the beam spot to the exact center of the mirror tape. Centering here directs the beam correctly toward mirror 2 and sets the foundation for proper alignment.
- Fix mirror 1 screws in place, then repeat the process for mirror 2. Loosen screws, place tape on mirror 2, and adjust to center the beam spot. Ensure the beam from mirror 1 hits the middle of mirror 2 accurately.
- Continue the same process on mirror 3, centering the beam spot on the mirror tape positioned there. Finally, check that the beam passes through the middle of the focusing lens and nozzle, indicating proper alignment over the entire path.
- Fine-tune all mirrors as needed by small incremental screw adjustments. Check the beam spot after each change, aiming for consistent, centered positioning that remains steady without drift.
Good results mean the beam strikes each mirror’s center precisely and passes cleanly through the lens focal point, avoiding angled cuts or weak edges on the material. Misalignment often shows as a beam spot off-center or missing on mirrors, weak cuts on one bed side, or angled edges. Proper adjustment of the mirror screws controls vertical and horizontal directions; turning one screw changes the beam horizontally, while the other adjusts vertical tilt. Tightening nuts secures the mirror after aiming. Different machines might have three or four mirrors; the sequence and principles remain the same, just repeat the centering steps. Proper initial beam alignment usually requires no frequent rework unless the machine is moved or bumped.
2. Essential Tools and Materials for Alignment
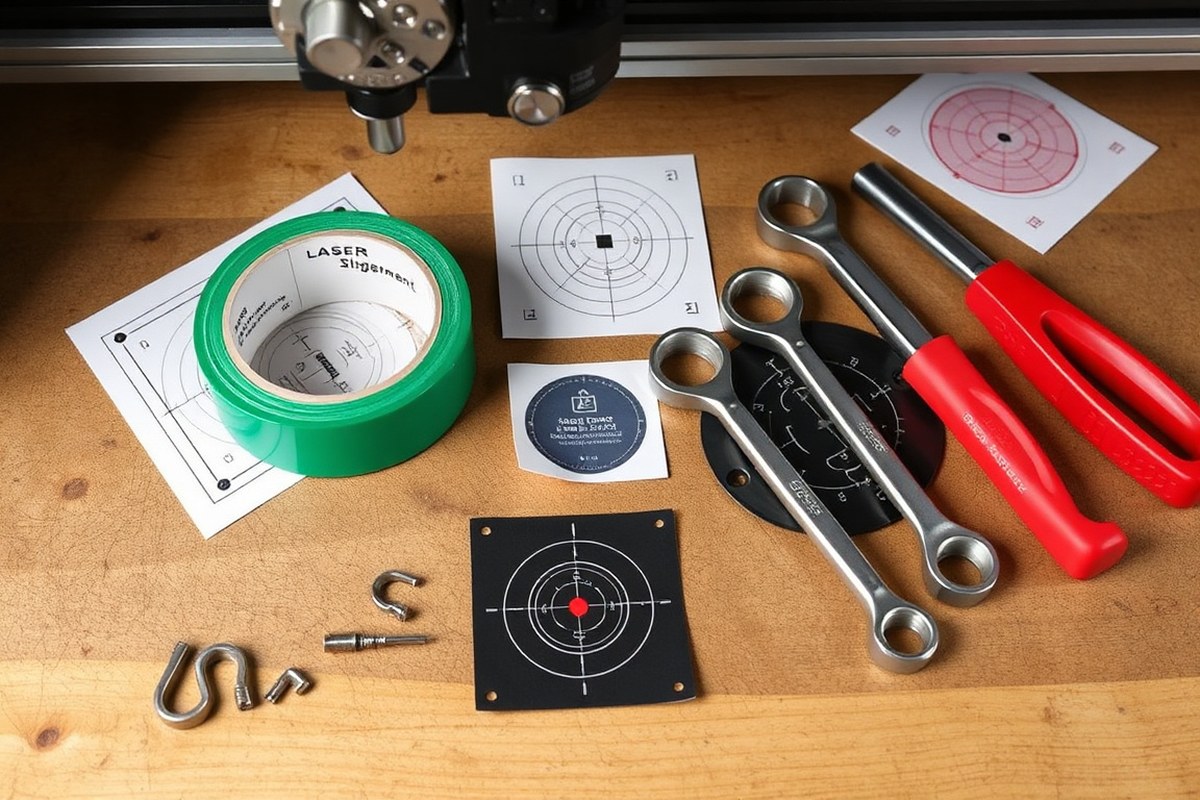
To achieve exact mirror positioning on your laser engraver, a handful of key tools is necessary. Use transparent tape, a 1.5mm nozzle, and an Allen wrench for precise tuning. Blue painter’s tape works well with the pulse-tape technique since it adheres firmly but cleanly without leftover glue. Using these correct tools ensures the laser reliably hits the intended mirror targets, essential for producing sharp and clear engravings.
Using a laser pointer can assist in alignment, but it needs to fit snugly into the beam window to be effective. This method helps you trace the beam path visually from the laser tube through the mirrors. However, avoid relying solely on a laser pointer because it lacks the heat or power output to fully test the real beam path for cutting or engraving precision.
| Tool/Material | Purpose | Cost Estimate | Notes |
|---|---|---|---|
| Transparent Tape (Blue Painter’s Tape) | Pulse-tape method for marking beam spots on mirrors | $5 per roll | Removes cleanly, helps see where beam strikes |
| 1.5mm Nozzle | Focus point reference for beam path alignment | $10-$20 | Ensure nozzle is clean and free of debris |
| Allen Wrench (Hex Key) | Adjust mirror mounts | Free with laser engraver or $5-$15 separately | Common sizes include 1.5mm to 3mm |
| Laser Pointer | Visual guide for beam path during alignment | $10-$20 | Must fit snugly in beam window; supplementary tool |
| Mirror Cleaning Supplies | Maintain mirror clarity for accurate alignment | $5-$15 | Use lint-free wipes and isopropyl alcohol |
Optional tools like a laser pointer speed up alignment by letting you quickly check if the beam hits each mirror’s center. Having cleaning supplies ready is also wise; even a thin layer of dust can throw off alignment and reduce engraving quality. The Allen wrench lets you adjust mirror angles precisely, which is necessary after marking positions with tape. The nozzle serves as the ultimate reference for the focal spot, so make sure it’s properly installed and clear of obstructions.
Always turn off the laser before placing any tape or making adjustments to mirrors to avoid injury or damage.
3. Safety Precautions During Laser Engraver Alignment
Safety during laser engraver alignment is critical to prevent injury and damage. Use appropriate personal protective equipment, handle the laser beam carefully, and never bypass built-in safety features. These rules help ensure you can adjust mirrors and align the beam without risking eye or skin exposure or causing machine faults.
Personal Protective Equipment Essentials
Wear laser safety glasses rated specifically for your CO₂ laser wavelength, typically around 10.6 microns, to protect your eyes from harmful reflections and direct exposure. Normal glasses or sunglasses do not provide adequate protection. Gloves can prevent skin burns when handling heated parts or mirrors after use.
Ensure you have a dust mask if you are cleaning mirrors or other components, as dust and particles from materials can irritate your respiratory system. Use protective clothing to avoid skin contact with reflective surfaces that might redirect the beam unexpectedly.
Safe Handling of the Laser Beam and Power Settings
Keep the laser’s power as low as possible during alignment to reduce risk. Use short pulses instead of a continuous beam to check beam position by marking tape on the mirrors. Avoid running the laser at full power when adjusting the beam path, which can create hazardous reflections and damage components.
Do not place any part of your body inside the machine or in the beam path while the laser is operating. Remember the laser beam exits the tube, bounces off three mirrors at roughly 90-degree angles, passes through the focusing lens, and then hits the workpiece. Even indirect reflections can cause injury.
Managing Machine Safety Features During Alignment
Always keep the laser machine’s lid or access panels closed during operation. The lid sensors are there to stop the laser from firing when open. Disabling or bypassing these sensors is unsafe and strongly discouraged. If alignment requires the lid to be open, use the lowest possible laser power setting and avoid direct exposure to the beam.
Before starting alignment, verify that mechanical components like gantry rails, mirror mounts, and the laser head are secure and not damaged. Loose or distorted parts can cause misalignment and increase hazards. Follow your machine’s user manual instructions and never override factory safety procedures.
- Wear laser safety glasses rated for your CO₂ laser’s wavelength
- Use gloves to protect against burns and cuts
- Work with low laser power and short pulses for alignment
- Keep the lid or access panels closed during laser firing
- Do not bypass or disable safety interlocks and sensors
- Check mechanical components for tightness before aligning
- Avoid direct or reflected beam exposure to skin and eyes
Following these safety measures helps prevent injuries and damage during mirror and beam path alignment, maintaining both your safety and the longevity of your laser engraver.
4. Aligning the Laser Tube and Beam Path Setup
Position the laser tube so the beam exits centered on the first mirror and travels in a straight line through the gantry. Establishing this initial beam path is essential because all subsequent mirror alignments depend on it. The process requires adjusting the laser tube both vertically and horizontally, then confirming the beam hits the desired spot on mirror one with a low power pulse test.
Adjusting Laser Tube Alignment Vertically and Horizontally
Start by loosening the mounting bolts holding the laser tube to the gantry. Small vertical or horizontal movements can significantly change the beam’s aim. Make gradual inch or millimeter shifts, aiming to center the laser beam on the first mirror’s reflective surface. Avoid forcing the beam directly over the mirror’s exact center; the key is a straight beam path parallel to the gantry’s axes.
Physically raising or lowering the laser tube may be necessary if the beam hits too high or too low on the third mirror later on. Usually, you’ll adjust the tube position along with mirror tweaks during alignment, but at this stage focus on getting the initial beam close to the first mirror’s center line.
Setting Low Power Pulse for Safe Beam Verification
Using low power pulses protects components and provides clear beam location marks on tape placed on mirrors. Set the laser engraver power to a low pulse mode, typically 5 to 10% power for 0.1 to 0.2 seconds, just enough to leave a visible mark on reflective tape.
Do not start with full power to avoid damage or safety hazards. Performing a pulse test before loosening any nuts or mirrors helps decide if adjustments are necessary. This low power pulse is your baseline for alignment and can be repeated as you adjust the tube and mirrors.
Verifying Initial Beam Centering on the First Mirror
Attach reflective tape to the first mirror’s surface to help spot the laser dot during pulse tests. Perform a low power pulse and observe where the beam hits. Adjust the laser tube position and repeat pulses until the laser dot is centered horizontally within the mirror’s active area.
Tighten the laser tube mounting bolts carefully after centering to prevent movement. Move the engraver bed about 1 inch away from the laser head nozzle and pulse again to see if the beam stays aligned on mirror one. This verifies the beam path is parallel and stable, which is critical before proceeding to align subsequent mirrors.
- Loosen the laser tube mounting bolts to allow movement.
- Place reflective tape on the first mirror surface.
- Set laser power to 5-10% for a 0.1-0.2 second pulse.
- Pulse the laser and observe the beam location on mirror one.
- Adjust the laser tube vertically and horizontally to center the beam.
- Tighten the mounting bolts gently without shifting the tube.
- Move the work bed at least 1 inch away, perform another pulse test.
- Confirm the beam remains centered horizontally on mirror one’s tape.
5. Troubleshooting Common Laser Alignment Problems
One common issue is an off-center laser beam, which happens when the beam does not travel evenly through the mirrors. This misalignment causes uneven cutting or engraving. To check if the beam is centered, pulse the laser and observe the dot on each mirror’s guide hole. The dot should fall neatly in the center of each hole. When it doesn’t, adjust the mirrors slightly until the pulse hits the center consistently.
Beam wander or drift occurs when the beam shifts position over time or between pulses. It could result from loose mounts, temperature changes, or vibrations. To fix beam wander, tighten all mirror holders and supports. Next, ensure the machine sits on a stable surface away from fans or heat sources. Sometimes waiting a few minutes after powering on lets components reach thermal stability, reducing drift.
If the beam doesn’t hit a mirror at all, begin by verifying the laser tube position. The beam should exit the tube cleanly and strike mirror 1 without clipping or missing. Use the pulse-tap method: quickly pulse the laser to create a bright spot, then adjust the tube’s vertical and horizontal position by small increments. Continue until the beam spot centers on mirror 1’s guide hole. Next, repeat the process down the line for mirrors 2 and 3, making sure the spot hits each mirror’s center.
- Do not over-tighten screws as this can move mirrors unintentionally.
- Always power off the laser and wear protective eyewear during adjustments.
- Perform alignment in a dim room to see laser spots clearly but avoid direct viewing.
- Use small, deliberate mirror adjustments to avoid losing alignment further.
- Be patient, as coarse alignment often requires multiple fine-tuning steps.
A single pulse that doesn’t land in the same spot as the previous one signals misaligned mirrors, so focus your adjustments there before moving to other parts.
Correct alignment means the laser beam moves straight through all mirrors with the dot centered on each guide hole. Expect to spend 15 to 30 minutes carefully adjusting each mirror, especially when components have shifted due to shipping or extended use. Good results show no beam clipping on mirrors or the lens, stable spots with repeated pulses, and consistent engraving performance without fading or uneven lines.
6. Adjusting Mirrors and Focus Lens for Optimal Precision
After aligning the main mirrors on your laser engraver, the final precision adjustments involve fine-tuning the mirror screws and properly positioning the focus lens. This ensures the laser beam travels directly through the lens axis, resulting in sharp, clean cuts and accurate engraving. Careful adjustments here prevent beam scattering and maximize cutting power.
Fine Tuning Mirror Alignment Screws
Mirrors have small adjustment screws that control their angle and position. These must be adjusted with precision, especially for the third mirror close to the laser head. Small-angle changes can cause significant beam shifts over longer distances, so making tiny incremental turns is key. Signs that mirror alignment needs readjusting include inconsistent burn marks and a beam spot that is off-center on the target.
Use a laser alignment tool or tape on the bed to track the laser spot location as you adjust screws. Slowly turn each screw less than a quarter turn at a time. You want the laser pulse to hit the same exact spot on each mirror without shifting when you release the screws. When the beam hits the mirror’s sweet spot, where it reflects straight down through the lens axis, tighten the retaining nuts gently to hold the mirror firmly without moving it.
Centering the Beam Through the Focus Lens
The focus lens sits on the carriage, held by three thumb screws allowing fine movement. Its position is critical: The laser beam must pass right through the lens axis and nozzle opening. The beam entering the lens off-center can cause uneven cutting or weak burns. Check this by observing the beam spot on a piece of masking tape placed just beneath the lens nozzle.
Adjust the focus lens by slightly loosening the thumb screws and nudging the lens until the beam spot lines up in the center of the lens opening. Once aligned, re-tighten the screws firmly. Repeated testing and adjustment may be needed before the laser hits the sweet spot consistently, where the beam travels straight through the lens and exits cleanly at the nozzle tip.
Testing Beam Spot and Adjusting Focal Distance
After mirror and lens alignment, test your focus by engraving a small pattern at different heights. A correctly focused lens will produce a sharp, consistent beam spot and clean cuts. Weak or inconsistent cuts often indicate the focus distance needs adjustment. Adjust the lens height in small increments around your starting focal length, typically the distance recommended by your lens manufacturer, often about 50 to 100 mm from the material surface.
On some machines, fine focus is adjusted by moving the lens up or down slightly on the carriage. Use test cuts on scrap material, checking for the smallest, darkest burn marks with no smoke or spread. The spot growing larger or cuts fading means you should tweak the focus height accordingly. Regularly clean the lens and mirrors with appropriate materials to maintain optimal clarity and avoid distortion.
- Turn on the laser and place masking tape on the bed under the lens nozzle.
- Adjust the third mirror screws in quarter-turn increments until the beam hits the same spot on each pulse, centered on the tape.
- Loosen the focus lens thumb screws and gently shift the lens so the beam passes exactly through the center of the lens axis and nozzle aperture.
- Retighten the lens screws carefully without disturbing the alignment.
- Perform test engravings on scrap material, observing beam sharpness and cut quality.
- Adjust the focus distance by raising or lowering the lens in small steps if cuts are blurry or weak.
- Repeat beam spot checks after each adjustment to confirm the beam remains centered through the lens.
- Clean all mirrors and the focus lens before finalizing adjustments to remove any residue that could affect beam quality.
7. Creating a Laser Engraver Alignment Checklist and Routine
Regular laser engraver alignment protects your investment by keeping your machine performing at its best and helping avoid costly errors or wear. A reliable alignment routine should include a checklist of key steps, performed at intervals based on your machine’s use, operating environment, and recent activities like moving or servicing. Common timing for alignment checks ranges from weekly to monthly for regular users, with a full setup alignment required for new machines or after relocation. Create a checklist that suits your machine and workflow using these steps:
- Inspect mirrors and lenses for dirt or damage, and clean before adjustments.
- Verify laser tube and beam path position with a test burn on scrap material.
- Check framing and engraving accuracy against edge guides taped to the bed.
- Confirm the focus lens is set correctly for the material thickness.
- Adjust mirrors to align the laser beam exactly along the intended path.
- Capture results in a log, noting any changes or issues detected.
- Run a final quality test engraving to confirm crisp, consistent results.
Maintain a routine where quick checks happen before each job and full setups are scheduled based on usage intensity, such as monthly or after any impact or disassembly. The cost usually involves time and minor consumables like cleaning wipes, not exceeding 15 minutes for quick checks. Good results show clean, sharp engraving without misalignment marks or inconsistent cutting depths.
Make your own edge guides by taping scrap material pieces along the laser bed. This removes subtle inaccuracies in factory bed guides and helps consistently position blanks exactly where you want them. By aligning your blanks to these precise guides, minor shifts in the laser path become easier to detect and correct during your routine checks.
Routine checks improve long-term stability by catching early misalignments before they lead to material waste or damage. This proactive maintenance extends laser tube life and protects the integrity of mirrors and lenses. Skipping regular alignment can cause beam drift, uneven cuts, and reduced engraving quality.
Keep a written or digital log of all alignment activities, including dates, problems found, actions taken, and results. This historical data helps identify recurring issues and informs adjustments to your checklist or schedule. Over time, your alignment routine will become a reliable safeguard for consistent, high-quality laser engraving outcomes.
8. When to Seek Professional Help for Laser Alignment
You should consider calling a professional for laser alignment when your attempts at fixing the beam path do not produce visible marks on the alignment tape after adjusting the mirrors. This often means the laser beam is bouncing beyond the tape area and may indicate a deeper issue with mirror 1 or mirror 2. If your normal DIY steps, such as checking mirror positions, cleaning the lenses, and using proper alignment tools, fail to correct the beam path, it is time to seek expert assistance to avoid costly damage.
DIY alignment works well for common issues like minor mirror misplacements or lens dirt, but it has limits. Complex problems like warped mirrors, internal laser tube damage, or misaligned mounts often require specialized tools and experience. Trying to force adjustments beyond your knowledge can cause permanent damage to expensive components or degrade laser performance, leading to wasted materials and production downtime.
To decide whether to seek professional help, use this rule: if after 30 minutes of careful alignment using proper tools you cannot see a consistent and centered laser mark on each mirror’s tape, and the laser cut quality remains poor, pause and call a technician. Professionals have access to precision measurement devices that can detect angular errors within 0.1 degrees and can replace or realign components safely at a cost typically ranging from $100 to $300 depending on machine type and location.
Poor alignment can result in uneven engraving depth, burned or incomplete cuts, and reduced laser tube life due to increased scatter and inefficiency. Addressing these issues too late can lead to a need for costly mirror replacements that cost around $50 to $100 each or a full laser tube replacement that may run $400 or more. Also, an improperly aligned laser increases fire risk and can damage the machine’s mechanical parts over time.
Some small businesses and hobbyists may hesitate to hire professional service due to cost or machine downtime. In such cases, carefully documenting your alignment procedure and results, taking photos of each step, and noting exact mirror adjustments can help a technician understand the problem faster and reduce service times and costs. However, don’t delay professional support if the laser shows erratic behavior or fails to engage properly after multiple alignment attempts.
Attempt no more than three full alignment cycles with proper tools before calling a professional to prevent costly damage and unnecessary expenses.
Step-by-Step Action Plan to Align Your Laser Engraver
Use this plan to get your laser engraver beam properly aligned and maintain precision for every project.
- Before you start: Gather all essential tools like alignment cards, screwdriver set, and safety goggles. Confirm your workspace is well-lit and clean to avoid errors.
- Day 1: Power off the machine and perform a visual check of mirrors and lens for dirt or damage. Clean or replace parts as needed for a clear beam path.
- Day 1: Power on and position your alignment card at the first mirror. Adjust the mirror screws slowly until the beam hits the center of the card, confirming with a visible spot.
- Day 1: Repeat mirror adjustments for the second and third mirrors, always aiming for the beam to align centrally on each target card. Test the laser pulse gently to verify.
- Day 2: Adjust the focus lens by lowering the head close to the bed using a material of known thickness. Use the focus tool to achieve a sharp dot, indicating correct distance.
- After initial alignment: Run a test engraving on scrap material to check for consistent, clean cuts or marks across the bed.
- Weekly: Use your alignment checklist to inspect mirrors, lens, and beam path, making small adjustments if the test engraving shows inconsistencies.
- Monthly: Inspect hardware for wear or loosening screws; tighten or replace components as needed to maintain alignment stability.
Frequently Asked Questions
What Is the First Step in Aligning a Laser Engraver?
Start by ensuring the laser beam consistently hits the center of the lens and mirrors. This establishes a correct path and sets the stage for accurate engraving.
How Do I Check If My Laser Engraver’s Mechanical Parts Affect Alignment?
Confirm that the gantry, rails, mirror mounts, and laser head are not loose or distorted, as mechanical issues impact alignment precision.
Can Using a Beam Alignment Tool Improve My Alignment Accuracy?
Yes, a beam alignment tool helps you see where the beam lands on mirrors, making adjustments easier and more precise.
How Often Should I Perform Laser Engraver Alignment?
Perform alignment regularly, especially after moving the machine or noticing engraving quality decline, to maintain crisp results.
What Role Do Accuracy and Precision Play in Laser Alignment?
Accuracy refers to striking the exact center of the mirror, while precision involves achieving that exact strike repeatedly for the best engraving results.
Is Laser Tube Alignment Part of the Overall Laser Alignment Process?
Absolutely, aligning the laser tube correctly is critical as it directs the initial beam path before mirrors adjust direction.
The Bottom Line
Aligning your laser engraver correctly improves the precision and quality of your engraving projects significantly. Start by focusing on mirror and lens adjustments, then develop a regular maintenance routine to keep the beam path accurate. Begin today by gathering your alignment tools and performing your first mirror alignment step.


