Can You Paint over Vinyl? A Complete Guide with Proven Tips
Can you paint over vinyl? Yes, you can paint vinyl surfaces successfully by choosing the right paint and preparing the surface properly. Use 100% acrylic exterior-grade latex paint for the best results, and keep in mind that thorough cleaning and surface preparation are essential before painting.
Key Takeaways
- Use 100% acrylic exterior latex paint for painting vinyl surfaces like windows and siding.
- Primer usually isn’t required when painting vinyl windows with acrylic latex paint.
- Clean vinyl surfaces thoroughly before painting to remove dirt, grease, and mildew.
- Allow paint 12-48 hours to dry depending on room conditions and paint type.
- Vinyl paint can last 5-10 years, influenced by weather and maintenance.
- Light Reflectance Value (LRV) above 55 is safer for vinyl paint color choices.
Can You Paint over Vinyl Surfaces Successfully?

Yes, you can paint over vinyl surfaces, but the success depends on the type of vinyl and its application. Vinyl siding, windows, and furniture can be painted effectively with proper surface preparation and the right paint type. Vinyl floors and wallpaper, however, present more challenges and often are not the best candidates for painting due to adhesion and durability issues.
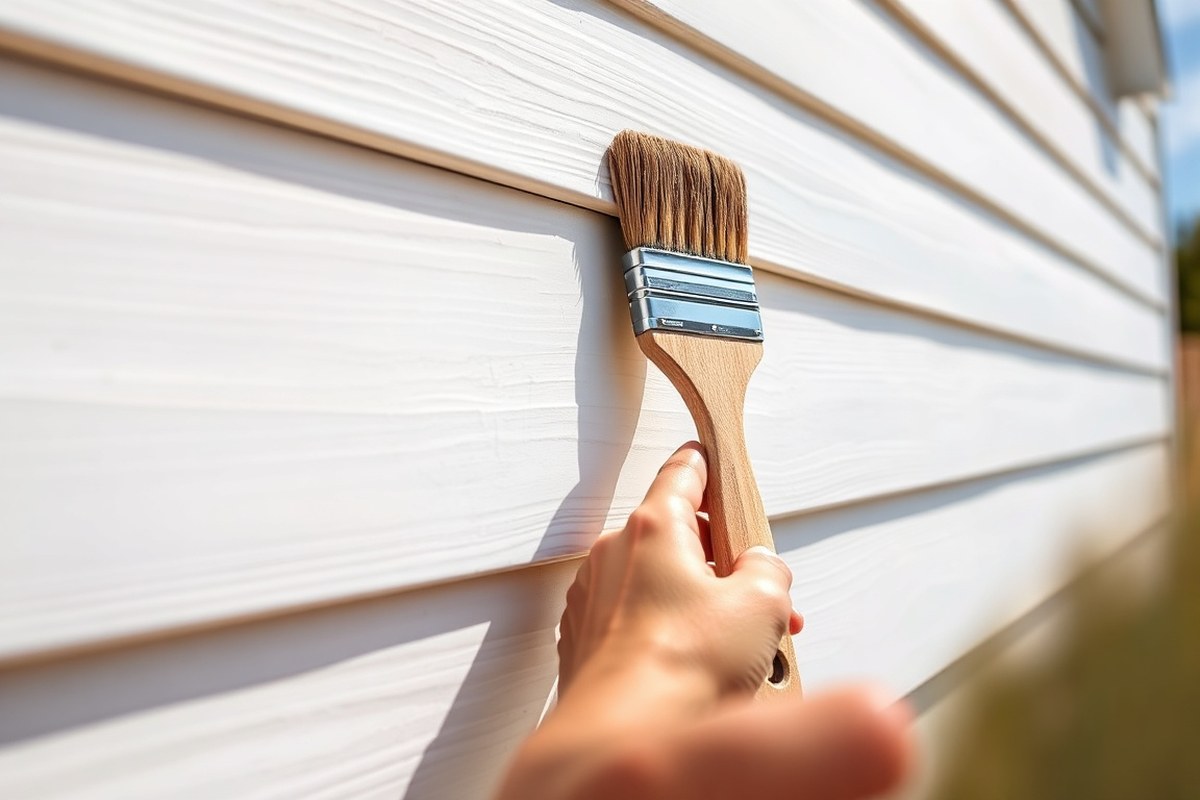
Vinyl siding is one of the most common vinyl surfaces that homeowners choose to paint rather than replace. Painting vinyl siding can refresh the exterior of a home without the higher cost and labor of full replacement. This process usually requires thorough cleaning to remove dirt and mildew, and sometimes a primer designed for vinyl surfaces, although some 100% acrylic latex paints perform well without primer. Vinyl siding painted under ideal weather conditions can hold up for 10 years or more. Expect to spend a full day or a weekend on a typical home exterior, including cleaning, priming (optional), and applying two coats of durable acrylic latex paint.
Vinyl windows are also suitable for painting, especially when coated with exterior-grade 100% acrylic latex paint. Unlike siding, vinyl window frames generally do not require primer if the surface is clean and in good condition. This type of paint offers flexibility and durability needed to handle temperature changes and outdoor exposure. Painting windows can improve aesthetics without the expense of frame replacement, but preparation is key to avoid peeling and ensure good adhesion.
Vinyl floors and wallpaper come with more risks and less reliable outcomes. Vinyl plank floors can be painted with products like Rust-Oleum’s Home Floor Coating system, which offers a two-part color and protective solution; however, this is not usually recommended by flooring experts because painted vinyl floors can chip or wear quickly under traffic. Painting vinyl wallpaper requires a binder or primer made specifically for glossy or vinyl surfaces to promote adhesion. Even then, the durability depends heavily on preparation and paint quality, and might not match the longevity of painted siding or windows.
Whether you should paint or replace vinyl depends on the surface condition and your goals. Vinyl siding and windows in good shape can benefit from painting, saving money and time compared to replacement. Paint application costs mainly involve purchasing quality acrylic latex paint, with prices ranging from $30 to $60 per gallon. The labor includes cleaning, some sanding or scuffing, and applying two coats, which you can do yourself or hire out. Vinyl floors and wallpaper may be cheaper to replace than to paint, due to the additional prep, risk of poor adhesion, and shorter lifespan of painted surfaces in these areas.
Carefully evaluate the vinyl surface type, its condition, and expected use before deciding to paint. Use exterior-grade acrylic latex paint for siding and windows, and a primer suitable for vinyl if the surface is glossy or has low porosity. Avoid painting vinyl floors unless you’re ready to invest in specialized products and accept shorter durability. Taking these steps ensures that your painted vinyl surfaces look better and last longer.
Which Paints and Primers Work Best on Vinyl?

Latex or acrylic-based paints combined with a suitable primer work best for painting vinyl surfaces. Priming is usually necessary to ensure the paint adheres properly and lasts longer. The right primer creates a bond between the non-porous vinyl and the paint.
Best Paint Types for Vinyl Surfaces
Vinyl surfaces repel moisture, so flexibility in paint is important. Latex and acrylic paints are good choices because they stretch with the vinyl, reducing peeling or cracking. Acrylic exterior paints are especially durable for outdoor vinyl, with options that resist mildew and weather.
Oil-based paints may also coat vinyl, but they tend to be less flexible, increasing the chance of cracking over time. Latex-based paints dry faster and provide easier cleanup, making them more popular for DIY projects on vinyl furniture, siding, and wallpaper.
When and Why Use Primer on Vinyl
Priming vinyl before painting is important because vinyl’s smooth, glossy surface doesn’t let paint stick well on its own. A primer designed for glossy, non-porous, or vinyl surfaces improves adhesion, creating a stable base for the paint.
Use a high-quality oil-based or bonding primer that states compatibility with vinyl or glossy surfaces. Apply two coats for best results. Without primer, paint may peel or flake quickly, especially on vinyl exposed to weather or heavy use.
Recommended Brands and Products
Several primers and paints are formulated specifically for vinyl. While availability varies, look for primers labeled as suitable for vinyl or glossy surfaces, and paints categorized as 100% acrylic exterior or interior latex.
Testing the product on a hidden vinyl area before the entire project helps you confirm adhesion and appearance. The cost for primers ranges generally from $10 to $20 per quart, while acrylic or latex paints for vinyl can be between $20 and $40 per gallon. These are reasonable investments for a durable finish. Here is a table summarizing paint types, priming needs, and surface suitability.
| Paint Type | Primer Needed? | Durability on Vinyl | Common Uses |
|---|---|---|---|
| Latex (Acrylic-based) | Yes, use a bonding primer | High, flexible, mildew-resistant outdoors | Vinyl siding, furniture, wallpaper |
| Oil-based | Yes, oil-based primer preferred | Moderate, less flexible, prone to cracking | Occasional use on vinyl furniture |
| Exterior Acrylic | Yes, bonding primer recommended | High, weather-resistant, mildew-resistant | Vinyl siding, window frames |
| No Primer | Not recommended | Low, poor adhesion, peeling likely | None |
Tip: Always clean and lightly sand vinyl before applying primer to improve adhesion and create a long-lasting paint finish.
Primers that bond well to vinyl typically come labeled for use on glossy or non-porous surfaces, often oil-based or specialty bonding formulas. Using the right primer reduces the chances of peeling and ensures your paint job stands up to normal wear, weather, and cleaning. Applying two coats of primer before the paint, along with thorough surface preparation, produces the best results.
How to Prepare Vinyl for Painting Step-by-Step
Preparing vinyl for painting involves cleaning, sanding lightly, and applying a bonding primer. These steps improve paint adhesion and help create a smooth, durable finish. Skipping or rushing any part can cause peeling, bubbling, or uneven surfaces that shorten the paint’s life.
Cleaning and Degreasing Vinyl
Vinyl surfaces attract dirt, oils, and residues that block paint adhesion. Thorough cleaning should be your first step to remove grime and grease. Use a mild detergent mixed with warm water, or a degreasing product specifically designed for vinyl. Avoid harsh chemicals that could damage the surface.
Wipe the vinyl with a sponge or cloth soaked in your cleaning solution, then rinse twice with clean water. Let the vinyl dry completely, which usually takes 30 minutes to an hour. This drying time ensures no moisture remains trapped under the paint.
Light Sanding for Paint Adhesion
Vinyl’s glossy surface needs light sanding to promote better primer bonding. Employ 120- to 150-grit sandpaper or a sanding pole to achieve an even matte texture. Be careful not to sand too aggressively to avoid damaging or revealing the base layer.
Sanding lightly prevents deep scratches or cracks that could show through your paint layers. After sanding, wipe down the vinyl with a damp cloth to remove dust and allow it to dry again before priming.
Applying Primer Correctly
Applying a bonding primer seals the vinyl and builds a surface the paint can adhere to strongly. Use a primer specified for vinyl surfaces to avoid peeling or bubbling. You can apply primer with a quality brush or roller, depending on the size and shape of the vinyl area.
Cover the vinyl evenly with primer, avoiding drips or pooling. Let the primer dry fully, which typically takes 2 to 4 hours but check the product label for exact times. Only after the primer feels dry and firm to the touch should you apply your paint coat. Follow these detailed steps to prepare your vinyl surface for painting:
- Clean the vinyl thoroughly using a mild detergent or degreaser and warm water.
- Rinse the vinyl twice with clean water and let it dry completely, about 30 to 60 minutes.
- Lightly sand the entire surface with 120- to 150-grit sandpaper to dull the sheen.
- Wipe down the vinyl with a damp cloth to remove sanding dust and dry again.
- Apply a bonding primer evenly using a brush or roller.
- Wait for the primer to dry fully, usually 2 to 4 hours.
- Inspect the surface for any missed spots or uneven texture and touch up as needed.
- Begin painting only after the primer has cured completely to ensure adhesion.
Painting Techniques for Different Vinyl Types
Painting techniques for vinyl vary significantly depending on the type of vinyl surface you’re working with. Vinyl floors, siding, windows, wallpaper, and furniture each have specific requirements for preparation, paint choice, and application method to ensure a durable and attractive finish without damage. Understanding these differences can help you get the best results and avoid common pitfalls like peeling or warping.
Vinyl Floors: Preparation and Paint Application
Vinyl floors require thorough cleaning and proper paint selection to hold up under foot traffic. Start by scrubbing the surface with a gentle detergent to remove dirt and oils that prevent paint adhesion. Lightly sanding with fine-grit sandpaper creates a rougher texture for the paint to cling to but avoid aggressive sanding that can damage the vinyl tile or plank.
Use porch and floor enamel or a specialized epoxy-based paint designed for floors, which offers durability and moisture resistance. Apply a high-quality bonding primer first to improve adhesion. Expect to pay $30 to $60 for a gallon of paint suitable for vinyl floors. Apply at least two thin coats, waiting 4 to 6 hours between coats. Allow 24 to 48 hours before walking on the surface. Properly applied, the paint should resist wear but repainting every 5 to 7 years might be necessary depending on traffic levels.
Vinyl Siding: Color Choices and Heat Considerations
Vinyl siding covers the exterior and faces weather exposure, so paint selection and color choices are critical. Avoid dark paint colors that absorb excessive heat because vinyl expands and contracts with temperature changes; too much heat can cause warping or buckling. Choose light to medium shades specifically formulated for vinyl siding to ensure UV resistance and flexibility.
Preparation involves cleaning the siding with a power washer or scrub brush and detergent, then allowing it to dry fully. Use a primer suited for vinyl surfaces if the paint label recommends it. Exterior acrylic latex paints designed for vinyl siding provide a durable finish. Application can be done with brushes, rollers, or sprayers. Painting on a mild day, avoiding direct sunlight and temperatures below 50°F or above 90°F, helps paint cure evenly and prevents bubbling or cracking.
Vinyl Windows: Interior vs. Exterior Techniques
Painting vinyl windows is possible but requires extra care, especially for exterior windows. Interior vinyl windows are easier since they are protected from weather extremes and UV exposure. Clean the window frames thoroughly and sand lightly with fine-grit sandpaper to dull the glossy surface. Use a primer made for vinyl followed by a UV-resistant acrylic latex paint to maintain flexibility over time.
Exterior vinyl windows must deal with sun, rain, and temperature swings. Use paint with UV stabilizers to resist fading and cracking. Avoid dark colors on windows to reduce heat buildup. Application can be tricky, so use a high-quality synthetic brush for smooth, thin coats. Drying times lengthen when painting outside, so plan for at least 24 hours between coats and avoid painting just before rain.
Vinyl Wallpaper and Countertops: Special Surface Challenges
Vinyl wallpaper is non-porous, making it difficult for paint to adhere and increasing the chance of peeling or bubbling. A very thorough cleaning is essential, followed by a bonding primer designed for smooth surfaces. Use a high-quality acrylic latex paint. Apply light coats with a high-density roller or spray gun to limit the likelihood of texture disruption. Patience during curing is important to avoid finish defects.
Painting vinyl countertops demands even greater care because of the wear and moisture exposure. After cleaning and sanding, use a specialized countertop paint or epoxy coating compatible with vinyl. These products cost more, often $50 or more per quart. Multiple thin coats with long drying times of 24 to 48 hours per coat give the best durability. Expect regular maintenance or touch-ups after several years due to heavy use.
Vinyl Furniture: Flexible Paint and Layering
Vinyl furniture needs paint that can bend without cracking. Use a bonding primer made for vinyl surfaces, then apply flexible acrylic paints. Clean well and sand lightly to roughen the surface. Thin, even coats reduce the risk of peeling. Allow at least 4 hours drying between coats. Avoid heavy textures or thick layers that can crack with furniture movement.
For layered paints, apply two to three coats for full coverage. Finish with a clear flexible sealer to protect the paint from scratches and spills. These steps generally take a few days from start to finish but result in refreshed furniture that lasts longer without damage.
How Long Does Vinyl Paint Last and What Affects Durability?
Paint applied to vinyl surfaces typically lasts between 5 to 10 years, though this can vary widely based on several factors. These include the quality of the paint and primer used, how well the vinyl surface was prepared before painting, and the environmental conditions the painted surface faces. Outdoor vinyl siding exposed to strong sunlight, frequent rain, or temperature extremes will generally see its paint fade or peel faster compared to an indoor surface or a vinyl wall shielded from harsh weather.
Proper surface preparation plays a significant role in paint longevity. Thorough cleaning to remove dirt, oils, and mildew ensures better adhesion of the paint. Using a primer designed for vinyl also helps the paint grip the slick surface, preventing early peeling or flaking. Application technique matters, too, applying paint in thin, even layers and allowing adequate drying time between coats improves durability. Paints with flexible formulas can accommodate vinyl’s natural expansion and contraction with heat changes, reducing cracking.
Maintenance can extend the life of your painted vinyl. Regular cleaning with a mild detergent and soft cloth or mop keeps dirt and grime from building up and wearing down the paint layer. Avoid harsh chemicals and abrasive scrubbing tools that can damage the finish. Sweeping grit and debris away is especially important for painted vinyl flooring, as small particles can scratch and wear the paint faster. Placing felt pads under furniture legs and promptly wiping up spills minimizes damage and stains.
Climate factors like UV exposure and temperature swings are beyond your control but understanding them helps set realistic expectations for your vinyl paint job. In humid or extremely sunny regions, repainting might be needed closer to the 5-year mark. In milder climates, the paint might stay intact for a decade or more. Indoor painted vinyl usually lasts longer since it avoids constant weather exposure.
Cleaning painted vinyl surfaces gently with a mild detergent and soft cloth about once a month helps maintain the paint’s appearance and prolong its life.
Avoiding Common Mistakes When Painting Vinyl
One of the biggest mistakes when painting vinyl is skipping thorough cleaning. Vinyl surfaces are often slick and non-porous, which means any dirt, dust, or oils will stop paint from sticking properly. Clean the vinyl with a mild detergent and warm water, rinsing well and letting it dry completely before you start painting. Avoid harsh cleaners that might damage the surface or leave behind residues.
Applying paint too thickly also causes problems like peeling, bubbling, or cracking. Several thin coats work better than one heavy coat because they dry evenly and maintain flexibility with the vinyl. Use a high-quality synthetic brush or foam roller designed for smooth surfaces, and allow each layer to dry fully, usually 2 to 4 hours depending on humidity and temperature. For a project like painting a vinyl chair, expect at least two to three coats for good coverage.
- Clean vinyl with detergent and warm water; rinse and dry thoroughly
- Use thin, even coats of paint to prevent bubbling and peeling
- Choose paint made for vinyl or flexible surfaces to improve adhesion
- Allow at least 2-4 hours drying time between coats
- Avoid painting in high humidity or cold temperatures below 50°F
- Lightly sand faded or glossy vinyl to help paint stick better
- Use appropriate primer if required by your paint brand
Failures like peeling or bubbling usually mean the paint did not bond well to the vinyl. Fix adhesion problems by first removing loose paint with a scraper or fine sandpaper, then cleaning the area to clear dust and oils. Applying a vinyl-compatible primer will help new paint stick. If peeling happens after a long time, the vinyl may be too flexible or dirty for a lasting paint job, making repainting more of a short-term refresh than a permanent fix.
Adhesion can also fail if paint is applied in unsuitable conditions. Humidity above 70% or temperatures below 50°F can prevent paint from curing properly. Check the paint label for ideal temperature ranges and avoid painting outdoors or in damp areas. For vinyl flooring or furniture, keep your workspace within recommended conditions to ensure paint bonds and lasts longer.
Choosing Safe Colors: Painting Vinyl Dark or Black
You can paint vinyl surfaces dark colors, including black, but it requires careful consideration because dark paint absorbs more heat. When vinyl heats up, especially under direct sunlight, it can warp or buckle. That’s why many experts recommend using paint colors with higher Light Reflectance Values (LRV) when painting vinyl. LRV measures how much light a color reflects, with higher numbers reflecting more light and heat.
For example, white has an LRV around 80 to 90, meaning it reflects most light, while black has a very low LRV near 5, absorbing most light and heat. Choosing a color with too low an LRV for vinyl increases the risk of heat damage. However, some manufacturers offer vinyl-safe paints specially formulated for darker shades, including black. These paints are designed to resist warping and fading by incorporating heat-reducing technologies or flexible binders.
To safely paint vinyl dark or black, start by selecting a paint labeled safe for vinyl applications, like Sherwin-Williams’ vinyl siding paint or similar products. Use specially formulated primers made for vinyl to block color bleed-through, especially if the original vinyl has a bold or dark base color. Applying two coats usually provides good coverage, but you may need a third coat with black or very dark shades to achieve uniform color.
Before painting, check the vinyl surface temperature on sunny days. Vinyl exposed to temperatures above 90°F during or immediately after painting may react poorly. For outdoor projects, paint in cooler parts of the day or during mild weather to prevent heat buildup. The flexible formulation of vinyl-safe paints allows the surface to expand and contract without cracking.
If you live in an area with strong sun exposure, consider a slightly lighter dark color or a dark gray for less heat absorption, balancing the modern look of black with fewer risks. Review local building codes or homeowner association rules, as some neighborhoods restrict exterior paint colors, especially on vinyl siding.
Good results mean a smooth, even finish with no signs of bubbling, warping, or peeling after at least several months. Watch for soft spots or blistering shortly after painting, this indicates the paint or color choice is causing heat retention issues. Using vinyl-safe dark paints ensures better durability and aesthetics while protecting the vinyl.
When to Hire a Professional for Vinyl Painting Projects
Deciding to hire a professional for painting vinyl depends on the scale, complexity, and conditions of your project. Small touch-ups or simple projects like painting trim or small vinyl panels may be manageable for a DIY enthusiast. However, larger tasks such as painting extensive exterior vinyl siding or moisture-prone vinyl trim in kitchens and bathrooms often require expert skills. Professionals can better handle surface preparation, select the right latex urethane paint formulated for vinyl, and apply it under ideal conditions to ensure durability through seasonal changes.
Projects that involve large vinyl surfaces exposed to weather, older materials that might need special primers, or areas subject to frequent moisture can become complex quickly. A poorly executed paint job on vinyl siding, for example, can lead to bubbling, peeling, or color fading within months. Local climate conditions like extreme cold or heat make choosing the right paint blend and primer important. Working with a professional helps avoid these common pitfalls, as they have experience matching primers and topcoats to the vinyl’s age and specific environmental factors.
Finding a qualified painter means looking for contractors or companies familiar with vinyl surfaces, not just general painting. Ask for references or examples of past vinyl painting jobs and check reviews. Request a detailed estimate that outlines the number of coats, type of paint and primer, surface preparation steps, and expected timeline. Labor costs vary by location but expect to pay more for intricate surfaces or multiple coats; local paint stores often recommend painters who specialize in vinyl projects.
Evaluate potential hires by their knowledge of vinyl-specific products and processes. For example, a professional should advise using latex urethane paint for exterior vinyl siding and understand moisture challenges in areas like bathrooms. Confirm they follow manufacturer guidelines for temperature and humidity during application, paint applied outside optimal conditions tends to fail early. You can also consult your local paint supplier to verify a contractor’s experience with vinyl projects tailored to your climate and material age.
Applying primer and using the right paint type are critical steps, skipping these or choosing an inexperienced painter can cause paint to peel or fade within a year, especially on exterior vinyl surfaces.
Step-by-Step Action Plan for Painting Vinyl
Follow these steps to paint your vinyl surfaces with confidence and achieve durable results.
- Before you start: Clean the vinyl thoroughly using a mild detergent and water. Make sure all dirt, grease, and residues are removed for better paint adhesion.
- Day 1: Sand the vinyl lightly with fine-grit sandpaper to roughen the surface. The paint should have a slight texture to grip onto once sanded.
- Day 1 (after sanding): Wipe down the vinyl with a damp cloth to remove all sanding dust; let it dry completely.
- Day 2: Apply a primer specifically designed for vinyl surfaces, following the manufacturer’s instructions. The primer should dry clear and feel smooth to the touch.
- Day 3: Paint the vinyl using a flexible acrylic or latex paint made for outdoor or vinyl use. Use thin, even coats to avoid drips and cracking.
- Day 3-5: Allow each coat to dry fully before applying the next, usually 4-6 hours. Two to three coats usually provide full coverage and durability.
- After 1 week: Inspect the paint finish. If you notice any peeling or rough areas, lightly sand and apply a final touch-up coat.
- After 2 weeks: Let the paint cure fully before cleaning or exposing the vinyl to heavy use for maximum longevity.
Frequently Asked Questions
Can You Paint over Vinyl Wallpaper?
Yes, you can paint vinyl wallpaper by cleaning it thoroughly and using a primer designed for glossy surfaces to ensure paint adhesion. Choose a high-quality acrylic paint for durability.
What Kind of Paint Sticks Best to Vinyl Furniture?
Acrylic-based paint works best on vinyl furniture, especially when the surface is clean and primed for better adhesion. It offers good flexibility and durability for indoor use.
Is It Necessary to Sand Vinyl Before Painting?
Lightly sanding vinyl can help paint adhere better by creating a slightly rough surface. Use fine-grit sandpaper and clean the dust off before priming.
Can You Paint Vinyl Windows Without Removing the Glass?
Yes, you can paint vinyl window frames without removing the glass by masking the glass carefully and using exterior-grade 100% acrylic latex paint for durability.
Does Painting Vinyl Flooring Affect Its Flexibility?
Painting vinyl floors might reduce flexibility, making them more prone to cracking if not properly prepared and painted with flexible acrylic paint designed for floors.
Can You Change the Color of Vinyl Siding by Painting?
Yes, painting vinyl siding is possible, but use paint formulated for vinyl and choose lighter colors to prevent heat buildup that can warp the siding.
Wrapping Up
You can successfully paint over vinyl when following proper prep and using the right materials. Take time to clean, sand, prime, and apply flexible paint in thin layers, then allow adequate drying and curing. Start by gathering the recommended primer and paint for vinyl and cleaning your surface today to set your project up for long-lasting results.