How to Make a Pallet Sign by Hand with Easy Steps and Pro Tips
How to make a pallet sign by hand starts with selecting and preparing reclaimed pallet wood to create a rustic base. After safely disassembling the pallet, clean and smooth the boards for a sturdy foundation. Using basic hand tools, you can align and attach the boards to form the sign’s shape effectively.
Key Takeaways
- Remove all nails carefully to avoid splitting pallet boards during disassembly.
- Sand the pallet wood thoroughly for a clean surface before applying any designs.
- Use a combination square to ensure your sign’s corners are exactly 90 degrees.
- Attach wood boards securely with screws or brad nails for long-lasting stability.
- Choose stencils or vinyl decals for easy and accurate text or image application.
- Allow glue and paint to dry fully in a low-humidity environment to prevent warping.
What Is a Pallet Sign and Why Use Pallet Wood?
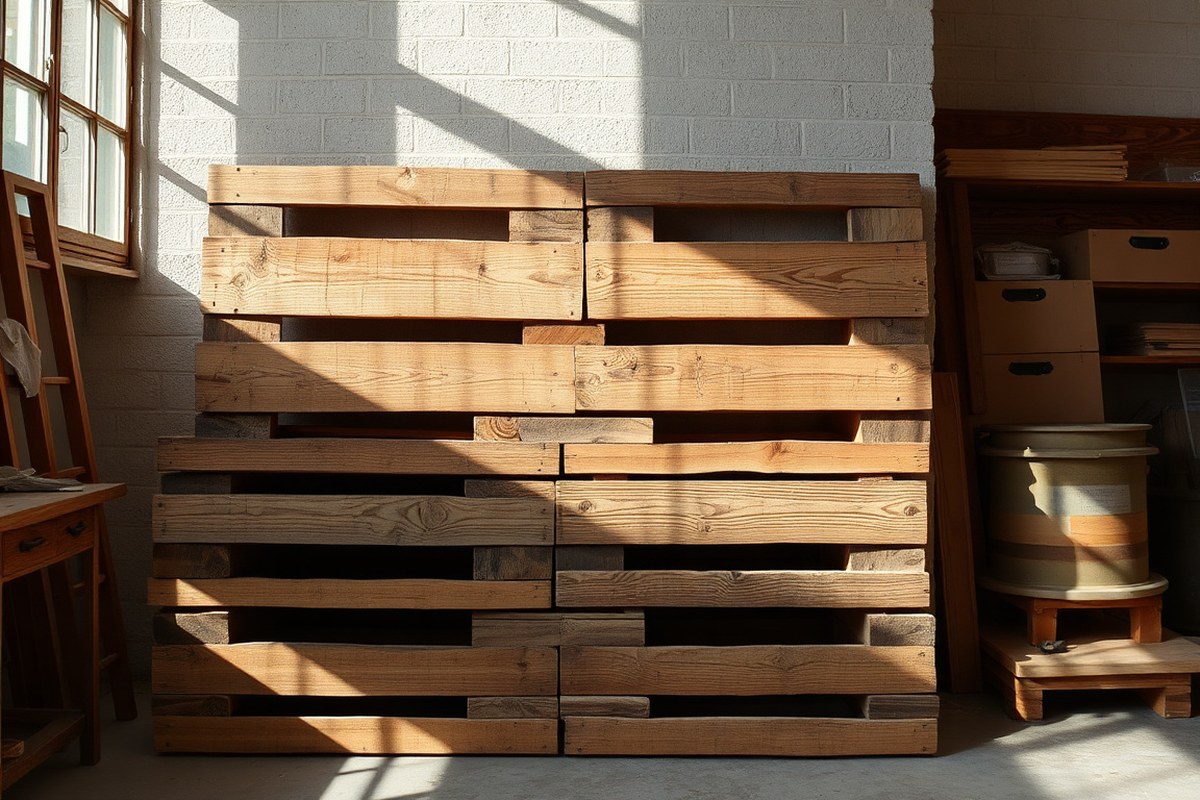
A pallet sign is a decorative piece made by assembling several wooden boards, often reclaimed from shipping pallets, into a flat surface to which text, images, or designs are added. These signs typically showcase rustic or farmhouse styles, prized for their worn textures and natural wood grains. You can craft one by arranging pallet wood boards horizontally or vertically, then attaching them with wood strips or screws. The result is a versatile sign perfect for home decor, weddings, or personalized gifts that bring warmth and character to any space.
Using pallet wood offers significant benefits over new lumber, primarily cost and character. Pallet wood is often free or very inexpensive, making it budget-friendly. Since pallets are built tough for shipping, the wood is usually solid yet well-aged, lending an authentic weathered look that new lumber lacks. The natural imperfections, knots, nail holes, and uneven coloring, add charm that improve the rustic vibe. Using reclaimed wood also reduces waste and supports environmentally friendly crafting.
The typical style of a pallet sign leans toward rustic and shabby-chic, often with rough edges and a distressed finish. You might see signs with simple stenciled quotes like “Welcome,” or more elaborate painted images. Some designs use just three or four 1×4-inch boards hung together with leather strips or mounted on a backing board for stability. The wood thickness is usually around half an inch, enough to provide sturdiness without making the sign too heavy. These signs often suit home offices, craft rooms, playrooms, or outdoor porches, offering a cozy, handmade look that fits casual and farmhouse decor styles.
When choosing or preparing pallet wood for your sign, it’s wise to check for safe, heat-treated pallets rather than chemically treated ones, which can affect indoor air quality. Once you disassemble the pallet carefully to avoid splitting the boards, clean and sand the planks lightly to remove rough spots and splinters. This preparation makes applying paint or stain easier and results in a smooth surface for your design. Pallet wood’s uniqueness means every sign you make will differ visually, allowing for personal touches and creativity without extra cost.
Tools and Materials Needed for Handcrafting a Pallet Sign
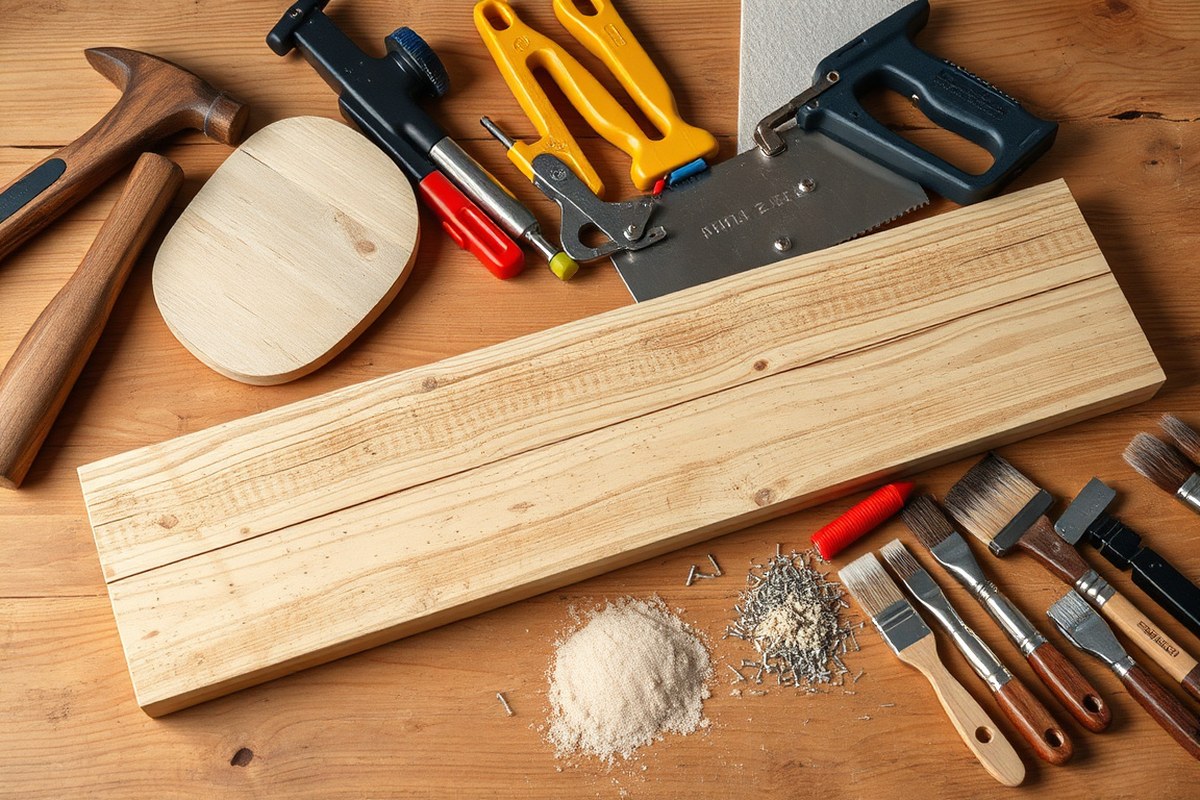
To handcraft a pallet sign, gather essential hand tools first: a hammer or claw hammer, a flat pry bar for disassembling, a hand saw or coping saw for cutting, a tape measure or ruler, and sandpaper or sanding blocks. These tools help you safely take apart pallet wood, trim it to size, and smooth rough surfaces without electricity or costly equipment.
Materials and fasteners include reclaimed pallet wood boards, a brace board for backing if needed, and fasteners such as 1 3/4-inch screws or sturdy nails. Using screws provides a tighter hold, but nails can work if you have a hammer and prefer simpler fastening. Choose softer reclaimed softwood boards since they’re easier to saw and sand manually.
- Hand tools: hammer, pry bar, hand saw, measuring tape, sanding block
- Wood: pallet boards, optional brace board (24” x 16” size common)
- Fasteners: 1 3/4” screws or nails
- Painting and finishing supplies: acrylic paints, brush or sponge applicator
- Optional: pencil for sketching text or images
Using acrylic paints is ideal for decorating your pallet sign because they dry quickly, are inexpensive, and come in many colors. Brushes or sponges make applying paint easier by hand. For protection and a rustic look, apply a clear coat of sealant or wood stain after painting. This preserves your sign from moisture and fading if it will be outdoors.
Budget-friendly options prioritize hand tools you may already own, avoiding power tools like electric sanders or saws. Instead, sand wood with coarse to medium grit sandpaper by hand, which takes more time but reduces upfront costs. A hand saw lets you cut boards without investing in a power miter saw. Screws work well, but if you only have a hammer, nails suffice for fastening.
Wear gloves during disassembly to avoid splinters, as pallet wood is often rough and sometimes treated.
This setup typically costs under $30 if you source pallet wood free and buy only the paints and fasteners. Shop for paints at craft stores where small tubes cost around $1-$3 each. A hammer and simple hand saw can be found for under $15 each if you don’t own them. The result is a charming, handcrafted, personalized sign with visible wood grain and a handmade character, ideal for rustic home decor without relying on power tools or expensive materials.
How to Safely Disassemble and Prepare Pallet Wood
Disassembling pallet wood safely requires careful handling to avoid damaging the boards and protect yourself from potential hazards. Identifying treated wood before work, using protective gear, and preparing the boards properly will ensure good results for your pallet sign. Follow precise steps to remove boards, clean, and sand them for a ready-to-use surface.
Choosing the Right Pallet for Projects
Select pallets stamped with “HT” (heat-treated) rather than “MB” (methyl bromide) to avoid harmful chemicals. Avoid pallets with visible mold, heavy stains, or strong chemical smells. Inspect the wood for large cracks, excessive warping, or rot, which can weaken the final product.
Hardwood pallets tend to be more durable but can be harder to work with and sand. Softwood pallets may have more knots and rougher surfaces but are easier to shape. Choose weathered boards for a rustic look, but prioritize structural soundness.
Removing Boards Without Splitting Wood
Remove nails carefully to avoid splitting the boards, working slowly and methodically with the right tools like a pry bar, hammer, or a repurposed lug wrench for use. Use eye protection and an N95 respirator throughout the process to guard against flying debris and dust. Here is a step-by-step method to remove pallet boards safely:
- Always wear ANSI Z87.1-certified safety glasses along with an N95 respirator mask before you begin working.
- Place the pallet on a stable work surface to prevent slipping.
- Use a hammer or pry bar to gently loosen the boards at the ends, starting with the least damaged area.
- Slide a flat pry bar or a putty knife between the board and stringer to gradually separate wood without cracking.
- Pull nails halfway out with pliers or a cat’s paw tool; do not yank the board forcibly to avoid splitting.
- Remove each nail fully with a hammer claw or nail puller once the board is loose enough.
- Check for stubborn nails or staples and remove carefully to prevent surface damage.
- Set aside nails safely to avoid injury or loss.
Cleaning and Sanding for a Smooth Surface
Start by brushing or vacuuming sawdust and dirt off the pallet boards after removal. Use a clean, slightly damp cloth for any sticky residue or minor stains. Check again for residual paint or varnish that may need gentle removal with fine-grade sandpaper or a paint scraper.
Sand boards moderately smooth but retain character by not over-sanding. This preserves the rustic aesthetic of old pallet wood while removing splinters. Sand with 80-grit sandpaper first to even out roughness, then finish with 120- or 150-grit for a smoother surface suitable for staining or painting.
Seal gaps or damaged spots with a stainable wood filler that matches your planned finish. Sand the filler flush and clean the dust with a cloth before applying your design.
Constructing the Pallet Sign Base by Hand
Creating a solid base for your pallet sign involves arranging the boards attractively and securing them firmly without power tools. You will work with hand tools like a hammer and nails, wood glue, and clamps to join and stabilize your boards. Paying attention to alignment and using support braces ensures your sign is square, sturdy, and long-lasting.
Board Layout and Spacing Tips
Start by selecting about 6 to 8 sanded pallet boards that are clean and roughly the same thickness, typically 1″ by 4″ wide. Lay them side by side on a flat surface, aiming for a width close to your desired sign size, around 17″ to 24″ wide is common. Offset the boards slightly if you want a rustic look, but keep gaps consistent at about 1/8″ or less so your design has a neat background.
Mark the length to trim the boards, usually around 24″ to 26″, allowing about 2″ extra for a clean cut. Keep airflow in mind by spacing gaps evenly; too wide can weaken the sign, while too tight may cause warping in wood changes due to humidity. A well-arranged base looks balanced and sets the stage for attaching support braces.
Attaching Boards Using Nails, Screws, or Glue
Without power tools, nails and wood glue create a strong bond. Use 1¼″ finishing nails and wood glue at all board seams. Hammer nails in every 6 to 8 inches along the edges, alternating sides for a secure fit. Apply glue sparingly to the joining surfaces to prevent squeezing out excess, which can cause mess or discoloration.
Many builders also use small clamps while the glue dries, usually 30 minutes to 1 hour, for a tighter hold. If you prefer screws, pre-drill holes with a hand drill to avoid splitting the wood. Nails work well here because they are fast and plentiful, holding the boards firmly while the glue sets.
Adding Support Braces for Stability
Attach two or three support braces running horizontally across the back of your assembled boards about 3″ in from the top and bottom edges and centered between. Cut scrap wood pieces roughly 1″ x 3″ wide and about 16″ long, which fits well for common sign sizes. These braces keep boards flat and prevent warping or sagging over time.
Nail or screw the braces onto the back, driving 1¼″ nails or screws through the brace into each board beneath. Making the braces slightly shorter than the width of the sign ensures they don’t show from the front. Check the sign for squareness by measuring diagonally corner to corner; adjust the boards before final fastening if you detect uneven angles.
- Gather and sand pallet boards to your desired dimensions, typically 1″x4″ and 24″ to 26″ long.
- Arrange boards side by side on a flat surface, spacing gaps about 1/8″ and offset slightly for rustic effect.
- Apply wood glue along the edges where boards meet, then press together firmly.
- Hammer finishing nails about every 6 to 8 inches along each board seam, alternating sides for stability.
- Clamp the boards if available and allow glue to set for 30, 60 minutes before proceeding.
- Cut 2 or 3 brace boards to about 16″ length, matching the sign width minus clearance.
- Position the braces evenly on the back, about 3″ in from top, center, and bottom, then nail through the braces into each board.
- Check the sign is square by measuring diagonals; adjust before fully tightening nails.
Designing and Applying Text or Images on Your Pallet Sign
You can add lettering and images to your pallet sign in several ways, each with different skill levels and equipment needs. Hand-painting lets you customize freely but needs a steady hand. Stencils help keep letters neat and consistent. Vinyl decals offer a quick, polished look that works well on pallet wood with the right prep and finish.
Hand-Painted Lettering Techniques
Hand-painting your design means using brushes and paint directly on the pallet wood. Start by planning your layout with a pencil or chalk, lightly marking where each letter or image will go. Measuring tape or a ruler can help keep everything even. Painting by hand gives you full control over size, style, and color but requires patience and practice to avoid drips or uneven lettering.
Use acrylic paint for good coverage that sticks to rough wood without soaking in too much. Thin the paint slightly with water for smoother strokes but not too much to lose opacity. A small angled brush around ¼-inch wide can help make cleaner lines. Work slowly and let each painted section dry before adding details or outlines. Practicing on scrap pallet pieces first improves your technique without wasting your sign.
Draw your design with a light pencil outline and use painters’ tape to mask edges for crisper letters.
Using Stencils and Adhesive Sprays
Stencils are a beginner-friendly option to get uniform lettering or shapes. You can buy pre-made stencils or cut your own from cardstock or thin plastic sheets. Arrange the stencil on your pallet, then secure it with low-tack painter’s tape or spray adhesive made for temporary sticking. Spray adhesive prevents paint bleeding under the stencil, which otherwise results in blurry edges.
Apply paint with a foam brush or sponge, dabbing gently rather than brushing to keep paint from seeping under the stencil edges. Remove the stencil while the paint is still wet to avoid peeling dried paint off the wood. Stenciling is faster than hand-painting and reduces the chance of mistakes for clear, precise designs. You can combine multiple stencils for layered or multi-colored effects.
Test your stencil positioning first by taping it and tracing the shapes lightly with pencil before painting.
Applying Vinyl Decals and Protective Coats
Vinyl decals are a quick way to get professionally styled text or graphics on your pallet sign. You can buy pre-cut designs or custom orders on sites like Etsy. To apply vinyl safely on pallet wood, prepare the surface by sanding the area smooth and cleaning it of dust and oils. Rough or uneven wood can cause decals to stick poorly or bubble.
Peel back the vinyl’s backing slowly, align carefully, and press it down firmly with a plastic scraper or credit card to remove air bubbles. Seal the decal with a clear matte or satin polyurethane to protect it from moisture and wear without adding unwanted shine. Avoid thick or glossy finishes that can trap dirt or damage the decal edges over time. This method takes about 30 minutes and requires minimal artistic skill.
Make sure your wood surface is completely dry before applying vinyl decals to get the strongest bond.
Best Finishing Methods for Durability and Appearance
Protecting pallet wood from moisture and wear depends on the finishing method you choose. Paint creates a solid barrier that seals the wood, making it the best option for outdoor signs exposed to varying weather. Acrylic paint is popular for DIY pallet signs because it adheres well and dries relatively fast, usually within 1 to 2 hours for touch dry and about 24 hours to fully cure. For indoor signs or those with intricate text or images, paint also offers vibrant colors and can be distressed with steel wool while still tacky to add rustic character.
Stain improve the wood’s natural grain while providing some protection. Oil-based stains like Minwax Provincial offer rich, deep tones and better durability but take longer to dry, typically 8 to 12 hours before recoating or sealing. Water-based stains, such as Retique It Vintage Wood Stain, dry faster (around 1 to 2 hours) and have low odor, which can be more convenient indoors. Stain is ideal if you want a natural look without the solid coverage paint gives. It penetrates the wood but doesn’t build a thick layer on top, so sealing afterward is recommended for outdoor use.
Clear sealers and varnishes add a transparent protective layer, preserving your paint or stain and shielding the wood from moisture, dirt, or scratches. For outdoor signs, sealers with UV protection guard against fading. A polyurethane varnish or spar urethane costs about $10 to $20 per quart and takes 4 to 6 hours to dry, with full curing often requiring several days. Indoor signs can use lighter sealants like clear acrylic spray, which dries quickly but offers less moisture resistance.
Choosing between these finishes depends on where your pallet sign will hang and the look you want. For outdoor durability, start with a stain or paint, then apply at least two coats of outdoor-rated sealer. Make sure the pallet wood is dry, ideally under 15% moisture content, to avoid trapping moisture and causing peeling or warping. Allow each coat to dry fully before applying the next, rushing the process often leads to a sticky or uneven finish that peels faster.
Indoor signs benefit from quicker drying finishes, so water-based stains or acrylic paints combined with clear acrylic sealers work well. These finishes dry within hours, letting you finish your project in a day or less. Test the finish on a small wood scrap to confirm drying times and look. Good results show an even, smooth finish with no tackiness, bubbles, or flaking. Poor results often come from applying too thick a coat, insufficient drying time, or using finishes not rated for the sign’s environment.
Taking time to pick the right finish and letting each layer cure properly protects your pallet sign and keeps it looking good longer. The cost ranges from a few dollars per bottle for paint or stain to $10 or more for quality sealers, but the improved durability justifies the investment for both indoor decor and outdoor displays.
Common Mistakes and How to Fix Them Quickly
Uneven boards and warping are common challenges when working with pallet wood. Warping happens because pallet planks were often exposed to weather before, and moisture changes cause them to bend or twist. To fix this, start by selecting the straightest boards when you remove them from the pallet. You might see mild warping after assembly; applying clamps to flatten the board and letting the wood rest for a day or two can help fix this. For significant warping, try soaking the board in water for 30 minutes, then clamp it flat while drying. Be aware this may not fully restore the wood but usually improves its shape enough for a sign.
Uneven boards in your sign base can create an unfinished look and make painting difficult. Sand any rough or uneven surfaces with medium-grit sandpaper (around 80 to 120 grit). For better results, finish with fine grit (220 grit) to smooth out the wood before painting or staining. Sanding costs only your time and some sandpaper, usually under $10 for a pack, making it a low-cost fix. Gaps between planks can be filled with wood filler that matches your wood color. Once dry, sand the filler flush with the wood. You’ll get a clean, professional base ready for decoration.
Painting or staining unevenly is another frequent problem. Uneven application occurs when the wood surface is too rough, dirty, or has inconsistent absorption. Before finishing, wipe the surface with a damp cloth to remove dust. Use a foam brush or a high-quality synthetic-bristle brush to apply stain or paint evenly. Apply thin coats rather than a thick one, allowing each layer to dry fully (typically 4 to 6 hours for paint, 24 hours for stain) before adding more. Test your finish on a scrap piece of the same wood to see how it absorbs, and adjust brush pressure or number of coats accordingly.
- Select the straightest boards first to reduce warping.
- Clamp warped boards flat and let dry before assembling.
- Sand boards smooth with 80-220 grit sandpaper before finishing.
- Fill gaps with wood filler and sand flush before painting.
- Clean the wood surface thoroughly before applying paint or stain.
- Apply thin coats of finish with proper drying time between layers.
- Test finishes on scrap wood to avoid surprises.
Using these fixes, your pallet sign will look cleaner and last longer. Uneven wood or poor finishing can make a project feel rushed or amateur, but simple preparation and patience produce a durable, attractive sign. Also, wearing gloves and working in a ventilated area during staining or painting ensures safety. Following these steps takes time, expect at least a day or two for proper drying and sanding, but the improved result is worth it.
Creative Customizations for Seasonal and Themed Pallet Signs
Personalizing a pallet sign for weddings, holidays, or specific decor themes starts with choosing a simple message or symbol that fits the occasion. For weddings, phrases like “Mr. & Mrs.” or the couple’s names work well. Holidays call for themed words such as “Joy,” “Thanks,” or “Welcome,” paired with seasonal images like leaves for fall or snowflakes for winter. A good way to keep it simple is to use stencils designed specifically for these events, which you can buy online or print and cut by hand. Use white or black paint for clear contrast on the wood. This method costs under $10 for paint and stencil supplies, depending on what you already have.
Adding embellishments lets your sign show more character without needing power tools or complex skills. For a wedding sign, attach a small artificial flower bouquet or some lace ribbon with a hot glue gun, which costs around $5 to $10 at a craft store. Holiday signs benefit from natural elements like pinecones or small wreaths hung over the top, attached with twine or small nails. Interchangeable decor like seasonal wreaths can make a single sign appropriate year-round, saving time and effort. Keep embellishments lightweight to avoid warping the wood or causing damage when the sign hangs outdoors.
Simple paint motifs are perfect for beginners and offer plenty of charm. For example, paint the whole pallet board in a tropical or pastel color for summer and use a letter stencil to add a fun phrase like “Welcome” or “Gather.” For fall, create a simple border of painted leaves around the edge using a small stencil or by freehand with a sponge brush. The key is using basic shapes or letters and applying one to two coats of acrylic paint, drying for at least one hour between coats. Expect to spend a few dollars on inexpensive acrylic paints and brushes, which last for multiple projects if cleaned promptly.
Below is a reusable script for a wedding-themed pallet sign that suits beginners: paint the pallet base in soft white, stencil the phrase “Together Forever” in black block letters centered on the front, then glue a small cluster of silk flowers to one corner. Finish with a clear coat of outdoor sealer applied with a foam brush to protect your work. This costs about $15 and takes a few hours including drying. For holiday signs, simply swap out the phrase to “Merry & Bright” or “Happy Fall,” and add corresponding small wreaths or pinecone clusters for an instant seasonal update.
Make sure each paint layer dries fully before applying the next to avoid smudging or peeling later; patience here saves rework.
Step-by-Step Action Plan for Your Pallet Sign
Follow these steps to create a sturdy, attractive pallet sign with tools and skills you can manage at home.
- Day 1: Select and safely disassemble pallet wood. Check the wood for damage and remove nails to prepare quality boards.
- Day 2: Sand the boards by hand, focusing on smoothness and removing splinters. The wood should feel smooth to touch without rough patches.
- Day 3: Arrange and join the boards side by side for the sign base. Use wood glue and clamps to hold them tight until fully dry, about 24 hours.
- Day 4: Sketch your design directly on the wood with pencil, then apply paint or stain using brushes or stencils. Let each layer dry completely to avoid smudging.
- Day 5: Apply a clear protective finish like polyurethane or outdoor sealer to guard against wear and weather. Check for an even coat and let it cure per the product instructions.
- Day 6: Attach hanging hardware on the back for wall mounting. Test it by gently hanging the sign to ensure it supports the weight securely.
- Day 7: Add any custom touches, such as seasonal details or decorative elements, with safe adhesives or small nails. Confirm they are firmly attached before display.
Frequently Asked Questions
What Type of Pallet Wood Is Best for Making a Pallet Sign by Hand?
Softwood pallets are best for handcrafting signs because they’re easier to cut and sand. Choose pallets with minimal damage and free of chemical treatments to ensure safety and ease of use.
Can You Make a Pallet Sign Without Power Tools?
Yes, you can make a pallet sign using hand tools like a handsaw, hammer, and screwdriver. This requires more time but gives you control and is safer for beginners.
How Do You Attach Multiple Pallet Boards Securely by Hand?
Use wood strips along the back and wood screws to join boards securely by hand. This method keeps your sign sturdy without needing clamps or specialized clamps.
What Is the Best Way to Transfer Text or Images Onto a Pallet Sign?
Stenciling with paint or using transfer paper works best for applying designs by hand. Stencils allow even beginners to get a clean, professional look on rough pallet surfaces.
How Do You Prevent Pallet Signs from Cracking or Warping over Time?
Apply a clear sealer or outdoor wood finish to protect against moisture and warping. Reapply every year if the sign is hung outside to maintain durability.
How Can You Make Your Pallet Sign Stand Out with Unique Decorations?
Add elements like leather strips, metal accents, or seasonal paint themes for a creative touch. These simple additions give each sign a personalized, eye-catching finish.
Wrapping Up
Making a pallet sign by hand gives you a unique piece for your home while recycling wood in a creative way. Start by choosing good-quality pallet wood and prepare it carefully for smooth, safe crafting. The next step is applying your design with patience and sealing the finished sign to keep it looking fresh for years. Grab your materials, and begin your handmade pallet sign project today.


