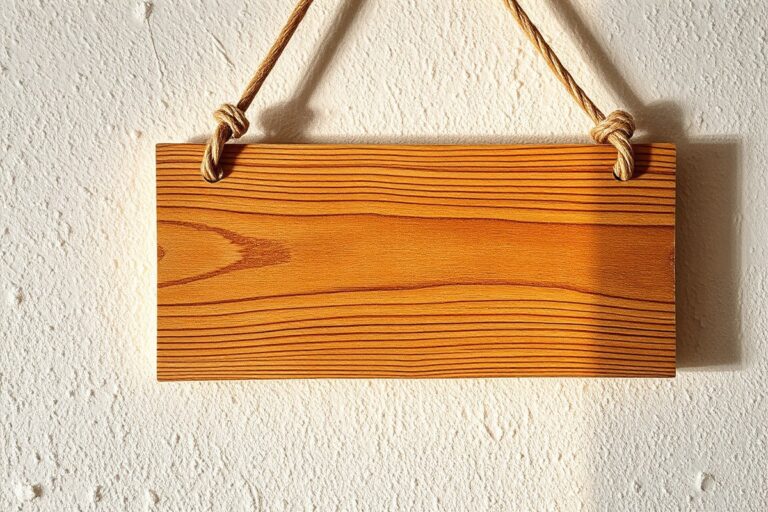
How to Make a Pallet Sign with Cricut: Step-by-Step Guide for Perfect Results
How to make a pallet sign with Cricut starts by selecting pallet wood boards and cutting a vinyl stencil that fits your design space. Use your Cricut machine to cut a precise stencil sized for your pallet, then apply it carefully before painting for sharp, clean results. Starting with a properly assembled pallet base ensures your sign holds together and looks professional.
Key Takeaways
- Choose pallet wood boards around 14″ x 14″ to fit most Cricut stencil designs easily.
- Size your vinyl stencil about 11″ to leave room around the edges of the pallet sign.
- Peel back 2-3 inches of backing on your vinyl stencil to position it precisely on the wood.
- Secure the pallet boards by joining three with leather strips or brad nails for durable support.
- Consider adding 3D elements like spoons or raised letters to make your sign stand out.
- Use scrap materials when possible to keep project costs near $15, much cheaper than buying pre-made signs.
Materials and Tools Needed for a Cricut Pallet Sign

Start by choosing the right wood pallets for your sign. Look for pallet wood that is dry and clean, with a moisture content below 12% to avoid warping and cracking. Ideal boards are between 1/2 inch and 1 inch thick, which provides enough surface to attach vinyl and paint without splintering. Avoid pallets treated with chemicals or marked with “MB” (methyl bromide); instead, opt for heat-treated boards marked “HT” for safe indoor use. Weathered, rustic pallets lend charm, but ensure they have no loose nails or rotten sections.
Using quality vinyl is key for crisp, clean stencil designs on pallet wood. Oracal vinyl is popular among crafters, with Oracal 651, 631, and stencil vinyl each offering different benefits. Oracal 651 is permanent, waterproof, and holds up well on textured pallet wood, making it a top choice for durable signs. Oracal 631 is removable and less adhesive, better for temporary uses or delicate surfaces but might lift on rough pallets. Stencil vinyl or vinyl specifically designed for stenciling has a medium tack and tears easily for detailed edges, helping prevent paint bleed under the stencil. Prices range from about $5 to $10 per 12″x24″ sheet, depending on type and finish.
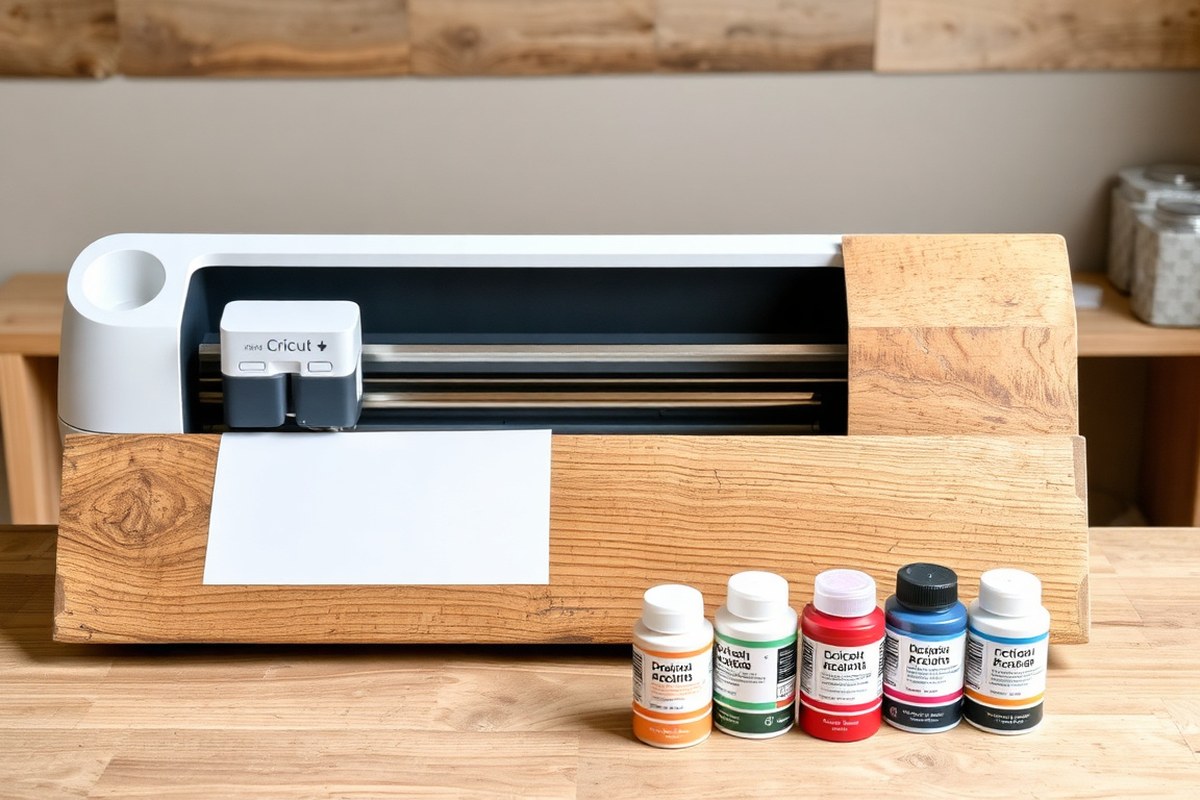
Your Cricut machine is central to cutting precise vinyl stencils. The Cricut Explore Air 2 and Cricut Maker models are excellent for pallet signs due to their ability to cut different vinyl thicknesses and detailed designs. The Maker offers expanded tool compatibility if you want to try engraving or scoring wood boards in the future. Pair your machine with standard grip mats designed for vinyl to hold your material steady without damage.
A few additional tools complete your setup. A good scraper or credit card smooths vinyl onto uneven pallet surfaces, while weeding tools help remove excess vinyl with accuracy. Painter’s tape can hold stencils in place on rough pallet wood before applying paint. Use sheer latex paint or acrylic craft paint in sample sizes for ease and color variety. A small foam roller or stencil brush applies paint evenly without soaking through gaps in the vinyl edges.
For budgeting, pallet wood boards can often be sourced for free from local stores or online marketplaces, though treated pallets or pre-cut wood boards usually cost $5 to $15 per board. Vinyl ranges from $5 to $10 per sheet, and paint supplies vary widely but expect $1 to $5 per sample container. You can adjust your materials depending on your budget and project scale.
Choosing each material thoughtfully ensures your pallet sign project looks professional and lasts. Dry, stable wood prevents paint and vinyl from lifting prematurely. The right vinyl provides clean lines and easy removal of stencil parts, making crisp images possible. Invest in a Cricut model that fits your crafting goals, and gather practical tools like scrapers, tape, and paint rollers for smooth application. This balanced approach saves time and delivers satisfying results every time.
Preparing and Assembling the Pallet Wood Base
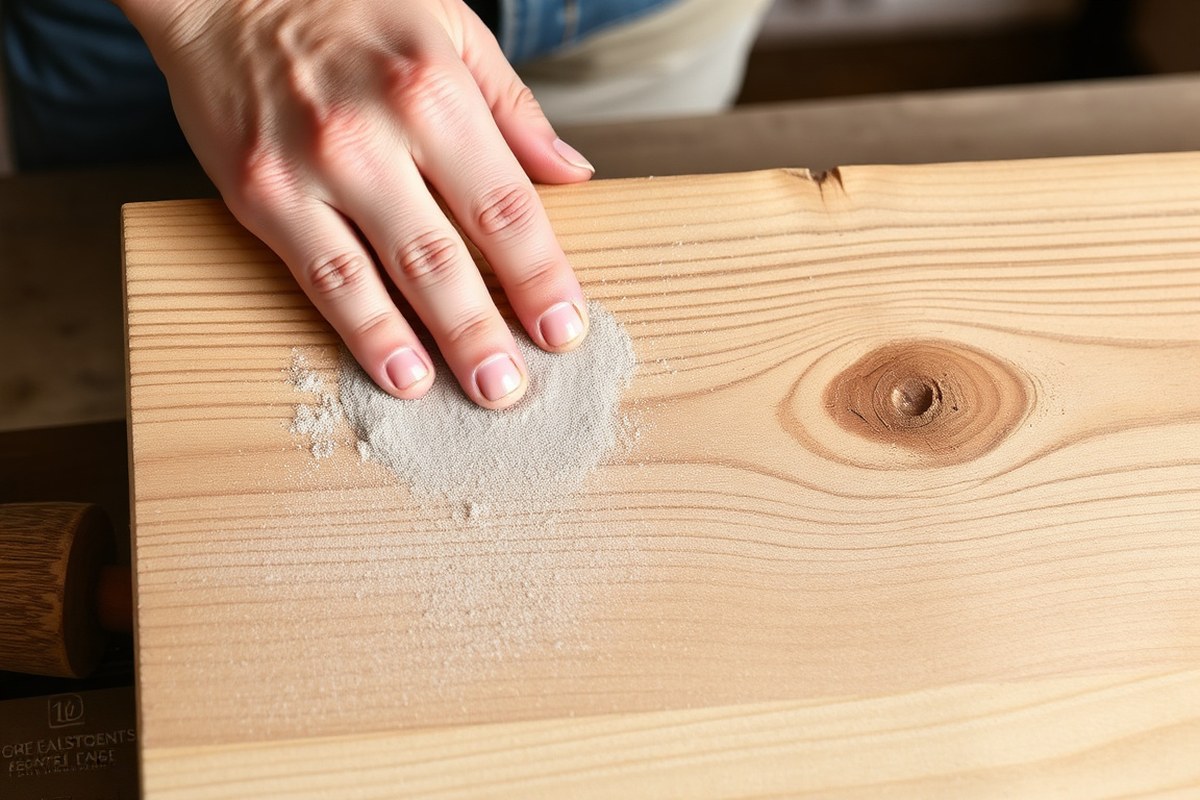
Preparing your pallet wood base starts with cleaning and sanding the wood to remove dirt and rough patches, then assembling the boards securely to form a durable surface. Proper preparation ensures your pallet sign lasts and looks great. Recycled pallet wood can work well once cleaned and fixed as needed.
Cleaning and Sanding the Pallet Wood
Begin by taking apart the pallet carefully if you’re using old wood, removing any nails and staples with a pry bar or hammer. Cleaning the boards thoroughly removes dirt, grease, and any residues. Use warm soapy water and scrub with a stiff brush, then allow the boards to dry completely, usually 24 hours or until fully dry.
Light sanding smooths rough surfaces but leaves some texture for a rustic look. Use medium-grit sandpaper (around 120 grit) to remove splinters and rough patches, then finish with fine-grit paper (220 grit) for an even surface. Avoid sanding too smooth if you want to keep the authentic pallet feel. Optional sealing with a clear wood sealer after sanding can protect the wood but is not required for every project.
- Remove nails and staples carefully from pallet wood.
- Wash boards with warm soapy water and a stiff brush.
- Let boards dry fully before sanding (up to 24 hours).
- Sand boards with medium-grit sandpaper to smooth rough areas.
- Optionally, use fine-grit sandpaper for a smoother finish.
- Seal wood with clear sealer if desired and allow to dry.
Cleaning dirty pallet wood thoroughly avoids paint adhesion problems and ensures better stencil application.
Assembling Pallet Boards Securely
Align the cleaned and sanded boards side by side, offsetting them slightly for a rustic look if preferred. To hold the boards together, place two or three thinner cross slats running perpendicular on the back about 1 to 2 inches from each end. Use wood glue combined with screws or nails for the strongest grip. Wood glue alone may not hold well enough for a sign that will be moved or hung.
Mark your cross slat placement, pre-drill holes to prevent splitting, then fasten screws (1¼-inch screws work well for typical ½-inch thick boards). Pocket holes are an alternative for a cleaner back finish but require a pocket hole jig. Depending on the wood thickness and width, use at least two cross slats for a standard sign size around 14 inches tall by 24 inches wide.
For smaller projects, wood glue and clamps can suffice if you plan to keep the sign indoors. Let glue dry for at least 30 minutes before painting or handling.
- Lay pallet boards flat and arrange spacing or offset.
- Cut two or three cross slats to the width of your assembled boards.
- Position cross slats on the back, about 1 to 2 inches from edges.
- Apply wood glue along the contact edges, spread evenly.
- Clamp pieces together or press firmly.
- Pre-drill pilot holes through the cross slats into boards.
- Screw 1¼-inch wood screws through cross slats to secure.
- Allow glue to dry fully before moving or painting.
Always pre-drill holes to avoid splitting fragile or older pallet wood boards.
Safety Tips for Handling Woods and Paints
Wear gloves and safety glasses when disassembling pallets to protect your hands and eyes from splinters and flying nails. Work in a well-ventilated area to avoid inhaling dust while sanding. A dust mask is highly recommended to prevent respiratory irritation.
Use clamps to secure boards when cutting or sanding to keep your hands clear of the tools. When applying paints or sealers, choose non-toxic options or work outside to reduce inhalation of fumes. Protect your workspace with drop cloths and wear old clothes or a protective apron.
Dispose of used sandpaper, paint rags, and scraps according to local safety guidelines. If uncertain about any chemical product, check the label and use as directed.
- Wear gloves and safety glasses throughout wood prep.
- Use a dust mask when sanding to avoid inhaling wood dust.
- Work in a well-ventilated or outdoor area.
- Clamp wood securely to prevent slipping during cuts or sanding.
- Select paints and sealers with low VOCs for safer application.
- Protect surfaces with drop cloths and wear appropriate clothing.
- Follow disposal instructions for paint-related waste safely.
Respiratory protection is essential during sanding to avoid harmful wood dust exposure.
Designing and Cutting Your Vinyl Stencil with Cricut
Designing and cutting your vinyl stencil with Cricut involves creating or importing your artwork, sizing it to fit your pallet sign, and adjusting the Cricut machine settings to cut the vinyl precisely. This process ensures the stencil fits your wood base and produces crisp, clean edges for your painting.
Creating and Importing Designs into Cricut
Start by opening Cricut Design Space, where you can create a custom design or import an existing image. Most pallet signs feature text, simple graphics, or a combination. You can either use Cricut’s font library or upload your own fonts and images, such as the Freestyle font downloaded from your computer.
To import a design, click on the “Upload” button, select your file (PNG, SVG, or JPG formats work well), and clean up the image using the canvas tools. For text, use the “Text” tool to type your message, then customize the font type, size, letter spacing, and alignment. Avoid overly intricate details that won’t cut well on vinyl.
Maintaining simplicity in your design helps prevent issues during cutting and when applying the stencil. Designs with connected letters or shapes reduce the risk of vinyl pieces falling apart.
Sizing and Positioning the Stencil for Your Pallet
Measuring your pallet correctly is important before setting the design size. Use a tape measure to get the width and height of the wood boards you’ll stencil. This measurement guides you in resizing the design within Cricut Design Space to fit your available space without overcrowding the pallet surface.
If your design is larger than the Cricut cutting mat limit (typically 12 inches by 24 inches), split the design into two or more sections. This can be done by duplicating and cropping parts of your design in Design Space or using the slicing tool to cut it into smaller pieces.
Position the segments carefully, noting the cut lines for easy realignment on your wood. Correct sizing and sectioning avoid wasted vinyl and make assembly straightforward.
- Open Cricut Design Space and start a new project.
- Use the “Text” or “Upload” tool to add your design or font.
- Adjust the font style, size, and spacing to your preference.
- Measure your pallet and set the design dimensions accordingly.
- Split the design into smaller pieces if it exceeds 12″ x 24″.
- Arrange design pieces on the virtual mat to match vinyl cutting sections.
- Set the design to “Cut” and “Vinyl” material type before sending to the machine.
Optimizing Cricut Settings for Vinyl Cutting
Setting the correct cut parameters on your Cricut machine ensures clean, accurate cuts on adhesive vinyl, making stencil application easier. Both the Cricut Explore Air 2 and Maker handle vinyl, but adjusting blade pressure and speed may vary.
Select “Vinyl” from the materials list in Design Space to set default settings, usually a fine-point blade, moderate pressure, and medium speed works well. Use a standard grip mat, and clean it to ensure the vinyl stays flat during cutting. Test cut a small section to verify the blade cuts through the vinyl layer but not the backing paper.
After cutting, carefully weed away the vinyl sections not part of your stencil using a weeding tool. This results in sharp stencil edges that paint won’t bleed through, giving your pallet sign professional-quality results.
Applying the Vinyl Stencil to Your Pallet Sign
Applying your vinyl stencil to pallet wood requires careful handling of transfer tape and patience to avoid bubbles or peeling. The right technique ensures sharp, even paint lines that showcase your design on the uneven pallet surface.
Preparing the Vinyl and Transfer Tape
Start with removeable vinyl if you plan to lift the stencil without damaging paint or wood. Smooth pallet boards by sanding lightly before applying vinyl, minimizing bumps or rough spots that cause gaps underneath.
Cut a piece of transfer tape slightly larger than your stencil. Peel the backing off just a few inches to expose the sticky side without touching the adhesive face of the vinyl. This prevents damage or lost tackiness on your stencil.
Positioning and Smoothing the Stencil
Align the vinyl stencil carefully by peeling back 2 to 3 inches of backing from the transfer tape and placing that section onto the pallet surface. Holding the painted or sanded wood steady, slowly press the exposed vinyl letters onto the board.
Use a firm scraper or a Cricut scraper tool to burnish the stencil, working from the center outwards. This pushes out air and helps flatten the vinyl into the wood’s texture. Gradually pull the rest of the backing down, smoothing as you go to prevent bubbles or folds.
Keep the transfer tape flat against the pallet while applying firm but gentle pressure, avoiding stretching or lifting edges. This helps the vinyl adhere strongly and creates crisp paint edges during stenciling.
- Sand the pallet surface lightly to smooth out rough areas.
- Cut transfer tape slightly bigger than the stencil size.
- Peel a small section (2-3 inches) of the transfer tape backing and stick it to the vinyl stencil.
- Align and secure the exposed part of the stencil onto the pallet.
- Burnish the vinyl with a scraper, pressing firmly from center to edges.
- Slowly remove the backing while continuing to smooth the stencil.
- Make sure there are no air bubbles; smooth out any you find carefully.
- Wait a few minutes for the vinyl to fully adhere before painting over.
Removing the Stencil Without Damage
Allow the paint to dry completely before lifting the vinyl stencil to avoid smudging. Peel the stencil back slowly at a sharp angle, pulling it away from the pallet surface rather than upward. This reduces the chance of lifting paint or damaging the wood grain.
If edges start to lift unwanted paint, score lightly along the stencil edges with a craft knife before removal. Pulling the vinyl off too fast or too soon often causes paint peeling or blurry lines.
Painting and Filling Your Pallet Sign Stencil
Painting over a stencil on your pallet sign works best when you use the right type of paint and apply it carefully to get crisp edges. Acrylic paint is a popular choice because it dries quickly, usually within 15 to 30 minutes, and adheres well to wood. Chalk paint is another option that gives a matte, vintage look and also dries fairly fast, typically in 1 to 2 hours. Spray paint can deliver an even coat but requires a steady hand and good ventilation. Avoid applying too much paint at once, as excess paint can bleed beneath the stencil edges, blurring your design.
Before you start painting, run your finger or a tool firmly along all stencil edges to press them down completely. This helps reduce paint seeping underneath. Use a small sponge or foam brush to dab the paint onto the stencil rather than brushing in long strokes. Dab in a gentle tapping motion to build color gradually. This technique prevents oversaturation and bleeding. For sharper lines, you can also use a stencil brush that’s designed with short, stiff bristles for controlled application.
Freehand painting without a stencil is an option if you’re confident in your brush control and want a more personalized or rustic look. However, Cricut-cut stencils provide more precision and consistency, especially for longer quotes or intricate designs. Using Cricut stencils saves time and helps ensure your lettering stays uniform. Painting with stencils typically speeds up the process because you don’t have to guess letter placement or shape.
Drying times vary by paint type and room conditions. Acrylic usually dries to the touch within 15 to 30 minutes, but wait at least an hour before removing the stencil to avoid smudging. Chalk paint may take 1 to 2 hours to dry enough for stencil removal. Sprays can dry in minutes but consider multiple thin coats with brief dry times between. Removing the stencil too soon risks lifting wet paint, while waiting too long might make peeling off the stencil difficult.
Depending on your design, expect the painting and filling of your stencil to take around 30 minutes to 1 hour. This range includes pressing down stencil edges, carefully dabbing paint, allowing drying time, and gently pulling off the stencil. Adding multiple colors or layering paints will lengthen this time. For example, adding an undercoat in turquoise, sealing the stencil with Mod Podge, and painting over it with chalkboard paint can create a two-tone effect but requires additional drying periods at each step.
Use just a small amount of paint on your brush or sponge; overloading it not only wastes paint but also causes bleeding under the stencil edges.
Adding 3D Elements and Decorative Touches
Adding 3D elements and decorative touches gives your pallet sign depth and character beyond flat paint and vinyl. You can use wooden letters, hooks, paper or fabric flowers, or seasonal decor like mini pumpkins and pinecones to create interest and personalize your sign. These embellishments work well combined with painted stencils from your Cricut design to highlight key words or create themed accents.
Wooden letters offer a strong visual impact and are easy to attach using wood glue or small finishing nails. Choose letters sized to fit your sign, typically 4 to 6 inches high works well for a standard 12×24-inch pallet. Arrange them centered or asymmetrically to fit your design. For lighter or smaller elements like paper flowers, use hot glue for a secure hold without damaging the wood. Paper and fabric flowers cut on your Cricut can be made cheaply with assorted cardstocks or felt, letting you match spring pastels or rich fall tones.
Hooks add function and charm, great for signs meant to hold keys or lightweight items. Small brass or black hooks cost just a few dollars each and attach easily with screws or strong adhesive strips rated for outdoor use if your sign will hang outside. Space hooks evenly and test stability before finishing.
Seasonal decor gives signs a timely feel. For winter, pinecones, faux snow spray, or miniature skis improve themes like “Ski Lodge.” In fall, consider acorns, orange paper leaves, or tiny gourds. Use hot glue or staple guns (taking care with wood thickness) depending on your materials’ weight. These add-ons typically cost between $5 and $15 at craft stores, keeping your project budget-friendly.
Integrating 3D elements with your stencil painting means planning layers. Paint your base and stencil first, let it dry 24 hours, then apply embellishments. This avoids smudges and allows precise placement. Balance painted and physical components so one does not overpower the other, paint works well for background words, while wooden letters or decorations draw the eye forward.
For quick sign updates, try adding just metal hooks or a few wooden letters glued on top of a dry stencil design. These add immediate texture with minimal crafting time, under 30 minutes. More detailed signs with layered flowers or multi-piece arrangements require extra drying and positioning time, often several hours total, but yield a standout piece for gifting or decor.
Be cautious attaching heavy items to thin pallet boards; test pieces off your sign to avoid breakage. Use clamps or weights on glued parts to ensure strong bonds when drying. Good results show clean, crisp paint edges with securely fastened 3D elements that don’t wobble or shift. Poor adhesion or messy glue marks can detract from the polished look you want, so take your time placing and drying each addition.
Protecting and Finishing Your Pallet Sign for Longevity
Protecting your finished pallet sign is essential to keep it looking fresh and vibrant, especially if you want it to last for years. Applying a suitable sealant creates a barrier against dust, moisture, and UV rays, preventing paint from chipping or fading. For indoor signs, a clear acrylic spray or a water-based polyurethane works well. Spray sealants are easy to apply and dry quickly, hold the can about 8 to 12 inches from the surface and spray in light, even coats. Two to three coats, allowing 15 to 30 minutes drying time between each, usually provide enough protection. Acrylic sprays cost around $5 to $10 per can and are widely available at craft or hardware stores.
Making pallet signs for outdoor use requires products that can stand up to rain, sun, and temperature swings. Outdoor-rated polyurethane or marine varnish is a better choice here since these finishes resist water and UV damage. Choose a clear, oil-based polyurethane or spar urethane labeled for exterior use. Apply with a synthetic brush in thin layers, brushing along the wood grain. Let each coat dry completely, often 4 to 6 hours, before applying the next. Most outdoor sealants need at least 3 coats for solid protection. A quart of outdoor polyurethane ranges from $12 to $20 and covers approximately 125 to 150 square feet, so one container should seal several signs. Avoid using products that yellow over time, especially on light-colored paint.
The vinyl stencils cut with your Cricut are durable for indoor projects, but for outdoor signs, seal the entire sign, including the vinyl, with the same outdoor polyurethane. This keeps the vinyl adhered and blocks moisture from getting underneath, which can cause peeling. Before sealing, make sure your paint is fully cured, which might take 24 to 48 hours depending on the brand and thickness. Remember to wear a mask and work in a well-ventilated area to avoid inhaling fumes from sprays or polyurethane.
Maintenance involves occasional cleaning and reapplication of the finish. Dust your indoor pallet sign with a soft cloth regularly. For outdoor signs, rinse off dirt gently with water and a mild soap every few months. Inspect for signs of wear like fading or flaking paint and add a fresh coat of sealant as needed, generally every one to two years. Leaving the pallet sign out in harsh weather all year can shorten its lifespan, so consider moving it under cover or indoors during storms or winter months.
Using Mod Podge as a sealer works well for indoor uses, especially on smaller signs or those with multiple decorative layers. Apply it with a foam brush in thin coats and allow each to dry for about an hour. Avoid using Mod Podge for outdoor pieces unless it’s the outdoor formula variant, which offers some water resistance but less durability than polyurethane. Mod Podge is generally cheaper, around $6 to $10 for an 8-ounce jar.
Common Problems and How to Fix Them When Making Pallet Signs
One common mistake when using vinyl stencils on pallet wood is poor adhesion of the vinyl. Pallet wood often has rough, uneven surfaces that can keep the stencil from sticking tightly. This causes paint to seep underneath, creating blurry edges. To fix this, make sure the wood surface is clean and dry, and press the stencil down firmly using a scraper or a credit card. Heat from a hairdryer can warm the vinyl slightly, improving its stickiness. Choose high-quality permanent adhesive vinyl designed for outdoor use, which tends to grip better on wood.
Paint bleeding or peeling usually results from applying too much paint or removing the stencil too soon. Acrylic and chalk paints work best because they dry quickly and adhere well. Apply thin layers of paint using a sponge or stencil brush with a gentle tapping motion rather than brushing hard. Let each coat dry a few minutes before applying the next. Avoid overloading your brush or sponge to keep paint from pooling under the stencil edges.
- Clean and lightly sand the wood surface before applying the stencil.
- Press the vinyl stencil firmly and evenly onto the pallet wood.
- Use thin, multiple layers of acrylic or chalk paint instead of one thick coat.
- Remove the stencil slowly after the paint is dry to the touch, usually 5-10 minutes.
- When paint bleeds, touch up the edges with a fine brush once dry.
- For stubborn vinyl, warm it slightly with a hairdryer before peeling off.
- Store leftover vinyl stencils flat to maintain their shape for reuse.
To troubleshoot vinyl sticking or peeling off, first check if the wood is too rough or dusty. Add extra time to clean and sand the surface, then try pressing the stencil on again. Paint that leaks under the stencil should be left to dry fully, then gently scrape off the excess with a craft knife or sandpaper. Any peeling paint after removing the stencil might mean the paint layer wasn’t dry enough, so in future projects, allow a few more minutes before removal.
Removing the vinyl stencil too soon is the fastest way to damage your paint edges, wait until the paint is dry to the touch and peel off slowly at a 45-degree angle for the cleanest results.
Removing the stencil without damaging the paint requires patience. Peel the vinyl back on itself slowly rather than pulling straight up. When the paint sticks to the vinyl, warm the area with a hairdryer to soften the adhesive bond. This prevents lifting or smudging the paint underneath. Using transfer tape when applying the stencil helps maintain stencil integrity during removal.
Step-by-Step Action Plan for Your Cricut Pallet Sign
Follow these steps to create your custom pallet sign efficiently and with confidence.
- Before you start: Gather all materials and tools, including pallet wood, paint, Cricut vinyl, and protective finish. Check everything is clean and ready to use.
- Day 1: Prepare and assemble the pallet base by sanding and securing boards together. Your base should feel sturdy and smooth to the touch.
- Day 2: Design your stencil on the Cricut software, then cut the vinyl. Verify the stencil details match your design and the cut vinyl peels easily.
- Day 3: Apply the vinyl stencil firmly onto your pallet base, ensuring no bubbles. Press firmly, especially around the edges, to avoid paint bleed.
- Day 4: Paint over and fill the stencil carefully, using multiple light coats for even coverage. Wait for the paint to dry fully before peeling the stencil.
- Day 5: Add 3D elements or other decorative touches with glue or nails as desired. Confirm attachments are secure and positioned as intended.
- Day 6: Apply a protective finish such as a clear sealant to protect your sign from moisture and wear. The sign should have a subtle, even sheen when dry.
- After 1 week: Inspect your sign for any flaws like paint peeling or loose decorations. Touch up paint or reinforce elements as needed to maintain durability.
Frequently Asked Questions
Can I Use Other Cricut Machines Besides the Explore for Pallet Signs?
Yes, machines like Cricut Maker also work well for cutting vinyl stencils. Just adjust settings based on your material, but the basic process remains the same for making pallet signs.
How Do I Size My Design Correctly for Different Pallet Wood Dimensions?
Measure your pallet wood first, then size your design slightly smaller to fit well. For example, a 14″ x 14″ pallet sign fits a design about 11″ wide to leave a comfortable border.
What Type of Paint Works Best for Painting Pallet Signs?
Acrylic paint is ideal because it dries quickly and adheres well to wood and vinyl stencils. It also offers vibrant colors and durability for indoor decor.
Can I Make a Weatherproof Pallet Sign with a Cricut?
Yes, use outdoor-grade paint and seal with a clear waterproof finish to protect against the elements. This allows your pallet sign to last longer outside.
How Do I Create 3D Elements for My Pallet Sign Like the Spoons and Letters?
Cut or source lightweight 3D pieces and glue them securely after painting. Adding these elements can give your sign a unique and eye-catching effect.
What Are Leather Strips Used for in Pallet Signs?
Leather strips can be both decorative and functional, used to hang multiple pallet boards together or as a rustic hanging method. They add charm and stability.
Final Thoughts
Making a pallet sign with your Cricut machine opens up many creative possibilities. Once you complete your first sign, try customizing different phrases or adding seasonal decorations to fit your space. Start your next project by experimenting with new stencil designs in the Cricut software today.