How to Fill CNC Carving with Epoxy: A Complete Guide for Precise, Bubble-Free Results
How to fill CNC carving with epoxy starts by preparing the carving to ensure a smooth, clean surface free of dust or debris. Choose a high-quality epoxy that suits your project’s depth and durability needs, then carefully control pouring and curing to avoid bubbles and overflow. Proper preparation and precise application are key to a flawless finish.
Key Takeaways
- Clean the carving thoroughly to remove dust and oils before epoxy application for better adhesion.
- Use clear or tinted epoxy with low viscosity to fill intricate CNC carve details effectively.
- Build a containment berm using painter’s tape or 100% silicone caulk to prevent epoxy overflow.
- Mix epoxy components precisely as per manufacturer instructions to ensure proper curing and strength.
- Pour epoxy slowly into the carving to minimize bubbles and fill all recesses evenly.
- Wait at least 90 minutes before applying a second coat if the first is not fully level.
How to Prepare CNC Carvings for Epoxy Filling
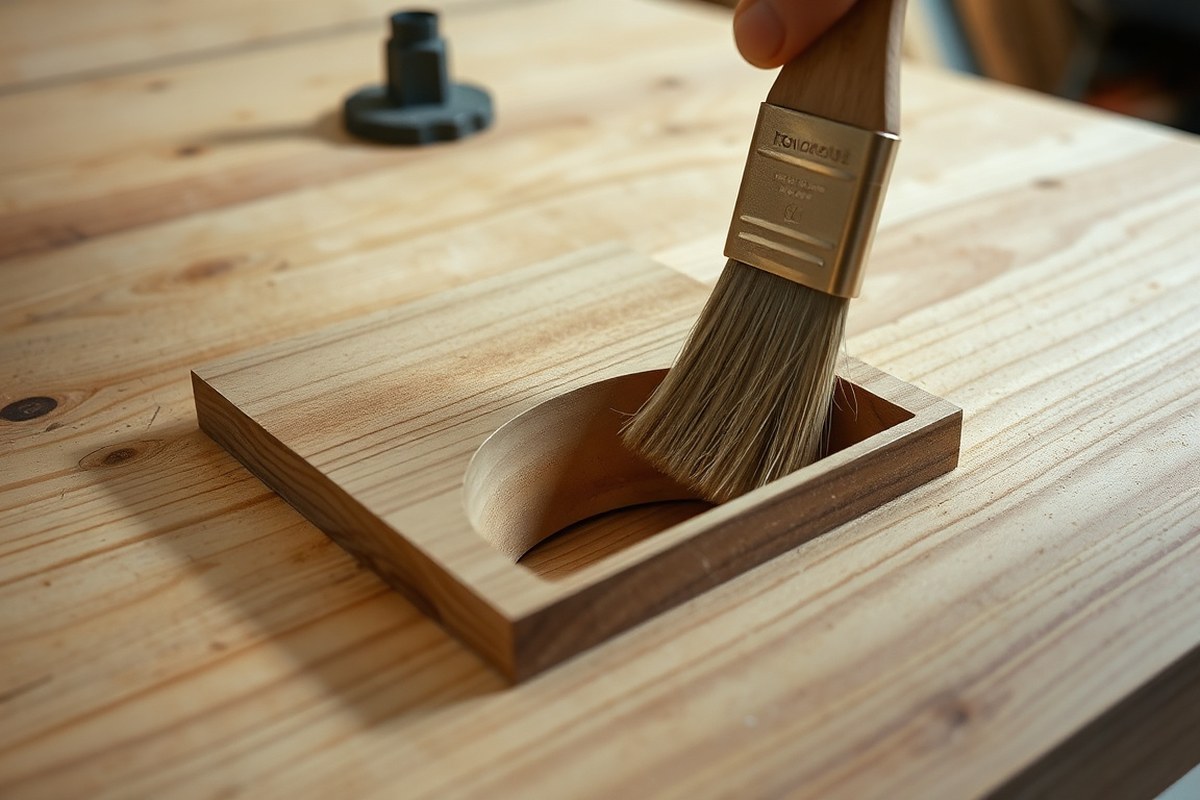
Proper preparation of your CNC carving ensures a clean, strong epoxy fill and protects the surrounding wood from unwanted drips or staining. Cleaning removes dust and debris that might interfere with adhesion. Sealing raw wood prevents it from absorbing the epoxy or bleeding color into the resin. Masking and containment help control the epoxy pour and avoid mess or damage to areas you want to keep clear. Use this checklist to prepare your CNC carving before pouring epoxy:
- Clean the carved recess and surrounding area. Remove dust, chips, and oils using a brush and tack cloth. For better adhesion, wipe the surface lightly with a damp cloth or denatured alcohol and let it dry completely. This step usually takes 5 to 10 minutes but is key to avoiding bubbles or weak bonding.
- Seal the raw wood inside and around the carving. Apply a thin coat of clear wood sealer or thinned epoxy onto the wood surface. This prevents your colored or clear epoxy from soaking into the wood and discolouring it. Allow the sealer to dry according to the product instructions, typically 30 minutes to 1 hour. Using a thinned epoxy resin for sealing reduces waste and provides excellent protection.
- Create a containment barrier (berm) around the carving. Use painter’s tape to mask off the wood surface beyond the edges of the recess. For deeper or larger pours, form a berm using 100% silicone caulk applied along the edge of the carved pocket. Let silicone cure overnight to create a flexible, epoxy-tight seal that prevents leaks. Thin wall tubing or strips of plastic can also serve as containment around bolt holes or irregular shapes.
- Protect the surrounding wood from drips. Cover adjacent surfaces with painter’s plastic, masking paper, or cardboard. Use painter’s tape to secure protective covers and prevent epoxy from spreading under edges. This saves cleanup time and preserves your wood’s finish.
- Ensure the work surface is level. Place the piece on a flat, stable surface and check with a spirit level. Leveling prevents epoxy from pooling unevenly or flowing out of the containment barrier during curing.
- Double-check sealed and masked areas. Confirm all surfaces that contact epoxy are sealed and contained. Missing a spot can cause epoxy to soak into the wood or leak, leading to uneven colour or difficult clean-up.
Following this preparation routine will help your epoxy fill adhere properly without discoloring or leaking, and keep your surrounding wood clean. Attention to detail here reduces rework and improves the final finish.
Choosing the Right Epoxy for CNC Carving Fills
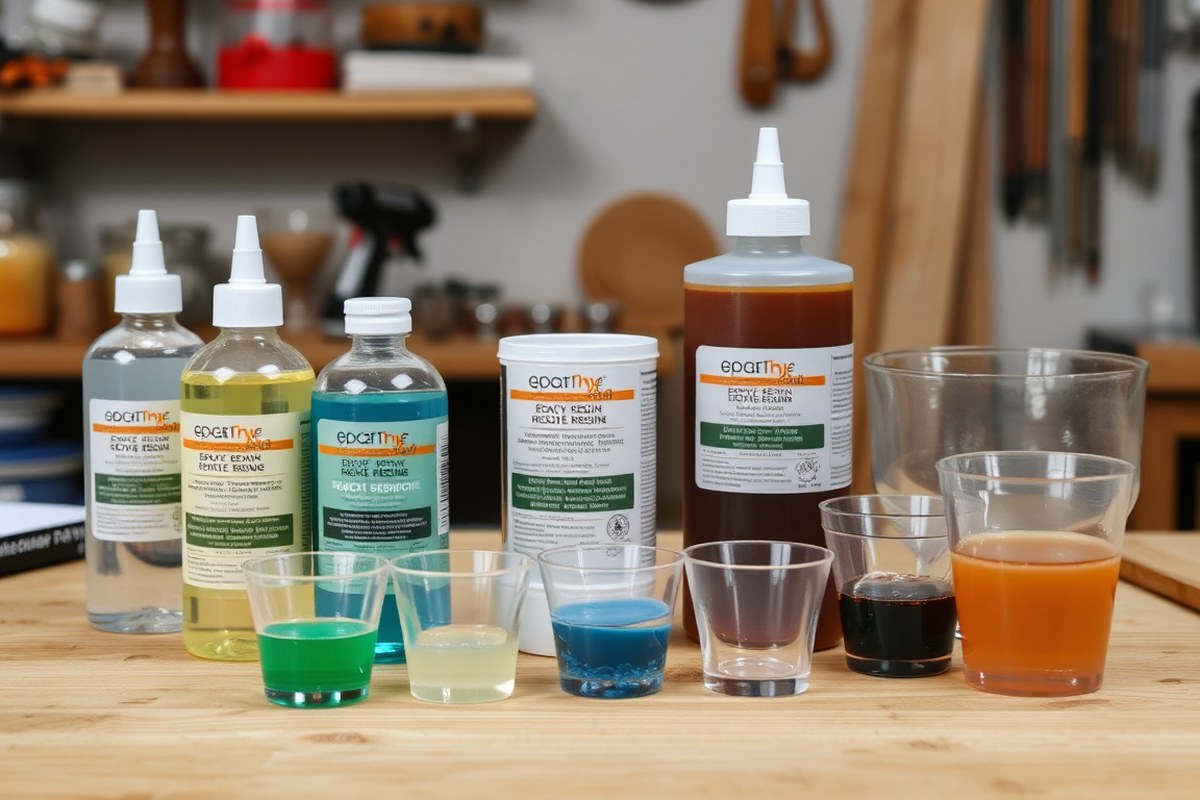
For CNC carving fills, marine-grade epoxy resins are the top choice because of their strong adhesion, low shrinkage, and water resistance. Epoxy like West Marine 105 combined with a slow hardener (e.g., West 206) works well, offering extended working time for detailed fills and layering. Such formulations cure to a hard, clear finish that bonds securely to wood and resists cracking. This type of epoxy typically costs around $50 to $70 per gallon, which is reasonable for hobby-grade use. Avoid quick-set or 5-minute epoxies because they can shrink excessively and may not bond evenly in deep or detailed carvings.
Adding pigments or dyes to the epoxy is a common practice to improve aesthetics or blend the fill with the wood. You can use liquid or powdered epoxy pigments, mica powders, or even alcohol-based dyes. Pigments blunt translucency and provide color opacity, while mica powders add shimmer or metallic effects. Keep pigment amounts below 5% of total epoxy volume to avoid weakening the cure or increasing bubbles. Mix pigments thoroughly with the resin before adding the hardener to achieve even color and prevent clumping.
Alternatives to epoxy for carving fills include polyester resin, polyurethane resin, or two-part acrylic fillers. These may cure faster or cost less but tend to shrink more and have weaker adhesion, making them less suitable for CNC fills with fine detail. Polyester, in particular, emits stronger fumes and requires better ventilation, while polyurethane can yellow over time. Epoxy remains the best balance of durability, clarity, and ease of use for woodworkers aiming for a clean, professional finish.
| Epoxy Type | Working Time | Cost (per gallon) | Shrinkage | Best Use |
|---|---|---|---|---|
| Marine Epoxy (e.g., West Marine 105 + 206 hardener) | 4-6 hours | $50-$70 | Low | Deep fills, layered pours, clear finish |
| Standard 5-minute Epoxy | 5-10 minutes | $20-$40 | Medium | Small fills, quick repairs |
| Polyester Resin | 10-20 minutes | $30-$50 | High | Cost-sensitive fills, fast cures |
For improved fill stability, consider mixing small aggregate like river rock or sand into epoxy to reduce the total resin used and add mechanical strength. Use a ratio around 20% resin to aggregate by weight for a workable mix that fills well. Tools such as a small ice cream scoop or chip brush help apply epoxy precisely into narrow or deep carvings without mess.
Epoxy resin can cause allergic reactions over repeated exposure; always wear gloves and work in a well-ventilated area to minimize risks.
Building a Containment System to Prevent Epoxy Overflow
To keep epoxy contained during pouring, build a berm or dam around the carved recess. This prevents overflow and messy spills. Silicone caulk is a popular choice because it sticks well, is flexible, and creates a watertight barrier that epoxy can’t penetrate.
Using 100% Silicone Caulk as a Berm
Apply a bead of 100% silicone caulk around the edges of the CNC-carved pocket before pouring epoxy. This forms a flexible barrier that resists the epoxy’s sticky nature. Use a caulking gun fitted with a smooth nozzle for better control. Smooth the bead with a damp finger or a caulk finishing tool to seal gaps and create a neat dam. Here is how to create a silicone berm step-by-step:
- Clean the area around the pocket to remove dust and oils, ensuring good adhesion.
- Load your caulk gun with 100% silicone caulk, preferably clear or color-matched.
- Apply a continuous bead along the entire edge of the carved recess, about ¼ to ½ inch wide and high enough to contain the epoxy.
- Smooth the bead immediately using a wet finger or caulk tool to seal all gaps and achieve uniform height.
- Let the silicone cure completely before pouring epoxy, following the manufacturer’s instructions.
Creating this containment berm prevents the epoxy from flowing outside the carved area, making cleanup easier and improving the final appearance of the fill.
Drying and Curing Times for Different Berm Materials
The drying time for a silicone berm depends on the product’s thickness and brand but typically ranges from 24 to 48 hours at room temperature (70°F). Full cure means the silicone is no longer tacky and forms a strong barrier resistant to epoxy.
Using silicone caulk that meets 100% silicone standards will ensure cure times stay within this range. Avoid rushing the pouring process if the berm isn’t fully cured; uncured silicone can mix with the epoxy and ruin the fill. Other materials like hot glue or masking tape can be used temporarily, but their drying or setting times are much shorter and less reliable for longer pours or thicker epoxy fills.
Alternative Containment Materials and Setup Tips
Besides silicone, caulking hot glue can serve as a quick containment berm for shallow pockets. Apply a thick line around the recess edges with a hot glue gun. The glue hardens within minutes, providing an immediate but less flexible dam. Hot glue is cheaper and easier to remove but more prone to epoxy seepage if the surface isn’t fully sealed.
Another option is using painter’s tape combined with a thin plastic strip or wooden edge clamped in place around the carving. Seal the tape edges thoroughly to prevent epoxy leaks. This method works well on flat panels or shallow pockets but can be fiddly for complex contours.
Choose a berm height 1/8 to 1/4 inch taller than the intended epoxy level to allow for surface tension and slight overflow. After pouring and nearing cure, carefully remove silicone or tape containment to reveal clean epoxy lines.
Mixing and Pouring Epoxy for CNC Carving Fills
Mixing and pouring epoxy properly is key to achieving a smooth and bubble-free fill for your CNC carving. Accurate measuring, careful mixing, adding pigments if needed, pouring slowly, and using heat to pop bubbles all contribute to a clean result. Following these steps helps avoid imperfections and ensures a consistent epoxy fill.
Measuring and Mixing Epoxy Components
Start by measuring the resin and hardener precisely according to the manufacturer’s ratio, usually 1:1 or 2:1 by volume. Accurate measurements prevent under or over-curing, which can cause sticky or weak fills. Use a disposable cup or mixing container, and stir the components thoroughly for at least 2-3 minutes. Slow, steady mixing helps reduce air bubbles introduced during the process.
Choose the right epoxy based on the carving depth. Typical thin fills use standard epoxy with a surface cure time of 20-30 minutes. For deeper carvings over 1 inch, pick a slow-curing epoxy formulated for deep pours, which prevents excessive heat buildup that could crack the fill.
- Measure resin and hardener exactly by volume, following product instructions.
- Pour them into a clean mixing container.
- Stir the mixture slowly and thoroughly for 2-3 minutes, scraping the sides and bottom.
- Check the mix for uniformity and no streaks before proceeding.
Adding Pigments and Flow Additives
Add pigments or dyes designed for epoxy to customize the colour of your fills. Start with small amounts, usually about 2-5% of the total epoxy volume, and mix until fully blended. Epoxy pigments made of powders or liquid dyes specifically for resin work best and won’t affect curing time.
For better flow into detailed or narrow gorge areas in your CNC carving, consider adding a flow additive like a low-viscosity clear glue or epoxy thinner made for resin. Stick to product recommendations, keeping additives to no more than 5% volume. This reduces epoxy thickness, helping it settle smoothly without leaving gaps or trapped air. Keep in mind, adding too much pigment or flow agent may change curing time or hardness, so test small batches before full application.
Techniques to Pour and Spread Epoxy Without Bubbles
Pour epoxy slowly and close to the carving surface to lower the chance of air bubbles forming. Aim to fill the carving in a continuous pour rather than multiple spots to prevent layering lines. If your carving has deep or complex recesses, pour in stages but allow each to partially set to minimize bubble trapping.
Use a small disposable stick or spreader to gently move the epoxy around, pushing it into corners and details. Poke any obvious trapped air bubbles with the stick to release them to the surface. Avoid overworking the epoxy, which can introduce more bubbles or streaks.
- Pour epoxy slowly and close to the carving to reduce splashing air entry.
- Fill cavities in a continuous pour; for deep pockets, use multiple stages with partial curing.
- Use a stick or spreader to push epoxy into edges and corners quickly.
- Pop any visible bubbles by poking them with the stick or pin gently.
Using Heat Guns or Torches to Remove Air Bubbles
After pouring, pass a heat gun or propane torch quickly over the epoxy surface to pop bubbles. Hold the heat source 6 to 12 inches away and keep it moving to avoid overheating or scorching the epoxy. A few quick passes of hot air or flame burst trapped bubbles on the surface, causing them to rise and pop.
This method is especially effective because most bubbles form at the top of the epoxy, not within. Heat also slightly thins the epoxy surface, helping it settle smoother. Avoid holding heat too close or too long, as excessive heat can cause discoloration or cracking.
How Long Does Epoxy Take to Cure in CNC Carvings?
Epoxy curing time varies widely depending on the type of resin, the thickness of the pour, and ambient conditions like temperature and humidity. Most standard two-part epoxies used in CNC carving projects become tack-free within 4 to 6 hours but require at least 24 to 72 hours to fully cure. You can expect a complete cure, meaning the epoxy hardens completely and reaches its full strength and clarity, after about one week under ideal conditions.
Thin pours of epoxy, such as those under 1/8 inch thick, cure faster and more evenly because heat dissipates quickly. For deeper carvings, especially those over 1/4 inch thick, it’s best to apply epoxy in multiple, thinner layers. Each layer should partially cure for several hours before pouring the next. This approach prevents excessive heat buildup, which can cause cracking or yellowing. For example, if filling a 1/2 inch deep cavity, pour 1/8-inch layers and wait around 6 hours between pours. Some slow-curing epoxies allow pours up to 1/2 inch thick but require longer wait times before sanding and finishing.
Choosing an epoxy with a slower cure time helps in thick fills, giving the resin time to cure without overheating. Fast-curing epoxies may be ready for sanding in 6 to 12 hours but usually require the project to be small or shallow. Conversely, slow-cure epoxies can take 24 hours or longer to reach full cure and help reduce the risk of bubbles or uneven surfaces in larger fills.
Environmental factors have a big impact on epoxy curing. Temperatures between 70°F and 80°F (21°C to 27°C) promote stable curing. Lower temperatures slow down the chemical reaction, increasing curing time significantly, while temperatures above 85°F (29°C) speed curing but can cause cracks or uneven cures. Humidity doesn’t affect all epoxies equally, but high moisture can cause cloudiness or surface imperfections in some formulas. Pouring and curing epoxy indoors or in a temperature-controlled environment gives the best results. Outdoor fills run the risk of dust contamination, direct sunlight, and unpredictable temperatures, which can interfere with curing.
To monitor curing, you can touch the surface to check if it is tacky or hard. If sticky, it needs more time. When hard but still soft under pressure, allow more curing before sanding. Wait at least 5 full days for final hardness and chemical resistance before subjecting the filled carving to heavy handling or finishing steps. Skipping proper cure times often leads to soft spots or dents that show up later.
Be careful not to pour epoxy too thick at once; thick pours generate heat that causes cracking or yellowing, build your fill in layers for a smooth, durable finish.
Sanding and Finishing Epoxy-Filled CNC Carvings
Sanding and finishing epoxy-filled carvings requires carefully leveling the epoxy flush with the wood surface before smoothing it to a flawless finish. This process prevents uneven surfaces and ensures the durability and aesthetics of your project. Using a step-by-step sanding progression with the right grit sandpapers helps you avoid scratches or overheating, producing a clean, polished look.
Starting with Coarse Grit Sandpaper
Begin by using coarse grit sandpaper to even out the epoxy and wood surfaces. Choose a grit between 80 and 120, as this range effectively removes excess epoxy without damaging the surrounding wood. Work carefully to avoid gouging the wood or sanding too deep into the epoxy, especially if the fill is shallow.
Keep the sanding motion consistent and avoid staying too long in one spot to prevent heat buildup, which can cause epoxy burns or melt the resin slightly. Light pressure paired with a flat sanding block helps maintain an even level across the carve.
Progressively Moving to Finer Grits
After leveling, switch to finer grits to remove sanding scratches and prepare the surface for polishing. A typical progression starts at 220 grit, then moves to 320, and finally 400 grit sandpaper. Each step smooths deeper scratches left by the previous grit, so take your time with each phase.
Water sanding can help minimize dust and reduce heat, but be sure your epoxy has fully cured (usually at least 72 hours) to prevent damage. Always dry the surface completely before moving to finer grits. This careful progression ensures the epoxy blends smooth with the wood, preventing visible transitions.
Final Polishing and Finishing Options
Once the surface is uniformly smooth, polish the epoxy fill to improve clarity and gloss. Use a polish or rubbing compound designed for plastics or epoxy, applying it with a soft cloth or buffing wheel at a moderate speed. This step brings out the shine and makes the fill look professional.
Alternatively, applying a finish like a wipe-on polyurethane or lacquer over the entire piece can protect the epoxy and wood. This step also evens out slight differences in sheen between materials. Test your finish in a small area first to ensure compatibility with your epoxy product.
- Use 80-120 grit sandpaper with a sanding block to level the epoxy flush with the wood.
- Sand evenly and avoid staying in one spot to prevent heat damage to the epoxy.
- Progress to 220 grit sandpaper to start smoothing scratches from the coarse grit.
- Continue sanding with 320 grit, then finish smoothing with 400 grit paper.
- If desired, wet sand with water at the finer grits, ensuring epoxy is fully cured.
- Apply an epoxy-safe polish or rubbing compound to improve gloss and clarity.
- Optionally, seal the entire piece with a compatible wood finish to protect and unify the look.
Common Mistakes and How to Fix Epoxy Filling Issues
Common mistakes when filling CNC carvings with epoxy often cause frustrating results like bubbles, leaks, cracks, and uneven fills. Bubbles form when air is trapped during mixing or pouring, or if the epoxy is too cold. Leaks happen if the containment system isn’t sealed well, allowing epoxy to escape. Cracks occur due to rapid curing or uneven thickness causing stress. Uneven fills result when epoxy cures before it has fully leveled or if areas aren’t properly prepared.
Fixing bubbles after pouring requires quick action. Running a small butane or propane blowtorch held a few inches above the epoxy surface will burst bubbles. Another option is using a toothpick or pin to pop larger surface bubbles gently. Some hobbyists use a heat gun carefully on low setting for wider coverage but avoid overheating, which speeds curing and can cause cracks.
Notice cracks or shrinking after curing? Repair by sanding the damaged area smooth and cleaning off all dust. Then mix a small batch of epoxy and pour or brush it over the cracks to fill them. Let that layer cure fully before sanding again and finishing. This re-pour method maintains the integrity of the original fill and extends the lifespan of your project.
Uneven fills usually happen when epoxy begins curing before you finish pouring or if there are low spots in the carving. To avoid this, pour slowly and in stages, allowing the epoxy to level naturally. The fill may still be uneven after curing; sanding and re-pouring a thin coat can help even out the surface.
Re-pouring epoxy is straightforward but requires patience. You must wait for the first layer to cure to a tacky or fully hardened state depending on your epoxy’s instructions. Clean the surface from dust or oils to ensure good adhesion. Mixing and pouring a fresh batch can then fix leaks or fill low areas.
- Seal all edges and bottoms well before pouring to prevent leaks
- Pre-fill deep carvings slowly to avoid trapping air bubbles
- Use a heat source to remove bubbles within 5 to 10 minutes after pouring
- Don’t pour epoxy too cold; keep temperature around 70 to 75°F for best flow
- Sand and clean between layers when doing re-pours or repairs
- Use thin metal or tape to build proper containment collars
- Avoid thick pours over ¼ inch to reduce curing cracks
Following these steps reduces common epoxy filling issues and supports a smooth, durable finish. Each epoxy has slightly different properties, so checking manufacturer guidelines for cure times and temperature ranges can save you time and materials. Expect fixes like sanding and re-pouring to add a few hours to your project, but they’re worth it for a clean, professional look.
Safety Tips When Working with Epoxy Resin
Epoxy resin can cause skin irritation and respiratory issues without proper safety measures. Always wear gloves made from nitrile or neoprene to protect your skin from resin and hardener exposure. Avoid latex gloves, as they do not provide sufficient resistance. Protect your eyes with safety goggles, and use a long-sleeved shirt to reduce skin contact. Respiratory protection is important because epoxy fumes can irritate your lungs. Work in a well-ventilated area or use a respirator rated for organic vapors, especially if you are pouring in a workspace without natural airflow.
To control fumes and airborne particles, position a fan near an open window or door to push the air outside. Maintain at least six air changes per hour in your workspace, meaning the total air volume is replaced six times every hour. This helps reduce inhalation risks. Keep an eye on temperature and humidity; epoxy cures best between 70, 80°F with 40, 60% humidity. Higher temperatures can increase fume production, so do not pour epoxy in poorly ventilated, hot environments.
When mixing epoxy, measure resin and hardener precisely with a postal scale or metering pumps to avoid improper cures that can result in sticky or toxic finishes. Mix slowly for 2, 3 minutes to minimize bubbles. After pouring, clean tools with acetone or isopropyl alcohol while the epoxy is still wet. Dispose of rags and disposable cups safely, as dried epoxy is less hazardous but wet resin materials can self-ignite if improperly discarded. Always follow local hazardous waste regulations for disposal.
Call a professional if you plan to work with large volumes of epoxy, apply thick layers over 1/4 inch, or use epoxy in confined areas without proper ventilation. Certified professionals have access to industrial ventilation systems and specialized PPE not typically available for home users. Handling industrial-grade epoxy without experience increases the risk of severe allergic reactions or long-term respiratory damage. Persistent skin redness, swelling, or breathing difficulties after exposure require immediate medical attention.
Always prepare your workspace by setting up ventilation and PPE before opening any epoxy containers to reduce exposure from the start.
Step-by-Step Action Plan for Filling CNC Carvings with Epoxy
Follow these clear steps to achieve a clean and durable epoxy fill in your CNC carvings.
- Before you start: Clean and dry your carving thoroughly to ensure epoxy bonds well; the surface should feel free of dust or oils.
- Day 1: Build a containment system around the carving using tape or a temporary dam to keep epoxy from overflowing; verify it is sealed tightly along edges.
- Day 1: Mix your chosen epoxy according to label directions, stirring slowly to reduce bubbles; check the mixture is uniform and clear.
- Day 1: Pour epoxy slowly into the carving recess, filling just to the surface level; watch for any leaks or overflow immediately.
- Day 1-3: Let epoxy cure undisturbed in a dust-free environment at room temperature; confirm the curing by checking if the surface hardens and is no longer tacky.
- Day 4: Begin sanding the cured epoxy starting with medium grit to level it flush with the wood, then fine grit to smooth the surface; test smoothness by touch.
- Day 4-5: Apply a finish compatible with both wood and epoxy, such as a polyurethane coat; observe that the finish adheres well with no peeling.
- If needed, Day 5: Fix any issues like pinholes or uneven surfaces by spot filling with more epoxy, then repeat sanding and finishing steps once cured.
Frequently Asked Questions
Can You Add Aggregates to Epoxy for CNC Filling to Reduce Resin Use?
Yes, mixing sand or gravel with epoxy can reduce the amount of epoxy needed. Aim for about 10-15% epoxy by weight for good strength and pourability.
How Do You Level Epoxy Fill in Deep CNC Carvings?
Use a flat tool or straightedge to level epoxy after pouring. This prevents uneven surfaces and helps with sanding later on.
Is It Necessary to Seal Porous Woods Before Epoxy Filling CNC Carvings?
Sealing porous wood is helpful to prevent epoxy from soaking in. Use a thin layer of diluted epoxy or a sealing coat before pouring.
Can You Overfill a CNC Carving with Epoxy, and What Happens?
Overfilling can cause excessive sanding and wasted materials. It’s best to fill just slightly above the surface for easier finishing.
How Do Temperature and Humidity Affect Epoxy Curing in CNC Projects?
Higher temperatures speed up curing, while humidity can cause cloudiness or bubbles in epoxy. Work in a controlled environment for best results.
What Are the Best Tools to Remove Epoxy Overflow from Carving Edges?
Use a sharp scraper or utility knife to carefully trim excess epoxy. Light sanding afterward smooths edges without damaging wood.
Key Points to Remember
Successfully filling CNC carvings with epoxy improves both function and appearance of your projects. Begin your next project by carefully preparing the surface and selecting an epoxy that meets your needs. Take time to maintain a clean workspace and use proper safety measures to protect yourself during the process.