How to Use a Vinyl Plotter: A Complete Guide for Fast, Flawless Results
Knowing how to use a vinyl plotter starts with understanding it cuts precise vector designs on vinyl sheets using an adjustable blade and computer software. Begin by setting up your cutter with the right blade angle and software that matches your material and design complexity. Adjust speed and blade depth for clean cuts, then proceed step-by-step from design preparation to finishing your project.
Key Takeaways
- Use a 30° blade for thin cast vinyl and delicate films; 45° for general-purpose cutting on Graphtec plotters.
- Select software offering drag-and-drop templates for a quick learning curve and user-friendly design adjustments.
- Adjust blade depth so only 0.3, 0.8 mm protrudes, matching material thickness for accurate cutting without damage.
- Set cutting speed slow (10, 20 cm/s) for detailed text and medium (40, 60 cm/s) for simpler shapes.
- Start with clean, smooth vinyl surfaces and properly loaded plotter rolls to avoid miscuts during automated cuts.
- Choose an aftermarket 0.9 mm blade with 60° angle for cutting reflective and tougher materials economically.
How Does a Vinyl Plotter Work and What Does It Do?
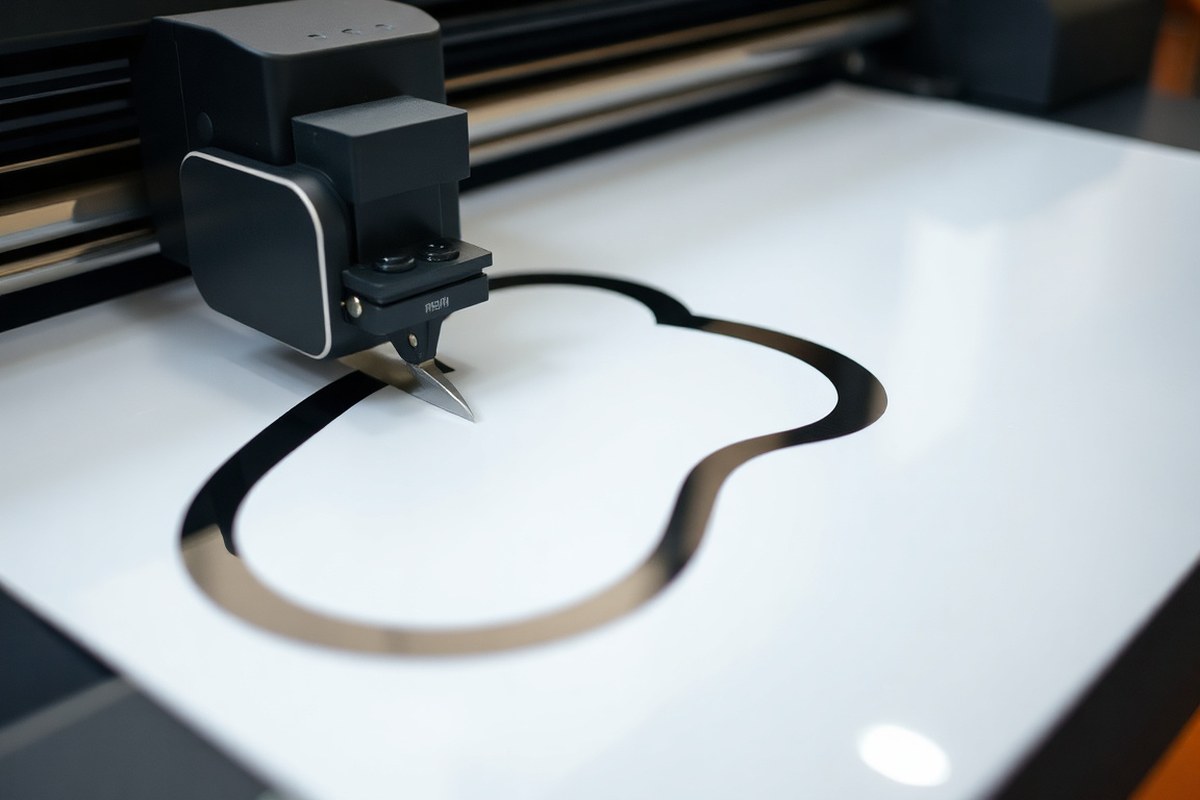
A vinyl plotter is a computer-controlled cutting machine designed to precisely cut shapes, letters, and graphics from thin sheets of material, most commonly vinyl. Unlike simple hand tools or basic craft cutters, a vinyl plotter uses a sharp blade mounted on a moving carriage to trace vector-based designs directly from digital files. This approach provides sharp edges and clean cuts that are difficult to achieve by hand, making the plotter ideal for detailed signage, decals, and custom decals.
The cutting mechanism works by following the precise path set by your design software, moving the blade smoothly over the material while applying adjustable pressure and speed. The blade usually rotates slightly to maintain clean cuts, especially on curves and fine details. Typical blade angles include 30, 45, and 60 degrees, the 45-degree blade is standard for most vinyl cuts. For thicker or tougher materials like reflective vinyl, a 0.9mm blade with a 60-degree angle may be necessary, as recommended for use in Graphtec or Vinyl Express Q series plotters. Cutting thicker materials can also require specialized blades, such as a 1.5mm blade for sandblast stencil cutting.
Vinyl plotters don’t only cut vinyl sheets but can also handle a variety of thin materials depending on the blade and machine settings. This includes heat transfer vinyl, reflective vinyl, sandblast stencil material, adhesive paper, and some thin plastics or cardstock. The cutting depth and pressure must be carefully adjusted to avoid tearing or damaging the material. For delicate cuts, especially those involving tiny details or fonts smaller than half an inch, using the correct blade exposure and angle is critical because standard blades can lift the edges of the vinyl if the settings are off. The plotter can achieve razor-sharp accuracy when properly set up, often cutting designs with precision down to fractions of a millimeter.
Precision is one of the key advantages of using a vinyl plotter over manual cutting methods. These machines can consistently reproduce intricate designs with fine cuts on curves and small text, thanks to their computer-controlled blade movement. The level of detail makes vinyl plotters an essential tool for sign makers, small business owners, and DIY crafters who want professional-looking results. However, achieving this accuracy requires proper blade selection, setup, and understanding how to control the machine’s speed, pressure, and blade exposure.
Costs for entry-level vinyl plotters start around $200 and can go significantly higher depending on size, brand, and additional features. For beginners, choosing a machine with compatible software and good documentation on blade settings for various materials will help maintain consistent results. When using a plotter for new materials, always begin by testing small cuts with different blade depths and speeds to find the right balance. This trial-and-error approach helps avoid wasted supplies and poor cuts. Over time, the right combination of blade type, angle, and settings allows the vinyl plotter to produce clean, precise cuts across a range of thin materials with accuracy and speed.
Essential Tools and Materials to Use with Your Plotter
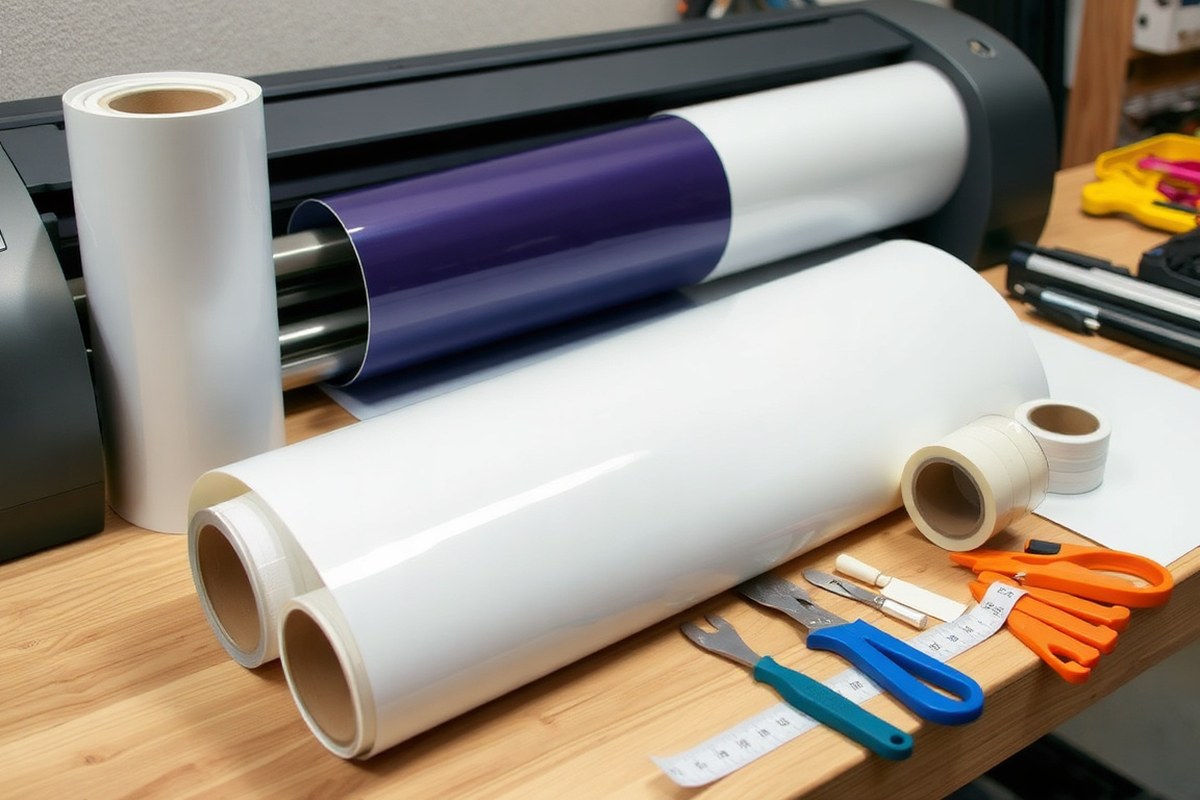
Successful vinyl cutting projects depend on using the right types of vinyl, blades, and accessory tools matched to your specific design and application. Common vinyl types include standard adhesive vinyl, cast vinyl, heat transfer vinyl, reflective film, and specialty films like flock or chrome. Standard adhesive vinyl works well for decals and signs and typically needs a 30° or 45° blade for clean cuts. Heat transfer vinyl, often 1 to 2 mil thick, requires a blade that cuts through without damaging the backing, usually a 30° blade.
Choosing the correct blade angle is critical. A 30° blade is ideal for thin films such as cast vinyl and delicate materials like ORACAL’s 1mil chrome film. For most standard vinyl types, a 45° blade with a 0.9mm shaft fits well in common blue-topped blade holders and provides reliable cutting. Thicker materials, such as flock vinyl, require a 60° blade to cut through the fuzzy texture accurately without jagged edges.
In addition to blades, you’ll need several tools to ensure a clean, professional finish. Weeding tools, including precision tweezers, nylon hooks, and picks, remove unwanted vinyl pieces after cutting. Transfer tape is essential for lifting cut designs off the backing and applying them smoothly to surfaces without bubbles or wrinkles. Application squeegees help press the vinyl firmly in place. Keeping a small blade cleaner or compressed air handy helps maintain blade performance by removing vinyl debris that builds up inside the blade holder and affects rotation.
- Standard 30° blade for thin vinyl films and heat transfer vinyl
- 45° blade with 0.9mm shaft for general vinyl cutting
- 60° blade for thick or specialty vinyl like flock
- Weeding tools such as tweezers, hooks, and picks for removing excess vinyl
- Transfer tape to move cut designs accurately to surfaces
- Application squeegee for applying vinyl without bubbles
- Blade cleaning tools or compressed air to keep blades sharp and clear of debris
Always check blade compatibility with your plotter model and clean the blade holder regularly to prevent cutting problems.
Vinyl materials differ in thickness, flexibility, and adhesive strength, so adjust your cutter’s blade pressure and speed accordingly for crisp edges without tearing. The right combination of vinyl type, blade angle, and auxiliary tools directly impacts the quality of your finished project. Investing in high-quality blades and maintaining them extends their lifespan, with some lasting several months depending on use. For best results, organize your blades and tools by material and task type to switch easily between projects without guesswork.
Choosing and Setting Up the Right Software for Vinyl Cutting
Choosing the right software for your vinyl plotter involves picking a program that’s compatible, easy to use, and equipped with the features you need for precise cutting. After selection, you must install the software and connect it properly to your plotter, configuring settings to ensure accurate cuts. Proper file preparation and managing design export formats are key to smooth operation.
Popular Vinyl Cutting Software Options
Users new to vinyl cutting often find Artcut, SignMaster, and FlexiSIGN to be approachable yet powerful choices. These programs support essential features like vectorizing images, editing designs, and managing cutting sequences. For simple projects like lettering or basic shapes, free software provided by Simma Equipment offers a quick start without additional cost.
Some advanced crafters prefer vector design tools like Adobe Illustrator or the free Inkscape software for detailed design work. These allow precise control over shapes and lines, which is critical for high-quality cuts. Many cutting programs include a built-in library of hundreds of vector designs and templates, which speeds up the design process.
Starter kits combining a vinyl cutter with user-friendly software commonly cost under $200, making entry affordable. Most popular software packages feature drag-and-drop interfaces and can be learned in less than an hour, so you don’t have to spend days getting started.
Preparing and Importing Your Design Files
Design preparation begins with ensuring your artwork is in a vector format like SVG, DXF, or PLT, which the cutter software can interpret accurately. Raster images like JPG or PNG files need vectorizing before they can be properly cut. Many cutting software options even include a vectorizing tool built in.
Always double-check the design orientation and output settings before sending your file to the plotter. If cutting heat-transfer vinyl (HTV), mirror your design horizontally to prevent backward lettering on finished products. For multi-color projects, prepare separate layers or files to cut and layer each color accurately. Steps for preparing a design file for cutting:
- Create or open your design in your chosen software.
- Vectorize images if needed, using built-in tools or external programs like Inkscape.
- Confirm your design uses only cuttable elements: lines, shapes, and vectors.
- Adjust size and position to fit your vinyl sheet dimensions.
- Mirror the design horizontally for heat-transfer projects.
- Export the file in a format your cutting software supports (SVG, DXF, PLT).
- Import the exported file into the cutting software.
- Review cutting paths and preview cuts before sending to the plotter.
Configuring Communication Between Software and Plotter
After software installation, connect your vinyl plotter using USB, serial, or network connections depending on your model. The software usually requires selecting the cutter model or driver to ensure proper communication. Check for the latest drivers from the plotter manufacturer’s website to avoid compatibility issues.
Use your software’s output or cut/send function to transmit files to the machine. Always confirm cutting order, verify you’ve selected the correct layers or colors to cut, and set parameters like speed and force. For example, slower speeds around 10 to 20 cm/s are best for small text or detailed designs, improving accuracy.
Watch for error messages or failed sends, which may indicate incorrect settings or connection problems. Adjust options like cut selection only or duplicate cut if your design requires multiple passes or partial cuts. Routine calibration and checking that your plotter responds to test commands help maintain consistent cutting quality.
Preparing Your Vinyl and Plotter for Accurate Cutting
Handling vinyl properly before loading it into your plotter helps ensure precise cuts without wasted material. Begin by storing your vinyl in a clean, dust-free area to prevent dirt or adhesive issues. Lay out sheets or roll ends flat to reduce curling or creases, which can cause the blade to misalign or skip.
Inspect the vinyl for any visible defects such as wrinkles, folds, or dirt spots. These imperfections can affect cut consistency and weedability. Roll-fed vinyl cutters like many Summa models can take rolls up to 30 inches wide. Open the roll feeder and smooth the vinyl into place, making sure it feeds straight without slack or tension that could cause jams or miscuts.
- Flatten vinyl sheets on a clean surface before loading
- Check for wrinkles, dirt, or damage in the material
- Insert vinyl roll evenly into the feeder, aligning edges parallel to cutter rails
- Set the blade origin point at the start of the vinyl to avoid cutting on empty areas
- Ensure the vinyl is taut but not stretched to prevent tearing or misfeeds
- Use static vinyl sheets for small or delicate text for better transfer
- Confirm cutter is online and communicates with the software on the correct port
After loading, you should see the vinyl lying flat and centered between the cutter’s pinch rollers. Adjust rollers if necessary to avoid slippage or uneven pressure, which can skew cuts. Setting the origin point correctly helps the cutter recognize where the vinyl begins, reducing risk of cutting into the backing or off the material edge.
Inspecting and loading your vinyl carefully adds only a few minutes but dramatically lowers cutting errors. Avoid excessive blade pressure to prevent cutting through backing paper, and replace blades when cuts become ragged. Preparing your cutting area with a clean bench for vinyl handling supports these steps and keeps your plotter performing well.
Selecting and Adjusting Blades and Cutting Settings
Choosing the correct blade and adjusting your plotter’s cutting settings will directly affect the quality of your vinyl cuts. Selecting the right blade angle depends mainly on the type and thickness of the vinyl you are cutting. A shallow 45° blade suits most standard calendered PVC vinyls and thinner materials, while thicker or specialty films require a steeper 60° blade to slice cleanly through the material layers without tearing.
The blade’s protrusion from the holder should be just slightly longer than the vinyl thickness, typically between 0.3 mm and 0.8 mm. This ensures the blade cuts through the vinyl but does not gouge the backing or mat. Pressure and speed settings are equally important; too high pressure can damage your vinyl, and too slow speed can scorch or warp the material. Starting with manufacturer recommendations from your vinyl packaging or a trusted settings guide helps, then fine-tuning with test cuts on scrap vinyl saves time and waste.
| Material Type | Blade Angle | Blade Protrusion (mm) | Pressure Level | Speed Setting |
|---|---|---|---|---|
| Standard Calendered PVC Vinyl | 45° | 0.3 – 0.5 | Medium | Medium |
| Thicker Films (Retro-reflective, Sandblast, Flock) | 60° | 0.5 – 0.8 | High | Slower |
| Window Tint Film (about 2 mil thick or less) | Special 45° (TintTek) | 0.3 or less | Low | Faster |
| Wood (under 2mm thick) | Deep-Cut Blade | According to thickness | High | Slow |
High-quality blades help deliver cleaner cuts with fewer errors, though they come at a higher upfront cost. For example, a pair of 1.5 mm blades and the appropriate blade holder might cost around $220. Maintaining proper blade sharpness and the right cutting mat beneath the vinyl protects both the material and blade longevity. Calibration through test cuts on small scrap pieces is important before larger jobs, this practice ensures you avoid wasting expensive vinyl and time.
Run a test cut on scrap vinyl to adjust blade depth, pressure, and speed before making your actual cut to prevent costly mistakes.
Specialized blades like the TintTek 09U provide optimized angles for niche materials like window tint film, which lacks thick liners and is easily damaged by too deep a cut. For thicker materials, increasing blade protrusion and reducing speed supports better penetration. Adjusting pressure carefully balances the force needed for a clean cut without deep gouges or vinyl deformation.
Step-by-Step Vinyl Cutting Process from Design to Finish
The vinyl cutting process begins with properly sending your design to the plotter and continues through careful monitoring and removing the vinyl to avoid damage. This workflow ensures your design transfers accurately onto the vinyl for professional results. Each stage requires attention to detail to maintain precision and avoid material waste.
Sending the Design File to the Plotter
Start by opening your design file, which can be in SVG, PNG, AI, PDF, or DXF format, in the cutting software associated with your vinyl plotter. Adjust sizing, placement, and any cut settings based on your vinyl type and project requirements before sending the file to the cutter. A USB connection is commonly used, but some plotters support Wi-Fi or Bluetooth connections. Follow these steps to send your design correctly:
- Open the design file in your cutter’s software.
- Resize or modify the design to fit your vinyl sheet and project dimension.
- Select the correct material profile to set blade depth, speed, and pressure for the specific vinyl.
- Place the vinyl sheet with the sticky side facing down onto a clean cutting mat that has no dirt or particles.
- Load the cutting mat into the plotter by aligning it with the rollers and pressing the feed or load button.
- Preview the cutting path in the software to confirm it matches your intentions and no errors are present.
- Send the job to the cutter using the “Send to Cutter” command or equivalent button.
Ensuring the cutter matches your vinyl type and design avoids common issues such as incomplete cuts that damage the backing or cuts that don’t fully separate vinyl shapes. This step usually takes under five minutes for experienced users.
Monitoring and Pausing the Cutting Job
Once the cutting starts, stay close to the machine to observe its progress. Watching the cutter allows you to catch issues early, like misfeeds, blade jams, or vinyl shifting. Plotters typically make smooth, noise-consistent cutting sounds; unusual noises or jerky movements can indicate a problem. Pause or stop the cutting process immediately if you notice:
- Vinyl shifting or wrinkling on the mat
- Blade dragging or inconsistent cutting lines
- Unusual sounds from the blade carriage or rollers
- Software or machine error messages
Most software includes a pause button to halt the job safely. Use it if adjustments to blade depth, mat alignment, or vinyl position are necessary. Taking small breaks during long cuts also helps avoid overheating the blade.
Removing Cut Vinyl Without Damage
Removing the vinyl requires patience and a careful approach to keep your design intact. Begin by gently lifting the vinyl corners using your fingernail or a weeding tool, avoiding direct pulling which could tear the cut shapes. Follow these steps to remove the vinyl properly:
- Place the cutting mat on a flat surface.
- Start peeling the unwanted vinyl from one corner at a low angle to prevent lifting the cut portions.
- Use a weeding tool to help remove small or intricate cut pieces smoothly.
- Keep the vinyl nearly flat to the surface to avoid curling or stretching.
- After removing excess vinyl, check the backing for any stuck pieces and remove them carefully.
Good removal means the liner remains intact, and the design edges stay sharp without tears or partially cut sections. Taking your time here reduces wasted materials and improves final project quality.
Weeding and Transferring Vinyl Designs Efficiently
Weeding removes the unwanted vinyl around your design without damaging small details. Transfer tape helps move the design accurately to its final surface. Using the right tools and methods lets you apply vinyl smoothly, avoiding bubbles or misalignment.
Weeding Tools and Techniques
Use sharp, precise weeding tools like fine tweezers or a dedicated vinyl hook to pick out small vinyl pieces gently. Work on a clean, flat surface under good lighting to avoid missing tiny details. Peel back the excess vinyl slowly at a low angle to prevent tearing the design.
Start by removing large areas of vinyl first, then concentrate on delicate shapes such as thin lines or letters. Use a magnifying glass if needed for very intricate designs. If parts stick to the backing, warm the vinyl slightly with a hairdryer on low heat for 10 to 15 seconds to loosen the adhesive before pulling.
- Use precision tweezers or a vinyl weeding hook
- Weed under strong lighting on a flat surface
- Remove large areas before small details
- Peel excess vinyl slowly at about a 45° angle
- Warm vinyl gently with a hairdryer if needed
- Use a magnifying glass for very fine details
Choosing the Right Transfer Tape
Select clear transfer tape to see your design during application. The transfer tape’s tackiness should match your vinyl type and project surface. For delicate vinyl or multi-layer designs, use a low-tack or application tape to avoid lifting the vinyl pieces.
Different projects require different tapes: for wall decals, a medium tack tape works best, while for fabrics or uneven surfaces, choose a flexible, stretchable type. Some tapes come with gridlines to help align your design precisely. Always cut transfer tape slightly larger than your design to cover and protect the entire vinyl area during transfer.
Applying Vinyl to Surfaces Smoothly
After applying the transfer tape over your weeded design, press it down firmly using a squeegee to secure adhesion and remove air bubbles. Start applying the vinyl on a clean, dry surface by placing one edge first and slowly lowering the rest, smoothing as you go to avoid trapping air.
Work using light pressure and a squeegee or credit card to push out bubbles, moving from the center toward the edges. For multi-layer or large vinyl projects, apply the design in sections to maintain control and alignment. Remove the transfer tape by peeling it back slowly at a 45° angle, keeping the vinyl pressed down.
- Use a squeegee or firm card to apply pressure
- Start application from one edge and smooth gradually
- Push bubbles out toward edges as you go
- For fabrics, apply heat-transfer vinyl with a heat press at recommended temperature and time
- Peel transfer tape slowly at low angle after application
- For curved surfaces, stretch flexible transfer tape carefully
Troubleshooting Common Issues and Maintaining Your Plotter
Common cutting problems like miscuts, vinyl lifting, and communication errors often come down to a few core issues: dull blades, incorrect settings, dirty rollers, or software-to-plotter connectivity glitches. Misaligned cuts usually mean the blade is either too dull or set at a wrong depth. If your vinyl lifts during cutting, your blade pressure might be too high, or the cutting mat or rollers might be worn out. Communication errors occur when the plotter loses connection with your computer, which could be due to cable issues, driver problems, or outdated software.
Fix miscuts by first inspecting your blade. Replace it if the cuts feel jagged or not fully through the vinyl. Blades should typically be swapped every few months or after around 100 hours of cutting, depending on how thick the vinyl is. Adjust cutting depth and pressure settings to match your vinyl type; too deep or too hard can ruin the material, while too light won’t cut through completely.
Vinyl lifting during cutting can be reduced by lowering blade pressure or cleaning and replacing rollers. Rollers usually last between 6 and 12 months. Keep them free of dust, adhesive residue, and lint as buildup causes poor grip. Worn rollers lead to vinyl slipping or feeding improperly. Swap them out when you notice slipping or misfeeds, which prevents inconsistent cuts and material waste.
Communication issues often clear up by disconnecting and reconnecting the USB or network cable, restarting the plotter and computer, and ensuring you have the latest software and driver updates from the manufacturer’s website. Double-check baud rates and port settings in your software to match the plotter’s requirements.
- Check blade sharpness and replace every 3-6 months or after 100 hours of use
- Clean rollers monthly with isopropyl alcohol and replace annually or when slipping occurs
- Store your plotter in a dust-free environment to avoid buildup on sensors and moving parts
- Run regular calibration routines in the plotter software to ensure registration accuracy
- Test vinyl and cut settings with small trial runs before large projects
- Restart devices to reset communication if errors appear
- Use only manufacturer-recommended blades and rollers for your specific plotter model
Regular cleaning and calibration significantly improve plotter reliability. Wipe the cutting strip and blade holder area after every 20 hours of cutting to remove debris, which can cause uneven pressure and poor cuts. Calibrate the plotter by following the software’s alignment process to ensure the blade cuts precisely along your design’s paths. Keeping your plotter clean and correctly calibrated will save time and material waste in the long run.
Replace blades at the first sign of dullness to avoid damaged vinyl and wasted materials; a clean blade is key for sharp, consistent cuts.
Step-by-Step Action Plan for Using Your Vinyl Plotter
Follow these clear steps to start creating sharp, professional vinyl designs with your plotter. Each phase ensures your setup and skills improve progressively.
- Before You Start: Gather all necessary tools including vinyl rolls, weeding tools, transfer tape, and your plotter’s software. Check that your work area is clean and well-lit to avoid errors during cutting.
- Day 1: Install and open your cutting software, then import or create a simple design. Confirm the design appears correct on screen and matches your vinyl size to ensure accurate cuts.
- Day 2: Load the vinyl into the plotter and set the blade depth to match the material thickness. Perform a test cut and peel the test shape to verify the blade pressure and depth are right.
- Week 1: Complete your first full cut project, including weeding and transferring the design to a test surface. Check for clean edges and good adhesion to know your process works well.
- After 2 Weeks: Experiment with different vinyl types and blade settings. Keep notes on settings that produce the best results for each material to improve efficiency.
- After 1 Month: Perform routine maintenance on your plotter such as blade cleaning and software updates to maintain cut quality and extend plotter life.
Frequently Asked Questions
What Blade Angle Is Best for Cutting Thin Vinyl Films?
Use a 30° blade angle for standard graphics on thin films like cast vinyl and delicate chrome films. This helps prevent lifting edges during cutting.
Can I Use a Vinyl Plotter to Cut Fabric for Heat Transfers?
Yes, a vinyl plotter can cut heat transfer vinyl (HTV) used on fabric. Make sure to mirror your design before cutting for proper transfer.
How Do I Reduce Vinyl Waste When Cutting Multiple Designs?
Arrange your designs close together and use nest or optimize cutting layout features in the software. This minimizes material waste and saves vinyl.
What Types of Blades Fit a Graphtec Vinyl Plotter for Reflective Materials?
Graphtec recommends a thicker 1.5mm blade in a red holder for reflective vinyl and sandblast stencils. Aftermarket 0.9mm 60° blades also offer an economical option.
Can I Use Metallic or Glitter Vinyl in a Standard Vinyl Plotter?
Yes, most standard vinyl plotters handle metallic and glitter vinyl well, but adjust blade depth and test cut to avoid damaging the material.
How Often Should I Replace the Blade on My Vinyl Plotter?
Replace your blade when you notice cuts are less clean or vinyl edges lift easily. Frequent cutting of thick materials may require more frequent blade changes.
Final Thoughts
Using a vinyl plotter effectively means careful setup, testing, and practice with your materials and software. Start with simple projects to build confidence and accuracy. Your next step is to design and cut a custom decal, so you can see firsthand how adjustments impact your results.