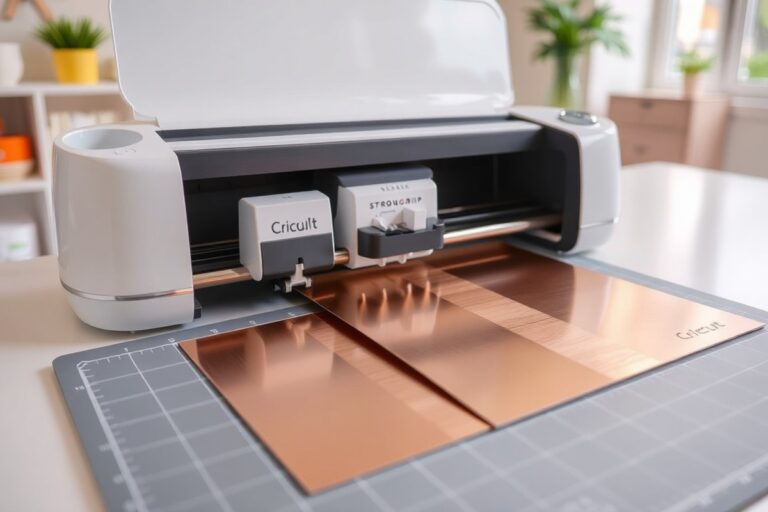
What Cricut Setting for Permanent Vinyl: A Complete Guide for Perfect Cuts
What Cricut setting for permanent vinyl works best? Use the standard “Vinyl” setting with a blade depth between 2 and 3 and multi-cut set to 2 or 3. This balance ensures clean cuts without cutting through the backing layer, especially when working with most Cricut machines like the Explore or Maker series. Start by placing your vinyl on a standard grip mat and selecting the “Vinyl” material setting to achieve precise cutting for both indoor and outdoor permanent vinyl projects.
Key Takeaways
- Set your Cricut blade depth to 2-3 for permanent vinyl to avoid cutting the backing paper.
- Use multi-cut settings of 2-3 to create crisp, clean cuts on tougher permanent vinyl types.
- For Cricut Explore Air 2, simply set the machine dial to “Vinyl” for standard permanent vinyl.
- Glitter or shimmer adhesive vinyl requires Light Cardstock setting and pressure around 340.
- Smart Vinyl is best used with Cricut Joy, Explore 3, or Maker 3 for longer cuts up to 20 feet.
- Adjust settings if you notice the vinyl isn’t cutting through; incorrect blade depth is a common issue.
Best Cricut Settings for Cutting Permanent Vinyl
To cut permanent vinyl with Cricut machines, choose the blade, pressure, speed, and material type based on your machine model and vinyl type. Standard vinyl typically uses the Vinyl setting with a fine-point blade, moderate pressure, and normal speed. For specialty vinyl like glitter or shimmer, adjust pressure and speed down to avoid cutting the backing. Smart Vinyl allows matless cutting on compatible machines with specific settings. Matching these factors ensures clean cuts without damaging the vinyl backing.
Standard Permanent Vinyl Settings
For classic permanent vinyl on Cricut Explore and Maker machines, start by selecting the “Vinyl” material setting. Use the fine-point blade with a blade depth of 2 or 3 to slice through the vinyl layer without cutting the backing paper. Pressure should be moderate, too high can cut the backing and damage your project. Speed can remain at Cricut’s default or lowered slightly if your design is intricate.
Multi-cut settings are usually not necessary for standard vinyl but can help with thicker vinyl varieties. The correct settings prevent uneven edges or tearing, ensuring a smooth cut that weeds easily. Always test cut a small piece to confirm the blade depth and pressure before running the full design.
Settings for Specialty Vinyl Types
Glitter, shimmer, and high-gloss vinyl require a more delicate cut than standard vinyl. For varieties such as Glitter Brush, Colorful Glitter, or Shimmer Craft Adhesive Vinyl, set your blade to depth 3, speed at 5, and pressure to 30 (on a 350 scale or equivalent). Selecting “Light Cardstock” as the material option improves cutting accuracy. These settings prevent harm to the vinyl’s backing and preserve the glitter finish.
Since these specialty vinyls have textured, thicker surfaces, reducing speed lets the blade glide smoothly. The sharper blade depth combined with controlled pressure cuts through the vinyl layer without cutting into the carrier sheet. This setup helps maintain intricate details and protects the material’s appearance.
Smart Vinyl Matless Cutting
Smart Vinyl is designed for use without a cutting mat, compatible with Cricut Maker 3, Cricut Explore 3, and Cricut Joy machines. To cut Smart Permanent Vinyl, load the material directly into the machine and select the appropriate Smart Vinyl setting in the software. These machines adjust blade depth and pressure automatically for the matless process.
Matless cutting saves time on loading and unloading mats but requires accurate software settings. Pressure tends to be moderate, and blade depth matches the thickness of the Smart Vinyl, which is consistent across variants. Speed is generally moderate to allow clean cuts without shifting the material.
Adjustments by Cricut Machine
Differences in hardware require tweaking settings to optimize vinyl cuts across machines. The Cricut Explore and Explore Air 2 models use a manual dial that should be set to “Vinyl” for standard permanent vinyl or “Custom” when selecting specialty vinyl types from the materials menu. These models commonly use a fine-point blade with a blade depth between 2 and 3 and moderate pressure.
The Cricut Maker 3 and Explore 3 feature automatic pressure and blade adjustments. Their software includes Smart Vinyl options for matless cutting and improve speed and precision for detailed projects. The Joy, being a smaller machine, also supports matless Smart Vinyl cutting but uses different default speeds and pressure values, typically lower due to its compact size.
| Machine Model | Material Setting | Blade Depth | Pressure | Speed | Mat Required? |
|---|---|---|---|---|---|
| Cricut Explore, Explore Air 2 | Vinyl (standard), Custom (specialty) | 2, 3 | Moderate | Default to slightly slower for detail | Yes |
| Cricut Maker 3 | Smart Vinyl, Custom | Auto (matches vinyl thickness) | Auto moderate | Faster capability | No (for Smart Vinyl) |
| Cricut Explore 3 | Smart Vinyl, Vinyl, Custom | Auto 2, 3 | Auto | Moderate to fast | No (Smart Vinyl) |
| Cricut Joy | Smart Vinyl | Auto | Lower pressure for precision | Moderate | No |
Matching your machine and vinyl type to the correct settings avoids cutting errors. Choose the blade first, the fine-point blade suits most vinyl cuts. Adjust pressure downward for specialty or thin materials. Speed varies by machine but usually targets balance between precision and efficiency. Knowing when to use a mat mostly depends on your vinyl type and model compatibility, with Smart Vinyl allowing matless cutting on the newest Cricut models.
Preparing Your Cricut Machine and Materials for Permanent Vinyl

Setting up your Cricut machine and materials correctly is key to cutting permanent vinyl with clean, precise lines. The right preparation prevents issues like tearing or incomplete cuts, ensuring your project looks professional and lasts. You’ll want a clean, well-lit workspace with your tools organized for easy access. This reduces mistakes and keeps your vinyl in good condition.
Choose a sturdy surface near your computer or mobile device running Cricut Design Space. Keep your scraper, weeding tool, and transfer tape handy. Avoid drafts or clutter around your workspace that could cause dust or debris to stick to the vinyl. A smooth, flat Cricut cutting mat free of wrinkles is essential. You can use a standard grip mat for most permanent vinyl types.
Before cutting, select the correct vinyl type in Cricut Design Space to program your machine properly. For Siser Permanent Vinyl and similar products, use the “Vinyl” or “Vinyl, Permanent” setting in the Materials Menu. If your machine supports Smart Materials, choose “Smart Permanent Vinyl.” These presets adjust blade pressure, speed, and multi-cut passes to match the vinyl thickness and adhesive strength. Confirm you have installed a sharp blade in your Cricut’s blade housing for consistent cuts. Follow this step-by-step checklist to prepare your machine and materials:
- Clean your cutting mat with a lint roller or mild soap and water if it’s reused, then dry it completely.
- Place your permanent vinyl sheet glossy side down on the mat aligned with the top-left corner for accurate cuts.
- Smooth out air bubbles or wrinkles with a scraper tool to ensure the vinyl adheres flat to the mat.
- Load the mat firmly into the Cricut machine, aligning the edges with the guides until the machine grips it automatically.
- Open your design in Cricut Design Space and select “Vinyl” or “Vinyl, Permanent” as your material setting, or choose “Smart Permanent Vinyl” for compatible Smart Materials.
- Check that your blade is clean, sharp, and properly installed in the blade housing.
- Press the flashing “Go” button on the machine to start the cutting process.
- Monitor the cut for any sticking or skipping, and pause the machine immediately if you notice issues to avoid ruining the vinyl or mat.
Always remove vinyl sheets from their packaging only when ready to use, and store unused vinyl flat in a cool, dry place to prevent warping or dust accumulation.
Weeding and Applying Transfer Tape to Permanent Vinyl
You can remove excess vinyl cleanly by using the right weeding tools and gentle techniques that protect your design. Applying transfer tape carefully helps avoid bubbles and misalignment, making the final application smooth. Following proper peeling angles ensures that the vinyl adheres well and doesn’t lift off with the tape.
Weeding Permanent Vinyl
Start by removing the larger sections of unwanted vinyl around your design first. Use a weeding tool or tweezers to lift the vinyl gently at a 45-degree angle; this reduces the chance of tearing the delicate parts of the design. For intricate cuts, a finer blade setting and slower cutting speed help avoid jagged edges, which makes weeding cleaner and easier. Avoid pulling straight up, since that can cause your design to stretch or tear.
Keep a pair of small scissors handy to trim any stray pieces or close cuts that didn’t fully separate during the cut. Work slowly and carefully so you don’t accidentally remove parts of the design you want to keep. Also, a light under good daylight or a bright task lamp helps you see cut edges clearly, speeding up the weeding process.
Choosing and Applying Transfer Tape
Pick transfer tape rated for permanent vinyl to guarantee proper adhesion. Some tapes handle textured vinyl like glitter better, so check compatibility if working with specialty finishes. Cut your tape roughly 1 centimeter larger than the design edges to cover the entire vinyl area and provide some margin for handling.
Peel the backing off the transfer tape carefully and place it on top of your weeded vinyl design. Press down firmly, rubbing with a scraper or similar tool in overlapping strokes to ensure full contact between the tape and vinyl. This prevents air bubbles and helps the transfer tape pick up the entire design uniformly.
Removing Transfer Tape Properly
After applying the transfer tape and vinyl to your target surface, peel the tape off slowly at about a 45-degree angle. Hold the vinyl down with one hand while pulling the tape back with the other, applying steady pressure to ensure the vinyl stays stuck. Avoid peeling too fast or pulling straight up, as this can lift the vinyl or cause it to detach from the surface.
The 180-degree peeling method works well for thin or detailed vinyl cuts. Flip the tape back toward the surface so it almost folds onto itself, moving slowly to avoid stretching or curling the vinyl. This technique gives you better control and reduces the risk of wrinkles or misalignment.
- Cut away excess vinyl around the design with scissors or a cutting tool.
- Use a weeding tool or tweezers to lift and remove the vinyl from cut areas, pulling gently at a 45-degree angle.
- Carefully trim stray vinyl with small scissors if needed for clean edges.
- Cut transfer tape at least 1 centimeter wider than the vinyl design.
- Peel backing off the transfer tape and carefully place tape over the vinyl, pressing firmly with a scraper tool.
- Rub the transfer tape thoroughly to remove air bubbles and help the vinyl adhere to tape.
- Peel the transfer tape off slowly at about a 45-degree angle to lift vinyl from backing.
- Place the vinyl and transfer tape on the desired surface, press firmly, then peel transfer tape back slowly using a 180-degree angle for best results.
How Vinyl Thickness and Adhesive Types Affect Cut Settings
Vinyl thickness directly influences how your Cricut machine settings should be adjusted. Thicker vinyl requires a deeper blade depth to make a clean cut through the material without dragging or tearing the backing. It also often needs increased pressure to ensure the blade pierces through firmly, especially if the adhesive layer is strong. Speed should be reduced slightly for thicker or textured vinyl to maintain precision and prevent jagged edges.
The type of adhesive and vinyl finish also affect cutting settings. Permanent vinyl usually has a stronger adhesive than removable vinyl, which means you might need more pressure during cutting to slice through the adhesive layer. Matte finishes tend to cut more easily than textured finishes like brushed metal or glitter vinyl, which demand higher pressure and careful speed control to avoid damaging the vinyl or the machine blade.
Here’s a comparison of typical vinyl thicknesses and recommended Cricut cut settings for permanent vinyl, based on common product examples. These settings apply primarily to Cricut Explore and Air series machines where dial adjustments or custom pressure settings are available.
| Vinyl Type | Typical Thickness | Blade Depth | Pressure Setting | Speed Setting |
|---|---|---|---|---|
| Standard Permanent Vinyl (matte finish) | 2.5 mil (0.0025 in) | 2-3 | Default or Medium | Default or Medium |
| Permanent Vinyl (glitter finish) | 3.0-3.5 mil | 3-4 | Increased (More Pressure) | Slower than Default |
| Brushed Metal Permanent Vinyl | 3.0+ mil | 4 | High | Reduced Speed |
| Siser Permanent Vinyl | 2.5-3 mil | 3 | Medium to High | Medium |
| TackWrap Craft Permanent Adhesive Vinyl | 2.5-3 mil | 3 | Medium to High | Medium |
Adjust pressure based on the adhesive strength as well. Stronger adhesives often require higher pressure to ensure the blade cuts cleanly through all layers but be cautious not to over-press, which can cut too deeply into the backing and make weeding difficult. For example, glitter vinyl, which has a rougher surface and tougher adhesive, benefits from increased pressure and reduced speed to maintain blade control and clean cuts.
Properly matching blade depth, pressure, and speed to the thickness and adhesive type of your permanent vinyl reduces the risk of incomplete cuts or vinyl damage. When cuts are too shallow, the vinyl won’t separate well, causing frustration during weeding. Excessive pressure or blade depth can harm the backing, leaving unwanted cuts or shredding. Testing with a small cut preview on your specific vinyl batch helps fine-tune these settings for reliable results.
Troubleshooting Common Permanent Vinyl Cutting Issues
Incomplete cuts, vinyl tearing, and slipping mats often happen during permanent vinyl projects because of incorrect pressure, blade dullness, or unsuitable mat grip. These problems matter because they waste material and time, and may ruin your design. Fixing them requires careful adjustment of your machine’s settings and preparation steps.
When cuts do not go all the way through the vinyl, the first step is to increase the pressure slightly. Most Cricut users find that adding about 5 to 10 points of extra pressure helps with thicker or higher quality permanent vinyl. Slow down the cutting speed to improve cut accuracy; reducing speed from default to about 1 or 2 can result in cleaner edges without overcutting the backing paper.
Vinyl tearing usually indicates a blade that is too dull or a pressure setting that is too high. Replace the blade if it’s been used extensively or shows visible damage. Reducing the pressure by small increments (around 5 points) can also prevent shredding while still cutting the design completely. Using a fine-point blade designed for vinyl is best; avoid using deep-cut or heavier-duty blades unless cutting thicker materials.
Mats slipping during the cut means your mat isn’t gripping well enough. Use a strong grip mat, which costs between $10 and $15, to hold the vinyl firmly in place. When the mat still slips, clean it using a lint roller or mild soap and water to get rid of dust and residue. Reusing mats after major decreases in stickiness is common but eventually requires replacement to ensure good adhesion.
- Increase pressure by 5, 10 points for incomplete cuts
- Lower cutting speed to improve cut quality on thick vinyl
- Change dull blades to reduce tearing
- Use fine-point blades for permanent vinyl
- Switch to a strong grip mat to stop slipping
- Clean mats regularly for best adhesion
- Reduce pressure incrementally if vinyl tears
Overpressuring can damage your vinyl and blade, so adjust settings gradually and test on scraps before final cuts.
Begin troubleshooting by cutting a small test shape on a scrap piece to see how changes affect the result. Adjust one variable at a time: pressure, speed, or blade condition. Avoid simultaneous changes to easily pinpoint causes of cuts failing. For example, if the test cut still won’t separate from the backing, add more pressure and slow the speed. Vinyl that cuts but tears when removing calls for lowering the pressure and checking if the blade is sharp. Keeping track of these adjustments ensures you understand your Cricut’s response to different brands and thicknesses of permanent vinyl, ultimately saving material and improving project outcomes.
Cutting Intricate Designs on Permanent Vinyl with Cricut
You can cut intricate or detailed designs on permanent vinyl using a Cricut, but it requires adjusting your settings and techniques carefully. Slowing the cutting speed, using the right blade, and preparing your vinyl properly help avoid tearing or distortion on small or complex shapes. These steps ensure clean, precise cuts that hold fine details.
Adjusting Speed and Pressure for Details
Reducing your cutting speed gives the blade more control as it moves through the vinyl, which is important for detailed sections where sharp turns or small cuts appear. Setting the speed at about 50% or lower helps avoid dragging or pulling on thin parts of the design. You should also fine-tune the pressure so that the blade cuts through the vinyl without cutting the paper backing, this “kiss cutting” prevents damage to your material and ensures each piece stays intact.
For intricate vinyl designs, increasing pressure slightly while using a low speed can improve cut depth without risking vinyl distortion. Some users find that applying the “washi sheet” material setting with slightly more pressure than usual works well for detailed permanent vinyl pieces. It’s a balancing act that depends on your specific vinyl brand and Cricut model, testing on a small scrap before the full cut helps confirm proper settings.
Blade Selection and Maintenance
The blade choice significantly impacts the cut quality on detailed permanent vinyl designs. A fine-point blade, designed for precision work, creates sharper cuts and captures small features better than a standard blade. If your blade is dull or nicked, it will tear the vinyl or leave jagged edges, so replace or sharpen blades regularly to maintain crisp results.
Before cutting intricate shapes, check your blade for any debris and perform a quick cleaning if needed. Using fresh blades reduces drag and helps your machine make consistent cuts throughout the project, especially when handling complex patterns with tiny text or thin lines.
Weeding Small and Complex Cuts
Weeding detailed designs without tearing requires patience and the right tools. Using fine-tip tweezers or a needle tool helps lift small weeded pieces carefully without stretching or ripping the vinyl. Start removing larger areas first, then work slowly around the tiny cuts, pulling weeds in a direction that follows the natural grain of the vinyl.
Ensuring the vinyl adhered well to the cutting mat before cutting prevents shifting, which can cause inaccuracies in fine cuts. Clean mats that maintain good grip are essential to hold the vinyl firmly during both cutting and weeding stages. This attention to detail in weeding makes the difference between a clean, professional-looking decal and a damaged one.
Post-Cutting Application and Care for Permanent Vinyl Projects
Properly preparing and maintaining surfaces when applying permanent vinyl ensures strong adhesion and lasting results. Cleaning the surface removes dirt, grease, and oils that can prevent the vinyl from sticking well. After applying the vinyl securely, some projects can benefit from gentle heat to improve bonding, especially on curved or textured surfaces. Regular care helps prevent fading, peeling, and damage from environmental exposure. Follow these steps to apply your permanent vinyl decal correctly and promote its durability over time:
- Clean the surface thoroughly. Use isopropyl alcohol or a mild detergent with water to remove any residue from your project material. Avoid using oils or furniture polish as they can leave behind substances that interfere with adhesion. Allow the surface to dry completely before moving on.
- Position and apply the vinyl. Align your design carefully, then press the vinyl onto the surface starting from one side and gradually smoothing it down. A scraper or credit card will help apply even pressure and avoid bubbles or wrinkles.
- Burnish the vinyl firmly. Use a firm, flat tool to press the vinyl down for about 30 seconds, focusing on edges and intricate areas. This step improves the contact between the vinyl’s adhesive and the surface.
- Remove transfer tape slowly. Peel back the transfer tape at a sharp angle, moving slowly to make sure the vinyl stays on the surface and doesn’t lift up.
- Optional: Apply gentle heat. For uneven or curved surfaces, warming the vinyl with a heat gun or hair dryer set to low (about 120°F) helps the adhesive activate and conform better. Do not overheat; keep the heat moving and avoid melting or damaging the vinyl. Let the surface cool before handling further.
Taking care of your vinyl decals also extends their lifespan. Avoid scrubbing vinyl with abrasive materials or harsh chemicals that can damage the surface. Clean vinyl surfaces gently using a soft cloth with mild soapy water only. Prolonged exposure to direct sunlight can cause fading over several years, so consider placing decals in shaded areas when possible.
For outdoor projects like water bottles or car decals, permanent vinyl from Cricut offers weather and fade resistance for 3 to 8 years depending on the product type. Still, it’s best to avoid power washing or heavy friction against the vinyl to prevent lifting or peeling. Checking the edges periodically and re-burnishing them can maintain a strong bond over time.
Differences Between Removable and Permanent Vinyl Settings
Permanent vinyl and removable vinyl differ mainly in their adhesive strength and how you set your Cricut to cut them. Permanent vinyl has a stronger adhesive designed to stick longer and resist peeling, making it ideal for outdoor use or items that will be handled frequently. Removable vinyl uses a lighter adhesive that lets you reposition and remove it without damaging the surface, perfect for temporary projects or delicate materials.
Because permanent vinyl’s adhesive is stronger, the Cricut cut settings generally use slightly higher pressure to fully cut through the vinyl and backing. In contrast, removable vinyl requires lower pressure and possibly a shallower cut to avoid piercing the backing or damaging the vinyl’s adhesion. Using the wrong setting can cause the removable vinyl to tear or not weed well, and permanent vinyl to not cut cleanly or lift properly when applied.
The choice between permanent and removable vinyl depends on how long you want your design to last and the type of surface you’re working with. Use permanent vinyl for items exposed to weather, handling, or cleaning, such as water bottles, outdoor signs, or car decals. Choose removable vinyl for interior walls, temporary decorations, or items where you might want to change the design later without residue or damage.
| Aspect | Permanent Vinyl | Removable Vinyl |
|---|---|---|
| Adhesive Strength | Strong, durable, may leave residue | Light to moderate, repositionable, less residue |
| Cricut Cut Pressure | Medium to high pressure | Low to medium pressure |
| Cricut Blade Depth | Standard blade depth for vinyl | Same or slightly less than permanent vinyl |
| Best Uses | Outdoor decals, water bottles, car graphics | Wall decals, temporary decorations, indoor use |
| Durability | Long-lasting, weather resistant | Lasts weeks to months, easy removal |
| Weeding and Transfer | Requires careful weeding and transfer via tape | Easier to weed due to lower adhesion |
When setting your Cricut to cut vinyl, selecting the correct material setting corresponding to your vinyl type ensures the blade cuts through the vinyl but not the backing. For example, using “Permanent Vinyl” setting on a Cricut Explore Air 2 applies medium pressure, while “Removable Vinyl” settings use lower pressure. Adjusting the cut pressure manually might be necessary for brand variations; some thicker Smart Vinyl requires different settings too.
Always perform a test cut on a small piece before cutting your full design to ensure clean cuts without damaging the backing or wasting vinyl.
Step-by-Step Action Plan for Cutting Permanent Vinyl with Your Cricut
Follow these steps to get clean cuts and smooth application from your permanent vinyl projects using your Cricut machine.
- Before you start: Set your Cricut material dial to “Vinyl” or “Permanent Vinyl” if available. Refer to your machine’s latest software to verify the recommended cut pressure. Proper settings ensure accurate cuts without tearing the vinyl.
- Day 1: Load your vinyl glossy side up onto a standard grip mat. Press to secure and make sure the mat is free of dust or debris. A clean mat prevents vinyl shifting during cutting.
- Day 1: Perform a test cut on a small piece of vinyl. The design’s edge should cut through the vinyl layer but leave the backing intact. Adjust blade pressure up or down if the test cut is too shallow or cuts through backing.
- Day 1: After cutting, gently weed out excess vinyl around the design using a weeding tool. Clean edges show you made a proper cut without gouging the backing.
- Day 1: Apply transfer tape over your weeded design. Press firmly to stick the tape evenly, then peel the backing off. When the design transfers fully, your vinyl and tape adhesion are at their best.
- Day 2: Prepare your project surface by cleaning it with isopropyl alcohol. This removes oils and helps permanent vinyl stick better, leading to longer-lasting results.
- Day 2: Position and apply the vinyl using a scraper tool. Work slowly to avoid bubbles. Smooth application prevents peeling and maintains design integrity.
- After 1 week: Inspect your project for any lifting edges. Lifting that happens calls for sealing edges with clear outdoor sealant to extend adhesion on exposed surfaces.
Frequently Asked Questions
What Cricut Blade Depth Works Best for Siser Permanent Vinyl?
A blade depth setting of 2 to 3 works best for cutting Siser Permanent Vinyl. Adjusting blade depth too high can cause tearing, so test on a scrap first to find the ideal setting for your machine model and vinyl thickness.
How Many Times Should You Set Your Cricut Blade to Cut Permanent Vinyl?
Setting your Cricut to cut 2 to 3 times usually ensures clean cuts through permanent vinyl. Multi-cut helps when using thicker vinyl or intricate designs but avoid too many passes to prevent cutting the backing paper.
Does Using a Different Cricut Mat Affect Cuts on Permanent Vinyl?
The LightGrip mat works best with permanent vinyl as it holds the material firmly but allows easy removal. Using a stronger grip mat can damage the vinyl or make weeding difficult.
Can I Use the Same Cricut Settings for Different Brands of Permanent Vinyl?
Settings can vary between brands like Cricut and Siser permanent vinyl. Testing cuts is important because different adhesive or vinyl thickness affects blade depth and cut pressure needed.
Is It Necessary to Clean the Cricut Blade After Cutting Permanent Vinyl?
Yes, cleaning your blade prevents sticky residue buildup, which can affect cut quality. Use a soft brush or cloth with alcohol to gently clean after vinyl cuts to maintain sharpness and precision.
What Cricut Setting Changes If My Permanent Vinyl Has a Carrier Sheet with a Special Coating?
For vinyl with a coated carrier sheet, reduce blade pressure slightly to avoid cutting through the backing. Testing a small piece first helps adjust settings without wasting material.
Before You Go
Using the right Cricut settings for permanent vinyl makes your projects look professional and last longer. Consistent testing and cleaning steps set you up for success every time you work with vinyl. Start by making a simple test cut to fine-tune your pressure, and then you can confidently create durable designs that stick well on your chosen surfaces.