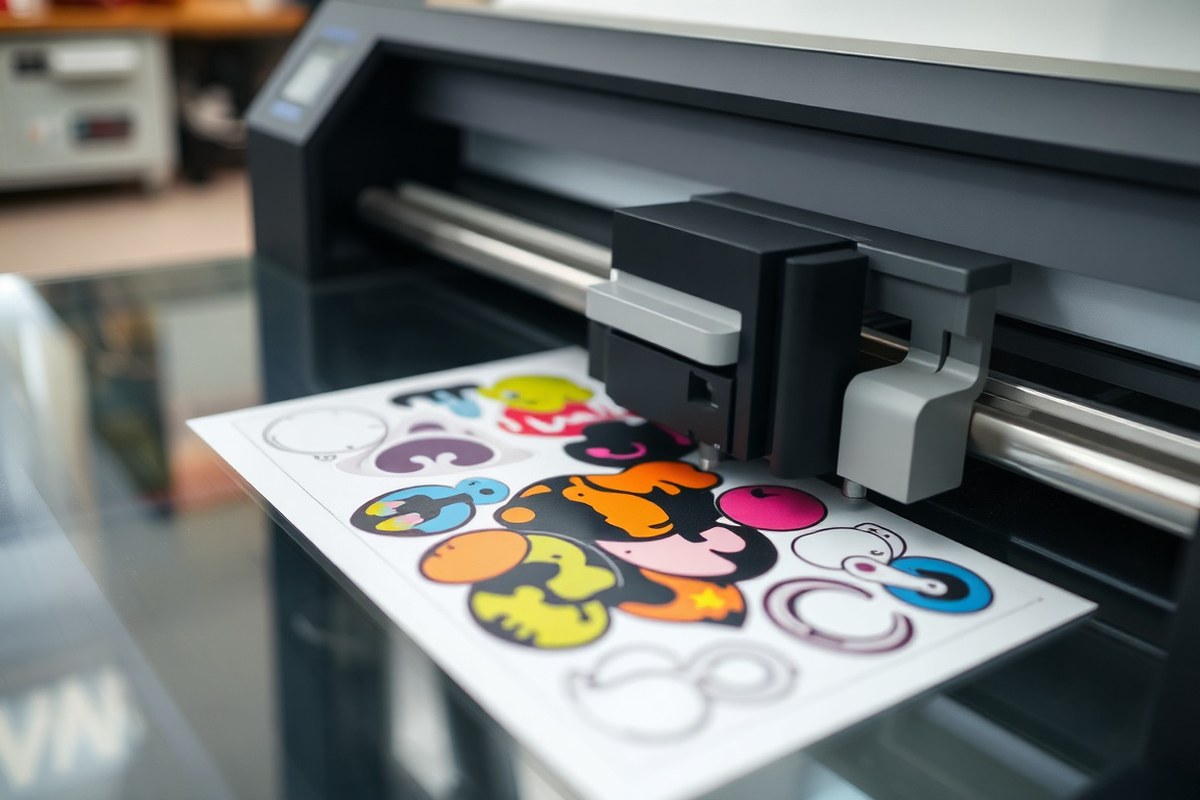
What Is a Contour Cutter? A Complete Guide to Precision Vinyl Cutting
What is a contour cutter? A contour cutter is a vinyl cutting tool that precisely follows the outline of a design, separating it cleanly from the surrounding material. It uses a blade guided by a cut path that usually extends slightly beyond the artwork edge by about 0.06 to 0.15 inches, creating a neat border around stickers and decals. This cutting process requires both the artwork file and a special cutting file to achieve accurate results.
Key Takeaways
- Contour cutters use a blade and a cut path to trim designs just outside their edges, ensuring clean separation from vinyl sheets.
- The cutting line is generated automatically, allowing up to 20 designs to be processed simultaneously for efficiency.
- Proper file preparation involves creating two files: the visual artwork and a cutting file with a spot color to guide the blade.
- Maintaining a cut path offset between 0.06 and 0.15 inches prevents damage to the design while allowing easy peeling.
- Kiss cutting trims the vinyl without cutting the backing, while die cutting or through cutting cuts through both layers completely.
- Manual to fully automatic contour cutters vary by speed, complexity, and required operator involvement.
What Is a Contour Cutter and How Does It Work?
A contour cutter is a vinyl cutting machine made to accurately trace and cut around the edges of a printed graphic. It doesn’t just cut basic forms such as rectangles or circles but follows a specific path set to the shape of your artwork. This method lets you produce custom decals, stickers, or signs that need detailed edge work. Ensuring a precise edge cut is important for complex logos or designs that must retain their original look.
The machine works by using a digital file that includes both the printed design and a vector cut path. This cut path, often called a contour line, defines exactly where the cutter’s blade should move. The contour cut path is usually created in design software and must be included in the file sent to the cutter. After printing your design on vinyl or other material, you load the printed sheet into the contour cutter. The cutter scans for registration marks that are printed alongside the design. These marks allow the machine to automatically adjust for any shifting or distortion that occurred during printing or loading, ensuring the cut is precisely aligned with the image.
Once the machine detects the registration marks, it follows the contour path by moving the blade along the printed edges of the design, cutting through the upper layer of vinyl but, depending on the cutting mode, may or may not cut through the backing paper. The blade’s pressure, speed, and angle can be adjusted for different materials. For instance, thin vinyl suitable for stickers requires lighter pressure and a faster speed, while thicker materials like heat transfer vinyl or magnetic sheets may need deeper cuts and slower blade speeds.
The contour cutting process starts by placing the printed medium on the cutter’s flat surface or feeding it into the machine. After selecting the appropriate job on the cutting software, the cutter reads the registration marks for alignment. The blade then follows the vector cut line exactly, moving around curves and sharp corners without damaging the printed design. The result is a perfectly trimmed, custom-shaped graphic ready for application or further processing.
Contour cutters can work with a variety of materials including self-adhesive vinyl, transfer films, heat transfer vinyl, cardstock, magnetic sheets, and even thin plastic films. Desktop vinyl cutters like Cricut or Silhouette models handle most hobby and small-business projects, while larger industrial cutters from brands like Advanced Machinery can manage wide-format prints and thicker media with higher precision.
Accuracy in contour cutting depends heavily on the quality of the cut line and proper placement of registration marks during printing. Without a well-defined vector path, the cutter cannot follow the design edges correctly, resulting in cuts that may be misaligned or inconsistent. Good results show a clean cut that exactly follows the design outline with no overlap or missed edges. Frequent issues include blade wear causing ragged cuts, misread registration marks from dirty or faded prints, and improper material loading leading to skewed cuts.
| Step | Action | Purpose |
|---|---|---|
| 1 | Print design with registration marks and vector cut line included | Provide cutter with guides for precise cutting |
| 2 | Load printed material onto cutter, matching the orientation indicated in software | Prevent skewed or inverted cuts |
| 3 | Cutter scans registration marks | Auto-align cut path to printed design, compensate for print distortion or loading error |
| 4 | Blade follows the contour cut path defined by the vector line | Cut precisely around the design edges |
| 5 | Remove cut graphic from uncut backing or release liner | Use for application or further processing |
This diagram illustrates how the cutter blade traces the printed line around the custom design. The red line shows the vector path, and the blade moves along it, carefully cutting through vinyl without affecting the backing paper unless a through cut is selected. This precise control is why contour cutting produces professional-quality custom shapes from printed graphics.
Different Types of Contour Cutting Methods Explained
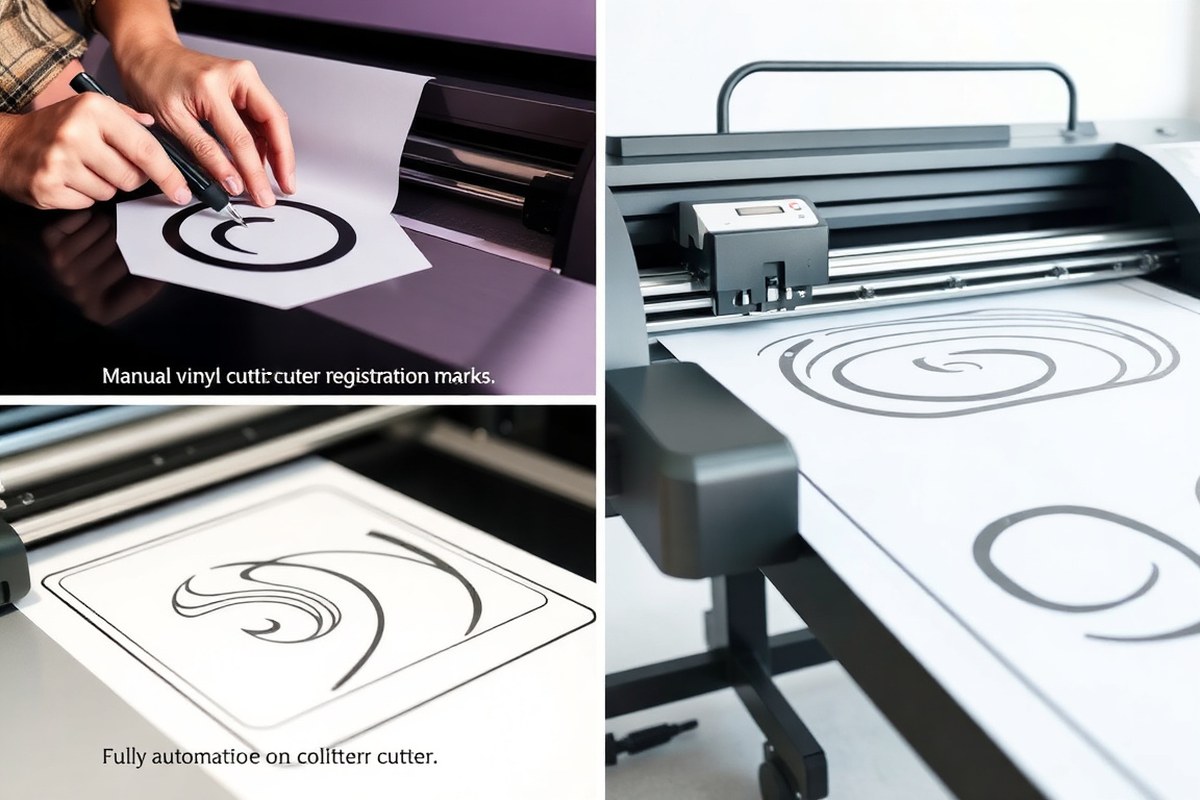
Contour cutting methods include manual, semi-automatic, and fully automatic processes. These vary in technology, cost, skill required, and ideal use cases. Choosing the right method depends on your project scale, precision needs, and available equipment.
Manual Contour Cutting Overview
Manual contour cutting involves using hand tools like craft knives or scissors to trace and cut shapes on vinyl or printed materials. This method requires steady hands and considerable skill to achieve clean edges. It’s cost-effective since it only needs basic tools, but it is time-consuming and prone to inaccuracies on detailed designs.
Manual cutting suits small-scale projects, prototypes, or situations where a vinyl cutter is unavailable. It lets you control every cut directly, which can be helpful for one-off tasks or unconventional materials that resist machine cuts. However, precise contour alignment depends entirely on your accuracy.
Semi-Automatic Contour Cutting Features
Semi-automatic contour cutters use a vinyl cutter equipped with optical sensors to detect registration marks printed on the media. These marks help the cutter align cuts precisely with the printed artwork’s contours. This method reduces manual input while maintaining decent accuracy and speed.
This approach is ideal for small to medium production runs where some automation benefits are needed, but budget limits prevent investing in fully automatic systems. It requires software to create registration marks and the cutter to recognize them, typically accommodating moderately complex shapes.
Make sure your registration marks are clearly printed and not distorted; poor marks lead to misaligned cuts.
- Uses optical sensors to read registration marks
- Balances automation with operator setup
- Good for medium complexity shapes and mid-sized batches
- Requires compatible software and cutters
- Speeds up production compared to manual cutting
- Costs less than fully automatic cutting machines
- Still needs occasional calibration and operator oversight
Semi-automatic cutting helps maintain a smooth workflow by automating recognition but still depends on operator skills for setup and troubleshooting.
Fully Automatic Contour Cutting Benefits
Fully automatic contour cutters operate without manual intervention once the job is set up. Using advanced sensors and precise motors, these machines follow registration marks or digital paths, smooth cutting complex and intricate shapes consistently. They integrate well with print-and-cut workflows in commercial print shops.
This method is best for high-volume production with demanding quality standards. It minimizes errors and operator fatigue, drastically improving throughput for large runs. However, fully automatic cutters involve higher upfront costs, typically ranging from several thousand to tens of thousands of dollars, plus maintenance expenses.
Ideal use cases include commercial signage, vehicle wraps, decals, and other print products where speed and precision directly impact profitability. Setting up fully automatic systems demands investment in compatible RIP software, skilled operators, and routine calibration to avoid misalignment issues.
Key Differences: Contour Cut vs Die Cut vs Kiss Cut
Contour cutting, kiss cutting, and die cutting are distinct cutting methods used to shape printed materials, especially in vinyl and wide format printing. They differ mainly in cut depth and precision, determining their best applications in various print projects. Understanding these differences helps you choose the right technique to achieve professional results and cost-effective production.
What Is Contour Cutting?
Contour cutting precisely cuts around the edges of a printed shape or design using a vinyl cutter or plotter. This technique follows a digital cutting path separate from the print file, allowing you to produce custom-shaped graphics, decals, or stickers with clean, smooth edges. It generally cuts through the vinyl or substrate layer completely, separating the printed piece from the backing or larger material sheet.
This method is valuable for small runs or custom orders since it requires no custom dies and can economically create complex shapes. Contour cutting achieves high accuracy by relying on registration marks to align the cut lines exactly with the printed images, preventing off-center cuts that reduce quality.
How Kiss Cutting Works
Kiss cutting is a form of contour cutting where the blade cuts through only the top vinyl or printable layer without cutting through the backing paper. This controlled depth cut allows the sticker or label to remain attached to its backing, making it easy to peel off later. Kiss cuts are ideal for producing sticker sheets or multi-cut labels that require precision and clean removal.
Kiss cutting requires selecting the correct blade depth and pressure to avoid cutting the backing layer. It offers more control over cut depth than standard contour cutting, which usually cuts through the entire material stack. This precision makes kiss cutting the best choice for thin vinyl stickers or applications where separation from the backing is important.
Understanding Die Cutting
Die cutting uses a physical steel die to punch shapes out of the material by applying pressure, unlike contour or kiss cutting, which uses a digital blade plotter. It is best suited for high-volume runs where identical shapes are needed, as the die must be custom-made, which increases upfront costs and setup time.
Die cutting cuts completely through the substrate and backing as needed and produces consistent shapes rapidly once the die is prepared. It’s commonly used for packaging, labels, and shapes requiring heavier materials or thicker stocks that are difficult to handle with plotters.
The main tradeoff for die cutting is the cost and inflexibility. You’ll spend hundreds to thousands for a custom die, making it less economical for small projects or highly variable designs. Contour and kiss cutting provide flexibility and speed for custom or small-quantity prints without that initial investment. Below is a comparison table outlining key differences among contour cut, kiss cut, and die cut methods.
| Cutting Type | Depth of Cut | Layer Cut | Best Use Case | Equipment Required | Cost Considerations |
|---|---|---|---|---|---|
| Contour Cut | Full depth through vinyl/substrate | Separates piece from backing | Custom shapes, small runs, wide-format prints | Vinyl cutter/plotter with registration marks | Low setup, no custom tools needed |
| Kiss Cut | Partial depth; cuts vinyl only | Leaves backing intact | Sticker sheets, labels needing easy peel | Vinyl cutter with precise blade depth control | Low setup, requires precise blade settings |
| Die Cut | Full depth, through vinyl and backing | Separates piece from material | High volume runs, heavy stock, packaging | Custom steel die and press | High initial die cost, low per-piece cost at scale |
Choosing the right cutting method depends mostly on volume, material thickness, design complexity, and budget. For one-off projects or variable shapes, contour or kiss cutting with a vinyl cutter is quickest and most flexible. For large runs with consistent shapes and thicker materials, die cutting offers efficiency despite upfront costs. Select kiss cutting when you need precise control on peelable sticker sheets to prevent cutting the backing, and contour cutting when clean separation of single pieces is your goal.
How to Prepare Artwork Files for Accurate Contour Cutting
Preparing artwork files for contour cutting involves creating precise cut paths, placing clear registration marks, and exporting the design in compatible formats. This process ensures the cutter correctly follows your intended outlines and aligns the cuts with your printed graphics. Accurate file preparation reduces waste and improves the quality of your finished product.
Creating the Cut Path Layer
Start by drawing the contour cut path as a separate vector layer within your artwork file. This path guides the cutter along the exact shape to be trimmed. The cut lines should be set as a special spot color, often named “CutContour” on Roland machines, to differentiate them from printed elements.
Keep cut paths simple and smooth; excess anchor points or complex shapes can cause cutting errors or slow down the machine. Make sure the paths stay within the boundaries of your design, avoiding overlay on the printed image edges. This clarity helps the cutter avoid misalignment or unwanted cuts.
Adding and Positioning Registration Marks
Registration marks are printed targets that contour cutters use to detect the position of the artwork and align the cut paths precisely. These marks must be added as a separate layer in the design file and placed outside the main graphic area but still within the printable space.
Use at least three registration marks arranged in a triangular pattern near the corners of the printed sheet. The cutter’s optical eye or camera reads these marks to adjust for any skewing or stretching of the material. Proper placement prevents cutting inaccuracies and ensures the contour matches the print exactly.
Best Export Settings for Vinyl Cutters
Export your file in a vector format that supports spot colors and multiple layers, such as PDF, EPS, or AI. These formats maintain the cut path data and registration mark layers, allowing the cutting software to distinguish between print and cut information.
Before exporting, double-check that each cut path is assigned the correct spot color for cutting recognition. Flatten layers carefully without merging cut paths into the artwork layer. Save separate files if your printer and cutter do not use an integrated workflow. Follow these steps to prepare your artwork for contour cutting:
- Create a new layer for the cut path in your design software.
- Draw a clean vector path around the edge of your artwork that represents where you want the cutter to cut.
- Assign a spot color specifically named (e.g., “CutContour”) to the cut path layer for easy recognition by cutting software.
- Add registration marks as a separate layer; position at least three marks in a triangular layout near the edges of the sheet.
- Verify paths do not overlap with printed artwork and are fully inside the printable area.
- Save or export the file in a compatible vector format such as PDF or AI, preserving layers and spot colors.
- Test the file on your cutter software to confirm the paths and registration marks are detected correctly.
| File Preparation Checklist | Details |
|---|---|
| Cut path as separate layer | Use vector paths assigned to a spot color named “CutContour” or equivalent |
| Registration marks | Place at least three marks outside the artwork within printable bounds |
| File format | Export as AI, EPS, or PDF preserving spot colors and layers |
| Path complexity | Simplify paths to reduce cutting errors and processing time |
| Alignment check | Use cutter software preview to confirm cut lines and registration marks detect properly |
Tips for avoiding common file errors: Do not merge or flatten cut paths with artwork layers. Avoid using colors similar to cut spot color for printed elements to prevent confusion. Double-check registration mark size and contrast for optimal optical eye detection. Confirm that the artwork and cut paths match in size without unwanted scaling.
Common Issues and Troubleshooting in Contour Cutting
Misalignment between the cut line and the printed image often occurs because the cutting machine cannot properly detect the registration marks. These marks serve as reference points that guide the contour cutter to trace the exact edges of the graphic. Failing to print these marks clearly, or using a machine with dirty or worn sensors, will cause the cutter to offset the cut path, commonly cutting outside or inside the intended boundary.
Incomplete or uneven cuts usually result from improper blade settings or uneven material feeding. Blades that are too dull, set at incorrect depths, or moving at inconsistent speeds fail to cut through the vinyl or media consistently. This causes ragged edges or missed sections of the contour, requiring rework that wastes time and materials.
Addressing registration mark detection problems begins with ensuring the marks are printed sharply and in the correct placement. A contrast between the mark and background is essential; too faint or small marks reduce sensor accuracy. Cleaning the sensor lens regularly improves detection, especially if dust or adhesive residue accumulates during production. Top contour cutting mistakes and their solutions include:
- Skipping regular blade replacements, leading to dull cuts, replace blades every 8 to 12 hours of cutting.
- Using graphics without registration marks or with poorly placed marks, always include clear, high-contrast marks at the artwork setup stage.
- Neglecting machine calibration, perform calibration routines before each print and cut job to align sensors with print positioning.
- Incorrect blade pressure and speed settings, adjust based on material type and thickness; vinyl typically requires medium pressure and slower speeds.
- Poor media loading causing shifting, secure media to prevent movement during cutting.
- Ignoring environment factors like temperature or humidity, which can affect material dimensions, maintain stable workshop conditions.
- Overlooking sensor maintenance, clean sensors weekly or after every major job to prevent debris buildup.
To calibrate your contour cutter, print a calibration sheet from your cutting software that includes various registration mark sizes and positions. Place this sheet on the cutting bed, then follow your machine’s guided calibration procedure. This ensures the cutter’s sensors correctly align with printed marks. Calibration may take 5 to 10 minutes but improves cutting accuracy dramatically.
Regularly check and clean registration mark sensors to avoid alignment errors before every major cutting job.
Good results mean sharp, clean cuts that match the printed design exactly, contouring even complex shapes like a dog’s ears and tail without deviation. Consistent blade pressure paired with precise sensor detection reduces waste and speeds up production, especially when handling large or long print runs that require continuous alignment. Troubleshooting these issues early saves costly materials and supports a smooth workflow in your print shop or vinyl cutting operation.
Common Applications of Contour Cutting in Printing and Signage
Contour cutting is widely used to produce vinyl graphics and decals, which remain one of the most common applications in printing and signage. You can create custom vinyl stickers, decals, and vinyl lettering with precision cuts that match the shape of your design. This method suits promotional materials, business branding, and marketing campaigns where clean, sharp edges showcase logos or artwork without excess material around them. The automated process reduces waste by cutting exactly along the printed outlines, saving both material costs and labor time for print shops and sign makers.
In apparel decoration, contour cutting plays a critical role by cutting heat transfer vinyl (HTV) into intricate shapes ready for application on fabrics. This makes custom printed shirts, hats, and sports jerseys possible with detailed designs that layer multiple colors or patterns. Cutting precisely around each graphic element allows for quick, efficient production of wearable goods. For hobbyists or professionals working with HTV, contour cutting means faster production runs and consistent results, especially when working with fine details or multiple small pieces that must fit perfectly on a garment.
Contour cutting is not limited to vinyl alone. It works on various printable substrates like clear sticker paper, adhesive vinyl, and specialty materials designed for packaging labels or custom signage. For example, custom-shaped packaging labels can be produced in bulk with contour cutting machines, providing brands with distinctive visual appeal on shelves. This technique also transfers well to rigid or flexible materials when combined with compatible cutting blades and machine settings, enabling the creation of bespoke signs, window clings, and decals that conform to complex shapes.
The benefits of contour cutting in these contexts include greater design freedom and efficiency. You can program contour paths directly from your vector artwork, allowing for complex shapes, curves, and angles that would be difficult or costly to achieve with traditional die cutting. Typical contour cutting machines can handle shapes ranging from simple circles and rectangles to elaborate logos or characters with tight curves. Automated registration sensing helps line up the cut path precisely around a printed image, ensuring consistent quality across production runs.
For best results, prepare your artwork with a clear cut line vector path that the cutter can follow exactly. Use software tools to define cut layers separate from print layers, and check registration marks before sending jobs to the cutter. While contour cutting reduces errors compared to hand trimming, problems can arise if the vinyl shifts during cutting or if registration marks are missing or inaccurate. The equipment investment varies widely; entry-level desktop cutters start around several hundred dollars, while commercial-grade machines with wide-format and high-speed capabilities can cost several thousand. For a print shop or signage business, the time saved by automated contour cutting and the ability to offer detailed custom shapes quickly can justify the upfront cost.
Essential Equipment and Software for Successful Contour Cutting
Contour cutting requires specific hardware and software tailored to the detail and precision of the job. Vinyl cutters capable of contour cutting often range from compact desktop models to larger, professional-grade machines. Popular choices include the Roland CAMM-1 GX series, which offers cutting widths from 15 to 54 inches and adjustable blade force up to 300 grams, ideal for thick vinyl. The Graphtec CE6000 series supports detailed contour cutting with up to 24-inch width and advanced registration mark sensing to increase accuracy. Entry-level options like the Silhouette Cameo 4 are suitable for hobbyists and cost around $300 to $400, providing effective contour cutting on smaller formats.
The software tools you use must handle contour cut file creation through precise vector paths and registration mark detection. Adobe Illustrator remains the industry standard for designing and preparing cut files due to its strong vector editing capabilities and integration with cutting plugins. CorelDRAW also supports contour cutting workflows with direct file export options compatible with many cutter models. For specialized cutting, RasterLink software accompanies Roland cutters to automate contour line generation and improve accuracy. Essential features to consider in software include the ability to create and place registration marks, convert text and images to vector paths, and generate contour lines automatically based on artwork.
Accessories and maintenance significantly impact cut quality and machine longevity. Blade types vary mainly in angle and material; for vinyl cutting, a 45-degree blade is common, offering a good balance between precision and durability. For detailed or thicker materials, a 60-degree blade is better but wears faster. Regular blade replacement every 3 to 6 months keeps cuts clean, while blade depth should be adjusted carefully to avoid cutting the backing paper. Using roll feeders can help maintain material tension and reduce slippage, while vacuum hold-down systems prevent material shifting during cuts. A clean blade holder and consistent cleaning of rollers reduce errors caused by debris or misalignment.
- Vinyl cutters like Roland CAMM-1 GX and Graphtec CE6000 for precise contour cutting
- Adobe Illustrator and CorelDRAW for designing and exporting cut paths
- Blade options: 45-degree for standard vinyl, 60-degree for thick or detailed cuts
- Roll feeders and vacuum hold-downs to stabilize materials during cutting
- Regular blade inspection and replacement every 3, 6 months
- Software features: auto contour line generation, registration mark placement
- Maintenance tips: clean blade holder, remove debris from rollers
Whether you choose a semi-automatic or a fully automatic contour cutter depends on production volume and budget. Machines with advanced registration mark sensors enable better alignment, especially for multi-layer decals and complex designs. Cost can range widely, from a few hundred dollars for hobbyist machines up to $5,000 or more for professional-grade models featuring wide-format cutting and integrated software. Investing in reliable software that can produce precise contour paths tailored to your cutter model minimizes file preparation errors, which are the leading cause of miscuts and wasted material.
How to Choose Manual, Semi-Automatic, or Fully Automatic Cutting
Choosing the right contour cutting method depends largely on your skill level, budget, and project demands. Manual cutting still has a place for hobbyists and very small runs where costs must be minimal and the precision required is low. However, manual processes require more hands-on work and often result in inconsistent cuts, making them less suitable as your project volume or complexity increases.
Semi-automatic contour cutters strike a balance, offering some automated features to improve precision and speed while still requiring some operator input. These systems generally cost less than fully automatic models and make sense for small businesses or contractors targeting customized sign or sticker production without the upfront investment needed for full automation.
Fully automatic contour cutters provide the highest precision and efficiency. They drastically reduce manual labor, cut turnaround times, and minimize material waste, important advantages for busy print shops or graphic designers producing large quantities or intricate designs. The tradeoff is the upfront cost, which may range from several hundred to several thousand dollars depending on the model and features. Use the following table as a checklist comparing pros and cons to match your needs:
| Cutting Method | Cost Range | Skill Required | Ideal Volume | Precision Level | Manual Labor | Setup Complexity |
|---|---|---|---|---|---|---|
| Manual | Lowest (under $50 for tools) | Basic | Very Low (prototypes, one-offs) | Low to Moderate | High | Low |
| Semi-Automatic | Mid-range ($500 – $2,000) | Moderate | Low to Medium | Good | Moderate | Moderate |
| Fully Automatic | High ($2,000+) | Advanced | Medium to High | Very High | Low | High |
When scaling from hobbyist to professional use, consider gradually upgrading from manual to semi-automatic equipment. Start by mastering artwork preparation and cutting precision with simpler tools. As demand grows or your design complexity increases, investing in fully automated contour cutting technology can save time and improve product quality, particularly for business applications where turnaround speed and consistency are critical.
Never rush the digital preparation phase, precision there is key to successful contour cutting results.
Looking at your specific materials and the complexity of your designs can also guide the choice. Complex curves and detailed graphics benefit most from automatic cutters that can follow intricate contour lines exactly. Meanwhile, simple shapes may still be managed well with manual or semi-automatic cutters, especially in small batch runs.
Quick-Start Action Plan for Using a Contour Cutter
Get your contour cutting projects off the ground with these clear, timed steps. Each step helps you build skills and confidence while avoiding common pitfalls.
- Before You Start: Choose the right contour cutter type (manual, semi-automatic, or fully automatic) based on your budget and volume needs. Confirm it matches your material and project complexity by testing a small sample cut.
- Day 1: Prepare your artwork file using vector paths and precise registration marks. Open the file in your cutting software and ensure the contour lines are set to cut. A successful test plot with exact alignment means you are set.
- Day 2: Load your vinyl or substrate correctly into the cutter, aligning it with sensors or registration marks. Check that the blade pressure and speed settings fit your material by completing a simple test cut without tearing or skipping.
- Week 1: Execute your first full contour cut, watching for issues like misalignment or incomplete cuts. Adjust the blade depth, speed, or sensor calibration based on these results.
- Week 2: Increase batch size as you gain confidence. Maintain consistency by regularly cleaning sensors and blades. Confirm success by minimal waste and precise edge cuts on multiple runs.
- After 1 Month: Experiment with complex shapes and layering techniques like kiss cuts to expand your design options. Evaluate efficiency improvements and quality consistency for future job planning.
Frequently Asked Questions
What Is the Difference Between a Contour Cut and a Kiss Cut?
A contour cut goes through the entire material, while a kiss cut cuts only the top layer, leaving the backing intact. This is useful for stickers needing easy peel-off without full separation from the backing.
How Does Registration Mark Placement Affect Contour Cutting Accuracy?
Registration marks help the cutter align precisely with the printed design edges. Proper placement ensures the vinyl cutter follows the artwork contour exactly, preventing miscuts or partial cuts.
Can Contour Cutters Handle Cut Designs with Overlapping Shapes?
Yes, contour cutters can cut overlapping shapes if the artwork is prepared correctly. Separate contour paths and clear layering in the file help the cutter identify each shape’s outline for accurate cutting.
Is It Possible to Contour Cut on Materials Other Than Vinyl?
Contour cutting works well on flexible materials like vinyl, decal film, or heat transfer materials but is less effective on thick or rigid substrates as the blade may not cut cleanly.
How Do Blade Type and Blade Pressure Influence Contour Cutting Results?
Blade type and pressure directly affect cut quality; the right blade shape and pressure setting prevent tearing or incomplete cuts. Testing on scrap material can optimize settings for different vinyl thicknesses.
What Software Features Assist with Contour Cutting File Preparation?
Software with a Cut Contour window or registration mark tools improves job setup. It allows you to assign specific cutters and preview cut paths to ensure accurate cutting along printed graphics.
Before You Go
A contour cutter streamlines precision cutting on vinyl and other materials, saving time while producing professional results that stand out. Start by mastering your chosen cutter type and preparing your files accurately. Then test your settings on scrap material to ensure consistent quality. Taking these steps will make contour cutting a reliable part of your printing or signage process.