
How to Use FlexiSign: A Complete Guide to Fast and Professional Sign Design
How to use FlexiSign starts with familiarizing yourself with its interface and tools designed for efficient sign design and production. Focus on mastering the key features like vector editing, color management, and print/cut preparation to speed up your workflow and reduce errors. Begin every new project by setting up your design workspace and preferences to match your equipment and output requirements.
Key Takeaways
- Choose the correct FlexiSign version based on your use case and equipment to optimize total cost of ownership.
- Set up the software workspace before starting your first project to ensure compatibility with your printer and cutter.
- Learn the main interface components such as menus, toolbars, and the design window for faster navigation.
- Use FlexiSign’s print and cut preparation features to correctly register designs and minimize material waste.
- Memorize or customize keyboard shortcuts to perform common tasks quickly and improve production speed.
- Avoid common mistakes like incorrect file formats or overlooked color separations by following software guidelines.
What Is FlexiSign and How Does It Work?
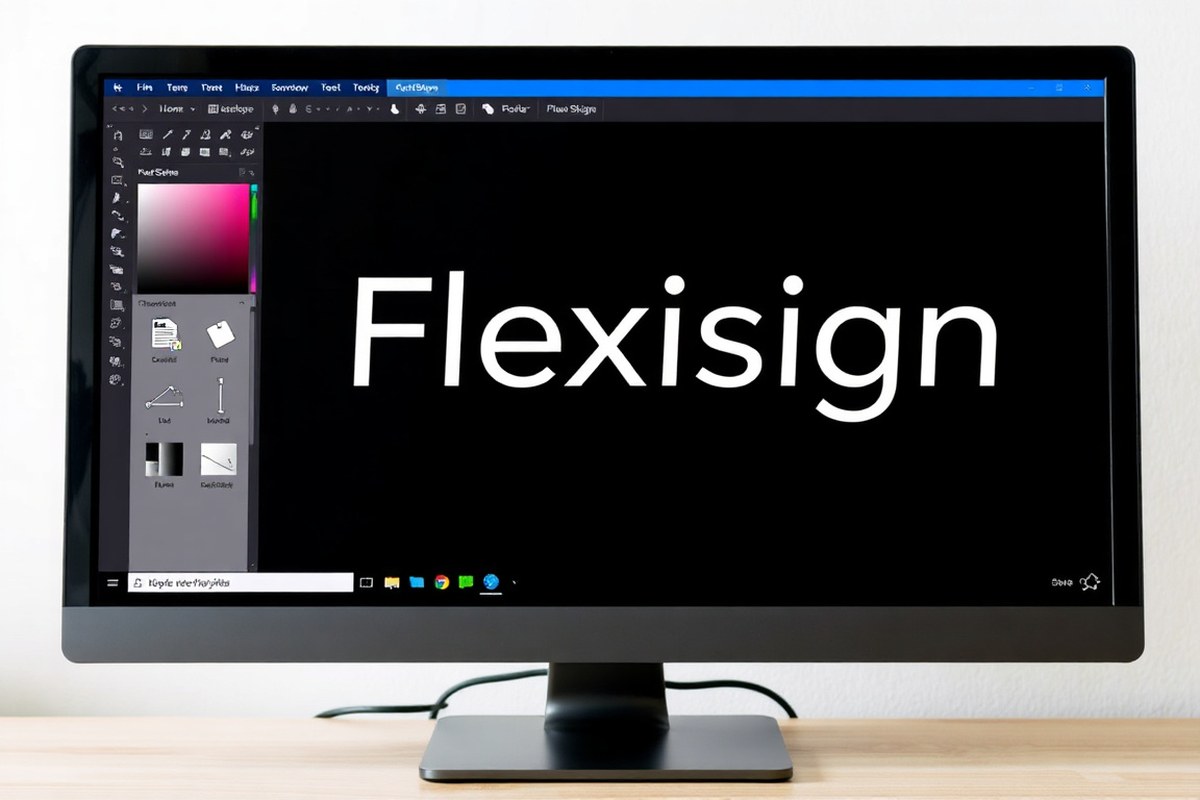
FlexiSign is a professional vector design and sign-production software made by SAi, tailored for commercial sign shops, vehicle wrap studios, and marketing departments. Its primary role is to help you create and manage designs that will be printed and cut on vinyl plotters such as Roland BN-20, GCC ExpertJet, or Summa S series. You can use it to make vinyl decals, vehicle wraps, banners, labels, and a large variety of cut/print signage, handling all the stages from design to production.
This software supports Unicode and OpenType fonts, which means you can design signage that meets multilingual requirements common in the sign industry. It uses a combination of vector drawing tools and layout features that optimize the preparation of print-and-cut workflows, saving time and material. For instance, it integrates cutting control with your design file, so you set up cut lines alongside printed graphics, reducing errors in the production process.
FlexiSign Pro is popular because it offers over 90 keyboard shortcuts spanning file management, text editing, alignment, selection, and path editing. These shortcuts help speed up repetitive tasks, such as grouping design elements or preparing for production, making your workflow leaner. The software follows a shortcut logic close to CorelDraw, which is common in the sign industry, facilitating easier transitions for users switching from similar platforms.
The software comes in different versions that vary by budget and features. FlexiSign Pro, the perpetual-license version, costs around $4,295, making it a significant investment if you want deep legacy support and offline activation. Flexi Design offers a subscription model starting at about $33.99 per month, including constant updates, cloud storage, and priority support, which suits new or hybrid shops needing easy collaboration. Larger operations that require RIP control for screen printing, UV printing, or direct-to-garment options might consider Flexi Complete for a more complete solution.
Good results with FlexiSign mean smooth, precise cut lines and clean, raster-ready designs that your cutter and printer can handle without jamming or misalignment. Production Manager in FlexiSign 22 and later versions includes features like smooth edges on transparency for more advanced output. If you see warnings about duplicate file names or conflicting processes, the software alerts you, helping avoid common mistakes in busy shop environments.
For professionals new to FlexiSign, understanding that it blends vector layout with direct print-and-cut control is key. That way, you use it not only as a design tool but as a production controller. Its integration with devices you own means you troubleshoot and verify output patterns before sending jobs. Since FlexiSign supports most print-and-cut workflows out of the box, you can expect it to account for things like vinyl stretch and weeding lines, critical for wrap designers and decal makers.
Your choice of FlexiSign version and your setup will influence the learning curve and cost, so consider your current hardware and production demands carefully. Shops running stable Windows 7 or 10 systems and owning your existing licenses might continue with Flexi 10, which requires more self-managed support but is cost-effective. New users or shops wanting cloud-enabled, feature-updated software will find Flexi Design a more forward-looking choice, especially if working in teams or from multiple locations.
How to Set Up FlexiSign for Your First Project

Setting up FlexiSign starts with installing the software on compatible hardware, activating your license, and connecting your printer or vinyl cutter. After that, you need to configure your document size and workspace to fit your specific project requirements. Following clear steps ensures better performance and fewer errors during production.
Installing and Licensing FlexiSign
Check your system meets the minimum requirements before installing FlexiSign. For Windows, use a recent version with sufficient RAM and processing power to handle large files. On Mac, you need macOS Catalina 10.15 or later. License costs range broadly from $30 to $630 depending on activation status and the hardware bundle included.
Activation can require offline steps, especially on newer operating systems. This process ties your license to the computer and prevents unauthorized use, so keep activation keys and serial numbers handy. Consider Flexi 10 for compatibility with legacy CorelDRAW formats and optical sensor plotter workflows when working with older files or equipment.
- Download the latest FlexiSign installer from the official website matching your OS version.
- Run the installer and follow on-screen prompts to complete installation.
- Launch FlexiSign and enter your license key when prompted.
- Complete offline activation by following the provided instructions, which may require visiting a specific URL from another device.
- Restart FlexiSign to apply the license.
Activation errors often stem from outdated operating system permissions; check your OS updates before installing.
Connecting Printers and Vinyl Cutters
Linking your printer or vinyl cutter correctly is essential to send jobs from FlexiSign without errors. Connect devices via USB or network depending on your hardware capabilities. Make sure you install the latest device drivers from the manufacturer to ensure stable communication.
Once connected, configure device profiles inside FlexiSign for accurate colour management, print output, and cutting parameters. Enable registration marks in your designs to allow your plotter’s optical sensors to automate alignment during print-and-cut processes.
- Power on your printer or vinyl cutter and connect it to your computer via USB or Ethernet.
- Install any necessary drivers or software provided by the device manufacturer.
- Open FlexiSign, go to the device setup section through File > Print Setup or Cut/Plot settings.
- Select your device from the list or add it manually if not auto-detected.
- Configure specific device parameters like media size, cutting force, and blade offset.
- Test communication by sending a small print or cut job from FlexiSign.
Misconfigured cut settings such as excessive force can damage your plotter blade or material; start with manufacturer’s recommended values.
Configuring Document and Workspace Settings
Setting your document size and workspace correctly before starting any project helps avoid scale and alignment issues. Use File > Document Setup to enter precise width and height measurements for your sign, banner, or vehicle wrap. Adjust units to inches, millimeters, or pixels depending on your project standards.
FlexiSign’s workspace is customizable to match your workflow. Access File > Workspace > Customize to add or remove toolbars and menu commands. Make sure your frequently used tools and shortcuts are visible to speed up your work, especially if working with complex vector and raster designs.
- Open FlexiSign and go to File > Document Setup.
- Enter your preferred page size or define a custom size matching your media.
- Select the measurement unit (inches or millimeters) appropriate for your material.
- Save the document setup and check the preview to confirm dimensions.
- Navigate to File > Workspace > Customize to personalize toolbars and menus.
- Add or remove commands and save your workspace layout for future projects.
A poorly configured workspace can slow your workflow; tailor toolbars to include only your essential tools.
Key FlexiSign Tools and Interface Components to Know
The core tools for creating designs in FlexiSign include the Design Editor, Fill/Stroke Editor, and Color Mixer, each accessible via keyboard shortcuts, E, I, and M respectively on both Windows and Mac. The Design Editor allows you to manipulate paths and shapes essential for creating and editing vector artwork. Using the Fill/Stroke Editor, you manage colors and outlines for design elements, adjusting widths, dash patterns, and fills for clear, professional results. The Color Mixer helps you fine-tune hues, matching specific brand or project requirements accurately. These tools together let you build complex graphics with precision while maintaining control over every visual detail.
Design Central plays a important role as a floating, context-sensitive panel that changes based on the currently selected object type. Pressing Ctrl + I or Command + I opens it, offering quick access to object properties like size, position, scale, and rotation. This interface component streamlines your workflow by centralizing control for adjustments without hunting through menus. For text elements, you’ll find font settings and alignment options here; for shapes, options to tweak stroke style and fill patterns. Proper use of Design Central reduces clicks and helps maintain a smooth design process, which is critical when working on tight sign shop deadlines.
Production Manager integrates tightly with FlexiSign’s design space, handling the print and cut workflow from final artwork to output. It supports job preparation with advanced finishing tools, such as grommet holes and bleeds, directly within the Flexi design environment. Using Production Manager, you control device queues, job nesting, and RIP settings to speed up production while ensuring accuracy. Its 64-bit RIP engine delivers faster processing and better precision, making it ideal for high-volume shops that demand reliable and repeatable results. Launch Production Manager from the main Flexi workspace, review job parameters, and send print or cut files to your hardware with minimal hassle.
Color management and layer organization happen within dedicated interface sections designed for efficiency. The Fill/Stroke swatch tables include new smooth tile patterns and vector management tools, like the Find Color tool, which identifies colors and matches them with the extensive Flexi Color libraries. This can be instrumental when ensuring color consistency across large signage projects. Layers are managed through the Objects panel, where grouping, locking, and visibility controls help keep multi-part graphics well organized, especially useful when working on vehicle wraps or large-format signage involving multiple design elements. Properly managing layers prevents accidental edits and helps maintain an efficient, error-free design process.
FlexiSign’s interface is also customizable, featuring six skinable themes and adjustable artboard contrast levels that improve visibility when working with white or light-coloured design elements. This adaptability helps reduce eye strain during long design sessions typical in sign production environments. Attention to these ergonomic details promotes accuracy and sustained productivity, factors that count when facing tight deadlines.
Being familiar with prepress terminology used in the interface, like “spot color separation” or “halftone simulation,” lets you use FlexiSign’s advanced production capabilities fully. The software is built specifically for signmaking workflows, so unique tools embedded in the UI speed up job preparation steps that generic graphic software might lack. Mastering these interface components and essential tools helps you produce high-quality signs, wraps, and print products efficiently and with fewer errors.
How to Create and Prepare Designs for Print and Cut
Creating and preparing designs for print and cut in FlexiSign involves drawing or importing vector artwork, applying contour cuts for precise cutting, and setting up the job to ensure accurate print and cut output. This process ensures your graphics are production-ready, minimizing errors and material waste.
Drawing and Editing Vector Graphics
Start by creating vector shapes directly in FlexiSign using the drawing tools or importing existing artwork in compatible formats like AI, EPS, or PDF. Vector graphics are essential because they allow you to scale images without losing quality, which is critical for signs and vehicle wraps.
To create vector shapes, select the appropriate shape tool from the toolbox, such as rectangle, ellipse, or pen tool for freeform paths. Edit your paths using node editing tools to adjust curves and angles precisely. You can select nodes or segments and move, add, or delete them to refine your design.
Applying Contour Cuts and Finishing Touches
Contour cutting defines the cut lines around your printed shapes. Flexi’s Contour Cutting engine lets you apply these cuts quickly, even on complex graphics, ensuring finishing lines are set for your vinyl cutter or plotter. This is important for signs and decals that require cutting around detailed shapes.
The software also supports optical sensor calibration, which aligns the cut paths precisely with the printed image, preventing miscuts. You can preview contour cut paths in multiple colors, making it easier to check that cut lines match your design exactly. Custom weed paths help remove excess vinyl cleanly, reducing manual finish work.
Setting Up Print and Cut Jobs
Prepare your file for printing and cutting by organizing your design layers and setting up color separation if needed. Preview and adjust the cut lines separately from the print elements to confirm accuracy, which minimizes material waste and machine downtime. Follow these steps to set up the job properly:
- Import or create your design and ensure it’s fully vectorized.
- Apply contour cuts using the Contour Cutting tool, calibrate optical sensors if your equipment supports it.
- Preview cut lines to verify all paths align correctly with printed graphics.
- Set up print parameters, selecting the correct media type and ink settings required by your printer.
- Adjust layout to optimize material usage and consider nesting multiple designs for efficiency.
- Send the job to print and cutting queues using the appropriate commands (Ctrl + H for RIP/print and Ctrl + L for cut/plot on Windows).
- Monitor output to ensure cuts are registering properly with the printed image before full production.
Adhering to these steps helps maintain workflow speed and accuracy, especially when working with multiple plots or jobs dependent on sensor registration. FlexiSign’s integration with popular RIP engines like Onyx and RasterLink supports smooth file transfer and device communication.
Top Keyboard Shortcuts and How to Customize Them
FlexiSign offers keyboard shortcuts that significantly speed up your design and production workflow, especially for alignment, grouping, and undoing actions. Most core shortcuts like Save, Copy, Group, and Undo have stayed consistent across versions, so learning these covers most daily tasks. The main difference between Windows and Mac versions is the substitution of Ctrl with Command and Alt with Option keys.
| Action | Windows | Mac |
|---|---|---|
| Align Left | Ctrl + 4 | Command + 4 |
| Align Left to Page | Ctrl + Shift + 4 | Command + Shift + 4 |
| Align Right | Ctrl + 6 | Command + 6 |
| Align Right to Page | Ctrl + Shift + 6 | Command + Shift + 6 |
| Align Top | Ctrl + 8 | Command + 8 |
| Align Top to Page | Ctrl + Shift + 8 | Command + Shift + 8 |
| Align Bottom | Ctrl + 2 | Command + 2 |
To customize shortcuts, go to File > Workspace > Customize. This opens the keyboard shortcuts editor, letting you remap existing shortcuts or assign new ones to commands you use frequently. Customizing keys can reduce repetitive mouse movements and adapt FlexiSign’s interface to your preferred workflow. Remember, changes save only to your workspace profile, so switching profiles reverts shortcuts. Test shortcuts right after customization to confirm they work as expected in your FlexiSign version and OS.
Shortcut availability and behavior generally do not differ between major FlexiSign versions, but older versions may lack some newer shortcuts. If you rely on design features or batch operations only in Flexi 10 or earlier, confirm your shortcuts in that version’s settings. Some users keep Flexi 10 for RIP and cutting specifically due to its stable handling of legacy file types like Illustrator CS6, CC2015, where shortcuts remain the same but workflow integration differs.
Check your version’s shortcut mapping if a shortcut doesn’t work, File > Workspace > Customize reveals your current layout and avoids confusion from version or OS differences.
Using shortcuts for alignment and grouping commands speeds up positioning multiple objects on vehicle wraps or signage layouts. For example, aligning objects to page edges using Ctrl/Command + Shift + number keys can save several clicks compared to manual mouse alignment. Grouping and ungrouping with Ctrl/Command + G and Ctrl/Command + Shift + G speeds editing complex layered designs. Matching your shortcut setup to tasks like batch cutting or CorelDRAW integration helps maintain a smooth design-to-production pipeline.
Comparing FlexiSign Versions and Their Practical Differences
Different versions of FlexiSign vary in features, operating system support, and workflow compatibility. Understanding these differences helps choose the right version for your shop’s needs and ensures smooth project execution. Compatibility with current systems and available updates also affects long-term usability.
Overview of Major FlexiSign Versions
FlexiSign 8, 10, 12, and 19 represent key stages in the software’s evolution. Flexi 10 reached end-of-life status, meaning SAi no longer provides security updates, compatibility testing with Windows 11, or driver development. It remains useful mainly for shops running legacy workflows supported on older operating systems like Windows 7.
Later versions like 12 and 19 offer improved functionalities, modern PDF workflows, and ongoing support for current Windows versions. These updates affect how you prepare files, interact with printers and cutters, and perform design tasks. Checking your operating system compatibility before installation ensures you avoid workflow interruptions.
Feature Changes and Workflow Impact
Each version introduces feature changes that affect design, print, and cut operations. Older versions such as Flexi 10 lack security patches and driver updates, posing risks if connected to newer hardware or networks. In contrast, Flexi 19 supports modern printer drivers and Windows 10 and 11, improving workflow stability.
Workflow impact varies by version. For example, Flexi 10 is aligned with older industrial PC setups, making it practical for shops unwilling to upgrade hardware or operating systems. Newer versions streamline PDF-based workflows, making file sharing and design adjustments easier and more portable. Regularly backing up your preferences file prevents data loss during bulk changes, especially important when updating software versions.
| Version | End-of-Life Status | Supported OS | Driver and Security Updates | Workflow Suitability |
|---|---|---|---|---|
| FlexiSign 8 | Older, unsupported | Windows XP to 7 (limited) | No | Legacy setups only |
| FlexiSign 10 | End-of-life (no updates) | Windows 7, limited Windows 10 (v1909 or earlier) | No | Legacy workflows on stable OS |
| FlexiSign 12 | Supported | Windows 10 | Yes | Modern print/cut workflows |
| FlexiSign 19 | Supported | Windows 10 and 11 | Yes | Current systems, future-proof |
This table highlights how support and compatibility evolve across FlexiSign versions. Choosing a version close to your current OS and hardware minimizes issues with drivers and security.
Choosing the Best Version for Your Needs
Your shop’s equipment and workflow goals determine the ideal version. Use Flexi 10 if you operate industrial PCs on Windows 7 with stable legacy workflows needing no additional technical support. This can save costs but lacks future-proofing.
Shops requiring ongoing updates, security, and support for Windows 10 or 11 should consider Flexi 12 or 19. These versions support modern print and cut technology and offer more efficient PDF workflows. Investing in current software versions prepares your operations for future hardware upgrades and avoids compatibility problems.
Common FlexiSign Mistakes and How to Avoid Them
One of the most common errors when setting up files in FlexiSign is incorrect document size or resolution settings. This leads to designs that print or cut at the wrong scale, wasting material and time. Always double-check your page size matches your substrate dimensions before you start designing. Use the “Page Setup” tab to confirm dimensions measured in inches or millimeters fit your actual media size.
Print or cut jobs also fail due to misalignment between design layers and cutter registration marks. For vehicle wraps and contour-cut decals, poor registration causes cuts to miss the printed graphics. Avoid this by enabling “Cut Contour” lines with a designated spot color that your cutter recognizes. Use the preview mode to verify registration marks appear correctly before sending the job. Ensure your cutter’s sensor is clean and adjusted for precise detection.
License or activation issues often arise from running FlexiSign on unsupported operating systems or changing hardware without properly transferring the license. If your license uses a dongle, keep it plugged in during operation. For activation files, move them carefully when changing computers, following FlexiSign’s official transfer process. Emulation solutions can help if you must use legacy software on modern systems, but consult a professional to maintain compliance.
Material waste frequently results from improper job nesting or cutting speed settings. FlexiSign offers nesting tools that arrange multiple jobs efficiently on one sheet to reduce scrap. Set your cutter’s speed and force correctly based on the vinyl type; testing on scraps can save costly errors. Avoid cutting on the wrong media profile by confirming the selected substrate matches your material’s thickness and finish.
- Verify page and design size match your media dimensions exactly
- Set precise registration marks and use spot color for cut contours
- Keep dongle inserted or follow transfer steps for activation files
- Use nesting features to optimize material layout and reduce waste
- Test cut settings on scrap media before full production runs
- Update or emulate licenses when migrating hardware or OS
- Clean cutter sensors regularly to maintain accurate registration
These common pitfalls can interrupt production and inflate costs, but they’re avoidable with attention to detail. Setting your document parameters correctly involves measuring and inputting exact media size in FlexiSign before import. Check that file resolution is set at least 300 dpi for print clarity. Cut jobs perform best with a calibrated plotter that reads registration marks aligned through FlexiSign’s software. Activation problems require care when moving licenses; keep track of dongles or verify offline files through official procedures.
Adjusting nesting and speed parameters ensures your vinyl lasts for many projects instead of being wasted. It typically takes just a few extra minutes to preview layouts or verify cut paths, but saves both money and time in the end. Paying close attention before printing or cutting will help you avoid failed jobs and maintain workflow efficiency in your signmaking business.
Tips to Optimize FlexiSign Workflow for Faster Production
Streamline your design-to-cut workflow by taking full advantage of FlexiSign’s batch-processing and built-in queue management. These features allow you to send multiple jobs to one or more devices, managing the workload automatically. This reduces manual intervention and speeds up job turnaround, especially when handling multiple small orders or working with shared plotters. Your shop uses two or more Roland GS-24 plotters or similar, so setting up centralized job routing helps balance the load and prevents bottlenecks. For typical users with one or two cutters, this system still improves efficiency but requires less configuration.
Effective color management is another key to reducing waste. FlexiSign supports 24-bit color depth and screen resolutions of 1920 x 1080 or higher, which ensures what you see on your screen matches print output more closely. Consistently calibrate your monitor with tools designed for color-critical work and use Flexi’s spot color matching to stay true to brand colors. This avoids costly reprints and material waste caused by inaccurate colors. Nesting and tiling help you maximize media usage. FlexiSign’s True Shape Nesting uses advanced algorithms to pack irregular shapes tightly, saving up to 15-30% on material costs depending on your job’s complexity and shape variety.
Managing several jobs simultaneously can become complex without proper organization. FlexiSign’s job queue lets you prioritize tasks, pause, and reorder them without losing work. Group similar tasks to run consecutively for better printer and cutter efficiency. For example, process all vinyl decals together to minimize vinyl roll changes and reduce setup time. Keeping a clean, digital job ticket with specifications upfront speeds operator decisions and reduces mistakes. You work with different devices, so confirm each has the correct drivers and settings synced through FlexiSign to avoid miscommunication and delays.
Professional support is valuable when upgrading your FlexiSign version, integrating with new hardware, or troubleshooting recurring technical issues. Authorized technicians can also advise on advanced workflow automation tailored to your shop size and equipment. Avoid extended downtime by scheduling regular maintenance and software updates with certified providers before critical job runs. This upfront investment often pays off by preventing costly production halts and maintaining consistent output quality. For smaller shops, online forums and official tutorials may suffice unless a unique problem arises.
Use FlexiSign’s True Shape Nesting feature before every batch run to ensure optimal material use and reduce cutting time by up to 30% on complex jobs.
Your First Week with FlexiSign: Step-by-Step Action Plan
Follow these steps to build a solid foundation in FlexiSign and get your projects moving smoothly.
- Day 1: Install and register FlexiSign on your computer. Confirm successful installation by opening the software and accessing the main interface without errors.
- Day 2: Set up your workspace preferences, including units of measurement and default media sizes. Verify changes by creating a new project with the updated settings.
- Day 3: Import sample artwork and learn to adjust layers and colors. Check that you can edit objects and save the file correctly.
- Day 4: Practice using print and cut tools with simple designs. Ensure the machine communicates with FlexiSign and prints/cuts as expected.
- Day 5: Customize essential keyboard shortcuts to speed up common tasks. Test the shortcuts by performing typical actions in your workflow.
- Day 6: Review common mistakes and try troubleshooting techniques provided. Confirm success by resolving at least one issue independently.
- Day 7: Map out a basic workflow for your daily projects incorporating the tips for faster production. Demonstrate comfort in moving from design to print with less downtime.
Frequently Asked Questions
How Do I Install and Activate FlexiSign Pro for the First Time?
Download the installer from the official SAi site, then enter your license key to activate it. Make sure your system meets the software requirements to avoid installation issues.
Can I Import Designs from Adobe Illustrator into FlexiSign?
Yes, FlexiSign supports importing AI files which preserves vector paths. Save your Illustrator file with PDF compatibility enabled to ensure smooth import.
How Do I Create a New Print and Cut Job Correctly in FlexiSign?
Start by setting your material size and print settings before placing your design. Use the Cut Contour feature to define cut lines accurately for your vinyl cutter.
What Should I Do If My Keyboard Shortcut Conflicts Appear in FlexiSign?
FlexiSign warns you when a shortcut is already assigned. Change or customize the shortcut in the Keyboard Shortcuts menu to avoid conflicts.
Is There a Way to Back Up All My FlexiSign Custom Settings and Preferences?
Yes, you can export your workspace and shortcut configurations via the Preferences menu. This helps transfer your setup to another machine or restore after reinstalling.
How Do I Prepare Complex Vector Shapes so They Cut Perfectly in FlexiSign?
Use the Path Edit tools to clean up and simplify shapes, removing overlapping points. Complex paths can cause cutting errors, so check your vectors before sending jobs to the cutter.
The Bottom Line
Mastering FlexiSign opens doors to designing and producing professional-quality signs efficiently. Start by experimenting with your current projects, using the tools and shortcuts that fit your style best. Focus on continuous practice to reduce errors and speed up your layout to print process. Take the next step by exporting a project file for print and cut, confirming all settings are optimized as you progress.


