Awning Sign Ideas: Practical Tips and Designs to Boost Visibility
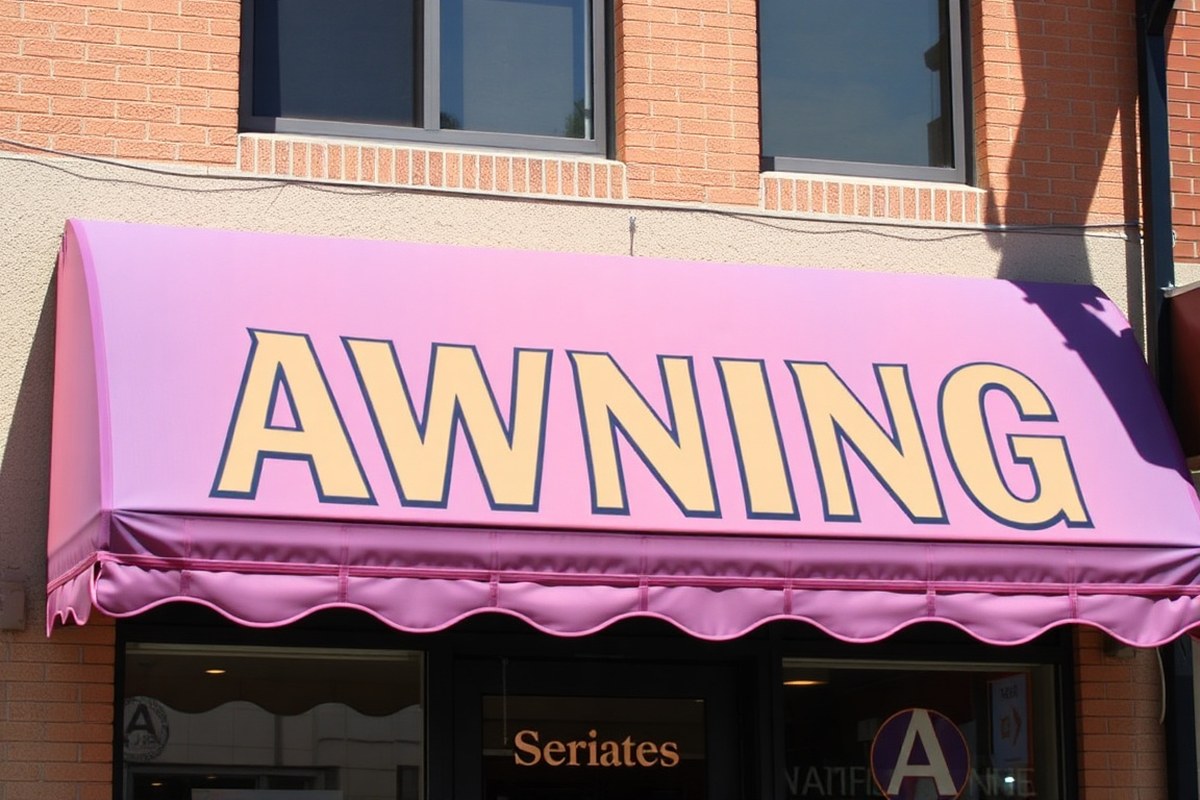
Awning sign ideas can transform your storefront by adding a three-dimensional, eye-catching display that attracts more attention than flat signs. Choosing the right design and materials makes your awning a powerful marketing tool that also protects your entrance. Start by focusing on legible, bold branding that’s visible from a distance to make the biggest impact.
Key Takeaways
- Select fabrics like acrylic or vinyl that resist weather damage and fading for longer-lasting awnings.
- Use sturdy frames made from aluminum or steel to support the awning’s structure and hold graphics securely.
- Incorporate your logo and brand colors prominently to reinforce recognition and attract customers quickly.
- Plan your installation timeline to expect about 7-10 days after design approval for a smooth setup.
- Set a realistic budget: small storefront awnings start around $2,500, while premium, large-scale signs may reach $15,000.
- Perform regular cleaning and inspections to maintain your awning’s appearance and extend its lifespan beyond 5-10 years.
Creative Awning Sign Ideas to improve Your Business

Awning signs offer versatile style options that can boost your storefront’s appeal and draw more customers. By selecting the right sign style, from eye-catching 3D lettering to illuminated designs, you can improve visibility and reinforce your business branding. Choosing designs that fit your business type, location, and customer needs will help you stand out effectively.
3D Lettering Designs for Impact
Raised 3D lettering on awning signs creates depth and shadow, making your business name or tagline more noticeable from a distance. These are particularly effective for retail stores, cafes, or boutiques that want a sophisticated, modern look. 3D letters catch the light at different angles, adding a tactile feel that draws the eye and invites customers in.
For designing 3D awning signs, use bold fonts and contrast the letter color with the fabric background for maximum legibility. Materials like acrylic or metal letters mounted on canvas work well and typically last through various weather conditions. A professional sign company can help ensure proper mounting and alignment.
Printed Graphics and Logo Applications
Printed graphics provide a flexible way to feature your logo, contact details, or promotions on your awning. This style suits service businesses like salons, restaurants, or repair shops that benefit from conveying detailed information directly on their storefront.
You can choose full-color printing or spot-color designs applied directly to compatible awning fabrics. This method allows for intricate logos and the inclusion of phone numbers or websites without cluttering the sign. Ensure high-resolution images for sharp, professional output that withstands sun exposure and rain.
- Select fonts that are easy to read from 15 feet or more
- Keep graphics balanced; avoid overcrowding with too much text
- Use contrasting colors to improve visibility in daylight
- Use waterproof ink to protect against weather damage
- Include your primary brand colors for consistency
- Position key information at eye level where possible
- Consult with a professional designer to optimize layout
Printed graphics can also be combined with logos and slogans to create a cohesive visual identity that works day and night.
Striped and Patterned Awnings with Signage
Striped or patterned awning fabrics add charm and character, making your storefront memorable. Incorporating your business name or logo into the stripes in a contrasting font color can create an elegant and classic appeal popular with cafes, bakeries, and specialty shops.
The key to this design is subtlety. Patterns should complement rather than overpower your text. Use simple, clean fonts against the stripes to ensure your message does not get lost. Awnings with muted earth tones and tasteful patterns work well in established neighborhoods or areas with historic districts.
Well-chosen stripes also help your awning age gracefully, with patterns disguising minor dirt and wear over time. These styles typically require an investment of $1,200 to $2,500 depending on size, but they upgrade your storefront’s personality and attract foot traffic more naturally.
Illuminated Awning Sign Ideas
Illuminated awning signs improve your visibility in the evening or low-light areas. Backlit fabric or integrated LED strips ensure your business name and logo stand out after dark, reaching potential customers anytime you are open.
Internal illumination distributes light evenly across your awning for a glowing effect. External lighting, such as spotlights or LED bars, highlights raised lettering or logos for a dramatic look. Businesses like convenience stores, night cafes, or boutique shops benefit most from this approach.
Installation of illuminated awnings often costs between $2,000 and $5,000 depending on complexity and size, but the return on visibility is significant. Remember to check local codes and hire licensed electricians to ensure safe installation. Proper illumination must avoid glare on sidewalks or neighbors’ property.
Choosing Materials: Which Awning Fabric and Frame Work Best?
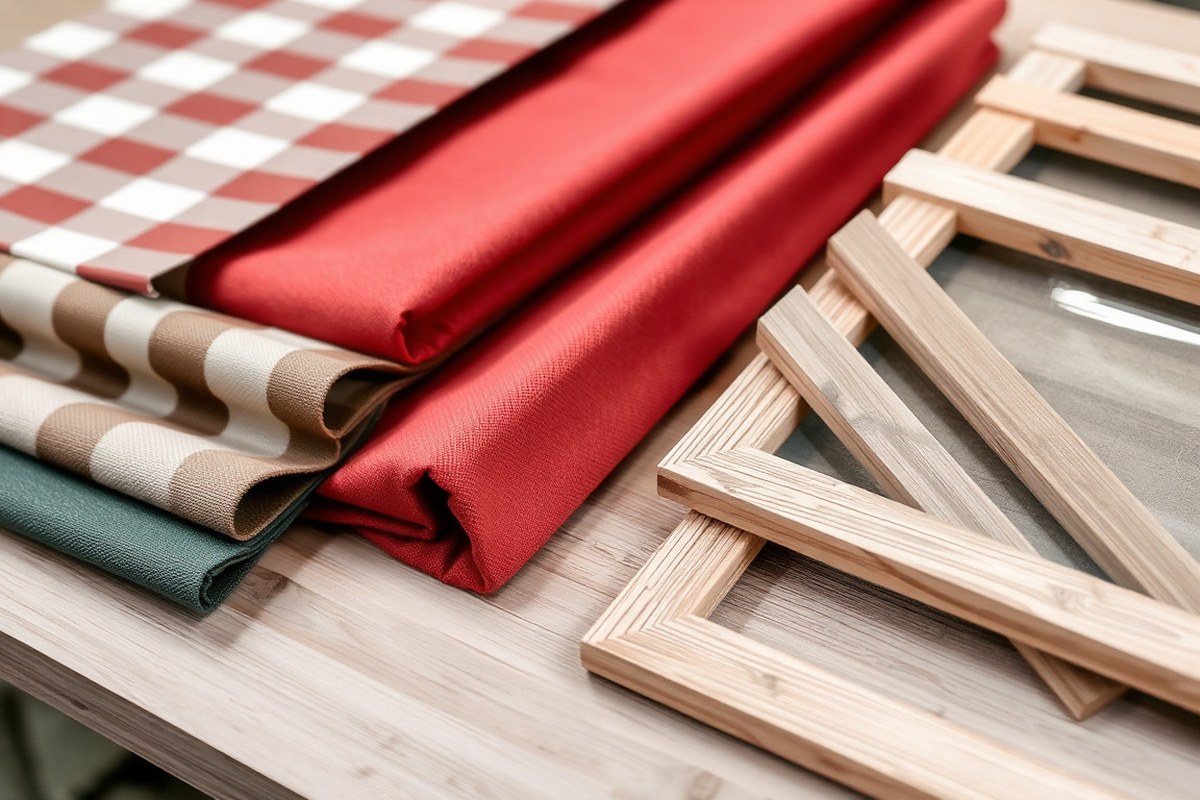
The best materials for awning signs balance durability, appearance, and cost. Fabric and vinyl offer classic or vibrant looks suitable for light to moderate exposure, while metal and polycarbonate frames provide strength and longevity, especially in harsh weather. Choose lighting that matches your awning type for consistent visibility without damaging materials.
Canvas and Fabric Options
Canvas and acrylic fabrics are popular choices for awning signs that provide a traditional, elegant aesthetic. These materials tend to be breathable, reducing heat buildup underneath the awning. High-quality fabrics are typically water-resistant and treated to resist UV rays, which helps maintain their color and prevents fading over 3 to 5 years depending on sun exposure.
Vinyl fabrics offer a more modern, glossy appearance and are often coated with a protective layer that improve durability against rain, wind, and dirt. Vinyl can last 5 to 7 years with proper maintenance, typically requiring just yearly cleaning to prevent grime accumulation.
| Material | Durability | Cost | Appearance | Weather Resistance |
|---|---|---|---|---|
| Canvas (Acrylic Fabric) | 3-5 years | Moderate | Classic, matte finish | Good UV, water-resistant |
| Vinyl | 5-7 years | Moderate to High | Glossy, vibrant | Excellent water, UV, and dirt resistance |
Select a fabric treated to repel dirt and resist UV rays for longer wear in sunny or rainy climates. Avoid untreated materials in places with heavy sun or frequent storms, as they can fade quickly and deteriorate.
Awnings made from untreated canvas can wear out faster in hot, sunny locations, look for UV-resistant coatings to extend life.
Metal and Polycarbonate Frames
Metal frames, typically aluminum or steel, support awning signs that need to withstand heavy wind and rain. Aluminum offers corrosion resistance and lighter weight, making it easier to install than steel. Steel frames are stronger but may require powder coating to prevent rust, especially in humid or coastal environments.
Polycarbonate frames combine durability with flexibility and resist impact while allowing some light transmission. They are excellent for awnings needing a modern design with weather resistance. These frames integrate well with fabric or vinyl awnings and are low maintenance, though slightly more expensive than standard metal.
| Frame Material | Durability | Cost | Maintenance | Best Use |
|---|---|---|---|---|
| Aluminum | High | Moderate | Low (occasional cleaning) | Most storefront awnings |
| Steel (Powder Coated) | Very High | Moderate to High | Medium (prevent rust) | Harsh weather or industrial areas |
| Polycarbonate | High | High | Low | Modern style, impact resistance |
Choosing a frame depends on your local climate and structural needs. Aluminum suits most business locations, while steel or polycarbonate fit areas with extreme wind or impact concerns.
Ensure metal frames are powder coated or otherwise protected to avoid corrosion, especially near coastal areas.
Lighting Technologies for Awnings
Lighting your awning sign helps attract attention during evening hours and inclement weather. LED strip lights are a popular choice for their energy efficiency and low heat emission, making them safe for use on fabric or vinyl awnings without damaging materials.
Alternatively, backlit and integrated lighting can illuminate metal or polycarbonate awnings. These setups tend to be more permanent and may require professional installation, but they provide consistent brightness and are weather-resistant.
| Lighting Type | Compatibility | Energy Use | Installation | Maintenance |
|---|---|---|---|---|
| LED Strip Lights | Fabric, Vinyl | Low | DIY or Pro | Low (occasional cleaning) |
| Backlit LED Panels | Metal, Polycarbonate | Moderate | Professional | Low (annual check) |
| Fluorescent/Incandescent | Metal Frames | High | Professional | Moderate (bulb replacement) |
Choose lighting based on your awning’s material and your budget. LEDs offer the best combination of longevity, safety, and energy savings. Avoid high-heat lighting on fabric awnings to prevent damage.
Always confirm your awning material’s compatibility with lighting types to avoid premature fabric wear or electrical hazards.
Installation Timeline and What to Expect
Installing an awning sign typically takes about 7 to 10 days after design approval, depending on complexity and any permit requirements. The process includes design finalization, securing permits, and the actual installation, which usually takes a few hours to a day at the storefront. Preparing ahead by understanding local rules and having all approvals in place helps prevent delays.
Design Approval and Fabrication
The first step in the timeline is finalizing your awning sign design. This includes approving the size, shape, colors, and graphics to ensure it fits your building’s façade and branding effectively. Once you give the green light, the fabrication team begins producing the awning, which involves cutting the frame, printing or applying graphics, and assembling the fabric.
This phase usually takes about 5 to 7 days. Complex designs like illuminated or custom-shaped awnings may require extra time, as they involve specialized materials and components. Clear communication with your sign maker speeds up the process and ensures the final product matches your expectations.
Obtaining Permits and Local Approvals
Before production or installation starts, you must check local zoning laws and building codes to confirm your awning sign complies with size, placement, and lighting restrictions. Many cities require permits for signage, especially if the sign extends into public space or changes the building’s exterior.
Start by contacting your local building department or permit office. Ask for the specific requirements and submit detailed plans of your awning sign. Permit approval can take anywhere from a few days to several weeks depending on the jurisdiction. Schedule this early because installation can’t proceed until you have all necessary authorizations.
Installation Day Procedures
On installation day, a professional crew arrives equipped with ladders, tools, and the fabricated awning. They begin by preparing the mounting surface, ensuring it is clean and capable of supporting the sign’s weight. Proper fastening is essential for safety and durability.
Most installations take between 3 to 6 hours but can be longer if the awning includes electrical work for lighting. Expect some noise and limited storefront access during this time. It’s a good idea to notify your staff and customers about the work schedule. To help you prepare, follow these steps before and during installation:
- Consult local regulations and request required permits from your city’s building department.
- Approve the awning sign design with your sign maker to start fabrication.
- Confirm the installation date, making sure your storefront is accessible and safe for workers.
- Clear the installation area of any outdoor furniture, plants, or signage.
- Be present or have a representative available during installation to address questions.
- Inspect the installed awning for secure attachment and correct signage placement.
- Keep the contact information of your installer for warranty and maintenance concerns.
How to Incorporate Branding and Graphics Effectively
Incorporating your logo and graphics into an awning sign starts with making sure every element reflects your existing brand identity. Begin by reviewing your brand style guide, if available, focusing on your logo’s proportion, color palette, and font choices. The goal is to maintain consistency so customers instantly recognize your business from a distance. Use a branding alignment checklist: verify logo clarity at the awning’s scale, confirm color accuracy using Pantone or CMYK codes, and select fonts that match your printed and digital materials. Misalignment can confuse customers and dilute brand recognition, so every detail matters.
Graphic placement on the awning demands clear visibility and balance. Position your logo centrally or off-center but above eye level to catch foot traffic and passing vehicles. Avoid overcrowding the space; too many elements reduce readability. Keep graphics about 12 to 18 inches high for storefront awnings between 6 and 10 feet wide. Contrast must be sharp, light-colored text on a dark background or vice versa improve legibility from 30 to 50 feet away. Use 100% opacity inks suitable for awning fabric to prevent fading and maintain brightness over time.
Choosing between 3D lettering and printed graphics largely depends on your brand personality and budget. Three-dimensional letters add depth and a high-end look that immediately draws attention, offering tactile visuals that stand out even at night when paired with lighting. They typically cost more, expect installation costs to range from $150 to $300 extra per letter, but they last longer and endure harsh weather better. Printed graphics, on the other hand, provide versatility and the ability to display complex images or gradients. They suit bold, vibrant logos or intricate designs and may cost 30% to 50% less than 3D options. For example, a boutique with a sleek, minimalist logo might benefit from understated 3D lettering, while a coffee shop with a colorful emblem would see better results from full-color prints.
One practical way to ensure your awning matches your brand is to request a before-and-after mockup from your sign designer. For instance, a restaurant with a traditional logo featuring dark reds and gold tones improve its storefront by swapping a plain solid-color awning for a custom-printed one displaying the logo with accurate colors and matching typography. Results included higher foot traffic and stronger brand recall verified through customer surveys. Avoid using graphics that clash with your building’s architecture or signage nearby, as this can confuse the customer’s perception of your brand.
Partnering with a knowledgeable graphic artist or sign specialist helps translate your brand into an effective awning sign. They’ll use professional software to test color matching, ensure your logo scales properly without pixelation, and recommend materials that maintain vibrancy in outdoor conditions. The overall process, from design proofing to installation, can take 4 to 6 weeks, depending on customizations, so plan accordingly to align with your marketing goals and seasonal business cycles.
Cost Factors and Budgeting for Awning Signs
Expect to pay between $500 and $5,000 for a typical awning sign, depending largely on size, style, and additional features like illumination. Smaller awnings (around 6 feet wide) usually cost between $500 and $1,200, while larger or custom-shaped awnings can push costs toward $4,000 or more. Budgeting starts with selecting an awning size that fits your storefront but also a shape that improve visibility without overwhelming the building’s facade. Awning size influences both material costs and installation complexity, which affect the overall price and effectiveness in attracting customers.
The shape of your awning shapes how customers perceive your business. Rectangular awnings offer clear, usable space for graphics or logos, while rounded or scalloped edges add charm but may limit sign space. Effectiveness depends on visibility at street level and how the awning complements your storefront design, not just on bigger size alone. Some businesses prioritize larger awnings for impact; others choose smaller, infill sizes for cost control and compliance with local signage rules.
| Awning Size | Style | Approximate Cost | Notes |
|---|---|---|---|
| 6 ft wide | Rectangular, non-illuminated | $500 – $1,200 | Simple design, suitable for small storefronts |
| 8-10 ft wide | Rounded or scalloped edge, non-illuminated | $1,200 – $2,500 | Adds aesthetic appeal with moderate signage space |
| 10-15 ft wide | Rectangular, illuminated | $2,500 – $4,000+ | Improve nighttime visibility but higher energy and maintenance costs |
| Custom shape or oversized | Any style, often illuminated | $4,000 – $5,000+ | Highest customization and impact, requires professional design and installation |
Lighting maximizes exposure after dark, extending customer reach hours but adds upfront costs of $500 to $1,500 or more, depending on system complexity. Illumination raises ongoing electricity use and may increase maintenance frequency, particularly if LEDs or neon lights are involved. Consider your business hours and location lighting environment before committing to illumination. If your store closes early or is located in a brightly lit area, the cost may not justify the benefits.
Plan your budget by first deciding your awning’s purpose: protection, marketing, or both. Allocate about 20% of your total signage budget to professional design and installation for best results. Balance initial investment with expected return; a well-placed and attractive sign can drive walk-in traffic but overspending on size or features that go unseen at street level wastes resources.
Tip: Verify local signage regulations and electrical code requirements before installing illuminated awning signs to avoid costly compliance issues.
Maintaining Your Awning Sign for Longevity
Proper maintenance significantly extends the life of your awning sign and keeps your storefront looking fresh. Most awnings last between 5 and 10 years with regular care. Key maintenance tasks include cleaning, inspecting for damage, and addressing repairs early to avoid costly replacements. Pay special attention to dirt, bird droppings, and mildew, which can degrade fabrics and fade print.
Regular cleaning is essential. Use a soft brush or cloth with mild soap and water, rinsing thoroughly to remove residue. Avoid harsh chemicals or abrasive tools that may damage the awning fabric or graphics. Cleaning every 3 to 6 months works well for most outdoor awnings, depending on local weather and pollution levels.
- Inspect seams and stitching for signs of wear or tearing every 6 months
- Check the frame and hardware for rust or loose bolts quarterly
- Trim nearby tree branches to prevent abrasion or staining
- Remove bird droppings quickly to prevent fabric degradation
- Reskin the fabric when graphics fade but the frame remains sound
- Schedule professional inspections if you notice sagging or rips
- Apply fabric protectants sparingly as recommended by the manufacturer
Deciding between repair and full replacement depends on the damage and age of your awning sign. Minor tears, small frame repairs, or faded graphics can often be fixed by a sign shop with reprinting or reskinning. Reskinning involves replacing only the fabric or vinyl cover without changing the frame, which costs significantly less than a full replacement. For example, re-skinning may range from $300 to $700, while a new awning sign often starts around $1,000 depending on size and materials.
Replacing your awning is wise if the frame is rusted through, the structure is unstable, or the fabric is extensively torn and weathered. Also, consider replacement if you want a major design update or if your current awning no longer fits your branding needs.
Common mistakes while choosing or designing awning signs include picking overly complex graphics that reduce readability, ignoring your typical customer’s viewpoint (pedestrian or vehicle), and underestimating maintenance needs. Avoid overly small fonts, cluttered visuals, or low-quality materials that wear out quickly. Prioritize simple, bold text and colors that contrast well with the awning color. Using quality fabrics and sturdy frames initially reduces maintenance headaches and improves long-term value.
Practical Steps to Design and Order Your Awning Sign
Designing and ordering an awning sign requires several clear steps to ensure the finished product looks great and fits your business needs. Starting with a solid plan helps you manage costs and avoid delays. Choosing to do it yourself or hire a professional sign company will influence these steps and the final result.
Choosing between a DIY approach and hiring a professional depends on your budget, design skills, and available time. DIY can save money upfront but risks poor craftsmanship or non-compliance with local codes, which may lead to costly fixes. Professional companies offer design consultations, handle material selection, and manage installation, typically resulting in a more polished and durable sign. Companies like AGC provide complete services that cover every detail, making the process less stressful.
Professional installation is worth considering, especially if your awning sign must meet safety regulations or requires electrical components. Licensed installers know how to secure the sign properly and protect it from weather damage. This service can also include obtaining permits, saving you time and potential legal issues. To guide your project efficiently, follow these practical steps:
- Assess your storefront and brand needs. Measure the space where the awning will go. Note your brand colors and logo placement to ensure the sign integrates smoothly with your overall look.
- Sketch a basic design concept. Use simple tools or paper to outline the shape, colours, and text. Think about visibility from the street and customer perspective.
- Research materials and weather considerations. Choose fabrics and frames that can withstand local weather, look for UV resistance and durability against rain or wind.
- Decide on DIY or professional services. Consider your skills and timeline. Hiring a professional means you should shortlist companies with experience in storefront signage.
- Request detailed quotes. Ask potential sign companies about their design process, included materials, installation services, and any permits they handle. Inquire about turnaround times and warranties.
- Refine your design with professionals. Use feedback from the sign company’s designers to adjust colours, fonts, and sizes. Confirm the legibility and brand consistency.
- Approve the final design and place your order. Review the proof carefully, checking for spelling, logo accuracy, and measurements.
- Schedule installation and inspect the completed work. Make sure the sign is securely mounted and weatherproofed. Address any issues immediately.
Questions to ask your signage provider include: Do you handle permits and installation? What warranties do you offer? How long will production and installation take? Can you provide references or examples of previous projects? Knowing these answers helps prevent misunderstandings and delays.
Maximizing Customer Experience with Your Awning Sign
Awning signs play a key role in shaping the customer experience at your storefront by combining visibility, comfort, and accessibility. They act as both a marketing tool and a functional feature that invites customers to step inside. Adding shade and shelter helps protect visitors from harsh sun, rain, or snow, making the entryway feel more welcoming and increasing the chances they’ll linger longer or return often.
Providing shelter with your awning sign can save energy costs by reducing heat gain on hot days. When positioned above windows and doors, awnings block direct sunlight, lowering indoor temperatures by up to 10 to 15 degrees Fahrenheit in some cases. This helps reduce air conditioning use and improve comfort inside your store. In cooler months, a well-designed awning also offers light protection from snow and rain, keeping entry areas safer and drier, which improves accessibility.
Different businesses benefit from awning signs in tailored ways. A café or bakery might choose a curved fabric awning with bold colors and their logo to create a cozy outdoor seating area protected from sun and light rain. Retail shops often use rectangular awnings with their business name and hours printed, helping customers identify the store easily while also shading window displays to reduce glare. For service-based businesses like salons or dry cleaners, awnings provide a clear, professional façade that signals quality and makes waiting outside more pleasant, especially when combined with benches or outdoor seating.
Combining shelter and branding on your awning sign means selecting durable materials that can withstand weather while displaying your logo clearly. Vinyl-coated fabrics with fade-resistant inks offer visibility and longevity. Frames should be sturdy enough to handle wind conditions in your area, with aluminum or steel being common. Most installations cost between $1,000 and $3,000 but vary based on size, fabric quality, and design complexity. A good result leaves your storefront standing out while offering practical shade and protection, encouraging customers to stop or wait comfortably.
Proper placement is also essential. Install awnings well above 7 feet to ensure easy clearance and compliance with local regulations. Consider your storefront’s orientation to maximize shade during peak sun hours. Adding lighting under the awning can increase visibility and safety at night without overwhelming your design. Finally, regular maintenance like cleaning and inspecting for tears preserves the awning’s function and appearance, sustaining customer appeal over time.
Make sure your awning height allows for clear pedestrian access and complies with local codes to avoid safety issues and fines.
Your First 30 Days: A Quick-Start Plan for Your Awning Sign
Follow this plan to go from concept to installation smoothly, making sure your awning sign fits your brand and impresses customers.
- Before you start: Define your budget and brand colors clearly. This helps keep design decisions focused and avoids costly changes later.
- Week 1: Choose the right materials based on weather exposure and location. Confirm your awning fabric and frame choices match your budget and durability needs.
- Week 2: Work with a professional designer or sign company to draft your awning sign graphics. Ensure logos, fonts, and colors follow brand guidelines for clear visibility.
- Week 3: Review prototype proofs and approve final drawings. Check that dimensions fit your storefront and that your message is easy to read from the street.
- Week 4: Schedule installation with your sign company during off-peak hours to avoid disrupting business. Confirm permits needed with local authorities have been obtained.
- After installation: Inspect the completed awning sign for quality and stability. Note any damage or color mismatches to report immediately.
- Weeks 5-6: Begin regular maintenance, cleaning fabric gently and checking the frame for wear. This extends the life of your investment and keeps your storefront attractive.
Frequently Asked Questions
How Do Awning Signs Impact Foot Traffic to Your Store?
Awning signs can increase foot traffic by attracting more attention and creating a welcoming vibe. Their three-dimensional shape stands out more than flat signs, making your business easier to notice from a distance.
What Are Common Mistakes to Avoid When Designing an Awning Sign?
Avoid overcrowding the design with too much text or small fonts. Clear, simple messaging and high contrast improve readability and effectiveness, especially from the sidewalk or street.
Can Awning Signs Be Customized to Fit Unusual Store Locations?
Yes, awning signs can be tailored to unique building shapes and entryways. Custom sizing and materials accommodate different storefront styles while maintaining brand consistency.
How Does Lighting Affect the Visibility of Awning Signs at Night?
Lighting improve awning sign visibility after dark and can increase business exposure hours. Choose energy-efficient options like LED strips for bright, even illumination.
Are There Any Restrictions for Awning Signs in Historic Districts?
Some historic districts limit sign size, materials, or lighting to preserve character. Check local regulations before designing to ensure compliance and avoid costly changes.
What Is the Typical Lifespan of an Awning Sign Before Needing Replacement?
Awning signs usually last 5 to 10 years depending on weather, materials, and maintenance. Regular cleaning and inspections extend their usable life and keep them looking fresh.
Wrapping Up
Your awning sign is more than just decoration, it’s a powerful tool to attract attention and communicate your brand’s identity. Taking practical steps from design to maintenance ensures you get the best return on your investment. Start by contacting a trusted local sign maker to discuss your vision and get expert guidance tailored to your storefront.