Projecting Sign Ideas: A Complete Guide with Expert Tips and Types
Projecting sign ideas provide a practical way to increase your business’s visibility by displaying dual-sided signs that are readable from 180 degrees. Perfect for corner locations or areas with tree cover, these signs hang at least 8 feet above sidewalks, ensuring compliance and clear pedestrian pathways. Start by choosing a projecting sign that suits your storefront position to maximize exposure from multiple directions.
Key Takeaways
- Choose projecting signs for corner shops to attract foot traffic from both streets with their two visible sides.
- Select durable materials that withstand service temperatures between -10° F and +150° F for lasting outdoor use.
- Consider 3D projecting signs to increase depth and interest, improving visibility indoors and outdoors.
- Illuminate projecting signs for 24/7 advertising, making your business stand out during day and night.
- Keep installation height between 8 and 25 feet to meet clearance rules and optimize sign viewing distance.
- Use flat, two-view blade signs installed at 90 degrees for straightforward, effective brand display.
What Is a Projecting Sign and Why Use It?
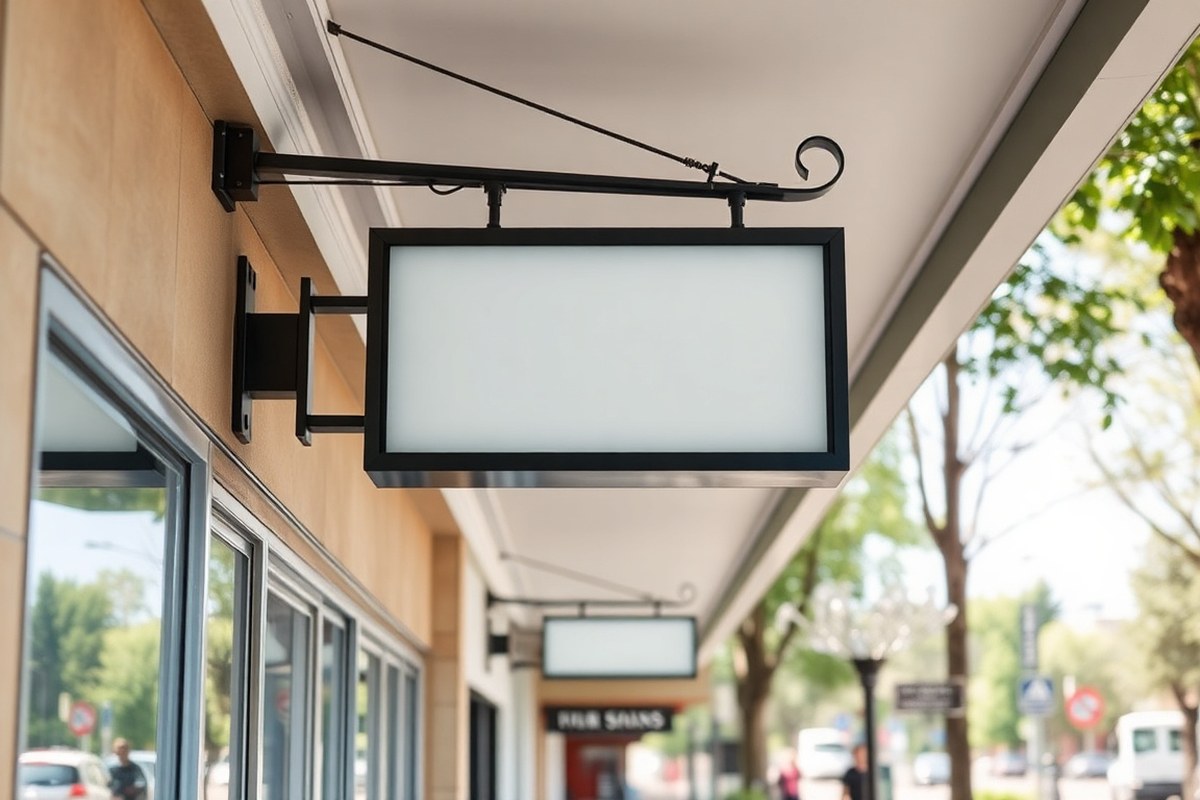
A projecting sign is a type of business sign that extends outward from the building facade, typically mounted perpendicular to the wall. Unlike flat or fascia signs that lie flush against the storefront and can only be seen from directly in front, projecting signs jut out into the pedestrian or driver’s line of sight. This design makes them visible from multiple directions, often up to 180 degrees. Because they stand at about 8 feet above the sidewalk, they remain unobstructed by street-level elements like parked cars or crowds, which improve visibility.
This unique placement offers several advantages for small businesses and retail stores seeking to boost foot traffic. Projecting signs catch the attention of people walking or driving along the street, including those approaching from either side, not just head-on. The dual-sided display allows for maximum exposure in high-traffic areas, making them especially effective in dense urban streets, shopping centers, or corner locations. They also serve as navigational aids in multi-tenant buildings by clearly marking a specific storefront or office entrance.
Projecting signs work well in tightly packed areas where space for signage is limited or where a flat sign might be blocked. They contribute positively to the streetscape without crowding the sidewalk since they are improve and extend outward rather than occupying ground or wall space. This feature is particularly useful in narrow streets or covered walkways where visibility is a challenge. Projecting signs can also be illuminated, allowing businesses to advertise 24/7 and maintain visibility after dark. This makes them a cost-effective tool for continual brand promotion.
The effectiveness of a projecting sign depends on exact placement and size. Mounting the sign about 8 feet above the sidewalk ensures compliance with most local codes and prevents pedestrian interference. Signs typically range in face size from about 4 inches by 4 inches to 18 inches by 7 inches, costing anywhere from $6 to $18 per unit for blank signs, depending on size and color options. Installing the sign so it protrudes clearly into the sightline of oncoming traffic, rather than being flush with the building, creates the best visual impact. Proper mounting with at least two to four holes ensures stability against weather and vibration.
Some common mistakes include placing the sign too low, which can cause obstruction or damage, or using a design that is difficult to read from a distance or both sides. Businesses in densely populated commercial areas often see better results by combining projecting signs with traditional fascia signage. Overall, projecting signs provide a smart, space-efficient way to increase visibility, give clear directions, and attract customers from multiple angles, making them a valuable addition to any store’s branding strategy.
Types of Projecting Signs and Material Options

Projecting signs come in various types, each suited for different business needs and environments. Blade signs, neon and lightbox varieties, and signs made from acrylic, metal, or wood all serve distinct purposes. Choosing the right material impacts durability, maintenance, and overall appearance, especially when deciding between indoor or outdoor use.
Blade Signs and Flag Mounts
Blade signs, also known as flag mount signs, project perpendicularly from a building façade and are mounted at least 8 feet above the sidewalk to meet pedestrian clearance rules. They are highly visible from both the sidewalk and the street, making them popular for retail stores, cafes, and service providers aiming to attract foot traffic and passing vehicles.
These signs are usually tailored to match a business’s look and can show graphics on both sides for better exposure. They work well in historic or classic areas, matching the architecture while promoting the brand efficiently. Pole-mounted flags often appear at outdoor events such as trade fairs or garden shows; they provide versatility but tend to be less durable than blade signs fixed to walls.
Neon and Lightbox Projecting Signs
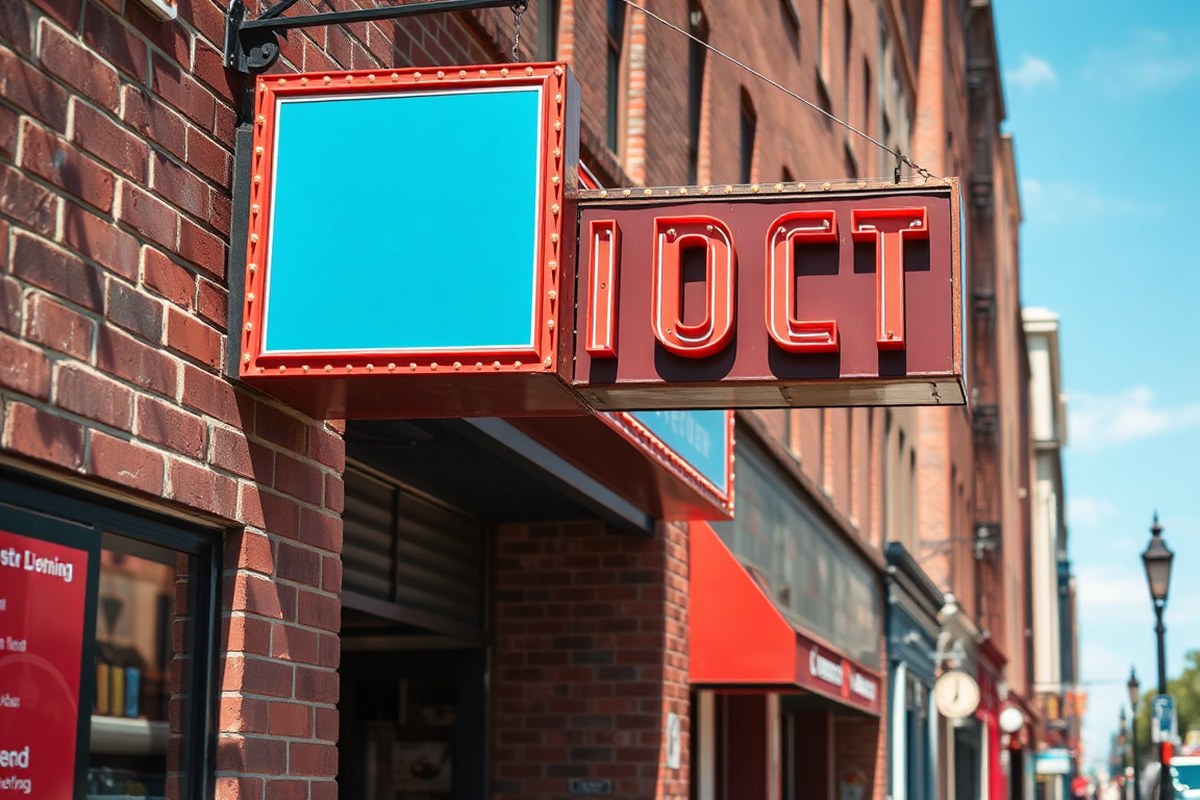
Neon projecting signs date back to the 1920s and brought an iconic glow that improve nighttime visibility. They remain a stylish choice, especially in entertainment districts or vintage-themed areas. Neon signs provide strong illumination but require more maintenance and typically carry higher costs due to the electrical components and custom glasswork.
Lightbox projecting signs are typically box-shaped fixtures with a translucent face, lit from within by LED or fluorescent lights. These signs provide uniform illumination, can feature colorful graphics, and are more energy-efficient and durable than traditional neon. They are especially effective for businesses open late or located on busy streets where standout visibility is important.
Acrylic, Metal, and Wooden Options
Acrylic signs are a popular and affordable choice for projecting signs, especially indoors or in environments with limited exposure to harsh weather. These signs allow for sharp color printing and can be shaped into custom forms. However, acrylic is less durable outdoors when compared to metal or sealed wood and may require replacement sooner depending on conditions.
Metal signs, although generally more expensive, offer superior durability and a stylish, modern look. Aluminum and routed composite materials are common metal options that withstand weather well and require low maintenance. These are ideal for outdoor use and can be finished with various coatings for extra protection against UV rays and moisture.
Wood signs bring a traditional, handcrafted appeal and are often used in historical or artisanal business districts. Proper sealing is essential for outdoor wooden signs to prevent warping, cracking, and decay. While wood can require more upkeep over time, it provides a warm, natural style unmatched by other materials.
| Type | Material | Durability | Typical Use | Visibility | Cost Range |
|---|---|---|---|---|---|
| Blade Sign | Metal, Wood, Acrylic | High (Metal), Medium (Wood, Acrylic) | Outdoor storefronts, historic districts | High (mounted 8+ ft above sidewalk) | $15, $200 per sq ft (depends on material and lighting) |
| Neon Sign | Glass Tubes with Gas | Medium (requires maintenance) | Nighttime businesses, vintage style | Very High (glowing illumination) | $200, $1000+ (custom work) |
| Lightbox Sign | Aluminum frame, Acrylic face, LED/Fluorescent light | High | Outdoor and indoor illuminated signage | High (uniform internal lighting) | $200, $500+ per sq ft |
| Acrylic Sign | Acrylic Plastic | Medium (better indoors or protected spots) | Store interiors, temporary outdoor spots | Medium (clear colors, no backlighting usually) | $15, $50 per sq ft |
This table shows clear differences among projects sign types and materials in terms of durability, usability, and budget implications. While cost varies widely with size and lighting features, metal and lightbox signs generally cost more upfront but last longer outdoors. Acrylic is your budget-friendly option with a bright look, but plan to replace signs that face harsh weather.
Always check local sign regulations for height, illumination, and size limits before ordering a projecting sign to avoid costly modifications.
Design Tips to Maximize Visibility and Impact
Designing projecting signs for maximum readability and impact starts with choosing the right size and mounting height, using high-contrast colors and clear fonts, and making the most of double-sided layouts to catch attention from multiple directions. These decisions improve visibility, ensure your message is understood quickly, and help your sign stand out on busy streets or sidewalks.
Choosing Optimal Size and Height
Select a sign size that matches your mounting space and visibility needs. For storefronts with limited frontage, signs around 12 inches high by 12 inches wide work well and usually cost between $7 and $8 for blank, color-ready signs. Larger signs, such as 18 by 7 inches, offer more room for text and graphics, generally priced around $8 to $15 depending on color and features. Mount your projecting sign above the pedestrian line of sight, typically 7 to 10 feet off the ground, to avoid obstruction from crowds or street fixtures. This height also meets most local code requirements for pedestrian clearance.
When your sign covers an entire wall or an extended façade, you can use larger fonts and more elaborate designs. However, keep in mind that overly large signs might require additional permits or engineering due to wind loads and municipal regulations, which can affect budget and timing.
Color and Font Selection Guidelines
Choose fonts that are simple and bold rather than decorative or thin to maintain legibility from a distance and at angles. Sans-serif fonts like Helvetica or Arial are popular for projecting signs because they read clearly even when scaled down or viewed from below. Avoid more than two font styles to keep the design clean.
Color contrast plays a key role in readability. Use a light color for text on a dark background or vice versa. High contrast improves visibility in different lighting conditions, including direct sun and nighttime if illuminated. For example, white letters on black or deep blue signs provide excellent clarity. Limit colors to 2 or 3 to avoid clutter and ensure the sign reinforces your brand identity.
- Use fonts with strokes at least 1 inch thick for signs viewed from 10 to 20 feet away
- Choose bold, sans-serif fonts for clarity
- Keep color contrast high (light on dark or dark on light)
- Limit text to essential information only
- Use uppercase letters sparingly; mixed case improves legibility
- Include your logo or brand colors consistently
Consistent use of branding colors and fonts reinforces your identity and helps customers recognize your business from a distance, key to staying memorable in a competitive environment.
Using Double-Sided Signage
Double-sided projecting signs increase your reach, capturing attention from both directions of foot or vehicle traffic. Designs for each side should be mirror images or complementary to maintain consistency and avoid confusing messages. Balance the layout so graphics and text are evenly distributed and aligned.
To use double-sided layouts effectively, keep the design simple and prioritize key messages centrally on both faces. Avoid placing text or logos near the edges where mounting or weathering might obscure parts of the sign. With double-sided signs, your potential visibility and advertising value roughly doubles, which can justify marginally higher upfront costs.
Consider materials rated for durability on both sides, especially if you plan illumination. Lightboxes with double-sided acrylic faces and neon or LED lighting work well in high-traffic urban areas but may cost several hundred dollars more than flat, single-sided signs. For smaller businesses, investing in double-sided signs delivers better ROI when placed in busy shopping districts or along sidewalks with two-way pedestrian flows.
Lighting and Illumination for Projecting Signs
Lighting plays a key role in making projecting signs stand out both day and night. The main options are neon, LED, backlit illumination, and reflective finishes. Neon lights offer a bright, colorful glow with smooth curves and classic appeal, often seen in vintage or upscale designs. They allow for detailed customization like custom fonts and logos. However, neon tends to be more expensive upfront and requires regular maintenance by a licensed professional due to the fragile glass tubes and electrical components.
LED lighting has become the industry standard for illuminated projecting signs. LEDs consume less electricity, last longer, typically 25,000 to 50,000 hours, and work well in outdoor conditions. While they cannot match neon’s full range of custom shapes and effects, LEDs provide a similarly attention-grabbing brightness and can be programmed for color changes or flashing. This makes them a budget-friendly, low-maintenance alternative suitable for most businesses. The average cost of installing an LED backlit projecting sign ranges between $300 and $700, depending on size and complexity.
Backlit signs use LEDs or other light sources hidden behind translucent panels to make the sign graphics glow evenly. This method creates great visibility at night and a polished look during the day. You can create a light box mounting it as a flag sign extending from your building façade, which improve visibility for passing pedestrians and vehicles. Backlit projecting signs add a slightly higher initial cost but appeal with continuous exposure and professional appearance, making them valuable for retail and service businesses aiming for extra curb appeal.
Reflective finishes increase daytime visibility by bouncing light back toward people’s eyes. These finishes don’t require electricity and can complement illuminated options. They are especially useful in areas with strong sunlight or on signs facing shaded streets. Reflective sheeting often costs less than lighting but requires clean surfaces to maintain effectiveness. Regular cleaning every few months prevents dulling from dust or grime build-up.
Deciding to illuminate your projecting sign depends on your location, operating hours, and budget. Signs illuminated by LEDs offer a noticeable return on investment by attracting attention after dark without large energy costs. Reflective signs work well if your business is open mainly during daylight. Maintaining illumination involves scheduling annual electrical checks and cleaning light surfaces every 3 to 6 months. Replacing LED modules rarely occurs before 5 to 7 years, saving money long-term compared to neon that may need repairs every 1 to 2 years.
Installation Rules, Permits, and Best Practices
Projecting signs must follow specific installation rules involving height, structural integrity, and permits to ensure safety and legal compliance. You need to consider required clearances, local signage codes, and engineering standards before installation. Proper planning protects pedestrians, prevents damage, and avoids costly fines or removals.
Pedestrian Clearance and Height Rules
Most local codes require a minimum clear height of 8 feet (about 2.4 meters) from the sidewalk to the bottom of the projecting sign. Common installation heights range up to 25 feet (8 meters), and in some commercial zones, signs can be installed as high as 45 feet (15 meters) to maximize visibility. Ensuring adequate clearance prevents injury and allows ease of passage, especially in busy pedestrian areas.
Measure from the ground level to the lowest point of the sign, including any hanging brackets or ornaments. If your sign extends over public sidewalks or streets, check with local authorities to confirm the minimum vertical clearance and any special provisions for ornamental features or lighting attachments.
Local Code and Permit Requirements
Before installation, verify the local municipality’s signage codes to confirm allowable sizes, materials, illumination rules, and placement restrictions. Most commercial zones require a permit that may involve submitting detailed drawings and site plans. These permits can include a structural engineer’s seal, especially for larger or heavier signs.
The permit application process typically takes several weeks and may require a temporary street-blocking permit if installation equipment such as boom trucks will be used. The regulatory review ensures your sign won’t block visibility, distract drivers, or violate zoning laws.
- Check municipal signage ordinances for size and placement limits.
- Prepare detailed design and structural drawings for permit submission.
- Obtain an engineer’s seal if required for structural safety assurance.
- Apply for temporary street-blocking or traffic control permits as needed.
- Comply with illumination, color, and material restrictions per your zoning.
- Schedule inspections as part of the approval and installation process.
Securing the right permits avoids fines, installation delays, and potential sign removal.
Structural and Wind Load Considerations
Projecting signs face constant exposure to wind and weather, which demand careful structural planning. Supports and mounting brackets must be designed to handle local wind loads, which vary based on geographic location, sign size, and height. Failure to account for wind pressure risks sign damage or detachment, creating hazards and liability.
Work with a structural engineer or experienced installer to calculate appropriate material strength and fastening methods. Heavy signs or those with ornate brackets might require additional reinforcements or specialized hardware. Ensuring your sign is structurally sound often means investing in quality mounting systems and possibly heavier-duty materials.
Always verify structural requirements with local code and consider hiring a licensed engineer to certify your sign’s stability, especially in high wind zones.
Cost Factors and Budgeting for Projecting Signs
Projecting signs usually cost between $300 and $1,500 depending on several factors such as design complexity, materials chosen, fabrication methods, lighting options, and installation challenges. Design fees may range from $50 to $300 if you hire a professional sign designer, while simple, ready-to-use templates from online services often come at lower or no cost. Materials vary widely in price, with aluminum and PVC typically found in the $15 to $50 per square foot range, while premium metals or specialty woods can double that cost. Fabrication involves cutting, shaping, and finishing, which may add $100 to $500 based on the sign’s size and detail.
Installation costs depend on mounting location, height, and whether electrical connections for lighting are needed. Professional installation averages $200 to $600. Lighting upgrades, such as LED strips or backlit panels, add $100 to $400, with energy-efficient LEDs tending to cost higher upfront but saving money over time. Many projecting signs include brackets designed to stabilize the sign against wind, which can add to installation and hardware expenses.
Choosing DIY or online options can reduce costs significantly. For example, ordering a ready-made bracketed sign online could cost as little as $150, and some companies offer kits including mounting hardware. DIY projects save on labor but require careful measuring and compliance with local mounting regulations and permit rules. The key is balancing affordability with durability and visibility, especially for signs exposed to weather and wind pressures.
| Cost Element | Low Range | High Range | Notes |
|---|---|---|---|
| Design | $0 (DIY templates) | $300 (professional designer) | Online services offer free or low-cost design tools |
| Materials | $15 per sq. Ft. | $100 per sq. Ft. | Aluminum or PVC on low end; premium metals or woods on high end |
| Fabrication | $100 | $500 | Depends on size and detail |
| Installation | $200 | $600 | Higher costs with complex mounting or lighting |
| Lighting | $100 | $400 | LED lighting is common for energy efficiency |
Good cost savings come from carefully selecting materials that fit your budget while ensuring durability against weather conditions, especially wind. Avoid cutting costs on mounting hardware, as securely stabilizing the sign reduces damage risks and future repair fees. Ordering from online vendors with positive reviews and clear warranty policies increases reliability for DIY projects. Some online services provide customization options and free shipping but verify local regulations before installation.
Maintenance, Safety, and Durability Considerations
Maintaining a projecting sign is essential to keep it safe, visible, and durable over time. Regular cleaning prevents dirt and grime buildup that can obscure your message and damage materials, especially if your sign uses digital displays or painted surfaces. Dust, pollen, bird droppings, and pollution can accelerate wear and reduce impact.
To clean, use a soft cloth or sponge with mild soap and water, avoiding harsh chemicals that might fade colors or degrade plastics and metals. For digital signs, follow the manufacturer’s instructions to avoid electrical issues. Cleaning every 1 to 3 months works well if your sign is in a moderate climate; more frequent cleaning may be needed in dusty or coastal areas.
Safety inspections are equally important. Signs projecting over sidewalks or entrances must be secure and free of sharp edges or loose components. Check brackets, bolts, and wiring at least twice a year, looking for rust, corrosion, or signs of fatigue. Loose mounting can cause falls and injuries, which can lead to costly liability claims.
- Inspect mounting hardware and supports every six months
- Replace rusted bolts or corroded metal brackets promptly
- Check electrical connections and lighting annually
- Clean the sign surface every 1 to 3 months depending on location
- Trim nearby tree branches to prevent damage
- Touch up paint or protective coatings yearly to prevent rust
- Monitor wear from wind, rain, and sun, especially in severe climates
Exterior signs face various weather challenges like UV rays, rain, wind, and temperature swings. UV light can fade paint and weaken plastics, while moisture encourages rust and mold growth. Applying UV-resistant coatings or laminates every 1 to 3 years helps maintain color and material integrity. For metal signs, rust inhibitors and waterproof paints extend lifespan by preventing corrosion.
Position your sign to minimize direct exposure to extreme weather when possible, such as placing it under an awning or using durable materials like aluminum or acrylic designed for outdoor use. Regular cleaning combined with prompt repairs of scratches or chips limits damage from moisture intrusion or oxidation.
Signs in areas with frequent storms or high winds require extra attention. Heavy gusts can loosen fasteners or bend supports. Using strong mounting brackets rated for at least 30 mph wind speeds improves safety. Also, after storms, conduct quick visual checks for dents, cracks, or loosened parts.
By establishing a routine maintenance schedule and focusing on both cleanliness and structural integrity, you can significantly prolong the useful life of your projecting sign. This reduces replacement costs and keeps your business message clear and inviting throughout the year.
When to Hire Professionals for Projecting Signs
Professional help becomes necessary for projecting signs when the project involves permits, complex designs, or structural challenges. Local building codes often require engineered drawings and professional certification for signs that exceed a certain size or weight, typically over 12 square feet or if the sign is mounted on a structurally sensitive surface. Hiring a licensed engineer ensures your signage complies with safety standards, preventing costly delays or fines. Designers skilled in signage understand how to tailor projections for your target audience and business type, avoiding mistakes like using bright, playful designs for a professional setting where subtlety is key.
Expect designers to deliver scalable concepts reflecting your brand identity, factoring in visibility distances, lighting, and materials suited for outdoor exposure. They will provide you with detailed mockups and allow adjustments before finalizing the design. Engineers focus on structural integrity, ensuring mounting brackets can withstand local wind loads, temperature fluctuations, and vibration if near high-traffic areas. Installers bring this to life with experienced handling of electrical connections, secure fastening, and precision placement, adhering strictly to permit requirements and installation best practices.
To choose reliable installers, ask for references and proof of licenses and insurance. Experienced installers familiar with your municipality’s processes reduce the risk of code violations and improper anchoring. Inquire about their familiarity with your specific building type, installing on brick, metal facades, or stucco demands different techniques and materials. Costs vary widely; permitting and engineering can add $500 to $2,000 or more, depending on complexity, while professional installation might range between $800 and $3,000 based on sign size and location. Good results appear as signs that remain securely mounted, evenly illuminated, and compliant with all local regulations, boosting business visibility without frequent repairs or safety incidents.
Delaying consulting a structural engineer for large or unusually positioned projecting signs risks unsafe installations and legal setbacks, so address these needs before ordering materials.
Projecting Sign Ideas: Your Quick-Start Action Plan
Follow these steps to select and implement the best projecting sign for your business to boost visibility and attract customers effectively.
- Day 1: Assess your business location and local sign regulations to determine allowable sizes and styles. Confirm success by having clear guidelines for your sign from the local permitting office.
- Day 3: Choose the type of projecting sign that fits your storefront design, consider blade signs, bracket signs, or double-sided signs. Check success by confirming the sign type complements your business frontage.
- Week 1: Decide on materials considering durability and look, like metal for strength or acrylic for illumination. Ensure success by selecting materials suited to your climate and maintenance ability.
- Week 2: Design the sign using high-contrast colors, readable fonts, and appropriate lighting to maximize impact. Test effectiveness by evaluating visibility from key customer viewpoints and at night.
- Week 3: Secure necessary permits and schedule professional installation if needed. Confirm success by obtaining all required approvals and installation completed safely.
- Month 1: Develop a maintenance schedule to keep the sign clean and functional, especially for illuminated signs. Track success by regularly inspecting and promptly repairing any issues.
- Ongoing: Monitor customer feedback and business impact to decide if upgrades or changes to your projecting sign are needed. Confirm it works by noting increased foot traffic or inquiries linked to the sign.
Frequently Asked Questions
Can Projecting Signs Be Used Effectively for Indoor Marketing?
Projecting signs can work indoors as decorative elements that also boost brand visibility. Using illuminated or 3D designs indoors adds depth and draws customer attention in retail spaces.
What Maintenance Do Wooden Projecting Signs Require Compared to Metal Ones?
Wooden signs need regular sealing or painting to prevent rot, while metal signs mainly require rust checks. This ensures durability and keeps both materials looking vibrant over time.
Can Projecting Signs Be Designed to Be Easily Updated with New Graphics or Messaging?
Yes, modular designs allow graphic panels to be swapped out without full sign replacement. This flexibility helps businesses keep their messaging current without extra costs.
Are Projecting Signs Suitable for Small Storefronts with Limited Space?
Projecting signs work well for small storefronts by extending visibility above sidewalk space. Their compact profile maximizes attention without crowding the building facade.
How Do Projecting Signs Compare to Flat Wall Signs in Terms of Foot Traffic Attraction?
Projecting signs can attract more foot traffic by being visible from multiple directions, unlike flat wall signs. This increased visibility makes them effective on busy streets.
What Types of Businesses Benefit Most from Projecting Signs?
Retail stores, restaurants, and service shops near pedestrian areas gain the most from projecting signs. Their design draws attention where foot traffic is dense.
Key Points to Remember
Choosing the right projecting sign can significantly improve your business visibility and attract more customers. Start by selecting a design that suits your storefront and complies with local regulations. Begin the process today by checking your local sign codes and gathering ideas for a sign style that fits your brand.