Cricut Maker vs Explore Air 2 for Signs: A Complete Vinyl Cutting Comparison
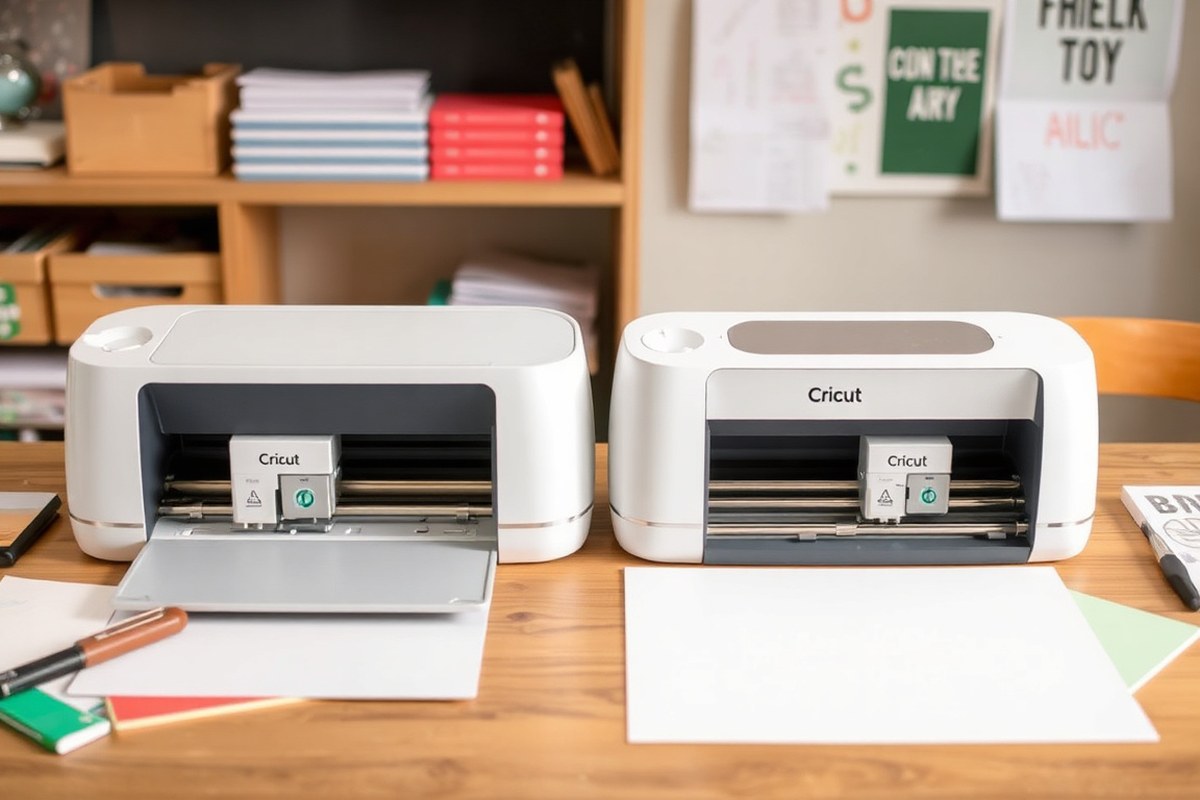
Choosing between the Cricut Maker vs Explore Air 2 for signs mainly comes down to cutting force, price, and material versatility. The Maker offers a tenfold stronger cutting force, great for thicker or layered vinyl signs, while the Explore Air 2 handles most standard vinyl tasks well at a lower cost. Start by weighing your specific sign materials and budget to pick the best fit for your projects.
Key Takeaways
- The Cricut Maker’s 4000-gram cutting force handles thicker and layered vinyl more effectively than the Explore Air 2’s 400 grams.
- The Explore Air 2 usually costs $70 to $130 less than the Maker, making it budget-friendly for simple vinyl signs.
- Both machines support the same materials and blades for standard vinyl projects, ensuring broad compatibility.
- Cutting speed differences are minimal, but Maker’s advanced blade options allow cleaner cuts on complex vinyl layers.
- Both machines share long-term costs: replacement blades, mats, and optional $10-per-month Cricut Access subscription.
- Frequent sales narrow the price gap, with Maker dropping close to Explore Air 2’s price during promotions.
1. What Are the Key Differences Between Cricut Maker and Explore Air 2 for Signs?
The Cricut Maker and Cricut Explore Air 2 differ mainly in cutting power and material range for sign making. The Maker offers up to 4,000 grams of cutting force, while the Explore Air 2 maxes out at 400 grams. This higher force allows the Maker to cut thicker materials like leather, chipboard, and balsa wood, which lets you create more detailed or layered signs. The Explore Air 2 handles standard vinyl, paper, and light cardstock but isn’t suited for heavier or specialty materials.
The blade compatibility also reflects this gap. The Maker supports over 12 different tools, including the Knife Blade required for thicker materials, while the Explore Air 2 holds up to 5 tools mainly suited for lighter media. Both machines cut vinyl up to 12 inches wide, but the Maker’s advanced Adaptive Tool System allows for more precise, diverse cuts.
Price is another important factor. The Maker generally costs between $330 and $430, whereas the Explore Air 2 ranges from $200 to $280. The higher price of the Maker is justified by those who make signs using a wide variety of materials or require advanced tools beyond vinyl cutting. For mostly vinyl-based signs, the Explore Air 2 remains an excellent budget option with fast cutting capability.
| Specification | Cricut Maker | Cricut Explore Air 2 |
|---|---|---|
| Retail Price Range | $330, $430 | $200, $280 |
| Cutting Force | 4,000 grams | 400 grams |
| Supported Materials | 300+ | 100+ |
| Blade Compatibility | Adaptive Tool System (12+ tools) | Standard tool holder (4-5 tools) |
| Max Cut Width | 12 inches | 12 inches |
| Fabric Cutting (no backing) | Yes, Rotary Blade | No |
| Thick Material Cutting | Yes, Knife Blade | No |
The greater cutting force of the Maker allows confident slicing through layered vinyl or thick sign substrates, which avoids jagged edges or incomplete cuts that can happen with the Explore Air 2. For sign projects mainly using standard vinyl or iron-on vinyl, the Explore Air 2 provides good value thanks to its lower cost and quicker cutting speed. However, the Maker’s broader material compatibility makes it the more future-proof choice for serious or growing sign makers who want to work with leather or chipboard layers.
2. How Do Cricut Maker and Explore Air 2 Cut Vinyl and Layered Vinyl Signs?

Both the Cricut Maker and Explore Air 2 deliver high-quality vinyl cuts suitable for sign making, but the Maker holds an advantage in handling multi-layer vinyl and thicker materials with greater precision and stability. The Explore Air 2 cuts single-layer vinyl very accurately, making it great for simpler signs, while the Maker’s stronger cutting force and advanced tension control support more complex, layered vinyl projects without misalignment.
Cutting Precision and Detail Differences
The Explore Air 2 uses a Smart Set Dial for material settings and offers cutting pressure up to about 400 grams, which is enough for fine vinyl details and basic lettering on signs. It maintains good accuracy for single-layer vinyl but can struggle with very intricate cuts or multi-pass operations because it has less built-in tension control.
The Cricut Maker has a stronger cutting force reaching up to 4 kilograms and use an adaptive tool system that dynamically adjusts pressure and blade depth throughout the cut. This results in finer detail reproduction and cleaner edges on vinyl, especially noticeable when working with tiny fonts or detailed logos for signage.
Both machines cut up to 12 x 24 inches, so size doesn’t limit large sign projects, but precision under load differs. The Maker’s stability reduces blade drift during cutting, preserving intricate designs and preventing vinyl distortion.
Handling Single vs Multi-Layer Vinyl
For single-layer vinyl, both machines handle most standard adhesive vinyl and heat transfer vinyl smoothly. Layering one or two vinyl colors for signs usually does not pose a problem on either device as long as cuts are aligned properly during application.
Challenges arise when cutting and aligning multi-layer vinyl signs with three or more layers. The Explore Air 2 may have alignment issues due to less stable tension control, especially over longer production runs. The Maker’s ability to maintain tension and perform multi-pass cuts ensures layers remain consistent without shifting. Here is a checklist to prepare vinyl layers for complex signs:
- Use transfer tape to align layers precisely during application
- Cut each vinyl layer separately with appropriate blade and pressure settings
- Test cut each color layer to ensure crisp edges and separation
- Let the machine complete each cut fully before unloading material
- Check cut depth to avoid cutting backing paper on delicate vinyl
- Use weeding tools to remove excess vinyl cleanly before layering
Following these steps helps achieve sharp, well-aligned multi-layer vinyl signs with both machines, but the Maker provides extra reliability on complex projects.
Best Blade Settings and Mat Choices
Both machines recommend the Fine Point Blade for vinyl cutting. The Maker’s adaptive system automatically adjusts blade pressure to accommodate different vinyl thicknesses, including specialty vinyl types up to 2.4 mm thick. The Explore Air 2 maxes out around 2 mm thickness and may require manual dial adjustments.
StandardGrip mats work well for most vinyl and heat transfer vinyl. Using a newer mat with strong adhesive prevents vinyl shifting during cutting, which is important for clean edges and consistent results. For thicker vinyl or repeated cuts, the Maker’s ability to sense blade pressure reduces wear on mats and blades.
Always perform a test cut on a scrap piece of vinyl to dial in pressure and blade depth, especially when layering or using thicker specialty vinyl.
3. Which Materials and Blades Support Sign Making on Both Machines?
The Cricut Maker and Explore Air 2 each use different blade systems that affect what materials and thicknesses they can handle, particularly for vinyl sign making. The Maker offers more blade options, including rotary and knife blades, which let you cut thicker, specialty materials. The Explore Air 2 uses a simpler blade set, suitable for standard vinyl and paper. Choosing the right blade depends on your sign material thickness and detail requirements.
Blades Supported by Cricut Maker
The Cricut Maker has an Adaptive Tool System that supports over a dozen tool types. It holds two clamps inside the machine, allowing you to switch between blades such as the fine point, rotary, and knife blades without swapping tools manually. The rotary blade excels at cutting fabrics and patterns cleanly, while the knife blade provides up to 10 times the pressure of the Explore Air 2 blades, enabling cuts through materials up to 2.44 mm thick like leather, basswood, and heavy cardstock.
This expanded blade selection broadens your material options for intricate vinyl signs or layered specialty projects that require deeper cuts. The fine point blade, compatible with both machines, handles standard vinyl well, but the knife blade and others let you cut thicker sign materials that Explore Air 2 cannot manage.
Blades Supported by Explore Air 2
The Explore Air 2 uses a single clamp system designed for basic blades: the fine point blade, deep point blade, and a few others for standard crafting. It does not support the rotary or knife blades that come with the Maker. These blades work well on over 100 materials, primarily thin vinyl, iron-on, and cardstock up to about 2 mm thick.
For vinyl sign makers who use mostly durable, standard craft vinyl or heat-transfer vinyl, the Explore Air 2’s blades offer a straightforward, cost-effective option. There is an accessory adapter compatible with Cricut cartridges, which helps you access many design options. However, it will hit a material thickness limit sooner than the Maker.
Materials Suited for Sign Making
Both machines cut standard vinyl, iron-on materials, and cardstock used widely in vinyl wall decals and heat-transfer signs. The Maker’s blade system enables cutting of specialty materials like leather, basswood, and thicker cardstocks up to 2.44 mm thick using the knife blade. This is a significant advantage for sign makers wanting to experiment with textured or sturdier materials or achieve layered 3D signs.
The Explore Air 2 is limited to materials roughly 2 mm thick or thinner, making it ideal for simple, flat vinyl signs but unsuitable for dense or wood-based signage. The Maker supports over 300 materials thanks to its Adaptive Tool System, including perforated, wavy, debossed, and engraved effects, adding creative flexibility beyond basic vinyl.
| Blade Type | Cricut Maker Compatibility | Explore Air 2 Compatibility | Material Thickness Supported | Best Use |
|---|---|---|---|---|
| Fine Point Blade | Yes | Yes | Up to 2 mm | Standard vinyl, paper, iron-on |
| Rotary Blade | Yes | No | Up to 2 mm (fabric) | Fabrics, intricate patterns |
| Knife Blade | Yes | No | Up to 2.44 mm | Thicker materials like leather, balsa wood |
| Deep Point Blade | Yes | Yes | Up to 2 mm | Thicker cardstock, vinyl |
| Perforation, Deboss, Wavy Blades | Yes | No | Varies | Specialty effects and textures |
To select the right blade for sign making, start with the material you plan to cut and its thickness. Use the fine point blade for most vinyl decals under 2 mm. Choose the knife blade on the Maker if you need to cut thick or dense materials like basswood. Avoid trying to cut these on the Explore Air 2, as it lacks the pressure to cut through safely. Carefully load the correct blade according to Cricut’s instructions and test cut the material to confirm clean edges without tearing or incomplete cuts.
4. How Does Cutting Speed and Software Affect Sign Projects on Each Machine?
The Cricut Maker cuts vinyl signs slightly faster than the Explore Air 2, especially on larger or more detailed projects. While the Explore Air 2 is already twice as fast as its predecessor for vinyl cutting tasks, the Maker completes intricate cuts about 15-20% quicker on thicker materials due to its optimized cutting force and torque. This improvement matters when you work with layered vinyl signs or detailed designs where precision and speed reduce your overall project time.
Both machines use Cricut Design Space, which lets you access a vast library of sign templates and design elements. This software compatibility means you can start designing right away regardless of which model you own. Design Space supports uploading your own images, adjusting sizes, layering, and applying text, which are essential features for customizing vinyl signs to match your vision.
However, the software experience is uniform for both machines because Design Space is cloud-based and device-independent. There are no exclusive software features in Design Space that favor one machine over the other. Your workflow in terms of design and machine communication will remain consistent, whether cutting on the Maker or Explore Air 2. You simply connect the machine via Bluetooth or USB, send your design from the software, and let the machine handle the cutting automatically.
The difference in cutting speed between these two comes from hardware rather than software. The Maker’s ability to apply up to 4,000 grams of cutting force (compared to 400 grams for the Explore Air 2) means it handles dense or layered materials faster and more cleanly. This makes a noticeable difference if your signs require complex layering or if you often work with thicker vinyl or specialty materials, reducing the chance of cutting errors and rework.
For typical single-layer vinyl signs, the Explore Air 2 meets most speed needs with its efficient cutting abilities at a generally lower cost. In contrast, for larger volume projects or more detailed signs, the Maker’s faster speed and stronger blade pressure translate into better throughput. You can expect the Maker to finish a complex 12” x 24” vinyl sign roughly 15-20% faster, which might save you several minutes per project, important when you produce signs regularly.
To get the most from either machine, download Cricut Design Space beforehand. Exploring the project library and familiarizing yourself with the software tools before your machine arrives reduces delays in starting your sign projects. Both machines integrate smoothly with Design Space’s cloud sync, so your saved projects and custom designs are available across devices instantly, streamlining your workflow.
In short, choose the Cricut Maker if you need faster cutting speeds for detailed or thick vinyl signs and if you want to future-proof for more advanced materials. Otherwise, the Explore Air 2 offers reliable cutting speed and full Design Space access at a more budget-friendly price, suitable for many vinyl sign makers focusing on simple or moderate complexity signs.
5. What Are the Long-Term Costs and Maintenance for Sign Making Machines?
Blades and mats wear out over time when cutting vinyl for signs. The basic fine-point blade that the Cricut Explore Air 2 uses typically lasts for about 6 to 8 hours of cutting or several hundred cuts, depending on the thickness and type of vinyl. Standard grip mats, critical for holding vinyl steady, usually need replacing every 3 to 6 months for hobbyists, and more often with frequent use in small business settings. The Cricut Maker uses the same blade type but benefits from a stronger cutting force, which can slightly reduce blade wear since cuts often happen more efficiently.
Cricut Access, a subscription service, is optional for sign making. It offers access to thousands of images and fonts, which can speed up design work. However, if you already have your own designs or prefer free or purchased assets from other sources, you don’t need Cricut Access for successful vinyl sign projects. The choice depends on whether you want ongoing access to a large library.
Proper maintenance keeps results clean and machines running longer. Vinyl cutting requires regular cleaning of the blade and mats to avoid buildup, which can cause tearing or uneven cuts. Debris and adhesive residue on mats reduce stickiness and cut quality. The machine’s rollers and blade housing should also be checked and cleaned monthly if used frequently.
- Replace fine-point blades every 6 to 8 hours of cutting or after several hundred cuts of vinyl
- Swap out standard grip mats every 3 to 6 months with regular use; sooner if adhesive feels weak
- Clean mats after each use with a plastic scraper and mild soap to maintain stickiness
- Remove blade from housing monthly to clear stuck vinyl pieces and dust
- Wipe rollers and inside machine surfaces with a soft cloth monthly to prevent debris buildup
- Store mats flat and covered to avoid dust and warping that reduce effectiveness
Use a scraper tool gently to remove small vinyl scraps stuck to mats; forcing them off can damage the mat’s surface and reduce grip.Costs for replacement blades range from $9 to $15 for a 5-pack of fine-point blades. Mats sell for about $10 to $15 each depending on size and strength (standard vs strong grip). These expenses add up over months of regular sign making. Machines do not require professional servicing for vinyl cutting maintenance but should be handled carefully to avoid mechanical issues. Keeping up with these tasks results in smoother cuts, less wasted vinyl, and fewer project delays.
6. Which Machine Suits Different Sign Makers: Hobbyists vs Small Businesses?
The Cricut Explore Air 2 is a practical choice if you make signs occasionally or are just starting out. It cuts most vinyl materials with reasonable speed and precision. For hobbyists, it meets basic needs without the higher upfront cost of the Maker. Your skill level and the complexity of your signs are key factors. Simple designs with one or two layers rarely require the advanced tools of the Maker.
Small businesses benefit from the Cricut Maker when sign projects demand more complexity or variety. It supports additional blades and tools, letting you cut intricate designs and thicker materials. A growing business often needs faster turnaround and the flexibility to produce more detailed layered signs. That can justify spending more time learning the Maker’s features and investing in its accessories.
User experience influences the best machine for sign making. Beginners often find the Explore Air 2 easier to set up and use immediately. The Maker offers more functions but comes with a steeper learning curve and may require practice to unlock its full potential. Think about how much time you’ll commit to mastering the machine versus how often you’ll make signs. The decision rule chart below helps match user needs to the right machine:
| Factor | Explore Air 2 | Cricut Maker |
|---|---|---|
| Sign Complexity | Simple designs, up to 2 layers | Complex, multi-layer, intricate cuts |
| Material Thickness | Standard vinyl, iron-on | Thicker materials and specialty blades supported |
| User Skill Level | Beginner to intermediate | Intermediate to advanced |
| Project Volume | Occasional sign making | Frequent or bulk production |
| Budget | Lower upfront cost | Higher initial investment; more accessories |
| Learning Curve | Gentle; easy setup and use | Requires practice to optimize features |
| Color Options | Many colors available to match personal style | Limited to 3 color choices |
Use this chart as a guide when choosing. For example, if your signs have simple text or basic shapes and you only occasionally make signs, the Explore Air 2 fits well. It keeps upfront costs down while delivering solid results with minimal delay. However, sign makers scaling their business with more complex projects find the Maker’s versatility and faster cutting speed worth the extra cost. Practicing with the Maker is essential since advanced tools require some skill to use effectively.
Ultimately, matching the machine to your sign making needs balances what you want to create with your skill level and business growth. Both machines do a good job for vinyl signs, but the Maker supports more demanding workflows and materials typical to small businesses expanding their craft.
7. What Accessories and Mats Improve Vinyl Sign Cutting Quality?
For cutting vinyl signs, the standard LightGrip mat is the best choice because it holds vinyl sheets securely without damaging them when removed. It provides a tacky surface that keeps your vinyl steady during cutting, ensuring clean lines and accurate cuts. Mats usually cost around $15 to $20 and can be reused multiple times if cleaned from stray pieces and dust.
The MediumGrip mat is an option if you work with heavier or thicker vinyl or layered projects that might shift during cutting. It offers stronger adhesion but increases the chance of vinyl tearing or curling when removing the cut pieces. Use it sparingly and test with scrap vinyl before committing to important signs.
Many accessories designed for vinyl cutting work interchangeably on both the Cricut Maker and Explore Air 2. Both machines support the same mats, weeding tools, scrapers, and transfer tape. You won’t need to buy separate toolkits unless you prefer brand-specific kits.
- LightGrip cutting mat, for standard vinyl sheets, easy removal, and clean cuts
- Weeding tools (hook tip and fine-tipped tweezers), remove excess vinyl precisely, especially from detailed signs
- Scraper tool, smooth vinyl onto transfer tape; remove bubbles and wrinkles
- Transfer tape (clear or grid-lined), transfers your vinyl design smoothly onto sign surfaces
- Scraper and scraper cleaning cloth, keeps your mats clean by removing tiny vinyl bits that reduce stickiness
- Brayer roller (optional), especially helpful when applying large vinyl layers to prevent air pockets
To improve quality when layering vinyl, use high-quality transfer tape with a grid. This allows you to line up layers accurately, preventing misalignment that spoils multi-color signs. Apply transfer tape smoothly by starting on one edge and using the scraper tool to push bubbles outward.
Keep mats sticky by cleaning them weekly with a damp cloth or mild soap followed by air drying. Losing mat adhesion leads to vinyl slipping and less precise cuts. Avoid using harsh cleaners, which can degrade the mat’s surface. Regular upkeep extends mat life, saving money over time.
When cutting multiple layers of vinyl, slow down the cut speed slightly on both machines to avoid pulling or stretching thin vinyl. Also, doing a test cut on scrap material first helps adjust blade pressure and speed to your specific vinyl brand and thickness. Proper knife pressure and speed prevent jagged edges and wasted material.
8. How to Avoid Common Mistakes and Troubleshoot Vinyl Cutting on Both Machines?
Poor vinyl cuts, tearing, or alignment problems can slow down your sign-making process on both the Cricut Maker and Explore Air 2. Most issues come from incorrect blade pressure, dull blades, or unsupported material settings. Fixing these problems requires careful adjustment of your machine settings, regular maintenance, and precise cutting techniques.
Common Vinyl Cutting Errors and Solutions
One frequent problem is vinyl tearing or incomplete cuts because the blade pressure isn’t set right. For both machines, using the default setting for the vinyl type usually works, but heavier or specialty vinyl often needs more pressure. You can increase the pressure by one or two levels in Cricut Design Space when you notice missed cuts. Poor cuts also happen when the blade is dull or clogged, which reduces cutting efficiency.
Misaligned layering happens when the weeded vinyl doesn’t match the backing or when transferring multiple layers. This usually results from inaccurate placement during transfer tape application or improper mat loading. To avoid this, always align the transfer tape carefully and use a brayer roller to secure well. Loading the mat straight in your machine ensures it cuts as designed.
- Check blade sharpness every 5-10 projects and replace if cuts dull
- Use moderate pressure settings and test cut on scrap vinyl first
- Secure transfer tape with a brayer roller for smooth layering
- Load mats straight to avoid angled cuts or misregistration
- Clean the blade and housing regularly to prevent buildup
- Weed vinyl promptly to avoid adhesive residue transfer problems
These steps reduce mistakes related to cutting depth and visual errors in multilayer signs, improving final results.
Blade Calibration and Mat Care Tips
Both machines require proper blade calibration for precision cuts. Calibration adjusts the blade’s cutting path so layers line up perfectly. Calibrate your Cricut machine through Design Space by selecting “Calibrate” in the settings menu, and follow the on-screen instructions which involve cutting test patterns. Doing this helps especially for layered vinyl signs needing exact alignment.
Mats play a important role in cutting quality. Use a LightGrip mat for vinyl, and replace mats every 30 to 50 projects or when adhesive weakens. A worn mat causes material slippage, leading to uneven cuts and tearing. Keep mats clean by peeling off leftover scraps and using a lint roller or mild soap and water to restore stickiness.
Never cut vinyl on a dull or damaged mat, it often causes vinyl shifting and ruined cuts.
Adjusting Settings for Different Vinyl Brands
Not all vinyls behave the same. Some brands have thicker backing or stronger adhesive requiring pressure or blade depth tweaks. For instance, thicker outdoor vinyl may need a deeper blade setting and higher pressure compared to standard indoor vinyl. Use a test cut to verify settings before starting your main project. Adjust the pressure slightly higher or gradually set the blade depth deeper when the cut doesn’t fully go through the vinyl or weeds poorly.
Software settings also matter. In Cricut Design Space, choosing the right material from the library gives default pressure and blade depth values. Use custom settings for uncommon vinyls or when cutting layered or glitter materials. This trial and error approach fine-tunes results by preventing tearing and improving clean edges without wasting material.
Your First Steps to Perfect Vinyl Signs with Cricut
Get started making vinyl signs easily by following this simple plan. It helps you choose the right machine and create your first projects with confidence.
- Before you buy: Compare your sign project needs, such as size, detail, and material variety. Decide if you need the Cricut Maker’s versatility or the Explore Air 2’s solid performance.
- Day 1: Set up your Cricut machine and install Design Space software. Confirm your machine communicates correctly by running a test cut on basic vinyl.
- Week 1: Practice cutting simple single-layer vinyl signs using standard blade and mat. Check edge quality and adjust cut pressure if needed.
- Week 2: Experiment with layered vinyl signs. Use transfer tape carefully and test how well layers align and stick.
- Week 3: Try different blades and mats recommended for sign materials. Note any improvements in cut accuracy and material handling.
- Week 4: Troubleshoot common vinyl cutting issues like tearing or incomplete cuts by adjusting speed and pressure, and clean your blade to maintain sharpness.
- After 1 month: Assess whether your machine and supplies fit your sign-making routine and volume. Consider accessories that could improve speed or detail for ongoing projects.
Frequently Asked Questions
Can I Use the Same Cricut Design Space Projects on Both Machines?
Yes, Cricut Design Space works equally well for both machines, letting you start projects on one and finish on the other with no issues. This helps maintain consistency when designing layered or detailed vinyl signs across different devices.
Is the Noise Level Different Between the Cricut Maker and Explore Air 2?
The Cricut Explore Air 2 generally runs quieter than the Maker due to its simpler motor and cutting pressure. This can be beneficial if you prefer a quieter workspace during long sign-making sessions.
Do Both Machines Support Wireless Bluetooth Connectivity?
Both the Cricut Maker and Explore Air 2 support Bluetooth for wireless cutting, allowing you to send vinyl sign designs from your computer or mobile device without cables. Keep in mind that a stable connection improves cutting reliability.
Which Machine Offers Better Precision for Small Vinyl Details?
The Cricut Maker provides better precision on fine vinyl cuts thanks to its stronger cutting force and adaptive tool system, ideal for intricate sign designs with tight details.
Can I Switch Blades Easily Between Cutting Vinyl and Other Materials on These Machines?
Yes, both machines let you quickly swap blades for different materials, but the Maker offers more blade options, making it easier to adapt to specialized vinyls or layered signs.
Is There a Difference in Software Updates Between the Cricut Maker and Explore Air 2?
Software updates for both machines are handled through Cricut Design Space and apply equally, with no difference in features or performance improvements related to sign making.
Wrapping Up
Choosing between the Cricut Maker and the Explore Air 2 depends on your specific sign-making needs and budget. The Maker offers more flexibility for diverse materials and complex designs, while the Explore Air 2 provides reliable performance for most vinyl signs at a lower cost. Start by testing how each handles your typical projects, then expand your tools and techniques as you grow your skills or business.