Does Permanent Vinyl Stick to Wood? A Complete Guide for Perfect Adhesion
Does permanent vinyl stick to wood? Yes, permanent vinyl can adhere well to wood surfaces when the wood is properly prepared and dry. The key is to ensure the wood’s moisture content is low and the surface is clean and smooth before application.
Start by checking that the wood has a moisture content of 6-8% for stable adhesion. This prevents peeling and helps the vinyl stick better over time.
Key Takeaways
- Allow new paint or stain on wood to dry at least 24 hours before applying permanent vinyl.
- Keep vinyl stored at 65°F to maintain its adhesive properties and extend shelf life to two years.
- For oily hardwoods, warm the wood surface to about 100°F before application to improve vinyl adhesion.
- Cut vinyl 1/16 inch smaller than wood edges to avoid peeling at edges from size mismatch.
- Use transfer tape twice on oily or rough wood for a smoother vinyl application and better transfer.
- Wait 10 to 20 minutes after placing vinyl decal on wood before removing transfer tape for clean release.
Does Permanent Vinyl Stick Well to Wood Surfaces?

Permanent vinyl generally sticks well to wood surfaces when applied under the right conditions. The adhesive used in permanent vinyl is pressure-sensitive and designed to form a strong, lasting bond, especially on smooth, sealed, or painted wood. Wood’s natural texture and finish significantly influence how well the vinyl adheres. Smooth, sealed, or painted wood provides a consistent surface for the vinyl’s adhesive to grip, while rough or unfinished wood might reduce adhesion strength due to its porous and uneven nature.
Adhesion works best when the wood surface is clean, dry, and fully cured. Painted or stained wood needs at least 24 to 48 hours to dry completely after finishing. This drying period allows moisture to evaporate and the surface to harden, which prevents premature vinyl lifting or bubbling. Applying vinyl too soon on wood that is still curing can cause the adhesive to fail or damage the wood finish when removed.
Not all vinyl types are equally effective on wood. Permanent adhesive vinyl offers the strongest bond and is recommended over removable vinyl, which lacks durable adhesive and tends to lift over time. Heat transfer vinyl (HTV) can also adhere to wood, but its effectiveness varies and usually works best on smoother, sealed surfaces. Always test on a small area with HTV before full application. The right transfer tape is essential for applying adhesive vinyl: regular-tack tape is suitable for most projects, while stronger tapes help precisely place the vinyl on rougher or uneven wood finishes.
Several factors limit adhesion. Natural wood expansion and contraction due to moisture can weaken the bond or cause vinyl lifting. To minimize this, use wood types known for stability and seal the surface properly. Moisture exposure is another risk; water can break down adhesive strength and damage both the vinyl and wood surface, so waterproof vinyl and sealed wood are recommended for projects exposed to damp conditions. UV light also degrades vinyl adhesive and color over time, so UV-resistant vinyl and protective coatings extend the life of outdoor wood projects.
When applying permanent vinyl on stained wood, the key is selecting a product designed for wood bonding and allowing the stain to fully cure. Strong, permanent adhesive vinyls work better on stained surfaces than removable vinyl. Pressing the vinyl firmly and waiting for at least 20 minutes after application helps the adhesive conform to the wood grain and secure the bond. Alignment is critical before placing the vinyl since repositioning is difficult and can damage the finish or the vinyl.
Which Types of Wood Are Best for Vinyl Application?
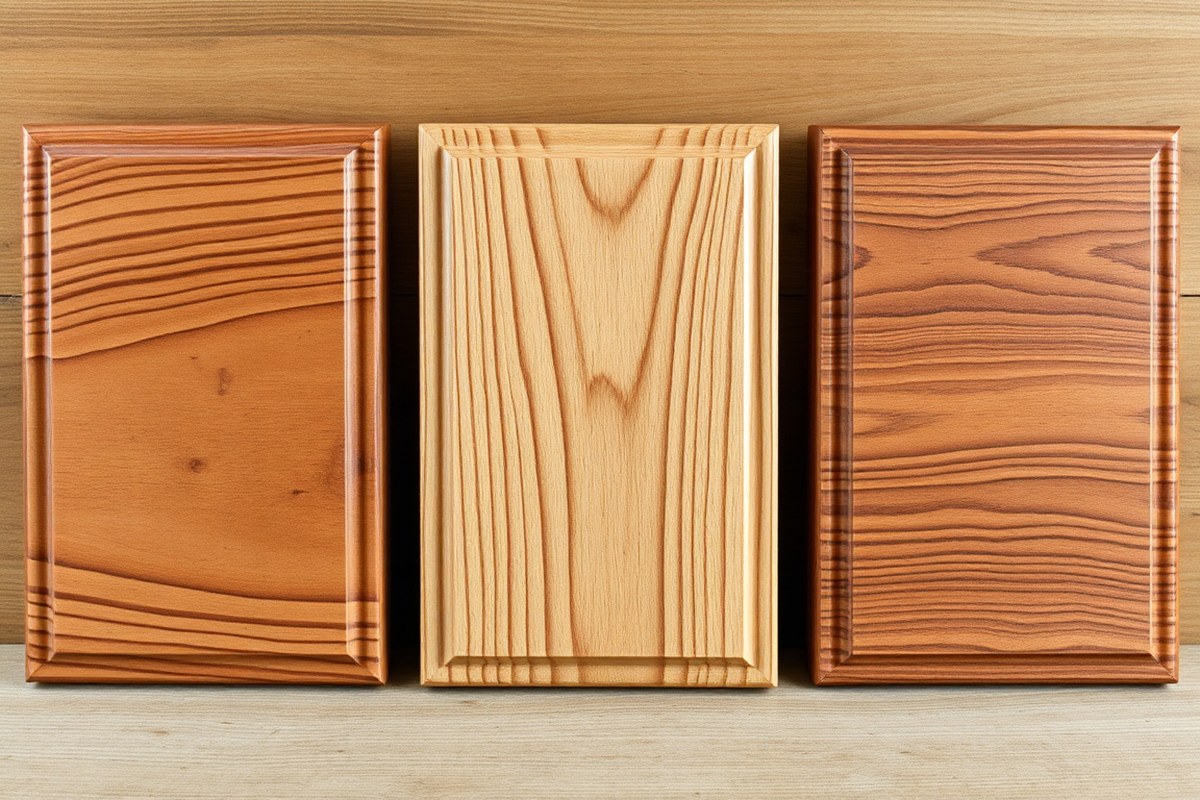
Vinyl sticks best to wood species with smooth, sealed surfaces. Woods like maple, birch, and poplar offer tight grain patterns, creating fewer gaps where vinyl can fail to adhere. Pine and cedar, while popular, have softer, more porous textures that may require more preparation. Avoid oily or resinous woods such as teak or cypress because their natural oils repel adhesives. You can still apply vinyl on these, but expect weaker adhesion without sealing or priming.
The smoothness of the wood surface plays a major role in vinyl adhesion. Rough or unfinished wood makes it difficult for the vinyl to form a solid bond, and bumps will appear under the vinyl, causing peeling or bubbling later. Sanding wood to at least 220-grit creates a smooth surface that vinyl can better cling to. For porous or rough wood, applying a sanding sealer or a coat of polycrylic improves the surface by filling gaps and preventing moisture from interfering with the vinyl’s adhesive.
| Wood Feature | Adhesion Quality | Recommended Finish |
|---|---|---|
| Maple, Birch, Poplar | High | Sanded smooth, stained or sealed with polycrylic |
| Pine, Cedar | Moderate | Sanded 220-grit and sealed with stain or polycrylic |
| Teak, Cypress (Oily wood) | Low | Requires thorough sealing and priming |
| Rough/Unfinished wood | Poor | Sand smooth, apply sanding sealer or coat of polycrylic |
| Stained wood (semi-gloss or gloss) | High | Use stain as base; add clear coat for better adhesion |
Staining wood before applying vinyl works well because it smooths the surface and provides a good bonding base. A semi-gloss or high gloss finish improve adhesion by creating a sealed, even surface. You can use acrylic paints similarly, especially if you want to add color first. Applying a clear polycrylic coat on top of stained or painted wood further seals the surface and strengthens the vinyl’s grip, particularly for indoor projects.
For the strongest adhesion, make sure your wood is smooth, clean, and completely dry before applying vinyl, and opt for a sealed or painted finish.
In some cases, you might want wood to keep its natural texture. Lightly sanding to create a slightly rough but even surface gives vinyl enough grip without fully sealing the wood. This works but isn’t as durable as sealed surfaces. To avoid peeling and bubbling, avoid using removable vinyl and ensure you’re using permanent adhesive vinyl designed for wood surfaces. You’ll see the best results with well-prepared, dense hardwoods and finishes that create a consistent, moisture-resistant base for the vinyl to bond securely.
Preparing Wood for Permanent Vinyl Application
Preparing wood for permanent vinyl means creating a clean, smooth, and stable surface for strong adhesion. Start by thoroughly cleaning the wood, then sanding it to 220 grit to remove roughness and open pores. Measure moisture levels to ensure the wood isn’t too damp, and apply a sealant if the wood is raw or stained for long-lasting results.
Cleaning and Dust Removal
Before applying permanent vinyl, removing all dirt, dust, oils, and debris from the wood surface is essential. Dirt or grease blocks adhesive contact and leads to peeling or lifting edges. Use a mild detergent solution and then wipe with a slightly damp cloth to ensure no residue remains.
Cleaning with isopropyl alcohol or denatured alcohol works well, especially on stained or previously finished wood. The alcohol removes oils and residues that detergent might miss. Let the wood dry completely before moving on.
Sanding to the Right Grit
Sanding wood to 220 grit smooths the surface and closes pores, which prevents vinyl from bridging gaps and bubbling. Skipping this step is the most common cause of vinyl edges lifting or peeling within weeks. Use fine-grit sandpaper and sand evenly with the grain.
After sanding, remove all dust using a tack cloth or a vacuum with a brush attachment. Residual dust interferes with vinyl adhesion and creates bumps. For stained wood, sanding also prepares the surface to accept a primer or seal coat evenly.
Checking and Adjusting Moisture Levels
Excess moisture in wood prevents permanent vinyl from sticking properly because adhesives don’t bond well to damp surfaces. Use a moisture meter to check the wood’s moisture content. Ideal moisture levels for vinyl application are below 12%, ideally between 6% and 9%.
Allow the wood to dry in a warm, well-ventilated room for several days when it is too moist. Avoid direct heat sources, which can warp the wood or cause uneven drying. Applying vinyl to wood with high moisture often leads to bubbling or lifting as the wood dries.
Applying a Sealant If Necessary
Sealing wood creates a non-porous, smooth base that protects the wood and improves vinyl adhesion. Raw or stained wood especially benefits from a clear wood sealer, water-based polyurethane, or polycrylic. Sealers lock in moisture and prevent finishes from releasing solvents under the vinyl.
Apply one thin coat of sealer with a synthetic brush or foam applicator, following the product instructions. Let it dry thoroughly, usually 2 to 4 hours for water-based sealers, before sanding lightly with 320 grit paper to smooth the finish. Clean off dust before the vinyl application.
Sealing painted or heavily stained wood prevents vinyl from lifting due to oily residues or uneven surface texture. Avoid oil-based finishes that are not fully cured, because solvent release can cause bubbles.
- Wipe the wood surface with a mild detergent mixed with water to remove dirt and oils.
- Clean the surface again using isopropyl or denatured alcohol to remove any leftover residue.
- Let the wood dry completely, then sand evenly using 220-grit sandpaper with the grain.
- Remove all sanding dust with a tack cloth or vacuum brush attachment.
- Check the wood moisture content with a digital moisture meter; ensure it is below 12%.
- Allow the wood to dry slowly in a ventilated area until the moisture level is suitable, if necessary.
- Apply a thin coat of clear water-based sealer or polycrylic, especially for raw or stained wood.
- Let the sealer dry fully, then sand lightly with 320-grit paper and clean off dust before applying vinyl.
How to Apply Permanent Vinyl on Wood Step-by-Step
Applying permanent vinyl to wood requires careful attention to cutting, preparing, transferring, and pressing techniques. Using the right tools and following specific steps helps you avoid bubbles, wrinkles, and peeling, giving you a clean, professional look on your wood signs or craft projects.
Cutting and Weeding Your Vinyl Design
Start by cutting your vinyl design using a digital cutting machine like a Cricut Maker 3 or Cricut Joy. These machines range from around $100 to $380 depending on model and can handle most standard vinyl projects. Use permanent adhesive vinyl rolls, which typically cost $8 to $15 for 12″×6 feet, covering several projects.
After cutting, carefully weed the excess vinyl, that means peeling away unwanted pieces from the backing. Make sure to remove all small scraps, especially from intricate areas, to ensure your design looks sharp and complete.
Using Transfer Tape for Wood Surfaces
Transfer tape is a low-tack adhesive film that moves your vinyl design from its backing to the wood. It’s especially useful for multi-piece or detailed designs. Since wood surfaces can sometimes pull fibers or stick too strongly, reduce transfer tape tackiness by sticking it once or twice to soft cloths, fuzzy jeans, or blankets before use. This step helps prevent the transfer tape from pulling the vinyl off the wood later.
Peel the backing from your vinyl, then apply your softened transfer tape smoothly over the vinyl design. Use a squeegee or credit card to burnish the transfer tape firmly but carefully so the vinyl lifts cleanly. This helps the full design transfer properly to the wood.
Applying and Pressing the Vinyl Correctly
Place your vinyl design on the prepared wood surface, being careful to position it exactly where you want. Start pressing from the center outward to avoid trapping air bubbles beneath the vinyl. Use a firm tool such as a squeegee, plastic card, or a soft cloth to smooth the design down.
Consistent pressure is key to bonding the vinyl adhesive with the wood. Hold the pressed vinyl flat and firm for at least 30 seconds to a minute. Allow a polycrylic finish on your wood to dry for 24 hours before applying vinyl to achieve the best adhesion.
- Cut your vinyl with a cutting machine appropriate for your design size and complexity.
- Weed excess vinyl carefully, removing all unnecessary pieces.
- Reduce transfer tape tackiness by sticking it to fabric once or twice.
- Apply transfer tape firmly over your vinyl and burnish evenly.
- Peel the vinyl backing, exposing adhesive surface.
- Place vinyl on the wood surface, aligning carefully.
- Press the vinyl firmly using a squeegee or soft cloth, moving center to edges.
- Maintain pressure on vinyl for 30, 60 seconds to ensure adhesion.
Removing Transfer Tape Without Peeling Vinyl
After pressing, wait a few minutes before removing the transfer tape. This pause helps the vinyl stick to the wood without lifting off. Pull the tape back slowly at a 45-degree angle, keeping the tape close and low to the surface. This technique reduces stress on the vinyl’s adhesive bond.
Try reducing the transfer tape’s stickiness by pressing it onto fabric more times or switching to a less aggressive tape if it pulls some vinyl back. Careful removal will leave your design clean and intact on the wood, without bubbles or wrinkles.
How Long to Wait Before and After Applying Vinyl to Wood?
Applying vinyl to wood requires patience with drying and curing times to ensure a strong, lasting bond. After painting, staining, or sealing your wood, you should wait at least 24 to 48 hours before putting vinyl on it. This gap lets the paint or stain cure fully, avoiding issues like peeling or bubbling of the vinyl later. For example, if you stain or use acrylic paint on your wood sign, wait a full two days before applying the vinyl to give the finish enough time to harden completely.
Before applying the vinyl, clean the wood surface with rubbing alcohol to remove oils or dust that might prevent proper adhesion. Then, after you place the vinyl, let it cure on the wood for another 24 to 48 hours without touching or sealing the piece. This curing step allows the vinyl adhesive to set and form a strong bond with the wood’s surface. Handling or coating it too soon can disrupt this process and weaken the stickiness.
Sealing the wood beforehand, such as with polycrylic over stain or paint, is beneficial for vinyl adhesion. This not only protects the wood but also creates a smoother surface that vinyl prefers to stick to. Wait the same 24 to 48 hours for sealer to dry thoroughly before applying the vinyl. If you plan to seal over the vinyl, hold off at least 24 hours after the vinyl application to avoid harming the adhesive layer. You can use a dry or very lightly damp cloth to clean the vinyl surface after curing, but avoid liquids or heavy handling till the bond is fully set.
Keep in mind that these time frames depend on factors like room temperature and humidity. Cooler or more humid environments may extend drying times, so look for fully dry and hard finishes as your cue. Following this schedule consistently will help you achieve a professional-quality wood sign or project that holds up well over time without peeling or lifting.
Waiting the full 24 to 48 hours after each step before moving on ensures your vinyl project sticks securely and lasts longer on wood surfaces.
Why Vinyl May Not Stick to Wood and How to Fix It
Vinyl may peel, bubble, or fail to adhere to wood primarily because of surface contamination, texture, moisture, or temperature. Oils or dust trapped under the vinyl cause edges to lift within days, especially on stained or unfinished wood. Vinyl also tents over deep grain when the wood’s surface is too rough for the thin vinyl to lay flat. Moisture and changing temperatures can cause bubbles to form or vinyl to release, as adhesives weaken when the wood’s moisture content is above 8% or if moisture gets beneath the vinyl edges.
Troubleshooting these adhesion issues starts with careful cleanup and proper surface preparation. You should clean the wood thoroughly with rubbing alcohol to remove oils and dust, then sand lightly to smooth any rough spots or open deep grain. Ensure the wood moisture content tests between 6% and 8% using a pinless moisture meter before applying vinyl. If you’re working on stained wood, add a thin clear coat like polycrylic or varnish and allow it to cure fully to create a sealed surface that vinyl sticks to better.
- Clean wood surface with isopropyl alcohol and let dry
- Sand very fine or fill deep grain with wood filler, then re-sand smooth
- Verify moisture content is in the 6, 8% range before application
- Apply a thin clear coat (polycrylic or varnish) on stained wood and let it cure
- Use outdoor-rated permanent vinyl for exterior wood exposed to sun and rain
- Cut vinyl slightly smaller than wood edges (about 1/16 inch) to prevent lifting
- Seal edges after vinyl application to block moisture intrusion
Small bubbles often result from trapped air or solvents still releasing from a freshly finished surface. You can prick small bubbles with a pin and press the vinyl flat carefully. Larger bubbles or peeling might mean the finish was not cured or there is residual moisture. Allow finishes to dry and cure at room temperature between 65°F and 75°F for 24 to 48 hours before applying vinyl. Avoid applying vinyl in very humid or cold conditions, as temperatures outside 50°F to 85°F can impair adhesion.
Edges that lift within days often trace back to poor burnishing, firmly rubbing down the vinyl after application to improve contact with wood. Use a firm squeegee or credit card with steady pressure along edges and surfaces right after applying vinyl. When peeling happens repeatedly, re-clean the surface and consider using a vinyl adhesive primer or an extra layer of adhesive vinyl. These treatments add tack to help vinyl “grab” onto tricky wood surfaces, especially if it’s raw or stained but not sealed.
Outdoor vs Indoor Vinyl Projects on Wood: What You Need to Know
Permanent vinyl can stand up well on wood surfaces both indoors and outdoors, but choosing the right type of vinyl and applying proper sealing methods are important for lasting results. Outdoor projects require vinyl with stronger adhesives and protective topcoats to resist weather and moisture. Indoor wood projects allow more flexibility with vinyl types and simpler maintenance.
Vinyl Grades for Indoor vs Outdoor Use
Outdoor wood projects such as garden signs or porch plaques need vinyl specifically designed for all-weather conditions. Solvent-based adhesive vinyl, like Oracal 651, offers very high adhesion strength and excellent moisture resistance, making it ideal for wood exposed to rain, sun, and temperature changes. Indoor projects usually use acrylic-based permanent adhesive vinyl, offering strong adhesion and good durability in controlled environments. Rubber-based adhesive vinyl tends to have weaker adhesion and poor moisture resistance, so it’s best for temporary indoor crafts.
| Adhesive Type | Adhesion Strength on Wood | Flexibility | Resistance to Moisture | Recommended Use |
|---|---|---|---|---|
| Acrylic-based PSA | High | Moderate | Good | Indoor wood surfaces, furniture decals |
| Rubber-based PSA | Moderate | High | Poor | Temporary wood applications, crafts |
| Solvent-based Adhesive | Very High | Low | Excellent | Outdoor wood signage, flooring |
| Heat-activated Adhesive | High | Moderate | Good | Specialty wood laminates |
Choosing based on this table helps ensure that your vinyl adheres properly to the wood and lasts as long as you expect. Outdoor projects benefit most from solvent-based adhesives, while indoor projects can rely on acrylic-based types.
Sealing and Protective Topcoats
For outdoor wood projects, sealing both the wood surface and the edges of the vinyl is a important step. Sealing prevents moisture from seeping underneath the vinyl, which can cause peeling or bubbling over time. Use a clear outdoor polyurethane or exterior-grade varnish compatible with your wood type. Apply the sealant before and again after placing the vinyl, focusing especially on edges.
Indoor projects usually don’t require heavy sealing, but a light clear coat can improve durability and ease cleaning. When sealing, wait at least 24 hours after applying the vinyl before adding a topcoat to allow the adhesive time to cure. Avoid sealants that contain solvents harsh enough to damage the vinyl’s adhesive.
Maintenance and Longevity Factors
Outdoor vinyl on wood typically lasts 5 to 7 years when applied properly with adequate surface preparation and sealing. Exposure to direct sunlight, temperature fluctuations, and moisture reduces vinyl life, so choose shaded or protected locations when possible. Regular cleaning with mild soap and water helps maintain appearance without damaging the vinyl or sealant.
Indoor projects enjoy longer lifespans due to stable temperatures and less exposure to moisture. Dust and dirt can be wiped away easily with a soft, damp cloth. Protecting wood surfaces with occasional reapplication of a clear sealant can extend the vinyl’s lifespan further.
Strong adhesion is also influenced by the type of wood used. Porous woods like pine offer high adhesion scores, while oily woods like teak repel vinyl adhesives and need special treatment or are better avoided for vinyl projects. Preparing the surface by sanding and cleaning before vinyl application is important to achieving good contact and durability.
Safety Tips and Best Practices When Applying Vinyl to Wood
Wearing protective gloves is essential when handling permanent vinyl and adhesives because the adhesive can irritate your skin. Use nitrile gloves to avoid allergic reactions that latex gloves might cause. Good ventilation protects you from inhaling fumes released by vinyl adhesives and alcohol-based solvents often used in surface preparation. Apply vinyl in a well-ventilated room or outdoors if possible, using fans or open windows to circulate air.
Temperature affects both the vinyl’s stickiness and your safety. Keep your workspace between 65°F and 80°F for optimal adhesion and comfort. Cooler temperatures can make adhesive less tacky, while excessive heat may cause fumes to increase and windows or doors to trap them indoors. Avoid applying vinyl if temperatures drop below 50°F or rise above 90°F. Store unused vinyl flat at around 65°F to maintain its shelf life, which typically lasts about two years.
Always ventilate the area well when working with vinyl adhesives to prevent inhaling irritant fumes and wear gloves to protect your skin from contact with adhesive chemicals.
- Wear nitrile gloves when handling vinyl and adhesives
- Work in a well-ventilated space or use fans/window ventilation
- Maintain application temperature between 65°F and 80°F
- Store vinyl flat at 65°F to preserve adhesive quality and lifespan
- Avoid applying vinyl in extremely hot or cold conditions
- Keep adhesive containers tightly sealed when not in use
Proper storage prevents vinyl from curling, drying out, or losing adhesive strength. Keep your vinyl rolled loosely or flat, avoiding direct sunlight and high humidity. Re-seal vinyl and adhesive products in their original packaging or airtight bags to minimize exposure to air and contaminants. Using this checklist will help ensure both safety and the best results when applying permanent vinyl on wood surfaces.
Step-by-Step Action Plan for Applying Permanent Vinyl to Wood
Follow these steps to ensure your permanent vinyl sticks well to wood surfaces and lasts as long as possible.
- Before You Start: Choose smooth, sealed wood like plywood or hardwood. Rough or unfinished wood will make vinyl adhesion difficult.
- Day 1: Clean the wood surface thoroughly with rubbing alcohol or mild soap and water. Let it dry completely to remove dust and oils.
- Day 1: Lightly sand the wood with fine-grit sandpaper if the surface is glossy, then wipe off dust. This creates a better hold for the vinyl.
- Day 1: Apply the vinyl to the wood using a firm scraper, starting from one edge and pressing out air bubbles as you go. Confirm smooth, tight contact.
- Day 2: Wait 24 hours after application before handling or placing the wood outdoors. This curing time helps secure the bond.
- Week 1: For outdoor projects, add a clear protective sealant over the vinyl and wood. Check adhesion regularly and clean gently as needed.
Frequently Asked Questions
Can Permanent Vinyl Stick to Raw, Untreated Wood?
Permanent vinyl can stick to raw wood but may not hold as well due to texture and moisture. Sanding and sealing raw wood improves adhesion and durability.
How Does Humidity Affect Permanent Vinyl’s Adhesion on Wood?
High humidity can weaken vinyl’s adhesive on wood by causing moisture absorption. Apply vinyl in a dry environment for best results.
Will Permanent Vinyl Peel Off If the Wood Grain Is Very Rough?
Rough wood grain can reduce vinyl sticking, causing peeling or lifting. Fine sanding smooths the surface and improve vinyl adhesion.
Does Applying a Clear Coat over Vinyl on Wood Protect It?
A clear coat can protect vinyl on wood but must be compatible and applied carefully. Test small areas first to avoid damaging the vinyl.
How Long Should Permanent Vinyl Cure on Wood Before Use?
Let vinyl cure on wood for at least 24 hours to ensure full adhesion before heavy use or outdoor exposure. This prevents peeling or lifting.
Can I Reuse Permanent Vinyl from One Wood Project to Another?
Permanent vinyl is designed for one-time use and will lose adhesive strength if removed. Use new vinyl for each project.
Key Points to Remember
Permanent vinyl can stick well to properly prepared wood, especially smooth, sealed surfaces. Taking time to clean, sand, and apply vinyl carefully increases long-term adhesion. Start your next project with a clean surface, and test a small vinyl piece on your wood before covering the whole area.