How to Make a Chalkboard Sign: A Complete DIY Guide with Pro Tips
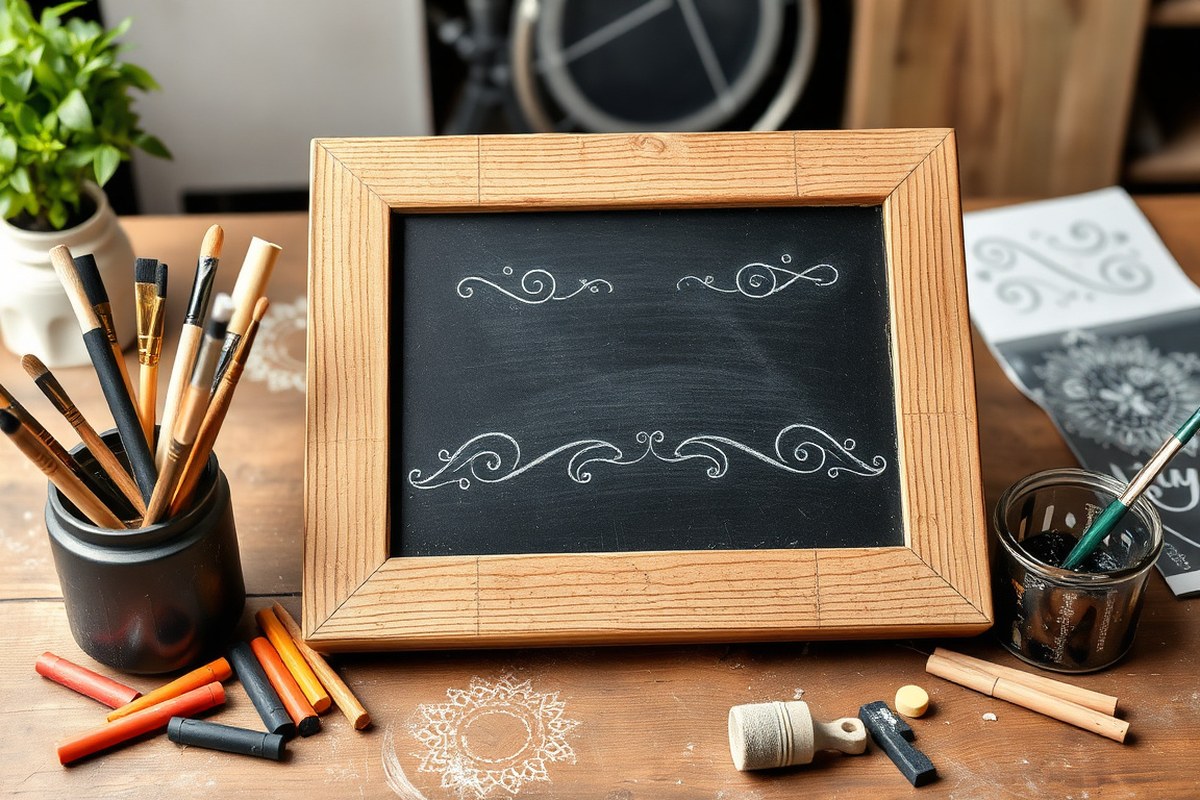
Knowing how to make a chalkboard sign lets you create personalized, affordable décor for your home, events, or business. Start by selecting a smooth surface and applying two coats of chalkboard paint to ensure a durable, workable background. Proper preparation and seasoning of the board help your chalk design adhere better and erase cleanly.
Key Takeaways
- Use a ready-made chalkboard sign or a simple wood base coated with chalkboard paint costing under $10.
- Apply at least two coats of chalkboard paint for a smooth, durable surface to write on.
- Season the chalkboard surface by rubbing chalk evenly before first use to improve chalk adhesion.
- Plan your sign design on paper to visualize layout and avoid mistakes on the board.
- Transfer designs using chalk transfer paper, stencils, or freehand drawing for clean outlines.
- Create lettering with chalk markers or traditional chalk, balancing bold and fine details for readability.
Essential Materials and Tools for Chalkboard Signs
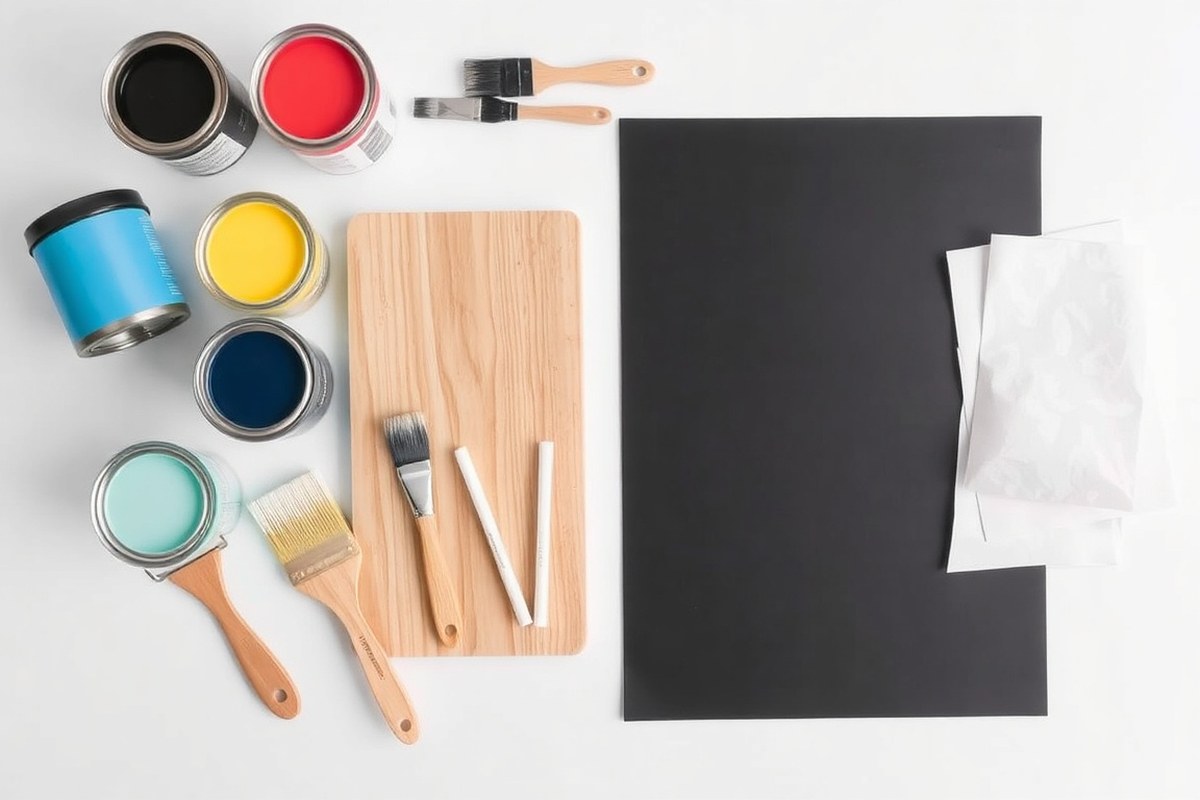
To make a chalkboard sign, gather materials that suit your project size and location. Start with a base such as wood, plywood, or thick cardboard. Wood is durable and ideal for outdoor or repeated use, while cardboard works for temporary signs or indoor events. Choose chalkboard paint designed for the surface you pick; some brands perform better on wood, others on smooth surfaces like glass or metal. A popular choice costs around $10 per quart and covers about 100 square feet with two coats.
Low-cost or thrifted materials can work but may affect durability and finish quality. For example, free-standing picture frames found at thrift stores for around 50 cents each offer an affordable way to create framed signs. However, watch for warped frames or glass that is difficult to remove. Using recycled wood can save money but might require extra sanding or priming to achieve a smooth paint surface.
Essential tools depend on the size and complexity of your sign. For cutting wood or plywood, a handsaw or jigsaw works well; a utility knife suffices for cardboard or foam board. A sanding block helps create a smooth surface before painting. Painter’s tape will keep edges clean, and high-quality brushes or foam rollers ensure an even paint coat. If framing, a hammer and nails or a power drill with screws work best for assembling parts securely.
- Base material: wood for durability, cardboard for temporary use
- Chalkboard paint: buy brand tested for your base, costs around $10 per quart
- Cutting tools: handsaw, jigsaw, or utility knife based on material
- Sanding block to smooth wood or edges
- Painter’s tape for crisp paint lines
- Brushes or foam rollers for paint application
- Hammer, nails or power drill, screws if framing
Choosing the right chalkboard paint involves checking coverage and cure times. Look for formulas that dry within 1 to 2 hours and fully cure in 3 to 5 days before writing. Some brands emphasize easy cleaning and resistance to ghosting (where chalk leaves behind residue). Reading reviews can help narrow choices. Always apply at least two coats following the label instructions, allowing full drying between coats to avoid peeling or uneven texture.
Thrifty materials can reduce expenses but expect a tradeoff in finish smoothness and longevity. For example, cheaper chalkboard paints may require more coats or have less vibrant chalk contrast. Investing in one good brush and quality paint offers better results than using multiple low-cost tools. Planning your tool and material choices by the sign’s purpose, permanent outdoor signage versus casual indoor use, ensures you spend your time and money wisely for lasting, attractive chalkboard signs.
Preparing and Painting Your Chalkboard Surface
Preparing your chalkboard surface correctly sets you up for a smooth painting process and a lasting chalk-friendly finish. Different materials need specific prep steps, and applying chalkboard paint properly helps prevent peeling or uneven texture. Seasoning the surface after painting ensures it writes well and erases cleanly.
Selecting the Right Surface Material
Wood, MDF, metal, glass, or even painted walls can become chalkboard signs with the right preparation. MDF and smooth wood boards are popular because they absorb chalkboard paint well and provide a sturdy base. Non-porous surfaces like glass or metal require extra prepping or using special chalkboard paint made for those materials. For outdoor use, choose a weather-resistant base such as treated wood or metal.
Sanding rough edges and surfaces before painting smooths the area and helps paint adhere better. When applying chalkboard paint over a stained or previously painted surface, ensure it is fully dry and lightly sanded to prevent peeling. Using multiple coats of chalkboard paint increases durability and chalk hold.
Step-by-Step Painting and Drying Process
Follow these steps to get a durable, smooth chalkboard paint finish that lasts in indoor or outdoor settings.
- Clean the surface thoroughly to remove dirt, grease, or old paint flakes.
- Sand the surface lightly using 120- or 150-grit sandpaper to ensure adhesion.
- Remove sanding dust with a tack cloth or damp rag; allow to dry completely.
- Apply the first thin, even coat of chalkboard paint using a foam roller or brush in one direction.
- Let the first coat dry completely, typically 1, 2 hours according to the paint label.
- Apply 2 to 3 additional coats, allowing each coat to dry fully before the next.
- For outdoor signs, consider using chalkboard paint designed for exterior use or add a clear weatherproof sealer later.
- Allow the final coat to cure for 24 to 72 hours depending on temperature and humidity before handling.
Make sure no dust lands on the surface while drying; even small particles can cause rough spots that affect writing.
How to Season Your Chalkboard for Use
Seasoning your chalkboard surface is a simple but often overlooked step that conditions the paint. This helps the chalk leave marks evenly and prevents ghosting or imprinting.
To season, rub the side of a piece of chalk evenly over the entire board surface, covering every inch starting vertically, then horizontally. Next, use a dry cloth or chalkboard eraser to wipe off the chalk. This process fills the paint’s porous texture with chalk dust, creating a better writing surface.
Your chalkboard surface may need extra coats of paint or a light sanding with reseasoning if it doesn’t write smoothly or erases poorly after seasoning. Outdoor chalkboards especially benefit from regular reseasoning because weather can degrade the surface.
Planning Your Design and Layout for Impact
Planning your chalkboard sign’s design involves balancing your message with the available space to create an eye-catching layout. Begin by measuring the board’s surface to know exactly how much room you have. Sketch your ideas on paper first, experimenting with different arrangements of words and visuals. This helps prevent overcrowding and ensures each element has enough space to stand out. For example, if your board is 18 by 24 inches, plan to leave about 1 inch of margin around the edges to frame your content neatly.
Select lettering styles that fit the occasion and your message’s tone. Choose bold, simple fonts for readability in busy areas like markets or events. For weddings or home decor, you might use more elegant, script-style fonts. You can find free printable fonts online to trace or practice basic hand lettering. Using a ruler or stencil supports straight lines and consistent letter height, which makes even simple signs look professional without artistic skills.
Customizing for specific occasions means matching your design elements to the event or use. For a birthday party sign, add playful shapes and bright colors alongside casual fonts. For a restaurant menu, focus on clarity and organize items in easy-to-scan blocks with small decorative flourishes like borders or icons. Planning these details in advance helps keep your design focused and relevant.
To achieve a polished look without being an artist, create a checklist: measure your chalkboard, draft a layout on paper, choose two or three lettering styles for variety, and plan the placement of illustrations or accents. Use simple geometric shapes to fill empty space or separate text sections. Take time to practice your lettering on scrap paper, then lightly sketch the final design on the board with a pencil or chalk before committing. This approach reduces errors and boost confidence.
Keep the sign’s purpose and audience in mind during planning. A casual home message board can be more whimsical, while business signs should prioritize readability and clear calls to action. Depending on your design’s complexity, expect the planning phase to take about 30 to 60 minutes. Investing this time upfront means fewer mistakes and a better-looking sign that effectively communicates your message.
Once the layout is finalized, carefully erase any pencil or chalk guide lines after lettering is complete to keep the board clean. Your planned design, balanced lettering styles, and thoughtful layout will result in a chalkboard sign that not only fits the space but also attracts attention and serves its purpose well.
Effective Methods to Transfer Your Design Onto the Board
Transferring your design onto a chalkboard sign can be done using tracing with transfer paper, stencils, or freehand methods. Each technique has its strengths and challenges, depending on your confidence level, the complexity of the design, and the precision needed. Choosing the right method helps ensure clean lines and a professional look.
Tracing and Transfer Paper Techniques
Tracing with transfer paper involves placing a carbon-coated sheet between your design and the chalkboard. When you trace over the design with a mechanical pencil, a faint outline transfers onto the board. This method is effective for detailed images and helps avoid distortions.
To use this technique, start by printing or drawing your design on regular paper. Place the transfer paper carbon side down on the chalkboard, then position your design on top. Firmly trace over the lines with a pencil, pressing evenly to transfer the outline. Check your work by lifting one corner carefully. Expect a faint yet clear pencil line guiding your chalk or paint.
This method costs about $5 to $10 for a pack of woodcraft transfer papers, with each sheet reusable several times if handled carefully. It suits beginners who want precision without freehand skill. Problems arise if the transfer paper shifts during tracing, causing misalignment, so secure the papers with tape if needed.
Using Stencils for Consistency
Stencils are pre-cut templates that you place directly on the chalkboard before applying chalk or paint. They provide uniform lettering or images, ideal for replicating text like menu items or repeated decorative motifs. Stencils remove much of the guesswork in drawing.
To work with stencils, tape the stencil securely onto your chalkboard. Use a chalk marker, brush, or sponge to fill in the spaces without pushing material under the edges, which would blur the image. Allow the chalk or paint to dry before removing the stencil carefully to avoid smudging.
Stencils range in price from $8 to $30 depending on material and size. They are reusable and come in sets for letters, numbers, and common shapes, which makes them flexible for different projects. However, stencils limit customization and can be tricky for large or highly detailed graphics due to size constraints.
Freehand Drawing Tips for Beginners
Freehand drawing offers the most flexibility but requires steady hand control and patience. Beginners are encouraged to practice simple shapes and letters on scrap chalkboard before tackling their final project. This method helps develop handwriting style and personal flair.
To improve freehand results, start by lightly sketching your design with chalk rather than marker or paint. You can rub chalk horizontally and vertically over your design’s back to create a chalk transfer, then position the paper on the board and press firmly to leave a faint guideline. Follow these with careful chalk or marker strokes. Regular practice on larger boards supports muscle memory development.
Freehand drawing costs nothing beyond chalk and your time, but may require several attempts to get perfect lines. Patience is key, and mistakes are easier to fix when using chalk rather than permanent paint. Be prepared for less precision compared to stencils or transfer paper but higher personal expression.
| Method | Cost Range | Skill Level | Best For | Main Drawback |
|---|---|---|---|---|
| Transfer Paper Tracing | $5 – $10 per pack | Beginner to Intermediate | Detailed designs, precise outlines | Requires steady tracing, alignment risk |
| Stencils | $8 – $30 per set | Beginner | Consistent letters, repeated motifs | Limited customization, size constraints |
| Freehand Drawing | Minimal (chalk cost) | Beginner to Advanced | Custom, unique styles | Less precise, needs practice |
| Chalk Transfer (alternate) | Minimal (chalk cost) | Beginner | Simple designs, soft outlines | Faint lines, needs careful pressing |
Taking time to match your design’s complexity with the right transfer method reduces frustration and improves final results. For large or very detailed work, transfer paper offers clear outlines while stencils speed up simple repeating elements. Freehand is ideal when you want a personalized touch and are willing to practice. Using chalk to transfer a lightly chalked paper provides a middle ground for less confident drawers.
Creating Attractive Lettering and Decorative Elements
Neat and attractive lettering begins with choosing the right chalk or chalk marker, as well as understanding letter spacing and style. Use chalk markers with fine tips for clearer lines and better control than traditional chalk sticks. Start by lightly sketching your letters with regular chalk or a pencil if your board allows, then trace over with the marker for a crisp finish. Keeping consistent spacing between letters and words prevents clutter and improves legibility, especially on smaller signs. Align your text using faint guidelines drawn with chalk or a ruler, erasing them gently afterward to keep your sign tidy.
Adding decorative flourishes improve your chalkboard’s visual appeal and ties into the style or theme of your sign. Small elements such as simple vines, dots, stars, or geometric patterns work well around borders or between text lines. Consider illustrations that relate to the message, like coffee cups for a café sign or leaves for a garden event. Flourishes should balance the lettering without overwhelming it. Plan decorations lightly with chalk first, adjusting until you like the placement, then finalize with a chalk marker. Using white chalk repeatedly and blending edges with a soft cloth can create shading effects that add depth.
Practicing chalkboard lettering on paper before working on the board helps build confidence and skill. Start with basic fonts like block letters or simple cursive, mastering each before progressing to more elaborate styles. Write each letter slowly to develop muscle memory for consistent shapes. Try exercises like writing the alphabet in different fonts or copying favorite quotes to practice spacing and style. You can also print templates of lettering styles and trace them on your chalkboard as a guide. Repeating these practices over several days improves steadiness and precision.
Visual appeal combines clear lettering with thoughtful decoration and layout. Use contrasting colors or thickness in strokes to highlight key words or phrases. Avoid overcrowding, negative space around letters and decorations makes your sign easier to read from a distance. Using a quality eraser or a damp cloth to correct mistakes keeps the board clean without smudges. Good results include evenly spaced text, smooth lines, and decorative accents that complement the overall message, making the sign welcoming and professional-looking. Common pitfalls include overly complex fonts that reduce readability or decorations that distract from the main text.
Practice your lettering in short daily sessions, focusing on one style or flourished element at a time to build your skills steadily without getting overwhelmed.
Fixing Mistakes and Cleaning Your Chalkboard Sign
Fixing mistakes on your chalkboard sign requires gentle care to avoid damaging the surface. Use a slightly damp, soft cloth or a damp cotton swab dipped in water to carefully erase the error. Avoid scrubbing hard, which can scratch or wear down the chalkboard paint. For more stubborn chalk marker marks, rubbing alcohol on a soft cloth can remove stains without harming the surface, but test a small hidden area first to be safe.
Correcting simple chalk mistakes can be done with a clean, dry eraser or a soft cloth. If the error is extensive, gently wipe the affected area with a damp cloth, then let it dry completely before rewriting. Waiting about 10 to 15 minutes after cleaning to write again helps prevent smudging. Avoid using harsh chemicals or rough materials, which can dull the finish and make future writing less clear.
Keeping your chalkboard sign clean is key to maintaining vibrant, easy-to-read letters. Regular wipe-downs remove chalk dust buildup that makes your sign look dull and cluttered. For a thorough cleaning, use a mixture of warm water and mild dish soap. Apply it with a soft sponge, then rinse with a damp cloth, wiping dry with a microfiber cloth to prevent streaks or water spots. Avoid soaking the surface, as excess moisture can damage the chalkboard paint or wood behind it. Following these simple steps will help your chalkboard sign stay fresh and reusable:
- Use a soft eraser or dry cloth for minor corrections
- Gently dab errors with a damp cotton swab for precise fixes
- Test rubbing alcohol on a hidden spot before removing stubborn marker stains
- Clean the whole surface monthly with mild soap and warm water
- Dry thoroughly with a microfiber cloth after every cleaning
- Avoid harsh scrubbing or abrasive cleaners
- Store in a dry place away from direct sunlight to prevent fading
Common mistakes include using the wrong cleaning tools, such as rough sponges or permanent markers not intended for chalkboards, which can leave permanent stains. Another is skipping the drying step after cleaning, leading to smeared chalk marks. Signs that look faded or glossy often need a deep clean or a light sanding and repainting if worn out. Proper care extends your sign’s lifespan and keeps it looking sharp for your décor or business needs.
Sealing Your Chalkboard Sign for Durability
You can seal your chalkboard sign to protect it from smudging and weather, but the choice depends on how you plan to use the board. Sealing will help keep your design longer-lasting, especially if the sign will be outdoors or handled frequently. It also reduces dust and ghosting from chalk or markers. However, once sealed, the surface may become less reusable with traditional chalk because the sealant creates a barrier that resists regular chalk sticking well.
The best sealers for chalkboard paint include clear matte acrylic sprays and polyurethane finishes formulated for painted surfaces. Matte acrylic spray is popular because it maintains the chalkboard’s matte look without adding shine, essential for good visibility. You can find these sprays in craft stores for around $6 to $15 per can. Apply two light, even coats about 15 to 30 minutes apart in a well-ventilated area and let dry for at least 24 hours before use. Polyurethane offers stronger weather resistance, making it suitable if your sign will face rain and sun, but it typically adds a slight gloss and should be used with oil-based chalk markers rather than regular chalk to prevent smudging.
To seal your sign, start with a clean, dry, and dust-free surface. Avoid sealing immediately after painting; allow your chalkboard paint to cure fully, usually 72 hours. Hold the spray can 8 to 12 inches away and move steadily across the surface to prevent drips or uneven coverage. After the first coat dries, apply the second. For outdoor use, select a weatherproof sealer labeled for exterior wood or metal surfaces.
Keep in mind sealed chalkboards are less suitable for regular chalk. Chalkboard markers remain usable on sealed surfaces and clean off easily with a damp cloth. Regular chalk may scrape off or not adhere well, so if you want full reusability with chalk, skip sealing or apply only a light fixative spray made specifically for chalkboards. Signs used for single events or permanent messages benefit most from sealing, while reusable kitchen or kids’ chalkboards often do better unsealed.
When properly sealed, your chalkboard sign resists smudging and light moisture, keeping artwork neat during display or transport. Problems arise if you spray too thickly, causing a shiny or sticky texture, or if you seal before the paint cures, which can trap solvents and weaken adhesion. In those cases, the sealer may peel or cause chalk to wipe off unevenly. Testing on a scrap board before sealing the final piece helps avoid surprises. In total, sealing adds durability and a polished finish for longer-term projects but limits traditional chalk use and requires patience for curing and correct application.
Displaying and Mounting Your Finished Chalkboard Sign
Mounting and displaying your finished chalkboard sign safely depends on its size, weight, and whether you plan to use it indoors or outdoors. Proper framing, secure hanging methods, or stands ensure stability and prevent damage. You can also create reversible or double-sided signs with extra steps to increase versatility, especially for event or business use.
Indoor vs Outdoor Display Solutions
Indoor chalkboard signs generally need lighter support and can be hung on walls using nails, picture hangers, or adhesive hooks rated for their weight. Avoid placing them in direct sunlight or near heat sources to prevent warping or fading of your design. For outdoor use, weatherproofing is key. Use waterproof sealant on the chalkboard surface and select rust-resistant hardware such as stainless steel screws or coated hooks.
Outdoors, mounting options include attaching the sign to a sturdy post or fence using brackets or zip ties for temporary setups, or mounting directly on a wall with anchors designed for masonry or wood. Ensure the sign is high enough to avoid water splashing and secure against strong wind by using additional fasteners or a weighted base if using a standing sign.
DIY Frame and Stand Ideas
Framing adds both style and stability to your chalkboard sign. Use reclaimed wood with a farmhouse look for popular decor styles, or opt for sleek metal frames for a modern touch. Softwood planks are affordable and easy to cut, costing around $10 to $20, while repurposed frames from thrift stores can save money and add character. Mitered corners glued and nailed reinforce the frame’s strength.
For freestanding signs, build A-frame stands from wood or PVC pipes. Measure your sign’s dimensions, and cut four legs plus braces that allow the sign to lean safely without tipping. Attach hinges at the top to let the stand fold flat for storage. You can also mount a chalkboard sign on an easel or from a heavy base with a pole, commonly used for sandwich boards or menu displays at events.
Creating a Reversible Chalkboard Sign
Double-sided chalkboard signs increase functionality by allowing messages to change frequently or show different information on each side. To make one, start by selecting a sturdy material for the back, such as a plywood panel slightly larger than the chalkboard surface. Apply chalkboard paint on both sides, allowing the recommended drying time of 24 hours per coat for durability.
Attach the double-sided chalkboard to an A-frame stand or hinge two framed boards back-to-back with weather-resistant piano hinges for outdoor use. This setup folds easily for transport and storage. Consider using lightweight materials like foam board under your chalk paint if you want a lighter reversible sign, but be mindful that this option is less durable outdoors.
Always test mounting hardware and stands with your finished sign before placing it for display to ensure safety and stability, especially in high-traffic or windy areas.
Step-by-Step Action Plan for Your Chalkboard Sign
Follow this simple plan to create and display your chalkboard sign confidently. Check each step off when you see the expected result before moving on.
- Day 1: Gather all essential materials and tools, including chalkboard paint, brushes, chalk markers, and your board. Confirm you have everything to avoid interruptions.
- Day 2: Prepare and paint your chalkboard surface with at least two coats of chalkboard paint. The surface should feel smooth and dry after 24 hours.
- Day 3: Plan your design by sketching it on paper or using printable stencils. Make sure your layout fits the size of your board and matches the style you want.
- Day 4: Transfer your design to the board using transfer paper or freehand with chalk. Check that the outline is clear and correctly placed.
- Day 5: Create your lettering and add decorative elements using chalk markers or chalk. The lines should be neat, bold, and evenly spaced.
- Day 6: Fix any mistakes by gently wiping with a damp cloth, then let the board dry before continuing. Mistakes should be fully removed without smudging the design.
- Day 7: Seal your chalkboard sign with a suitable fixative spray if it will be outdoors or handled frequently. The seal should create a protective layer without dulling your design.
- Day 8: Mount or display your finished sign using appropriate hooks, stands, or frames. Ensure the sign is stable and visible from your desired viewing distance.
Frequently Asked Questions
Can I Make a Chalkboard Sign Without Using Chalkboard Paint?
Yes, you can use a smooth, sealed wood surface and chalk markers for a similar effect, but chalkboard paint creates the best writable surface.
How Long Does It Take for Chalkboard Paint to Dry Before Writing on It?
Chalkboard paint typically needs 24 hours to dry fully before you can safely write on it without smudging.
Is It Better to Use Liquid Chalk Markers or Traditional Chalk for Lettering?
Liquid chalk markers offer brighter colors and less dust, but traditional chalk lets you easily erase and adjust your design.
How Do I Prevent Chalk Dust from Spreading Around My Chalkboard Sign?
Use damp cloths for cleaning and try liquid chalk markers to minimize dust when writing on your sign.
Can I Reuse a Chalkboard Sign for Different Events?
Yes, chalkboards are reusable by erasing old designs and writing new ones, making them versatile for multiple occasions.
What’s the Best Way to Protect My Chalkboard Sign Outdoors?
Use a sealant designed for chalkboards and avoid direct rain to keep the paint and lettering durable outdoors.
Before You Go
Creating a chalkboard sign involves careful planning, precise lettering, and the right finishing touches to last. Start with a clear design and take your time applying and sealing the paint and chalk. Try your first project using these steps today, and you’ll have a personalized sign ready to improve your space or event in no time.